Articles
How To Disassemble Ceiling Fan
Modified: October 19, 2024
Learn step-by-step how to disassemble a ceiling fan with this informative guide. Find detailed articles and tips on ceiling fan disassembly for easy maintenance.
(Many of the links in this article redirect to a specific reviewed product. Your purchase of these products through affiliate links helps to generate commission for Storables.com, at no extra cost. Learn more)
Introduction
Ceiling fans are a common feature in homes and provide a refreshing breeze during hot summer months. However, there may come a time when you need to disassemble your ceiling fan, whether it be for cleaning, repair, or replacement of certain components. While the thought of disassembling a ceiling fan may seem daunting, with the right tools and a little guidance, it can be a relatively simple and straightforward process.
In this article, we will guide you through the step-by-step process of disassembling a ceiling fan. We will discuss the tools and materials you will need, as well as provide detailed instructions for each stage of the disassembly process. By following these instructions, you will be able to safely and effectively dismantle your ceiling fan.
Before we begin, it’s important to note that safety should always be your top priority. Make sure to turn off the power to the ceiling fan at the circuit breaker before starting the disassembly process. Additionally, exercise caution when handling sharp objects or electrical components.
Now, let’s gather our tools and materials and get started with disassembling your ceiling fan!
Key Takeaways:
- Disassembling a ceiling fan is a manageable task with the right tools and guidance. Prioritize safety, follow the step-by-step process, and enjoy the satisfaction of a well-maintained fan for optimal performance and comfort.
- Regular maintenance, including cleaning and reassembly, can extend the lifespan of your ceiling fan and ensure efficient airflow. Embrace the process, exercise caution, and bask in the cool breeze of a freshly maintained fan.
Read more: How A Ceiling Fan Works
Tools and Materials Needed
Before you begin disassembling your ceiling fan, it’s important to gather all the necessary tools and materials. Having these items on hand will ensure a smooth and efficient disassembly process. Here are the tools and materials you will need:
- Screwdriver set – You will need both Phillips-head and flat-head screwdrivers of various sizes to remove screws and fasteners.
- Adjustable wrench – This tool will come in handy for loosening and tightening nuts and bolts.
- Pliers – Pliers will be useful for gripping and manipulating wires during the disassembly process.
- Voltage tester – It’s crucial to have a voltage tester to ensure that the power to the ceiling fan is turned off before beginning any work.
- Ladder or step stool – Depending on the height of your ceiling fan, you may need a ladder or step stool to safely reach it.
- Drop cloth or plastic sheet – To protect your floor or furniture from dust and debris, lay down a drop cloth or plastic sheet before starting the disassembly.
- Cleaning supplies – If your intention is to clean the ceiling fan components, gather cleaning supplies such as a mild detergent, microfiber cloths, and a vacuum cleaner with a brush attachment.
It’s important to have all the necessary tools and materials readily available before you start disassembling your ceiling fan. This will save you time and frustration during the process. Ensure that you have a safe and well-lit workspace to work in.
Once you have gathered all the tools and materials, you are ready to move on to the next step: turning off the power to the ceiling fan.
Step 1: Turn off Power to the Ceiling Fan
Before you begin disassembling your ceiling fan, safety should always be your top priority. The first step is to turn off the power supply to the fan to avoid any electrical accidents. Follow these steps to ensure that the power is completely turned off:
- Locate the circuit breaker box in your home.
- Identify the circuit breaker that controls the power supply to the ceiling fan. It is usually labeled and may be labeled as “ceiling fan” or “bedroom fan,” depending on the location.
- Switch off the circuit breaker by flipping it to the “off” position. This will cut off the power supply to the fan.
- Double-check that the fan is no longer receiving power by turning on the fan switch or pulling the fan chain. If the fan does not turn on, you can proceed with confidence knowing that the power is off.
It’s crucial to double-check that the power is completely turned off to avoid any unnecessary accidents. Once you are sure that the power is off, you can proceed to the next step of the disassembly process.
It’s important to note that if you are unsure about working with electrical components or if you are uncomfortable with this step, it is always best to consult a professional electrician to turn off the power for you.
Now that the power is turned off, you can move on to the next step: removing the ceiling fan blades.
Step 2: Remove the Ceiling Fan Blades
Now that the power supply to the ceiling fan has been turned off, it’s time to remove the fan blades. Follow these steps to safely remove the blades:
- Locate the screws or bolts that hold the ceiling fan blades in place. These are typically located at the base of each blade where it attaches to the fan motor.
- Using a screwdriver or wrench, loosen and remove the screws or bolts that secure each blade to the motor housing.
- Gently lift each blade away from the motor housing and set them aside in a safe place.
- As you remove each blade, take note of its position and orientation. This will make it easier to reassemble the fan blades correctly later on.
Some ceiling fans may have a separate blade bracket or assembly that needs to be removed before you can access the fan blades. If this is the case, consult the manufacturer’s instructions or user manual for guidance on removing the blade bracket.
Once you have removed all the fan blades, inspect them for any signs of damage or wear. This is a good opportunity to clean the blades with a mild detergent and a damp cloth, if needed. Allow the blades to dry completely before proceeding with the disassembly process.
With the fan blades safely removed, you can now move on to the next step: disconnecting the wires.
Step 3: Disconnect the Wires
After removing the ceiling fan blades, the next step in disassembling your ceiling fan is to disconnect the wires. Here’s how you can safely disconnect the wires:
- Examine the area where the fan motor is attached to the ceiling bracket or electrical box. You will see a set of wires connecting the fan to the electrical supply.
- Use a voltage tester to ensure that the power is truly off to avoid any potential electrical shock. Place the tester on each wire terminal and confirm that there is no power present.
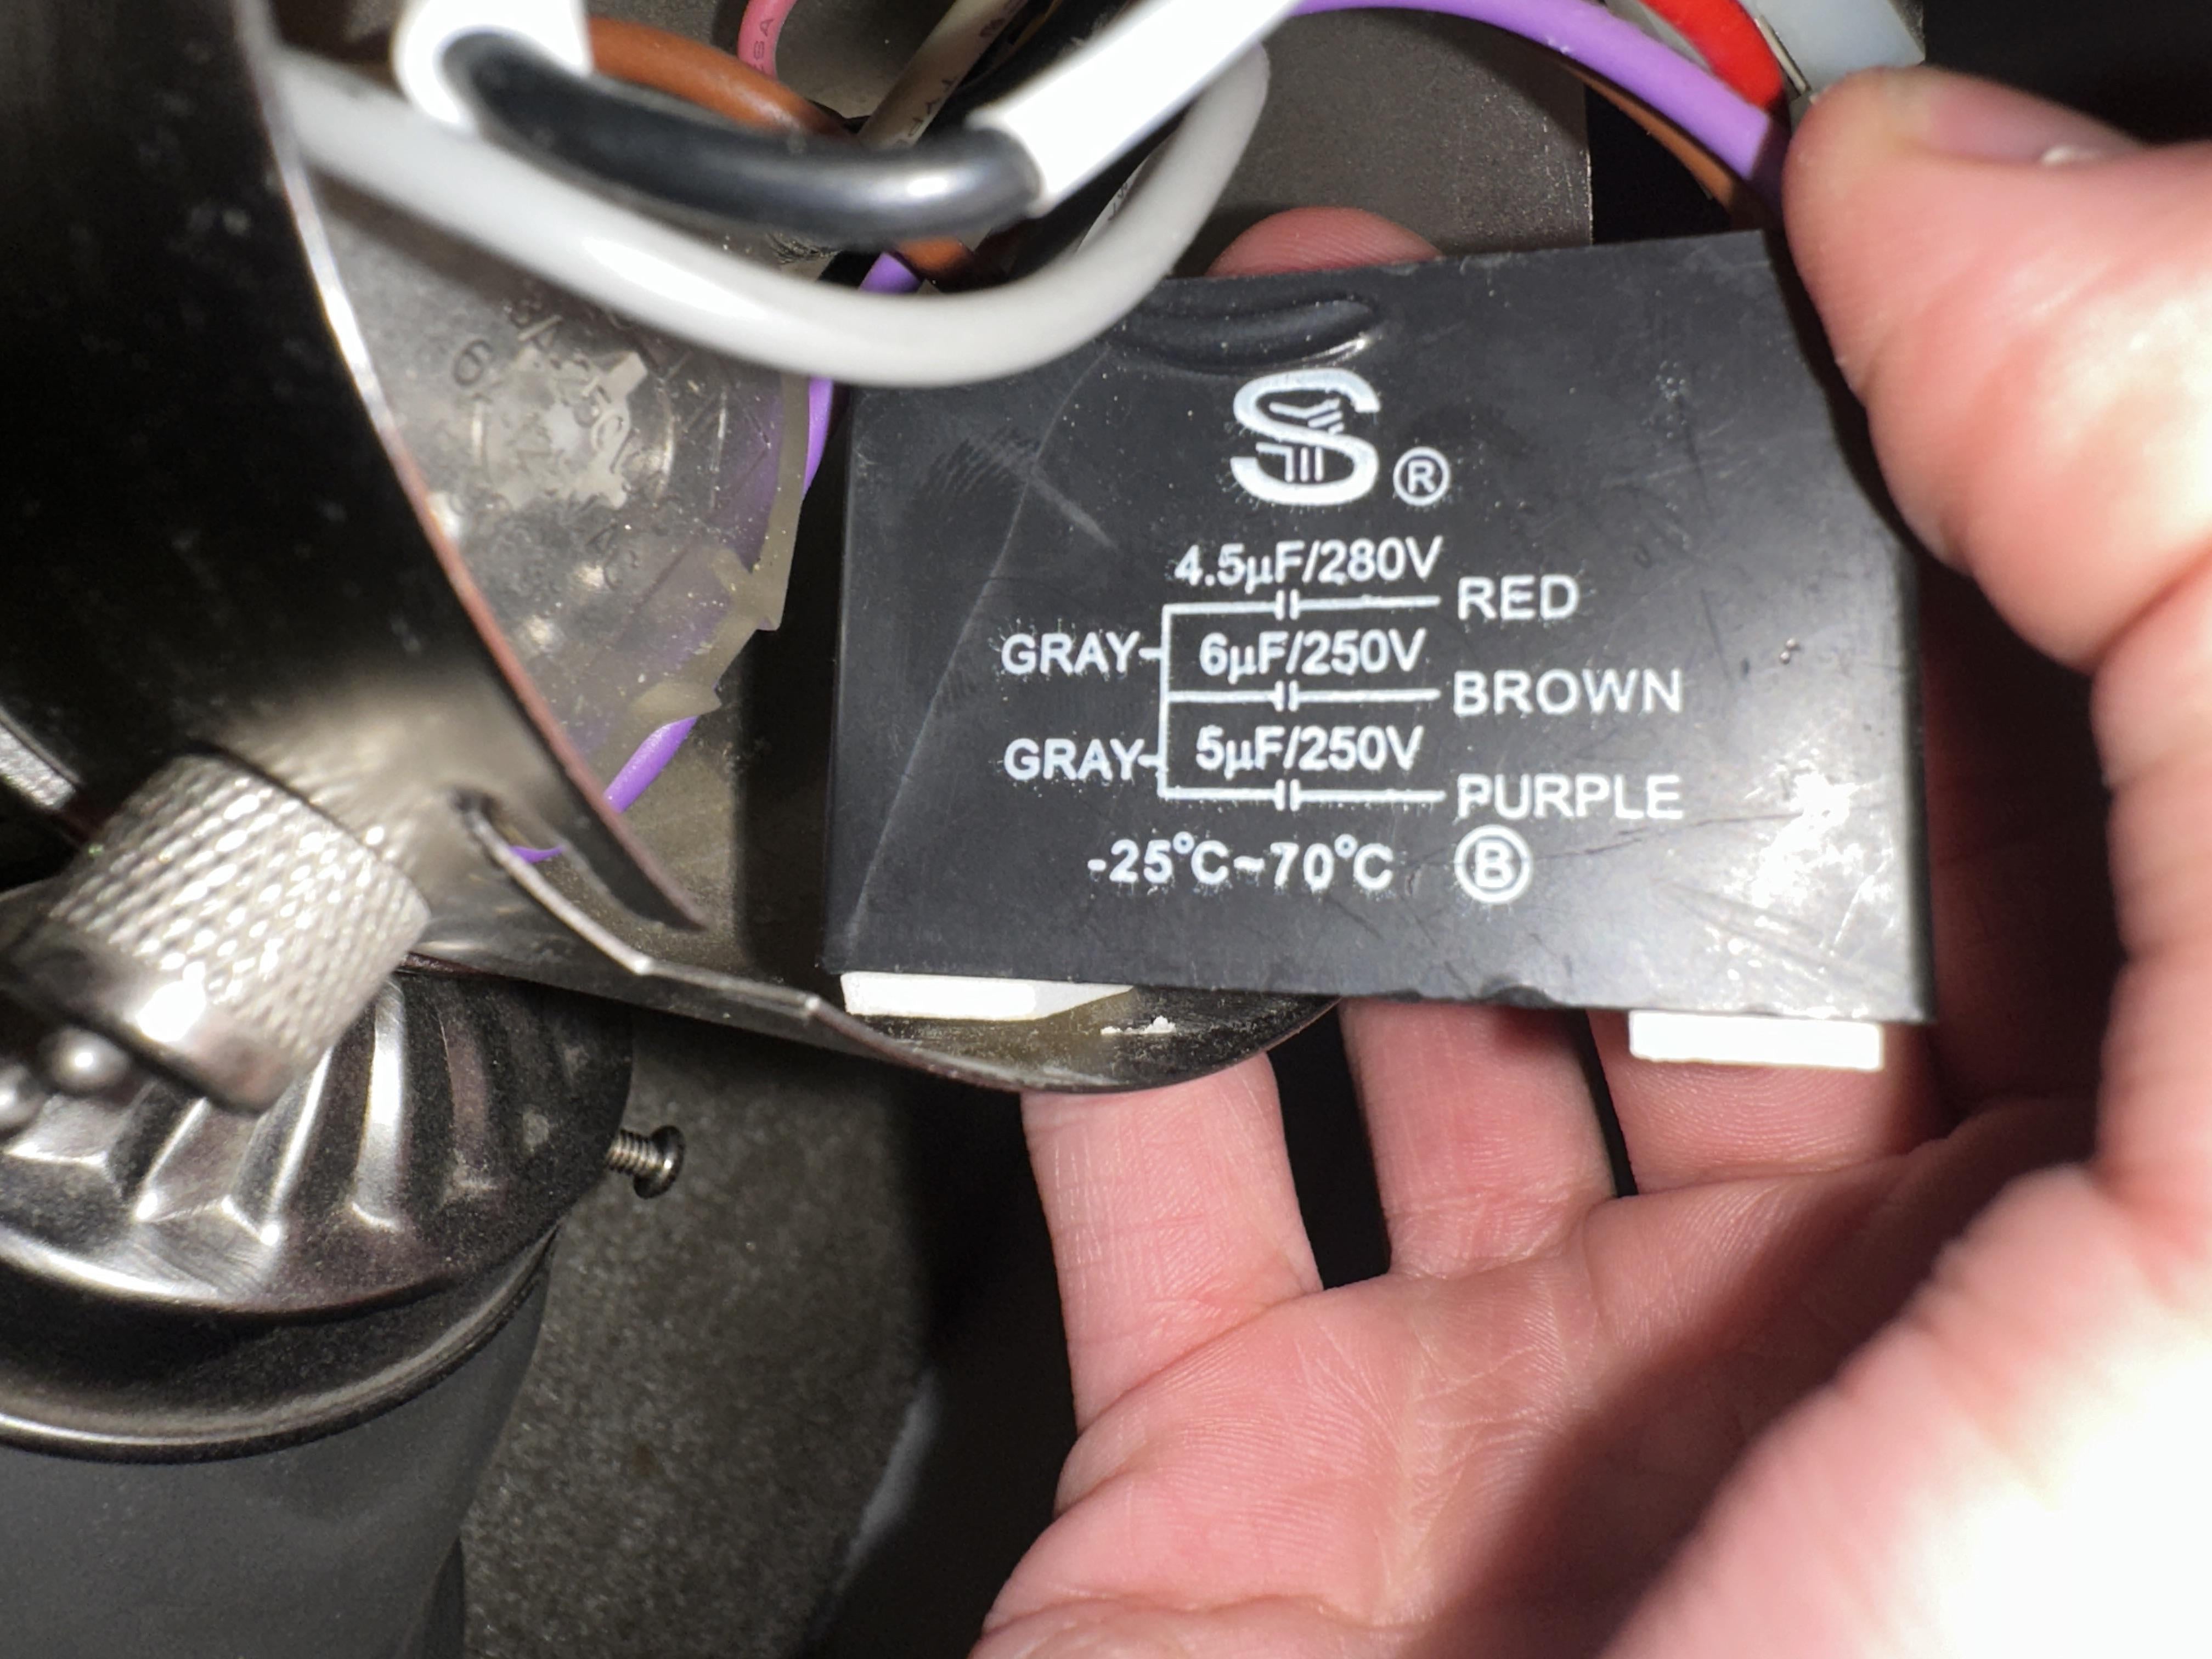
- Identify the wire connections between the fan and the ceiling electrical supply. Typically, there are three wires: black (live/hot), white (neutral), and green or bare copper (ground).
- Depending on your ceiling fan model, the wires may be connected using wire nuts or terminal screws. If there are wire nuts, unscrew them counterclockwise to remove the wire connections. If there are terminal screws, use a screwdriver to loosen and remove the screws.
- Once the wire connections are detached, carefully separate the wires and gently tuck them away. You may use electrical tape to secure the wires and prevent them from accidentally coming into contact with each other or any other live wires.
Always exercise caution when working with electrical connections. If you are unsure about disconnecting the wires or if you are uncomfortable working with electrical components, it is advisable to seek the help of a professional electrician.
Now that the wires are safely disconnected, you can proceed to the next step: unmounting the ceiling fan from the ceiling.
Read more: How To Update A Ceiling Fan
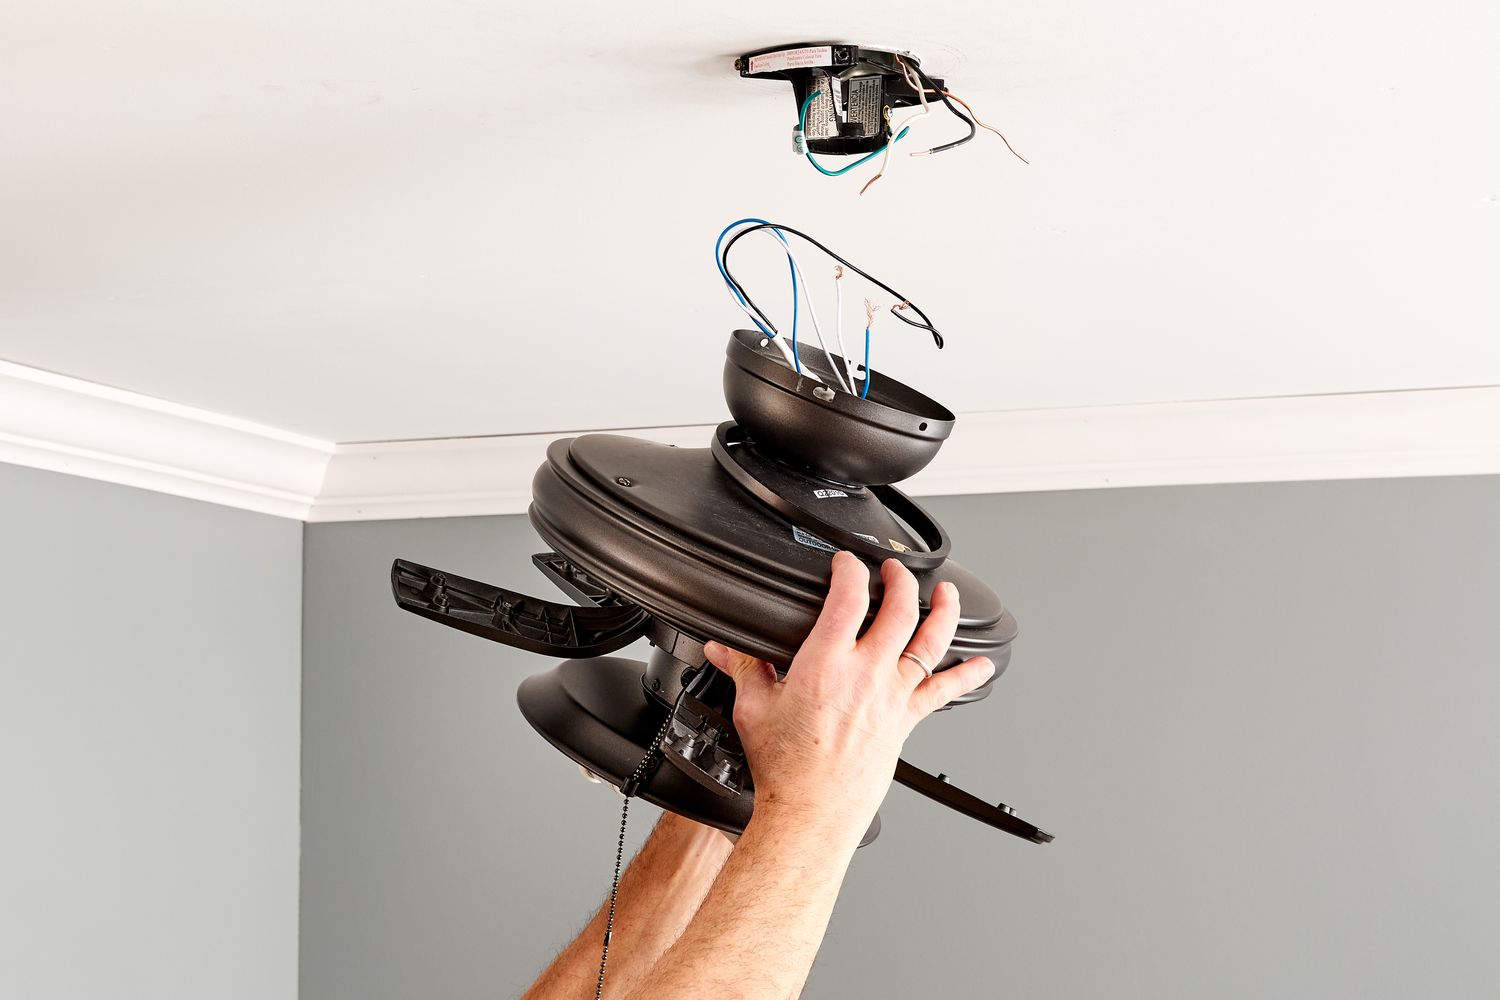
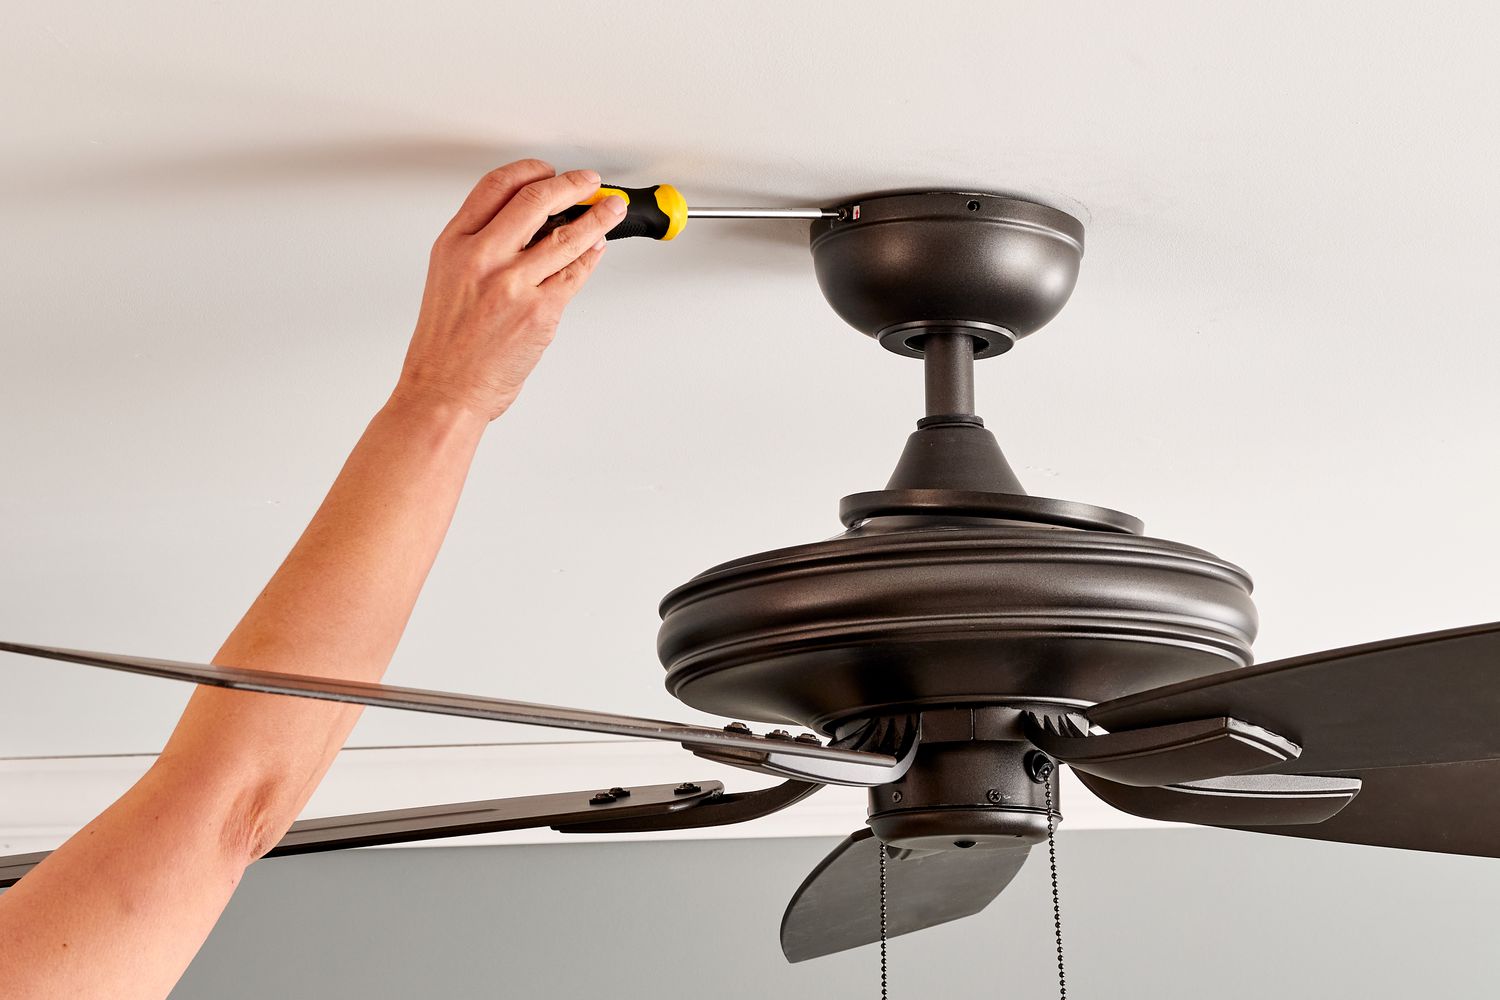
Step 4: Unmount the Ceiling Fan from the Ceiling
After disconnecting the wires, the next step in disassembling your ceiling fan is to unmount it from the ceiling. Follow these steps to safely remove the fan from the ceiling:
- Locate the mounting bracket that connects the ceiling fan to the ceiling. This bracket is typically secured with screws.
- Using a screwdriver, loosen and remove the screws that secure the mounting bracket to the ceiling.
- Gently lower the fan and carefully disconnect any remaining support brackets or chains that may be attached to the ceiling. Ensure that you have a firm grip on the fan to prevent it from falling.
- Once the fan is completely detached from the ceiling, place it on a secure surface or use a drop cloth to prevent any damage to the fan or surrounding area.
If your ceiling fan is heavy or if you need assistance with this step, it is advisable to have someone help you for safety purposes.
Now that the ceiling fan has been successfully unmounted from the ceiling, you can proceed to the next step: removing the canopy cover.
Step 5: Remove the Canopy Cover
With the ceiling fan unmounted from the ceiling, the next step in disassembling your fan is to remove the canopy cover. The canopy cover is the decorative piece that covers the wiring and mounting bracket. Follow these steps to remove the canopy cover:
- Inspect the area where the fan motor is connected to the mounting bracket. You will see a cylindrical or dome-shaped cover called the canopy cover.
- Locate the screws or decorative nuts that secure the canopy cover to the mounting bracket.
- Using a screwdriver or pliers, depending on the type of screws or nuts used, loosen and remove them.
- Gently lower the canopy cover and set it aside.
Some ceiling fan models may have a more complex canopy cover design, such as twist-lock or slide-on canopies. In this case, refer to the manufacturer’s instructions or user manual for guidance on removing the canopy cover.
With the canopy cover successfully removed, you can now access the motor housing of the ceiling fan. This allows you to proceed to the next step: disassembling the motor housing.
Before disassembling a ceiling fan, make sure to turn off the power at the circuit breaker to avoid any electrical accidents. Use a sturdy ladder and have someone assist you to safely remove the fan blades and motor housing. Keep track of the screws and parts to make reassembly easier.
Step 6: Disassemble the Motor Housing
After removing the canopy cover, the next step in disassembling your ceiling fan is to disassemble the motor housing. Follow these steps to safely take apart the motor housing:
- Inspect the motor housing to identify any screws or fasteners that hold it together. These screws are typically located around the perimeter of the housing.
- Using a screwdriver, carefully loosen and remove the screws. Keep them in a safe place as you will need them for reassembly.
- Gently separate the motor housing into two halves, exposing the internal components of the fan.
- Take note of the position and orientation of the motor components as you disassemble the housing. This will assist you during the reassembly process.
Some ceiling fan models may have additional clips or latches that secure the motor housing. In this case, refer to the manufacturer’s instructions or user manual for guidance on disassembling the housing.
As you disassemble the motor housing, it’s a good idea to inspect the fan motor for any signs of debris, wear, or damage. Cleaning the motor and its components at this stage can help improve its performance and extend its lifespan.
Now that the motor housing is successfully disassembled, you can move on to the next step: removing the fan motor itself.
Step 7: Remove the Fan Motor
After disassembling the motor housing, the next step in disassembling your ceiling fan is to remove the fan motor. Follow these steps to safely remove the motor:
- Inspect the motor housing to locate the screws or bolts that secure the fan motor to the housing.
- Using a screwdriver or wrench, loosen and remove the screws or bolts that hold the fan motor in place.
- Once the screws or bolts are removed, carefully lift the fan motor out of the housing.
- Set the fan motor aside in a safe location, taking care not to damage any of the motor components.
As you remove the fan motor, take note of the wires that are connected to it. These wires will need to be disconnected in the next step.
It’s a good opportunity to inspect the fan motor for any signs of wear or damage. If you notice any issues with the motor, such as excessive noise or vibration, this may be a good time to consider replacing it.
With the fan motor safely removed, you can proceed to the next step: disassembling the fan motor components.
Read more: How To Dispose Ceiling Fans
Step 8: Disassemble the Fan Motor Components
After removing the fan motor, the next step in disassembling your ceiling fan is to disassemble its components. Follow these steps to safely take apart the fan motor:
- Inspect the fan motor to identify any additional screws, clips, or fasteners that hold its components together.
- Using a screwdriver or pliers, carefully loosen and remove any screws or fasteners that secure the motor components.
- Gently separate the motor components, such as the motor housing, rotor, stator, and bearings, taking note of their position and orientation as you disassemble them.
- Inspect each component for any signs of wear, damage, or debris. This is an opportunity to clean the components and perform any necessary maintenance.
It’s important to handle the fan motor components with care to avoid any damage. Be mindful of any delicate or sensitive parts, and take your time during the disassembly process to ensure that you don’t force anything apart.
If you are unfamiliar with the internal components of the fan motor or find the disassembly process too challenging, it’s advisable to seek professional assistance or refer to the manufacturer’s instructions for guidance.
With the fan motor components safely disassembled, you can now move on to the next step: cleaning and maintaining the ceiling fan parts.
Step 9: Clean and Maintain the Ceiling Fan Parts
After disassembling the ceiling fan components, it’s important to take the time to clean and maintain each part. Cleaning the fan parts will not only improve the overall appearance but also help to ensure optimal performance. Here’s how you can clean and maintain the ceiling fan parts:
- Start by dusting off the fan blades using a microfiber cloth or a soft brush. Remove any accumulated dust or debris from both sides of each blade.
- For more stubborn dirt or grime, you can use a mild detergent mixed with water. Dampen a cloth with the soapy water and gently wipe down the blades, taking care not to saturate the motor or electrical components with water.
- Next, clean the motor housing and other metal parts using a non-abrasive cleaner or a mixture of mild soap and water. Wipe them down with a cloth and remove any grease or stains.
- For the fan motor itself, use a soft brush or a vacuum cleaner with a brush attachment to remove any dust or debris. Avoid getting the motor wet.
- Inspect the motor bearings and lubricate them if necessary, following the manufacturer’s instructions. This can help ensure smooth operation and reduce noise.
- Finally, once all the parts are cleaned and dry, apply a thin coat of protective lubricant to any moving parts, such as the motor bearings and pivot points, to maintain smooth operation.
Regular maintenance and cleaning of your ceiling fan parts will help prolong the lifespan of the fan and ensure it operates efficiently. It’s recommended to clean the fan parts at least once or twice a year, or more frequently if you live in a dusty environment.
With the ceiling fan parts cleaned and maintained, you can now proceed to the final step: reassembling the ceiling fan components.
Step 10: Reassemble the Ceiling Fan Components
After cleaning and maintaining the ceiling fan parts, it’s time to reassemble the components. Follow these steps to ensure a proper and successful reassembly:
- Begin by reattaching the fan motor components, including the motor housing, rotor, stator, and bearings. Make sure they are aligned correctly and secure them with the screws or fasteners you previously removed.
- Next, connect the fan motor wires to the corresponding wires in the ceiling electrical supply. Match the color-coded wires (black to black, white to white, and green/bare copper to the ground wire) and use wire nuts or terminal screws to secure the connections.
- Once the fan motor is securely connected, position the motor back into the motor housing and align it with the screw holes or mounting brackets.
- Using the appropriate screws or bolts, fasten the fan motor to the motor housing, ensuring a tight and secure fit.
- Now, reattach the canopy cover to the motor housing by aligning the screw holes and using the screws or decorative nuts.
- Gently install the fan blades back onto the motor housing, aligning them with the screw holes or attachment points. Use the appropriate screws or bolts to secure the blades in place.
Take your time during the reassembly process to ensure that each component is properly aligned and securely fastened. Double-check all the connections and screws to avoid any loose or unstable parts.
After reassembling the ceiling fan components, turn the power back on at the circuit breaker to test the fan. Make sure it is operating smoothly and without any issues. If everything is working correctly, you can enjoy the cool breeze again!
By following these step-by-step instructions, you have successfully disassembled and reassembled your ceiling fan. Remember that regular maintenance and cleaning of your fan will help to keep it in optimal condition and extend its lifespan.
Now that you have completed the reassembly process, your ceiling fan is ready to be mounted back onto the ceiling and provide you with cool air and comfort!
Conclusion
Disassembling a ceiling fan may seem like a daunting task, but with the right tools, guidance, and a little patience, it can be a straightforward process. In this article, we provided a comprehensive step-by-step guide to help you safely disassemble your ceiling fan.
Starting with the important step of turning off the power supply, we walked you through removing the fan blades, disconnecting the wires, unmounting the fan from the ceiling, removing the canopy cover, disassembling the motor housing, removing the fan motor, disassembling the motor components, cleaning and maintaining the parts, and finally reassembling the components.
Throughout the process, we emphasized safety precautions, such as using a voltage tester, handling electrical components with care, and involving a professional if needed. It’s essential to prioritize your safety and seek assistance if you are unsure about any step.
By periodically disassembling and cleaning your ceiling fan, you can improve its performance, extend its lifespan, and ensure a more pleasant and efficient airflow in your home. Regular maintenance is crucial in keeping the fan in optimal condition and reducing the accumulation of dust and debris.
We hope that this article has provided you with the knowledge and confidence to successfully disassemble and reassemble your ceiling fan. Remember to consult the manufacturer’s instructions specific to your fan model when necessary, and always exercise caution when working with electrical components.
So, roll up your sleeves, gather your tools, and enjoy the satisfaction of giving your ceiling fan a thorough cleaning and maintenance job. Once you have completed the process, you can sit back, relax, and enjoy the cool breeze of your freshly maintained ceiling fan.
Frequently Asked Questions about How To Disassemble Ceiling Fan
Was this page helpful?
At Storables.com, we guarantee accurate and reliable information. Our content, validated by Expert Board Contributors, is crafted following stringent Editorial Policies. We're committed to providing you with well-researched, expert-backed insights for all your informational needs.


0 thoughts on “How To Disassemble Ceiling Fan”