Articles
Why Is My Ge Ice Maker Not Working
Modified: October 19, 2024
Discover articles on why your GE ice maker is not working and find helpful troubleshooting tips to fix the issue.
(Many of the links in this article redirect to a specific reviewed product. Your purchase of these products through affiliate links helps to generate commission for Storables.com, at no extra cost. Learn more)
Introduction
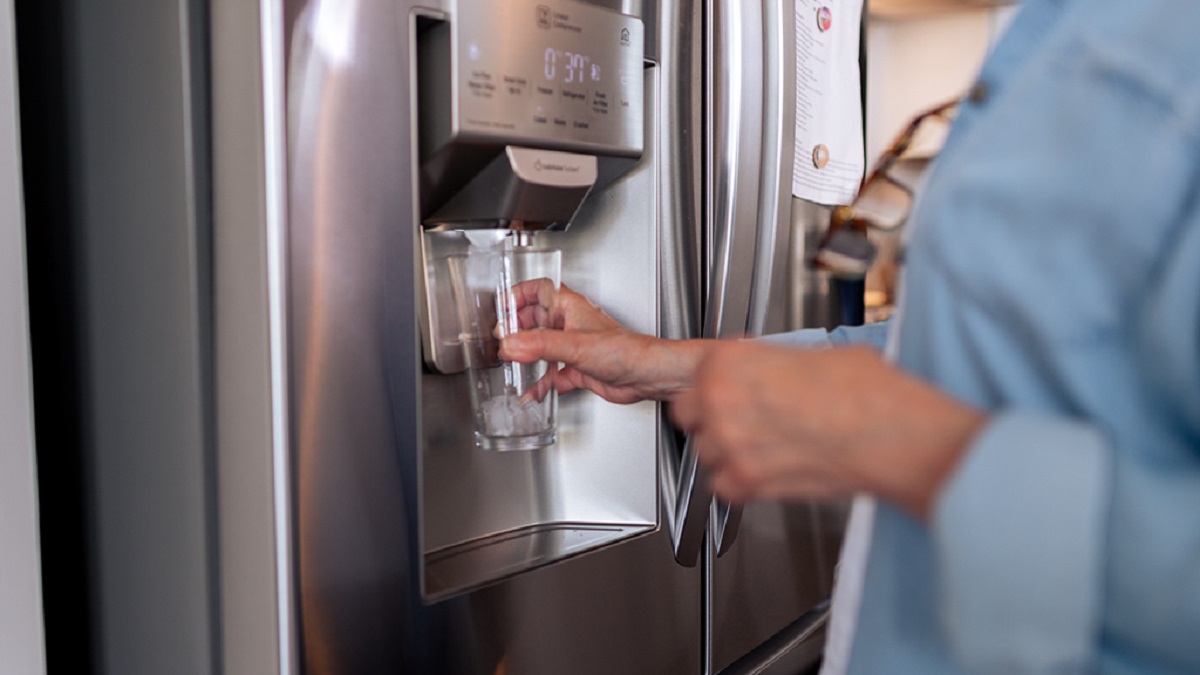
Having an ice maker in your GE refrigerator can be a convenient and refreshing feature. It provides a steady supply of ice cubes for your beverages, saving you the trouble of constantly refilling ice trays. However, like any appliance, a GE ice maker can encounter problems and stop working properly. If you’re wondering why your GE ice maker is not working, there could be a variety of reasons behind it.
In this article, we will explore some common issues that may cause a GE ice maker to malfunction. By understanding these potential problems and their solutions, you can troubleshoot the issue and get your ice maker working again in no time.
Key Takeaways:
- Troubleshoot power supply, water flow, and freezer temperature issues to resolve common GE ice maker malfunctions. Regular maintenance and professional assistance can ensure a steady supply of ice cubes.
- Address clogged water filters, faulty components, and frozen water lines to optimize GE ice maker performance. Regular maintenance and professional assistance can ensure a steady supply of ice cubes.
Read more: Why Is My Portable Ice Maker Not Working
Common reasons for a GE ice maker not working
When your GE ice maker stops working, it can be frustrating and inconvenient. Fortunately, many of the issues can be easily resolved once you identify the underlying cause. Here are some common reasons why your GE ice maker may not be working:
- Power supply issues: The first thing to check is whether the ice maker is receiving power. Ensure that it is properly plugged in and there are no issues with the power outlet. If the ice maker is connected to a power switch, make sure it is turned on.
- Faulty water supply: A consistent flow of water is crucial for the ice maker to produce ice cubes. Check if the water supply line is kinked, disconnected, or blocked. You should also inspect the water inlet valve for any signs of damage or blockage.
- Freezer temperature problems: The freezer temperature plays a vital role in the ice-making process. Make sure the freezer is set to the recommended temperature, typically between 0 and 5 degrees Fahrenheit (-17 to -15 degrees Celsius). If the temperature is too warm, the ice maker may not function properly.
- Frozen water line: Over time, the water line leading to the ice maker can become frozen, obstructing water flow. Check the water line for any ice buildup or blockage. If necessary, defrost the line to restore proper water flow.
- Malfunctioning ice maker assembly: The ice maker assembly itself can become faulty over time. Inspect the ice maker unit and look for any signs of damage or wear. If necessary, you may need to replace the ice maker assembly to resolve the issue.
- Clogged water filter: If your GE refrigerator has a water filter, it’s important to regularly replace it to maintain good water quality. A clogged or expired water filter can restrict water flow to the ice maker. Refer to the refrigerator manual for instructions on how to replace the water filter.
- Ice maker switch turned off: It may seem obvious, but sometimes the ice maker switch can accidentally get turned off. Double-check the ice maker switch, usually located near the ice maker or inside the freezer, and ensure it is in the “on” position.
- Faulty ice maker thermostat: The ice maker thermostat regulates the temperature within the ice maker assembly. If the thermostat is faulty, it may not signal the ice maker to start producing ice. Consider testing or replacing the thermostat if necessary.
- Defective water inlet valve: The water inlet valve controls the water flow into the ice maker. If the valve is defective or not working correctly, it can hinder the ice-making process. Inspect the water inlet valve for any issues and replace it if needed.
- Blocked or damaged ice maker components: The ice maker contains several components, such as the motor, gears, and sensors, that can become blocked or damaged over time. Thoroughly inspect these components and clean or repair them as necessary.
By addressing these common issues, you can increase the chances of resolving the problem with your GE ice maker and get it back to producing ice. However, if you are unsure or unable to diagnose the issue yourself, it is recommended to seek professional assistance from a certified technician.
Power supply issues
One of the first things to check if your GE ice maker is not working is the power supply. Without a proper power source, the ice maker won’t be able to function. Here are some steps to troubleshoot power supply issues:
- Check the power cord: Ensure that the power cord is securely plugged into a functioning power outlet. Sometimes, the cord can become loose or disconnected, preventing the ice maker from receiving power. If you find any issues with the power cord, try reinserting it or replacing it if necessary.
- Verify the circuit breaker: If the ice maker doesn’t turn on at all, it could be due to a tripped circuit breaker. Locate the circuit breaker panel in your home and check if the switch corresponding to the ice maker is in the “on” position. If it has tripped, flip it back to restore power to the ice maker.
- Inspect for damaged wiring: Examine the power cord and any visible wiring for signs of damage. If you notice frayed or exposed wires, it’s important to address the issue immediately. Damaged wiring can pose a safety hazard and may cause the ice maker to malfunction. In such cases, it’s advisable to seek professional help for repairs or replacements.
- Consider voltage fluctuations: Fluctuations in voltage can affect the operation of electrical appliances, including ice makers. If you live in an area with unstable voltage, consider installing a voltage stabilizer or surge protector. These devices can help regulate the power supply and protect your ice maker from potential damage.
- Test with a different outlet: To rule out a faulty power outlet, try plugging the ice maker into a different outlet. If it works in a different outlet, it indicates that the original outlet may be defective. In such cases, you may need to contact an electrician to repair or replace the outlet.
By checking the power supply and addressing any issues, you can ensure that your GE ice maker is receiving the necessary power to function properly. If you have tried these troubleshooting steps and the ice maker still doesn’t work, it may be necessary to consult a professional technician for further inspection and repairs.
Faulty water supply
A consistent water supply is essential for your GE ice maker to produce ice. If the water supply to the ice maker is disrupted or faulty, it can prevent the ice-making process from functioning correctly. Here are some steps to troubleshoot faulty water supply issues:
- Check the water supply line: Start by examining the water supply line that connects to your ice maker. Ensure that it is securely connected and not kinked or bent, as this can obstruct water flow. You should also check for any visible leaks or damage to the water supply line.
- Inspect the water inlet valve: The water inlet valve controls the flow of water into the ice maker. If the valve is defective or clogged, it can hinder water supply. Take a close look at the water inlet valve to see if there are any visible signs of damage or blockage. If necessary, clean the valve or replace it with a new one.
- Verify water pressure: Inadequate water pressure can also affect the ice maker’s performance. Check the water pressure in your home by turning on another faucet nearby. If you notice low water pressure or a weak stream, it could indicate an issue with your plumbing or water supply. Contact a plumber to resolve any water pressure problems.
- Inspect the water filter: If your GE refrigerator has a water filter, it’s crucial to regularly replace it to maintain good water quality. A clogged or expired water filter can restrict water flow to the ice maker. Refer to the refrigerator manual for instructions on how to replace the water filter.
- Check for frozen water line: Over time, the water line leading to the ice maker can become frozen, blocking water flow. Inspect the water line for any signs of ice buildup or blockage. If you find any, use a hairdryer on low heat or a warm cloth to defrost the line. This should restore proper water flow to the ice maker.
- Ensure proper water temperature: The water entering your ice maker should be at an adequate temperature. If the water is too warm or too cold, it can affect the ice-making process. Verify that your refrigerator’s water temperature is within the recommended range, typically around 50 degrees Fahrenheit (10 degrees Celsius).
By addressing these faulty water supply issues, you can increase the likelihood of resolving the problem with your GE ice maker. If you have tried these troubleshooting steps and the ice maker still doesn’t work, it is advisable to consult a professional technician for further assistance.
Freezer temperature problems
The temperature of the freezer plays a crucial role in the ice-making process. If the freezer temperature is too warm or too cold, it can affect the performance of your GE ice maker. Here are some steps to troubleshoot freezer temperature problems:
- Check the temperature setting: Verify that the temperature setting of your freezer is set to the recommended range, typically between 0 and 5 degrees Fahrenheit (-17 to -15 degrees Celsius). If the temperature is set too high, the ice maker may not function properly. Adjust the temperature setting as needed.
- Inspect the freezer vents: The freezer vents need to be clear and unobstructed for proper airflow. Check if there are any items blocking the vents, such as food packages or ice buildup. Clear away any obstructions to ensure good airflow, which helps maintain the freezer temperature.
- Avoid overstocking the freezer: Overloading your freezer with too many items can impede the circulation of cold air, leading to temperature fluctuations. Ensure that there is enough space for proper air circulation around your food items. Consider removing any unnecessary items to create adequate space.
- Check the door seal: A faulty or damaged door seal can cause cold air to escape from the freezer, resulting in temperature fluctuations. Inspect the door seal for any signs of wear, tears, or gaps. If you notice any issues, replace the door seal to ensure a tight seal and better temperature control.
- Avoid frequent door openings: Each time you open the freezer door, warm air from the surroundings enters, causing the temperature inside to rise. Minimize the frequency and duration of door openings to maintain a consistent freezer temperature and prevent strain on the ice maker.
- Consider ambient room temperature: The ambient temperature of the room where your refrigerator is located can affect the freezer temperature. Avoid placing the refrigerator near heat sources like direct sunlight, ovens, or heaters, as this can raise the temperature inside the freezer. Keep the refrigerator in a cool, well-ventilated area.
By addressing these freezer temperature problems, you can optimize the ice-making process of your GE ice maker. If you have tried these troubleshooting steps and the ice maker still doesn’t work, it is recommended to consult a professional technician for further investigation and assistance.
Read more: Why Is My Whirlpool Ice Maker Not Working
Frozen water line
If your GE ice maker is not working, one potential culprit could be a frozen water line. Over time, the water line leading to the ice maker can become frozen, obstructing the flow of water. Here are some steps to troubleshoot and resolve a frozen water line issue:
- Identify the water line: Locate the water line that supplies water to the ice maker. This line is usually located at the back of the freezer or may be inside the freezer compartment. Consult your refrigerator’s manual for specific instructions.
- Turn off the ice maker: To prevent any potential water leakage, it’s best to turn off the ice maker before troubleshooting the frozen water line. You can usually find an on/off switch or lever near the ice maker itself or inside the freezer compartment.
- Thaw the water line: The next step is to thaw the frozen water line. You can use a hairdryer on a low heat setting to gently warm the water line until the ice melts away. Alternatively, you can place a towel soaked in warm water around the water line to help speed up the thawing process. Be sure to handle the hairdryer and towel with caution.
- Check for water flow: Once the water line is thawed, turn on the ice maker and check if water is now flowing into the ice maker. Listen for the sound of water flowing or look for any water dripping into the ice maker’s tray.
- Inspect for leaks: While testing the water flow, keep an eye out for any leaks from the water line. If you notice any leaks or water accumulation, it could indicate a damaged or faulty water line that may need to be repaired or replaced.
- Prevent future freezing: To prevent the water line from freezing again, make sure that the temperature in the freezer is set to the recommended level. Additionally, ensure proper insulation around the water line and minimize any drafts or cold spots near the line.
By thawing the frozen water line and taking preventive measures, you can resolve this common issue affecting GE ice makers. However, if you have followed these steps and the ice maker still doesn’t work, it is advisable to consult a professional technician for further inspection and assistance.
Malfunctioning ice maker assembly
If your GE ice maker is not working, there is a possibility that the ice maker assembly itself is malfunctioning. The ice maker assembly consists of various components that work together to produce and dispense ice cubes. Here are some steps to troubleshoot a malfunctioning ice maker assembly:
- Inspect for visible damage: Carefully examine the ice maker assembly for any visible signs of damage or wear. Look for broken or loose parts, cracked trays, or misaligned mechanisms. If you notice any issues, it may indicate a need for repair or replacement.
- Reset the ice maker: Sometimes, the ice maker assembly can get stuck, preventing it from operating correctly. To reset the ice maker, locate the reset button or switch on the ice maker itself or inside the freezer compartment. Press or switch it off and then on again to reset the assembly.
- Ensure proper installation: Check if the ice maker assembly is correctly installed in your freezer. Refer to your refrigerator’s manual for installation instructions and ensure that all connections are secure. Improper installation can lead to operational issues.
- Clean the ice maker: Over time, mineral deposits or ice residue can accumulate on the ice maker assembly, affecting its performance. Use a soft cloth or brush to clean the assembly, removing any debris or buildup. Be gentle to avoid damaging the components.
- Contact GE customer support: If the above steps haven’t resolved the issue, it is recommended to contact GE customer support or schedule a service appointment. They can provide further guidance or arrange for a technician to inspect and repair the ice maker assembly professionally.
The ice maker assembly is a complex system, and attempting intricate repairs without the necessary expertise may lead to further damage. It is best to rely on professional assistance if you are unsure or if the troubleshooting steps haven’t resolved the problem. A certified technician will have the knowledge and experience to diagnose and fix issues with the ice maker assembly effectively.
Check if the water supply to the ice maker is connected and turned on. Also, make sure the freezer temperature is set to the recommended level for ice production.
Clogged water filter
A clogged water filter can be another reason why your GE ice maker is not working properly. The water filter is responsible for removing impurities from the water supply, ensuring that the ice cubes produced are clean and fresh-tasting. Here’s how you can troubleshoot and address a clogged water filter:
- Locate the water filter: The water filter is typically located inside the refrigerator compartment or at the back of the refrigerator. Consult your refrigerator’s manual to determine the exact location.
- Check the filter indicator: Some GE refrigerators have a filter indicator light that alerts you when the water filter needs to be changed. If the indicator light is illuminated or blinking, it’s a sign that the filter is clogged and requires replacement.
- Follow the filter replacement instructions: Refer to your refrigerator’s manual for specific instructions on how to replace the water filter. It usually involves turning off the water supply, removing the old filter, inserting a new one, and turning the water supply back on. Make sure to use a genuine GE water filter that is compatible with your refrigerator model.
- Flush the new filter: After replacing the water filter, it’s recommended to flush it to remove any air or trapped particles. Follow the instructions provided in the filter replacement manual to properly flush the new filter before using the ice maker.
- Regularly replace the water filter: To prevent future clogs and ensure optimal water flow to the ice maker, it’s important to regularly replace the water filter according to the manufacturer’s recommendations. This is usually every six months or as indicated by the filter indicator light.
- Monitor water quality: Even with a new filter, it’s important to monitor the quality of the water. If you notice any unusual taste, odor, or discoloration in the ice cubes, it could indicate a problem with the water supply or a faulty filter. In such cases, consider contacting a professional technician to assess the issue.
By regularly replacing the water filter and following the manufacturer’s recommendations, you can maintain a clean water supply for your GE ice maker. If you have followed these steps and the ice maker still doesn’t work, it is advisable to consult a professional technician for further inspection and assistance.
Ice maker switch turned off
It may seem simple, but one of the common reasons why your GE ice maker is not working is because the ice maker switch has been accidentally turned off. The ice maker switch is typically located near the ice maker or inside the freezer compartment. Here’s what you can do to troubleshoot and resolve this issue:
- Locate the ice maker switch: Take a look inside the freezer compartment and find the ice maker switch. It is usually a small lever or button that can be easily toggled on or off.
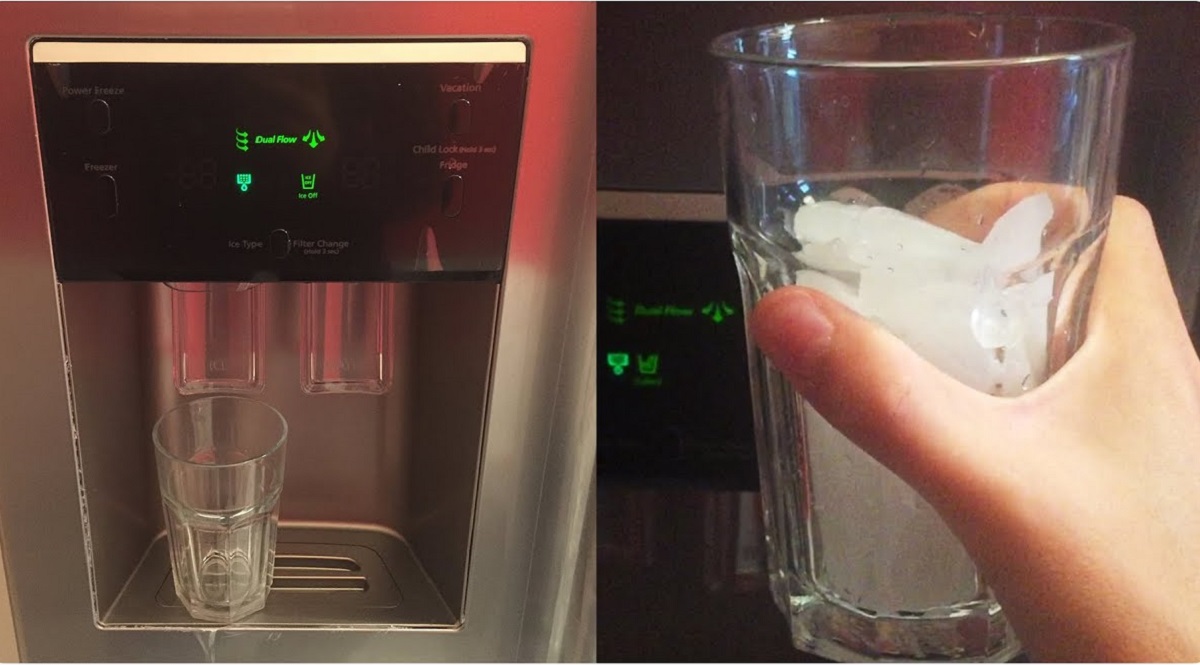
- Check the position of the switch: Ensure that the ice maker switch is in the “on” position. If it is already in the “off” position, toggle it to the “on” position.
- Wait for the ice maker to start: Once you have turned on the ice maker switch, give it some time to start. It may take a few moments for the ice maker to engage and begin the ice-making process.
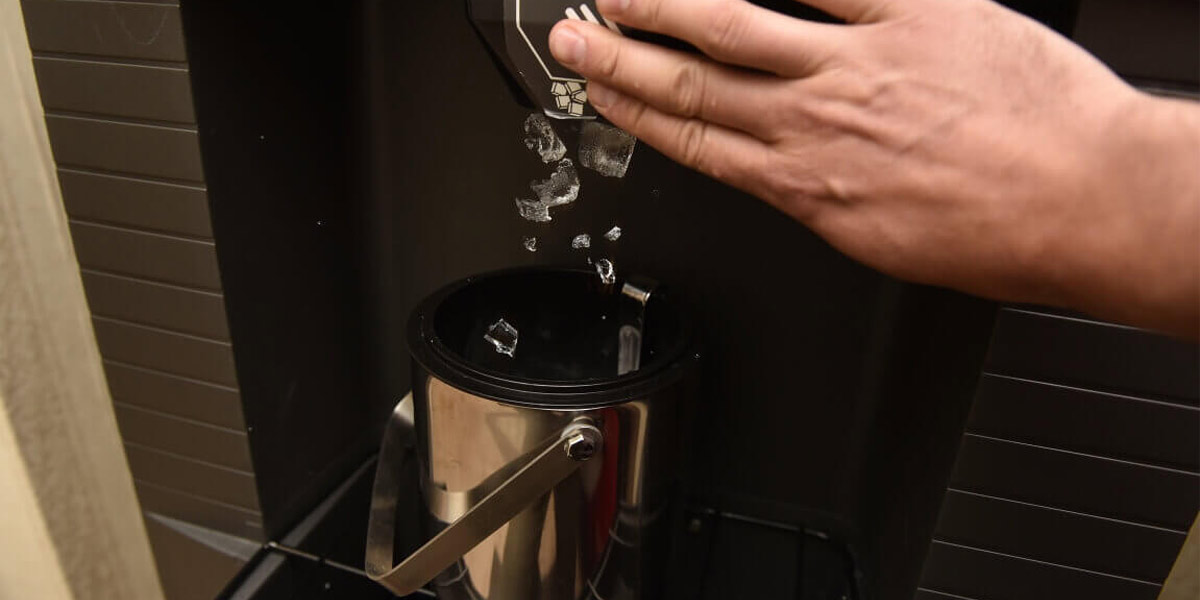
- Verify ice production: Check if the ice maker has started producing ice. You can listen for the sound of the ice maker operating or look for ice cubes forming in the ice tray. It’s also a good idea to check the ice dispenser if your GE refrigerator has one.
In many cases, the ice maker not working can be easily resolved by simply turning on the ice maker switch. However, if you have followed these steps and the ice maker still does not work, there may be other underlying issues that require further investigation.
If you find that the ice maker switch keeps turning off even after you have turned it on, it could indicate a more significant problem with the ice maker assembly or electrical components. In such cases, it is recommended to consult a professional technician for a thorough inspection and necessary repairs.
Remember to always refer to the user manual or contact the manufacturer’s customer support for specific instructions or guidance tailored to your GE ice maker model.
Read more: Why Is My GE Opal Ice Maker Not Working
Faulty ice maker thermostat
If your GE ice maker is not working properly, a faulty ice maker thermostat could be the culprit. The thermostat is responsible for regulating the temperature inside the ice maker assembly, ensuring that it cycles on and off as needed to produce ice. Here’s how you can troubleshoot and address this issue:
- Locate the ice maker thermostat: The ice maker thermostat is usually located within the ice maker assembly. Refer to your refrigerator’s manual or search for the specific location of the thermostat in your particular GE model.
- Inspect for visible signs of damage: Carefully examine the thermostat for any visible damage, such as cracks or loose connections. A damaged thermostat may not accurately sense the temperature, leading to improper ice production.
- Test the thermostat for continuity: To determine if the thermostat is faulty, you can perform a continuity test using a multimeter. Disconnect the power supply to the ice maker, and then use the multimeter to test the thermostat for continuity. If there is no continuity, it indicates a faulty thermostat that needs to be replaced.
- Replace the faulty thermostat: If the continuity test confirms that the thermostat is faulty, you will need to replace it. Contact the manufacturer or a qualified technician to obtain the correct thermostat replacement for your GE ice maker model. Follow the instructions in your manual or seek professional assistance for the proper installation.
- Consider professional assistance: If you do not have experience working with electrical components or are unsure about performing the continuity test and replacement, it is advisable to seek professional assistance. A certified technician will have the knowledge and expertise to handle the repair safely and effectively.
A faulty ice maker thermostat can disrupt the ice-making process and prevent your GE ice maker from functioning correctly. By identifying and replacing the faulty thermostat, you can restore proper functionality to the ice maker. However, if you have followed these steps and the ice maker still doesn’t work, it is recommended to consult a professional technician for further inspection and assistance.
Defective water inlet valve
If your GE ice maker is not working, a defective water inlet valve could be to blame. The water inlet valve controls the flow of water into the ice maker, and if it malfunctions, it can hinder the ice-making process. Here’s how you can troubleshoot and address this issue:
- Locate the water inlet valve: The water inlet valve is typically located at the back of the refrigerator near the bottom. Refer to your refrigerator’s manual or search for the specific location of the valve in your particular GE model.
- Inspect for visible signs of damage: Carefully examine the water inlet valve for any visible signs of damage, such as cracks, leaks, or loose connections. A damaged valve may not effectively control the water flow, impacting the ice maker’s performance.
- Test the water inlet valve: To determine if the water inlet valve is defective, you can use a multimeter to test its functionality. Disconnect the power supply to the refrigerator and use the multimeter to check for continuity across the valve’s terminals. If there is no continuity, it indicates a faulty valve that needs to be replaced.
- Replace the defective water inlet valve: If the continuity test confirms that the water inlet valve is defective, you will need to replace it. Contact the manufacturer or a qualified technician to obtain the correct replacement valve for your GE refrigerator model. Follow the instructions in your manual or seek professional assistance for the proper installation.
- Consider professional assistance: If you are uncomfortable or inexperienced with dealing with electrical components or plumbing, it is advisable to seek professional assistance. A certified technician will have the knowledge and expertise to handle the replacement safely and effectively.
A defective water inlet valve can disrupt the water flow to your GE ice maker, leading to reduced ice production or no ice at all. By identifying and replacing the faulty valve, you can restore proper water flow and improve the ice maker’s performance. However, if you have followed these steps and the ice maker still doesn’t work, it is recommended to consult a professional technician for further inspection and assistance.
Blocked or damaged ice maker components
If your GE ice maker is not working, it’s possible that certain components within the ice maker assembly are blocked or damaged. These components, such as the motor, gears, and sensors, play a crucial role in the ice-making process. Here’s how you can troubleshoot and address this issue:
- Inspect for visible blockages: Carefully examine the ice maker assembly for any visible blockages. Ice cubes, debris, or other foreign particles can obstruct the movement of the components. Clear any blockages using a soft cloth or brush, taking care not to damage any sensitive parts.
- Check for damaged parts: Look for any signs of damage or wear on the components of the ice maker assembly. Damaged parts can affect the proper functioning of the ice maker. If you notice any issues, consider replacing the damaged parts to restore the ice maker’s performance.
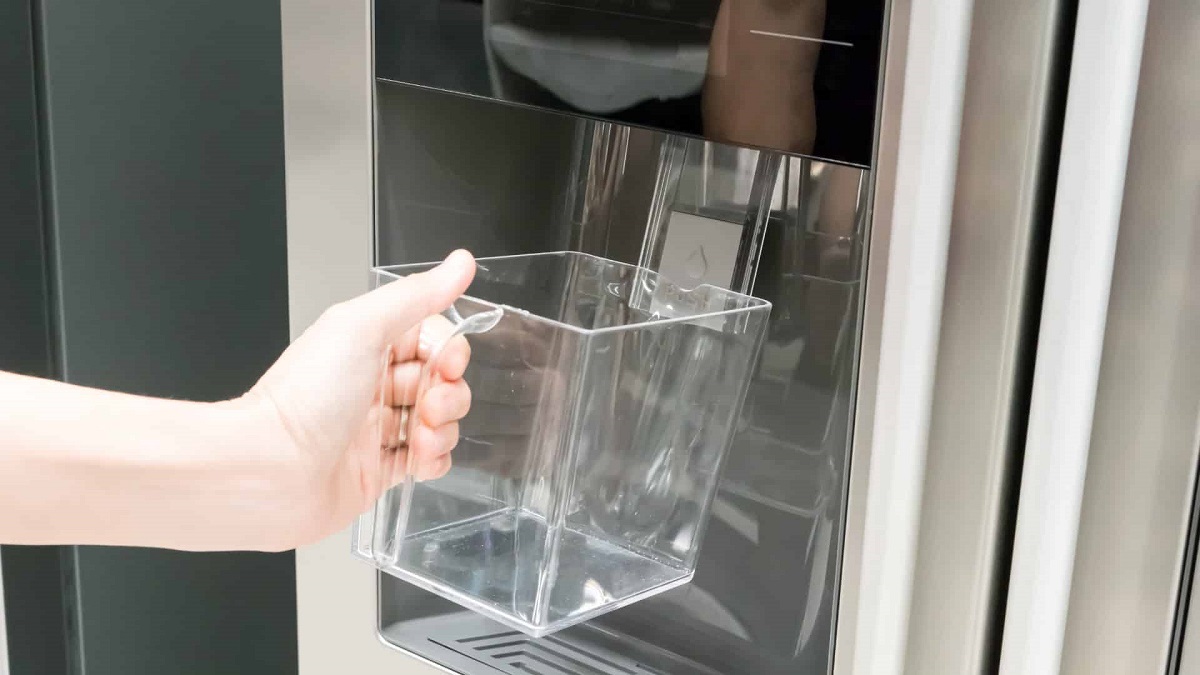
- Clean the ice mold and tray: The ice mold and tray can accumulate residue or mineral deposits over time, affecting ice production. Remove the ice mold and tray from the ice maker assembly and clean them using warm water and a mild detergent. Rinse thoroughly and allow them to dry completely before reinstalling.
- Verify proper alignment: Misalignment of the ice maker assembly components can hinder their proper operation. Check if the components are aligned correctly, ensuring that they fit into their designated slots and move freely without obstruction. Adjust any misaligned parts as needed.
- Consider professional assistance: If you have inspected the ice maker components and are unable to identify or resolve any blockages or damages, it may be necessary to seek professional assistance. A certified technician will have the expertise and proper tools to diagnose and address more complex issues with your GE ice maker.
Blocked or damaged components within the ice maker assembly can impede the ice-making process and cause your GE ice maker to malfunction. By clearing any blockages, repairing or replacing damaged parts, and ensuring proper alignment, you can optimize the performance of your ice maker. If you have followed these steps and the ice maker still doesn’t work, it is advisable to consult a professional technician for further inspection and assistance.
Conclusion
A GE ice maker not working can be a frustrating issue, but there are several common reasons why this may occur. By understanding these common issues and troubleshooting steps, you can hopefully resolve the problem and get your ice maker back to producing ice.
In this article, we have explored some of the most frequent reasons for a GE ice maker not working. These include power supply issues, faulty water supply, freezer temperature problems, frozen water lines, malfunctioning ice maker assembly, clogged water filters, ice maker switch turned off, faulty ice maker thermostats, defective water inlet valves, and blocked or damaged ice maker components.
Throughout the troubleshooting process, it’s essential to refer to your GE refrigerator’s manual for specific instructions tailored to your model. Additionally, if you are uncomfortable or unsure about any steps, it’s recommended to seek professional assistance from a certified technician.
Remember, in some situations, proper maintenance and regular preventive measures can help avoid potential issues with your GE ice maker. This includes regularly cleaning the ice maker, replacing water filters as recommended, maintaining proper freezer temperatures, and ensuring a consistent power supply.
If you have exhausted all troubleshooting options and your GE ice maker still does not work, it may be time to consult a professional technician. They have the knowledge, expertise, and specialized tools to diagnose and repair any more complex issues that may be affecting your ice maker’s functionality.
By addressing these common issues and seeking appropriate solutions, you can increase the chances of resolving the problem with your GE ice maker and enjoy the convenience of a steady supply of ice cubes once again.
Frequently Asked Questions about Why Is My Ge Ice Maker Not Working
Was this page helpful?
At Storables.com, we guarantee accurate and reliable information. Our content, validated by Expert Board Contributors, is crafted following stringent Editorial Policies. We're committed to providing you with well-researched, expert-backed insights for all your informational needs.


0 thoughts on “Why Is My Ge Ice Maker Not Working”