Articles
Why Is My Ice Maker Light Blinking
Modified: August 20, 2024
Discover why your ice maker light is blinking in this helpful article. Get troubleshooting tips and learn how to fix the issue
(Many of the links in this article redirect to a specific reviewed product. Your purchase of these products through affiliate links helps to generate commission for Storables.com, at no extra cost. Learn more)
Introduction
An ice maker is a convenient and essential appliance in many homes and businesses, providing a steady supply of ice for various purposes. However, it can be frustrating when the light on your ice maker starts blinking unexpectedly. This blinking light is an indication that something is not functioning correctly within the ice maker system. Understanding the possible causes of the blinking light and knowing how to troubleshoot the issue can help you resolve the problem quickly and efficiently.
In this article, we will explore the potential causes of a blinking light on an ice maker and provide step-by-step troubleshooting tips to help you rectify the problem. By following these guidelines, you can potentially avoid the cost and inconvenience of calling a professional technician.
Key Takeaways:
- Troubleshooting your ice maker’s blinking light can save time and money. Simple steps like checking the ice bin and water supply, cleaning components, and testing the motor can often resolve the issue without professional help.
- Regular maintenance, such as cleaning the ice maker components and inspecting the water supply, can prevent issues and extend the lifespan of your ice maker. Seeking professional help when needed ensures optimal functionality and convenience.
Read more: Why Is My Ice Melting In My Ice Maker
Possible Causes of Blinking Light on Ice Maker
When the light on your ice maker is blinking, it is indicating that there is an issue that needs to be addressed. Here are some possible causes for the blinking light:
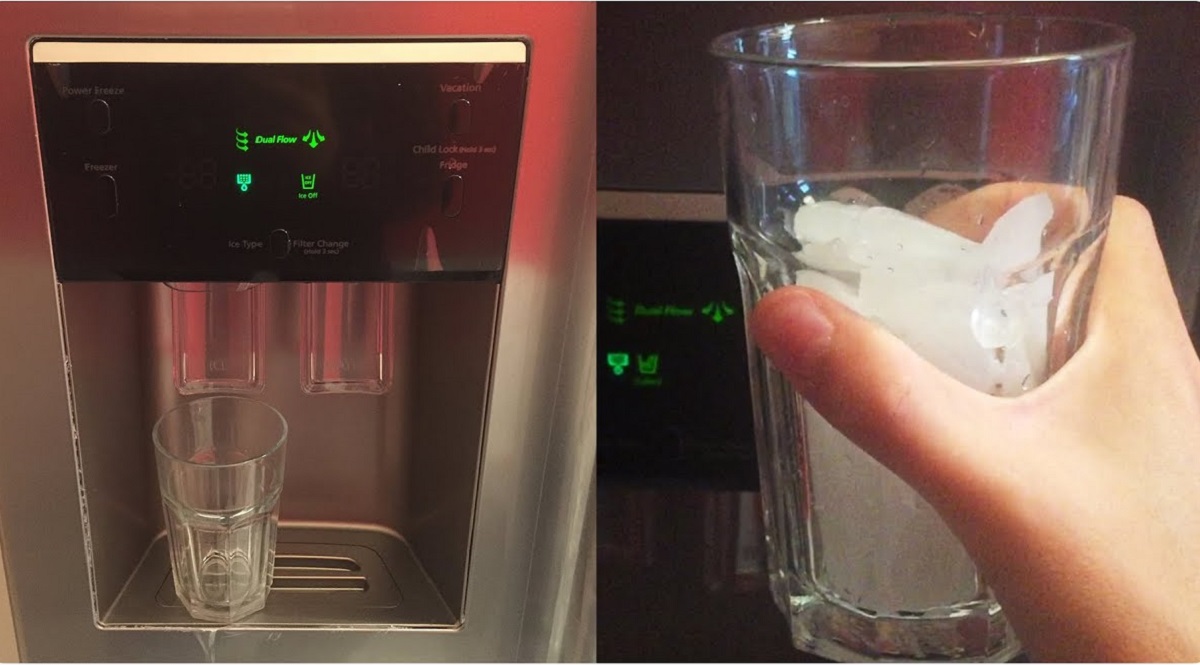
- Ice Bin Full: Some ice makers have a sensor that detects when the ice bin is full. If the sensor is blocked, malfunctioning, or not aligned properly, it may trigger the blinking light to indicate that the bin is full even if it’s not.
- Water Supply Issue: The ice maker relies on a consistent water supply to produce ice. If there is a problem with the water supply, such as a clogged water line or a malfunctioning water valve, the ice maker may not receive enough water to produce ice, resulting in the blinking light.
- Ice Maker Sensor Problem: The ice maker sensor detects the level of ice in the bin and signals the ice maker to produce more ice when needed. If the sensor is dirty, damaged, or malfunctioning, it may send an incorrect signal to the ice maker, causing the light to blink.
- Ice Maker Component Issue: The blinking light could be the result of a problem with one of the internal components of the ice maker, such as the motor, the fan, or the control module. Any malfunction in these components can disrupt the ice-making process and trigger the blinking light.
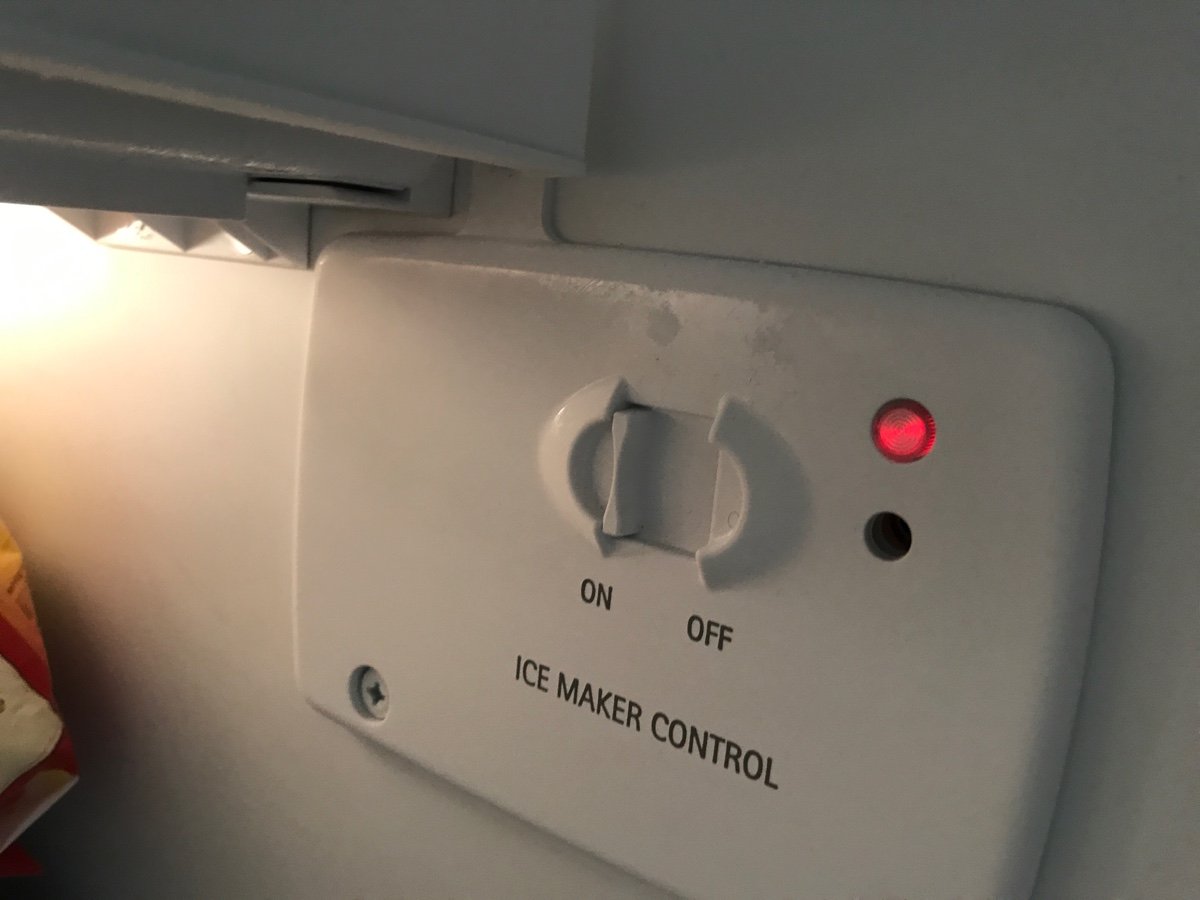
- Power Interruption: Sometimes, a brief power interruption or power surge can cause the ice maker to malfunction and the light to blink. In such cases, a simple reset may resolve the issue.
Identifying the possible cause of the blinking light is the first step towards resolving the problem. In the following sections, we will discuss troubleshooting steps that you can take to address each of these potential causes and restore the functionality of your ice maker.
Troubleshooting Steps
When dealing with a blinking light on your ice maker, it’s important to go through a systematic troubleshooting process to identify and resolve the issue. Here are some steps you can take to troubleshoot the problem:
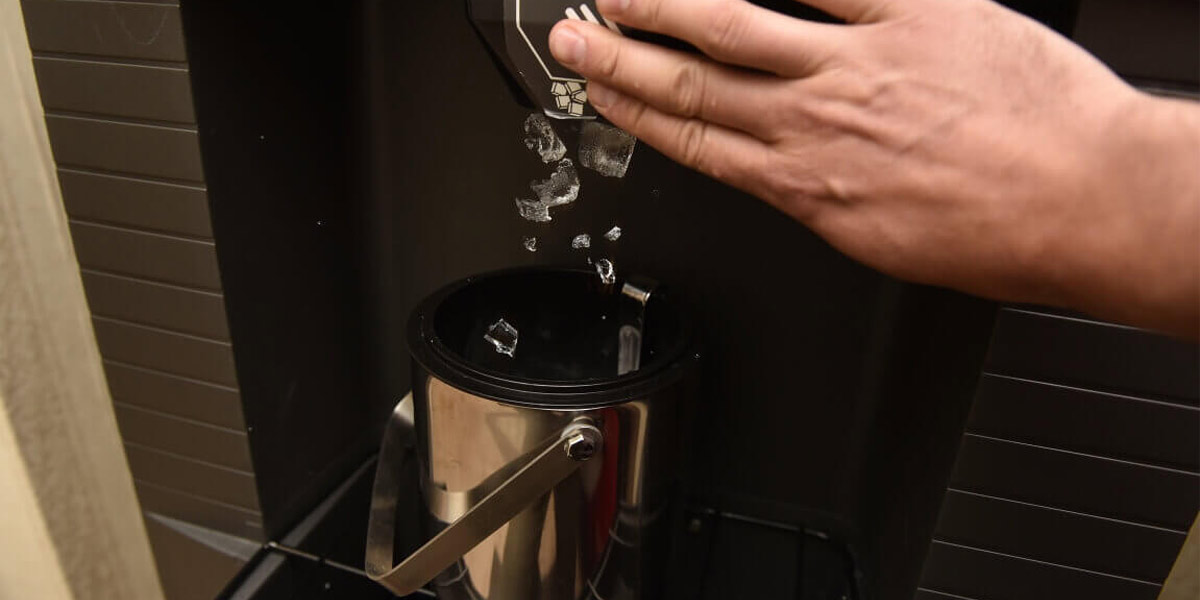
- Check the ice bin: Start by checking the ice bin and ensuring that it is not full or obstructed. Remove any excess ice or debris that may be blocking the sensor or preventing proper ice production.
- Inspect the water supply: Next, check the water supply to the ice maker. Make sure the water line is not kinked or frozen, and that the water valve is open and functioning correctly. If necessary, clean or replace the water filter to ensure a steady flow of clean water to the ice maker.
- Examine the ice maker sensor: Take a close look at the ice maker sensor, which is usually located near the bin or on the side of the ice maker. Clean the sensor with a soft cloth and ensure there are no obstructions or damage. Sometimes, realigning the sensor or adjusting its position can also resolve the issue.
- Clean the ice maker components: Over time, mineral deposits and debris can accumulate on the ice maker components, affecting their performance. Use a mixture of warm water and mild detergent to clean the ice maker tray, the ice chute, and other accessible parts. Rinse thoroughly and allow them to dry before reassembling the ice maker.
- Test the ice maker motor: If the above steps do not resolve the issue, it’s worth testing the ice maker motor. Disconnect the power supply to the ice maker, and then manually rotate the motor to check for any obstructions or irregularities. If the motor is damaged or not functioning correctly, it may need to be replaced.
It’s important to note that these troubleshooting steps are general guidelines, and the specific process may vary depending on the make and model of your ice maker. Always refer to the manufacturer’s instructions or consult a professional technician if you are unsure or unable to resolve the issue on your own.
If none of these troubleshooting steps resolve the blinking light issue, it may be necessary to contact a professional technician who specializes in ice maker repairs. They will have the expertise and tools to diagnose and fix any complex or underlying problems with your ice maker.
Resetting the Ice Maker
One of the first troubleshooting steps you can take when dealing with a blinking light on your ice maker is to reset the appliance. Resetting the ice maker can often resolve minor issues and restore normal functionality. Here’s how you can reset your ice maker:
- Locate the reset button: Look for a reset button on your ice maker. The location of the reset button can vary depending on the make and model of your appliance. It is typically located on the control panel or inside the ice maker compartment.
- Press and hold the reset button: Once you’ve located the reset button, press and hold it for about 10-15 seconds. You may need a small pointed object, such as a pen or paperclip, to press the reset button if it is recessed.
- Wait for the ice maker to reset: After pressing the reset button, wait for a few minutes to allow the ice maker to reset. During this time, the ice maker will go through a series of diagnostic tests and adjustments.
- Observe the blinking light: After the reset, check if the blinking light has stopped. If the light remains blinking, proceed with other troubleshooting steps.
Resetting the ice maker is a simple and quick step that can often resolve minor glitches or temporary issues. However, if the blinking light persists even after resetting, it may indicate a more significant problem that requires further investigation or professional assistance.
Keep in mind that the specific reset process may vary depending on the manufacturer and model of your ice maker. Consult the appliance’s user manual or the manufacturer’s website for detailed instructions on how to reset your specific ice maker model, if available.
Checking the Water Supply
A blinking light on your ice maker can sometimes indicate a problem with the water supply. If the ice maker is not receiving sufficient water or if the water supply is blocked, it can impact the ice-making process. Here are some steps to check the water supply:
- Inspect the water line: Start by examining the water line that connects your ice maker to the main water supply. Ensure that the water line is not kinked, crimped, or damaged in any way. A kinked water line can restrict the flow of water to the ice maker.
- Check the water valve: Locate the water valve that controls the flow of water to the ice maker. Ensure that the valve is fully open and functioning correctly. If the valve is partially closed or malfunctioning, it can hamper water flow, resulting in the blinking light.
- Clear any clogs: Inspect the water line for any clogs or blockages. Sediments, minerals, or debris can accumulate and obstruct the water flow to the ice maker. Use a thin brush or pipe cleaner to gently remove any obstructions and ensure a clear path for water.
- Inspect the water filter: If your ice maker is equipped with a water filter, check if it’s clogged or needs replacement. A dirty or clogged filter can impede water flow to the ice maker. Follow the manufacturer’s instructions to clean or replace the water filter accordingly.
- Test the water pressure: Measure the water pressure to ensure it is within the recommended range. Low water pressure can impact the ice maker’s performance. Use a water pressure gauge to measure the pressure and consult the ice maker’s manual for the appropriate pressure range.
By checking the water supply and addressing any issues or obstructions, you can ensure a consistent and adequate flow of water to your ice maker. If the blinking light persists even after checking the water supply, proceed to investigate other potential causes.
Remember, it’s essential to follow the manufacturer’s guidelines and refer to the user manual specific to your ice maker model for accurate troubleshooting steps and water supply requirements.
Check the manufacturer’s manual for troubleshooting tips. The blinking light could indicate a problem with the water supply, ice level, or other issues that can be easily resolved with the right guidance.
Read more: Why Is My Ice Maker Not Dropping Ice
Inspecting the Ice Maker Sensor
The ice maker sensor is responsible for detecting the level of ice in the bin and signaling the ice maker to produce more ice when needed. If the sensor is dirty, damaged, or malfunctioning, it can trigger the blinking light on your ice maker. Here’s how you can inspect the ice maker sensor:
- Locate the ice maker sensor: The ice maker sensor is typically located near the ice bin or on the side of the ice maker. Refer to your ice maker’s user manual to determine the exact location of the sensor.
- Check for dirt or debris: Examine the sensor visually for any dirt, debris, or ice buildup. If the sensor is dirty, use a soft cloth or sponge and mild soapy water to clean it gently. Avoid using abrasive materials or harsh chemicals that can damage the sensor.
- Ensure proper alignment: Verify that the sensor is properly aligned and in the correct position. If it has been knocked out of place or shifted, it may not function correctly. Adjust the position of the sensor following the manufacturer’s instructions.
- Inspect for damage: Carefully examine the sensor for any signs of damage, such as cracks or loose wiring. Damaged sensors may need to be replaced to resolve the blinking light issue. Refer to the manufacturer’s guidelines or contact a professional technician for assistance with replacing the sensor.
- Allow time for drying: After cleaning or inspecting the sensor, ensure that it is completely dry before reassembling the ice maker. Moisture can interfere with the sensor’s functionality and lead to further problems.
Regularly inspecting and cleaning the ice maker sensor can help prevent issues and maintain proper functioning. By ensuring that the sensor is clean, aligned, and undamaged, you can improve the overall performance of your ice maker.
If inspecting the ice maker sensor does not resolve the blinking light issue, continue troubleshooting by exploring other potential causes or contacting a professional technician for further assistance.
Cleaning the Ice Maker Components
Over time, mineral deposits, mold, and debris can accumulate on the various components of your ice maker, affecting its performance and triggering the blinking light. Regularly cleaning these components can help maintain the efficiency and functionality of your ice maker. Here’s how you can clean the ice maker components:
- Turn off and unplug the ice maker: Before starting the cleaning process, ensure that the ice maker is turned off and unplugged from the power source. This is crucial for your safety and to prevent any damage to the appliance.
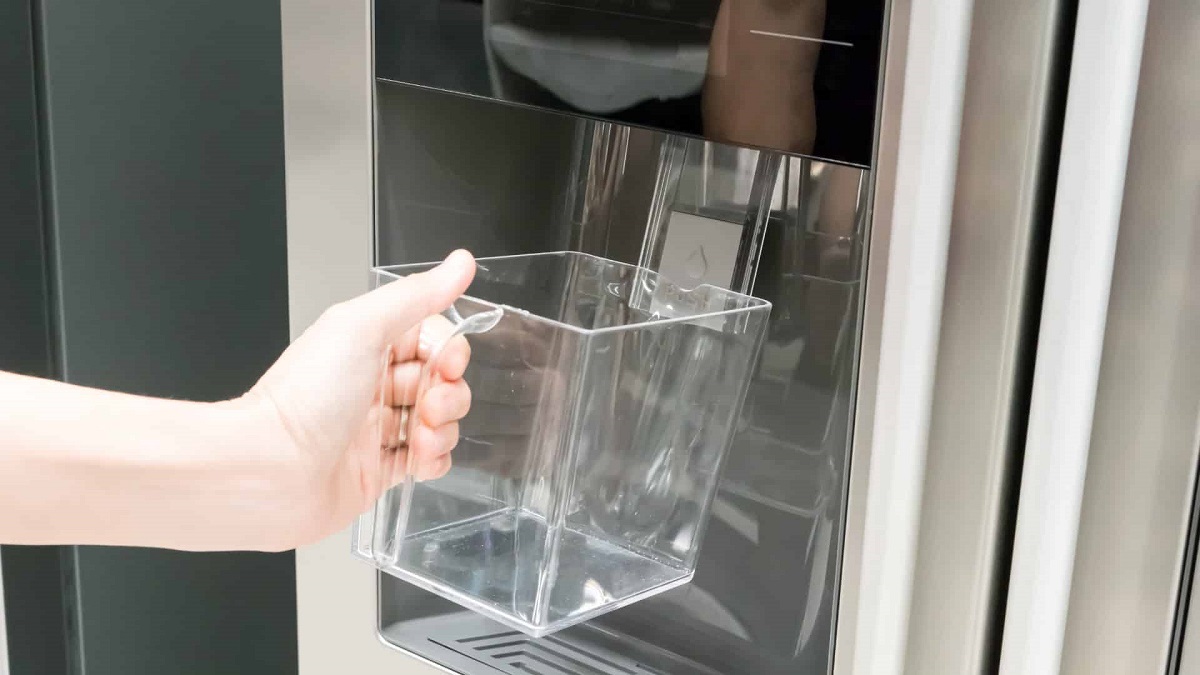
- Remove the ice bin: Take out the ice bin from the ice maker. Empty any remaining ice and discard it as needed. Rinse the ice bin with warm water to remove any residue or build-up.
- Clean the ice maker tray: Using a mixture of warm water and mild detergent, clean the ice maker tray thoroughly. Pay special attention to any hard-to-reach areas or corners where mold or debris might accumulate. Rinse the tray with clean water and dry it completely before reassembling it.
- Clean the ice chute and dispenser: Wipe down the ice chute and dispenser with a soft cloth dampened with warm soapy water. Be gentle to avoid any damage to the components. Remove any residue or blockage that might be obstructing the ice flow.
- Check the water reservoir: If your ice maker has a water reservoir, clean it according to the manufacturer’s instructions. Empty any remaining water and clean the reservoir with warm soapy water. Rinse it thoroughly and dry it before reassembling.
- Inspect and clean the condenser coils: Dust and debris can accumulate on the condenser coils, affecting the ice maker’s efficiency. Use a vacuum cleaner with a soft brush attachment to gently remove any dirt or dust from the coils. This will help ensure proper airflow and cooling.
Regularly cleaning the ice maker components can help prevent issues and maintain optimal performance. By removing any build-up or obstructions, you can minimize the chances of the blinking light appearing and extend the lifespan of your ice maker.
Remember to consult your ice maker’s manual for specific cleaning instructions and recommendations from the manufacturer. If the blinking light persists even after cleaning the components, further troubleshooting or professional assistance may be necessary.
Testing the Ice Maker Motor
If you have gone through the previous troubleshooting steps and the blinking light on your ice maker persists, it may indicate a problem with the motor. The ice maker motor is responsible for the mechanical functions of the ice maker, such as rotating the ice tray and dispensing ice. Here are the steps to test the ice maker motor:
- Disconnect the power: Before proceeding with any testing, ensure that the ice maker is disconnected from the power source to prevent any accidents or injuries.
- Access the ice maker motor: Locate the ice maker motor, which is usually located inside the ice maker behind a protective cover or panel. Refer to your ice maker’s manual for specific instructions on how to access the motor.
- Manually rotate the motor: Gently and manually rotate the ice maker motor. Observe if there is any resistance or unusual sounds during the rotation. If the motor is jammed or difficult to rotate, it may indicate a problem with the motor mechanism that requires further attention.
- Check the motor wiring: Inspect the motor wiring to ensure that it is properly connected and there are no loose or damaged wires. Loose or damaged wires can cause power interruptions or malfunctioning of the motor.
- Test the motor with a multimeter: If you have a multimeter, you can use it to test the motor for continuity and proper functioning. Follow the manufacturer’s instructions for using the multimeter and refer to the ice maker’s manual for the specific resistance values and testing procedure related to the motor.
If you notice any significant issues with the motor during testing, such as resistance, strange noises, or a lack of continuity, it may indicate that the motor is defective and needs to be replaced. In such cases, it is advisable to contact a professional technician or the manufacturer for further assistance and guidance in repairing or replacing the motor.
Keep in mind that testing the ice maker motor requires some technical skills and knowledge. If you are unfamiliar or uncomfortable with handling electrical components, it is always best to seek professional help to avoid potential risks.
If the blinking light persists even after testing the motor or if you are unsure about performing the testing yourself, it may be time to reach out to a professional technician who can diagnose and resolve the issue with expertise.
Contacting a Professional Technician
If you have exhausted all the troubleshooting steps and the blinking light on your ice maker continues to persist, it may be time to seek the assistance of a professional technician. A trained and experienced technician can diagnose and repair any complex or underlying issues with your ice maker. Here are some reasons to consider contacting a professional technician:
- Expertise: Professional technicians have extensive knowledge and expertise in repairing ice makers. They are familiar with various ice maker models and can quickly identify the root cause of the blinking light issue.
- Specialized tools and equipment: Technicians have access to specialized tools and equipment necessary for diagnosing and repairing ice maker problems. They can accurately test and assess the components of the ice maker to determine the best course of action.
- Manufacturer support: Professional technicians often have access to manufacturer support and resources. They can consult with manufacturers for technical guidance, obtain genuine replacement parts, or access specific troubleshooting information for your ice maker.
- Time and convenience: Calling a professional technician saves you time and effort in trying to troubleshoot and fix the issue on your own. They can efficiently diagnose and repair the problem, ensuring that your ice maker is back up and running as quickly as possible.
- Warranty considerations: If your ice maker is still under warranty, attempting to repair it yourself or seeking unauthorized repair services may void the warranty. Hiring a professional technician ensures that the repair work is conducted within the warranty guidelines, preserving your coverage.
When contacting a professional technician, provide them with detailed information about the problem, the make and model of your ice maker, and any troubleshooting steps you have already taken. This will help them pinpoint the issue more efficiently and come prepared with the necessary tools and parts.
Remember to choose a reputable and licensed technician with experience in ice maker repairs. Check for customer reviews and certifications to ensure you are hiring a trusted professional.
While hiring a professional technician may incur some cost, it can often be a cost-effective and reliable solution in the long run, especially for complex ice maker issues. It ensures that the problem is resolved correctly and helps extend the lifespan of your ice maker.
Read more: Why Is My Ice Maker Making Clumps Of Ice
Conclusion
A blinking light on your ice maker can be a frustrating issue to deal with. However, by understanding the possible causes and following the appropriate troubleshooting steps, you can resolve the problem and restore your ice maker’s functionality.
In this article, we explored some common causes of a blinking light on an ice maker, such as a full ice bin, water supply issues, sensor problems, component malfunctions, and power interruptions. We also discussed various troubleshooting steps, including resetting the ice maker, checking the water supply, inspecting the ice maker sensor, cleaning the ice maker components, and testing the ice maker motor.
While some issues can be resolved through these troubleshooting steps, it’s important to remember that not all problems can be fixed without professional help. If you have gone through all the necessary steps and the blinking light persists, it might be necessary to contact a professional technician. They have the expertise, tools, and knowledge to diagnose and repair complex problems and ensure that your ice maker is functioning optimally.
Regular maintenance, such as cleaning the ice maker components and inspecting the water supply, can help prevent issues and extend the lifespan of your ice maker. It’s also crucial to refer to the manufacturer’s guidelines and warranty terms when performing any repairs or seeking professional assistance.
By taking the appropriate steps and seeking professional help when needed, you can ensure that your ice maker continues to provide you with a steady supply of ice for your various needs. Say goodbye to the blinking light and enjoy the convenience of an efficiently working ice maker once again!
If you've learned valuable insights on resolving a blinking ice maker light, you'll find our guides on maintaining related appliances equally handy. For those keen on keeping kitchen devices in peak condition, our detailed guide on refrigerator maintenance will significantly extend your appliance's lifespan. Meanwhile, if you're wrestling with more specific device issues, our comprehensive article on ice maker troubles offers practical solutions for common problems. Don't miss out on these essential reads to ensure all your kitchen equipment runs smoothly!
Frequently Asked Questions about Why Is My Ice Maker Light Blinking
Was this page helpful?
At Storables.com, we guarantee accurate and reliable information. Our content, validated by Expert Board Contributors, is crafted following stringent Editorial Policies. We're committed to providing you with well-researched, expert-backed insights for all your informational needs.


0 thoughts on “Why Is My Ice Maker Light Blinking”