Articles
Why Is My Ice Maker Making Ice So Slow
Modified: August 16, 2024
Discover the reasons why articles related to ice makers making ice slowly. Explore solutions to improve ice making speed and efficiency.
(Many of the links in this article redirect to a specific reviewed product. Your purchase of these products through affiliate links helps to generate commission for Storables.com, at no extra cost. Learn more)
Introduction
Ice makers are a convenient appliance in our homes, providing us with a steady supply of ice for our drinks and various other purposes. However, it can be frustrating when the ice maker seems to be working slower than usual, leaving us with a shortage of ice when we need it the most. So, why is your ice maker making ice so slow?
There can be several reasons behind this issue, ranging from a simple fix to more complex underlying problems. In this article, we will explore the common causes of slow ice making in your ice maker and provide effective solutions to improve its efficiency.
By understanding the potential causes and troubleshooting steps, you can save yourself from the inconvenience of waiting for ice and ensure that your ice maker is running optimally.
Key Takeaways:
- Ensure a steady water supply by checking for kinks, clogs, and obstructions in the water line, and maintaining proper water pressure to improve ice production in your ice maker.
- Regularly clean or replace the water filter, adjust the freezer temperature, and troubleshoot assembly components to optimize ice-making speed and efficiency in your ice maker.
Read more: Why Is My Ice Maker Making Clumps Of Ice
Common Causes of Slow Ice Making
When your ice maker is producing ice at a slower rate than usual, there are several common causes that you can investigate. By identifying the underlying issue, you can take appropriate steps to resolve the problem. Here are some of the most common causes of slow ice making:
- Insufficient Water Supply: One of the primary reasons for slow ice making is an inadequate water supply. If the water line feeding your ice maker is not delivering enough water, it can significantly impact ice production. Check the water supply line for any kinks, clogs, or restrictions that may be reducing the water flow.
- Clogged Water Filter: A clogged or dirty water filter can also lead to slow ice production. The purpose of the water filter is to remove impurities from the water before it enters the ice maker. Over time, the filter can become clogged with sediment and debris, obstructing the water flow. Regularly changing or cleaning the water filter can help resolve this issue.
- Low Freezer Temperature: Your ice maker requires a specific temperature range to produce ice efficiently. If the freezer temperature is set too low, it can impede ice production. Check your freezer thermometer and adjust the temperature settings if necessary. The ideal temperature for the freezer should be around 0°F (-18°C).
- Faulty Water Inlet Valve: The water inlet valve controls the flow of water into the ice maker. If it is malfunctioning or partially blocked, it can restrict the water supply, leading to slow ice production. Inspect the water inlet valve and replace it if necessary.
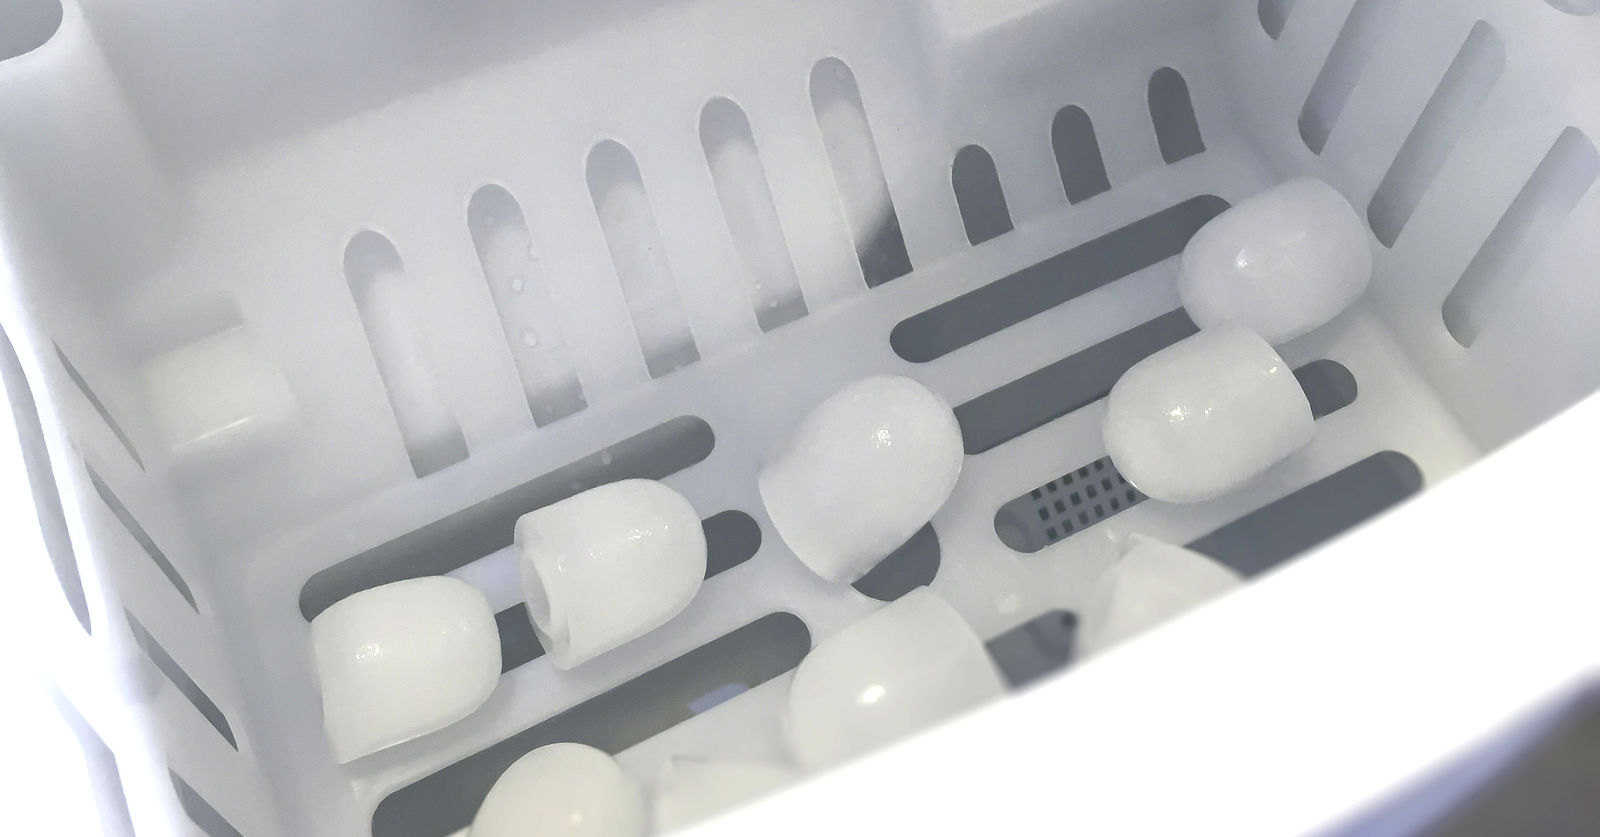
- Ice Maker Assembly Issues: There may be specific components within the ice maker assembly that can cause slow ice making. These can include a faulty ice mold thermostat, a malfunctioning ice maker motor, or a damaged water fill tube. Carefully examine the ice maker assembly and troubleshoot or replace any defective parts.
By identifying these common causes, you can narrow down the issue and take appropriate actions to improve ice making speed. In the next section, we will explore some effective solutions to address each of these causes and get your ice maker back to its optimal performance.
Insufficient Water Supply
One of the common culprits behind slow ice making in your ice maker is an insufficient water supply. If the water line feeding your ice maker is not delivering enough water, it can significantly impact ice production. Here are steps you can take to address this issue:
- Check the water supply line: Inspect the water supply line connected to your ice maker. Look for any kinks, bends, or obstructions that may be reducing or completely blocking the water flow. Straighten any kinks and remove any obstructions to ensure a steady water supply.
- Inspect the water inlet valve: The water inlet valve controls the flow of water into the ice maker. If it is partially blocked or malfunctioning, it can restrict the water supply, resulting in slow ice making. Carefully examine the water inlet valve for any signs of damage or clogs. If necessary, clean or replace the water inlet valve to restore proper water flow.
- Check the water pressure: Inadequate water pressure can also contribute to slow ice production. Ensure that the water pressure to your ice maker meets the manufacturer’s recommended range. You can do this by testing the water pressure using a pressure gauge or contacting a professional plumber to assess and adjust the water pressure if necessary.
- Verify the water supply shut-off valve: Make sure that the water supply shut-off valve connected to your ice maker is fully open. If it is partially closed or completely shut, it will hinder the water flow to the ice maker. Turn the valve counterclockwise to fully open it and allow for proper water supply.
By addressing these steps to ensure an adequate water supply, you can significantly improve ice production in your ice maker. If the issue persists even after checking these factors, it may be necessary to consult a professional technician to further diagnose and resolve the problem.
Clogged Water Filter
A clogged or dirty water filter can also contribute to slow ice making in your ice maker. The water filter is designed to remove impurities and contaminants from the water before it enters the ice maker, ensuring that the ice produced is clean and fresh. When the water filter becomes clogged, it restricts the water flow and can significantly impact ice production. Here’s how you can address this issue:
- Locate the water filter: Determine the location of the water filter in your ice maker setup. It is usually located in the refrigerator compartment, near the top or bottom, or behind a removable panel. Refer to your ice maker’s manual for specific instructions on locating the water filter.
- Turn off the water supply: Before removing the water filter, it is essential to turn off the water supply. Look for the shut-off valve connected to the water line feeding the ice maker and turn it off. This precautionary step prevents water from spraying out when removing the filter.
- Remove the water filter: Depending on the type of water filter, you may need to twist it counterclockwise to unhook it or push a release button to remove it. Follow the instructions provided by the manufacturer to safely and correctly remove the water filter.
- Inspect and clean the water filter: Examine the water filter for any signs of dirt, sediment, or blockage. If it appears dirty or clogged, it’s time to clean it. Rinse the water filter under warm water to remove any debris, or if required, use a soft brush to gently scrub away stubborn residues. Avoid using harsh cleaning agents or abrasive materials that can damage the filter.
- Replace the water filter: If the water filter is beyond cleaning or has reached its recommended lifespan, it may be necessary to replace it. Purchase a compatible replacement water filter from the manufacturer or an authorized retailer. Follow the manufacturer’s instructions to correctly install the new water filter, ensuring a proper fit and alignment.
- Turn on the water supply and flush the system: Once the new water filter is installed or the cleaned filter is back in place, turn on the water supply by reopening the shut-off valve. Allow the water to flow through the filter and discard the initial few batches of ice to flush out any remaining impurities.
By regularly checking and maintaining your water filter, you can ensure the smooth flow of water to your ice maker and enhance its ice-making capabilities. Remember to follow the recommended filter replacement schedule specified by the manufacturer to keep your ice maker running efficiently.
Low Freezer Temperature
The temperature of your freezer plays a crucial role in ice production. If the freezer temperature is set too low, it can hinder the ice-making process and result in slow ice production. Here’s what you can do to address this issue:
- Check the freezer temperature: Use a freezer thermometer to assess the current temperature inside your freezer. Ideally, the freezer temperature should be set around 0°F (-18°C) for optimal ice production.
- Adjust the freezer temperature: If the freezer temperature is set lower than the recommended range, it may be causing the ice maker to work harder, resulting in slower ice production. Refer to the user manual or control panel instructions to adjust the freezer temperature settings. Gradually increase the temperature setting until it reaches the recommended range.
- Avoid frequent door openings: Opening the freezer door frequently or leaving it open for extended periods can cause the temperature inside to fluctuate. These fluctuations can affect ice production. Be mindful of minimizing door openings and ensure that the freezer door is properly sealed.
- Check for obstructions: Make sure that there are no items blocking the airflow vents inside the freezer. Blocked vents can disrupt the circulation of cold air, leading to uneven cooling and potentially affecting ice production. Rearrange the items in the freezer to ensure proper airflow.
- Allow sufficient air circulation: Avoid overcrowding the freezer with excessive items that can hinder the circulation of cold air. Ensure that there is sufficient space between items for air to circulate freely, promoting even cooling throughout the freezer compartment.
By adjusting and maintaining the proper freezer temperature, you can optimize ice production in your ice maker. It is recommended to periodically check the freezer temperature to ensure that it remains within the optimal range for consistent and efficient ice making.
Read more: Why Is My Ice Maker Not Making
Faulty Water Inlet Valve
The water inlet valve is responsible for controlling the flow of water into your ice maker. A faulty or malfunctioning water inlet valve can restrict the water supply, leading to slow ice production. Here’s how you can address this issue:
- Disconnect the power: Before addressing the water inlet valve, disconnect the power to your ice maker. This ensures your safety and prevents any accidental water flow during the troubleshooting process.
- Locate the water inlet valve: The water inlet valve is typically located at the back of the refrigerator, behind a protective panel or cover. Consult your ice maker’s manual or professional technician to help you locate the water inlet valve.
- Inspect the water inlet valve: Carefully examine the water inlet valve for any signs of damage or obvious blockages. Look for cracks, leaks, or mineral deposits that may hinder proper water flow. If you notice any visible issues, the water inlet valve may need to be replaced.
- Test the water inlet valve: You can test the functionality of the water inlet valve using a multimeter. Set the multimeter to the “ohms” or “continuity” setting and place the probes on the terminals of the water inlet valve. If the multimeter reading shows continuity, it indicates that the water inlet valve is functioning properly. If there is no continuity, it suggests a faulty valve that needs to be replaced.
- Replace the water inlet valve: If you determine that the water inlet valve is faulty, it should be replaced. Consult the manufacturer’s instructions or seek assistance from a professional technician to ensure the correct replacement valve for your specific ice maker model. Follow the installation guidelines carefully to properly connect and secure the new water inlet valve.
- Reconnect the power and test: Once the new water inlet valve is installed, reconnect the power to your ice maker. Turn on the water supply and test the ice production. Observe if the ice maker is now producing ice at a normal pace, indicating that the faulty water inlet valve has been resolved.
By addressing the issue of a faulty water inlet valve, you can restore proper water flow to your ice maker and alleviate the problem of slow ice production. If you are uncertain or uncomfortable performing these steps, it is recommended to seek professional assistance to ensure a safe and effective repair.
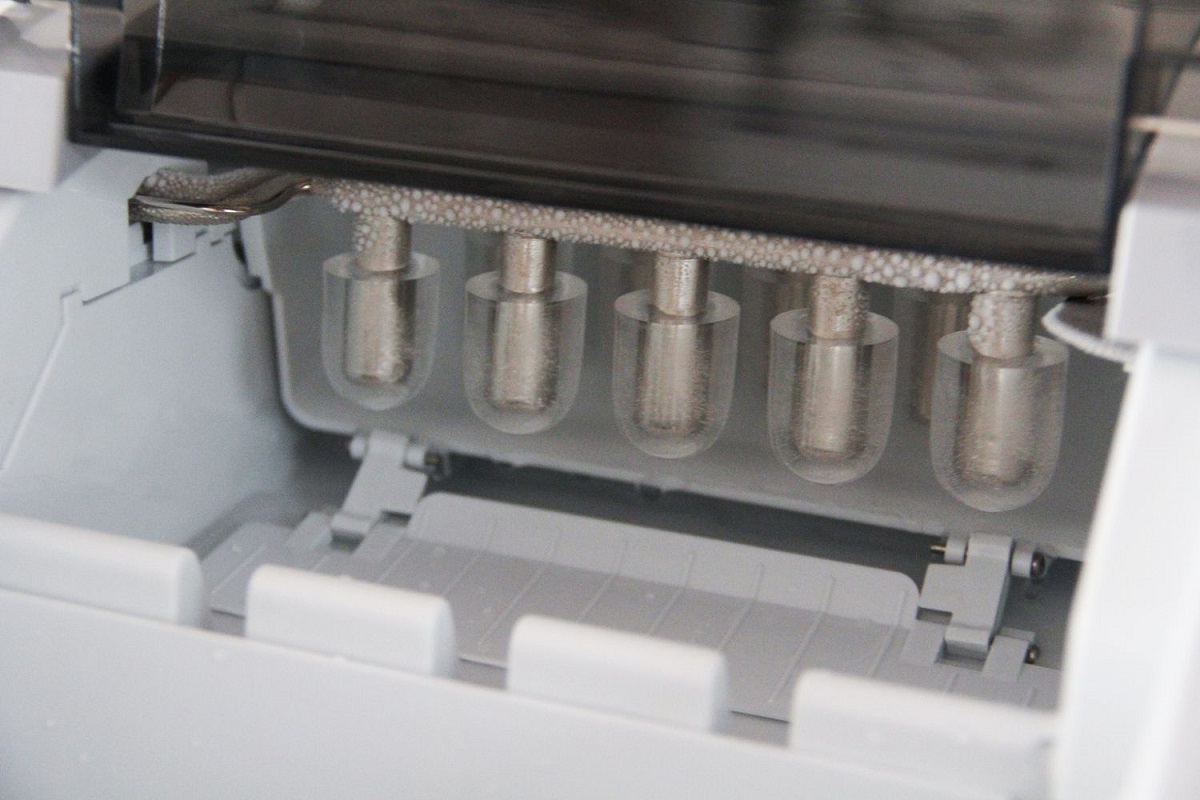
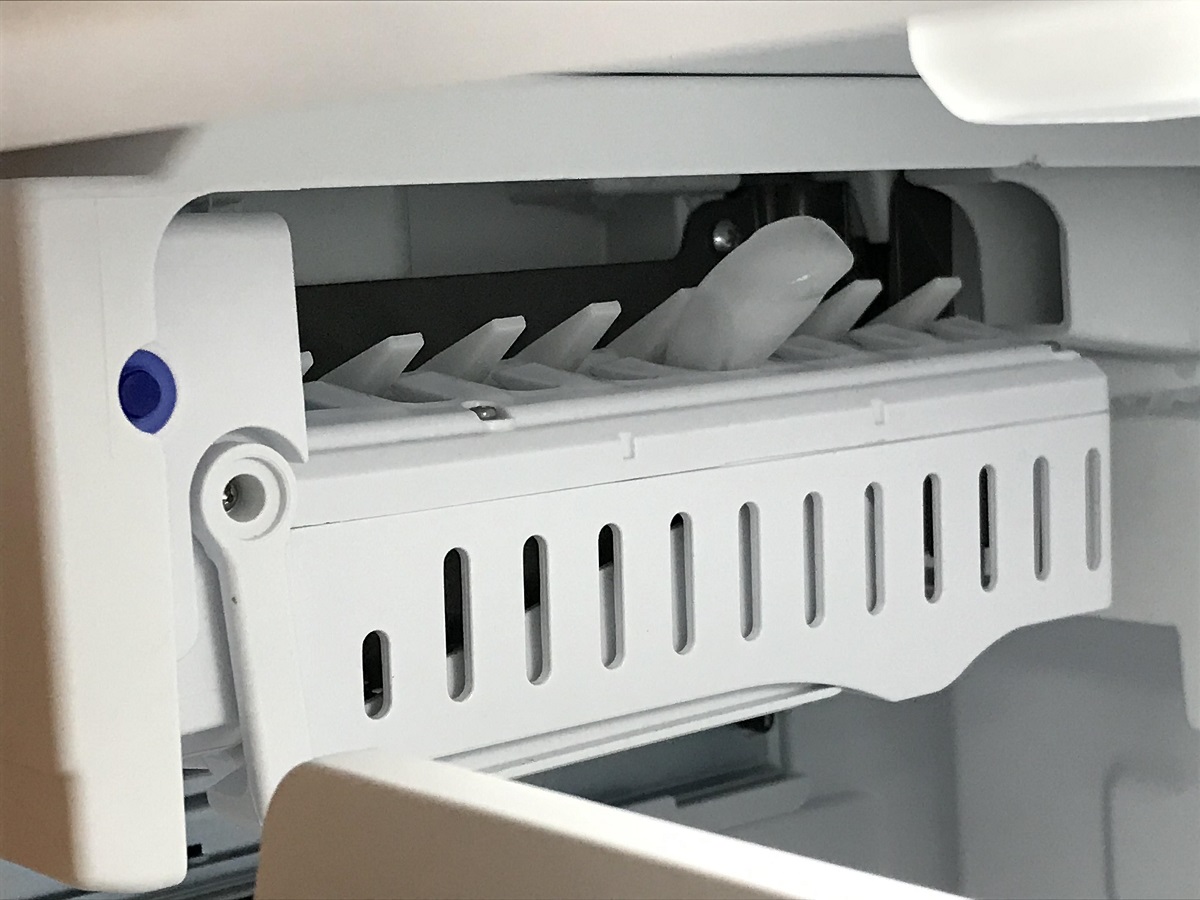
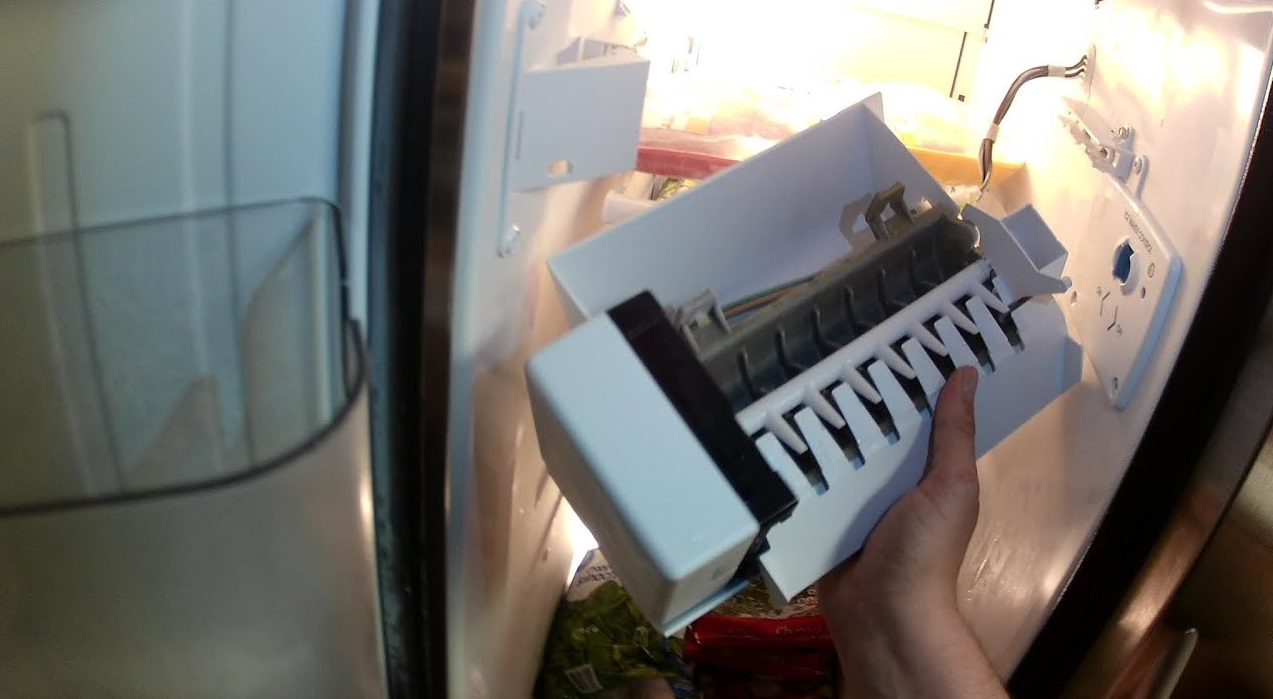
Ice Maker Assembly Issues
Various components within the ice maker assembly can contribute to slow ice production. It’s important to examine these components to identify and resolve any issues. Here are some common assembly issues that can affect ice maker performance:
- Faulty ice mold thermostat: The ice mold thermostat is responsible for monitoring the temperature of the ice mold and initiating the harvest cycle when the ice is frozen. If the thermostat is malfunctioning, it may not accurately detect when to release the ice, resulting in slow ice production. Inspect the ice mold thermostat and consider replacing it if necessary.
- Malfunctioning ice maker motor: The motor within the ice maker assembly is responsible for driving the various gears and mechanisms involved in ice production. If the motor is malfunctioning or not running efficiently, it can lead to slow ice making. Check the motor for any signs of damage or wear and consider replacing it if needed.
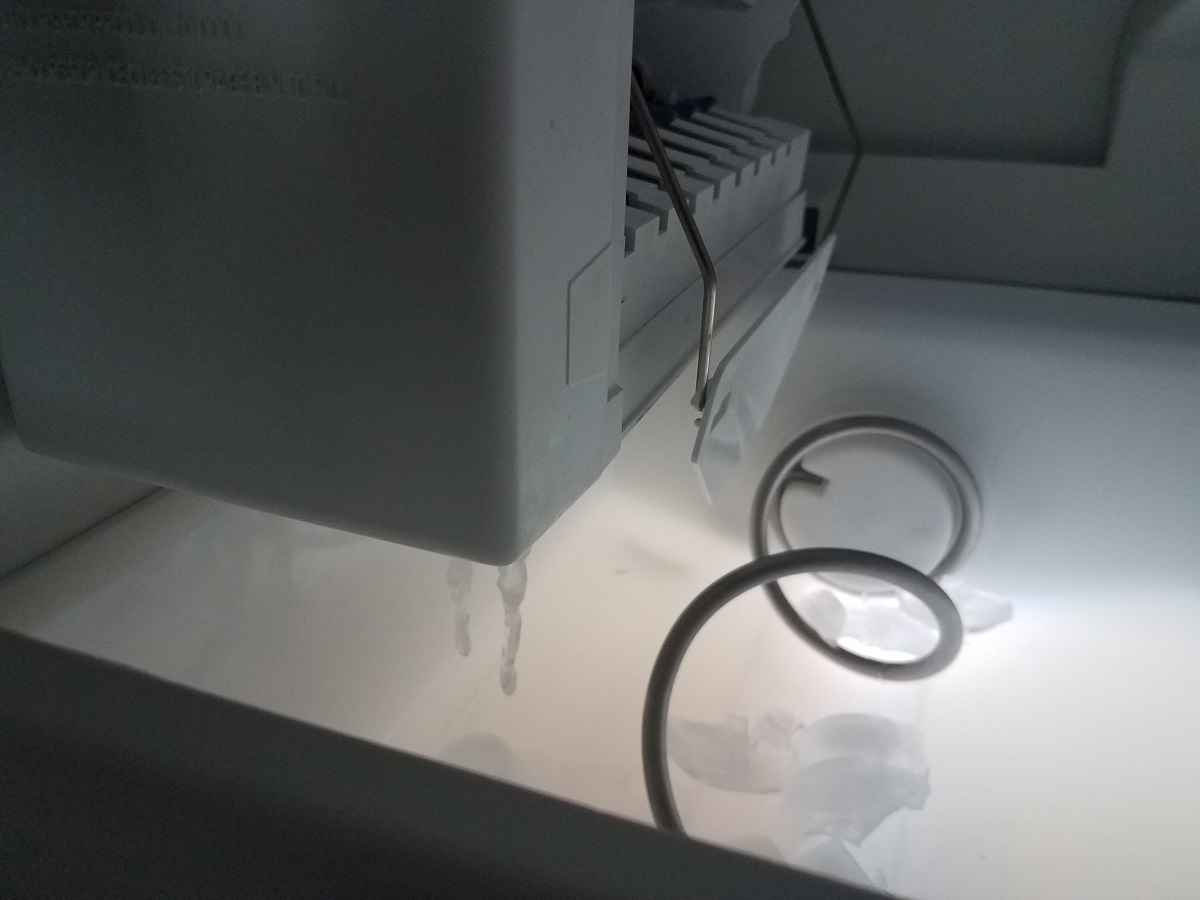
- Damaged water fill tube: The water fill tube supplies water to the ice maker mold. If the fill tube is damaged or kinked, it can restrict the water flow, resulting in slow ice production. Inspect the fill tube for any visible damages or obstructions. If necessary, replace the fill tube to ensure proper water flow to the ice maker.
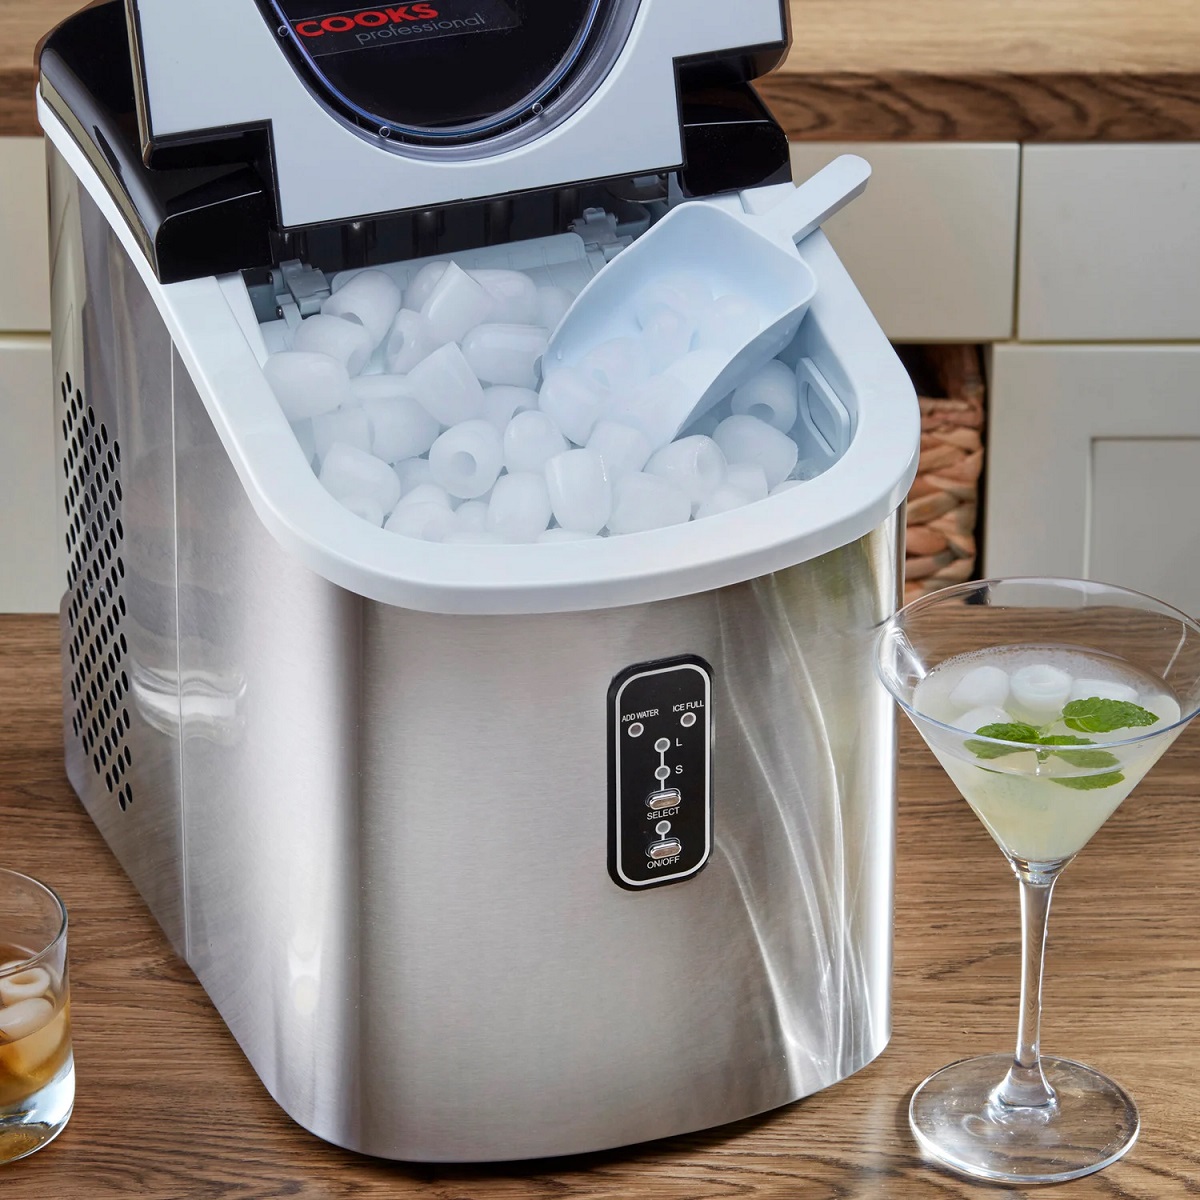
- Ice cube size settings: Some ice makers allow you to adjust the size of the ice cubes produced. If the ice cube size setting is set too large, it can slow down the production process as each ice cube requires more time to freeze. Review the ice maker’s settings and adjust it to a smaller cube size if needed.
When diagnosing ice maker assembly issues, it’s important to consult the manufacturer’s manual for specific instructions and diagrams related to your ice maker model. Troubleshooting and resolving these issues may require more technical knowledge, so if you’re unsure or uncomfortable performing the tasks, it’s recommended to seek the assistance of a professional technician who specializes in ice maker repairs.
By addressing these assembly issues, you can effectively improve the performance of your ice maker and restore its efficient ice production.
Check the water supply line for any kinks or blockages that may be restricting water flow to the ice maker. A steady flow of water is essential for efficient ice production.
Solutions to Improve Ice Making Speed
If your ice maker is making ice at a slow pace, there are several solutions you can implement to enhance its ice-making speed. By addressing the underlying causes and following these steps, you can optimize the performance of your ice maker and ensure a steady supply of ice. Here are some effective solutions:
- Check water supply and pressure: Ensure that the water supply line connected to your ice maker is delivering an adequate amount of water. Check for any kinks, clogs, or restrictions in the water line that may be hindering water flow. Additionally, verify that the water pressure to your ice maker meets the manufacturer’s recommended range.
- Replace or clean the water filter: A clogged or dirty water filter can restrict the water flow and impact ice production. Regularly replace or clean the water filter, following the manufacturer’s guidelines. This will ensure a steady flow of clean water to the ice maker.
- Adjust freezer temperature: Check the temperature of your freezer to ensure it is set within the recommended range for optimal ice production. Adjust the freezer temperature settings to around 0°F (-18°C) if needed. Avoid setting the freezer temperature too low, as it can actually hinder ice production.
- Test and replace the water inlet valve: The water inlet valve controls the flow of water into the ice maker. If it is faulty or partially blocked, it can restrict the water supply and slow down ice production. Test the functionality of the water inlet valve using a multimeter and replace it if necessary.
- Troubleshoot ice maker assembly components: Inspect the various components within the ice maker assembly, such as the ice mold thermostat, motor, and water fill tube. Replace any damaged or malfunctioning parts to ensure proper functioning of the ice maker assembly.
It’s essential to remember that these solutions may vary depending on your specific ice maker model. Always consult the manufacturer’s manual for detailed instructions and troubleshooting tips.
By implementing these solutions, you can significantly improve the ice-making speed of your ice maker. However, if the problem persists or if you are unsure about performing any repairs yourself, it is advisable to seek the assistance of a professional technician who specializes in ice maker repairs.
Check Water Supply and Pressure
One of the primary reasons for slow ice making in an ice maker is an insufficient water supply. To ensure that your ice maker is receiving an adequate amount of water, it is important to check the water supply and pressure. Here’s what you can do:
- Inspect the water supply line: Start by examining the water supply line that connects to your ice maker. Look for any kinks, bends, or obstructions that may be reducing or completely blocking the water flow. Straighten any kinks and remove any obstructions to ensure a steady water supply. If the water line is damaged or leaking, it may need to be replaced.
- Check the water shut-off valve: Locate the water shut-off valve connected to the water line feeding your ice maker. Ensure that it is fully open, allowing water to flow freely into the ice maker. If the valve is partially closed or completely shut, adjust it by turning it counterclockwise to fully open it.
- Assess the water pressure: Inadequate water pressure can also contribute to slow ice production. Verify that the water pressure to your ice maker meets the manufacturer’s recommended range. You can test the water pressure using a pressure gauge or consult a professional plumber to assess and adjust the water pressure if necessary.
- Check for clogs or filters: Some ice makers have built-in filters or screens along the water line to prevent debris from entering the ice maker. These filters can become clogged over time and restrict water flow. If your ice maker has a filter or screen, clean or replace it according to the manufacturer’s instructions to ensure proper water flow.
- Inspect the water inlet valve: The water inlet valve controls the flow of water into the ice maker. A faulty or blocked water inlet valve can limit the water supply, resulting in slow ice production. Inspect the water inlet valve for any signs of damage or blockage. If necessary, clean or replace the water inlet valve to restore proper water flow.
Regularly checking the water supply and pressure is key to maintaining optimal ice production in your ice maker. By ensuring a consistent and ample water supply, you can improve the speed and efficiency of ice making. If the issue persists or if you need assistance with any repairs, it is recommended to consult a professional technician who specializes in ice maker maintenance and repairs.
Read more: Why Is My Ice Maker Making Noise
Replace or Clean the Water Filter
A clogged or dirty water filter can significantly impact the performance of your ice maker and lead to slow ice production. The water filter is designed to remove impurities and contaminants from the water before it enters the ice maker, ensuring that the ice produced is clean and fresh. Here’s how you can address this issue:
- Locate the water filter: Determine the location of the water filter in your ice maker setup. It is usually located in the refrigerator compartment, either at the top or bottom, or behind a removable panel. Refer to your ice maker’s manual for specific instructions on locating the water filter.
- Turn off the water supply: Before removing the water filter, it is essential to turn off the water supply. Locate the shut-off valve connected to the water line feeding the ice maker and turn it off. This precautionary step prevents water from spraying out when removing the filter.
- Remove the water filter: Depending on the type of water filter, you may need to twist it counterclockwise to unhook it or push a release button to remove it. Follow the instructions provided by the manufacturer to safely and correctly remove the water filter.
- Inspect and clean the water filter: Examine the water filter for any signs of dirt, sediment, or blockage. If it appears dirty or clogged, it’s time to clean it. Rinse the water filter under warm water to remove any debris, or if required, use a soft brush to gently scrub away stubborn residues. Avoid using harsh cleaning agents or abrasive materials that can damage the filter.
- Replace the water filter: If the water filter is beyond cleaning or has reached its recommended lifespan, it may be necessary to replace it. Purchase a compatible replacement water filter from the manufacturer or an authorized retailer. Follow the manufacturer’s instructions to correctly install the new water filter, ensuring a proper fit and alignment.
- Turn on the water supply and flush the system: Once the new water filter is installed or the cleaned filter is back in place, turn on the water supply by reopening the shut-off valve. Allow the water to flow through the filter and discard the initial few batches of ice to flush out any remaining impurities.
Regularly checking and maintaining your water filter is essential to ensure the smooth flow of water to your ice maker and improve ice production. It is recommended to follow the manufacturer’s guidelines and replace the water filter at the recommended intervals to ensure optimal performance.
By keeping the water filter clean or replacing it as necessary, you can enhance the quality and quantity of ice produced by your ice maker, ensuring a constant supply of fresh ice.
Adjust Freezer Temperature
The temperature of your freezer plays a vital role in ice production. If the freezer temperature is set too low, it can hinder the ice-making process and result in slow ice production. Here’s what you can do to address this issue:
- Check the freezer temperature: Use a freezer thermometer to assess the current temperature inside your freezer. Ideally, the freezer temperature should be set around 0°F (-18°C) for optimal ice production.
- Adjust the freezer temperature: If the freezer temperature is set lower than the recommended range, it may be causing the ice maker to work harder, resulting in slower ice production. Refer to the user manual or control panel instructions to adjust the freezer temperature settings. Gradually increase the temperature setting until it reaches the recommended range.
- Allow sufficient air circulation: Proper air circulation inside the freezer is crucial for maintaining consistent temperatures. Avoid overloading the freezer with items that can obstruct the airflow. Make sure there is sufficient space between containers and packages to facilitate proper circulation of cold air. Rearrange items if necessary to ensure even cooling throughout the freezer compartment.
- Check for door seal issues: A faulty door seal can lead to temperature fluctuations inside the freezer, affecting ice production. Inspect the gasket around the freezer door for any signs of damage, wear, or gaps. If you find any issues, consider replacing the door seal to create an airtight seal and maintain the desired temperature.
- Avoid frequent door openings: Opening the freezer door frequently or leaving it open for extended periods can cause the temperature inside to rise, slowing down ice production. Be mindful of minimizing door openings and ensure that the freezer door is properly closed after use.
By adjusting and maintaining the proper freezer temperature, you can optimize ice production in your ice maker. It is recommended to periodically check the freezer temperature using a thermometer to ensure that it remains within the optimal range for consistent and efficient ice making.
Remember, it may take some time for the freezer temperature to stabilize after adjustment. If the issue persists or if you are unsure about performing any adjustments, it is advisable to consult the user manual or seek the assistance of a professional technician specialized in refrigerator and freezer repairs.
Test and Replace the Water Inlet Valve
The water inlet valve in your ice maker is responsible for controlling the flow of water into the ice-making mechanism. A faulty or partially blocked water inlet valve can restrict the water supply, leading to slow ice production. Here’s how you can test and replace the water inlet valve if necessary:
- Disconnect the power: Before working on any components of your ice maker, ensure that it is disconnected from the power source. This step is crucial for your safety and prevents any accidental water flow during the process.
- Locate the water inlet valve: The water inlet valve is typically found at the back of the refrigerator, behind a protective panel or cover. Consult your ice maker’s manual or a professional technician to determine the exact location of the water inlet valve.
- Inspect the water inlet valve: Carefully examine the water inlet valve for any signs of damage or blockage. Look for cracks, leaks, or mineral deposits that may hinder the proper flow of water. If you notice any visible issues, it’s likely that the water inlet valve needs to be replaced.
- Test the water inlet valve: To determine if the water inlet valve is functioning properly, you can use a multimeter. Set the multimeter to the “ohms” or “continuity” setting and place the probes on the terminals of the water inlet valve. If the multimeter shows continuity, it indicates that the water inlet valve is functioning correctly. If there is no continuity, it suggests a faulty valve that needs to be replaced.
- Replace the water inlet valve: If the water inlet valve is determined to be faulty or non-functional, it is recommended to replace it. Consult the manufacturer’s instructions or seek the assistance of a professional technician to ensure the correct replacement valve for your specific ice maker model. Follow the installation guidelines carefully to properly connect and secure the new water inlet valve.
- Reconnect the power and test: After replacing the water inlet valve, reconnect the power to your ice maker. Turn on the water supply and observe the ice production. If the new water inlet valve is functioning correctly, you should notice an improvement in ice-making speed and efficiency.
Replacing the water inlet valve may require some technical knowledge and expertise. If you are unsure or uncomfortable performing these steps, it is advisable to consult a professional technician who specializes in ice maker repair for proper diagnosis and replacement.
By testing and replacing a faulty water inlet valve, you can ensure a consistent and adequate water supply to your ice maker, allowing for optimal ice production in a timely manner.
Troubleshoot Ice Maker Assembly Components
There are various components within the ice maker assembly that can affect the speed and efficiency of ice production. By troubleshooting these components, you can identify and resolve any issues that may be causing slow ice making. Here’s how you can troubleshoot the ice maker assembly components:
- Faulty ice mold thermostat: The ice mold thermostat is responsible for monitoring the temperature of the ice mold and initiating the harvest cycle when the ice is frozen. If the thermostat is malfunctioning, it may not accurately detect when to release the ice, resulting in slow ice production. Test the ice mold thermostat using a multimeter to ensure it is functioning properly. If it is faulty, consider replacing it.
- Malfunctioning ice maker motor: The motor within the ice maker assembly drives the various gears and mechanisms involved in ice production. If the motor is malfunctioning or not running optimally, it can lead to slow ice making. Inspect the motor for any signs of damage or irregularities. If there are issues with the motor, it may need to be replaced.
- Damaged water fill tube: The water fill tube supplies water to the ice maker mold. If the fill tube is damaged or obstructed, it can restrict the water flow, resulting in slow ice production. Inspect the fill tube for any visible damages or blockages. If necessary, replace the water fill tube to ensure proper water flow to the ice maker.
- Check ice cube size settings: Some ice makers allow you to adjust the size of the ice cubes produced. If the ice cube size setting is set too large, it can slow down the production process as each ice cube requires more time to freeze. Review the ice maker’s settings and adjust it to a smaller cube size if needed.
- Verify electrical connections: Ensure all electrical connections within the ice maker assembly are secure and free from corrosion. Loose or faulty connections can disrupt the operation of the ice maker. Carefully inspect the wiring and connections, tighten any loose connections, and clean off any corrosion if present.
- Reset or reboot the ice maker: Sometimes, resetting or rebooting the ice maker can resolve minor issues and restore normal functioning. Consult the manufacturer’s manual for instructions on how to reset or reboot your specific ice maker model. This process may involve turning off and unplugging the ice maker, waiting for a few minutes, and then plugging it back in and turning it on again.
It’s important to consult the manufacturer’s manual for specific troubleshooting steps and diagrams related to your ice maker model. If the troubleshooting steps do not resolve the issue or if you are unsure about performing any repairs yourself, it is recommended to seek the assistance of a professional technician who specializes in ice maker repairs.
By troubleshooting and resolving any issues with the ice maker assembly components, you can ensure optimal performance and improve the speed and efficiency of ice production in your ice maker.
Read more: Why Is My Ice Maker Only Making Crushed Ice
Conclusion
A slow ice maker can be frustrating when you’re in need of a constant supply of ice. However, by understanding the common causes of slow ice making and implementing the appropriate solutions, you can optimize the performance of your ice maker and enjoy a steady flow of ice.
We have explored several common causes of slow ice making, including issues with the water supply, clogged filters, low freezer temperature, faulty water inlet valves, and problems within the ice maker assembly. By identifying these causes and following the recommended troubleshooting steps, you can address the underlying issues and improve ice production in your ice maker.
Whether it’s checking and adjusting the water supply and pressure, replacing or cleaning the water filter, adjusting the freezer temperature, testing and replacing the water inlet valve, or troubleshooting the ice maker assembly components, each solution targets specific issues that may be causing slow ice making.
Remember to consult the manufacturer’s manual for specific instructions and guidelines related to your ice maker model. If you’re unsure or uncomfortable with any repair tasks, it’s always advisable to seek the assistance of a professional technician who specializes in ice maker repairs.
By taking proactive measures to maintain and troubleshoot your ice maker, you can ensure that it operates efficiently, providing you with a reliable supply of ice whenever you need it.
So, don’t let slow ice production dampen your spirits. Put these solutions into action and enjoy the convenience of a fast and efficient ice maker in your home.
Frequently Asked Questions about Why Is My Ice Maker Making Ice So Slow
Was this page helpful?
At Storables.com, we guarantee accurate and reliable information. Our content, validated by Expert Board Contributors, is crafted following stringent Editorial Policies. We're committed to providing you with well-researched, expert-backed insights for all your informational needs.
0 thoughts on “Why Is My Ice Maker Making Ice So Slow”