Articles
Why Is My LG Ice Maker Not Dropping Ice
Modified: October 20, 2024
Troubleshoot your LG ice maker not dropping ice with our informative articles. Find solutions and fixes for common issues with ice makers.
(Many of the links in this article redirect to a specific reviewed product. Your purchase of these products through affiliate links helps to generate commission for Storables.com, at no extra cost. Learn more)
Introduction
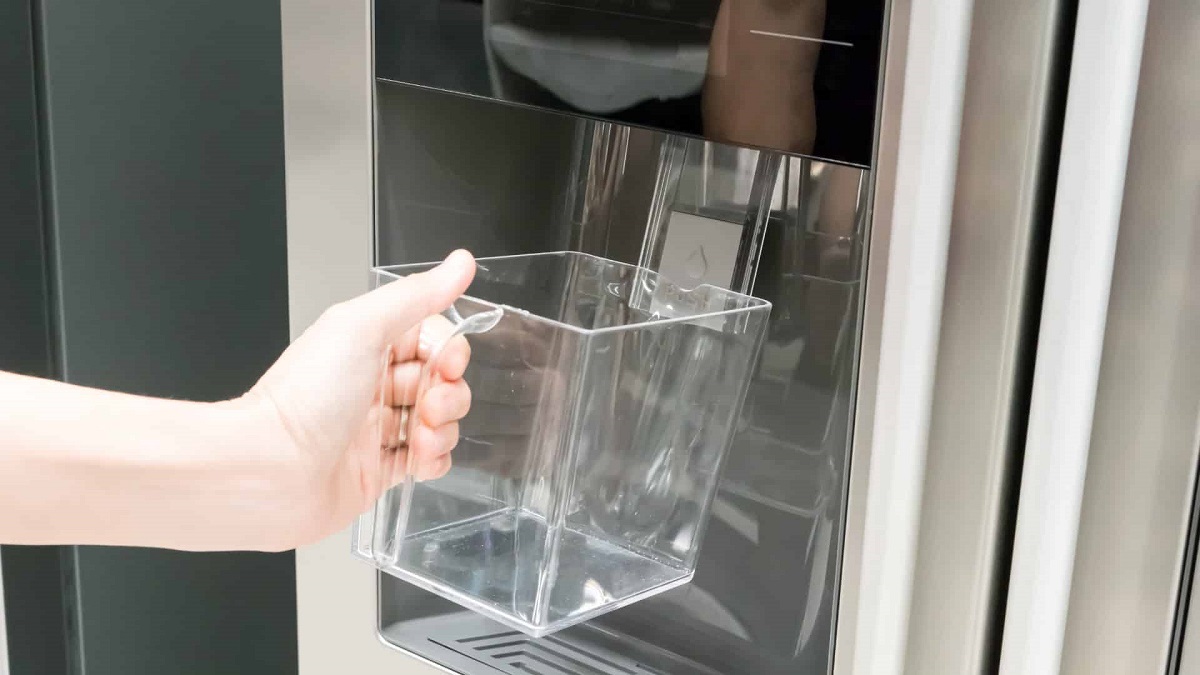
Having an ice maker in your LG refrigerator can be incredibly convenient, providing you with a steady supply of ice for your beverages and cool treats. However, it can be quite frustrating when your LG ice maker refuses to drop ice. There can be several factors that contribute to this issue, ranging from simple clogs to more complex mechanical malfunctions.
In this article, we will explore the common causes behind an LG ice maker not dropping ice and provide troubleshooting steps to resolve the problem. So, if you’re tired of constantly dealing with a temperamental ice maker, read on to find out how you can get it back to working order.
Key Takeaways:
- Troubleshooting LG ice maker issues involves checking water supply, cleaning the inlet valve, examining the assembly, testing the sensor, adjusting water pressure, and monitoring freezer temperature for optimal ice production.
- Regular maintenance and care for your LG ice maker, including cleaning and monitoring, will help prevent future problems and ensure a continuous supply of ice cubes for your convenience.
Read more: Why Is My Ice Maker Not Dropping Ice
Common Causes of LG Ice Maker Not Dropping Ice
There are various potential reasons why your LG ice maker may not be dropping ice. Understanding these common causes can help you diagnose and fix the issue more effectively. Let’s take a closer look at each one:
1. Clogged Water Inlet Valve
One possible culprit for an ice maker not dropping ice is a clogged water inlet valve. The water inlet valve is responsible for supplying water to the ice maker, and if it becomes clogged with debris or mineral deposits, water flow may be restricted or completely blocked. This can prevent the ice maker from producing and dispensing ice cubes.
2. Faulty Ice Maker Assembly
Another cause to consider is a faulty ice maker assembly. Over time, the parts within the ice maker can wear out or malfunction, leading to issues with ice production and dispensing. If any component of the ice maker assembly, such as the motor or the ejector arm, is damaged or not functioning properly, it can result in the ice maker not dropping ice.
3. Ice Maker Sensor Malfunction
The ice maker sensor plays a critical role in detecting when the ice bin is full and signaling the ice maker to stop producing ice. If the sensor is faulty or dirty, it may not accurately recognize when the ice bin is full, causing the ice maker to halt production even when there is still space available. This can prevent the ice maker from dropping ice cubes.
Read more: Why Is My Samsung Ice Maker Not Dropping Ice
4. Low Water Pressure
Insufficient water pressure can negatively affect the performance of your ice maker. If the water pressure is too low, it can hinder the ice maker’s ability to fill the ice molds adequately, resulting in small or incomplete ice cubes. Low water pressure may also cause the ice maker to take longer to produce ice or prevent it from dropping ice altogether.
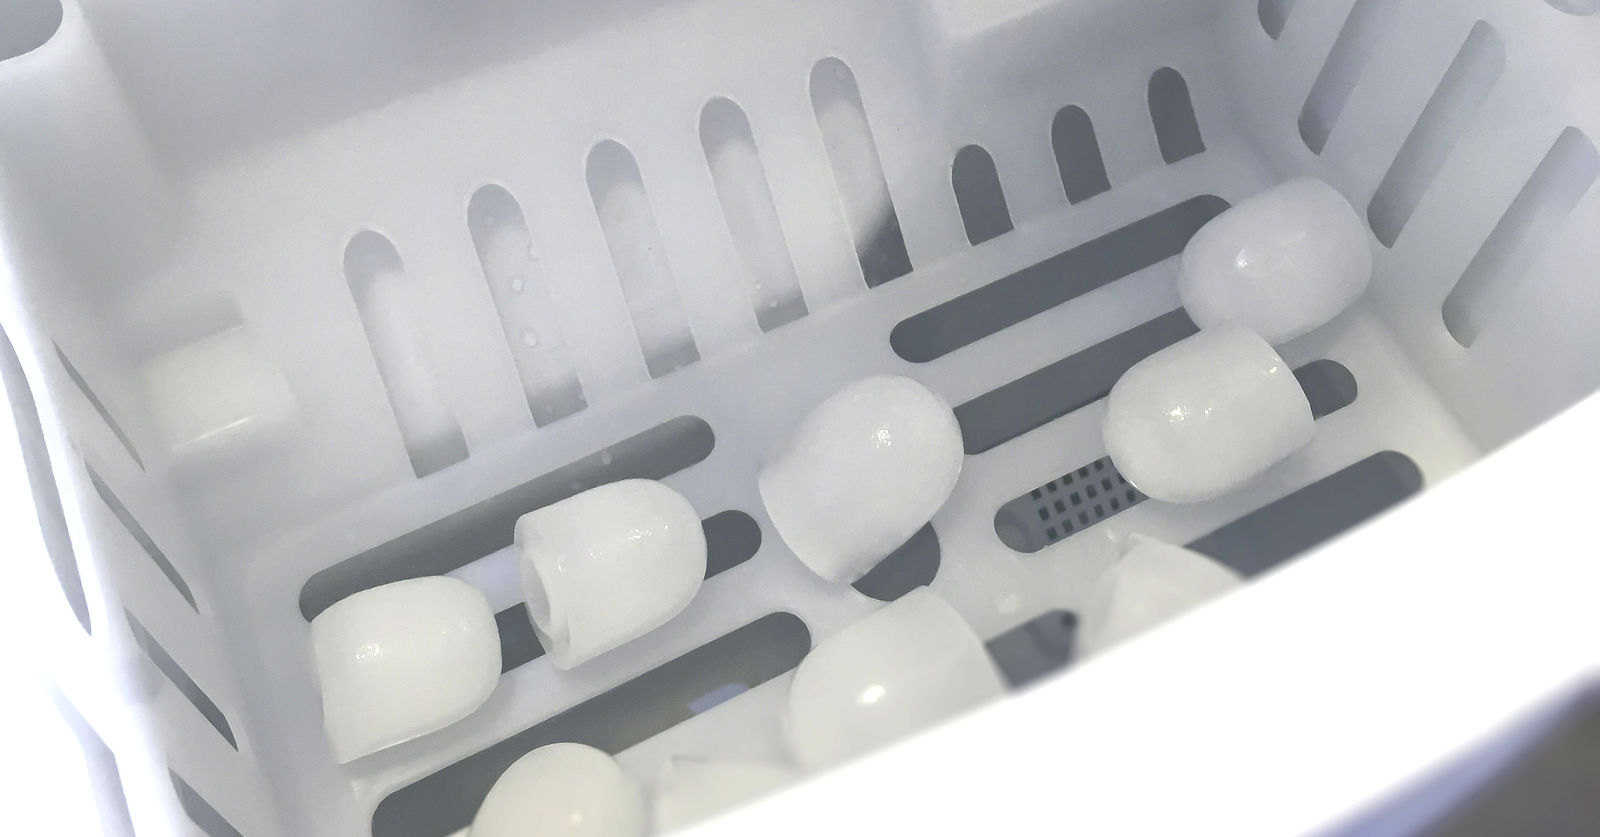
5. Freezer Temperature Issues
The freezer temperature plays a crucial role in ice production. If the temperature in the freezer is too high, it can interfere with the freezing process, leading to partially formed or melting ice cubes. Additionally, if the temperature is too low, the ice cubes may freeze together, causing them to get stuck and preventing them from dropping into the ice bin.
Now that we have explored the common causes behind an LG ice maker not dropping ice, let’s move on to the troubleshooting steps that can help you get your ice maker back on track.
Key Takeaways:
- Troubleshooting LG ice maker issues involves checking water supply, cleaning the inlet valve, examining the assembly, testing the sensor, adjusting water pressure, and monitoring freezer temperature for optimal ice production.
- Regular maintenance and care for your LG ice maker, including cleaning and monitoring, will help prevent future problems and ensure a continuous supply of ice cubes for your convenience.
Read more: Why Is My Ice Maker Not Dropping Ice
Common Causes of LG Ice Maker Not Dropping Ice
When your LG ice maker fails to drop ice, it can be quite frustrating. Fortunately, there are several common causes for this issue that you can easily troubleshoot. Understanding these causes can help you identify and resolve the problem quickly. Let’s delve into these common causes:
1. Clogged Water Inlet Valve
The water inlet valve supplies water to the ice maker. Over time, mineral deposits or debris can accumulate, leading to a clogged valve. This restricts or completely blocks the flow of water, preventing the ice maker from producing and dispensing ice cubes.
To address this, you can start by shutting off the water supply and disconnecting the water line. Then, carefully clean the water inlet valve by removing any build-up or debris. Once cleaned, reassemble the valve and reconnect the water line. This should restore proper water flow to the ice maker.
2. Faulty Ice Maker Assembly
The ice maker assembly consists of various mechanical parts, including the motor, ejector arm, and ice mold. If any of these components are damaged or malfunctioning, it can cause the ice maker to stop dropping ice.
To diagnose a faulty ice maker assembly, inspect the motor for signs of wear or damage. Check if the ejector arm is stuck or unable to move freely. Additionally, examine the ice mold for any cracks or leaks that may affect ice formation. If any of these issues are present, it is recommended to replace the faulty parts to restore proper ice production.
3. Ice Maker Sensor Malfunction
A malfunctioning ice maker sensor can cause the ice maker to incorrectly detect the ice bin as full, resulting in no ice being dispensed. The sensor is responsible for signaling the ice maker to pause production when the bin is full.
To address this, locate the ice maker sensor, typically located near the ice bin’s entrance. Carefully clean the sensor using a soft cloth or sponge to remove any dirt or residue that may be obstructing its function. If cleaning doesn’t resolve the issue, it may be necessary to replace the sensor.
Read more: Why Is My Samsung Ice Maker Not Dropping Ice
4. Low Water Pressure
Insufficient water pressure can hinder the ice maker’s performance. If the water pressure is too low, the ice molds may not fill properly, resulting in small or incomplete ice cubes. It can also cause the ice maker to take longer to produce ice or fail to drop it altogether.
To address low water pressure, start by checking the water supply line and ensure it is fully open. If the line is kinked or damaged, replace it. Additionally, consider installing a water pressure booster to increase the water pressure to your ice maker.
5. Freezer Temperature Issues
The temperature in the freezer is crucial for proper ice production. If the temperature is too high, it can interfere with the freezing process, leading to partially formed or melting ice cubes. On the other hand, if the temperature is too low, the ice cubes may freeze together, causing them to get stuck and preventing them from dropping into the ice bin.
To address freezer temperature issues, check the thermostat settings and ensure they are set to the recommended temperature for ice production. If the temperature is not accurate, adjust it accordingly. It is also important to regularly defrost the freezer to avoid ice build-up that can impact ice production.
By understanding and addressing these common causes, you can tackle the issue of an LG ice maker not dropping ice. Follow the troubleshooting steps outlined in this article to restore the functionality of your ice maker and enjoy a fresh supply of ice.
Read more: Why Is My Ice Maker Making Clumps Of Ice
Clogged Water Inlet Valve
A clogged water inlet valve is a common cause for an LG ice maker not dropping ice. The water inlet valve is responsible for supplying water to the ice maker, allowing it to produce ice cubes. Over time, mineral deposits or debris can accumulate in the valve, obstructing the flow of water and impeding the ice-making process.
When the water inlet valve is clogged, the ice maker may struggle to receive a sufficient amount of water, resulting in either no ice production or the production of undersized, misshapen, or incomplete ice cubes. If you’re facing this issue, here are some steps you can take to address a clogged water inlet valve:
1. Shut off the Water Supply: Before you begin any troubleshooting, it’s important to turn off the water supply to avoid any potential leaks or water damage. Locate the shut-off valve connected to your refrigerator’s water line and close it.
2. Disconnect the Water Line: Once the water supply is turned off, locate the water line that connects to the back of your refrigerator. Carefully remove the line by loosening the fittings or using pliers, depending on the connection type.
3. Inspect the Water Inlet Valve: With the water line disconnected, locate the water inlet valve at the back of your refrigerator. Depending on the model, it may be located behind an access panel. The valve usually has two or more solenoids and corresponding water line connections.
4. Clean the Water Inlet Valve: Using a soft cloth or sponge, carefully clean the water inlet valve to remove any mineral deposits or debris that may have accumulated. Be gentle to avoid damaging the valve. You can also use a solution of vinegar and water to help dissolve stubborn mineral deposits.
5. Reassemble and Test: After cleaning the water inlet valve, reassemble the components and reconnect the water line. Ensure that all connections are secure. Once everything is back in place, turn on the water supply and wait for a few minutes to see if the ice maker begins producing and dropping ice.
By cleaning the clogged water inlet valve, you are restoring the proper water flow to the ice maker. This should allow it to produce ice cubes and drop them into the ice bin as intended.
If cleaning the water inlet valve doesn’t resolve the issue, it’s possible that the valve itself is faulty and needs to be replaced. In such cases, it is recommended to consult your LG refrigerator’s manual or contact a professional for assistance.
Remember to always exercise caution when working with water and electrical connections. If you’re unsure or uncomfortable performing these troubleshooting steps, it’s best to seek professional help to ensure your safety and the proper functioning of your ice maker.
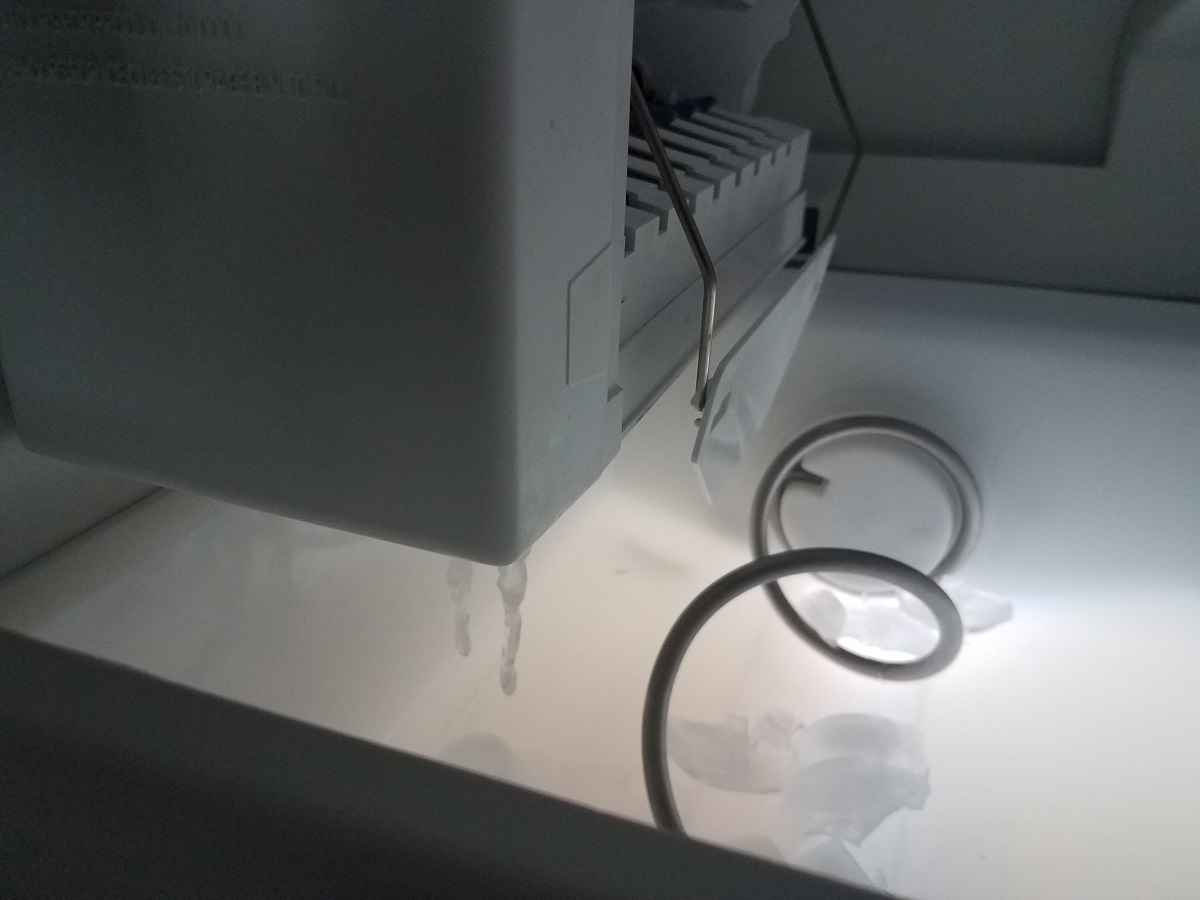
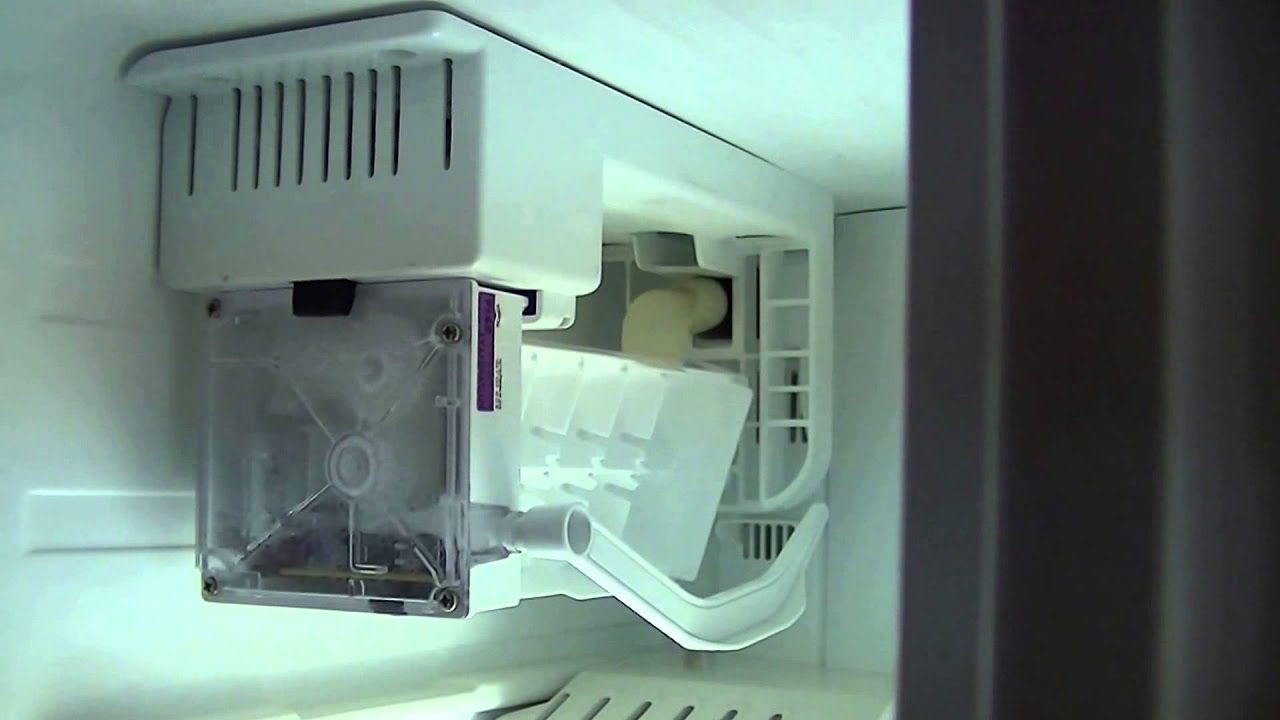
Faulty Ice Maker Assembly
A faulty ice maker assembly is another common cause for an LG ice maker not dropping ice. The ice maker assembly is responsible for the entire ice-making process, from freezing the water to dispensing the ice cubes into the ice bin. If any component within the assembly becomes damaged or malfunctions, it can prevent the ice maker from properly dropping ice.
Here are some steps you can take to address a faulty ice maker assembly:
1. Inspect the Motor: The motor is a crucial component of the ice maker assembly as it drives the movements of the ejector arm and other parts. Over time, the motor may wear out or become damaged, causing it to malfunction. Inspect the motor for any signs of wear, damage, or overheating. If you notice any issues, it is recommended to replace the motor with a compatible one.
2. Check the Ejector Arm: The ejector arm is responsible for pushing the ice cubes from the molds into the ice bin. If the arm is stuck or unable to move freely, it can prevent the ice from dropping. Give the ejector arm a gentle push to see if it moves easily. If it is obstructed or not functioning properly, try to determine the cause of the blockage or consider replacing the faulty arm.
3. Examine the Ice Mold: The ice mold is where the water is frozen to form ice cubes. Inspect the mold for any cracks, leaks, or deformities that may impact ice production. If the mold is damaged, it may not release the ice cubes properly, preventing them from dropping into the ice bin. In this case, replace the defective ice mold with a new one to ensure proper ice formation and dropping.
4. Test the Thermostat: The thermostat regulates the temperature inside the ice maker assembly. If the thermostat is faulty or not calibrated correctly, it can interfere with the freezing process and result in ice cubes that do not drop. Test the thermostat with a multimeter to ensure it is functioning within the specified temperature range. If necessary, replace the thermostat to maintain optimal ice-making conditions.
5. Consider Professional Assistance: If you have inspected the motor, ejector arm, ice mold, and thermostat but are still unable to resolve the issue, it may be best to seek professional assistance. A qualified technician will have the expertise and tools to diagnose and repair any complex mechanical malfunctions within the ice maker assembly.
By addressing any faults or malfunctions within the ice maker assembly, you can restore its proper functionality and ensure that ice cubes are produced and dropped into the ice bin as intended. Regular maintenance, cleaning, and prompt repairs can help prolong the lifespan of your LG ice maker assembly and minimize the chances of it experiencing issues in the future.
Ice Maker Sensor Malfunction
A malfunctioning ice maker sensor can be a common cause of an LG ice maker not dropping ice. The ice maker sensor is responsible for detecting when the ice bin is full and signaling the ice maker to pause production. If the sensor is dirty or faulty, it may not accurately detect the ice bin’s status, causing the ice maker to stop producing and dropping ice prematurely.
To address an ice maker sensor malfunction, follow these steps:
1. Locate the Ice Maker Sensor: The ice maker sensor is typically located near the entrance of the ice bin. It may be located on the ice maker assembly or on the side of the ice bin itself. Refer to your LG refrigerator’s manual to find the exact location of the sensor.
2. Disconnect Power and Remove the Ice Bin: Before proceeding, make sure to disconnect the power to your refrigerator and remove the ice bin from the freezer. This will allow you easier access to the ice maker sensor for cleaning and inspection.
3. Clean the Ice Maker Sensor: Carefully clean the ice maker sensor using a soft cloth or sponge. The sensor may accumulate dirt, frost, or residue over time, interfering with its ability to detect ice bin fullness accurately. Gently wipe the sensor surface to remove any debris or build-up, ensuring it is clean and free from obstructions.
4. Inspect for Damage: While cleaning the sensor, inspect it for any damage or signs of wear. Check for loose connections, visible cracks, or other issues that may indicate sensor malfunction. If any damage is detected, the sensor may need to be replaced to restore proper functionality.
5. Reassemble and Test: Once the sensor is clean and inspected, reassemble the ice bin and reconnect the power to your refrigerator. Allow the ice maker to resume its operation and monitor if the ice maker now drops ice properly. Ensure that the ice bin is empty before initiating a test cycle.
If cleaning the ice maker sensor does not resolve the issue, it is recommended to consult your LG refrigerator’s manual for further troubleshooting steps or contact a professional technician for assistance. They will have the necessary expertise and tools to diagnose and repair any sensor-related malfunctions.
Remember to always exercise caution when handling electrical components and ensure that your refrigerator is properly disconnected from the power source before attempting any repairs. By addressing an ice maker sensor malfunction, you can ensure that your LG ice maker functions efficiently and consistently drops ice into the bin when needed.
Low Water Pressure
Low water pressure is a common cause of an LG ice maker not dropping ice. Proper water pressure is crucial for the ice maker to fill the ice molds adequately and produce ice cubes. If the water pressure is too low, it can lead to issues such as undersized or incomplete ice cubes, slow ice production, or no ice dropping at all.
To address low water pressure and ensure optimal performance of your ice maker, follow these steps:
1. Check the Water Supply Line: Begin by inspecting the water supply line connected to your refrigerator. Ensure that the valve supplying water to the fridge is fully open. Additionally, check for any kinks or restrictions in the water line that may be reducing water flow. Straighten any kinks and remove any obstacles that are obstructing water flow.
2. Clean or Replace the Water Filter: If your LG refrigerator is equipped with a water filter, it is essential to check its condition. A clogged or dirty filter can restrict water flow and lower the water pressure, affecting the ice maker’s performance. Refer to your refrigerator’s manual for instructions on how to clean or replace the water filter. Regularly maintaining the filter ensures optimal filtration and water flow.
3. Inspect the Water Inlet Valve: The water inlet valve is responsible for controlling the water flow to the ice maker. Check if the valve is fully open and functioning correctly. If the valve is partially closed or malfunctioning, it can restrict water flow and lead to low water pressure. In such cases, it may be necessary to clean or replace the water inlet valve.
4. Consider Installing a Water Pressure Booster: If the low water pressure issue persists even after checking the water supply line and ensuring proper functioning of the water inlet valve, you may want to consider installing a water pressure booster. A water pressure booster can increase the water pressure to your refrigerator, ensuring an adequate flow of water to the ice maker.
5. Consult a Professional: If you have followed the above steps and the water pressure issue still persists, it is recommended to consult a professional technician or plumber. They will have the expertise to assess and address any underlying plumbing issues that may be causing low water pressure to the refrigerator’s ice maker.
By addressing low water pressure, you can ensure that your LG ice maker receives sufficient water flow for proper ice production and dropping. Adequate water pressure will result in fully formed ice cubes that drop into the ice bin as intended, allowing you to enjoy a consistent supply of ice for your beverages and other cooling needs.
Read more: Why Is My Ice Maker Knocking
Freezer Temperature Issues
Freezer temperature issues can contribute to an LG ice maker not dropping ice. The freezer temperature plays a crucial role in the ice-making process, as it affects the formation and functionality of the ice maker. If the freezer temperature is too high or too low, it can result in issues with ice production and dropping.
To address freezer temperature issues and ensure optimal ice maker performance, follow these steps:
1. Check the Freezer Thermostat Settings: Start by checking the thermostat settings on your LG refrigerator. Ensure that the freezer temperature is set to the recommended level for ice production, usually between 0 and 5 degrees Fahrenheit (-18 to -15 degrees Celsius). If the temperature is set too high or too low, adjust it accordingly to maintain the ideal conditions for ice production.
2. Allow Adequate Air Circulation: Proper air circulation is crucial for maintaining the desired temperature in the freezer. Make sure that there is sufficient space around the vents and inside the freezer to allow air to circulate freely. Avoid overloading the freezer with items, as this can obstruct air circulation and lead to temperature imbalances.
3. Defrost the Freezer: Ice build-up inside the freezer can disrupt the freezing process and lead to issues with ice formation and dropping. Regularly defrosting the freezer can help prevent ice accumulation and ensure optimal ice maker performance. Follow the defrosting instructions provided in your LG refrigerator’s manual for safe and effective defrosting.
4. Check the Freezer Door Seal: A faulty or damaged door seal can cause warm air to enter the freezer, leading to temperature fluctuations. Inspect the door seal for any signs of wear, gaps, or damage. If you notice any issues, replace the door seal to maintain the proper temperature in the freezer and ensure optimal ice maker functionality.
5. Avoid Setting the Freezer Temperature too Low: While it may seem counterintuitive, setting the freezer temperature too low can also impact the ice maker’s performance. Extremely low temperatures can cause the ice cubes to freeze together, preventing them from dropping properly. If you suspect that the temperature is set too low, adjust it slightly higher within the recommended range.
By addressing freezer temperature issues, you can create an optimal environment for ice production and dropping. Maintaining the proper freezer temperature ensures that the ice maker functions efficiently, producing fully formed ice cubes that drop into the ice bin as intended. Regular maintenance and monitoring of the freezer temperature will help ensure consistent ice availability for your convenience.
Troubleshooting Steps for LG Ice Maker Not Dropping Ice
If your LG ice maker is not dropping ice as it should, there are several troubleshooting steps you can take to diagnose and resolve the issue. Follow these steps to address the problem effectively:
1. Check the Water Supply Line: Ensure that the water supply line connected to your refrigerator is fully open and supplying water to the ice maker. Check for any kinks, leaks, or blockages in the line that may be hindering water flow to the ice maker.
2. Inspect and Clean the Water Inlet Valve: The water inlet valve supplies water to the ice maker. A clogged or malfunctioning valve can prevent water from reaching the ice maker, causing it to not drop ice. Carefully inspect the valve for any debris or mineral deposits that may be clogging it. Clean the valve or replace it if necessary.
3. Examine the Ice Maker Assembly: Inspect the various components of the ice maker assembly, including the motor, ejector arm, and ice mold. Look for any signs of wear, damage, or obstructions that may be preventing the ice maker from functioning properly. Replace any faulty components as needed.
4. Test the Ice Maker Sensor: The ice maker sensor detects when the ice bin is full and signals the ice maker to stop producing ice. Clean the sensor to remove any dirt or residue that may be interfering with its function. If cleaning doesn’t resolve the issue, the sensor may need to be replaced.
5. Adjust Water Pressure: Low water pressure can affect the ice maker’s performance. Ensure that the water pressure is adequate for proper ice production. Check the water supply line, water inlet valve, and any filters for any restrictions that may be causing low water pressure. Adjust or replace any components as necessary.
6. Check Freezer Temperature Settings: Ensure that the temperature in the freezer is set to the recommended level for ice production. If the temperature is too high or too low, adjust it accordingly within the recommended range. Additionally, regularly defrost the freezer to prevent ice build-up that could affect ice production and dropping.
By following these troubleshooting steps, you can determine the underlying issue causing your LG ice maker to not drop ice and take the appropriate actions to resolve it. Remember to always refer to your LG refrigerator’s manual for model-specific instructions and seek professional assistance if needed. With proper maintenance and troubleshooting, you can restore your ice maker’s functionality and enjoy a steady supply of ice.
Check Water Supply Line
One of the initial troubleshooting steps when your LG ice maker is not dropping ice is to check the water supply line. The water supply line delivers water to the ice maker, and any issues with it can prevent proper water flow, thereby affecting ice production.
Follow these steps to check the water supply line and ensure it is not causing the problem:
1. Locate the Water Supply Line: Identify the water supply line that is connected to your LG refrigerator. It is typically located at the back of the refrigerator near the bottom.
2. Check for Water Leakages: Inspect the water supply line for any visible signs of leaks or damage. Look for dripping water, wet spots around the connection points, or water pooling on the floor. If you notice any leaks, tighten the connections or replace the water supply line if necessary.
3. Ensure Full Water Supply: Make sure that the water supply to the refrigerator is turned on and providing an adequate flow of water. Sometimes, the water supply valve may have accidentally been closed or not fully opened. Verify that the valve supplying water to the refrigerator is fully open.
4. Inspect for Line Blockages: Check for any blockages or kinks in the water supply line that may impede water flow. If you notice any obstructions, gently straighten the line to remove the kink or clear the blockage. This will ensure uninterrupted water flow to the ice maker.
5. Monitor Water Flow: Disconnect the water supply line from the refrigerator and place a bucket or container beneath it. Turn on the water supply and observe the flow of water. If there is no water flow or a weak stream, it indicates a problem with the water supply line. In such cases, you may need to replace or repair the line to restore proper water flow.
6. Check for Frozen Line: If your refrigerator is in a cold environment, the water supply line may freeze. Inspect the water supply line for any signs of freezing such as visible frost or ice build-up. Use a hairdryer or warm towel to thaw the frozen section, but exercise caution to avoid overheating or damaging the line.
By checking the water supply line, you can identify any issues that may be causing a lack of water flow to the ice maker, resulting in the ice maker not dropping ice. Fixing these issues promptly will restore proper water flow and allow the ice maker to produce and dispense ice cubes effectively.
If you encounter complex issues or are unsure about conducting these checks, it is always recommended to consult your LG refrigerator’s manual or seek professional assistance from a technician familiar with your specific model.
Inspect and Clean the Water Inlet Valve
Another troubleshooting step to take when your LG ice maker is not dropping ice is to inspect and clean the water inlet valve. The water inlet valve controls the flow of water into the ice maker, and if it becomes clogged or faulty, it can disrupt the ice-making process.
Follow these steps to inspect and clean the water inlet valve:
1. Shut off the Water Supply: Before proceeding with any inspection or cleaning, it is crucial to turn off the water supply to your refrigerator. Locate the shut-off valve connected to the water line and close it to prevent any water leakage or accidents.
2. Locate the Water Inlet Valve: The water inlet valve is typically located at the back of your LG refrigerator, near the bottom. It is connected to the water supply line and has several solenoids or inlet ports.
3. Inspect for Visible Damage: Carefully examine the water inlet valve for any visible signs of damage or wear. Look for cracks, corrosion, or loose connections. Any visible issues may indicate that the valve needs to be replaced.
4. Clean the Water Inlet Valve: Using a soft cloth or sponge, gently clean the water inlet valve to remove any mineral deposits, debris, or buildup that may be obstructing water flow. In areas with hard water, mineral deposits can accumulate over time, affecting the valve’s performance. You can also use a solution of equal parts vinegar and water to dissolve any stubborn deposits.
5. Check the Valve Solenoids: The water inlet valve comprises solenoids that control the water flow to the ice maker. Ensure that the solenoids are clear and free from blockages. Gently push on the solenoids to see if they move freely. If a solenoid is stuck or not functioning correctly, the valve may need to be replaced.
6. Reassemble and Test: Once you have cleaned the water inlet valve and ensured its proper functioning, reassemble any components you removed during the inspection. Turn on the water supply to your refrigerator and wait for a few minutes to check if water is flowing properly into the ice maker.
By inspecting and cleaning the water inlet valve, you can remove any obstructions or build-up that may be preventing water flow to the ice maker. This process will restore the proper functioning of the valve, allowing for adequate water supply and ultimately resulting in the ice maker dropping ice cubes as intended.
If cleaning the water inlet valve does not resolve the issue, or if you encounter more complex problems with the valve, it is recommended to consult your LG refrigerator’s manual or seek professional assistance from a qualified technician.
Read more: Why Is My Ice Maker Not Making
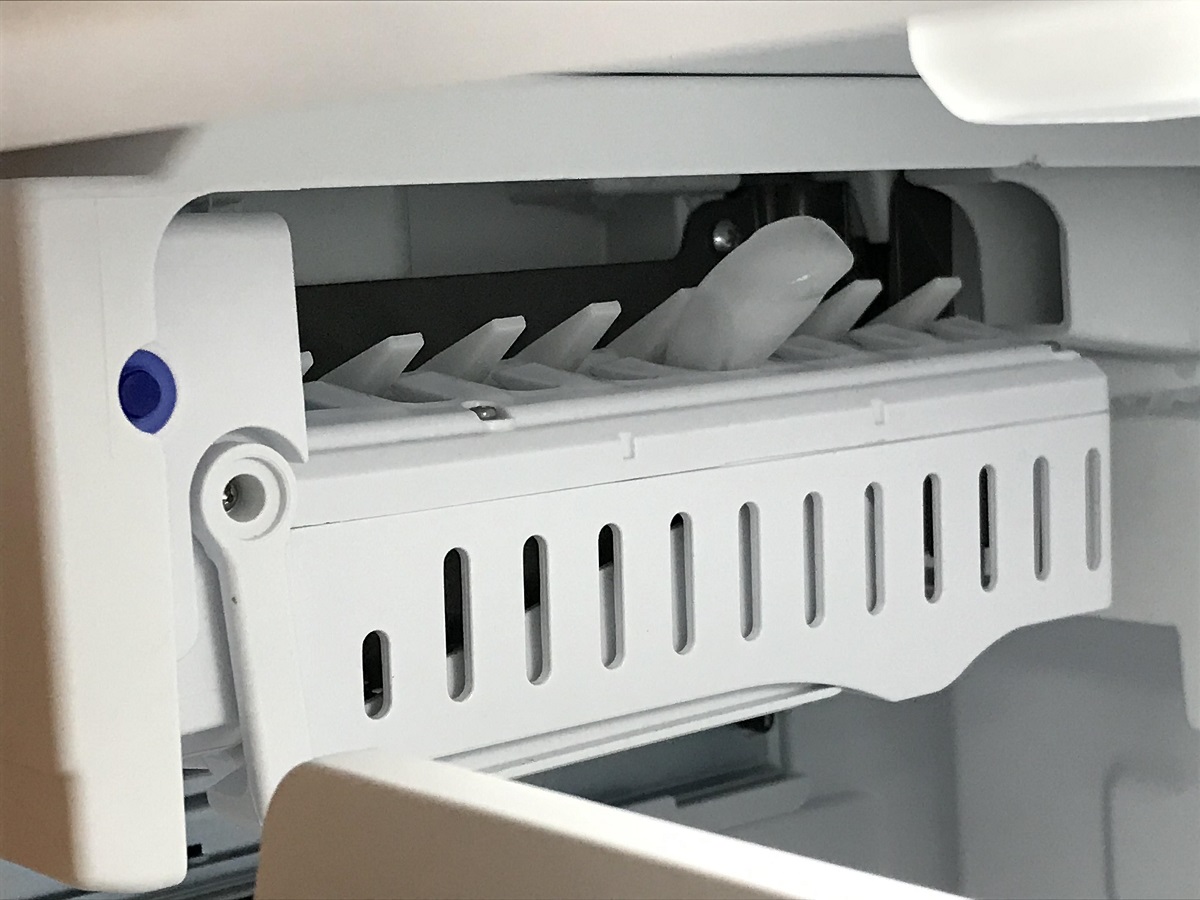
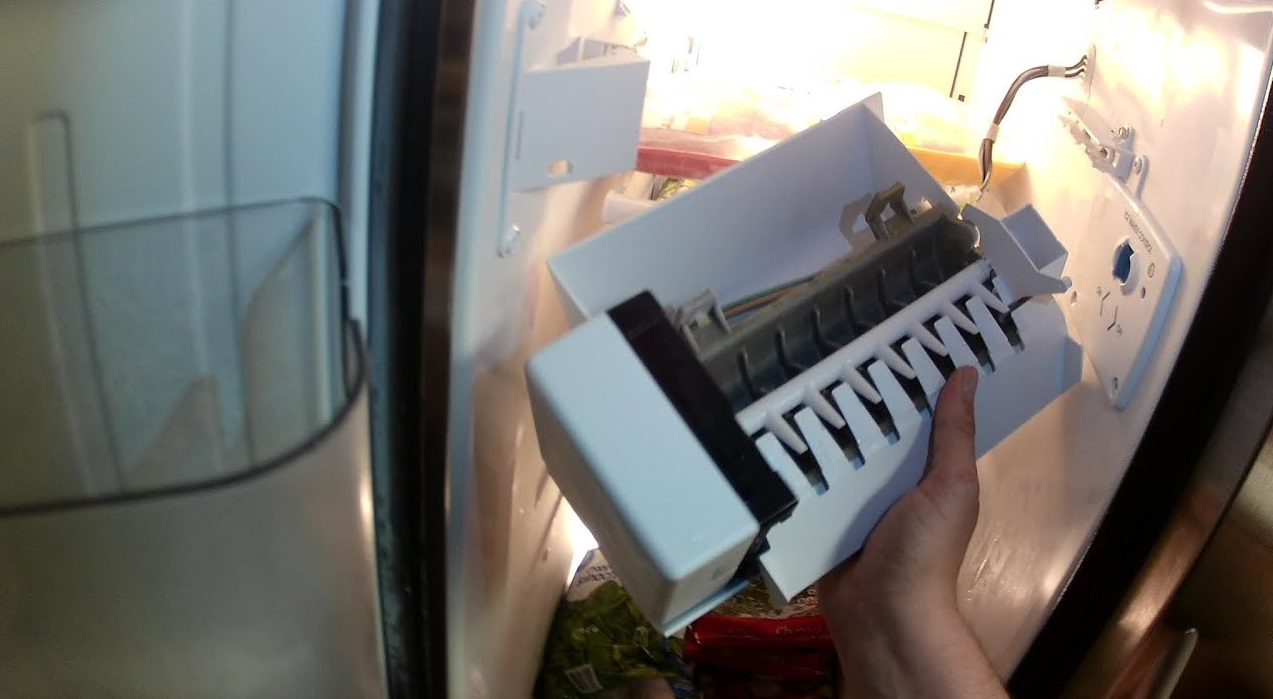
Examine the Ice Maker Assembly
When your LG ice maker is not dropping ice, it is essential to examine the ice maker assembly for any issues that may be causing the problem. The ice maker assembly consists of various mechanical components that work together to freeze water and release ice cubes into the bin.
Follow these steps to examine the ice maker assembly:
1. Access the Ice Maker Assembly: Depending on your LG refrigerator model, accessing the ice maker assembly may require removing an ice bin or pulling out a drawer. Refer to your refrigerator’s manual for specific instructions on how to access the ice maker assembly.
2. Inspect the Motor: The motor is a critical component of the ice maker assembly as it drives the movements of the ejector arm and other parts. Examine the motor for any signs of wear, damage, or overheating. A malfunctioning motor can hinder the ice maker’s ability to drop ice.
3. Observe the Ejector Arm: The ejector arm is responsible for pushing the ice cubes out of the ice maker molds and into the bin. Ensure that the ejector arm moves freely without any obstructions. If the arm is stuck or unable to move, it may prevent ice cubes from dropping into the bin. Remove any ice or debris that may be obstructing the arm’s movement.
4. Check the Ice Mold: The ice mold is where water is frozen to form ice cubes. Inspect the ice mold for any cracks, leaks, or deformities that may affect ice formation. A damaged or faulty ice mold can hinder the dropping of ice cubes. Replace the ice mold if necessary to ensure proper ice formation and dropping.
5. Examine Other Assembly Components: While examining the ice maker assembly, pay attention to other components such as the ice maker thermostat and sensors. Inspect these parts for any visible damage or misalignment. A malfunctioning thermostat or sensor can affect the ice maker’s functioning and prevent the dropping of ice cubes.
6. Clean the Assembly: During the examination, take the opportunity to clean the ice maker assembly. Use a soft cloth or sponge to wipe away any dirt, residue, or ice build-up. Cleaning the assembly helps to ensure smooth movement of mechanical parts and proper ice production.
7. Reassemble and Test: Once you have completed the inspection and cleaning, reassemble the ice maker assembly and ensure that all components are securely in place. Turn on the ice maker and allow it to go through a full ice-making cycle. Monitor to see if the ice maker now drops ice cubes as expected.
By carefully examining the ice maker assembly, you can identify any mechanical issues that may be causing the ice maker to not drop ice. Regular inspection and maintenance of the assembly can help prolong its lifespan and ensure optimal performance.
If you are unable to identify or resolve any issues with the ice maker assembly, it is recommended to consult your LG refrigerator’s manual or seek professional assistance from a technician with expertise in refrigerator repairs.
Test the Ice Maker Sensor
When your LG ice maker is not dropping ice, it is worth testing the ice maker sensor to ensure it is functioning correctly. The ice maker sensor is responsible for detecting when the ice bin is full and signaling the ice maker to pause ice production. If the sensor is dirty or malfunctioning, it may not accurately detect the ice bin’s status, causing the ice maker to stop dropping ice prematurely.
Follow these steps to test the ice maker sensor:
1. Locate the Ice Maker Sensor: The ice maker sensor is usually located near the entrance of the ice bin. It may be attached to the ice maker assembly or positioned on the side of the bin. Refer to your LG refrigerator’s manual to find the exact location of the sensor.
2. Clean the Sensor Surface: Use a soft cloth or sponge to carefully clean the surface of the ice maker sensor. Dirt, residue, or ice build-up can hinder the sensor’s functionality. Gently wipe away any debris or obstructions, ensuring that the sensor is clean and free from any blockages.
3. Check for Proper Alignment: Inspect the position of the ice maker sensor and ensure it is properly aligned with the ice bin. It should be able to detect the ice level accurately. If the sensor appears misaligned, adjust it carefully to ensure proper contact with the ice bin.
4. Perform Manual Sensor Test: Depending on your LG refrigerator model, you may have the option to manually trigger a sensor test. Consult your fridge’s manual to determine if this feature is available and how to activate it. Follow the instructions provided to initiate the sensor test.
5. Observe Ice Maker Operation: During the sensor test, observe the ice maker’s operation. If the sensor is functioning correctly, it should detect the ice bin as full when it is indeed full, and the ice maker should stop producing ice. Conversely, if the ice bin is not full, the ice maker should continue producing ice.
6. Monitor Ice Maker Performance: After completing the sensor test, monitor the ice maker’s performance during regular use. If the ice maker consistently stops producing ice when the bin is full and resumes when there is more space, the sensor is likely functioning properly.
If cleaning the ice maker sensor and performing the manual sensor test does not resolve the issue, it is possible there may be a more complex problem with the sensor. In such cases, it is recommended to consult your LG refrigerator’s manual for further troubleshooting steps or contact a professional technician for assistance. They will have the expertise and tools to diagnose and repair any sensor-related malfunctions effectively.
Regular maintenance and cleaning of the ice maker sensor can help prevent issues and ensure optimal ice maker performance.
Check if the ice maker is getting water and if the water inlet valve is working properly. Also, make sure the ice maker is set to the correct temperature.
Adjust Water Pressure
If your LG ice maker is not dropping ice, adjusting the water pressure can be a crucial troubleshooting step to consider. Inadequate water pressure can impact the ice maker’s ability to produce and drop ice cubes properly. By adjusting the water pressure, you can ensure a steady and sufficient flow of water to the ice maker.
Follow these steps to adjust the water pressure for your ice maker:
1. Locate the Water Supply Valve: Locate the water supply valve responsible for providing water to the refrigerator. It is usually located behind the refrigerator or under the sink. Turn off the water supply by shutting off this valve.
2. Access the Water Line: Access the water line connected to the refrigerator. This may involve moving the refrigerator or removing a panel if necessary. Ensure that you can reach the water line easily.
3. Locate the Water Line Valve: Along the water line, you should find a valve that regulates the water flow to the refrigerator. It may be a separate valve or integrated into the water line itself. This valve allows you to adjust the water pressure.
4. Adjust the Water Line Valve: Using a screwdriver or pliers, carefully adjust the water line valve. Turn it clockwise to decrease the water pressure or counterclockwise to increase the pressure. Make only small adjustments and test the ice maker between adjustments to determine the ideal water pressure.
5. Monitor Ice Maker Performance: After making adjustments to the water pressure, observe the ice maker’s performance. Check if the ice maker is producing and dropping ice cubes properly. If the water pressure was the issue, adjusting it should resolve the problem, and the ice maker should function as intended.
6. Fine-Tune the Water Pressure: If the ice maker is still not dropping ice or if the ice cubes are not of the desired size, continue making slight adjustments to the water line valve. Monitor the ice maker’s performance closely after each adjustment until you achieve the optimal water pressure for proper ice production.
It’s important to note that every refrigerator model and water supply setup is unique, so the specific location and adjustment mechanism of the water line valve may vary. Always refer to your LG refrigerator’s manual for model-specific instructions and recommendations.
If adjusting the water pressure does not resolve the issue or if you are unsure about making adjustments yourself, it is recommended to consult a professional technician or contact LG support for further assistance. They can provide guidance specific to your refrigerator model and ensure that the water pressure is properly adjusted to optimize ice maker performance.
Remember to monitor the ice maker’s performance regularly and maintain the water pressure adjustment as needed for consistent ice production.
Check Freezer Temperature Settings
When your LG ice maker is not dropping ice, checking the freezer temperature settings is an important step in troubleshooting the issue. The freezer temperature directly impacts the ice-making process, and if it is not set correctly, it can affect ice production and the ice maker’s ability to drop ice cubes.
Follow these steps to check the freezer temperature settings and ensure they are properly adjusted:
1. Locate the Freezer Temperature Controls: Depending on your LG refrigerator model, the freezer temperature controls may be located inside the refrigerator compartment or on the exterior of the appliance. Consult your refrigerator’s manual to locate the temperature control settings specifically for the freezer.
2. Review the Recommended Temperature Range: Check the recommended temperature range for the freezer in your refrigerator’s manual. In general, the ideal temperature for ice production is between 0 and 5 degrees Fahrenheit (-18 to -15 degrees Celsius). Confirm that the freezer temperature is set within this recommended range.
3. Adjust the Freezer Temperature: If the current temperature settings are too high or too low, adjust the temperature accordingly to align with the recommended range. Most LG refrigerators allow you to adjust the temperature by using buttons or a dial. Follow the instructions in your manual to make the proper adjustments.
4. Allow for Temperature Stabilization: After adjusting the freezer temperature, allow the refrigerator and freezer compartments to stabilize for several hours. This will ensure proper temperature distribution and equilibrium throughout the appliance.
5. Monitor Ice Maker Operation: Once the temperature has stabilized, monitor the ice maker’s operation. Check if it starts producing and dropping ice cubes as expected. Proper temperature settings create an optimal environment for ice formation and ensure that the ice cubes are formed correctly and drop into the ice bin.
6. Regularly Maintain Temperature: It’s important to regularly check and maintain the freezer temperature to ensure consistent ice production. Monitor the temperature periodically to ensure it remains within the recommended range. Make adjustments as needed to account for any seasonal temperature changes or variations.
If you have adjusted the freezer temperature within the recommended range and the ice maker still does not drop ice, there could be other factors contributing to the issue. In such cases, it is recommended to consult your LG refrigerator’s manual for further troubleshooting steps or contact customer support for assistance.
Remember to refer to your specific LG refrigerator model’s manual for accurate temperature adjustment instructions, as the control settings may vary. Proper freezer temperature settings are essential to maintain optimal ice maker performance and ensure a continuous supply of ice cubes for your convenience.
Read more: Why Does My Ice Maker Ice Taste Funny
Conclusion
Dealing with an LG ice maker that refuses to drop ice can be a frustrating experience. However, by following the troubleshooting steps outlined in this article, you can diagnose and resolve common issues that may be causing the problem. Let’s recap the key points:
1. Common Causes: Clogged water inlet valve, faulty ice maker assembly, malfunctioning ice maker sensor, low water pressure, and freezer temperature issues are common culprits behind an LG ice maker not dropping ice.
2. Troubleshooting Steps: The troubleshooting steps provided in this article guide you through checking the water supply line, inspecting and cleaning the water inlet valve, examining the ice maker assembly, testing the ice maker sensor, adjusting water pressure, and checking freezer temperature settings.
By addressing these potential issues and performing the necessary maintenance, you’ll be able to get your LG ice maker back to dropping ice efficiently and providing a continuous supply of ice cubes.
Remember to consult your LG refrigerator’s manual for model-specific instructions and recommendations. If you encounter complex issues or are unsure about performing the troubleshooting steps yourself, it is always best to seek professional assistance from a technician familiar with your specific LG refrigerator model.
Regular maintenance and care for your ice maker, including cleaning and monitoring, will help prevent future problems. Additionally, maintaining proper freezer temperature settings, adequate water pressure, and a clean water supply line will contribute to the optimal performance and longevity of your ice maker.
Should you find yourself unable to resolve the issue or if the ice maker continues to experience problems, it is recommended to reach out to LG customer support for further assistance. They have the expertise and knowledge to assist you in resolving any complex issues or arranging for professional repairs if necessary.
By taking proactive steps to troubleshoot and maintain your LG ice maker, you can enjoy a reliable supply of ice cubes for all your refreshing needs.
Resolved your LG ice maker's issue of not dropping ice? Keep that momentum going! Dive into understanding why your ice maker might be frozen up ice maker, ensuring uninterrupted ice supply. For more hands-on solutions, learn how to repair an ice maker in a refrigerator. Don't overlook maintaining other parts of your fridge; knowing how to change the air filter on your LG refrigerator can boost its efficiency and prolong its lifespan. Equip yourself with these essential skills for a smoother kitchen experience.
Frequently Asked Questions about Why Is My LG Ice Maker Not Dropping Ice
Was this page helpful?
At Storables.com, we guarantee accurate and reliable information. Our content, validated by Expert Board Contributors, is crafted following stringent Editorial Policies. We're committed to providing you with well-researched, expert-backed insights for all your informational needs.
0 thoughts on “Why Is My LG Ice Maker Not Dropping Ice”