Articles
Why Will My Ice Maker Not Work
Modified: February 29, 2024
Discover common reasons why your ice maker may not be working in this informative article. Find solutions to troubleshoot the issues and get your ice maker up and running again.
(Many of the links in this article redirect to a specific reviewed product. Your purchase of these products through affiliate links helps to generate commission for Storables.com, at no extra cost. Learn more)
Introduction
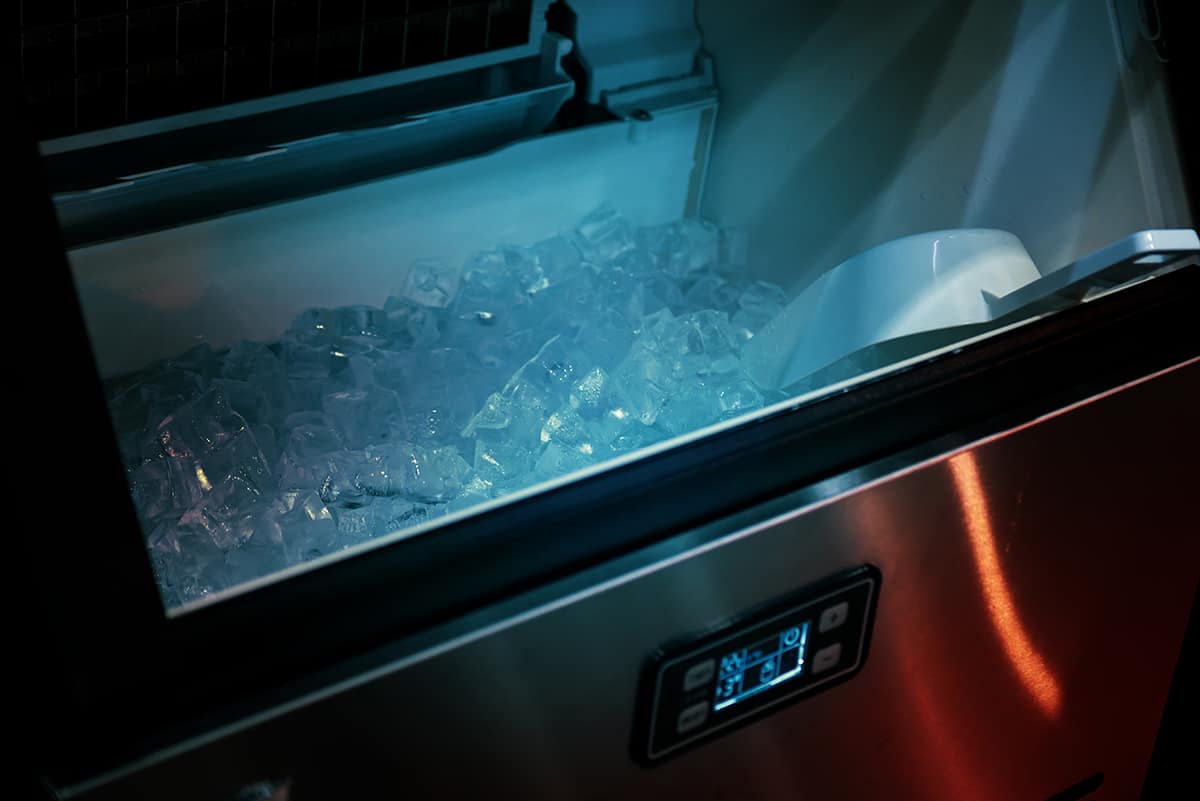
Having an ice maker in your home is a convenient and enjoyable way to have ice readily available for drinks and various other uses. However, encountering issues with your ice maker can be frustrating, especially when it fails to produce ice altogether. If you’re facing the problem of your ice maker not working, there are several troubleshooting steps you can take to identify and resolve the issue.
In this article, we will explore some common reasons why your ice maker may not be functioning as expected. By following these troubleshooting steps, you can potentially save yourself from the hassle of calling a professional or purchasing a new ice maker.
Before diving into the troubleshooting steps, it’s important to note that these suggestions are general in nature and may vary depending on the make and model of your ice maker. Always refer to the manufacturer’s instructions and recommendations for your specific appliance.
Now, let’s begin the troubleshooting process to get your ice maker back up and running.
Key Takeaways:
- Troubleshooting your ice maker can save time and money by addressing common issues like power supply, water flow, and temperature settings. Following manufacturer’s instructions is key for success.
- If troubleshooting fails, seek professional assistance to diagnose and repair complex issues. Prioritize safety and consider warranty coverage when dealing with ice maker repairs.
Read more: Why Is My Portable Ice Maker Not Working
Troubleshooting Steps
When your ice maker refuses to work, follow these steps to identify and resolve the issue:
- Check the Power Supply: The first step is to ensure that your ice maker is properly connected to a power source. Check the power cord for any damage or loose connections. If necessary, plug the ice maker into a different outlet to rule out any power supply issues.
- Verify the Water Supply: A steady water supply is essential for the functioning of your ice maker. Make sure that the water supply valve connected to your ice maker is fully open. Check for any leaks or kinks in the water line that may be obstructing water flow.
- Inspect the Water Inlet Valve: The water inlet valve controls the flow of water into the ice maker. If it is malfunctioning, it can prevent water from entering the ice maker. Inspect the valve for any debris or mineral deposits that may be blocking the water flow. If necessary, clean or replace the valve.
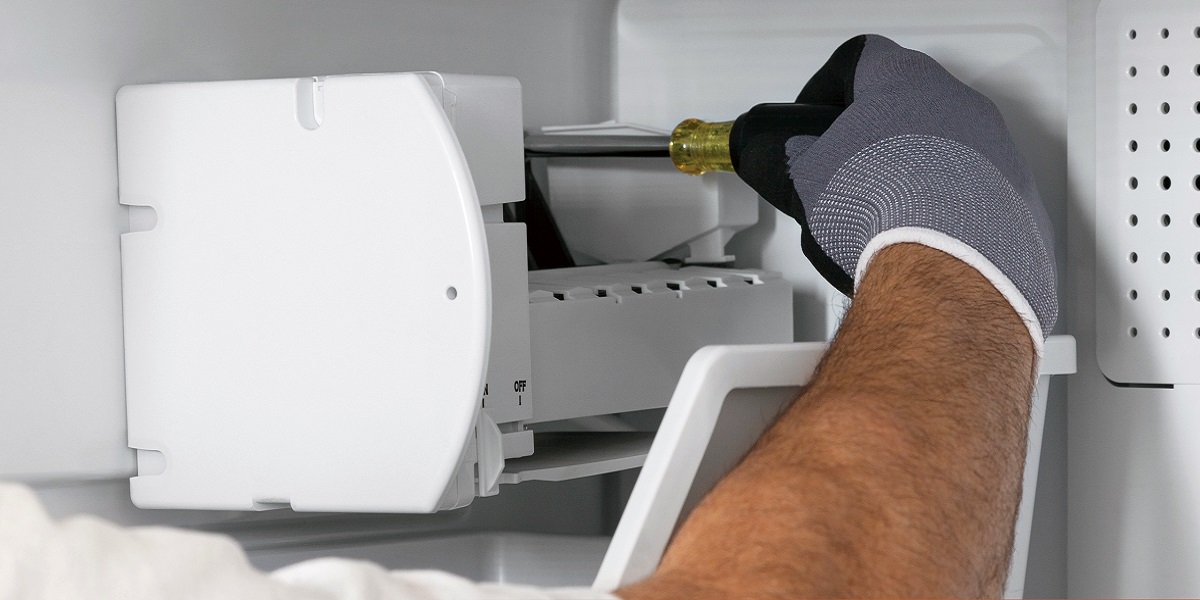
- Examine the Ice Maker Assembly: Carefully inspect the ice maker assembly for any visible signs of damage or obstruction. Ensure that the ice maker arm is in the correct position and moves freely. Clear away any ice buildup or debris that may be blocking the ice maker’s operation.
- Clean or Replace the Filter: If your ice maker has a water filter, it may become clogged over time, hindering water flow. Follow the manufacturer’s recommendations to clean or replace the filter as needed.
- Check the Temperature Settings: Ensure that the temperature inside your freezer is set to the optimal range for ice production. If the temperature is too high, it can affect the functioning of the ice maker. Adjust the temperature settings accordingly.
- Inspect the Ice Mold Thermostat: The ice mold thermostat is responsible for monitoring the temperature of the ice mold. If it is faulty, it may prevent the ice maker from cycling properly. Test the thermostat for continuity using a multimeter and replace it if necessary.
- Test the Ice Maker Control Module: The control module is the brain of your ice maker. If it fails to function correctly, it can impact the operation of the ice maker. Test the control module according to the manufacturer’s instructions and replace it if needed.
- Look for Any Blockages: Check for any blockages in the water line or reservoir that may be preventing water from reaching the ice maker. Clear away any ice or debris that may be obstructing the flow.
- Seek Professional Assistance: If you have tried all the troubleshooting steps and your ice maker is still not working, it may be time to call a professional technician. They will have the expertise and tools to diagnose and repair any complex issues with your ice maker.
By following these troubleshooting steps, you can increase the chances of resolving the issue with your ice maker and get it back to its normal functioning. Remember to always prioritize your safety and consult the manufacturer’s instructions when dealing with appliance repairs.
Check the Power Supply
One of the first things you should do when your ice maker is not working is to check the power supply. Ensure that the ice maker is properly plugged into a functioning power outlet. Examine the power cord for any signs of damage, such as frayed wires or exposed insulation. If you notice any issues with the power cord, it may need to be repaired or replaced.
Next, check the circuit breaker or fuse box to ensure that there is power running to the outlet. Sometimes, a tripped circuit breaker or a blown fuse can disrupt the power supply to the ice maker. If you find that the circuit breaker has tripped or the fuse has blown, reset the breaker or replace the fuse and test the ice maker again.
If the power supply checks out, it’s also important to confirm that the ice maker is properly connected to the power source. Ensure that the plug is securely inserted into the outlet and that there are no loose connections. Sometimes, simply unplugging the ice maker and plugging it back in can establish a more secure connection and resolve any power-related issues.
Additionally, it’s worth trying a different power outlet to rule out any potential issues with the original outlet. Plug the ice maker into a different outlet that you know is functioning properly. If the ice maker starts working when connected to a different outlet, it indicates that there may be an issue with the original outlet.
By checking the power supply and ensuring that the ice maker is properly connected, you can eliminate any power-related issues that may be causing your ice maker to not work. If the problem persists, move on to the next troubleshooting step.
Verify the Water Supply
When your ice maker is not working, it’s important to verify that there is a steady water supply to the appliance. Without proper water flow, the ice maker will not be able to produce ice. Follow these steps to ensure that the water supply is adequate:
1. Start by checking the water supply valve connected to your ice maker. This valve controls the flow of water into the ice maker. Make sure that the valve is fully open. If it’s partially or completely closed, open it to allow water to flow.
2. Inspect the water line that connects the water supply valve to the ice maker. Look for any kinks, bends, or leaks in the line. These can obstruct water flow or cause leakage. If you find any issues, straighten out the line or repair any leaks to restore proper water flow.
3. Sometimes, mineral deposits or debris can accumulate in the water line, resulting in blockages. If you suspect a blockage, you can try flushing the line with water to remove any obstructions. Disconnect the water line from the ice maker and direct the flow of water into a bucket or sink. Turn on the water supply briefly to flush out any debris. Reconnect the water line and test the ice maker again.
4. If your ice maker is equipped with a water filter, check if it needs to be replaced. Over time, filters can become clogged, inhibiting water flow. Refer to the manufacturer’s instructions to determine the recommended interval for filter replacement. Replace the filter if necessary.
By verifying and ensuring a proper water supply to your ice maker, you can eliminate any issues related to water flow that may be causing your ice maker to not work. If the problem persists, move on to the next troubleshooting step.
Inspect the Water Inlet Valve
The water inlet valve plays a crucial role in supplying water to your ice maker. If this valve is malfunctioning, it can prevent water from entering the ice maker, resulting in a lack of ice production. To troubleshoot this issue, follow these steps to inspect the water inlet valve:
1. Locate the water inlet valve, which is typically located at the back of the refrigerator where the water supply line connects. The valve may have a solenoid or two solenoids, depending on the make and model of your ice maker.
2. Inspect the valve for any visible signs of damage or debris. Look for mineral deposits or sediment that may be blocking the valve’s functionality. If you notice any obstructions, clean the valve using a soft brush or a cloth soaked in vinegar to dissolve the deposits. Ensure that the valve is free from any blockages that may impede water flow.
3. Test the water inlet valve for proper functionality. Disconnect the power supply to the ice maker and use a multimeter to test the valve for continuity. Follow the manufacturer’s instructions for testing the specific model of your ice maker. If the water inlet valve fails the continuity test, it may need to be replaced.
4. If you suspect that the water inlet valve is faulty or beyond repair, it’s recommended to replace it with a new one. Contact the manufacturer or consult a professional technician for assistance in finding the appropriate replacement valve for your specific ice maker model.
By inspecting and, if necessary, cleaning or replacing the water inlet valve, you can ensure that the water flow to your ice maker is not hindered. This step can help resolve the issue of your ice maker not working properly. If the problem persists, proceed to the next troubleshooting step.
Read more: Why Is My Whirlpool Ice Maker Not Working
Examine the Ice Maker Assembly
The ice maker assembly is the core component responsible for the actual ice-making process. If there are any issues or obstructions within the assembly, it can prevent the proper functioning of your ice maker. Here’s how you can examine the ice maker assembly:
1. Start by locating the ice maker assembly within your freezer. It is usually found near the top or side wall of the freezer compartment. Consult your ice maker’s manual or the manufacturer’s website for the exact location if you’re unsure.
2. Inspect the ice maker for any visible signs of damage or obstruction. Look for any ice buildup, debris, or foreign objects that may be blocking the ice-making process. Use a soft cloth or sponge to clean the interior of the ice maker assembly, being careful not to damage any delicate components.
3. Make sure that the ice maker arm is in the correct position. The arm should be in the down position to activate the ice-making cycle. If the arm is lifted or stuck in an upright position, gently lower it to initiate the ice-making process.
4. Check that the ice maker assembly is level. If it is not properly aligned, it may not function correctly. Use a level tool to ensure that the assembly is balanced and adjust as necessary.
5. If you notice any broken or damaged parts within the ice maker assembly, they may need to be replaced. Contact the manufacturer or a professional technician to obtain the appropriate replacement parts for your specific ice maker model.
By examining and cleaning the ice maker assembly, you can eliminate any obstructions or damages that may be causing your ice maker to malfunction. This step can help restore proper ice production. If the problem persists, move on to the next troubleshooting step.
Clean or Replace the Filter
If your ice maker has a water filter, it is essential to regularly clean or replace it to ensure optimal performance. Over time, filters can become clogged with impurities, hindering water flow and affecting ice production. Follow these steps to clean or replace the filter:
1. Refer to the manufacturer’s instructions to locate the water filter within your ice maker. It is typically found in the water line leading to the ice maker or inside the refrigerator compartment.
2. If it is a reusable filter, clean it according to the instructions provided by the manufacturer. This may involve rinsing it under running water or soaking it in a cleaning solution to remove any buildup or contaminants. Be sure to handle the filter with care and avoid using abrasive materials that could damage it.
3. If your ice maker uses a disposable filter, check the recommended lifespan specified by the manufacturer. Replace the filter if it has exceeded its recommended usage period or if it appears clogged or discolored.
4. To install a new filter, follow the manufacturer’s instructions. This may involve removing the old filter and inserting the new one, ensuring a secure fit in the designated slot. Be sure to align the filter correctly and tighten any locking mechanism if required.
5. Once the new filter is installed or the reusable filter is cleaned, run water through the system to purge any air or residue. This will help ensure that clean and filtered water is supplied to the ice maker.
Regularly cleaning or replacing the water filter can help maintain a healthy and efficient ice maker. It ensures that the water entering the ice maker is free from impurities that could affect the taste and quality of the ice. If the filter cleaning or replacement does not resolve the issue, proceed to the next troubleshooting step.
Check to make sure the water supply to the ice maker is turned on and the water filter is not clogged. Also, ensure the ice maker arm is in the down position. If these are all in order, it may be a sign of a faulty ice maker and may need to be replaced.
Check the Temperature Settings
The temperature settings of your freezer play a crucial role in the ice-making process. If the temperature is too high, it can hinder the proper functioning of your ice maker. Follow these steps to check and adjust the temperature settings:
1. Refer to the user manual or the manufacturer’s instructions to locate the temperature control settings for your freezer. It is usually a knob, dial, or digital display located on the front or inside of the freezer compartment.
2. Verify that the temperature settings are within the recommended range for ice production. Generally, the freezer temperature should be set between 0 and 5 degrees Fahrenheit (-18 to -15 degrees Celsius).
3. If the temperature is set too high, adjust it to a lower setting. This will ensure that the freezer maintains a colder temperature, allowing the ice maker to function optimally. Consult the manual or manufacturer’s guidelines for the recommended temperature range specific to your ice maker model.
4. Give the freezer some time to reach the new temperature setting. It may take a few hours for the temperature to stabilize and for the impact on the ice maker to be noticeable. Avoid opening the freezer frequently during this period to maintain a consistent temperature.
5. Monitor the ice maker over the next 24 hours to see if the adjustment in temperature settings has improved its performance. Check for any signs of ice production and ensure that the ice cubes are firm and properly formed.
By checking and adjusting the temperature settings of your freezer, you can ensure that the environment is conducive to ice production. This simple step can make a significant difference in the functionality of your ice maker. If the problem persists, move on to the next troubleshooting step.
Inspect the Ice Mold Thermostat
The ice mold thermostat plays a vital role in regulating the temperature inside the ice maker. If this thermostat is faulty or not functioning correctly, it can disrupt the ice-making process. To troubleshoot this issue, follow these steps to inspect the ice mold thermostat:
1. Locate the ice mold thermostat within your ice maker. It is typically located near the ice mold assembly or attached to the evaporator plate. Refer to the manufacturer’s instructions or the ice maker’s manual for its exact location.
2. Carefully inspect the ice mold thermostat for any signs of damage or wear. Look for any visible cracks, frayed wires, or loose connections. If you notice any physical defects, it may indicate a faulty thermostat that needs to be replaced.
3. Using a multimeter, test the continuity of the ice mold thermostat to determine if it is functioning correctly. Follow the manufacturer’s instructions or refer to the ice maker’s manual for the specific procedure to test the thermostat. If the multimeter shows no continuity, it indicates that the thermostat is faulty and should be replaced.
4. If the ice mold thermostat is indeed faulty or damaged, contact the manufacturer or a professional technician to obtain a compatible replacement part. Follow the manufacturer’s guidelines or consult a professional for assistance in properly installing the new thermostat.
5. After replacing the ice mold thermostat, monitor the ice maker’s performance over the next 24 hours. Check for proper ice formation and ensure that the ice cubes are solid and fully formed. If the ice maker is now functioning correctly, the issue may have been resolved. However, if the problem persists, proceed to the next troubleshooting step.
By inspecting and, if necessary, replacing the ice mold thermostat, you can ensure that the ice maker is maintaining the correct temperature for ice production. This step can help resolve issues related to inconsistent or improper ice formation. If the problem continues, move on to the next troubleshooting step.
Read more: Why Is My Ge Ice Maker Not Working
Test the Ice Maker Control Module
The ice maker control module is responsible for controlling the various functions of the ice maker, such as initiating the ice-making cycle and signaling the fill valve to dispense water. If the control module is faulty or malfunctioning, it can disrupt the ice-making process. To test the ice maker control module, follow these steps:
1. Locate the ice maker control module within your ice maker. It is usually housed in a control box or mounted near the ice maker assembly. Consult the manufacturer’s instructions or the ice maker’s manual for its exact location.
2. Disconnect the power supply to the ice maker before proceeding with the testing process. This ensures your safety and prevents any accidental electrical shock.
3. Remove the control module from its position, following the instructions provided by the manufacturer. Gently disconnect any wire harnesses or connections to remove the module for testing.
4. Using a multimeter, set the tool to the appropriate setting for continuity testing. Follow the manufacturer’s instructions or the ice maker’s manual for the specific testing procedure and the expected readings for the control module.
5. Carefully touch the multimeter probes to the appropriate terminals or wires on the control module. Compare the readings displayed on the multimeter to the expected readings. If there is no continuity or the readings deviate significantly from the expected values, it indicates a faulty control module that may need to be replaced.
6. If the control module is determined to be faulty, contact the manufacturer or a professional technician to obtain a compatible replacement module. Install the new control module following the manufacturer’s guidelines or consult a technician for assistance.
7. Once the new control module is installed, reconnect the power supply to the ice maker and observe its performance. Monitor the ice maker over the next 24 hours to see if the replacement control module has resolved the issue and restored the proper ice-making functionality. If the problem persists, proceed to the next troubleshooting step.
By testing and, if necessary, replacing the ice maker control module, you can address any issues related to the control of the ice maker functions. This step can help restore the proper operation of the ice maker. If the problem continues, proceed to the next troubleshooting step.
Look for Any Blockages
Blockages within your ice maker can impede the proper flow of water, affecting the ice-making process. It’s important to check for any blockages and remove them to ensure that water can freely enter the ice maker. Follow these steps to look for and address any blockages:
1. Start by inspecting the water line leading into the ice maker. Look for any kinks or bends in the line that may be obstructing water flow. Straighten out any kinks or bends to restore proper water flow to the ice maker.
2. If the water line appears to be clear, move on to inspecting the water inlet tube. This is the tube that carries water from the water line to the ice maker assembly. Look for any ice buildup or debris that may be blocking the tube. If you notice any blockages, use a soft cloth or sponge to carefully remove the ice or debris.
3. Next, check the ice mold itself for any ice buildup or obstructions. Sometimes, ice can accumulate in the mold and prevent newly formed ice cubes from being released. Gently remove any excess ice using a plastic utensil or your fingers. Be careful not to damage the mold or any other components in the process.
4. Inspect the ice chute or dispenser area for any clogs or obstructions that may prevent the ice from dispensing properly. Clear away any ice or debris from the chute to ensure smooth and uninterrupted ice dispensing.
5. Lastly, check the drainage system of the ice maker. If there is a drain line or drain pan, ensure that they are not clogged with ice or debris. Clear any blockages to prevent water from backing up and affecting the ice-making process.
By looking for and removing any blockages within the ice maker, you can restore proper water flow and improve the functionality of the ice maker. Once the blockages are cleared, monitor the ice maker’s performance over the next 24 hours to ensure that the issue has been resolved. If the problem persists, proceed to the final troubleshooting step.
Seek Professional Assistance
If you have followed all of the previous troubleshooting steps and your ice maker is still not working properly, it may be time to seek professional assistance. A professional technician will have the expertise and experience to diagnose and repair any complex issues with your ice maker.
Here are some reasons why you should consider seeking professional assistance:
1. Complex Repairs: Ice makers can be intricate appliances with various components and mechanisms. If the troubleshooting steps have not resolved the issue, it may indicate a more significant problem that requires professional attention. A technician will have the knowledge and specialized tools to identify and fix the underlying issue.
2. Warranty Coverage: If your ice maker is still under warranty, it’s important to contact the manufacturer or an authorized service provider. Attempting DIY repairs may void the warranty, leaving you responsible for the cost of repairs or replacements. A professional technician can work within the warranty terms and ensure that the necessary repairs are covered.
3. Safety Considerations: Repairing an ice maker can involve working with electrical components and delicate parts. If you do not have the appropriate knowledge and expertise, there is a risk of injury or further damage to the appliance. Professional technicians are trained in handling these repairs safely and efficiently.
4. Time and Convenience: Trying to troubleshoot and repair an ice maker can be time-consuming and frustrating, especially if you do not have prior experience. By seeking professional assistance, you can save time and avoid the hassle of potentially ineffective DIY repairs.
To find a reputable appliance repair service, consider asking for recommendations from friends, family, or neighbors. You can also check online directories or review websites to find trusted technicians in your area. Be sure to inquire about their experience in repairing ice makers and inquire about any certifications they may hold.
By seeking professional assistance, you can ensure that your ice maker is properly diagnosed and repaired by a qualified technician. They will be able to provide the necessary expertise to get your ice maker back up and running as quickly and efficiently as possible.
Remember, always prioritize your safety and consult the manufacturer’s instructions or guidelines when dealing with appliance repairs.
Conclusion
A dysfunctional ice maker can be a source of frustration, but with the proper troubleshooting steps, you can resolve many common issues. Throughout this article, we’ve explored various troubleshooting steps to help get your ice maker back up and running. From checking the power supply to inspecting the ice mold thermostat, each step plays a crucial role in identifying and resolving the underlying issue.
By following these troubleshooting steps, you can save yourself from the hassle of calling a professional or purchasing a new ice maker. However, it’s essential to remember that these steps are general in nature and may vary depending on the make and model of your ice maker. Always refer to the manufacturer’s instructions and recommendations specific to your appliance.
If you’ve exhausted all the troubleshooting steps and your ice maker is still not functioning properly, it may be time to seek professional assistance. A skilled technician can diagnose complex issues and provide the necessary repairs, ensuring the long-term functionality of your ice maker.
Remember to prioritize your safety throughout the troubleshooting process. Disconnect the power supply when necessary, and always exercise caution when handling electrical components or delicate parts.
In conclusion, troubleshooting your ice maker requires patience, attention to detail, and a systematic approach. By following the steps outlined in this article, you can increase your chances of resolving the issue and enjoying the convenience of a fully functional ice maker once again.
So roll up your sleeves, get ready to troubleshoot, and soon enough, you’ll be enjoying a refreshing glass of ice-cold goodness from your perfectly operational ice maker!
Frequently Asked Questions about Why Will My Ice Maker Not Work
Was this page helpful?
At Storables.com, we guarantee accurate and reliable information. Our content, validated by Expert Board Contributors, is crafted following stringent Editorial Policies. We're committed to providing you with well-researched, expert-backed insights for all your informational needs.


0 thoughts on “Why Will My Ice Maker Not Work”