Articles
How To Fix My Ice Maker
Modified: February 26, 2024
Learn how to fix your ice maker with these informative articles. Our expert tips and step-by-step guides will help you troubleshoot and repair common ice maker problems.
(Many of the links in this article redirect to a specific reviewed product. Your purchase of these products through affiliate links helps to generate commission for Storables.com, at no extra cost. Learn more)
Introduction
An ice maker is a convenient appliance that ensures a constant supply of ice for your beverages and food preservation needs. However, like any other appliance, it can encounter issues and stop functioning properly over time. When your ice maker stops working, it can be frustrating, especially during those hot summer months when a refreshing glass of cold water or a cool beverage is a must-have.
Thankfully, many common ice maker problems can be resolved with a little bit of troubleshooting. In this article, we will guide you through some easy steps to help you diagnose and fix your ice maker issues, allowing you to enjoy a steady supply of ice once again.
Before we begin troubleshooting, it’s important to note that ice makers can vary in design and functionality, so the specific steps may differ for different models. Always refer to your appliance’s user manual for model-specific instructions and safety precautions.
Now, let’s dive into some useful tips and techniques for fixing your ice maker and getting it back to its optimal performance.
Key Takeaways:
- Troubleshooting and basic maintenance can resolve common ice maker issues, such as low ice production and strange odors. Regular cleaning and checking the water supply are crucial for optimal performance.
- If troubleshooting fails, calling a professional technician can save time and ensure effective repairs. Safety, warranty coverage, and preventive maintenance are key reasons to seek professional assistance.
Read more: Why Is My Ice Melting In My Ice Maker
Identifying the Issue
When your ice maker is not producing ice or is producing insufficient ice, the first step is to identify the underlying issue. Here are some common problems you may encounter and how to diagnose them:
1. No Ice Production:
If your ice maker is not producing any ice at all, there are a few potential causes to consider:
- Check the power supply: Ensure that the ice maker is properly plugged in and receiving power.
- Inspect the control arm: The control arm, also known as the ice maker feeler arm, should be in the down position. If it is stuck in the up position, the ice maker will not produce ice.
- Examine the water supply: Make sure that the water supply valve is fully open and that there are no kinks or clogs in the water line.
2. Insufficient Ice Production:
If your ice maker is producing ice, but not enough to meet your needs, consider the following possibilities:
- Check the ice cube size setting: Some ice makers allow you to adjust the size of the ice cubes. Ensure that it is set to the desired size.
- Clean the condenser coils: Dust and debris can accumulate on the condenser coils, reducing their efficiency. Clean them using a soft brush or vacuum cleaner to improve ice production.
- Inspect the water filter: If your ice maker has a water filter, it may be clogged and restricting water flow. Replace the filter if necessary.
3. Ice with Strange Odor or Taste:
If your ice has an unpleasant odor or taste, the following factors could be responsible:
- Cleanliness of the ice maker: Regularly clean the interior of the ice maker to remove any buildup or residue that may affect the taste or smell of the ice.
- Water quality: If your water has a strong odor or taste, it can transfer to the ice. Consider using filtered water or installing a water filtration system.
By carefully examining your ice maker’s performance and addressing these potential issues, you can narrow down the problem and move on to the appropriate solutions. In the next section, we will explore some common ice maker problems and their corresponding troubleshooting steps.
Read more: Why Is My Ice Maker Not Dropping Ice
Common Problems and Solutions
Ice makers can experience a range of issues that can hinder their performance. Here are some common problems you may encounter and their respective solutions:
1. Low Ice Production:
If your ice maker is producing fewer ice cubes than usual, try the following troubleshooting steps:
- Check the freezer temperature: Ensure that the freezer temperature is set between 0 and 5 degrees Fahrenheit (-18 to -15 degrees Celsius). If it’s too warm, it can affect ice production.
- Inspect the water supply line: Make sure that the water supply line is not frozen or obstructed. Clear any ice or debris that may be blocking the water flow.
- Clean the ice maker and water inlet valve: Remove any scale or mineral deposits from the ice maker and water inlet valve using a cleaning solution recommended by the manufacturer.
2. Ice Maker Leaking:
If you notice water leaking from your ice maker, consider the following troubleshooting steps:
- Check the water inlet valve: Inspect the water inlet valve for leaks or malfunctions. If it’s damaged, it may need to be replaced.
- Inspect the water supply line: Ensure that the water supply line is properly connected and tightened. Look for any signs of damage or leaks.
- Examine the ice maker assembly: Check for cracks or damage in the ice maker assembly. If any parts are broken, they may need to be replaced.
3. Ice Maker Freezing Over:
If your ice maker is freezing over or producing clumped ice cubes, try the following solutions:
- Adjust the freezer temperature: If the freezer is set too cold, it can cause the ice maker to freeze over. Increase the temperature slightly and monitor the ice production.
- Clean the ice maker components: Remove any ice buildup or debris from the ice maker, including the ice bin, ice mold, and ice chute. Use warm water and a mild detergent if necessary.
- Check the ice mold thermostat: If the ice mold thermostat is not functioning properly, the ice maker may overproduce or produce clumped ice. Test the thermostat and replace it if needed.
Remember to always follow safety precautions and refer to your ice maker’s user manual for specific instructions and tips. By troubleshooting these common problems, you can often resolve ice maker issues and restore its functionality.
Read more: Why Is My Ice Maker Making Clumps Of Ice
Cleaning the Ice Maker
Regularly cleaning your ice maker is essential for maintaining its performance and ensuring the production of clean and fresh-tasting ice. Here are the steps to clean your ice maker:
1. Gather the necessary materials:
- Mild detergent
- Warm water
- Soft cloth or sponge
- Vinegar (optional)
2. Turn off and unplug the ice maker:
Before cleaning, ensure that the ice maker is turned off and unplugged from the power source for safety purposes.
3. Remove ice and accessories:
Empty the ice bin and remove any ice cubes or frozen debris. If the ice maker has any removable parts, such as the ice bin or ice mold, take them out as well.
Read more: How To Fix A Kitchenaid Ice Maker
4. Clean the ice bin and accessories:
Wash the ice bin and any removable parts with warm water and a mild detergent. Use a soft cloth or sponge to scrub away any residue or buildup. Rinse thoroughly and allow the parts to air dry.
5. Clean the interior of the ice maker:
Dampen a soft cloth or sponge with warm water and mild detergent. Gently wipe the interior walls, ice mold, ice chute, and other surfaces inside the ice maker. Pay special attention to removing any deposits or stains. Rinse the cloth or sponge thoroughly and wipe down the surfaces again to remove any soap residue.
6. Optional: Use vinegar for deep cleaning:
If your ice maker has stubborn mineral deposits or scale buildup, you can use a mixture of equal parts water and vinegar as a cleaning solution. Apply the solution to the affected areas and allow it to sit for a few minutes. Use a soft cloth or sponge to scrub away the buildup, then rinse with plain water and wipe dry.
7. Reassemble and restart the ice maker:
Once all the components are fully dry, reassemble the ice maker, including the ice bin and any other removable parts. Plug the ice maker back in and turn it on. Allow it some time to start producing fresh ice.
Regularly cleaning your ice maker, ideally every 3-6 months, will help prevent clogs, odors, and subpar ice production. By following these simple steps, you can keep your ice maker in top condition and enjoy clean and refreshing ice whenever you need it.
Read more: Why Is My Samsung Ice Maker Not Making Ice
Checking the Water Supply
A properly functioning water supply is crucial for your ice maker to produce ice. If your ice maker is not getting water or the water supply is restricted, it can impact ice production. Here are the steps to check the water supply:
1. Ensure the water supply valve is open:
Check that the water supply valve, which connects the ice maker to the main water line, is fully open. This valve is typically located behind the refrigerator or under the sink. Turn the valve counterclockwise to open it fully. If the valve was closed or partially closed, opening it should restore water flow to the ice maker.
2. Inspect the water supply line:
Inspect the water supply line for any kinks, bends, or obstructions. These can restrict water flow to the ice maker. Straighten out any kinks and ensure the line is free from obstruction. If you notice any damage or leaks in the water supply line, it may need to be replaced.
3. Check for frozen water line:
In colder climates or if the refrigerator is located in an unheated area, the water supply line might freeze. This can prevent water from reaching the ice maker. Inspect the water supply line for signs of freezing, such as ice buildup or a solid blockage. If you find a frozen line, carefully thaw it using a hairdryer on the low heat setting or by placing a warm towel around the frozen area. Do not use any sharp objects to remove the ice as this can cause damage to the water line.
Read more: Why Is My LG Ice Maker Not Dropping Ice
4. Verify water pressure:
Check the water pressure to ensure it meets the requirements specified by the ice maker manufacturer. Low water pressure can impact ice production. Attach a water pressure gauge to the water supply line and test the pressure. If the pressure is below the recommended range, you may need to increase it by adjusting the main water supply valve or contacting a professional plumber.
By carefully checking the water supply and addressing any issues, you can ensure that your ice maker is receiving the proper amount of water for efficient ice production. If the water supply appears to be functioning correctly and the ice maker is still not producing ice, it may be necessary to inspect the ice maker components further or contact a professional technician for assistance.
Inspecting the Ice Maker Components
When your ice maker is not working correctly, it’s essential to inspect the various components to identify any potential issues. Here are the key components to inspect:
1. Control Arm:
The control arm, also known as the ice maker feeler arm, is responsible for sensing the ice level in the ice bin. Make sure the control arm is in the down position. If it is stuck in the up position, it will prevent the ice maker from producing ice. Gently move the arm down to see if it resumes normal operation.
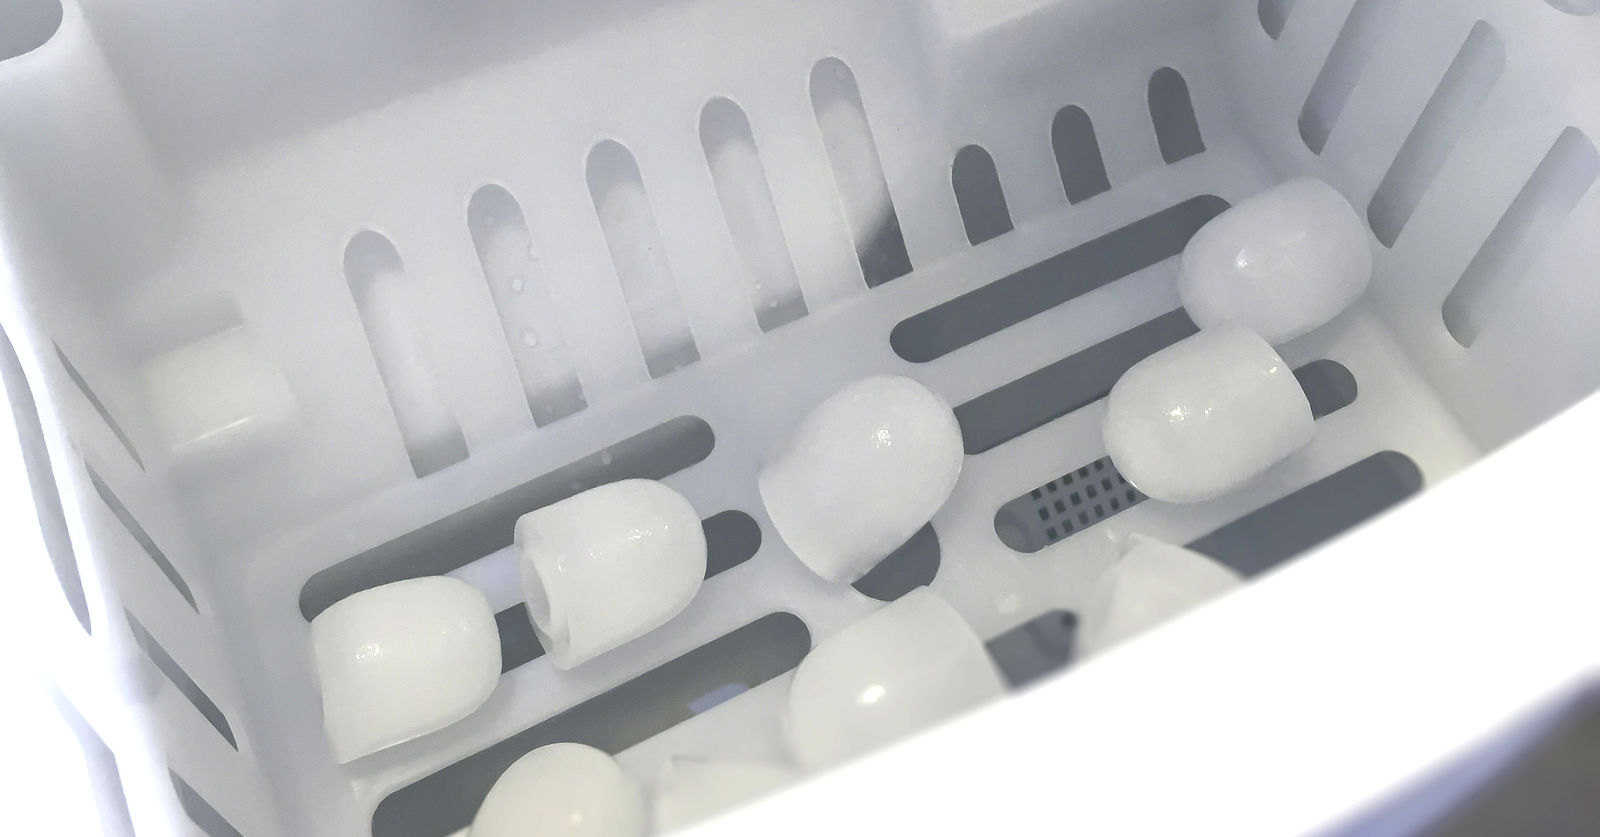
2. Ice Mold and Water Fill Tube:
The ice mold is where the water freezes to form ice cubes, and the water fill tube directs water into the mold. Inspect both the ice mold and water fill tube for any clogs or obstructions. Remove any debris, ice buildup, or other blockages that may be preventing the ice maker from working properly. Use a soft brush or warm water to clean these components if necessary.
Read more: Why Is My Samsung Ice Maker Not Dropping Ice
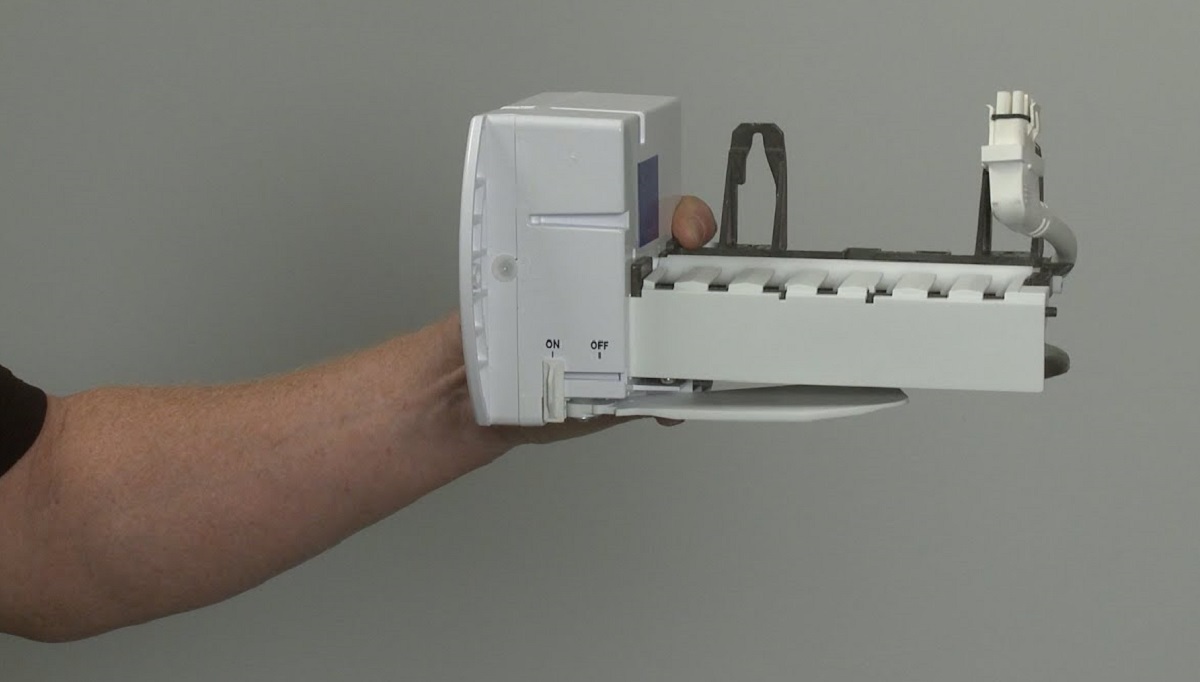
3. Ice Ejector Mechanism:
The ice ejector mechanism includes the ice ejector fingers that push the ice cubes out of the mold and into the ice bin. Check for any obstructions or ice cubes that may be stuck, preventing the mechanism from operating smoothly. Gently remove any obstructions and ensure that the ice ejector fingers move freely without any hindrance.
4. Water Inlet Valve:
The water inlet valve controls the flow of water into the ice maker. Inspect the valve for leaks or malfunctions. If you notice any signs of damage or if the valve is not opening or closing properly, it may need to be replaced. Refer to the manufacturer’s instructions or consult a professional technician for assistance.
5. Electrical Connections:
Ensure that all electrical connections are secure and properly plugged in. Loose connections can disrupt the ice maker’s functionality. Check the wiring harness and connections to make sure they are intact and properly connected.
6. Condenser Coils:
The condenser coils are responsible for dissipating heat from the ice maker. Over time, dust and debris can accumulate on the coils, reducing their efficiency. Inspect the condenser coils and clean them using a soft brush or vacuum cleaner to improve the ice maker’s performance.
By thoroughly inspecting these key components and addressing any issues or obstructions, you can often restore the proper operation of your ice maker. If you’ve inspected all the components and the ice maker is still not functioning correctly, you may need to consider resetting the device or seeking assistance from a professional technician.
Read more: How To Fix Ice Maker Kenmore
Resetting the Ice Maker
If your ice maker is experiencing issues such as not producing ice or not functioning properly, performing a reset can often resolve the problem. Here are the steps to reset your ice maker:
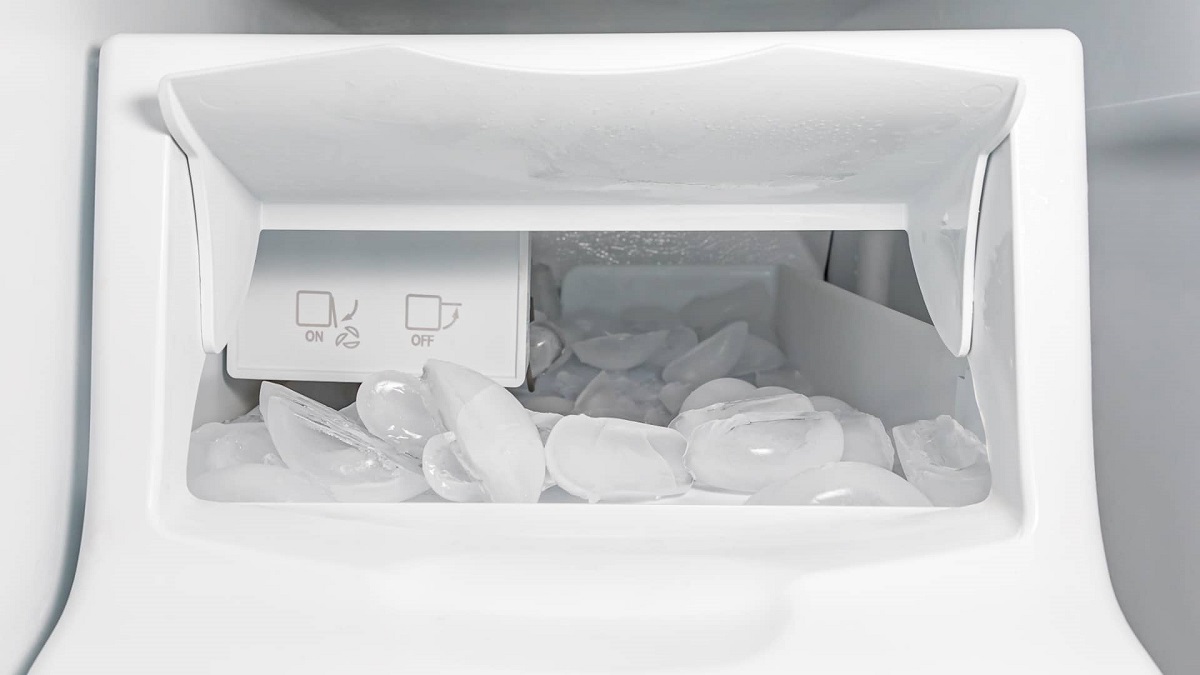
1. Locate the reset button or switch:
Check the user manual or the manufacturer’s website to find the location of the reset button or switch on your specific ice maker model. The reset button is typically found inside the ice maker or on the control panel.
2. Turn off the ice maker:
Before resetting, it’s important to turn off the ice maker to ensure a clean restart. Locate the power switch or control knob and switch it to the “off” position. Unplug the ice maker from the power source as an added precaution.
3. Reset the ice maker:
Press and hold the reset button for about 10-15 seconds, or follow the instructions provided by the manufacturer. This will reset the ice maker’s internal settings and clear any error codes or malfunctions. Keep holding the reset button until you see or hear a response from the ice maker, such as a beep or indicator light.
Read more: Why Is My Igloo Ice Maker Not Making Ice
4. Turn on the ice maker:
Once you have completed the reset process, plug the ice maker back into the power source and turn it on. Wait for a few minutes to allow the ice maker to initialize and start its ice-making cycle. It may take some time for the ice production to resume, so be patient.
5. Monitor the ice maker:
Observe the ice maker’s operation and check if it starts producing ice again. Be sure to follow the manufacturer’s recommended guidelines for ice production, such as allowing sufficient time for the ice bin to fill up. If the ice maker still does not produce ice or if the problem persists, continue troubleshooting or consider contacting a professional technician for further assistance.
Resetting your ice maker can often resolve minor issues and restore its proper functionality. However, if the problem persists even after a reset, it may indicate a more significant issue that requires professional attention.
Calling a Professional Technician
If you’ve tried troubleshooting your ice maker and the issues persist, it may be time to call a professional technician. Here are some reasons why you might consider seeking professional assistance:
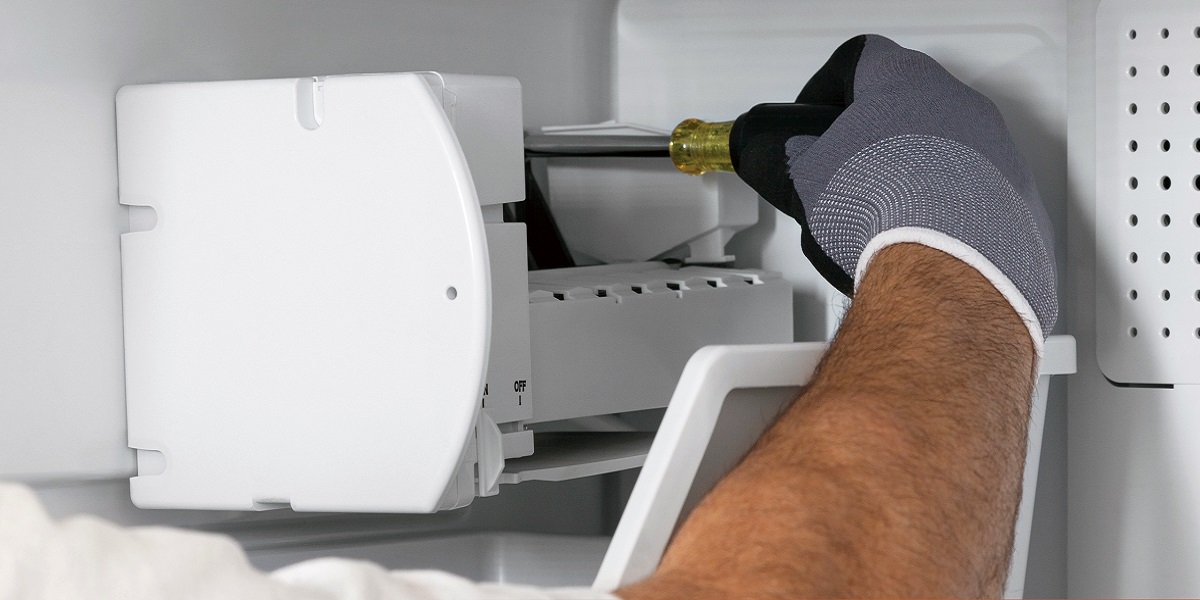
1. Complex Repairs:
If you’re unsure about how to disassemble or work with the internal components of your ice maker, it’s best to leave it to a professional. Ice makers can be intricate appliances, and attempting complex repairs without the necessary knowledge and expertise can potentially cause further damage.
Read more: Why Is My Ice Maker Only Making Crushed Ice
2. Warranty Coverage:
If your ice maker is still within the warranty period, it’s advisable to contact the manufacturer or authorized service center to perform repairs. Attempting to fix the ice maker yourself or seeking help from an unauthorized technician can void the warranty coverage and result in additional expenses.
3. Safety Concerns:
Working with electrical components and water connections can present safety risks if not handled correctly. Professional technicians are trained to follow safety protocols, reducing the likelihood of accidents or injuries during the repair process.
4. Specialized Tools and Parts:
Professional technicians have access to specialized tools and genuine replacement parts that may be required to fix specific issues. They can accurately diagnose the problem and ensure the proper parts are installed in your ice maker for optimal performance.
5. Time and Convenience:
Hiring a professional technician saves you time and effort. They have the knowledge and experience to quickly troubleshoot and repair your ice maker, minimizing downtime and inconvenience caused by a malfunctioning appliance. You can focus on other tasks while leaving the repair work in capable hands.
Read more: Why Does My Ice Maker Ice Taste Funny
6. Preventive Maintenance:
A professional technician can not only fix immediate issues but also perform regular maintenance on your ice maker. Routine maintenance can help prolong the life of your appliance, improve efficiency, and prevent future problems.
When contacting a professional technician, provide them with detailed information about the problems you’re experiencing with your ice maker. This will help them assess the situation and come prepared with the necessary tools and expertise. Confirm their credentials, including licenses and certifications, and inquire about any potential service charges or warranties they offer.
By seeking professional assistance, you can ensure that your ice maker is repaired effectively and efficiently, restoring it to optimal performance and prolonging its lifespan.
Conclusion
An ice maker is a convenient appliance that provides a steady supply of ice for your beverages and food preservation needs. When it encounters issues and stops functioning properly, it can be frustrating. However, with some troubleshooting and basic maintenance, many common ice maker problems can be resolved.
In this article, we covered various troubleshooting steps to help you fix your ice maker. We discussed how to identify the issue, common problems and their solutions, the importance of cleaning the ice maker, checking the water supply, inspecting the ice maker components, resetting the ice maker, and when to call a professional technician.
Remember to refer to your ice maker’s user manual for model-specific instructions and safety precautions. Always prioritize safety when working with electrical components or water connections. If you’re unsure or uncomfortable with any aspect of ice maker repair, it’s best to seek the assistance of a professional technician.
Maintaining a clean and properly functioning ice maker can ensure a constant supply of ice for your enjoyment. Regular cleaning, checking the water supply, and inspecting the various components are crucial for optimal performance. Additionally, performing a reset can often resolve minor issues and restore the ice maker’s functionality.
If you encounter persistent issues even after troubleshooting, it may be necessary to contact a professional technician. They have the expertise, specialized tools, and access to genuine parts to effectively repair your ice maker. Their assistance can save you time, ensure effective repairs, and help prevent future problems.
By following the tips and techniques discussed in this article, you can troubleshoot and fix common ice maker problems, allowing you to enjoy a reliable and refreshing supply of ice whenever you need it.
Frequently Asked Questions about How To Fix My Ice Maker
Was this page helpful?
At Storables.com, we guarantee accurate and reliable information. Our content, validated by Expert Board Contributors, is crafted following stringent Editorial Policies. We're committed to providing you with well-researched, expert-backed insights for all your informational needs.

0 thoughts on “How To Fix My Ice Maker”