Home>Construction & Tools>Building Materials>How To Attach Downspout To Brick
Building Materials
How To Attach Downspout To Brick
Modified: August 28, 2024
Learn how to attach a downspout to brick with the right building materials. Follow our step-by-step guide for a secure and professional installation.
(Many of the links in this article redirect to a specific reviewed product. Your purchase of these products through affiliate links helps to generate commission for Storables.com, at no extra cost. Learn more)
Introduction
Welcome to our comprehensive guide on how to attach a downspout to brick. Downspouts are essential components of any building’s drainage system, as they direct rainwater away from the structure, preventing water damage and erosion. Attaching a downspout to a brick surface requires careful planning, precise measurements, and the right tools and materials. In this guide, we will walk you through the step-by-step process of securely fastening a downspout to a brick wall, ensuring a professional and durable installation.
Whether you are a seasoned DIY enthusiast or a homeowner looking to tackle this project for the first time, our detailed instructions and expert tips will equip you with the knowledge and confidence to complete the task successfully. By following our guidelines, you can enhance the functionality and aesthetic appeal of your property while effectively managing rainwater runoff.
Key Takeaways:
- Securely attaching a downspout to a brick wall requires precise measurements, proper tools, and careful planning. By following the step-by-step process, you can enhance your property’s drainage system and curb appeal.
- Prioritize safety, accurate markings, and precise drilling when attaching a downspout to brick. This ensures a durable and visually appealing installation, effectively managing rainwater runoff and protecting your property.
Read more: How To Attach A Downspout To A Brick House
Tools and Materials Needed
Before embarking on the process of attaching a downspout to a brick surface, it’s essential to gather the necessary tools and materials. Here’s a list of items you will need for this project:
Tools:
- Power drill
- Masonry drill bit
- Level
- Tape measure
- Pencil or marker
- Screwdriver or impact driver
- Caulking gun
- Adjustable wrench
- Hacksaw or pipe cutter (if resizing the downspout)
- Safety goggles
- Work gloves
Materials:
- Downspout brackets or straps
- Screws suitable for masonry (such as masonry screws or anchors)
- Silicone caulk or exterior-grade construction adhesive
- Downspout elbow (if redirecting the downspout along the wall)
- Downspout extension (if needed)
- Downspout outlet
- Downspout (pre-cut or in a length that suits your installation)
- Safety glasses
By ensuring that you have all the necessary tools and materials on hand, you can streamline the installation process and minimize interruptions once you begin working on attaching the downspout to the brick wall.
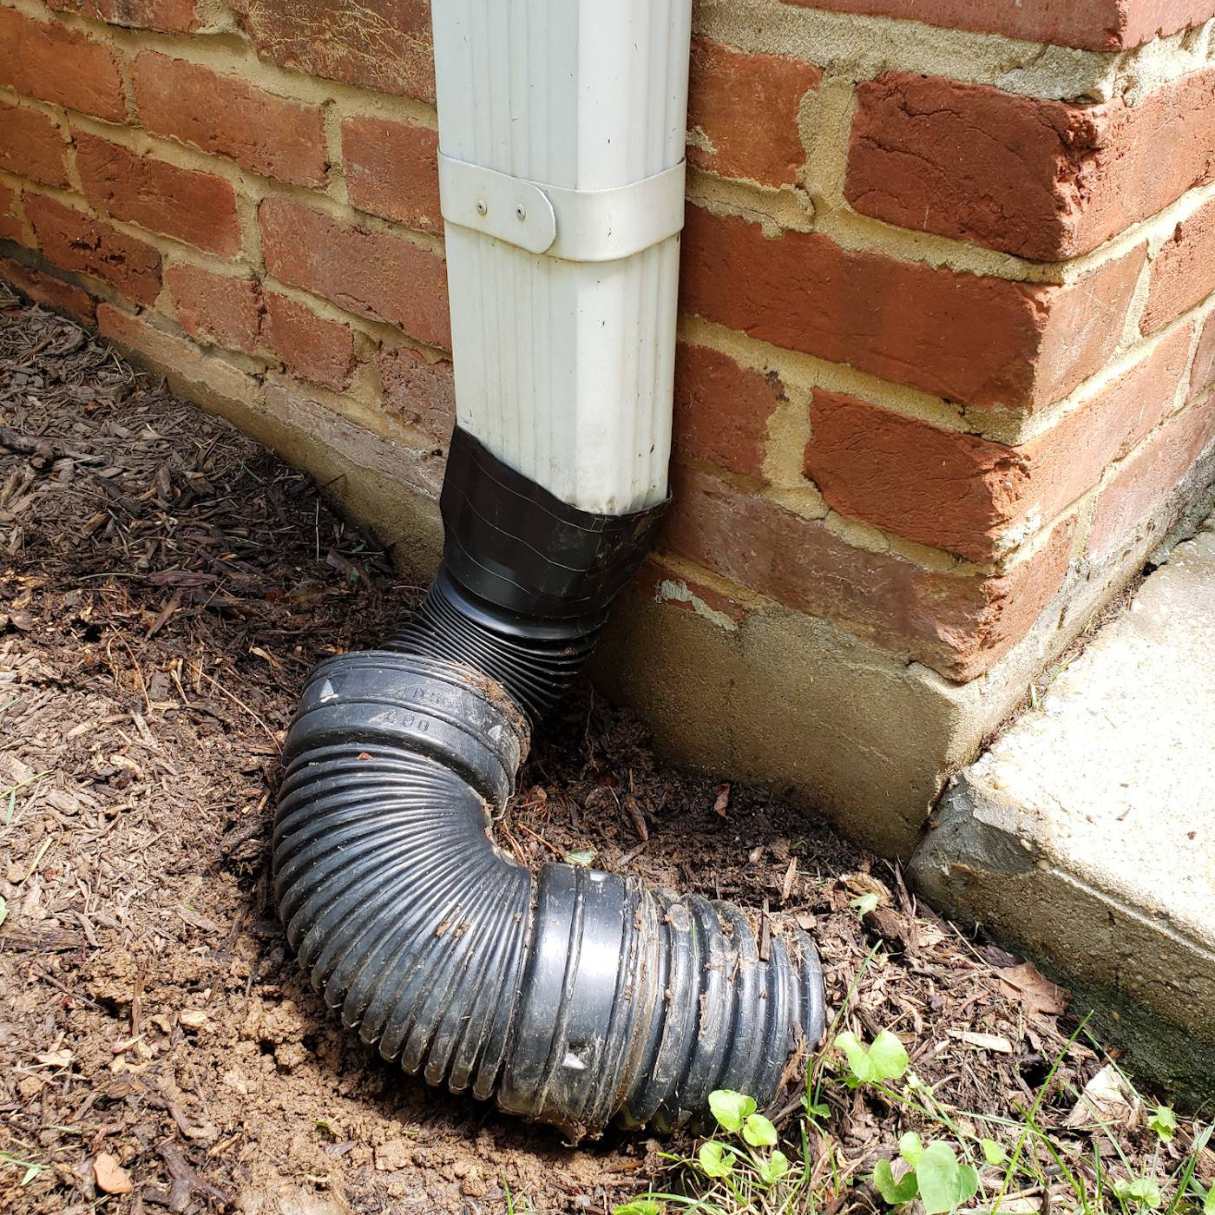
Preparing the Downspout
Before attaching the downspout to the brick wall, it’s important to prepare the downspout itself. If the downspout is not already cut to the desired length, you may need to resize it to fit the specific requirements of your installation. This can be done using a hacksaw or a pipe cutter, depending on the material of the downspout.
Additionally, if the downspout needs to redirect along the wall, you will need to attach a downspout elbow to the bottom of the downspout. This elbow will allow the downspout to turn and follow the contour of the wall, ensuring proper water drainage while maintaining a visually appealing appearance.
Inspect the downspout for any sharp edges or burrs that may have been created during the cutting process. Smooth out any rough areas using a metal file or sandpaper to prevent injuries during handling and installation.
Finally, ensure that the downspout is clean and free of any debris or obstructions. Any dirt or blockages inside the downspout can impede water flow and compromise the effectiveness of the drainage system. A quick rinse with water or the use of a plumber’s snake can help clear any potential obstructions before proceeding with the installation.
By taking the time to properly prepare the downspout, you can ensure a seamless and efficient installation process, setting the stage for a secure attachment to the brick wall.
Read more: How To Secure Downspout To Brick
Marking the Position on the Brick
Accurate marking of the position on the brick wall is crucial for a precise and visually appealing downspout installation. Before making any marks, it’s important to consider the optimal placement of the downspout to ensure effective water drainage and a professional finish.
Begin by positioning the downspout against the brick wall at the desired location. Use a level to ensure that the downspout will be installed vertically, allowing water to flow freely without any obstructions. Once you are satisfied with the placement, use a pencil or marker to mark the positions where the downspout brackets or straps will be attached to the wall.
Measure the distance between the marks to ensure that the brackets or straps are spaced evenly and provide adequate support for the downspout. Additionally, consider the slope of the downspout to ensure that water will flow smoothly towards the desired drainage point.
If you are redirecting the downspout along the wall using an elbow, mark the position where the elbow will connect to the downspout. This mark should align with the bottom of the downspout and indicate the angle at which the elbow will be installed.
Before proceeding to the next step, double-check the accuracy of the marks and the alignment of the downspout. Making any necessary adjustments at this stage will help avoid issues during the drilling and attachment process, ultimately resulting in a professional and secure installation.
By carefully marking the position on the brick wall, you can lay the groundwork for a successful and visually pleasing attachment of the downspout, ensuring effective water drainage and a polished exterior appearance.
Drilling Holes in the Brick
Drilling precise holes in the brick wall is a critical step in securely attaching the downspout. To ensure a strong and durable installation, it’s essential to use the right tools and techniques for drilling into masonry.
Start by selecting a masonry drill bit that is suitable for the type of brick you are working with. The size of the drill bit should match the diameter of the screws or anchors you will be using to secure the downspout brackets or straps to the wall. It’s important to use a drill bit specifically designed for masonry to effectively penetrate the brick surface without causing damage.
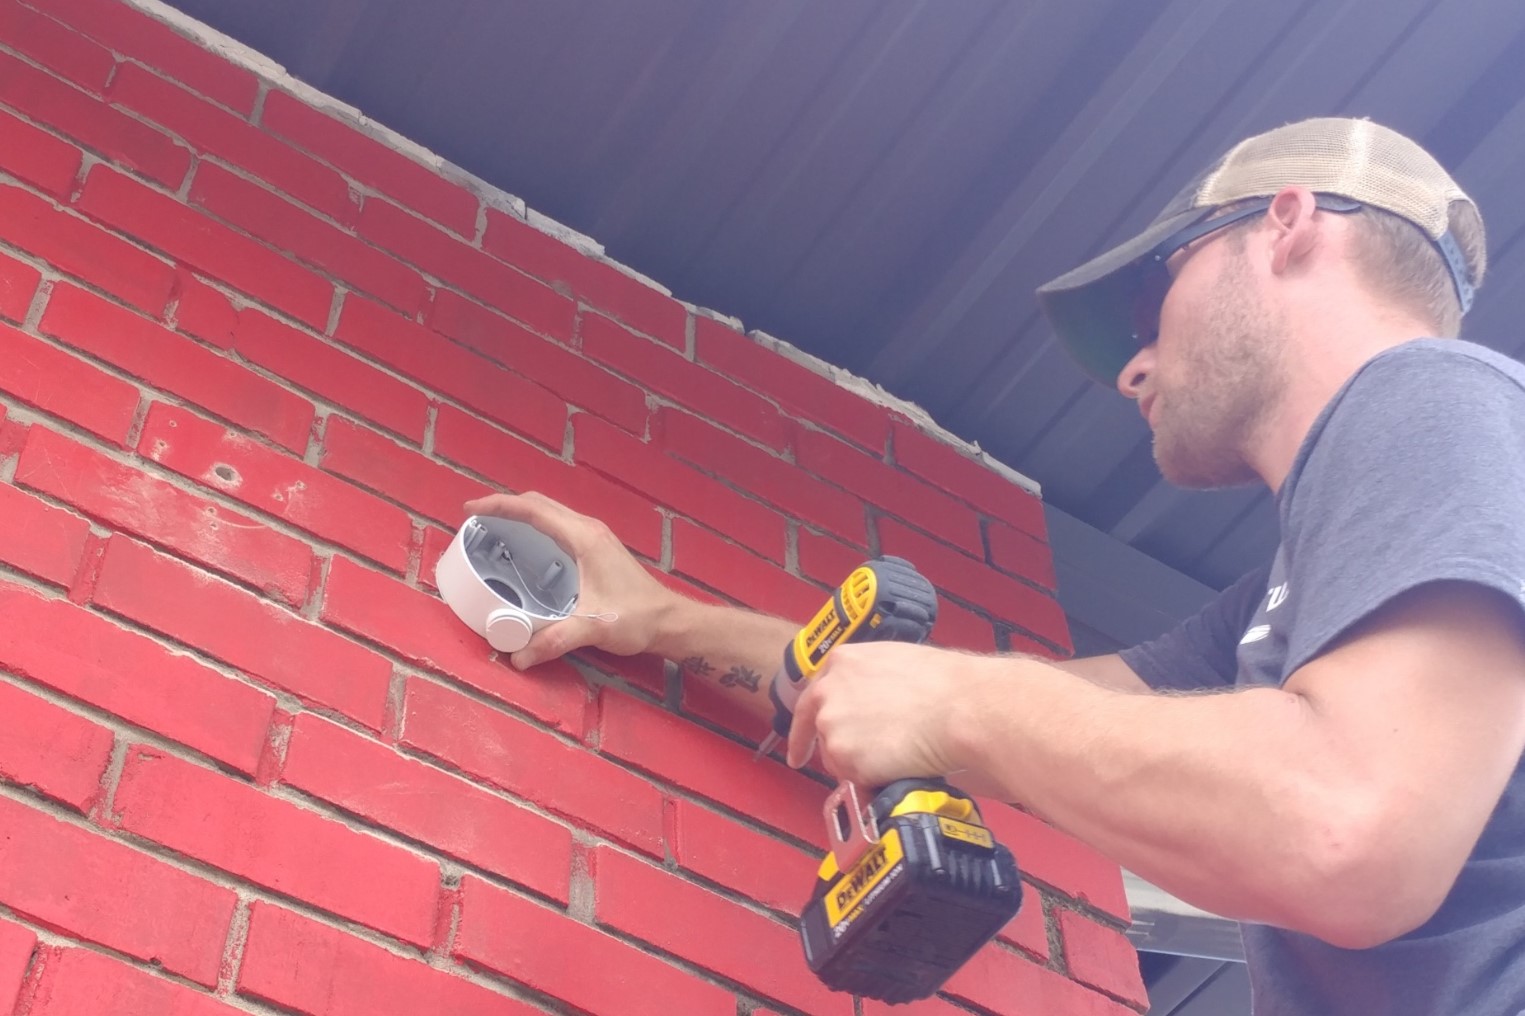
Prior to drilling, put on a pair of safety glasses to protect your eyes from any debris that may be generated during the drilling process. Position the drill perpendicular to the wall, aligning it with the marked spots where the brackets or straps will be attached.
Apply steady pressure as you begin drilling, using a slow and consistent speed to allow the drill bit to penetrate the brick gradually. It’s important to maintain control and avoid excessive force, as this can lead to overheating the drill bit or causing the brick to crack or chip.
Periodically withdraw the drill to clear away any accumulated dust and debris, allowing the drill bit to continue cutting smoothly. This will help maintain the effectiveness of the drilling process and prevent the buildup of material that could impede progress.
Once the holes are drilled to the appropriate depth, remove any remaining debris from the holes using a brush or compressed air. This will ensure a clean and secure fit for the screws or anchors when attaching the downspout brackets or straps.
By taking the time to drill precise holes in the brick wall, you can lay the foundation for a strong and reliable attachment of the downspout, providing long-lasting support and stability for the drainage system.
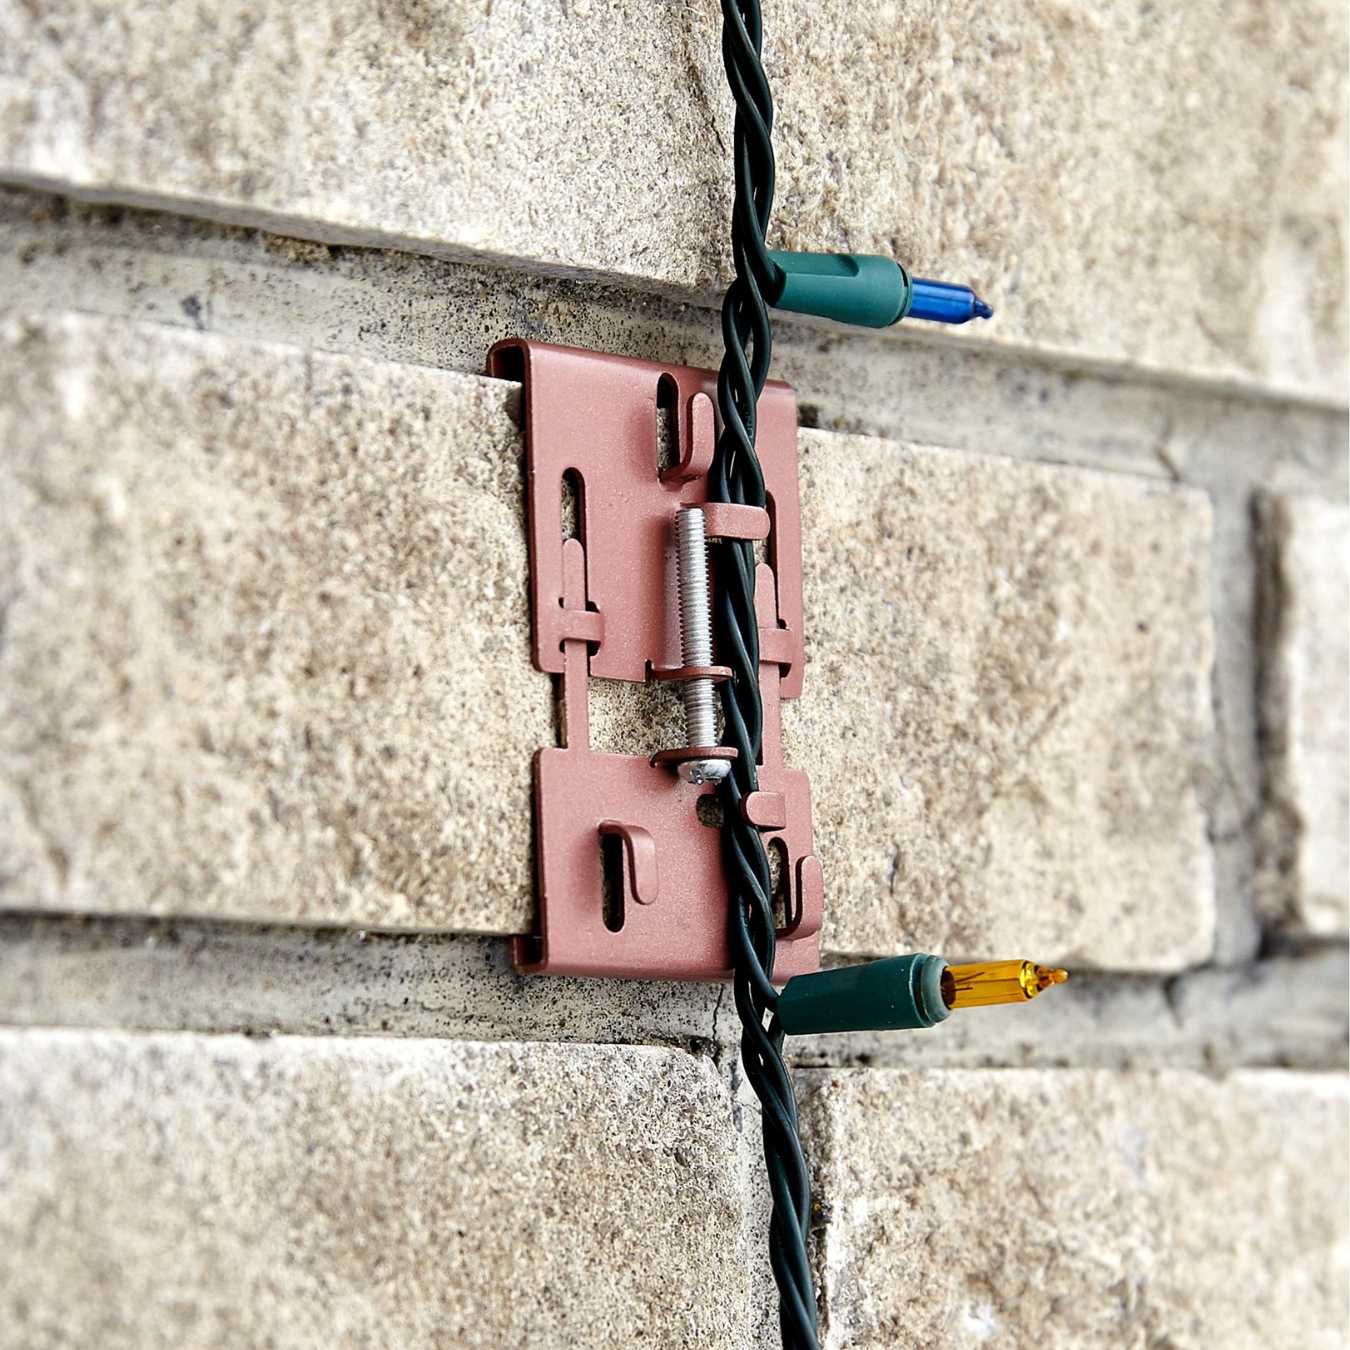
Use masonry screws and a drill to attach a downspout bracket to the brick. Make sure to pre-drill holes and use a level to ensure the downspout is straight.
Attaching the Downspout to the Brick
With the necessary preparations and markings in place, it’s time to securely attach the downspout to the brick wall. This step requires attention to detail and precision to ensure a stable and professional installation that will withstand weather conditions and effectively manage rainwater runoff.
Begin by positioning the downspout brackets or straps against the wall, aligning them with the drilled holes. Insert the appropriate screws or anchors into the holes, ensuring that they are securely fastened to provide robust support for the downspout. Use a level to confirm that the brackets or straps are installed evenly and that the downspout will be vertically aligned.
Once the brackets or straps are in place, carefully position the downspout within the supports, ensuring a snug fit that allows for proper water flow. Use a screwdriver or impact driver to secure the downspout to the brackets or straps, tightening the screws to achieve a secure attachment without over-tightening and damaging the brick or the downspout.
If you are redirecting the downspout along the wall using an elbow, attach the elbow to the bottom of the downspout, following the marked position. Secure the elbow using screws or fasteners, ensuring that it is firmly attached and aligned to facilitate smooth water drainage along the wall.
As a final step, apply a bead of silicone caulk or exterior-grade construction adhesive around the edges of the brackets or straps where they meet the brick wall. This will create a watertight seal, preventing moisture from seeping behind the downspout and compromising the integrity of the installation.
Once the downspout is securely attached to the brick wall, double-check the alignment and stability of the entire assembly. Make any necessary adjustments to ensure that the downspout is firmly in place and that water will flow unobstructed from the gutter down through the downspout and away from the building.
By following these steps and paying close attention to the details, you can achieve a professional and durable attachment of the downspout to the brick wall, enhancing the functionality and visual appeal of your property’s drainage system.
Conclusion
In conclusion, attaching a downspout to a brick wall is a manageable project that can significantly improve the efficiency and aesthetics of your property’s drainage system. By following the step-by-step process outlined in this guide, you can achieve a secure and professional installation that effectively manages rainwater runoff while enhancing the exterior appearance of your building.
From preparing the downspout and marking the position on the brick to drilling precise holes and securely attaching the downspout, each step plays a crucial role in ensuring a durable and reliable installation. By using the right tools, taking accurate measurements, and paying attention to detail, you can achieve a seamless integration of the downspout with the brick wall, providing long-lasting support and functionality.
It’s important to prioritize safety throughout the installation process, wearing appropriate personal protective equipment and exercising caution when handling tools and materials. Additionally, taking the time to plan and prepare before beginning the installation can streamline the process and minimize potential challenges along the way.
Upon completion of the installation, take a moment to inspect the entire assembly, ensuring that the downspout is securely attached, aligned properly, and free of any obstructions. This final check will provide peace of mind and confidence in the effectiveness of your newly installed downspout.
By following the guidelines in this guide, you can take pride in a successful downspout installation that enhances the functionality and visual appeal of your property while effectively managing rainwater runoff. Whether you are a seasoned DIY enthusiast or a homeowner tackling this project for the first time, the detailed instructions and expert tips provided here will empower you to achieve a professional and durable attachment of a downspout to a brick wall.
With the downspout securely in place, you can enjoy the benefits of a well-maintained drainage system, protecting your property from water damage and erosion while contributing to its overall curb appeal.
Frequently Asked Questions about How To Attach Downspout To Brick
Was this page helpful?
At Storables.com, we guarantee accurate and reliable information. Our content, validated by Expert Board Contributors, is crafted following stringent Editorial Policies. We're committed to providing you with well-researched, expert-backed insights for all your informational needs.


0 thoughts on “How To Attach Downspout To Brick”