Home>Construction & Tools>Building Materials>How To Secure Downspout To Brick
Building Materials
How To Secure Downspout To Brick
Modified: August 20, 2024
Learn how to securely attach a downspout to brick using the right building materials and techniques. Protect your home from water damage with our expert tips.
(Many of the links in this article redirect to a specific reviewed product. Your purchase of these products through affiliate links helps to generate commission for Storables.com, at no extra cost. Learn more)
Introduction
When it comes to protecting your home from water damage, ensuring that your downspouts are securely attached to your brick exterior is crucial. A loose or improperly secured downspout not only detracts from the aesthetic appeal of your home but also poses a risk of water seepage and potential structural damage to your property. Fortunately, with the right tools, materials, and a clear understanding of the process, securing a downspout to brick can be a manageable DIY project.
In this comprehensive guide, we will walk you through the step-by-step process of securing a downspout to brick, providing you with the knowledge and confidence to tackle this task effectively. By following these instructions, you can ensure that your downspouts remain firmly in place, safeguarding your home from water-related issues and maintaining the integrity of your brick exterior.
Before embarking on this project, it’s essential to gather the necessary tools and materials, which we will outline in the next section. With the right preparation and a systematic approach, you can successfully secure your downspout to brick, contributing to the overall protection and longevity of your home.
Key Takeaways:
- Securing a downspout to brick involves measuring, drilling, and attaching brackets to ensure water is directed away from your home, protecting it from potential damage and preserving its structural integrity.
- By using high-quality materials and following precise steps, you can confidently secure your downspout to brick, enhancing the functionality and visual appeal of your home while safeguarding it from water-related issues.
Read more: How To Attach Downspout To Brick
Tools and Materials Needed
Before you begin the process of securing your downspout to brick, it’s important to gather the essential tools and materials. Having the right equipment at your disposal will streamline the installation process and ensure that the downspout is firmly attached to the brick exterior. Here’s what you’ll need:
Tools:
- Measuring tape
- Pencil or marker
- Power drill
- Masonry drill bit
- Screwdriver
- Level
Materials:
- Wall anchors (appropriate for masonry)
- Downspout brackets
- Screws
- Downspout
It’s crucial to ensure that the wall anchors are specifically designed for use with masonry, as they need to provide a secure grip within the brick for optimal stability. Additionally, the downspout brackets should be durable and corrosion-resistant to withstand the elements and support the weight of the downspout effectively.
By having these tools and materials on hand, you’ll be well-equipped to proceed with the installation process. With a focus on precision and attention to detail, you can successfully secure your downspout to the brick exterior, enhancing the functionality and visual appeal of your home’s drainage system.
Step 1: Measure and Mark the Downspout Placement
Prior to drilling any holes in the brick, it’s essential to accurately measure and mark the placement of the downspout. This initial step sets the foundation for a precise and secure installation, ensuring that the downspout aligns seamlessly with the existing drainage system and complements the aesthetic of your home’s exterior.
Begin by using a measuring tape to determine the appropriate location for the downspout. Take into account factors such as proximity to the existing gutter system, as well as any obstructions or architectural features that may influence the placement. Once you have identified the optimal position, use a pencil or marker to clearly mark the spots where the downspout brackets will be attached to the brick.
It’s crucial to maintain a level orientation during this process, as any misalignment can result in an uneven installation and compromise the stability of the downspout. Utilize a level to confirm that the marked positions are straight and accurately positioned relative to the surrounding architecture. This meticulous approach will contribute to a seamless and visually appealing outcome.
By taking the time to measure and mark the downspout placement with precision, you lay the groundwork for a successful installation process. This attention to detail ensures that the downspout will be securely attached to the brick, functioning effectively and enhancing the overall functionality and curb appeal of your home.
Read more: How To Attach A Downspout To A Brick House
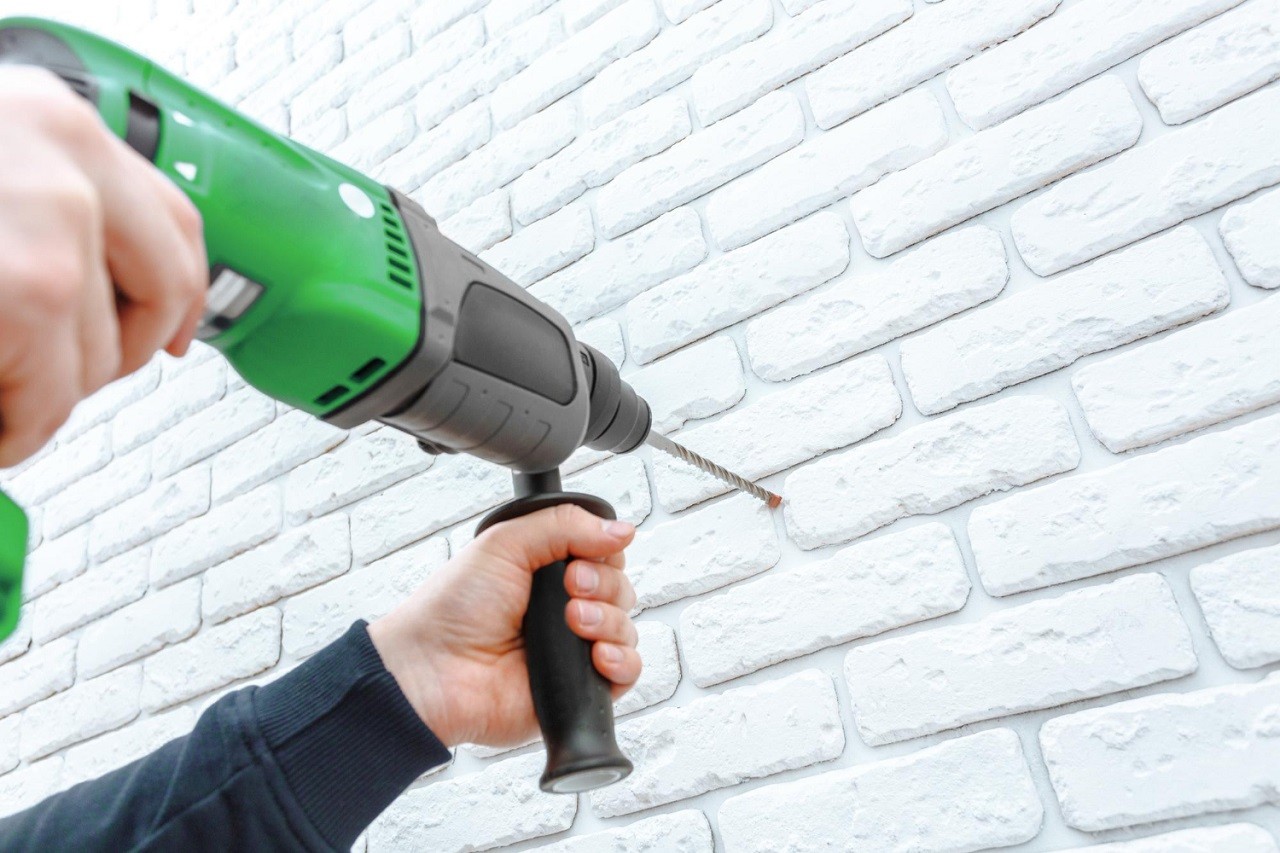
Step 2: Drill Holes in the Brick
With the downspout placement accurately marked, the next crucial step is to drill holes in the brick to accommodate the wall anchors. This process requires precision and care to ensure that the holes are aligned correctly and provide a secure foundation for attaching the downspout brackets.
Before drilling, it’s important to select the appropriate masonry drill bit size that corresponds to the diameter of the wall anchors. This ensures a snug fit for the anchors, promoting stability and durability once the downspout brackets are installed. Additionally, it’s advisable to use a power drill with a hammer function, as it can effectively penetrate the tough surface of the brick.
When drilling the holes, maintain a steady hand and apply consistent pressure to create clean, straight perforations in the brick. It’s advisable to periodically clear away any debris or dust from the holes to ensure that they are free of obstructions, allowing the wall anchors to be inserted smoothly.
As you proceed with this step, exercise caution to avoid damaging the surrounding brick or creating unnecessary blemishes on the exterior surface. By approaching the drilling process with precision and a focus on maintaining the integrity of the brick, you can ensure that the subsequent installation of the wall anchors and downspout brackets proceeds smoothly and yields a professional-looking result.
Drilling holes in the brick represents a pivotal phase in the process of securing the downspout, laying the groundwork for the subsequent attachment of the essential components. With careful attention to detail and a methodical approach, you can effectively prepare the brick surface to accommodate the hardware required for a secure and reliable installation.
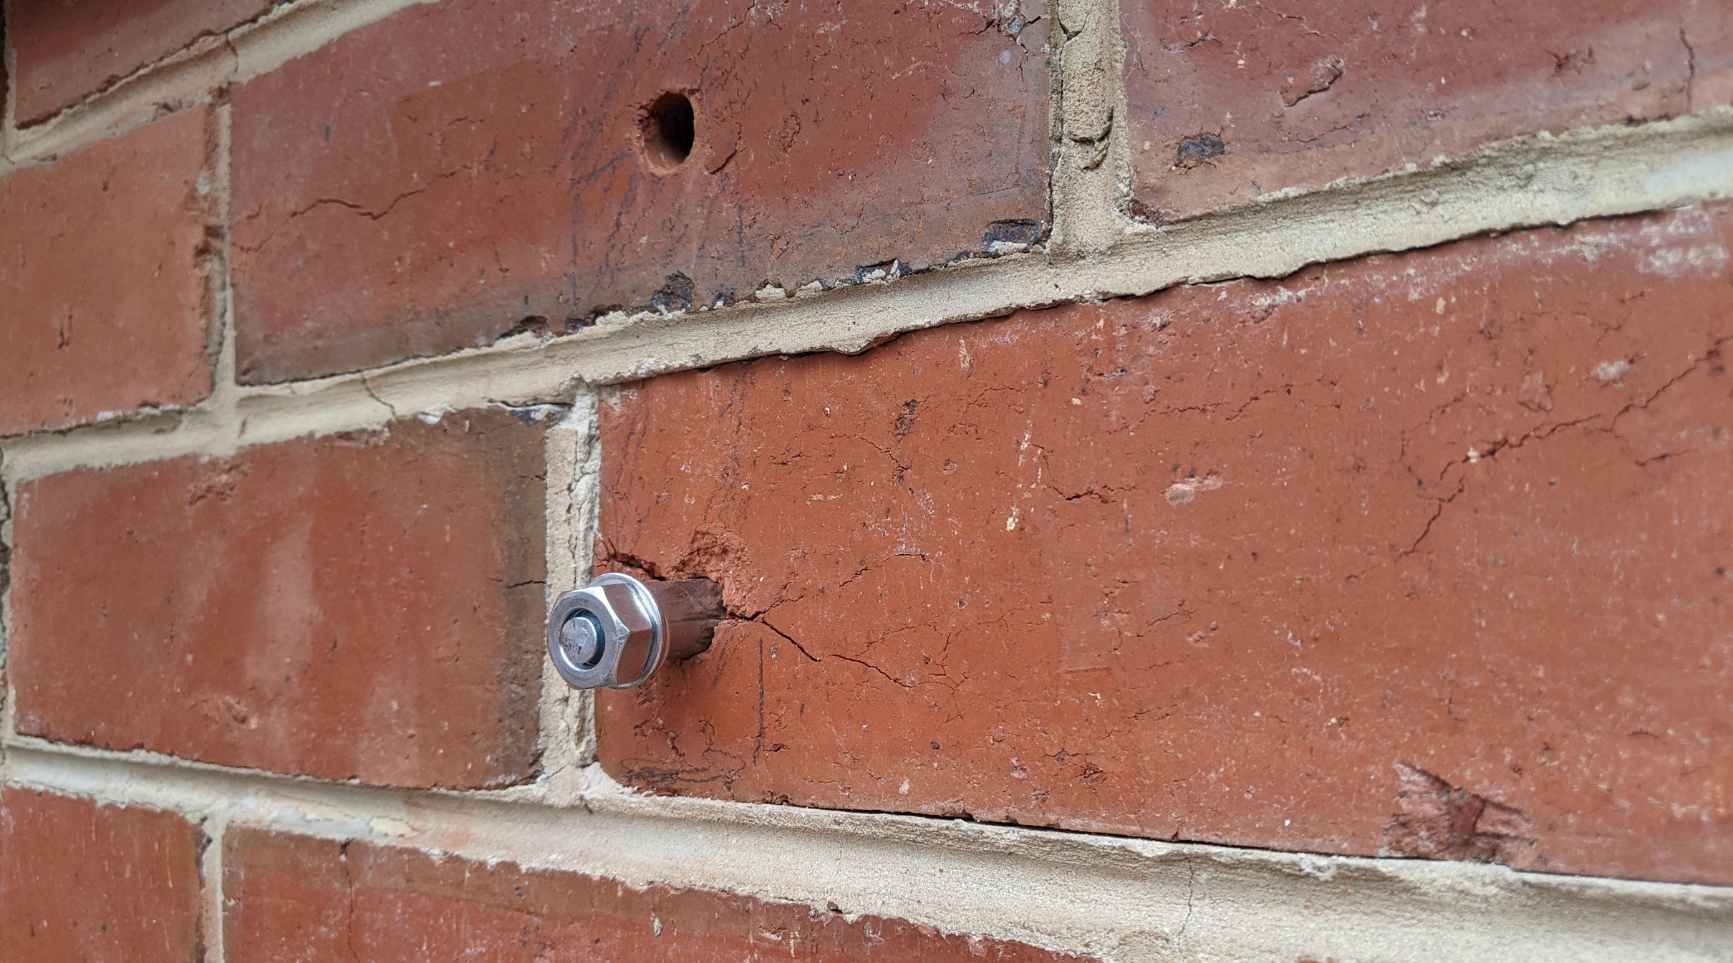
Step 3: Insert Wall Anchors
Once the holes are drilled in the brick, the next critical step is to insert the wall anchors. These anchors play a fundamental role in providing a stable and secure foundation for attaching the downspout brackets, ensuring that they remain firmly affixed to the brick exterior.
Begin by selecting wall anchors that are specifically designed for use with masonry, ensuring that they are compatible with the diameter of the drilled holes. Carefully insert the wall anchors into the prepared holes, using a gentle tapping motion to facilitate their placement within the brick. It’s important to verify that the anchors sit flush with the surface of the brick, indicating a secure and stable fit.
As you insert the wall anchors, it’s essential to exercise caution and precision to avoid damaging the surrounding brick or compromising the integrity of the installation. By taking a methodical approach and confirming that the anchors are securely positioned, you can lay the groundwork for a reliable and long-lasting attachment of the downspout brackets.
It’s advisable to verify the load-bearing capacity of the selected wall anchors, ensuring that they can support the weight of the downspout and withstand the elements effectively. By choosing high-quality, durable anchors, you can enhance the overall stability and resilience of the installation, contributing to the longevity and functionality of the downspout attachment.
The insertion of wall anchors represents a pivotal stage in the process of securing the downspout to brick, establishing a solid foundation for the subsequent attachment of the brackets. With a focus on precision and attention to detail, you can ensure that the wall anchors provide a reliable and steadfast support system for the downspout, contributing to the overall integrity and functionality of your home’s drainage system.
Use a masonry anchor and screws to secure a downspout to brick. Drill pilot holes into the brick, insert the anchor, and then screw the downspout securely in place.
Step 4: Attach Downspout Brackets
With the wall anchors securely in place, the next crucial step is to attach the downspout brackets to the brick. These brackets serve as the primary means of supporting the downspout, ensuring that it remains firmly affixed to the exterior of your home and effectively directs water away from the foundation.
Begin by positioning the downspout brackets over the installed wall anchors, aligning them with the marked placement to ensure a symmetrical and balanced configuration. Utilize a level to confirm that the brackets are straight and evenly positioned, contributing to a visually appealing and structurally sound installation.
Once the brackets are aligned, use screws to fasten them securely to the wall anchors, ensuring a tight and stable connection. It’s important to select screws that are appropriate for use with the wall anchors and capable of withstanding the weight of the downspout while resisting corrosion and environmental exposure.
As you attach the brackets, it’s essential to verify that they are firmly anchored to the wall, providing robust support for the downspout. This step is pivotal in ensuring that the downspout remains securely in place, even during inclement weather or heavy water flow.
By taking a meticulous approach to attaching the downspout brackets, you can contribute to the overall durability and functionality of your home’s drainage system. These brackets play a critical role in supporting the downspout and directing water away from the foundation, safeguarding your property from potential water-related issues and maintaining the integrity of your exterior surfaces.
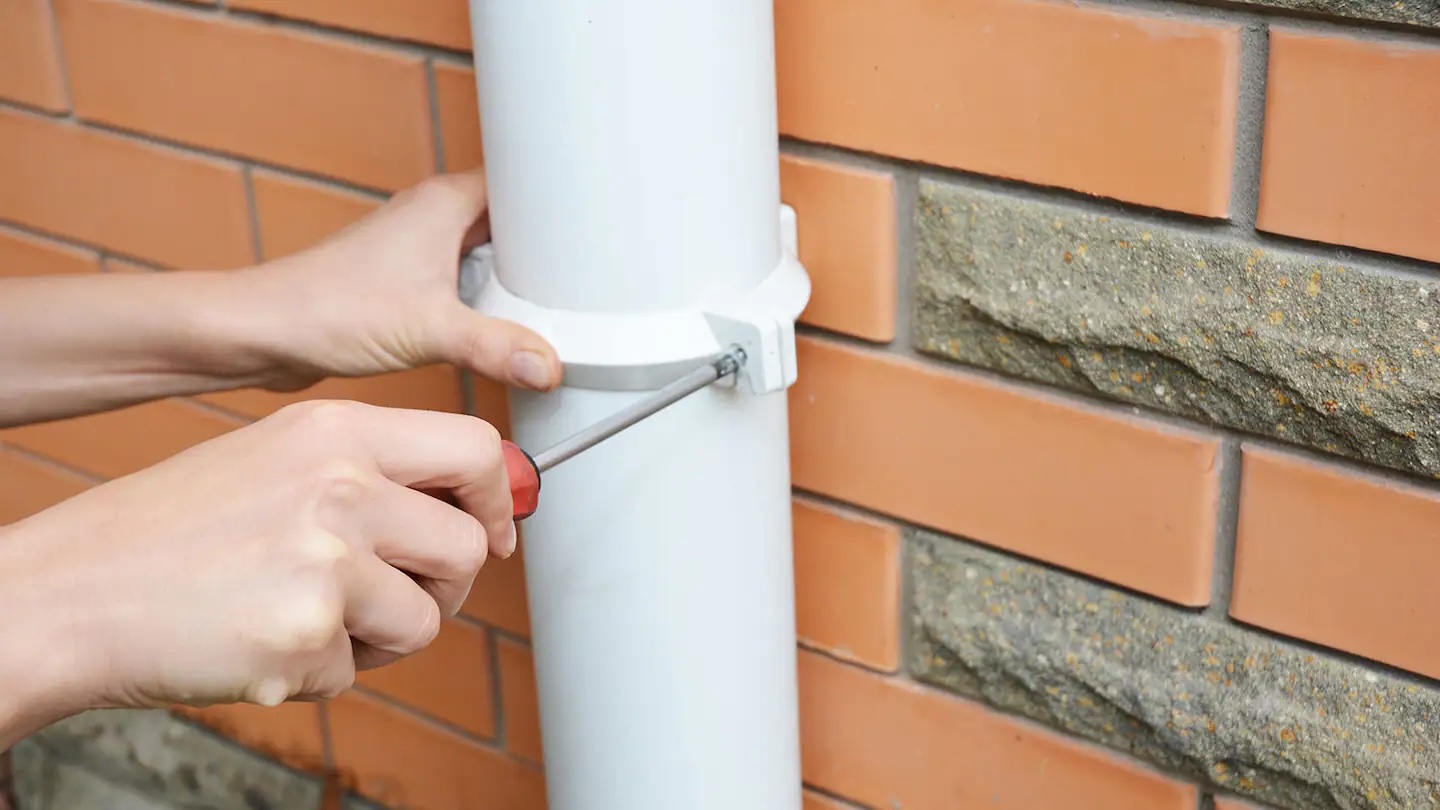
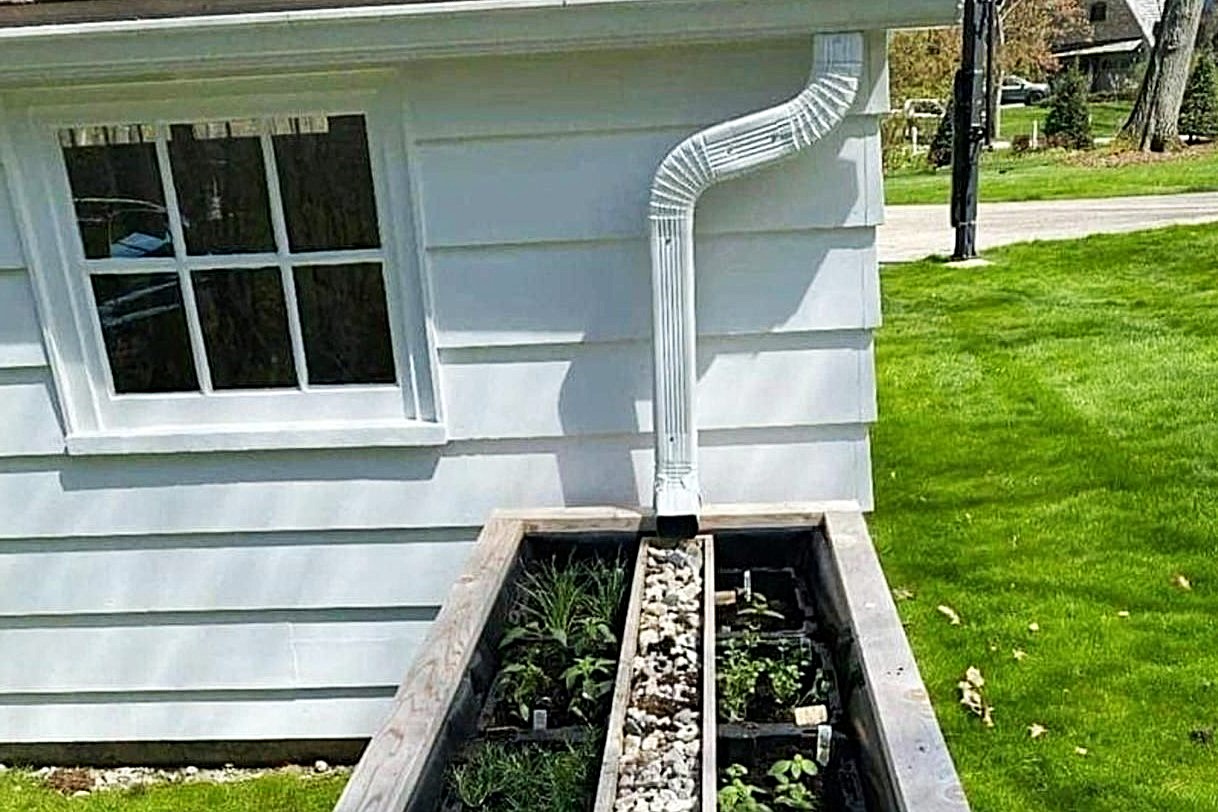
Step 5: Secure Downspout to Brackets
With the downspout brackets firmly attached to the brick, the final step in securing the downspout involves affixing it to the brackets, ensuring a stable and reliable connection. This critical phase completes the installation process, allowing the downspout to effectively channel water away from your home’s foundation and maintain the integrity of your property.
Position the downspout over the installed brackets, ensuring that it aligns seamlessly with the bracket configuration. Once in place, secure the downspout to the brackets using the appropriate screws or fastening mechanisms, ensuring that it is firmly and evenly attached. This step is pivotal in ensuring that the downspout remains stable and resistant to displacement, particularly during periods of heavy rainfall or inclement weather.
It’s important to verify that the downspout is securely affixed to the brackets, providing a robust and steadfast connection. By confirming the stability of the attachment, you can mitigate the risk of the downspout becoming dislodged or compromised, contributing to the overall effectiveness and reliability of your home’s drainage system.
As you secure the downspout to the brackets, take the time to verify that the alignment is straight and symmetrical, contributing to a visually appealing and professional-looking installation. This attention to detail not only enhances the aesthetic appeal of your home’s exterior but also reflects a commitment to precision and quality in the installation process.
By completing this final step, you can rest assured that your downspout is securely attached to the brick, effectively diverting water away from your home and protecting your property from potential water-related issues. This comprehensive installation process ensures that your downspout remains stable and reliable, contributing to the overall functionality and longevity of your home’s exterior drainage system.
Read more: How To Secure Wood To Brick
Conclusion
Securing a downspout to brick is a fundamental aspect of maintaining the integrity and functionality of your home’s exterior drainage system. By following the step-by-step process outlined in this guide, you can ensure that your downspout remains securely attached to the brick, effectively directing water away from your property and safeguarding it from potential water-related issues.
From measuring and marking the downspout placement to drilling holes in the brick, inserting wall anchors, attaching downspout brackets, and securing the downspout in place, each step plays a crucial role in ensuring a reliable and durable installation. By approaching the process with precision, attention to detail, and the right tools and materials, you can achieve a professional-quality result that enhances the functionality and visual appeal of your home’s exterior.
It’s important to select high-quality wall anchors, durable downspout brackets, and corrosion-resistant screws to ensure the longevity and resilience of the installation. By prioritizing the use of robust and reliable components, you can have confidence in the stability and effectiveness of your downspout attachment, even in challenging weather conditions.
Ultimately, securing a downspout to brick is an investment in the protection and preservation of your home. By directing water away from the foundation and exterior surfaces, you can mitigate the risk of water damage and maintain the structural integrity of your property for years to come.
With the completion of this installation, you can take pride in knowing that your home is equipped with a secure and dependable downspout attachment, contributing to its overall resilience and functionality. By following these guidelines and approaching the process with care and precision, you can achieve a successful and long-lasting installation that enhances the value and durability of your home’s exterior drainage system.
Frequently Asked Questions about How To Secure Downspout To Brick
Was this page helpful?
At Storables.com, we guarantee accurate and reliable information. Our content, validated by Expert Board Contributors, is crafted following stringent Editorial Policies. We're committed to providing you with well-researched, expert-backed insights for all your informational needs.


0 thoughts on “How To Secure Downspout To Brick”