Home>Construction & Tools>Building Materials>How To Build A Brick Dog Kennel
Building Materials
How To Build A Brick Dog Kennel
Modified: October 19, 2024
Discover the best building materials for constructing a durable brick dog kennel. Find expert tips and advice for creating a secure and comfortable space for your furry friend.
(Many of the links in this article redirect to a specific reviewed product. Your purchase of these products through affiliate links helps to generate commission for Storables.com, at no extra cost. Learn more)
Introduction
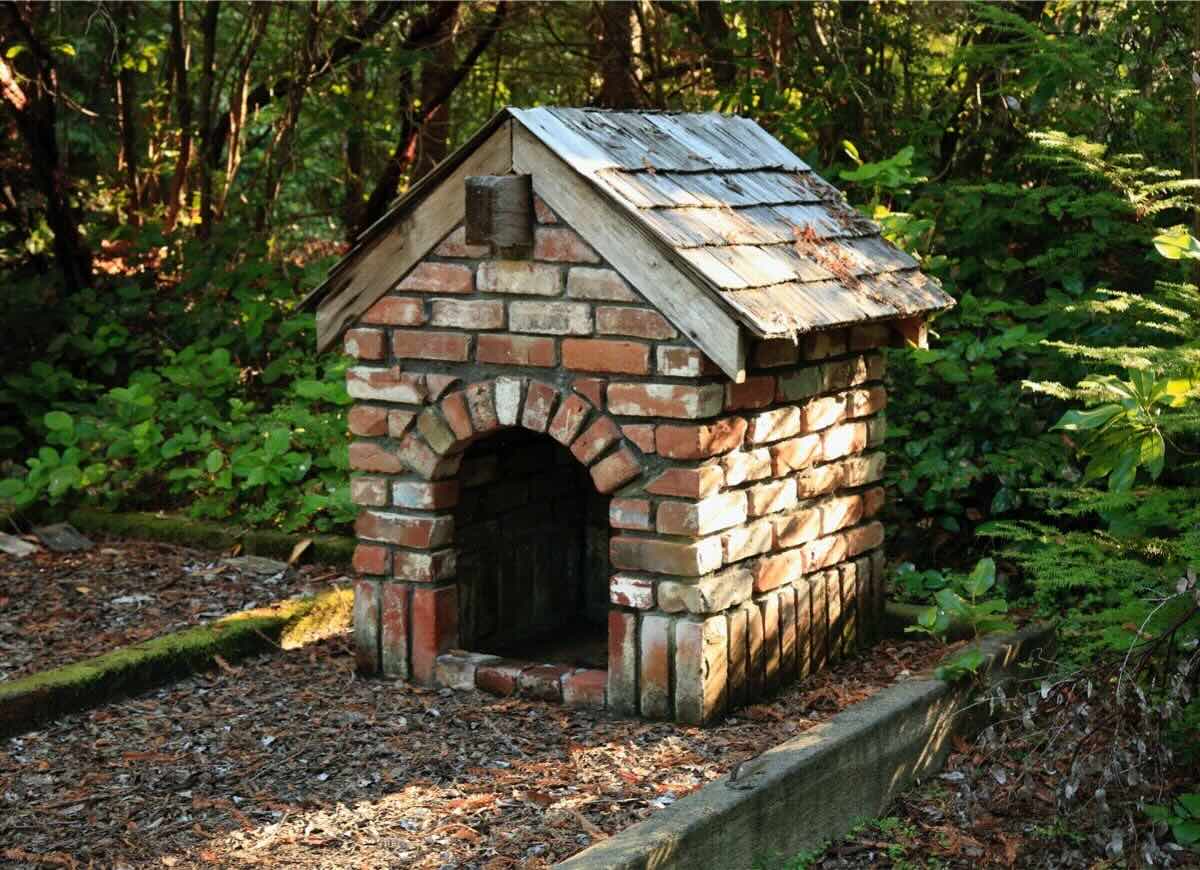
Welcome to the world of do-it-yourself building projects! If you're a proud pet owner looking to provide your furry friend with a cozy and secure outdoor space, then building a brick dog kennel might be the perfect project for you. Not only does a brick dog kennel offer durability and weather resistance, but it also adds a touch of charm to your backyard.
In this comprehensive guide, we'll walk you through the step-by-step process of constructing a brick dog kennel. Whether you're a seasoned DIY enthusiast or a novice looking to embark on your first building project, we've got you covered. By the end of this guide, you'll have the knowledge and confidence to create a safe and comfortable haven for your beloved canine companion.
So, roll up your sleeves, gather your tools, and let's dive into the rewarding journey of building a brick dog kennel that will stand the test of time.
Key Takeaways:
- Building a brick dog kennel requires careful planning, precise construction, and attention to detail. It’s a rewarding DIY project that provides a durable and charming outdoor space for your furry friend.
- From gathering materials to adding finishing touches, constructing a brick dog kennel is an expression of love and commitment to your pet’s well-being. It’s a testament to the strong bond between humans and their canine companions.
Read more: How To Build Outdoor Dog Kennel
Step 1: Gather Materials and Tools
Before diving into the construction process, it’s crucial to gather all the necessary materials and tools. Here’s a comprehensive list to ensure you’re well-prepared for the project:
Materials:
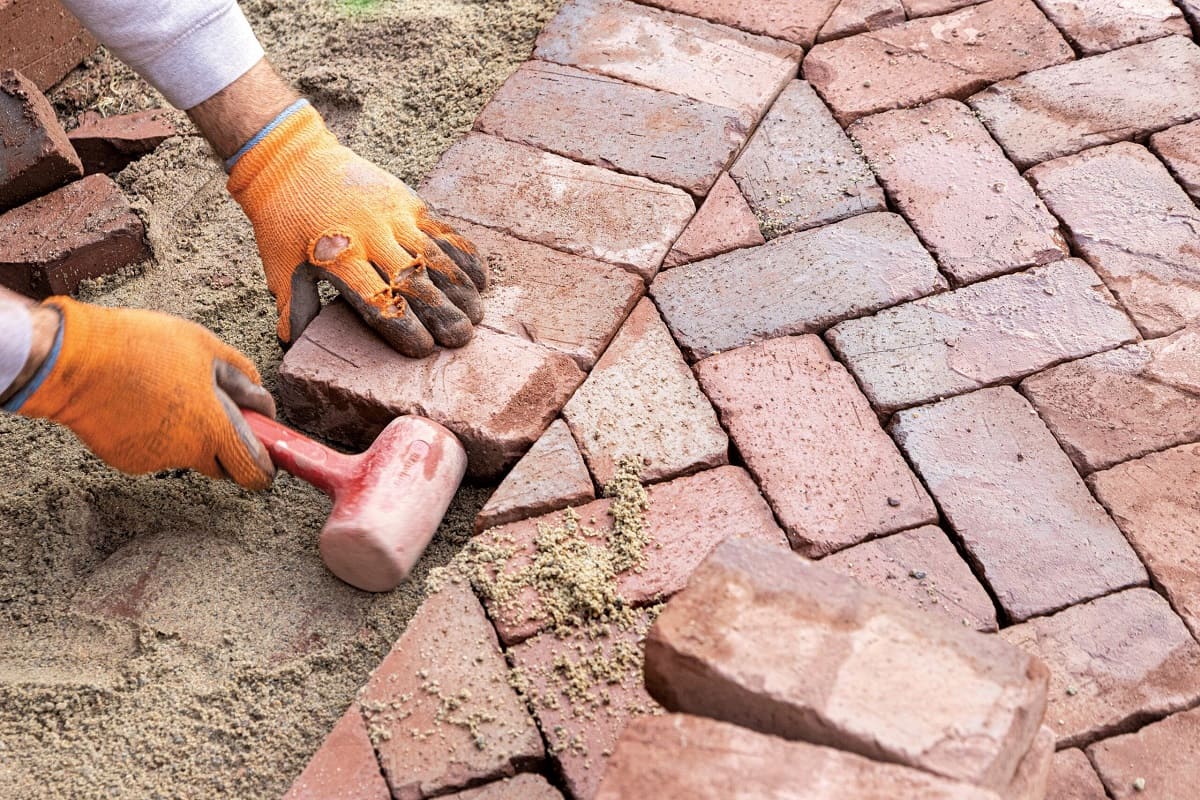
- Bricks: Select high-quality, weather-resistant bricks that will provide the structural integrity and aesthetic appeal you desire for the kennel.
- Cement and Sand: These materials are essential for mortar preparation to secure the bricks in place.
- Gravel: Use gravel as a base for the kennel foundation to promote proper drainage and stability.
- Concrete Blocks: These will serve as the foundation for the kennel, providing a sturdy base for the structure.
- Roofing Materials: Depending on your design preference, gather roofing materials such as shingles or metal sheets to protect the kennel from the elements.
- Wood or Metal for the Door: Choose a durable material for the kennel door to ensure security and longevity.
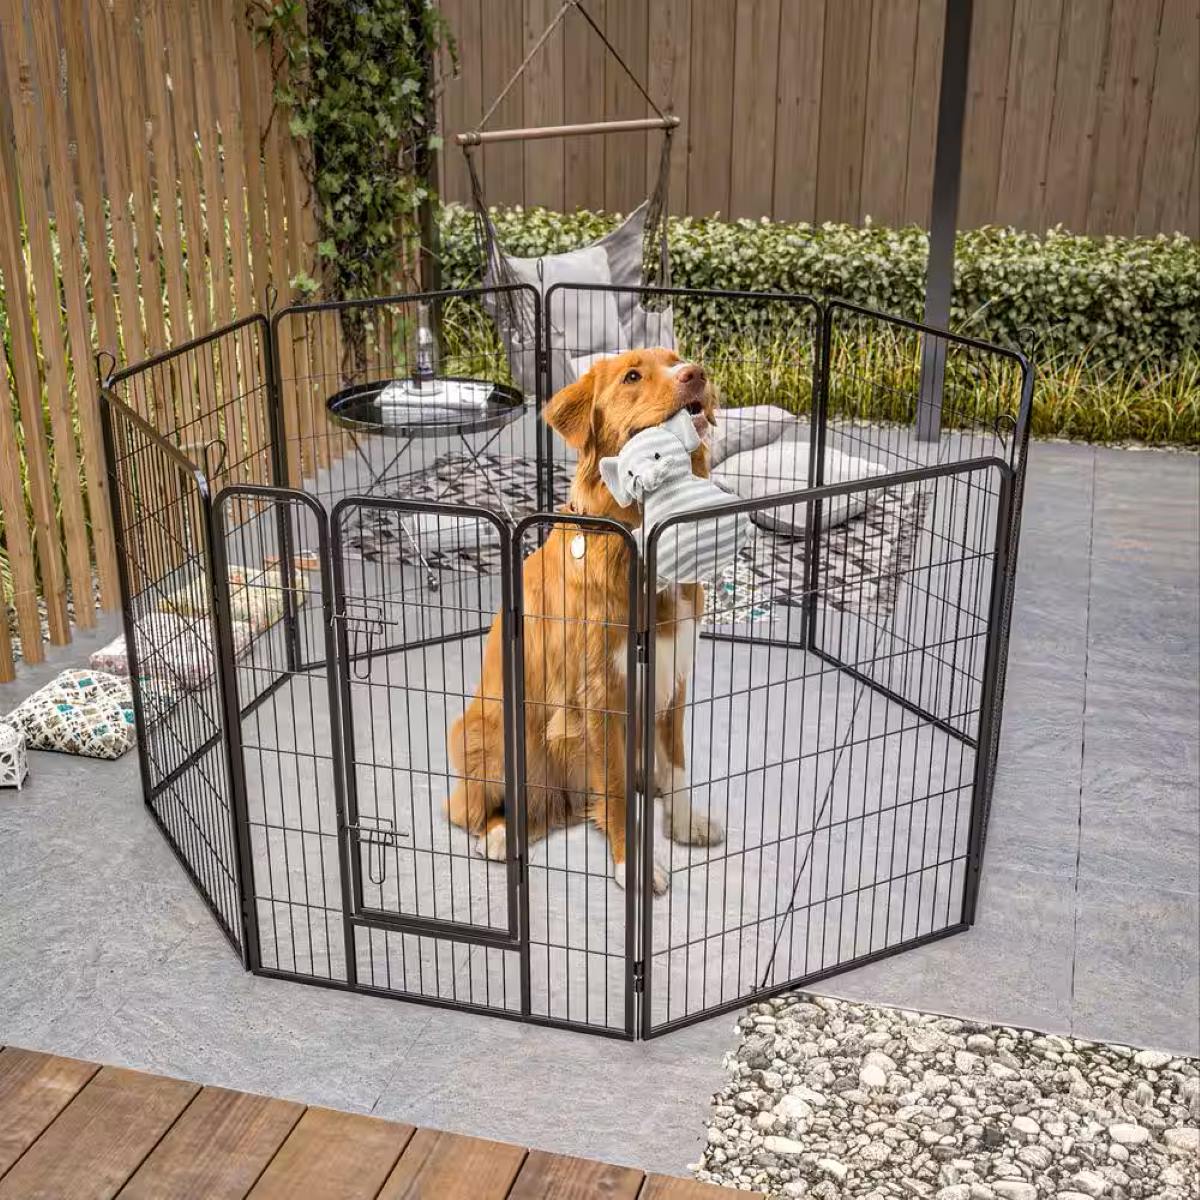
- Wire Mesh: This will be used to create a secure enclosure within the kennel, offering containment without obstructing visibility.
- Insulation (optional): If you reside in a region with extreme weather conditions, insulation can provide added comfort for your dog.
- Paint or Sealant: Select pet-safe paint or sealant to protect the brick surfaces and enhance the overall aesthetics of the kennel.
Tools:
- Trowel: Essential for applying mortar and securing the bricks during construction.
- Level: A level will help ensure that the walls and foundation are perfectly aligned and plumb.
- Shovel: Use a shovel for excavation work and preparing the site for the kennel foundation.
- Safety Gear: This includes gloves, protective eyewear, and a dust mask to ensure your safety during construction.
- Saw: If you're customizing the door or any wooden components, a saw will be necessary for precise cutting.
- Measuring Tape: Accurate measurements are crucial in ensuring the kennel is built to the desired dimensions.
- Brushes and Rollers: These tools will be used for applying paint or sealant to the finished structure.
- Hammer and Nails: If you're working with wooden components, these will be essential for assembly.
By gathering these materials and tools, you’ll be well-equipped to embark on the construction of your brick dog kennel. With everything in hand, you’re ready to move on to the next step: preparing the site for the kennel’s foundation.
Step 2: Prepare the Site
Preparing the site for your brick dog kennel is a crucial initial step that sets the foundation for the entire construction process. Here’s a detailed guide on how to prepare the site effectively:
Read more: How To Winterize Outdoor Dog Kennel
Clear the Area:
Before beginning any excavation work, clear the designated area of any debris, rocks, or vegetation. This will provide a clean canvas for the construction process and ensure a level surface for the kennel foundation.
Mark the Layout:
Using stakes and string, mark the layout of the kennel on the cleared site. This will help visualize the dimensions and ensure that the kennel is positioned exactly where you want it to be.
Excavate the Foundation:
Using a shovel, excavate the marked area to a depth that allows for proper drainage and provides a stable base for the kennel foundation. It’s essential to follow local building codes and regulations regarding the depth of the foundation.
Level the Ground:
Once the excavation is complete, use a level to ensure that the ground is perfectly flat and even. This step is crucial for the stability and structural integrity of the kennel.
Read more: How Big Should An Outdoor Dog Kennel Be?
Add Gravel Base:
Lay a bed of gravel in the excavated area to promote proper drainage and prevent water accumulation around the kennel’s foundation. The gravel base will also contribute to the stability of the structure.
Compact the Base:
Using a compactor or tamper, compact the gravel base to create a solid and level foundation for the kennel. This step is essential for preventing shifting or settling of the structure over time.
By meticulously following these steps to prepare the site, you’ll establish a solid foundation for the construction of your brick dog kennel. With the site ready, you’re now set to move on to the next phase: laying the foundation for the kennel.
Step 3: Lay the Foundation
With the site prepared, it’s time to lay the foundation for your brick dog kennel. The foundation serves as the base on which the entire structure will rest, providing stability and support. Here’s a detailed guide on how to lay the foundation effectively:
Prepare the Mortar:
Begin by preparing the mortar mixture, which typically consists of cement, sand, and water. The mortar will be used to secure the concrete blocks in place and create a solid foundation for the kennel.
Lay the Concrete Blocks:
Carefully place the concrete blocks in the designated layout, ensuring that they are level and properly aligned. The blocks will form the perimeter of the foundation, so precision is key in this step.
Apply Mortar:
Using a trowel, apply mortar between the concrete blocks to bond them together securely. Ensure that the mortar is applied evenly and that the blocks are firmly set in place.
Check for Level and Alignment:
As you progress, regularly use a level to ensure that the concrete blocks are perfectly level and aligned. This step is crucial for the overall stability and integrity of the kennel’s foundation.
Allow for Proper Curing:
Once the foundation is laid and the mortar is in place, allow sufficient time for the mortar to cure and harden. Follow the manufacturer’s recommendations for curing time to ensure optimal strength.
Read more: How To Build A Brick Mailbox
Inspect the Foundation:
After the mortar has cured, thoroughly inspect the foundation to ensure that it is structurally sound and ready to support the weight of the kennel. Any inconsistencies or issues should be addressed before proceeding to the next phase of construction.
By meticulously following these steps to lay the foundation, you’ll establish a solid base for the construction of your brick dog kennel. With the foundation in place, you’re now ready to move on to the exciting phase of building the walls that will define the structure of the kennel.
Step 4: Build the Walls
Building the walls of your brick dog kennel is a significant phase that will define the structure and enclosure for your canine companion. Here’s a detailed guide on how to construct the walls effectively:
Prepare the Mortar:
Before laying the bricks, prepare a consistent and workable mortar mixture to ensure strong adhesion and stability for the walls.
Lay the First Course:
Begin by laying the first course of bricks on top of the foundation, applying mortar to the ends and edges of the bricks to secure them in place. Ensure that the bricks are level and aligned, using a level and string as a guide.
Read more: How To Build Brick Steps
Stack Additional Courses:
Continue stacking additional courses of bricks, applying mortar between each layer to create sturdy and stable walls. Use a staggered pattern for the bricks to enhance the structural integrity of the walls.
Install Door Frame and Opening:
If your kennel includes a door, carefully install the door frame within the brick walls, ensuring that it is securely anchored and aligned. Create the door opening according to the dimensions of the door frame, allowing for smooth operation.
Integrate Wire Mesh (Optional):
For added security and containment, consider integrating wire mesh within the walls of the kennel. This will create a secure enclosure for your dog without obstructing visibility.
Check for Plumb and Alignment:
Regularly check the walls for plumb and alignment as you progress, ensuring that they are straight and level. Adjust the positioning of the bricks as needed to maintain the structural integrity of the walls.
Allow for Proper Curing:
Once the walls are constructed, allow ample time for the mortar to cure and the bricks to set firmly in place. This will ensure that the walls achieve optimal strength and stability.
By following these steps to build the walls of your brick dog kennel, you’ll create a secure and durable enclosure for your beloved pet. With the walls in place, you’re now ready to move on to the next phase: constructing the roof to provide shelter and protection for your furry friend.
Step 5: Construct the Roof
Constructing the roof of your brick dog kennel is a pivotal step that will provide shelter and protection for your canine companion. Here’s a detailed guide on how to effectively build the roof:
Select Roofing Materials:
Begin by selecting the roofing materials that best suit your design and provide optimal weather resistance. Options include shingles, metal sheets, or other durable roofing materials.
Frame the Roof Structure:
Construct a sturdy frame for the roof, ensuring that it is securely anchored to the top of the brick walls. The frame should provide ample support for the selected roofing materials and withstand weather elements.
Read more: How To Build A Brick Grill
Install Roofing Materials:
Carefully install the chosen roofing materials on the framed structure, ensuring that they are securely fastened and provide complete coverage for the kennel. Follow manufacturer guidelines for proper installation.
Ensure Proper Drainage:
Incorporate proper drainage features into the roof design to prevent water accumulation and ensure the kennel remains dry and comfortable for your dog. This may include sloping the roof or adding gutters and downspouts.
Add Insulation (Optional):
If you reside in a region with extreme weather conditions, consider adding insulation to the roof to provide additional comfort and protection for your dog. This will help regulate temperature within the kennel.
Check for Structural Integrity:
Once the roof is constructed, thoroughly inspect it to ensure that it is structurally sound and capable of withstanding various weather conditions. Address any issues or deficiencies before proceeding to the final phase of construction.
By following these steps to construct the roof of your brick dog kennel, you’ll provide a secure and weather-resistant shelter for your furry friend. With the roof in place, you’re now ready to add the finishing touches that will enhance the functionality and aesthetics of the kennel.
Read more: How To Build A Brick Column
Step 6: Add Finishing Touches
As you near the completion of your brick dog kennel, adding the finishing touches will elevate the functionality, aesthetics, and comfort of the structure. Here’s a comprehensive guide on how to add the essential finishing touches to your kennel:
Seal and Protect the Bricks:
Apply a high-quality sealant to the exterior bricks to protect them from weather elements and enhance their longevity. Choose a pet-safe sealant to ensure the well-being of your dog.
Paint or Stain the Interior:
If desired, paint or stain the interior of the kennel with pet-friendly products to create a welcoming and visually appealing environment for your dog. Opt for non-toxic options to prioritize your pet’s safety.
Install the Door:
Carefully install the door within the designated frame, ensuring that it opens and closes smoothly and securely latches to provide a safe enclosure for your dog.
Read more: How To Build A Brick Hearth
Add Bedding and Comfort Items:
Incorporate comfortable bedding, toys, and other accessories within the kennel to create a cozy and inviting space for your dog. Consider your pet’s preferences and needs when selecting these items.
Personalize with Name Plate (Optional):
For a personalized touch, consider adding a name plate or sign to the exterior of the kennel, displaying your dog’s name and adding a charming accent to the structure.
Ensure Proper Ventilation:
Incorporate adequate ventilation features within the kennel to maintain air circulation and ensure a comfortable and healthy environment for your dog, especially during warmer months.
Inspect and Secure Any Protrusions:
Thoroughly inspect the kennel for any protrusions, sharp edges, or potential safety hazards. Secure or address any such elements to create a safe and secure space for your dog.
By adding these finishing touches to your brick dog kennel, you’ll create a welcoming, secure, and comfortable haven for your beloved pet. With the completion of these final details, your DIY project will culminate in a structure that provides both practical functionality and a touch of charm to your outdoor space.
Read more: How To Build A Brick Arch
Conclusion
Congratulations on successfully completing the construction of your brick dog kennel! Through meticulous planning, dedicated effort, and a passion for providing the best for your furry friend, you’ve created a durable, secure, and charming outdoor haven that your dog will love.
Building a brick dog kennel is not only a rewarding DIY project but also a testament to the bond between humans and their pets. As you reflect on the journey from gathering materials to adding the final touches, you’ve not only created a functional structure but also a space filled with love and care for your canine companion.
It’s important to remember that the process of building a brick dog kennel goes beyond the physical construction. It’s an expression of your commitment to your pet’s well-being and happiness. As your dog enjoys the comfort and security of their new space, you’ll find joy in knowing that you’ve provided them with a place to call their own.
As you admire the completed kennel in your backyard, take pride in the craftsmanship and attention to detail that went into every aspect of the construction. Your dedication has resulted in a structure that not only serves a practical purpose but also adds a touch of character to your outdoor environment.
Whether it’s watching your dog explore their new space, basking in the satisfaction of a job well done, or simply enjoying the enhanced appeal of your backyard, the completion of your brick dog kennel marks a significant achievement. It’s a testament to your DIY skills, creativity, and the love you have for your pet.
As you and your dog embark on this new chapter with the brick dog kennel as a centerpiece of your outdoor space, cherish the memories of the construction process and the anticipation of the adventures that lie ahead. Your brick dog kennel stands as a symbol of the strong bond between you and your pet, creating a lasting legacy of care and devotion.
Now, take a moment to celebrate your accomplishment and embrace the joy of providing a safe and comfortable retreat for your beloved canine companion. Your brick dog kennel is not just a structure—it’s a testament to the love and companionship that enriches both your life and that of your cherished pet.
Frequently Asked Questions about How To Build A Brick Dog Kennel
Was this page helpful?
At Storables.com, we guarantee accurate and reliable information. Our content, validated by Expert Board Contributors, is crafted following stringent Editorial Policies. We're committed to providing you with well-researched, expert-backed insights for all your informational needs.


0 thoughts on “How To Build A Brick Dog Kennel”