Home>Construction & Tools>Building Materials>How To Build A Brick Grill
Building Materials
How To Build A Brick Grill
Modified: October 19, 2024
Learn how to build a brick grill using high-quality building materials. Follow our step-by-step guide for a durable and functional outdoor cooking space.
(Many of the links in this article redirect to a specific reviewed product. Your purchase of these products through affiliate links helps to generate commission for Storables.com, at no extra cost. Learn more)
Introduction
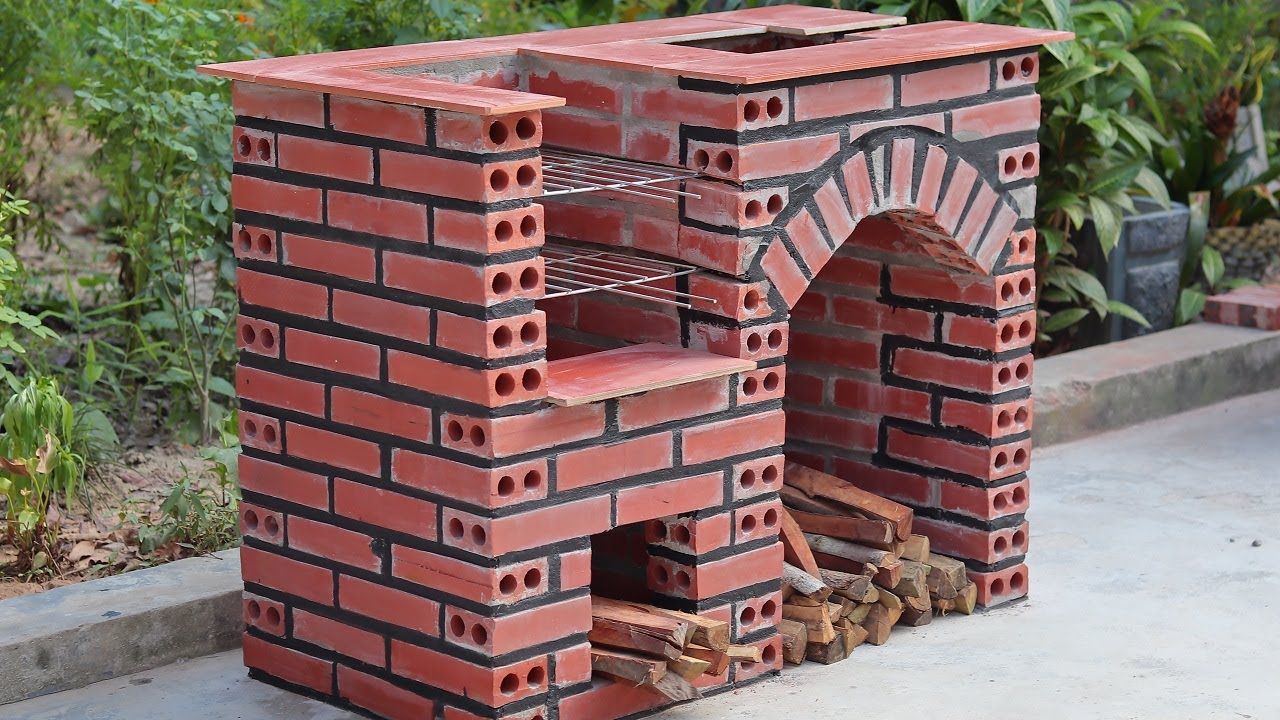
Welcome to the world of outdoor cooking! Building a brick grill in your backyard is a fantastic way to enhance your outdoor space and enjoy delicious meals with family and friends. The process of constructing a brick grill is not only a rewarding DIY project but also adds a touch of rustic charm to your outdoor living area. Whether you’re a seasoned DIY enthusiast or a beginner looking for a new challenge, building a brick grill can be a fulfilling and enjoyable endeavor.
In this comprehensive guide, we’ll walk you through the step-by-step process of building a brick grill, from selecting the materials to adding the finishing touches. By the end of this article, you’ll have the knowledge and confidence to create a beautiful and functional brick grill that will be the centerpiece of your outdoor entertaining space.
So, roll up your sleeves, gather your materials, and let’s dive into the exciting world of building a brick grill!
Key Takeaways:
- Building a brick grill is a fun and rewarding DIY project that adds rustic charm to your outdoor space. With careful planning and attention to detail, you can create a durable and stylish grill for enjoyable outdoor cooking.
- When building a brick grill, choose a safe and accessible location, construct a sturdy base, and add thoughtful finishing touches. This will ensure a functional and visually appealing outdoor cooking oasis for years to come.
Read more: How To Use A Grill Brick
Materials Needed
Before embarking on your brick grill construction journey, it’s essential to gather all the necessary materials. Having the right supplies on hand will streamline the building process and ensure that your brick grill is sturdy and long-lasting. Here’s a list of the materials you’ll need:
- Bricks: Select high-quality, heat-resistant bricks that are suitable for outdoor use. The number of bricks required will depend on the size of the grill you intend to build.
- Mortar: Invest in a reliable mortar mix specifically designed for outdoor brickwork. The mortar will hold the bricks together, providing structural integrity to the grill.
- Grill Grate: Choose a durable, food-grade stainless steel grill grate that fits the dimensions of your brick grill. The grill grate will serve as the cooking surface for your delicious outdoor meals.
- Concrete Blocks: These will be used as the base and support structure for the brick grill. Opt for solid, heavy-duty concrete blocks that can withstand the weight of the bricks and the heat from the grill.
- Shovel and Trowel: These basic masonry tools are essential for handling and applying the mortar, as well as shaping the foundation and brick layers.
- Level: A spirit level is crucial for ensuring that the bricks are laid evenly and that the grill structure is straight and balanced.
- Protective Gear: Safety should always be a priority. Equip yourself with gloves, safety goggles, and a dust mask to protect against mortar dust and debris.
- Measuring Tape: Accurate measurements are key to a successful construction project. A measuring tape will help you plan and build the grill with precision.
- Fire Bricks (Optional): For added heat resistance, fire bricks can be used to line the interior of the grill, especially in areas exposed to direct flames and high temperatures.
By ensuring that you have all these materials at your disposal, you’ll be well-prepared to start the exciting process of building your own brick grill.
Choosing a Location
Selecting the right location for your brick grill is a crucial initial step in the construction process. The chosen spot should not only accommodate the size of the grill but also provide a safe and enjoyable cooking environment. Here are some key considerations for choosing the perfect location:
Accessibility: Ensure that the location is easily accessible from your kitchen or outdoor dining area. This convenience will make it effortless to transfer food and cooking utensils to and from the grill.
Safety: Safety is paramount when it comes to outdoor cooking. Choose a location that is a safe distance from any flammable structures, such as sheds, trees, or overhanging branches. Additionally, consider the direction of prevailing winds to minimize smoke interference with your outdoor activities.
Level Ground: It’s essential to build your brick grill on a level surface to ensure stability and structural integrity. If the ground is uneven, you may need to level the area by adding or removing soil as necessary.
Ventilation: Adequate ventilation is crucial for a comfortable cooking experience. Position the grill in an area where smoke can dissipate easily and won’t be a nuisance to you or your neighbors.
Ambiance: Consider the overall ambiance of the chosen location. Whether you prefer a cozy nook or an open entertaining space, the location of your brick grill should complement the aesthetics of your outdoor living area.
By carefully considering these factors, you can select a location that not only accommodates the practical aspects of grilling but also enhances the overall enjoyment of outdoor cooking and entertaining.
Building the Base
The foundation of your brick grill is the base, which provides stability and support for the entire structure. Building a solid base is essential for ensuring that your grill remains durable and safe for cooking. Here’s a step-by-step guide to constructing the base of your brick grill:
- Prepare the Ground: Clear the chosen location of any debris, rocks, or vegetation. Use a shovel to level the ground, ensuring that the area is flat and stable.
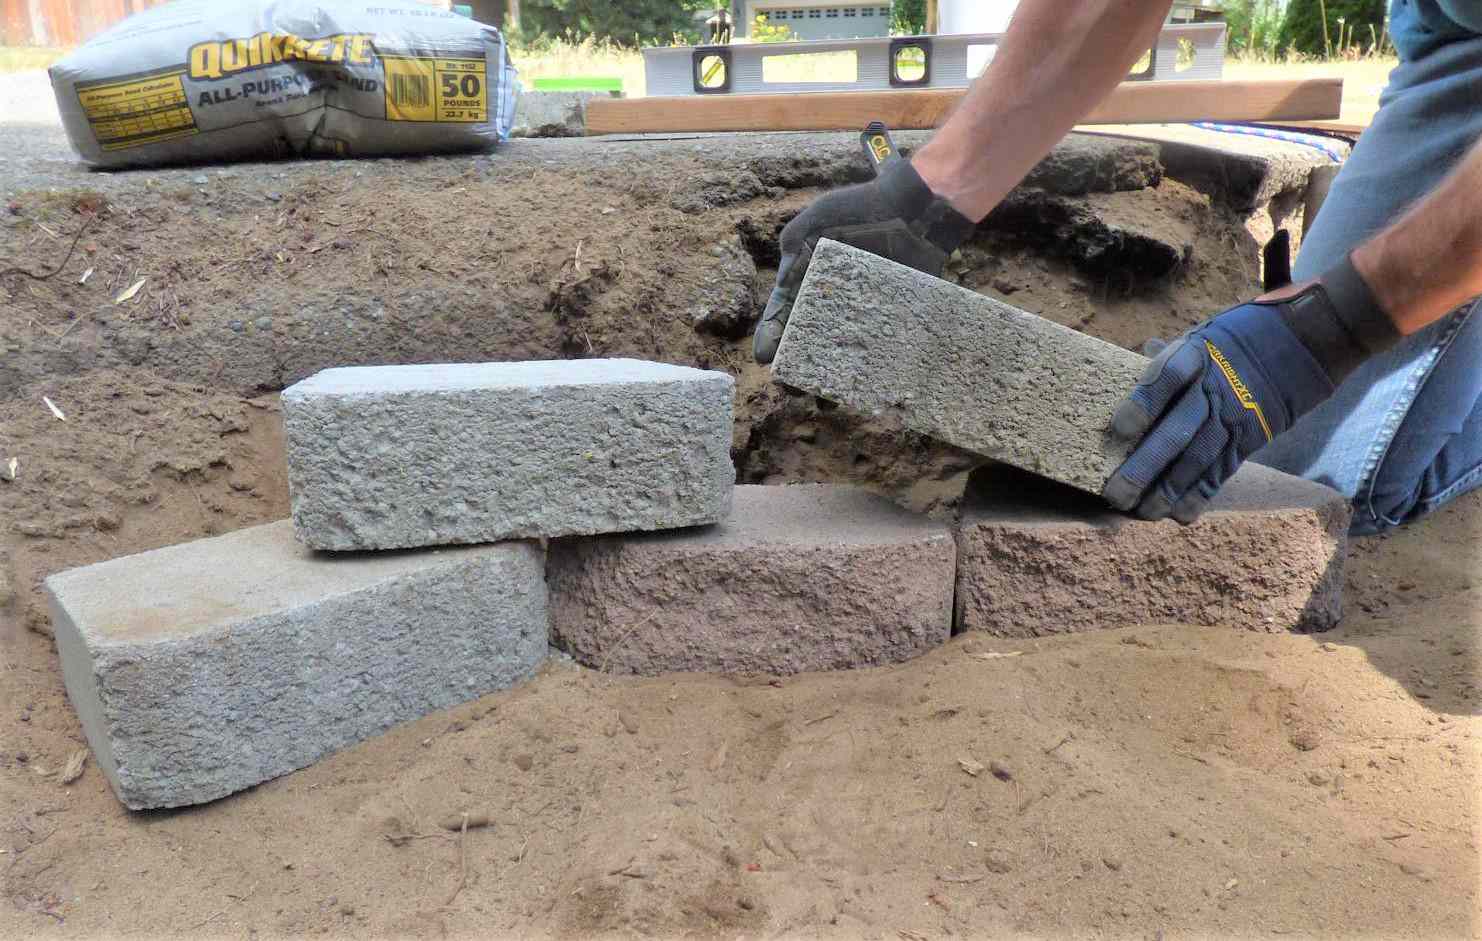
- Lay the Concrete Blocks: Begin by arranging the concrete blocks in a square or rectangular shape, depending on the size of the grill you want. Ensure that the blocks are level and firmly positioned. This will form the base of the grill.
- Check for Level: Use a spirit level to confirm that the blocks are even and level. Adjust the position of the blocks as needed to achieve a flat and stable base.
- Secure the Blocks: Once the blocks are in the desired position, use mortar to secure them together. Apply mortar between the blocks to create a solid, cohesive base structure.
- Create a Sturdy Platform: Add additional layers of blocks to create a stable platform for the grill. The height of the platform will depend on your preference and the design of the grill.
- Allow the Base to Set: After constructing the base, allow the mortar to cure and set for the recommended period, typically 24 to 48 hours. This will ensure that the base is solid and ready to support the weight of the bricks and grill components.
By following these steps, you’ll establish a strong and reliable base for your brick grill, setting the stage for the next phase of the construction process.
When building a brick grill, make sure to use fire-resistant bricks and mortar. Plan the size and location of the grill carefully, and consider adding a metal grate for cooking. Always follow local building codes and safety guidelines.
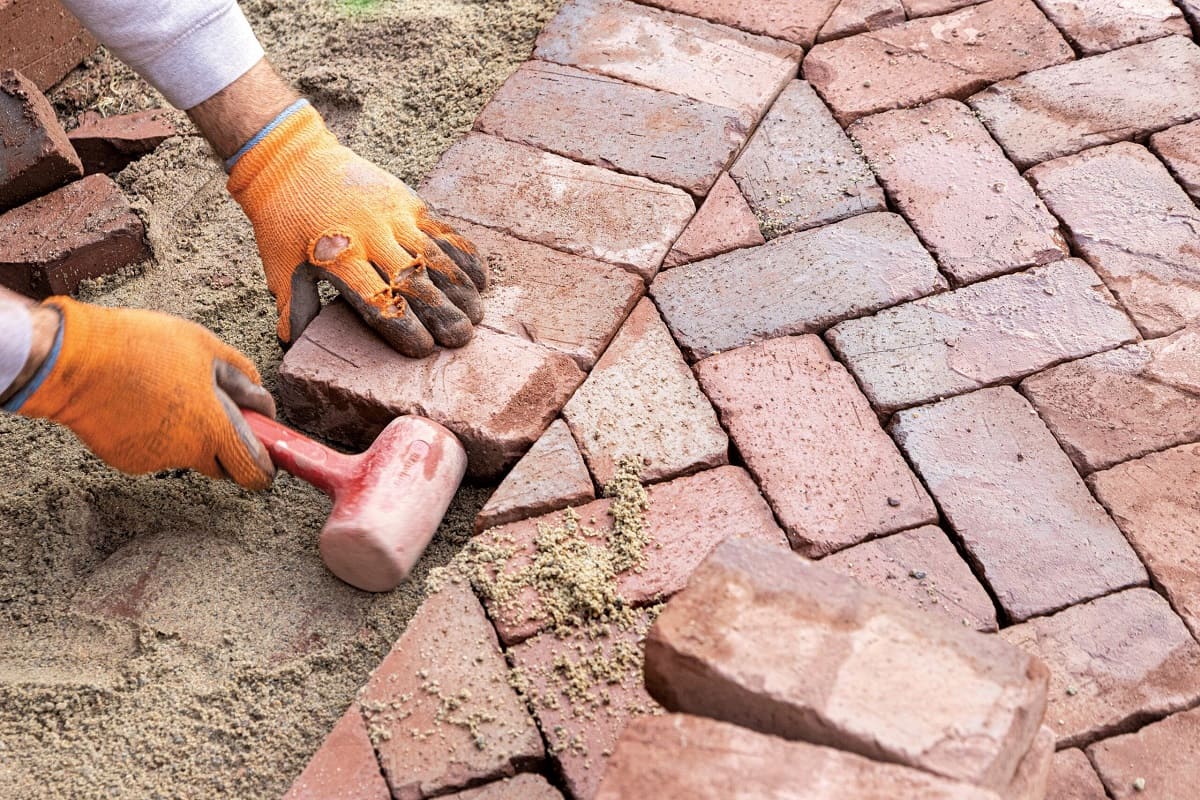
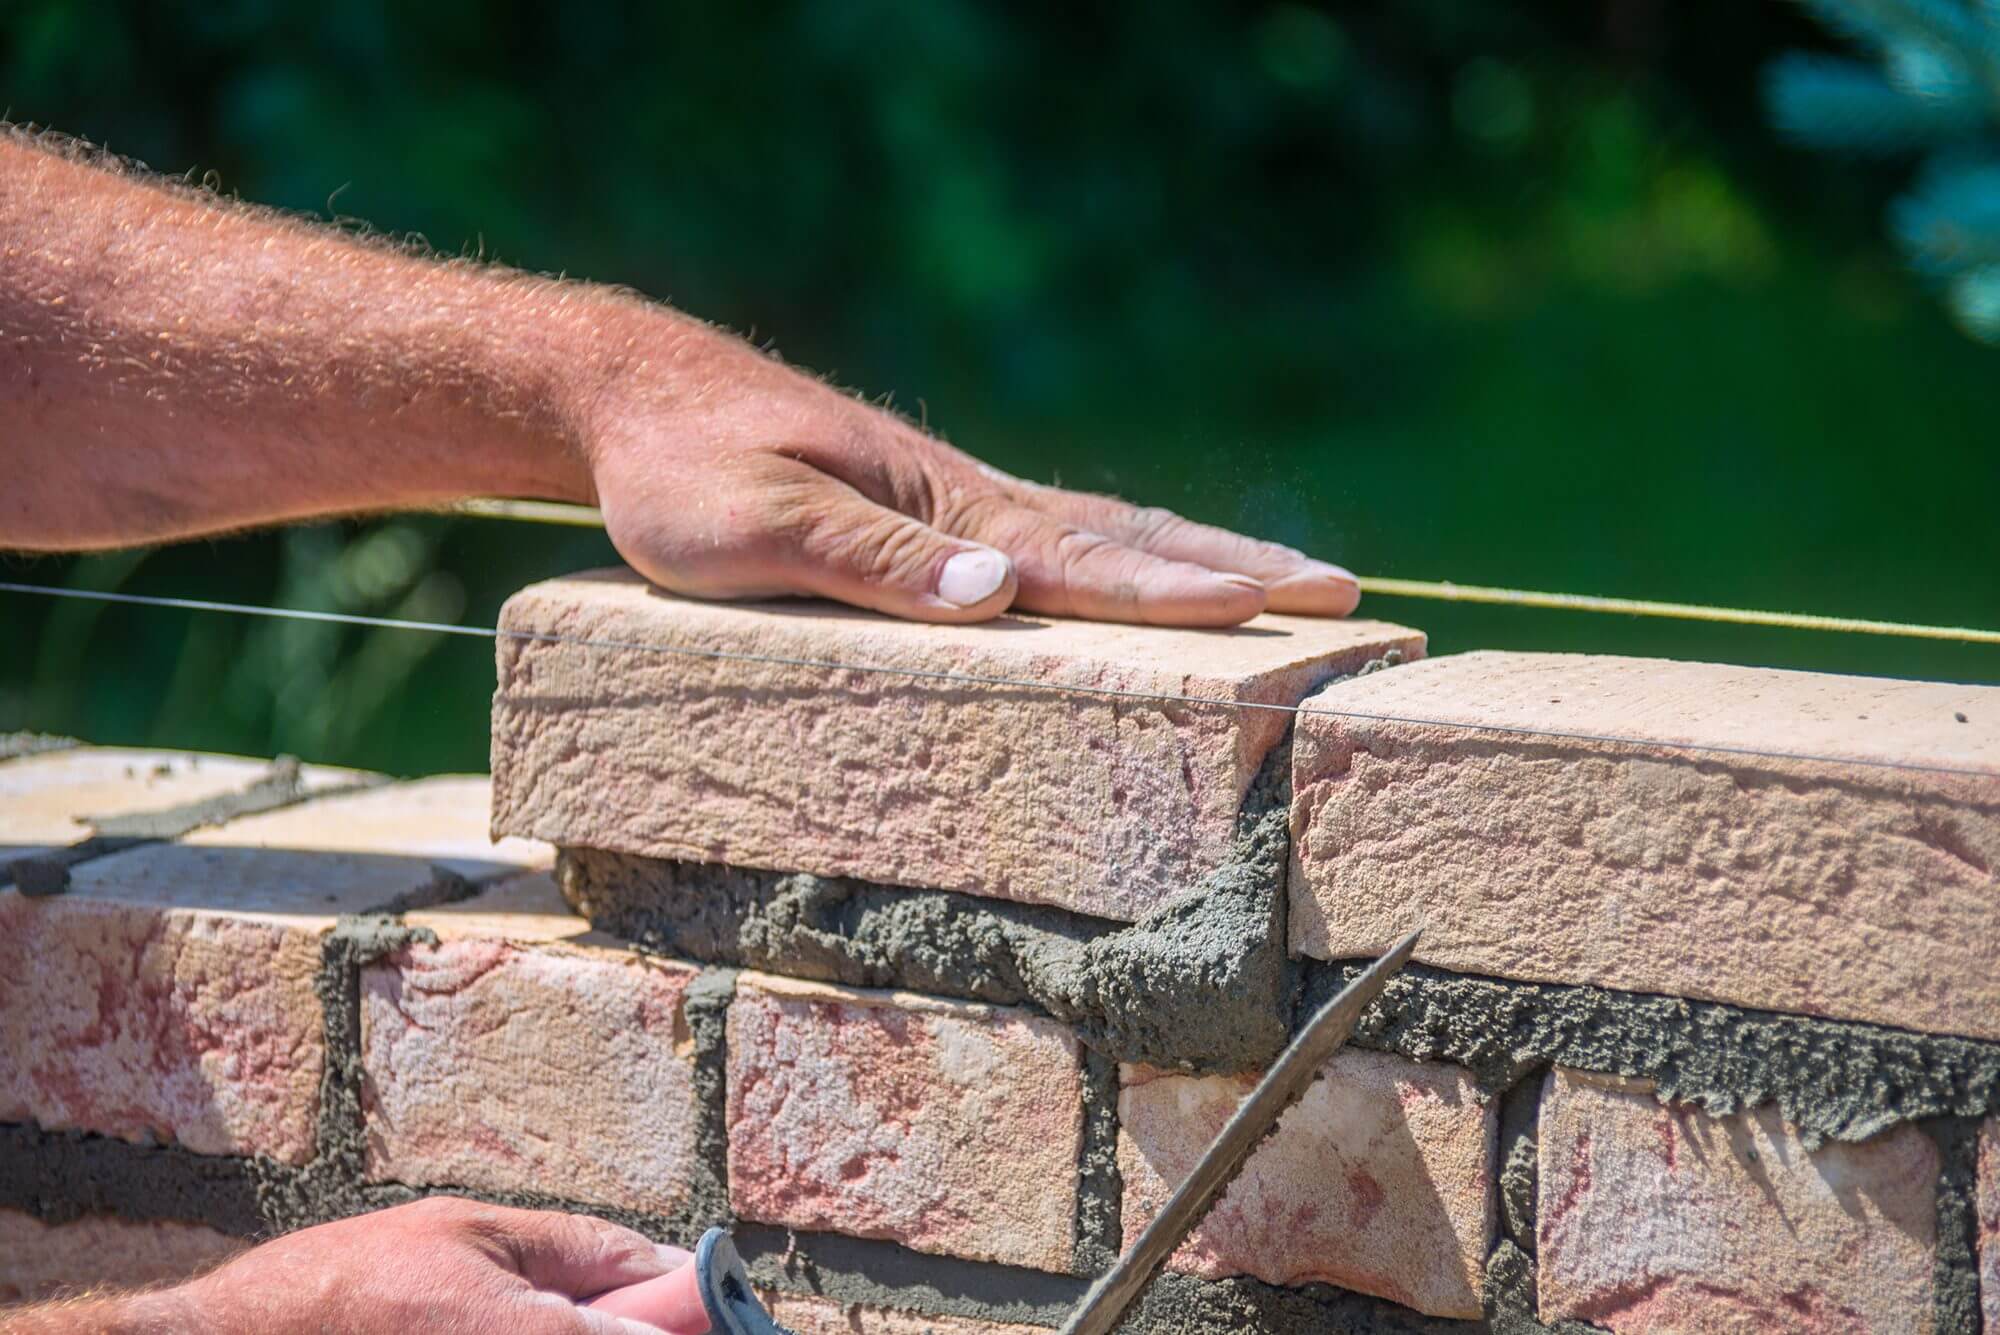
Laying the Bricks
With the solid base in place, it’s time to embark on the exciting phase of laying the bricks to construct the walls of your grill. This step requires precision and attention to detail to ensure that the structure is sturdy and visually appealing. Here’s a guide to laying the bricks for your brick grill:
- Prepare the Mortar: Mix the mortar according to the manufacturer’s instructions. The consistency should be workable but not too wet, allowing it to hold the bricks firmly in place.
- Start at the Corners: Begin by applying a layer of mortar along the top surface of the concrete blocks. Place the first brick at one corner, pressing it firmly into the mortar. Ensure that the brick is level and plumb using a spirit level.
- Continue Layer by Layer: Apply mortar to the side of each brick as you add it to the structure. Stagger the joints of the bricks for added strength and stability. Use a trowel to remove any excess mortar and maintain clean, even joints.
- Check for Alignment: Periodically check the alignment and level of the bricks as you build upward. Adjust the position of the bricks as needed to maintain a straight and uniform structure.
- Build the Walls: Continue adding layers of bricks to build the walls of the grill to the desired height. Ensure that each layer is securely bonded with mortar to create a solid and cohesive structure.
- Leave Openings for Airflow: Depending on your grill design, leave openings in the brick walls to facilitate airflow for the fire. These openings will contribute to efficient and controlled grilling temperatures.
By following these steps and taking the time to lay the bricks with precision, you’ll create a sturdy and visually appealing enclosure for your brick grill, bringing you one step closer to enjoying outdoor culinary delights.
Read more: How To Build A Brick Mailbox
Building the Grill
As the brick walls of your grill take shape, it’s time to focus on constructing the grill component itself. The grill assembly will provide the cooking surface and support for your outdoor culinary adventures. Here’s a detailed guide to building the grill within the brick enclosure:
- Install the Grill Grate Supports: Position metal or brick supports within the brick enclosure to hold the grill grate in place. These supports should be sturdy and heat-resistant to accommodate the weight of the grate and withstand the heat from the fire.
- Place the Grill Grate: Carefully position the grill grate on top of the supports, ensuring that it fits securely within the brick walls. The grate should be at an optimal height for cooking and easily accessible for grilling activities.
- Adjustable Grate Height (Optional): If desired, consider incorporating a mechanism for adjusting the height of the grill grate. This feature allows you to control the distance between the cooking surface and the fire, offering versatility in grilling techniques.
- Fire Chamber Construction: Depending on the design of your brick grill, you may choose to create a designated fire chamber within the enclosure. This area will house the fuel source, such as charcoal or wood, and provide the heat for cooking.
- Heat-Resistant Lining (Optional): For added durability and heat retention, consider lining the interior of the grill walls with fire bricks or a heat-resistant material. This lining enhances the grill’s ability to maintain consistent cooking temperatures and prolongs the life of the structure.
- Final Adjustments: Once the grill components are in place, make any necessary adjustments to ensure that everything is securely positioned and ready for use. Double-check the stability of the grill grate and the overall integrity of the grill structure.
By following these steps, you’ll successfully integrate the grill components into the brick enclosure, creating a functional and durable cooking space that is sure to elevate your outdoor culinary experiences.
Finishing Touches
As the construction of your brick grill nears completion, it’s time to add the finishing touches that will enhance both the functionality and visual appeal of the structure. These final details will elevate your brick grill from a simple cooking space to a stylish and efficient outdoor culinary centerpiece. Here’s a guide to the finishing touches for your brick grill:
- Weatherproofing: Apply a weatherproof sealant to the exterior of the brick grill to protect it from the elements. This sealant will help prevent moisture penetration and extend the lifespan of the structure.
- Customization and Personalization: Consider adding personalized elements to the grill, such as decorative tiles, engraved stones, or a custom-built chimney. These touches can reflect your personal style and make the grill a unique focal point in your outdoor space.
- Storage and Convenience: Integrate storage compartments or shelves into the design of the grill for convenient access to cooking utensils, condiments, and grilling accessories. This thoughtful addition enhances the practicality of the grill area.
- Lighting: Install outdoor lighting near the grill to ensure visibility during evening cooking sessions. Whether it’s integrated LED lights, solar-powered lanterns, or decorative string lights, proper illumination adds functionality and ambiance to the grill area.
- Landscaping and Surroundings: Enhance the overall aesthetic appeal of the grill area by incorporating landscaping elements, such as potted plants, flower beds, or a designated grilling patio. A well-designed outdoor space complements the charm of the brick grill.
- Personal Safety Features: Consider safety features such as a fire extinguisher, a first aid kit, and clear signage indicating the location of safety equipment. Prioritizing safety ensures that you and your guests can enjoy the grill area with peace of mind.
By attending to these finishing touches, you’ll transform your brick grill into a functional, inviting, and aesthetically pleasing outdoor cooking oasis. These details will not only enhance the usability of the grill but also contribute to a welcoming and enjoyable outdoor entertaining space.
Conclusion
Congratulations on completing the construction of your very own brick grill! Through meticulous planning, precise execution, and a touch of creativity, you’ve transformed a collection of materials into a functional and visually striking outdoor cooking space. As you stand back and admire your handiwork, it’s time to appreciate the journey you’ve undertaken and the rewards that lie ahead.
Building a brick grill is not just about creating a place to cook; it’s about crafting a focal point for outdoor gatherings, a stage for culinary creativity, and a symbol of your dedication to creating memorable experiences for yourself and your loved ones. The process of building a brick grill is a testament to your craftsmanship and your desire to enhance your outdoor living space.
As you fire up the grill for the first time and savor the aromas of your favorite foods sizzling over the open flames, take pride in the fact that you’ve built more than just a cooking appliance—you’ve built a hub for warmth, laughter, and shared moments. Whether it’s a casual family barbecue, a gathering of friends, or a quiet evening of relaxation, your brick grill will be at the center of cherished memories for years to come.
Remember to maintain your brick grill with care, keeping it clean, inspecting it regularly, and addressing any maintenance needs promptly. With proper upkeep, your brick grill will continue to serve as a reliable and beloved feature of your outdoor living space, enriching your life with the joy of outdoor cooking and entertaining.
So, as you embark on this new chapter of outdoor culinary adventures, may your brick grill be a source of warmth, flavor, and togetherness. Here’s to the countless meals, conversations, and celebrations that await in the presence of your meticulously crafted brick grill. Cheers to the art of outdoor cooking and the memories yet to be made!
Frequently Asked Questions about How To Build A Brick Grill
Was this page helpful?
At Storables.com, we guarantee accurate and reliable information. Our content, validated by Expert Board Contributors, is crafted following stringent Editorial Policies. We're committed to providing you with well-researched, expert-backed insights for all your informational needs.


0 thoughts on “How To Build A Brick Grill”