Home>Construction & Tools>Building Materials>How To Hang Lights On A Brick Wall
Building Materials
How To Hang Lights On A Brick Wall
Modified: August 28, 2024
Discover the best techniques for hanging lights on a brick wall using top-quality building materials. Get expert tips and step-by-step instructions for a successful installation.
(Many of the links in this article redirect to a specific reviewed product. Your purchase of these products through affiliate links helps to generate commission for Storables.com, at no extra cost. Learn more)
Introduction
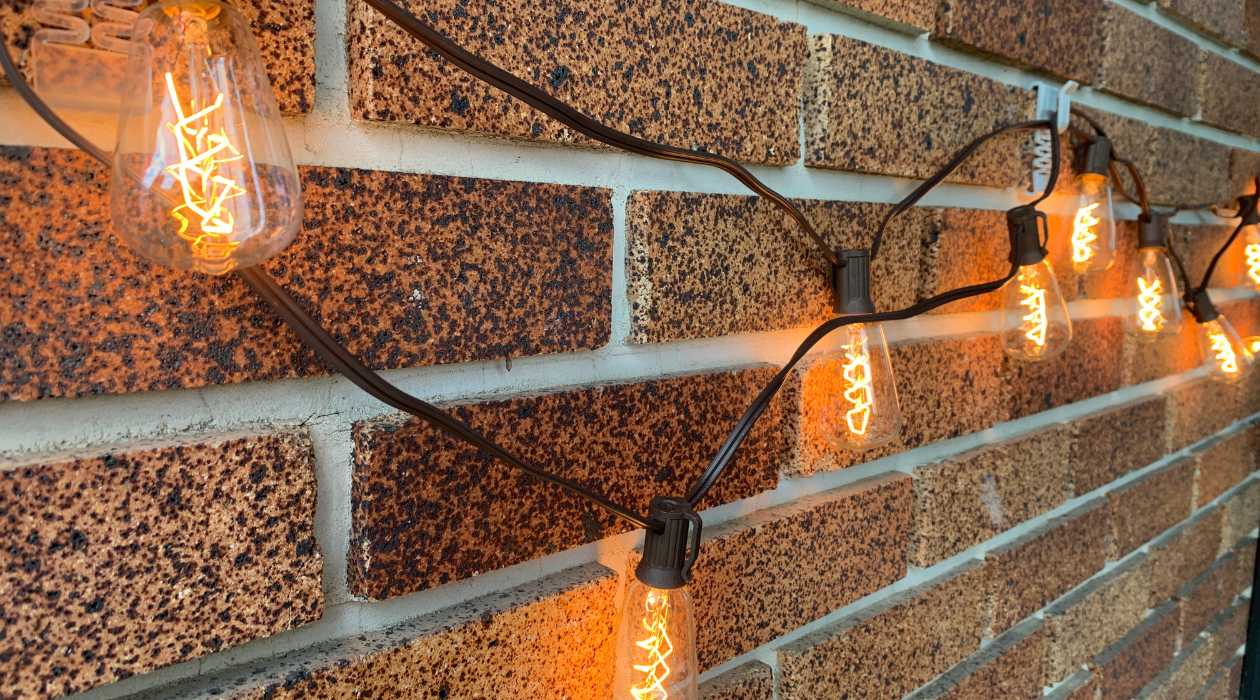
Adding lights to a brick wall can instantly elevate the ambiance of your outdoor space, creating a warm and inviting atmosphere. Whether you’re preparing for a festive gathering or simply enhancing your outdoor decor, learning how to hang lights on a brick wall can be a rewarding DIY project. With the right tools and a methodical approach, you can achieve a stunning display that complements the rugged beauty of the brick while illuminating your outdoor area.
In this guide, we’ll walk through the step-by-step process of hanging lights on a brick wall, from gathering the necessary materials to testing your illuminated creation. By following these instructions, you’ll be able to add a touch of enchantment to your outdoor space while showcasing the timeless allure of brick as a backdrop for your lighting design.
Key Takeaways:
- Planning is crucial. Visualize your design, measure the space, and consider the power source. Test the illumination at night to refine your layout before permanent installation.
- Safety first! Wear protective gear, choose the right drill bit, and install wall anchors with precision. Test the lights thoroughly to ensure a captivating and safe display.
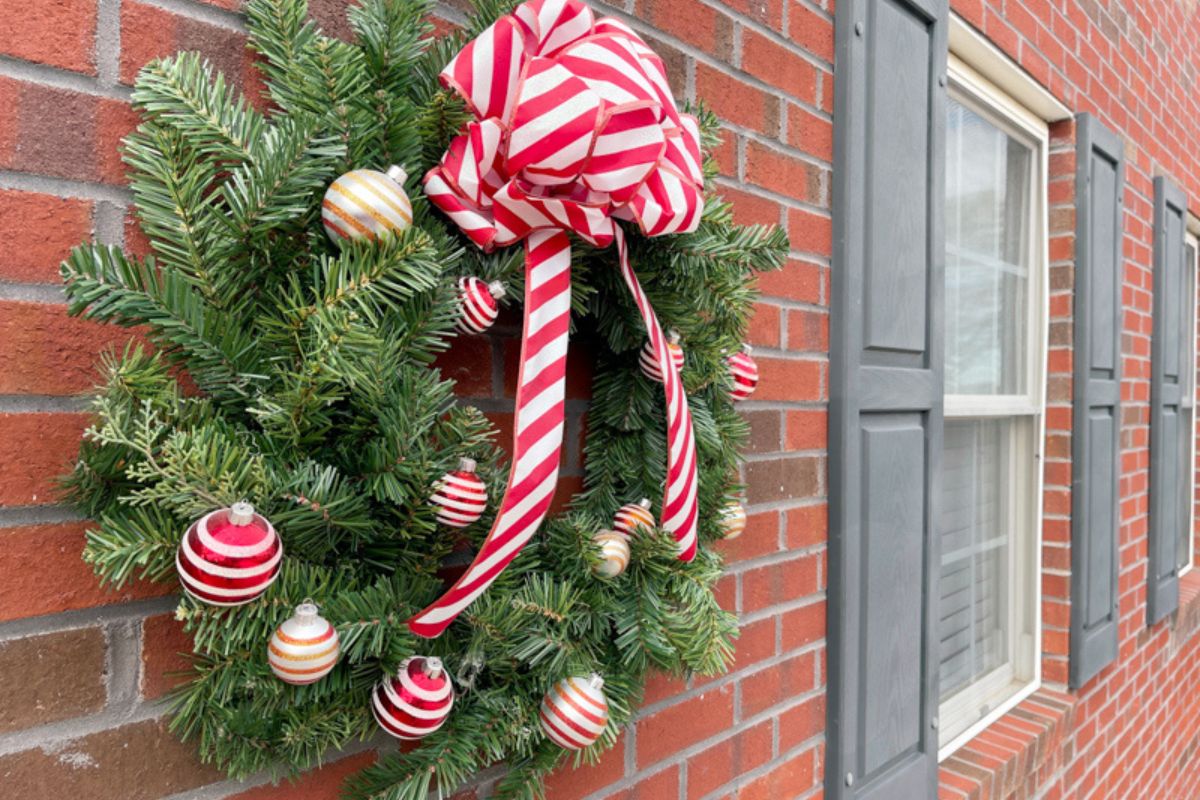
Read more: How To Hang A Banner On A Brick Wall
Step 1: Gather Your Materials
Before embarking on the project of hanging lights on a brick wall, it’s essential to gather the necessary materials. Here’s a list of items you’ll need to ensure a smooth and successful installation:
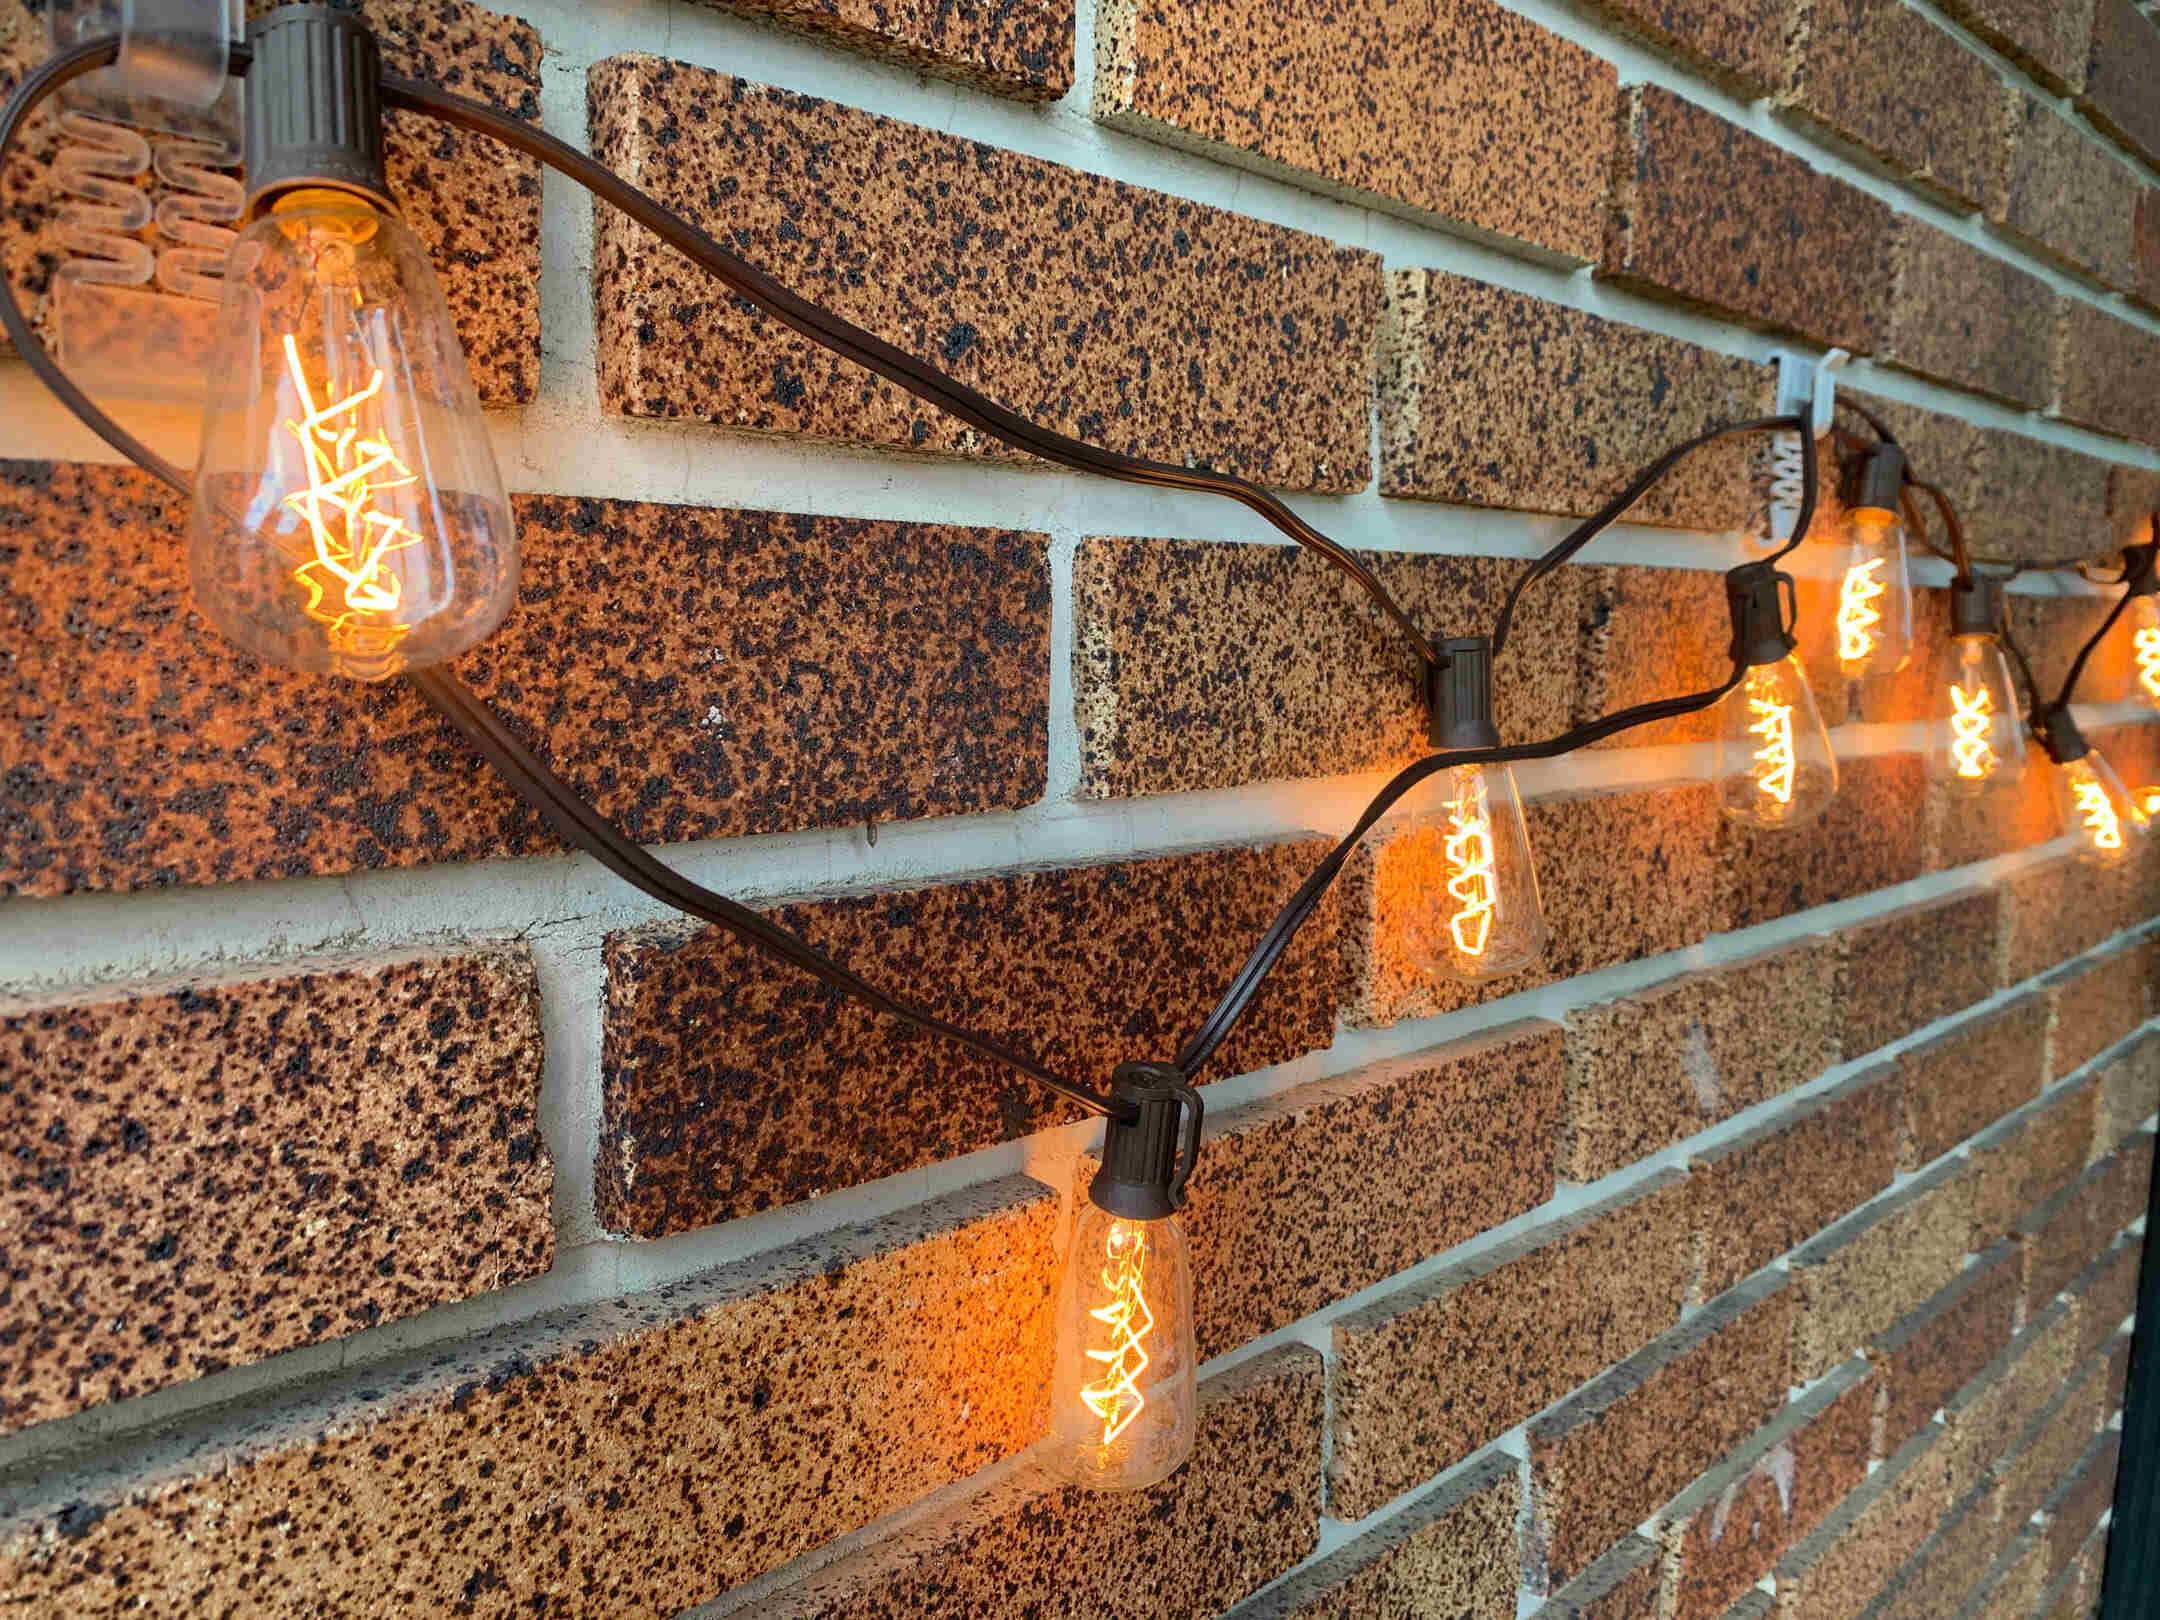
- Outdoor Lights: Select the type of lights that best suit your desired ambiance, whether it’s string lights, lanterns, or LED sconces.
- Tape Measure: Accurately measuring the area where you plan to hang the lights is crucial for precise placement.
- Pencil or Chalk: These will be used for marking the drill holes and layout on the brick wall.
- Drill: Choose a masonry drill bit that matches the size of the wall anchors you’ll be using.
- Wall Anchors: Opt for sturdy anchors designed for masonry surfaces to ensure secure attachment.
- Screws or Hooks: Depending on the type of lights you have, you’ll need appropriate screws or hooks for mounting.
- Safety Gear: Always prioritize safety by wearing protective goggles and gloves when drilling into the brick.
- Ladder: A stable ladder will be necessary for reaching higher sections of the wall.
- Extension Cord (if needed): Ensure you have a suitable outdoor extension cord if the lights require an extended reach to the power source.
By assembling these materials before you begin, you’ll be well-prepared to tackle each step of the installation process with confidence and efficiency.
Step 2: Plan Your Layout
Once you have gathered all the necessary materials, it’s time to plan the layout for your lights on the brick wall. Consider the design and placement that will best enhance the aesthetic of your outdoor space. Here are some key considerations as you plan your layout:
- Visualize the Design: Envision how you want the lights to illuminate and accentuate the features of the brick wall. Whether you aim for a symmetrical arrangement or a more organic, free-flowing display, take the time to visualize the end result.
- Measure the Space: Use a tape measure to determine the exact dimensions of the area where the lights will be installed. This will guide the spacing and placement of the lights for a balanced and harmonious arrangement.
- Consider Power Source: Identify the nearest power source and plan the layout to ensure convenient access to electricity for the lights. If an extension cord is needed, factor this into your layout plan.
- Account for Obstacles: Take note of any architectural features, such as windows or doors, that may impact the placement of the lights. Ensure that the layout complements the overall architecture and landscaping of the outdoor area.
- Test the Illumination: If possible, conduct a nighttime test by temporarily hanging the lights in your planned layout to assess the illumination and ambiance they create. This can help refine your layout before the permanent installation.
By carefully planning the layout of your lights on the brick wall, you can create a captivating display that harmonizes with the architectural elements of your outdoor space while infusing it with a warm and inviting glow.
Step 3: Mark Your Drill Holes
With your layout plan in mind, the next crucial step in hanging lights on a brick wall is marking the drill holes for precise installation. Here’s how to effectively mark your drill holes:
- Use a Level: Before marking any holes, ensure that your lights will be aligned correctly by using a level to guide the placement. This will help maintain a straight and balanced arrangement.
- Mark Hole Locations: With a pencil or chalk, carefully mark the spots on the brick wall where the drill holes will be made. Double-check the measurements and layout to confirm that the markings align with your planned design.
- Account for Wall Anchors: If you are using wall anchors, mark the locations for these as well. Wall anchors provide essential support for securing the screws or hooks that will hold the lights in place.
- Ensure Even Spacing: If you are installing multiple lights, maintain consistent spacing between the drill hole markings to achieve a balanced and visually appealing arrangement.
- Consider Brick Type: Different types of brick may require specific considerations when marking the drill holes. For example, softer bricks may necessitate lighter pressure to avoid chipping, while harder bricks may require more force for marking.
By meticulously marking the drill holes according to your layout plan, you can ensure a seamless and professional-looking installation of your lights on the brick wall. Taking the time to mark the holes accurately will set the stage for the next steps in the installation process.
Step 4: Drill Holes
Drilling holes into a brick wall requires precision and care to achieve secure and accurate placements for your lights. Here’s a step-by-step guide to effectively drilling the necessary holes:
- Choose the Right Drill Bit: Select a masonry drill bit that matches the size of the wall anchors you’ll be using. The correct drill bit will ensure clean and properly sized holes in the brick.
- Wear Protective Gear: Prioritize safety by wearing protective goggles and gloves to shield yourself from any debris or dust generated during the drilling process.
- Position the Drill: Hold the drill steady and position it perpendicular to the brick surface at the marked drill hole locations. Maintain a firm grip on the drill to prevent slippage during drilling.
- Apply Even Pressure: Begin drilling at a slow speed to create an initial groove in the brick. Once the groove is established, gradually increase the pressure while maintaining a steady and controlled pace to avoid causing damage to the brick.
- Clean the Holes: After drilling each hole, use a brush or compressed air to remove any debris or dust from the holes. This will ensure a clear pathway for inserting the wall anchors.
- Double-Check Alignment: Confirm that the drilled holes align with your layout plan and that they are at the correct depth to accommodate the wall anchors securely.
By following these steps and exercising patience and precision, you can successfully drill the necessary holes in the brick wall, laying the groundwork for the secure installation of your lights.
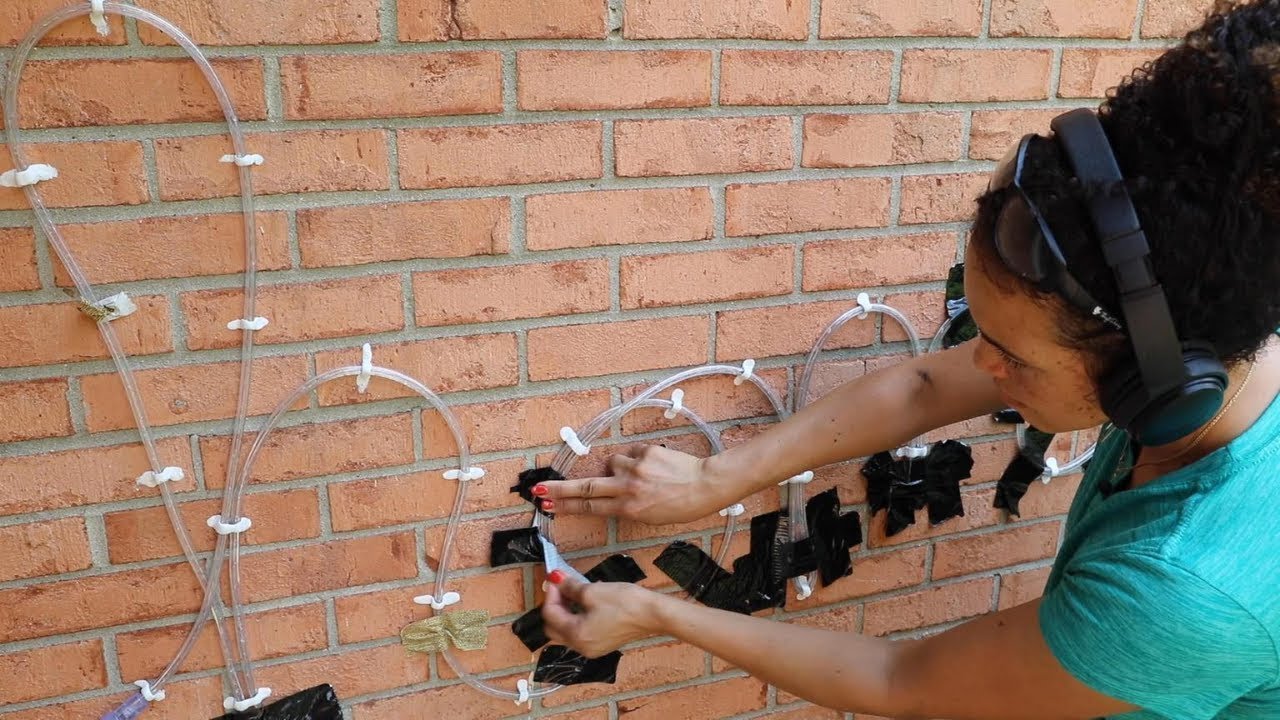
Use brick clips or adhesive hooks designed for outdoor use. Place them at regular intervals along the top of the wall and hang the lights from the clips. Make sure to use outdoor-rated lights for safety.
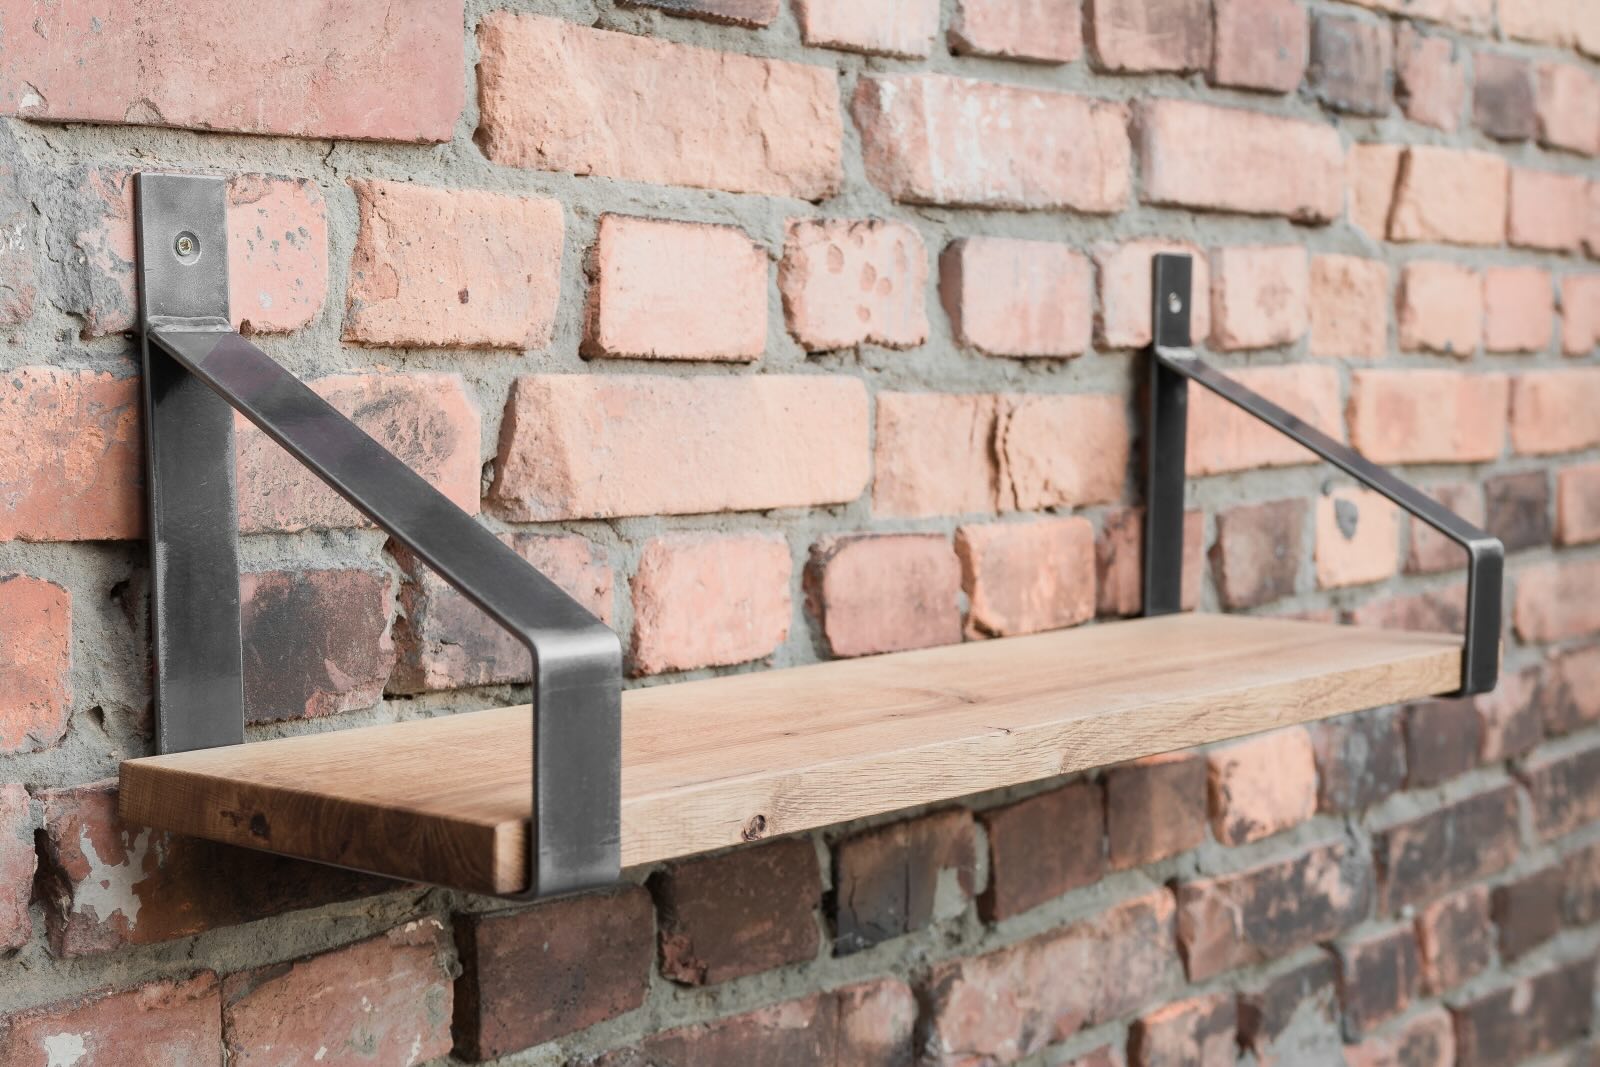
Read more: How To Hang A Shelf On A Brick Wall
Step 5: Install Wall Anchors
Once the holes have been drilled, the next critical step in hanging lights on a brick wall is installing the wall anchors to provide stable and secure support for the mounting hardware. Here’s how to effectively install the wall anchors:
- Select the Right Anchors: Choose wall anchors specifically designed for masonry surfaces, ensuring they are compatible with the screws or hooks you’ll be using to hang the lights.
- Insert the Anchors: Gently tap the wall anchors into the drilled holes using a hammer, ensuring they are inserted flush with the surface of the brick. The anchors should fit snugly in the holes for optimal stability.
- Verify Alignment: Confirm that the wall anchors are aligned with the drill holes and are positioned according to your layout plan. Adjust the placement if necessary to maintain the desired layout and spacing.
- Ensure Firm Attachment: Once the wall anchors are in place, verify that they are securely seated in the brick and can effectively support the weight of the lights without loosening or shifting.
- Test the Anchors: Apply gentle pressure to the installed wall anchors to ensure they are firmly embedded in the brick and can withstand the weight and tension of the lights once they are hung.
By meticulously installing the wall anchors with precision and attention to detail, you can establish a solid foundation for securely mounting the lights on the brick wall, ensuring a safe and durable installation.
Step 6: Hang Your Lights
With the wall anchors in place, it’s time to proceed with hanging your lights on the brick wall. This step requires careful attention to detail to ensure that the lights are securely mounted and aligned according to your layout plan. Here’s a guide to effectively hanging your lights:
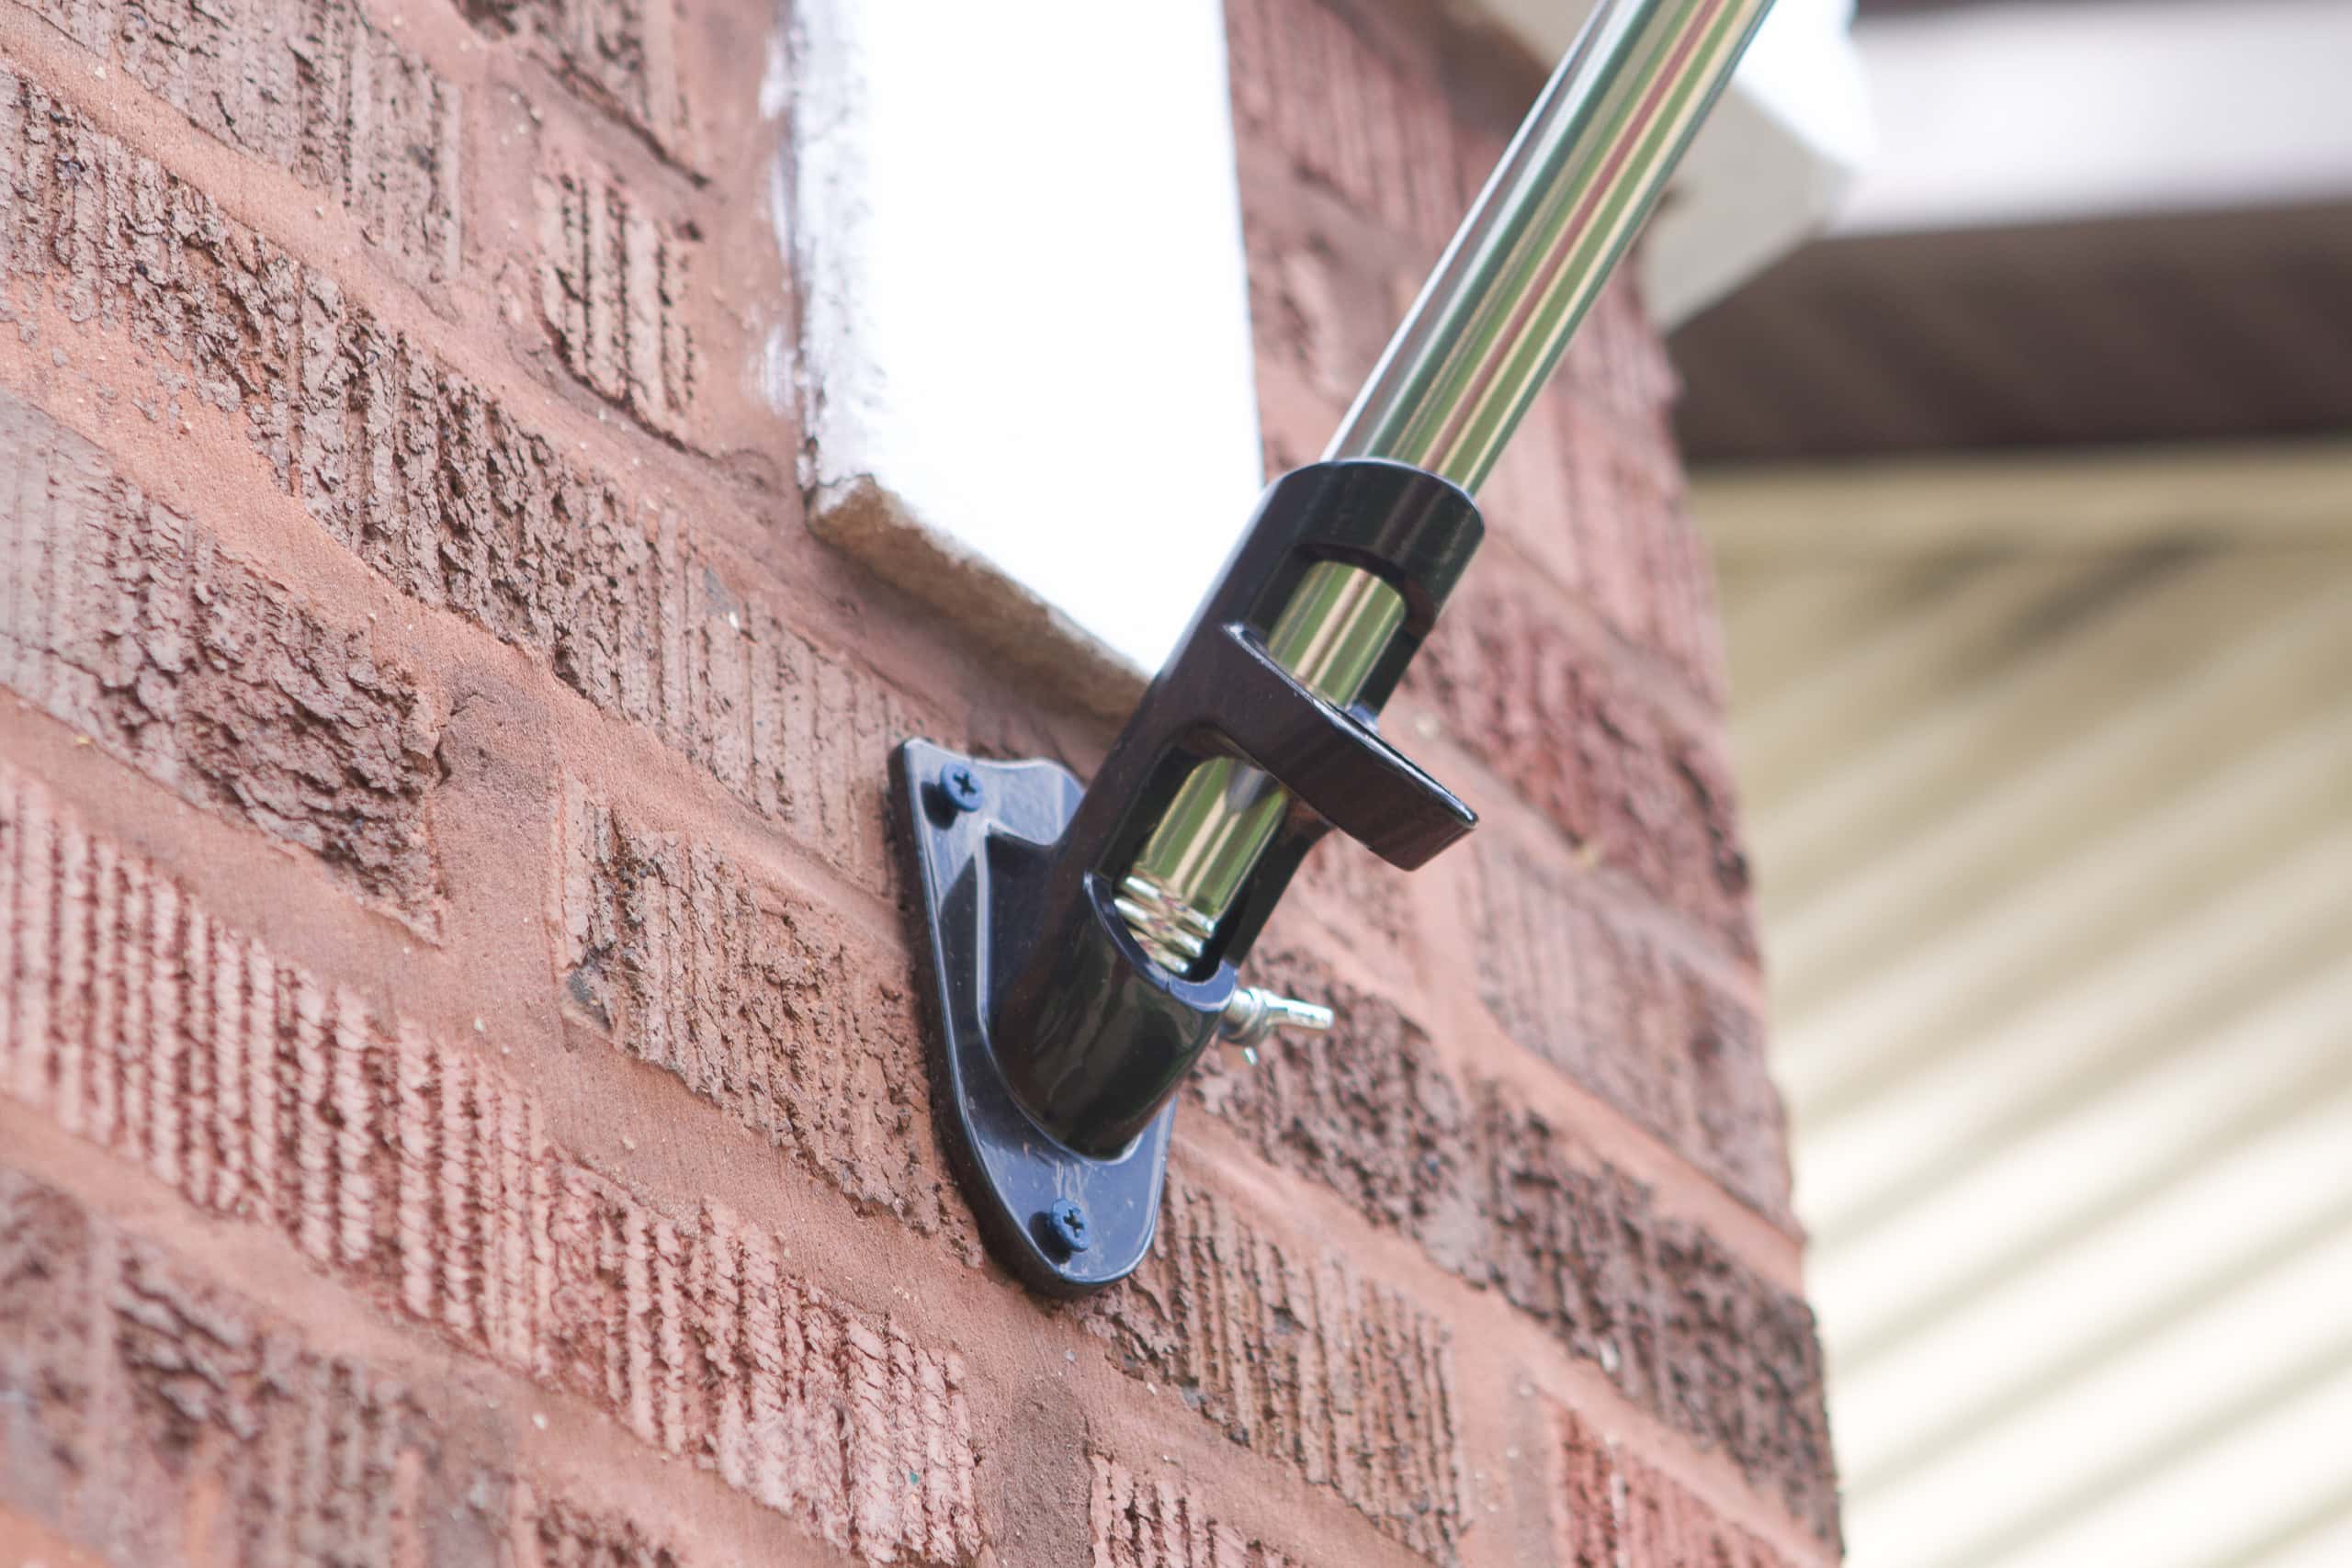
- Attach the Mounting Hardware: Depending on the type of lights you have, whether string lights, lanterns, or sconces, securely attach the mounting hardware to the wall anchors using the appropriate screws or hooks. Ensure that the hardware is fastened tightly to prevent any movement or slippage.
- Test the Stability: Before fully securing the lights, gently test the stability of the mounting hardware to confirm that it can support the weight of the lights without shifting or coming loose. Make any necessary adjustments to ensure a secure attachment.
- Align the Lights: Carefully align the lights according to your layout plan, ensuring that they are level and evenly spaced. Use a level to guide the alignment and maintain a visually pleasing display.
- Secure the Lights: Once the lights are properly aligned, securely fasten them to the mounting hardware, double-checking the stability and ensuring that they are firmly attached to the brick wall.
- Account for Power Source: If the lights require a power source, ensure that the cords are neatly arranged and safely connected to the electrical supply, taking care to conceal or secure any excess wiring for a tidy appearance.
By following these steps and exercising patience and precision, you can successfully hang your lights on the brick wall, creating a captivating and inviting illumination that enhances the beauty of your outdoor space.
Step 7: Test Your Lights
After hanging your lights on the brick wall, it’s essential to thoroughly test their functionality and overall effect to ensure a stunning and safe display. Here’s a comprehensive guide to testing your lights:
- Check Electrical Connections: Verify that the electrical connections are secure and that the lights are receiving power without any issues. Inspect the cords and connections for any signs of damage or wear.
- Illuminate the Area: Turn on the lights and assess the illumination they provide. Take note of any areas that may require additional adjustment or repositioning to achieve the desired lighting effect.
- Assess the Ambiance: Step back and observe the overall ambiance created by the lights on the brick wall. Evaluate how the illumination enhances the architectural features and contributes to the desired atmosphere of your outdoor space.
- Ensure Safety Measures: Confirm that the lights are installed securely and that all cords and wiring are positioned safely to prevent tripping hazards or exposure to the elements.
- Make Adjustments if Necessary: If any aspect of the lighting display requires adjustments, such as repositioning, angle modification, or brightness level, make the necessary changes to achieve the desired outcome.
- Consider Timed Testing: Observe the lights during different times of the day and evening to assess their impact in varying lighting conditions. This will help fine-tune the display for optimal visual appeal.
By meticulously testing your lights and assessing their performance, you can ensure that your installation on the brick wall meets your expectations in terms of both aesthetics and functionality. This thorough evaluation will allow you to make any final adjustments for a captivating and seamless lighting display.
Conclusion
Embarking on the journey of hanging lights on a brick wall is a rewarding endeavor that can transform your outdoor space into a captivating and inviting environment. By following the step-by-step process outlined in this guide, you can achieve a stunning lighting display that complements the rugged charm of the brick while infusing your outdoor area with warmth and ambiance.
From gathering the necessary materials to meticulously planning the layout, marking drill holes, drilling with precision, installing wall anchors, and finally hanging and testing your lights, each step plays a crucial role in ensuring a successful and visually appealing installation.
As you bask in the enchanting glow of your illuminated brick wall, take pride in the meticulous effort and attention to detail that went into creating this captivating display. Whether you’re hosting outdoor gatherings, enjoying quiet evenings under the stars, or simply admiring the beauty of your outdoor space, the addition of lights to the brick wall will undoubtedly elevate the atmosphere and leave a lasting impression.
Embrace the creative possibilities that come with lighting design, and don’t hesitate to experiment with different styles and arrangements to achieve the perfect ambiance for your unique outdoor setting. With a touch of creativity and a methodical approach, you can continue to enhance the allure of your outdoor space through the artful placement of lights on the enduring canvas of a brick wall.
May your illuminated brick wall serve as a beacon of warmth and beauty, inviting moments of joy and connection in the heart of your outdoor sanctuary.
Frequently Asked Questions about How To Hang Lights On A Brick Wall
Was this page helpful?
At Storables.com, we guarantee accurate and reliable information. Our content, validated by Expert Board Contributors, is crafted following stringent Editorial Policies. We're committed to providing you with well-researched, expert-backed insights for all your informational needs.


0 thoughts on “How To Hang Lights On A Brick Wall”