Home>Construction & Tools>Building Materials>How To Point A Brick Wall

Building Materials
How To Point A Brick Wall
Published: January 22, 2024
Learn how to point a brick wall using the right building materials and techniques. Our step-by-step guide will help you achieve professional results. Discover the best practices for pointing brickwork.
(Many of the links in this article redirect to a specific reviewed product. Your purchase of these products through affiliate links helps to generate commission for Storables.com, at no extra cost. Learn more)
Introduction
Welcome to the world of bricklaying! Whether you’re a seasoned DIY enthusiast or a novice looking to embark on your first masonry project, knowing how to point a brick wall is an invaluable skill. “Pointing” refers to the process of filling in the joints between bricks with mortar, providing structural integrity and enhancing the visual appeal of the wall. This comprehensive guide will walk you through the step-by-step process of pointing a brick wall, from gathering the necessary materials to applying the finishing touches.
By following these instructions, you’ll be able to tackle this task with confidence, creating a sturdy and aesthetically pleasing brick wall that will stand the test of time. So, roll up your sleeves, gather your tools, and let’s dive into the art of pointing a brick wall!
Key Takeaways:
- Pointing a brick wall involves gathering materials, preparing the surface, laying out the bricks, mixing mortar, applying it, laying the bricks, finishing the joints, and cleaning up for a sturdy and visually appealing result.
- Before pointing a brick wall, gather materials like bricks, mortar mix, trowel, and protective gear. Prepare the surface by cleaning joints, moistening them, and securing loose bricks for a successful pointing process.
Read more: What Is Tuck Pointing Brick
Step 1: Gather the Necessary Materials
Before you begin the process of pointing a brick wall, it’s essential to gather all the required materials. Having everything on hand will streamline the project and ensure that you can work efficiently without interruptions. Here’s a comprehensive list of the materials and tools you’ll need:
- Bricks: Ensure that you have enough bricks to complete the wall, including extras for any potential breakage or miscalculations.
- Mortar Mix: Select a high-quality mortar mix suitable for your specific project, considering factors such as weather resistance and load-bearing requirements.
- Water: You’ll need water to mix with the mortar, so ensure a convenient water source is accessible near the work area.
- Trowel: A pointed brick trowel is essential for applying mortar to the joints and maneuvering it into place.
- Jointing Tool: This tool is used to finish the mortar joints, creating a neat and uniform appearance.
- Bucket: Use a sturdy bucket for mixing the mortar to the desired consistency.
- Measuring Tools: Depending on the scale of your project, you may need a tape measure and a level to ensure precision.
- Protective Gear: Safety should always be a priority. Equip yourself with gloves, safety goggles, and a dust mask to protect against potential hazards.
- Clean-Up Supplies: Have a stiff brush and a sponge or cloth on hand to tidy up any excess mortar and maintain a clean work area.
By gathering these materials in advance, you’ll set the stage for a smooth and organized bricklaying process. With everything at your fingertips, you’ll be ready to move on to the next steps with confidence and efficiency.
Step 2: Prepare the Surface
Before diving into the bricklaying process, it’s crucial to ensure that the surface on which you’ll be working is properly prepared. This preparation sets the foundation for a successful pointing project and contributes to the long-term durability of the brick wall. Here’s a detailed guide on how to prepare the surface for pointing:
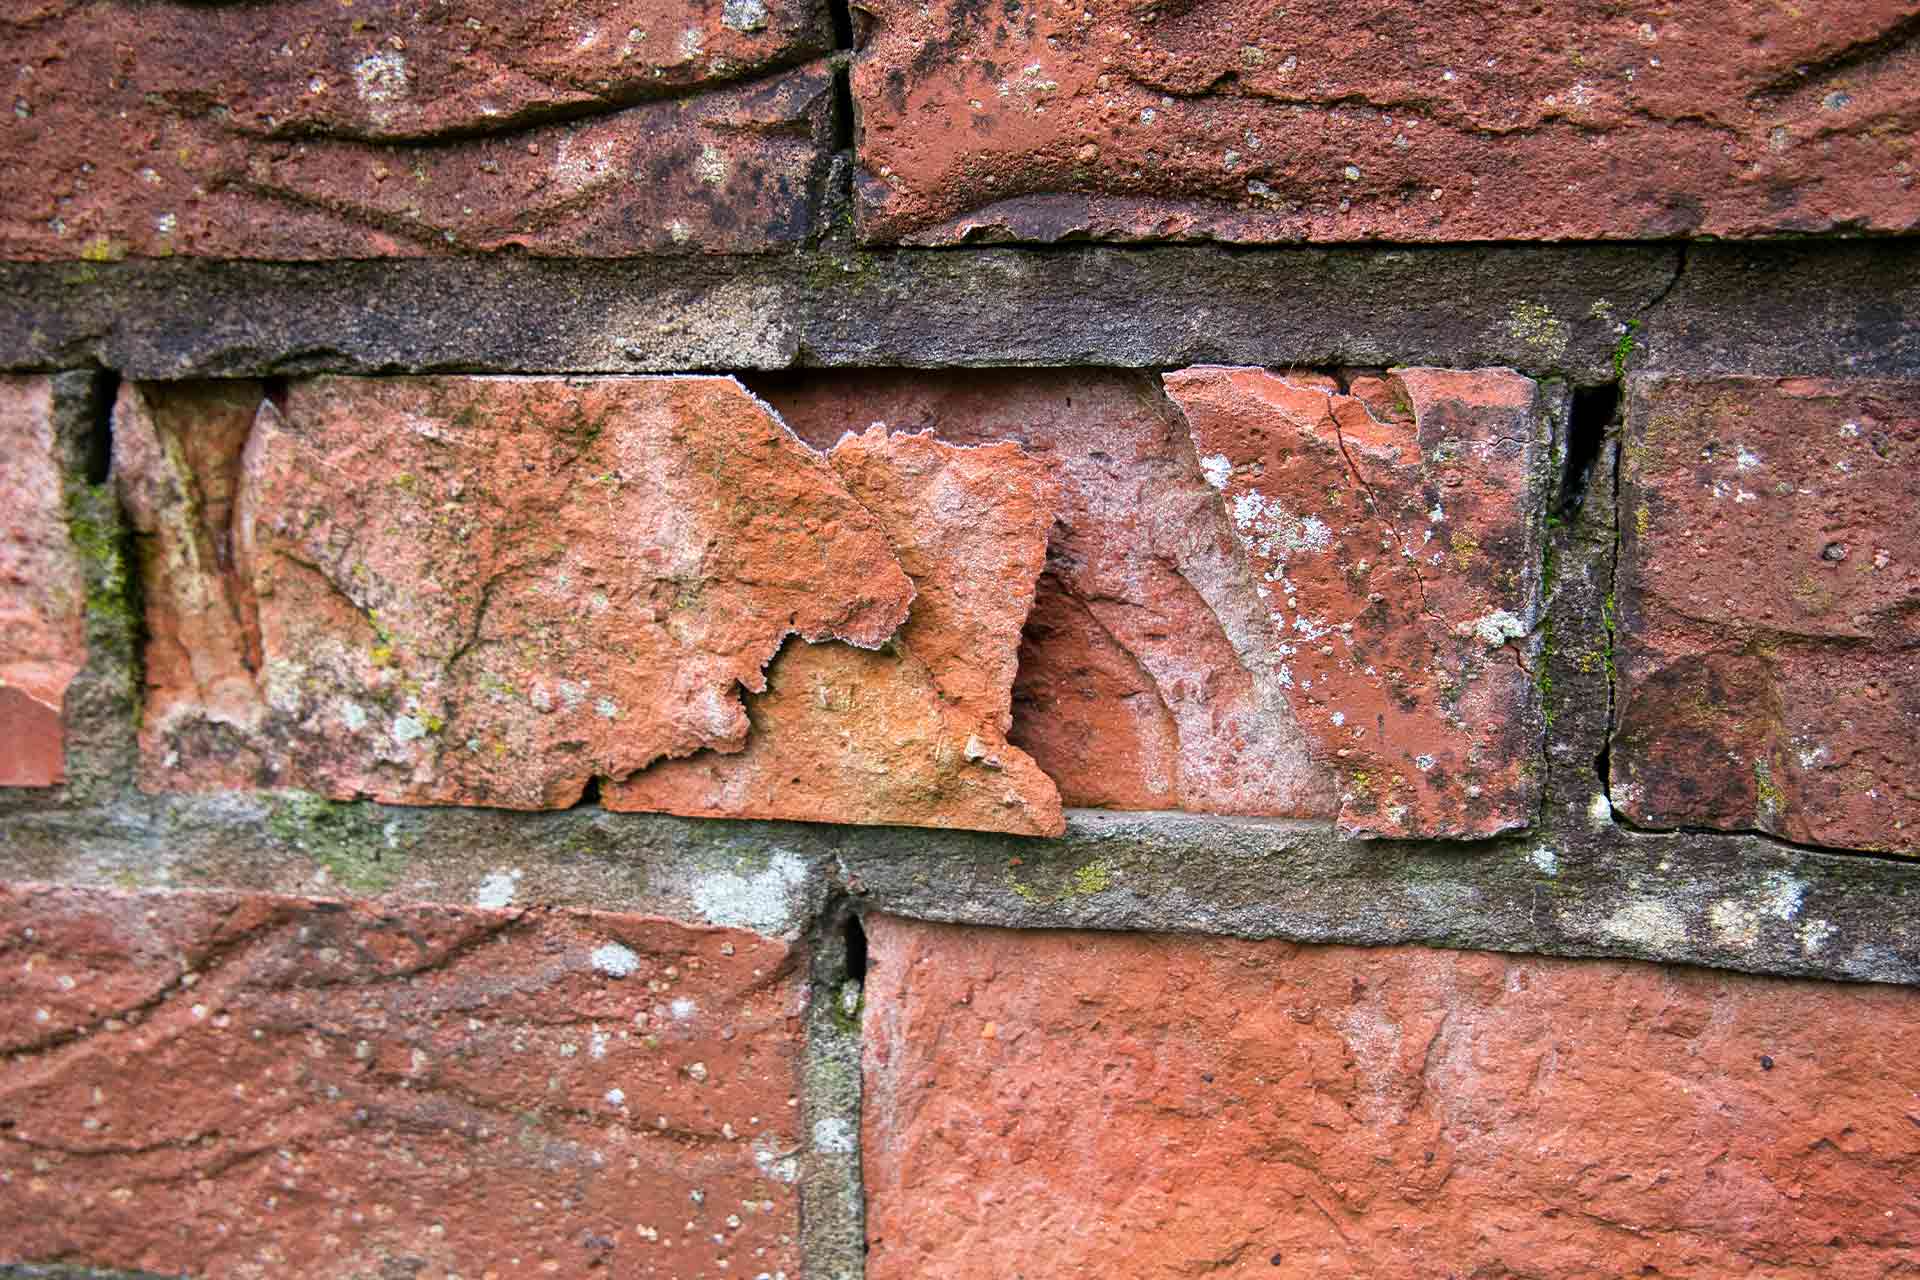
Inspect the Existing Wall: Carefully assess the condition of the existing brick wall. Look for any signs of damage, such as cracks or loose bricks, and address these issues before proceeding with the pointing process.
Clean the Joints: Use a wire brush to thoroughly clean out the existing mortar from the joints between the bricks. It’s essential to remove any debris, dust, or loose material to create a clean and stable base for the new mortar.
Moisten the Joints: Before applying the new mortar, lightly dampen the cleaned joints with water. This helps prevent the bricks from absorbing moisture from the fresh mortar too quickly, ensuring proper adhesion and curing.
Secure Loose Bricks: If any bricks are loose or protruding, gently tap them back into place using a rubber mallet. Ensuring that all bricks are securely set in position is vital for the structural integrity of the wall.
Check for Level and Plumb: Use a spirit level to verify that the existing brick wall is both level and plumb. Making any necessary adjustments at this stage will contribute to the overall stability and visual appeal of the finished wall.
By diligently preparing the surface before commencing the pointing process, you’ll lay the groundwork for a successful and visually pleasing brick wall. These preparatory steps contribute to the overall strength and longevity of the structure, ensuring that your pointing work will stand the test of time.
Step 3: Lay Out the Bricks
Before diving into the mortar mixing and bricklaying process, it’s essential to lay out the bricks in a strategic and organized manner. This step ensures that you have a clear plan for the placement of the bricks and allows you to address any potential challenges before applying the mortar. Here’s a detailed guide on how to lay out the bricks effectively:
Plan the Pattern: Consider the desired pattern for the bricks, whether it’s a traditional running bond, stack bond, or a custom design. Visualizing the pattern and ensuring that it complements the overall aesthetic of the wall is crucial at this stage.
Measure and Mark: Use a tape measure and chalk line to mark the precise layout of the bricks on the wall. Accurate measurements and markings are essential for achieving a professional and uniform appearance.
Account for Joints: When laying out the bricks, be mindful of the joint thickness. Proper spacing between the bricks will ensure that the mortar can be easily applied and that the joints are consistent throughout the wall.
Address Special Features: If your project involves intricacies such as corners, openings for doors or windows, or decorative elements, take the time to plan for these features during the layout stage. This foresight will streamline the bricklaying process and contribute to a polished final result.
Double-Check the Layout: Before proceeding to the mortar application, carefully review the layout of the bricks to ensure that everything aligns with your vision for the wall. Making adjustments at this stage is far easier than having to rework the layout after the mortar has been applied.
By meticulously laying out the bricks before applying the mortar, you’ll set the stage for a smooth and visually appealing pointing process. This preparation allows you to approach the bricklaying phase with confidence, knowing that the layout has been carefully planned and executed.
Step 4: Mix the Mortar
Creating the perfect mortar mixture is a critical step in the bricklaying process. The mortar serves as the binding agent that holds the bricks together, providing strength and stability to the wall. Here’s a detailed guide on how to mix the mortar to the ideal consistency for pointing a brick wall:
Measure the Ingredients: Start by measuring the appropriate quantities of mortar mix and water based on the manufacturer’s recommendations. Following the specified ratios is crucial for achieving a mortar mixture with the right strength and workability.
Use a Mixing Container: A sturdy bucket or mixing tray is ideal for combining the mortar mix and water. Ensure that the container is clean and free of any debris that could compromise the quality of the mixture.
Blend the Mixture: Pour the mortar mix into the mixing container, and gradually add the water while stirring consistently. Use a trowel or mixing tool to blend the ingredients until the mixture reaches a smooth and uniform texture.
Check the Consistency: The ideal mortar consistency is one that is workable but not overly wet. The mortar should hold its shape when scooped with a trowel and should adhere well to the bricks without slumping excessively.
Adjust as Needed: If the mixture is too dry, gradually add small amounts of water and continue blending until the desired consistency is achieved. Conversely, if the mortar is too wet, incorporate additional mortar mix to balance the texture.
Test the Workability: Perform a test by applying a small amount of the mortar to a brick and pressing another brick against it. The mortar should form a strong bond and maintain its shape without oozing excessively from the joint.
By mastering the art of mixing mortar to the perfect consistency, you’ll ensure that the bricks are securely bonded and that the mortar joints exhibit a professional finish. This crucial step sets the stage for the seamless application of mortar during the bricklaying process.
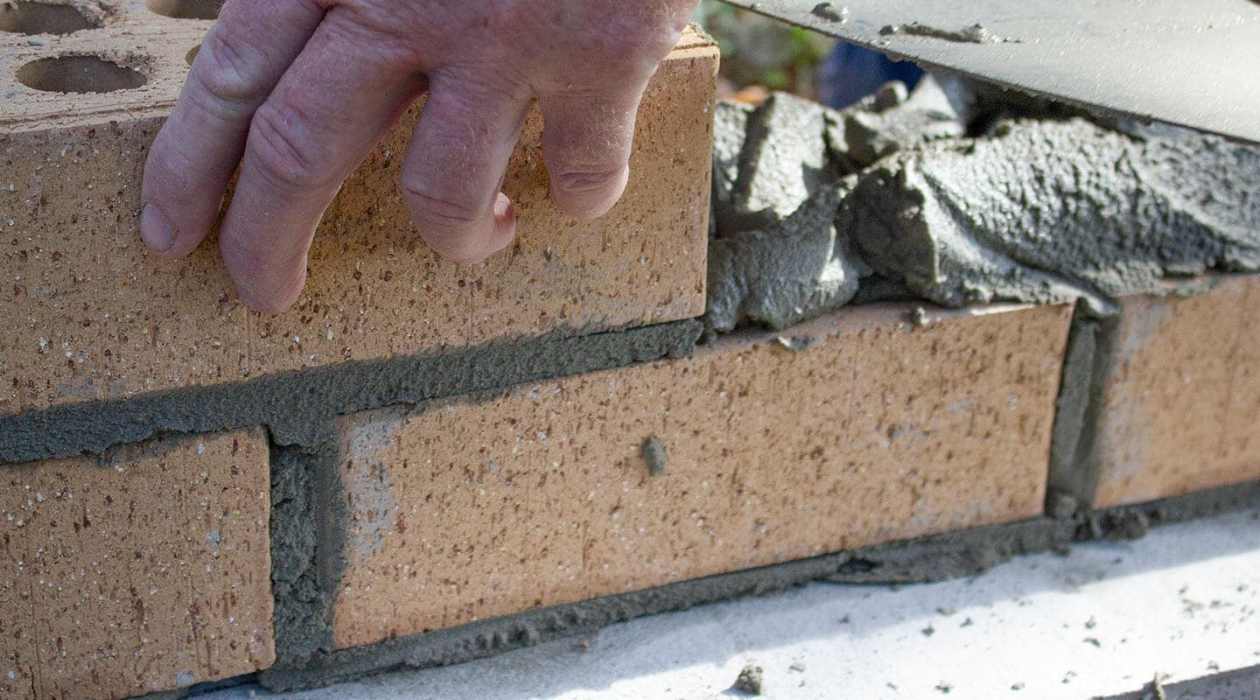
Use a level and chalk line to mark the starting point. Apply mortar to the wall and back of the brick, then press the brick into place. Use a trowel to scrape off excess mortar. Repeat for each brick, checking for level and spacing as you go.
Read more: How To Tuck Point A Brick House
Step 5: Apply the Mortar
With the mortar mixture prepared, it’s time to apply it to the brick wall in preparation for laying the bricks. This step requires precision and attention to detail to ensure that the mortar is evenly distributed and properly adheres to the bricks. Here’s a comprehensive guide on how to apply the mortar effectively:
Load the Mortar on the Trowel: Using a pointed brick trowel, scoop an appropriate amount of mortar onto the blade. Ensure that the mortar is evenly distributed across the surface of the trowel for consistent application.
Start at the Bottom: Begin by applying the mortar to the bottom of the joint between the bricks. Using the trowel, press the mortar firmly into the joint, ensuring that it fills the space completely and adheres to the cleaned surface.
Work in Manageable Sections: To maintain control and prevent the mortar from drying out too quickly, focus on applying the mortar to a manageable section of the wall at a time. This approach ensures that the mortar remains workable as you lay the bricks.
Use a Consistent Technique: As you apply the mortar, use a consistent motion to ensure uniform coverage and thickness. A smooth, sweeping motion with the trowel helps distribute the mortar evenly and minimizes the need for excessive adjustments.
Avoid Excess Mortar: While it’s important to fill the joint adequately, be mindful of excess mortar that may spill onto the face of the bricks. A clean and precise application minimizes the need for extensive cleaning and contributes to a polished final appearance.
Check for Consistency: Periodically assess the consistency of the mortar as you work, adjusting the mixture if necessary to maintain the desired texture and workability. Consistent mortar application is key to achieving a professional finish.
By mastering the art of applying mortar with precision and care, you’ll lay a solid foundation for the subsequent bricklaying process. This step sets the stage for seamless brick placement and ensures that the mortar joints exhibit a uniform and professional appearance.
Step 6: Lay the Bricks
With the mortar applied and ready, it’s time to begin the bricklaying process. Laying the bricks requires careful attention to detail and a methodical approach to ensure that the wall is structurally sound and visually appealing. Here’s a comprehensive guide on how to lay the bricks effectively:
Select the First Brick: Begin by selecting a brick and applying a small amount of mortar to its underside. This will help it adhere securely to the wall as you position it in place.
Position the Brick: Carefully place the first brick at the starting point of the wall, ensuring that it aligns with the layout markings and the surrounding bricks. Press the brick firmly into the mortar to establish a strong bond.
Check for Alignment: Use a spirit level to verify that the brick is both level and plumb. Making adjustments at this stage will ensure that the subsequent rows of bricks maintain a uniform and professional appearance.
Continue the Pattern: Apply mortar to the next brick and position it adjacent to the first, maintaining consistent joint spacing and alignment. Continue this process, working row by row, to lay the bricks across the wall surface.
Address Corner Bricks: When reaching a corner, carefully plan for the placement of corner bricks to ensure a seamless and structurally sound transition. Corner bricks play a crucial role in the overall stability and appearance of the wall.
Use a String Line: For long, straight sections of the wall, consider using a taut string line to ensure that the bricks are aligned horizontally. This technique helps maintain a straight and professional finish across the entire wall.
Check for Consistency: Periodically step back to assess the overall alignment and appearance of the laid bricks, making any necessary adjustments to maintain a uniform and visually appealing wall surface.
By approaching the bricklaying process with precision and care, you’ll create a sturdy and visually striking brick wall. This step sets the stage for the final phase of pointing, ensuring that the bricks are securely positioned and aligned for the next crucial step in the process.
Step 7: Finish the Joints
Once the bricks are securely in place, the next crucial step is to finish the joints between the bricks, a process known as “pointing.” This step involves carefully filling the joints with mortar and creating a clean, uniform appearance. Here’s a detailed guide on how to finish the joints effectively:
Prepare the Jointing Tool: Select a jointing tool that matches the desired joint profile, whether it’s concave, V-shaped, or another style. Ensure that the tool is clean and free of any debris that could affect the finish of the joints.
Apply the Mortar to the Joints: Using the same mortar mixture prepared earlier, carefully fill the joints between the bricks with mortar. Apply the mortar using a pointing trowel, ensuring that the joints are completely filled and free of voids.
Use the Jointing Tool: Once the mortar is in place, use the jointing tool to create a consistent and professional finish. Run the tool along the joints, exerting even pressure to shape the mortar and achieve the desired profile.
Smooth and Neaten the Joints: As you work, periodically step back to assess the appearance of the joints and make any necessary adjustments. The goal is to achieve a uniform and visually appealing finish across the entire wall surface.
Address Excess Mortar: Be mindful of any excess mortar that may have spread onto the face of the bricks during the pointing process. Use a pointing trowel or a small brush to carefully remove any stray mortar and maintain a clean and polished appearance.
Check for Consistency: Periodically assess the consistency of the finished joints, ensuring that they exhibit a uniform profile and that the mortar is securely in place. Consistent joint finishing contributes to the overall visual appeal of the brick wall.
By approaching the joint finishing process with precision and attention to detail, you’ll achieve a professional and visually striking result. This crucial step enhances the structural integrity and aesthetic appeal of the brick wall, setting the stage for the final phase of the pointing process.
Step 8: Clean Up and Finish
As you near the completion of the pointing process, it’s essential to focus on the final touches that will elevate the overall appearance of the brick wall. This step involves cleaning up any residual mortar and ensuring that the wall exhibits a polished and professional finish. Here’s a comprehensive guide on how to clean up and finish the brick wall:
Remove Excess Mortar: Use a stiff brush or a pointing trowel to carefully remove any excess mortar that may have accumulated on the face of the bricks during the pointing process. Taking the time to tidy up the wall surface contributes to a clean and polished appearance.
Inspect the Joints: After the mortar has had time to set, inspect the joints between the bricks to ensure that they exhibit a consistent and professional finish. Address any areas that may require additional touch-ups to achieve the desired appearance.
Clean the Wall Surface: Use a damp sponge or cloth to gently clean the surface of the bricks, removing any residual mortar or debris. This step enhances the visual appeal of the wall and ensures that the bricks exhibit their natural color and texture.
Verify Structural Integrity: Take a moment to verify that the brick wall is structurally sound and that the mortar joints are securely in place. This assessment ensures that the wall is not only visually appealing but also capable of withstanding the test of time.
Step Back and Appreciate Your Work: Once the clean-up process is complete, take a step back and admire the finished brick wall. Appreciate the craftsmanship and attention to detail that have gone into creating a sturdy and visually striking structure.
Protect the Wall: Consider applying a suitable sealant or protective coating to the brick wall to enhance its durability and weather resistance. This additional step can further safeguard the wall against the elements and preserve its appearance over time.
By dedicating time to the final clean-up and finishing touches, you’ll ensure that the brick wall exhibits a professional and polished appearance. This step marks the culmination of your efforts, resulting in a visually striking and enduring structure that adds character and charm to its surroundings.
Frequently Asked Questions about How To Point A Brick Wall
Was this page helpful?
At Storables.com, we guarantee accurate and reliable information. Our content, validated by Expert Board Contributors, is crafted following stringent Editorial Policies. We're committed to providing you with well-researched, expert-backed insights for all your informational needs.


0 thoughts on “How To Point A Brick Wall”