Home>Construction & Tools>Building Materials>How To Render A Brick Wall

Building Materials
How To Render A Brick Wall
Modified: August 28, 2024
Learn how to render a brick wall using the best building materials. Our expert guide will help you achieve a professional finish.
(Many of the links in this article redirect to a specific reviewed product. Your purchase of these products through affiliate links helps to generate commission for Storables.com, at no extra cost. Learn more)
Introduction
Building a brick wall is a timeless and enduring way to enhance the aesthetic appeal and structural integrity of a property. Whether you're embarking on a DIY project or working with professionals, understanding the process of rendering a brick wall is essential. This comprehensive guide will walk you through the steps involved in achieving a professional-quality finish that will stand the test of time.
Rendering a brick wall involves more than just slapping on some mortar. It requires careful preparation, precise application, and a keen eye for detail. By following the steps outlined in this article, you'll gain the knowledge and confidence to tackle this project with skill and finesse.
So, roll up your sleeves and get ready to delve into the world of brick wall rendering. From gathering the necessary materials and tools to applying the finishing touches, we'll cover each step in detail to ensure that your brick wall not only looks stunning but also remains strong and durable for years to come. Let's dive in and explore the art of rendering a brick wall!
Key Takeaways:
- Rendering a brick wall requires careful preparation, precise application, and attention to detail. Each step, from cleaning the surface to applying the mortar, contributes to the wall’s enduring strength and timeless charm.
- The art of rendering combines craftsmanship and practical skill, resulting in a visually striking and structurally robust feature. Embrace the process with enthusiasm, knowing that the end result will stand as a testament to your skill and artistry.
Read more: How To Point A Brick Wall
Materials and Tools Needed
Before embarking on the endeavor of rendering a brick wall, it’s crucial to gather the necessary materials and tools. This ensures that the process unfolds smoothly and efficiently. Here’s a comprehensive list of what you’ll need:
Materials:
- Bricks: High-quality bricks suitable for rendering.
- Mortar mix: Choose a mortar mix appropriate for the specific project, considering factors such as weather conditions and load-bearing requirements.
- Water: Clean water for mixing the mortar to the right consistency.
- Primer: A suitable primer to prepare the surface for rendering.
- Sealant: A protective sealant to apply after the rendering process is complete.
- Optional additives: Depending on the specific requirements, additives such as bonding agents or waterproofing compounds may be necessary.
Tools:
- Trowel: A pointed or square-edged trowel for applying and shaping the mortar.
- Spirit level: To ensure the wall is rendered evenly and plumb.
- Masonry brush: For cleaning the bricks and applying the primer.
- Bucket and mixing tool: For preparing the mortar mix to the appropriate consistency.
- Hawk: A flat surface to hold the mortar while working.
- Jointer: For finishing the mortar joints with a professional touch.
- Protective gear: Including gloves, safety goggles, and a dust mask to ensure personal safety during the rendering process.
- Scaffolding or ladder: Depending on the height of the wall, safe and stable access equipment is essential.
By ensuring that you have all the required materials and tools at the outset, you’ll be well-prepared to begin the process of rendering your brick wall. This comprehensive list sets the stage for a successful and satisfying rendering project.
Preparing the Brick Wall
Before diving into the actual rendering process, it’s essential to prepare the brick wall to ensure optimal adhesion and a professional finish. The following steps will guide you through the essential preparatory measures:
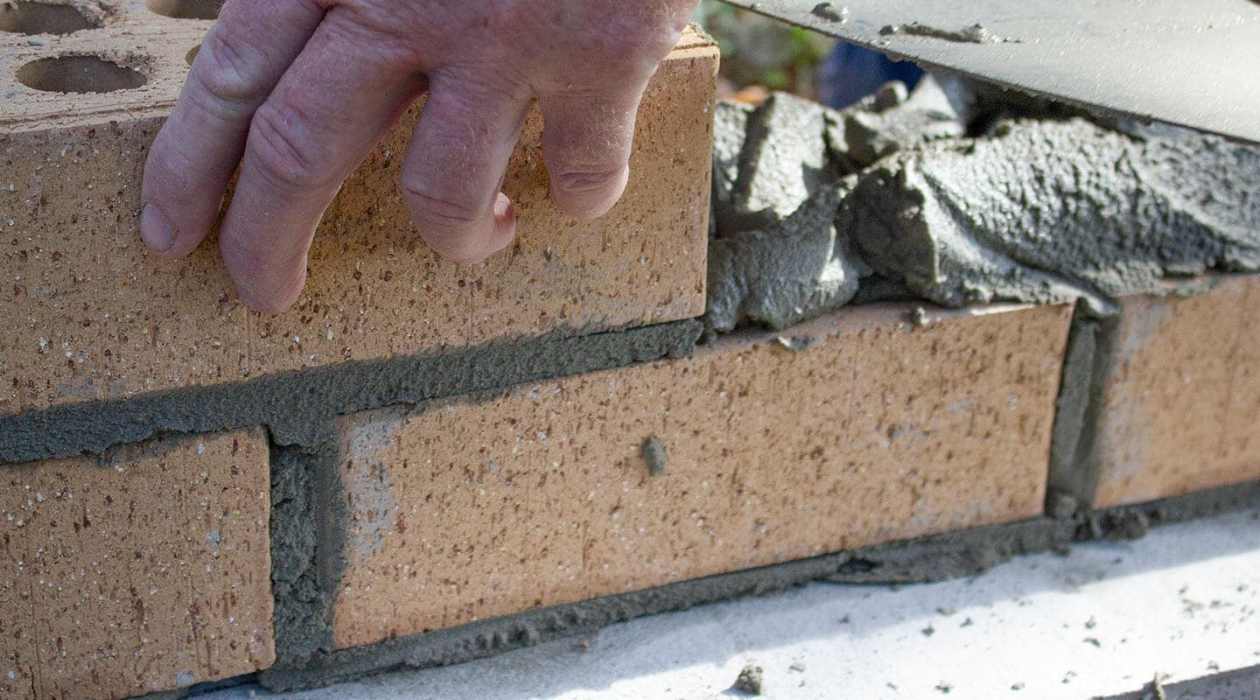
1. Clean the Surface: Start by thoroughly cleaning the brick wall to remove any dirt, dust, or debris. Use a stiff-bristled brush or a pressure washer to ensure that the surface is free from any contaminants that could hinder the adhesion of the mortar.
2. Repair Any Damage: Inspect the brick wall for any cracks, chips, or damaged mortar joints. Repair these areas using suitable masonry repair products to ensure that the surface is uniform and structurally sound before proceeding with the rendering process.
3. Apply Primer: Once the surface is clean and any necessary repairs have been made, apply a suitable primer to the brick wall. The primer promotes adhesion, seals the surface, and ensures that the mortar bonds effectively to the bricks, providing a solid foundation for the rendering process.
4. Check for Stability: Assess the stability of the brick wall, ensuring that it is structurally sound and free from any significant movement or instability. Address any structural concerns before commencing with the rendering, as a stable substrate is essential for a successful and long-lasting finish.
By meticulously preparing the brick wall before rendering, you set the stage for a seamless and professional outcome. Taking the time to clean, repair, prime, and assess the stability of the surface ensures that the rendering process can proceed with confidence and precision, ultimately yielding a visually appealing and durable result.
Read more: How To Waterproof A Brick Wall
Mixing the Mortar
Creating the perfect mortar mix is a critical aspect of rendering a brick wall. The consistency and quality of the mortar directly impact the strength, adhesion, and overall aesthetic of the finished wall. Follow these steps to ensure that you mix the mortar to perfection:
1. Gather the Ingredients: Start by assembling the necessary ingredients for the mortar mix, including the mortar itself and clean water. It’s crucial to use the correct type of mortar for the specific project, considering factors such as weather exposure and load-bearing requirements.
2. Measure the Components: Follow the manufacturer’s guidelines to measure the mortar and water in the appropriate ratios. Consistency is key, so use a consistent measuring container to ensure uniformity throughout the mixing process.
3. Mix Methodically: Pour the required amount of mortar into a clean mixing container. Gradually add water while mixing, ensuring thorough incorporation of the water into the mortar. Use a suitable mixing tool, such as a hoe or a mixing drill, to achieve a smooth and uniform consistency. Avoid adding too much water, as this can compromise the strength and adhesion of the mortar.
4. Test the Consistency: The mortar should reach a consistency that allows it to hold its shape without being too dry or too runny. Aim for a texture that is workable and cohesive, enabling easy application and manipulation on the wall surface.
5. Allow for Hydration: Once the mortar is mixed to the desired consistency, allow it to rest for a few minutes to ensure proper hydration of the ingredients. This resting period facilitates the activation of the bonding agents within the mortar, enhancing its adhesive properties.
By meticulously mixing the mortar to the correct consistency and quality, you lay the foundation for a successful rendering process. The attention to detail in this crucial stage ensures that the mortar effectively bonds to the bricks, providing a durable and visually appealing finish for your brick wall.
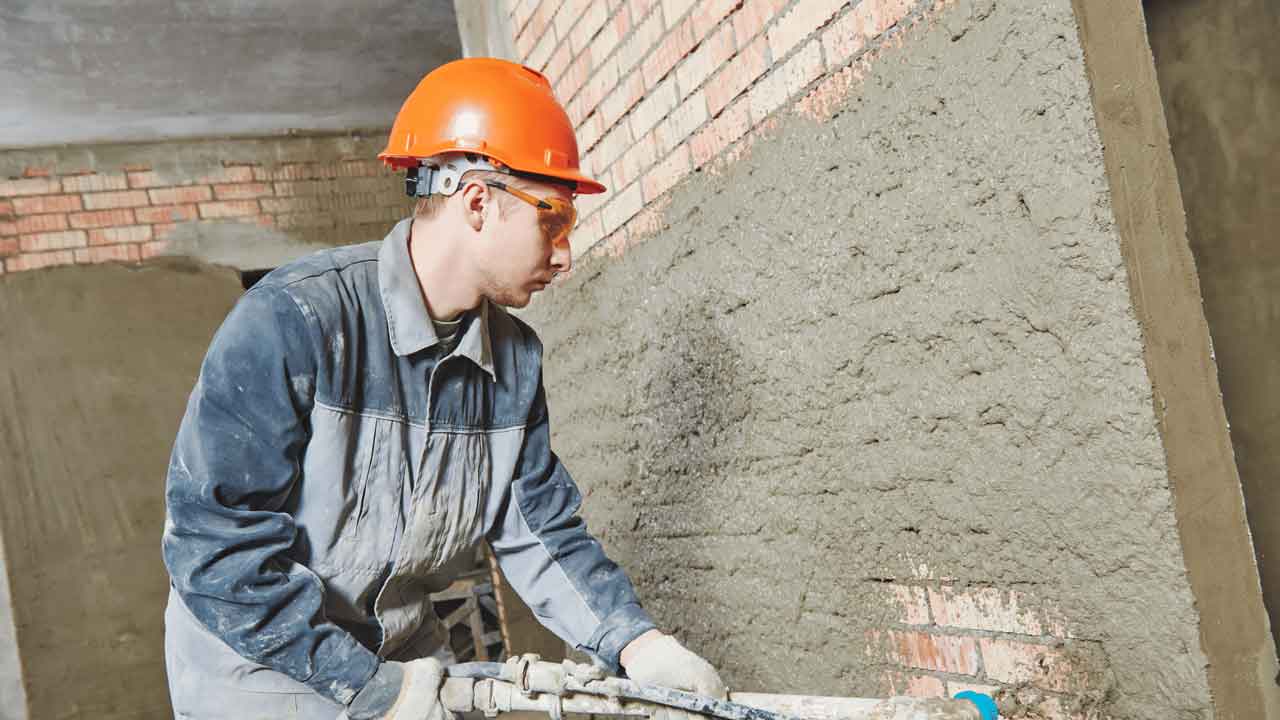
Applying the Mortar
With the brick wall prepared and the mortar mixed to perfection, it’s time to apply the mortar and begin the transformative process of rendering. This step-by-step guide will walk you through the intricacies of applying the mortar to achieve a seamless and professional finish:
1. Load the Hawk: Transfer a suitable amount of mortar onto the flat surface of a hawk, ensuring that it is easily accessible during the application process. This facilitates a steady supply of mortar as you work on the wall.
2. Use the Trowel: With a trowel in hand, scoop up a portion of mortar from the hawk. Apply the mortar to the brick wall in even, manageable sections, working from the bottom up. Use the trowel to spread the mortar evenly, covering the surface with a consistent layer.
3. Maintain Consistent Thickness: Aim for a uniform thickness of mortar across the entire wall. A consistent application ensures an even and professional finish, enhancing the structural integrity and visual appeal of the rendered surface.
4. Shape and Texture: Use the trowel to shape and texture the mortar as desired, ensuring that it conforms to the intended aesthetic. Whether you prefer a smooth, sleek finish or a textured, rustic appearance, the trowel allows for creative expression and customization.
5. Check for Plumb and Level: Use a spirit level to ensure that the rendered surface is plumb and level. This step is crucial for achieving a visually pleasing result that exudes professionalism and attention to detail.
6. Address Joints and Gaps: Pay close attention to the mortar joints between the bricks, ensuring that they are neatly filled and finished with precision. Any gaps or inconsistencies should be promptly addressed to maintain the integrity and visual cohesiveness of the rendered wall.
By meticulously applying the mortar with care and precision, you bring the brick wall one step closer to its fully rendered and refined state. The application process sets the stage for the final touches, culminating in a striking and enduring finish that elevates the aesthetic and structural qualities of the wall.
To render a brick wall, start by cleaning the surface and applying a bonding agent. Mix the render with water and apply it to the wall using a trowel. Smooth the surface with a float and let it dry before adding a second coat if needed.
Finishing Touches
As the brick wall nears completion, attention to detail during the finishing touches is paramount to achieving a polished and professional result. The following steps will guide you through the crucial final stages of the rendering process:
1. Smoothing and Shaping: Use a jointer or a suitable tool to smooth and shape the mortar joints, ensuring a clean and uniform appearance. Pay attention to the details, as well-executed joints contribute to the overall aesthetic and structural integrity of the rendered wall.
2. Clean the Surface: Once the mortar has set to the appropriate firmness, carefully clean the surface of the rendered wall. Use a soft brush or a damp cloth to remove any excess mortar or debris, revealing the true beauty of the finished brick wall.
3. Allow for Curing: Allow the rendered wall to cure and set for the specified duration, as per the manufacturer’s recommendations for the mortar mix used. This crucial curing period ensures the development of strength and durability within the rendered surface.
4. Apply Sealant: After the curing period, consider applying a suitable sealant to the rendered brick wall. The sealant provides an additional layer of protection, enhancing the wall’s resistance to weathering and ensuring longevity and durability.
5. Final Inspection: Conduct a thorough inspection of the completed brick wall, ensuring that the rendering process has been executed to the highest standards. Address any minor imperfections or irregularities to achieve a flawless and professional finish.
6. Appreciate the Transformation: Stand back and admire the transformation that has taken place. The rendered brick wall now exudes timeless charm, structural strength, and enduring beauty, a testament to your meticulous craftsmanship and dedication to the art of rendering.
By meticulously attending to the finishing touches, you elevate the rendered brick wall to a state of refinement and durability. The culmination of these steps results in a visually stunning and structurally sound feature, enriching the character and value of the surrounding space.
Conclusion
Rendering a brick wall is a labor of love that combines artistry, craftsmanship, and practical skill. From the initial preparation to the final finishing touches, each step contributes to the creation of a visually striking and structurally robust feature. As you reflect on the journey of rendering a brick wall, consider the following key takeaways:
Artistry and Precision: The art of rendering a brick wall demands a keen eye for detail and a commitment to precision. From shaping the mortar to perfecting the joints, each action contributes to the overall aesthetic and quality of the finished wall.
Structural Integrity: Beyond its visual appeal, a rendered brick wall embodies strength and durability. The careful application of mortar and attention to the wall’s stability ensure that the finished result is not only beautiful but also enduring.
Timeless Charm: A well-rendered brick wall exudes timeless charm and character, adding a touch of tradition and elegance to any space. Whether it complements a historic structure or enhances a modern design, the allure of a rendered brick wall transcends time and trends.
As you embark on the journey of rendering a brick wall, remember that each step – from preparing the surface to applying the mortar and adding the finishing touches – contributes to the creation of a lasting and captivating feature. Embrace the process with enthusiasm and dedication, knowing that the end result will stand as a testament to your skill and artistry.
So, whether you’re revitalizing an existing brick wall or creating a new one from scratch, the art of rendering holds the power to transform spaces and captivate the eye. Let the timeless allure of rendered brick walls inspire your next project, and revel in the satisfaction of creating a visually stunning and enduring masterpiece.
With these insights and a newfound appreciation for the art of rendering, you’re well-equipped to embark on – or appreciate – the journey of transforming brick and mortar into a work of art.
Frequently Asked Questions about How To Render A Brick Wall
Was this page helpful?
At Storables.com, we guarantee accurate and reliable information. Our content, validated by Expert Board Contributors, is crafted following stringent Editorial Policies. We're committed to providing you with well-researched, expert-backed insights for all your informational needs.


0 thoughts on “How To Render A Brick Wall”