Home>Construction & Tools>Building Materials>How To Secure Wood To Brick
Building Materials
How To Secure Wood To Brick
Modified: October 20, 2024
Learn how to securely attach building materials like wood to brick with our step-by-step guide. Find the best methods and tools for a secure and lasting installation.
(Many of the links in this article redirect to a specific reviewed product. Your purchase of these products through affiliate links helps to generate commission for Storables.com, at no extra cost. Learn more)
Introduction
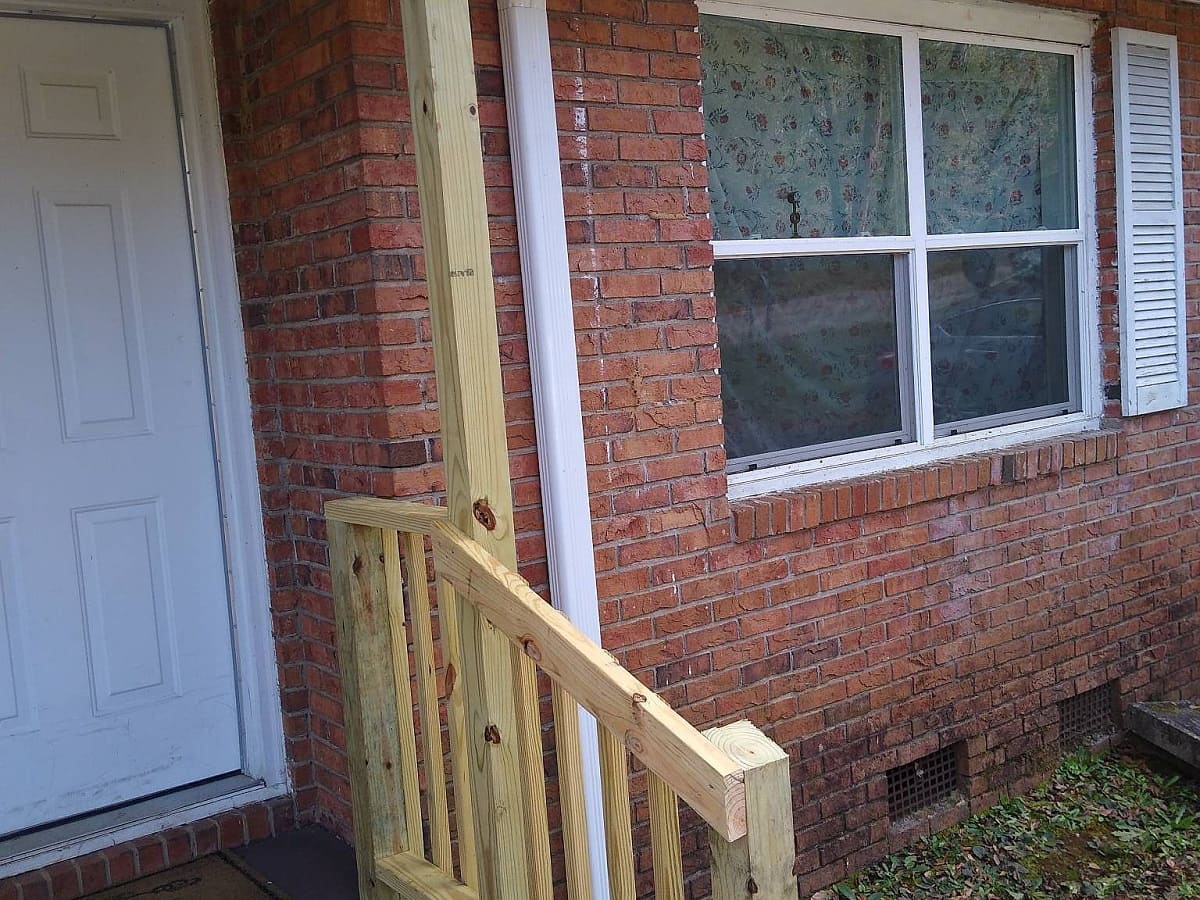
Securing wood to brick can be a daunting task, especially for those unfamiliar with the process. Whether you’re looking to install shelving, a mantle, or any other wooden fixture on a brick wall, it’s essential to ensure a secure and long-lasting attachment. With the right tools, materials, and know-how, you can tackle this project with confidence.
In this comprehensive guide, we’ll walk you through the step-by-step process of securely fastening wood to brick. From preparing the brick surface to selecting the appropriate fasteners, we’ll cover all the essential aspects to help you achieve a professional and durable result. By following these instructions, you’ll be well-equipped to take on this task and enhance the functionality and aesthetics of your space.
So, let’s dive in and explore the tools, materials, and techniques needed to securely attach wood to brick surfaces.
Key Takeaways:
- Securely attaching wood to brick requires cleaning, drilling, and selecting the right fasteners. Patience and precision are key to achieving a durable and visually pleasing installation.
- By following step-by-step instructions and using the proper tools, you can confidently enhance your space with securely attached wood fixtures on brick surfaces.
Read more: How To Mount Wood To Brick
Tools and Materials
Before embarking on the process of securing wood to brick, it’s crucial to gather the necessary tools and materials. Here’s a list of items you’ll need to ensure a smooth and successful installation:
Tools:
- Power drill
- Masonry drill bit
- Hammer drill (if dealing with particularly tough bricks)
- Level
- Tape measure
- Pencil
- Safety goggles
- Work gloves
- Stud finder (if attaching wood to a framed wall behind the brick)
Materials:
- Wood screws or masonry screws
- Wood boards or shelving
- Concrete anchors (if attaching heavy items)
- Construction adhesive
- Wood stain or paint (if desired)
Having these tools and materials on hand will streamline the installation process and ensure that you’re well-prepared to tackle any challenges that may arise. Now that you’re equipped with the necessary resources, let’s move on to preparing the brick surface for the wood attachment.
Preparing the Brick Surface
Before attaching wood to a brick surface, it’s essential to prepare the brick to ensure a secure and long-lasting bond. Follow these steps to properly prepare the brick surface:
Read more: How To Secure Downspout To Brick
Step 1: Clean the Brick
Begin by thoroughly cleaning the brick surface using a stiff-bristled brush and a mild detergent solution. This will remove any dirt, dust, or debris that could hinder the adhesion of the wood or interfere with the drilling process.
Step 2: Mark the Drilling Points
Using a pencil and a level, mark the precise points on the brick where you intend to drill holes for attaching the wood. Ensure that the markings are accurately aligned and level to achieve a professional and visually appealing result.
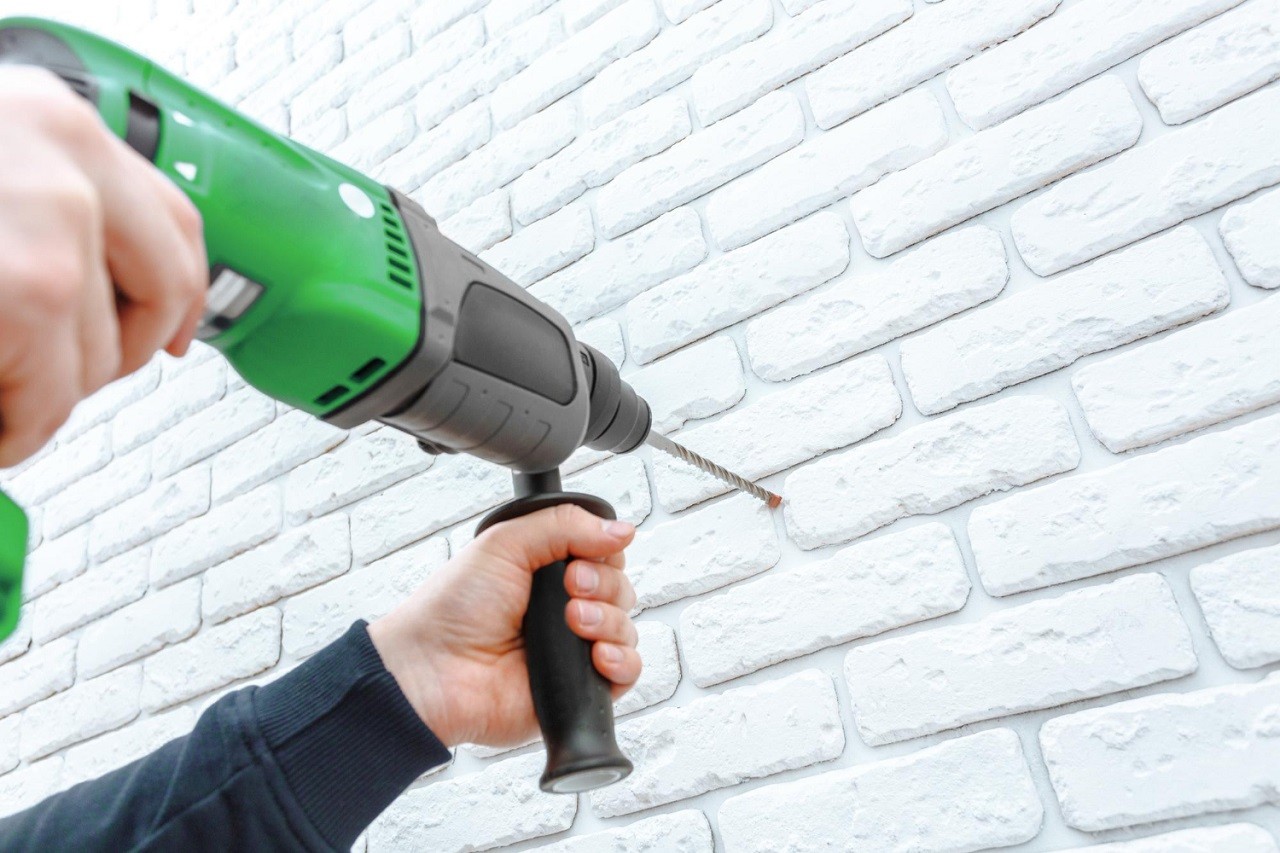
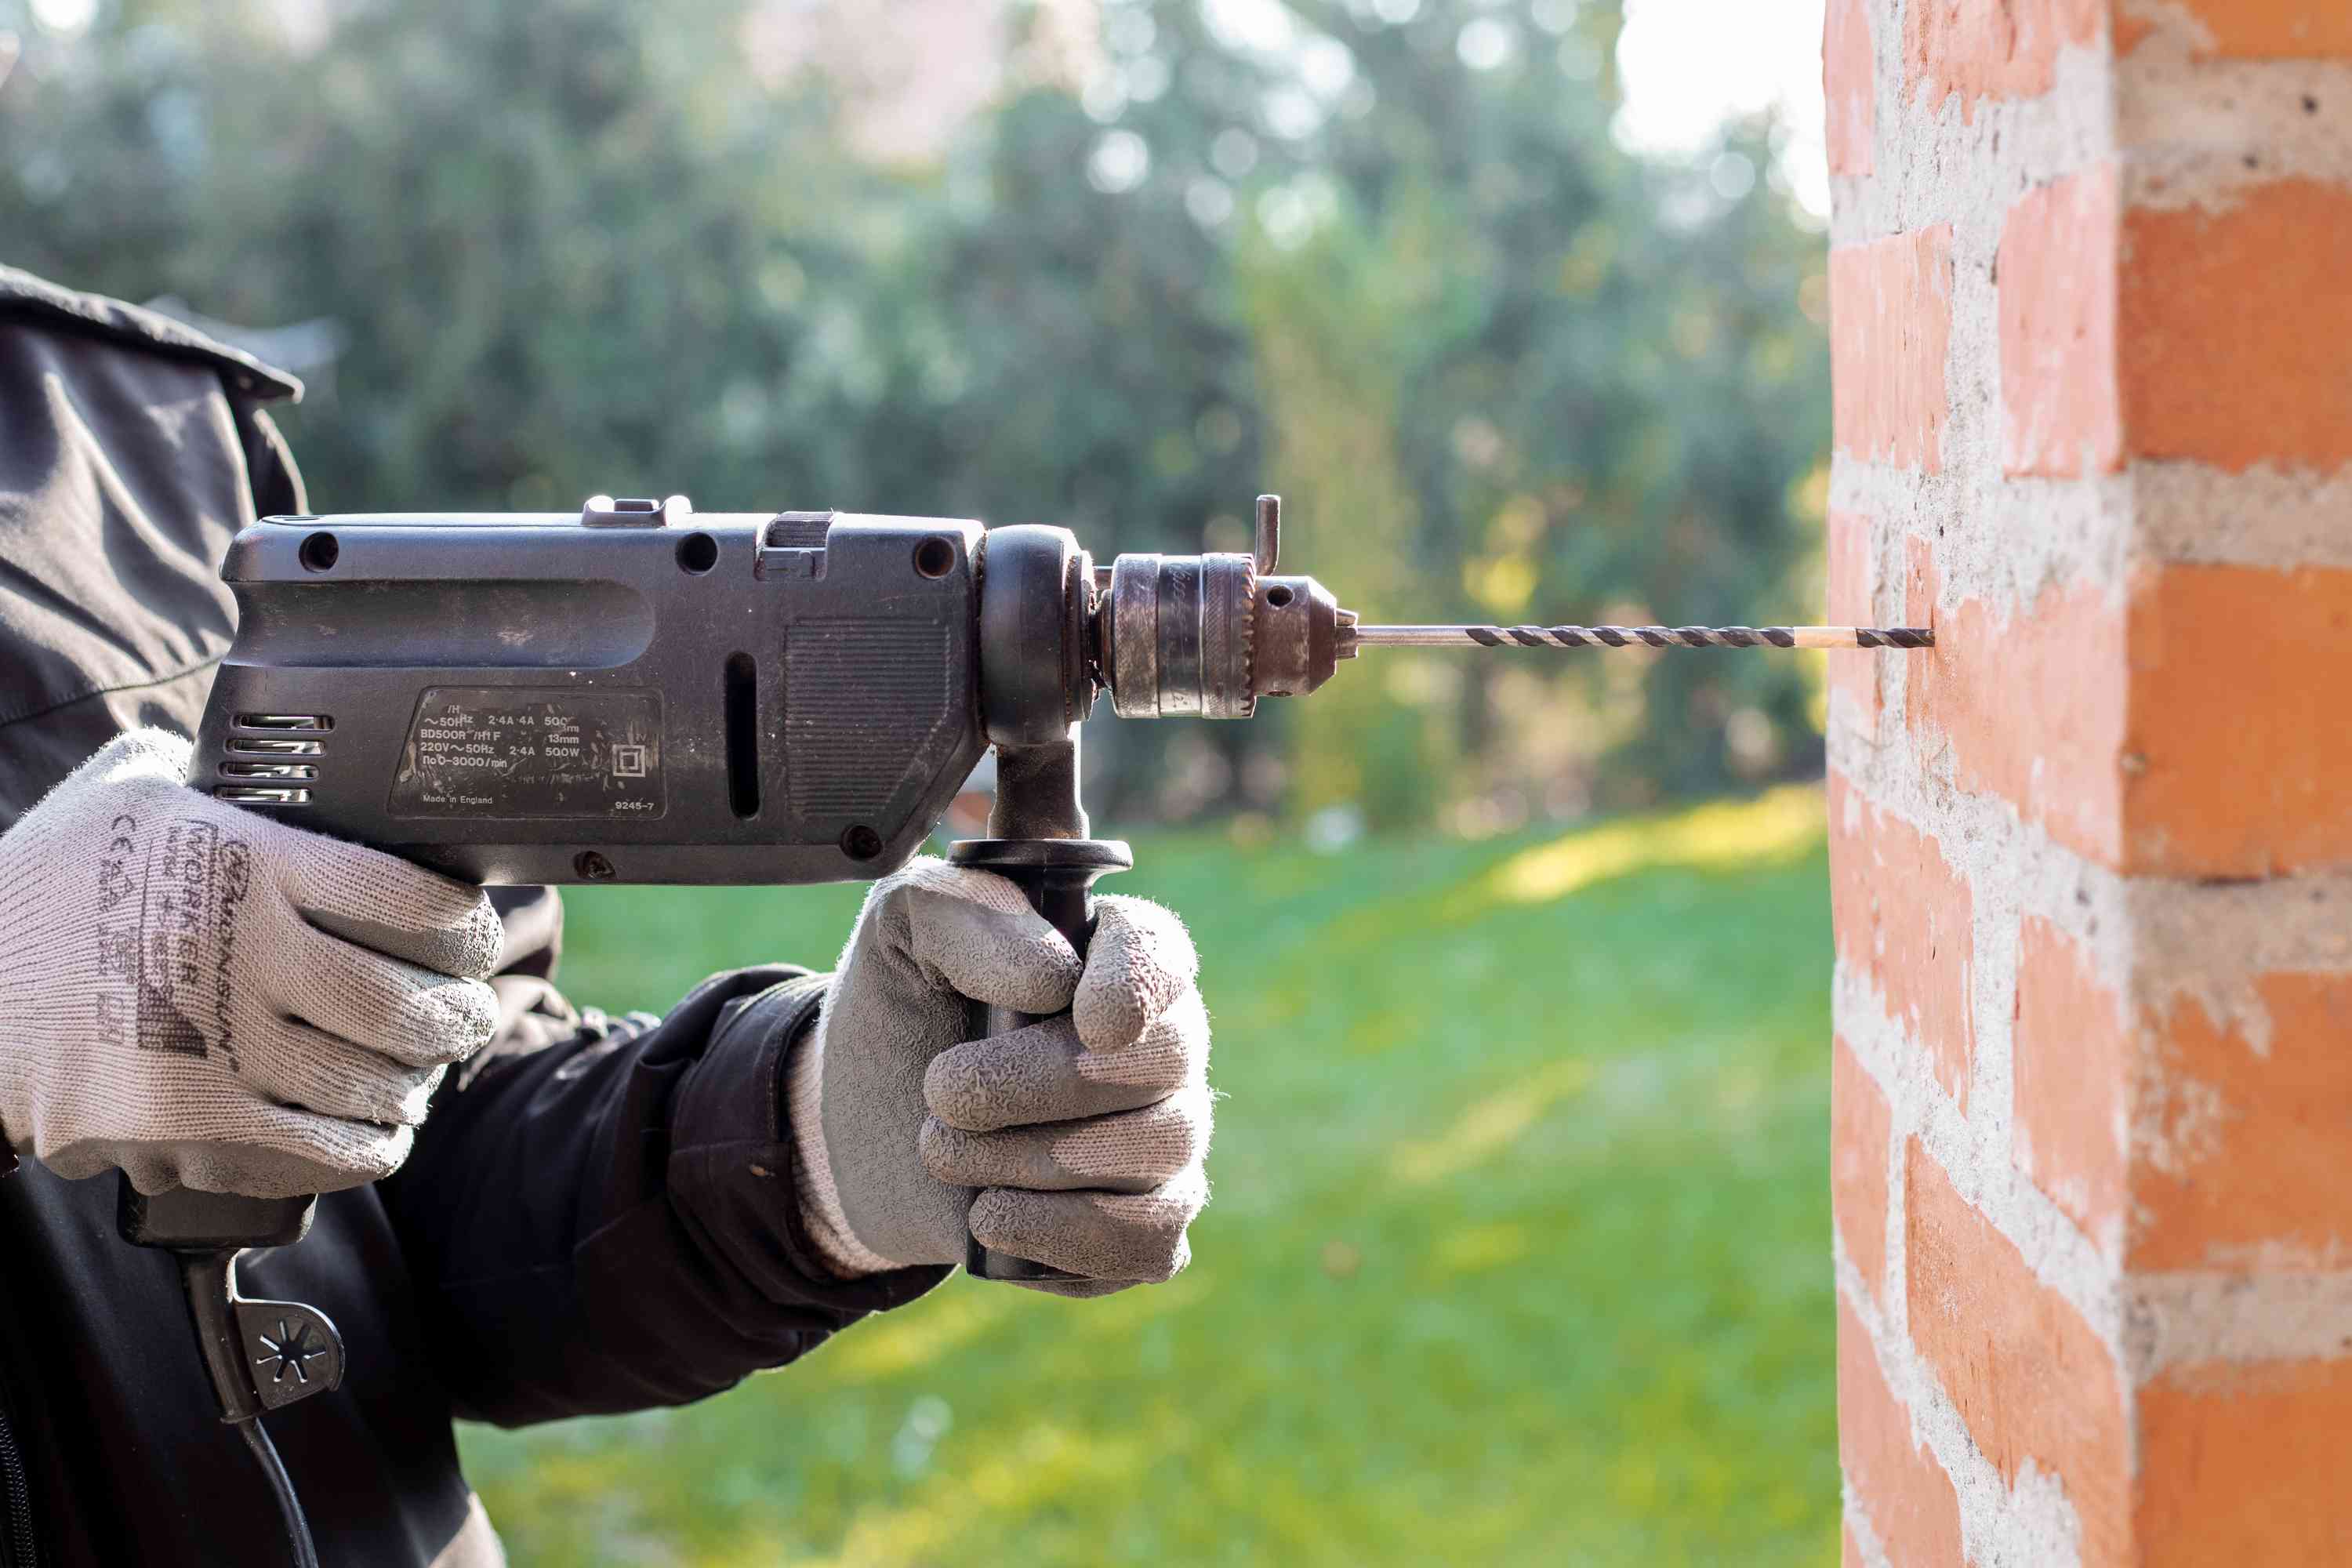
Step 3: Drill Pilot Holes
With a masonry drill bit and a power drill, carefully drill pilot holes into the marked points on the brick. It’s crucial to use the appropriate drill bit size for the screws or anchors you’ll be using to attach the wood.
Step 4: Clear the Dust
After drilling the pilot holes, use a vacuum or a blower to remove any dust and debris from the holes. This will create a clean and optimal environment for securing the wood to the brick.
Read more: How To Attach A Security Camera To Brick
Step 5: Apply Construction Adhesive (Optional)
If you’re attaching heavier wood items or shelves, applying construction adhesive to the back of the wood can provide additional support. This step is particularly useful for enhancing the overall stability of the attachment.
By diligently following these steps, you’ll effectively prepare the brick surface for the secure attachment of wood. With the brick surface ready, it’s time to prepare the wood for installation.
Preparing the Wood
Preparing the wood for attachment to a brick surface is a crucial step that contributes to the overall stability and aesthetics of the installation. Follow these essential guidelines to ensure the wood is ready for secure fastening:
Step 1: Cut and Sand the Wood
Measure and cut the wood boards or shelving to the desired dimensions using a saw. Ensure that the edges are smooth and free from splinters by sanding them with fine-grit sandpaper. This will not only enhance the appearance of the wood but also prevent any potential injuries during handling.
Step 2: Stain or Paint the Wood (Optional)
If you wish to enhance the visual appeal of the wood or complement the existing decor, consider staining or painting the wood before attaching it to the brick. Choose a high-quality wood stain or paint that is suitable for the type of wood you’re using and apply it evenly for a professional finish.
Read more: How To Remove Wood Stain From Brick
Step 3: Pre-drill Screw Holes
To facilitate the attachment process and prevent the wood from splitting, pre-drill pilot holes into the wood at the locations where it will be fastened to the brick. Use a drill bit that matches the size of the screws you’ll be using for the attachment.
Step 4: Apply Wood Sealant (Optional)
If the wood will be exposed to moisture or outdoor elements, applying a wood sealant can help protect it from damage and prolong its lifespan. Be sure to choose a sealant that is suitable for the specific type of wood you’re using and apply it according to the manufacturer’s instructions.
By meticulously preparing the wood according to these steps, you’ll ensure that it is ready for a secure and visually appealing attachment to the brick surface. With the wood prepared, it’s time to move on to the process of attaching the wood to the brick.
Attaching the Wood to the Brick
Securing wood to a brick surface requires precision and the use of appropriate fasteners to ensure a strong and durable attachment. Follow these steps to securely fasten the prepared wood to the brick:
Step 1: Select the Right Fasteners
Depending on the weight and intended use of the wood fixture, choose the appropriate fasteners for the job. For lighter items, such as decorative shelves, wood screws may suffice. For heavier items, concrete anchors or masonry screws designed for brick installations are recommended to provide the necessary strength and stability.
Read more: How To Install Fire Brick In A Wood Stove
Step 2: Position the Wood
Hold the prepared wood in the desired position against the marked points on the brick. Use a level to ensure that the wood is perfectly aligned and straight before proceeding with the attachment.
Step 3: Drill into the Brick
Using a power drill equipped with the appropriate masonry drill bit, carefully drill through the pilot holes in the wood and into the brick surface. Exercise caution and apply steady pressure to create clean and precise holes for the fasteners.
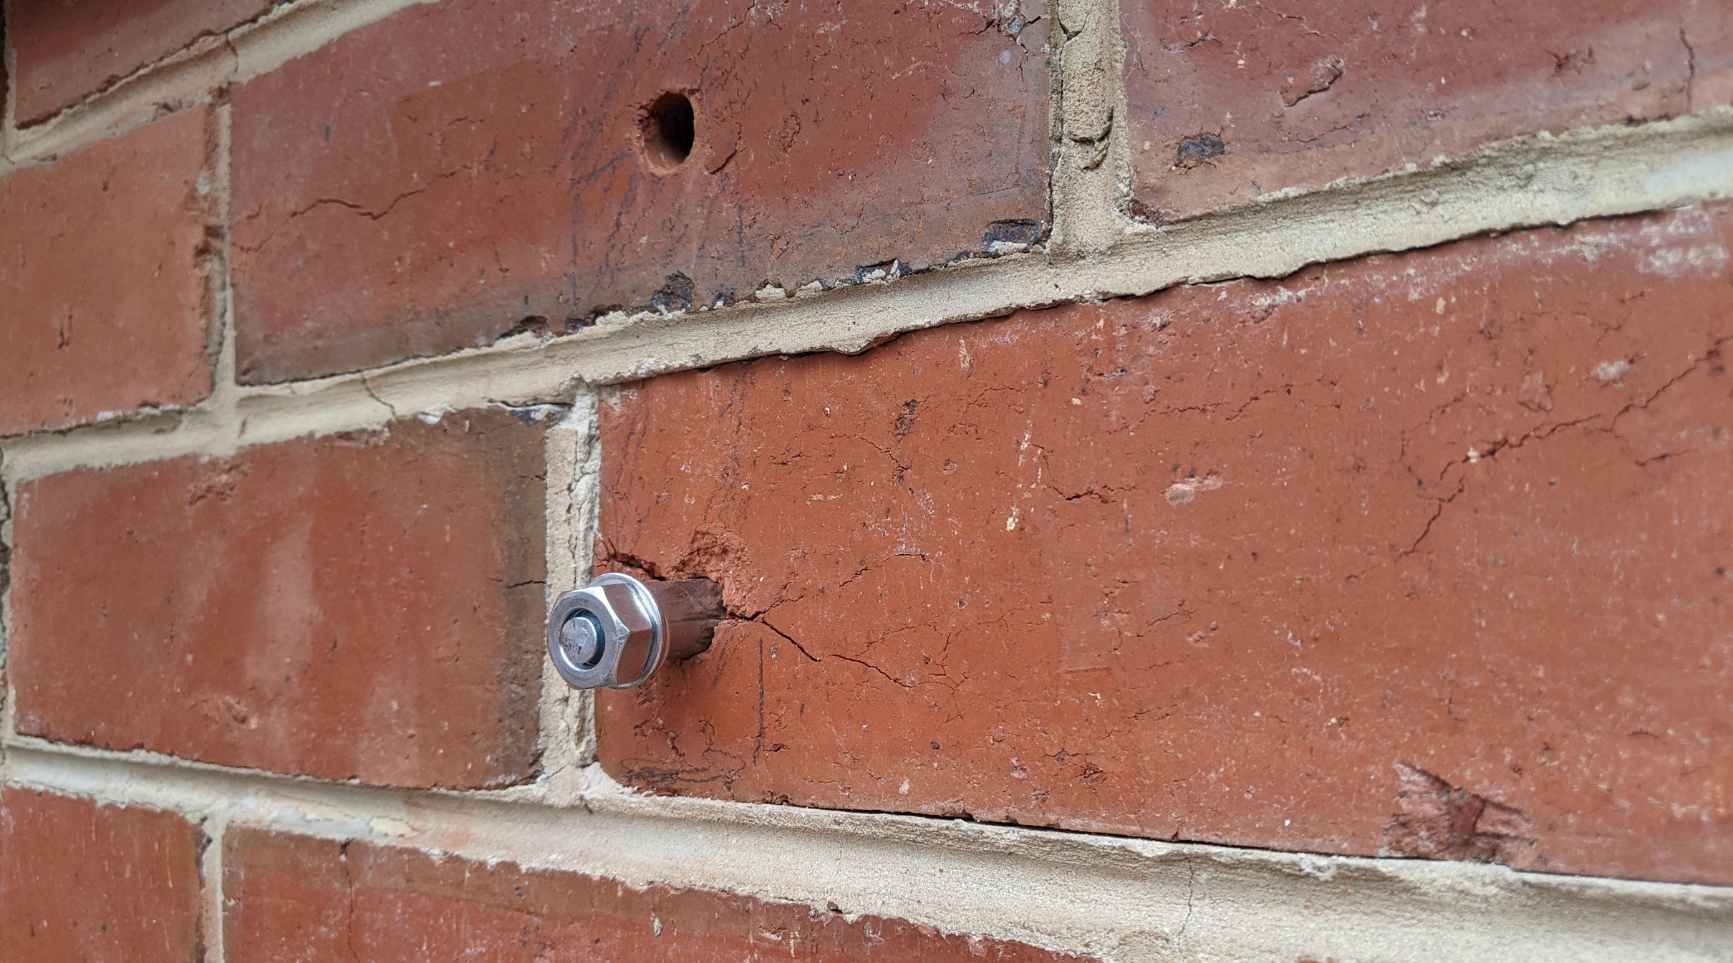
Step 4: Insert Fasteners and Secure the Wood
Insert the selected fasteners through the wood and into the drilled holes in the brick. Depending on the type of fastener, you may need to use a hammer or a screwdriver to secure them firmly in place. Be mindful of not overtightening the fasteners, as this could damage the wood or compromise the attachment.
Step 5: Verify Stability and Alignment
Once the wood is securely attached to the brick, verify its stability and alignment using a level. Make any necessary adjustments to ensure that the wood fixture is level and firmly in place.
By following these steps and utilizing the appropriate tools and fasteners, you can confidently attach wood to a brick surface, creating a secure and visually appealing installation. With the wood successfully fastened to the brick, you’ve completed the process of securing wood to brick.
Read more: How To Make A Brick
Conclusion
Securing wood to a brick surface may initially seem like a challenging endeavor, but with the right approach and attention to detail, it can be accomplished with confidence. By following the steps outlined in this guide, you can achieve a secure and professional attachment that enhances both the functionality and aesthetics of your space.
From gathering the necessary tools and materials to preparing the brick surface and the wood for installation, each step plays a crucial role in ensuring a successful outcome. By meticulously cleaning the brick, drilling precise holes, and selecting the appropriate fasteners, you can create a strong and enduring bond between the wood and the brick surface.
It’s important to approach this task with patience and precision, as rushing through any of the steps could compromise the integrity of the attachment. Taking the time to measure, level, and align the wood fixture will result in a visually pleasing and professional-looking installation.
Whether you’re adding shelving, a mantle, or any other wooden fixture to a brick wall, the techniques and principles outlined in this guide can be applied to various projects, both indoors and outdoors. By mastering the art of securing wood to brick, you’ll have the confidence to take on future installations and enhance the functionality and beauty of your living or working space.
Now that you’re equipped with the knowledge and understanding of how to securely fasten wood to brick, you can embark on your next project with the assurance of achieving a durable and visually appealing result.
Remember, the key to success lies in meticulous preparation, the use of the right tools and materials, and a methodical approach to each step of the process. With these elements in place, you can confidently transform your brick surfaces with the addition of securely attached wood fixtures.
Frequently Asked Questions about How To Secure Wood To Brick
Was this page helpful?
At Storables.com, we guarantee accurate and reliable information. Our content, validated by Expert Board Contributors, is crafted following stringent Editorial Policies. We're committed to providing you with well-researched, expert-backed insights for all your informational needs.


0 thoughts on “How To Secure Wood To Brick”