Home>Construction & Tools>Building Materials>How To Set Brick Edging
Building Materials
How To Set Brick Edging
Modified: August 28, 2024
Learn how to set brick edging with our step-by-step guide using high-quality building materials. Create a professional and durable border for your landscaping project.
(Many of the links in this article redirect to a specific reviewed product. Your purchase of these products through affiliate links helps to generate commission for Storables.com, at no extra cost. Learn more)
Introduction
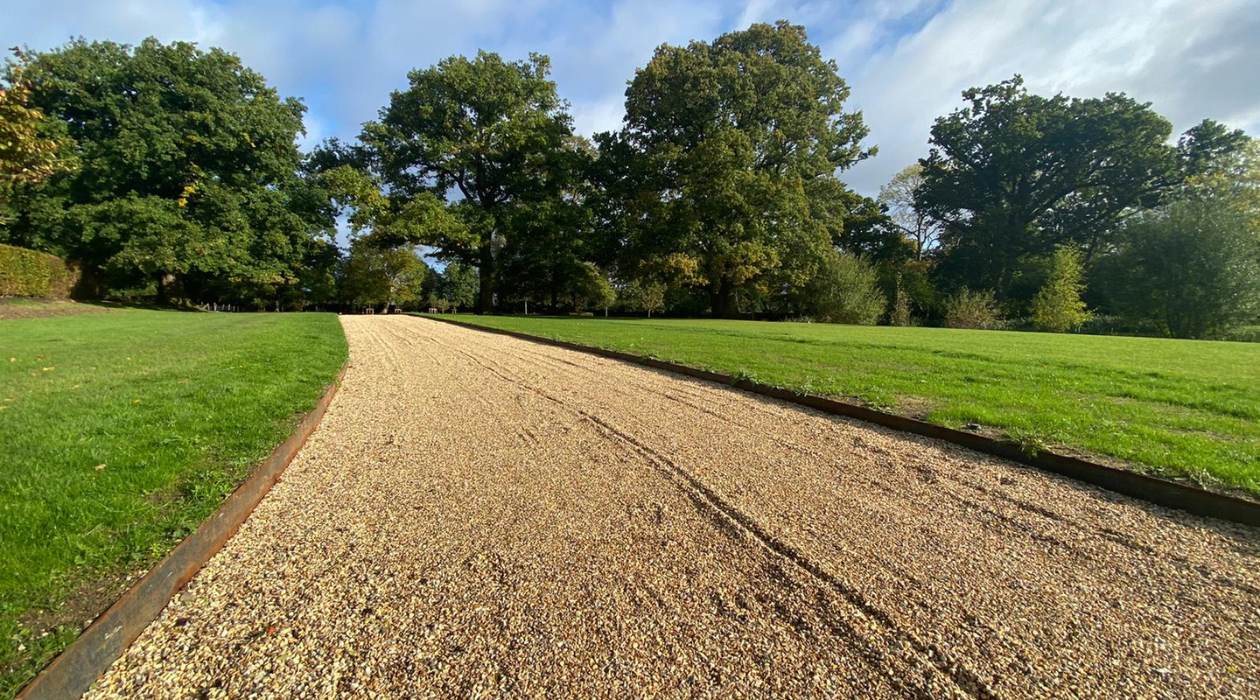
Setting brick edging is an excellent way to add a touch of elegance and structure to your outdoor space. Whether you're looking to define a garden bed, create a pathway, or enhance the appearance of your landscape, brick edging offers a timeless and versatile solution. This DIY project not only adds visual appeal but also serves a practical purpose by containing mulch, gravel, or soil within the designated area.
By following a few simple steps and utilizing basic tools, you can achieve professional-looking brick edging that complements your home's architecture and landscaping. This guide will walk you through the process, from planning and preparation to the finishing touches and maintenance. With attention to detail and a bit of creativity, you can transform your outdoor space into a charming and well-defined area that reflects your personal style.
Whether you're a seasoned DIY enthusiast or a novice looking to embark on your first outdoor project, setting brick edging can be a rewarding and enjoyable endeavor. As you embark on this journey, envision the impact that carefully placed bricks can have on the overall aesthetics of your outdoor space. With the right approach and a willingness to get your hands dirty, you'll soon be on your way to creating a polished and inviting landscape that showcases your dedication to craftsmanship and design.
Key Takeaways:
- Create a visually appealing brick edging by planning, marking, excavating, adding a stable base, laying bricks with precision, and finishing with maintenance. Transform your outdoor space with timeless elegance and charm.
- Achieve a professional-looking brick edging by meticulous planning, precise marking, foundational preparation, and laying bricks with attention to detail. Elevate your outdoor space with a touch of craftsmanship and sophistication.
Read more: How To Lay Bricks For Garden Edging
Step 1: Planning and preparation
Before diving into the physical labor of setting brick edging, it's crucial to lay a solid foundation through meticulous planning and thorough preparation. This initial step sets the stage for a successful and visually appealing outcome. Here's a detailed breakdown of the essential tasks involved in the planning and preparation phase:
-
Assess the Area: Begin by surveying the area where you intend to install the brick edging. Take note of the existing landscape, including any slopes, curves, or obstacles that may impact the layout. Understanding the topography and dimensions of the space will inform your design decisions and help you anticipate any challenges that may arise during the installation process.
-
Select the Right Bricks: Choose bricks that align with the aesthetic of your outdoor space and complement the overall design of your home. Consider factors such as color, texture, and size to ensure that the selected bricks harmonize with the existing elements in your landscape. Additionally, opt for durable, weather-resistant bricks that can withstand the outdoor elements and maintain their appearance over time.
-
Gather Necessary Tools and Materials: Compile a list of tools and materials required for the project, including a shovel, tape measure, string, stakes, level, masonry saw, safety goggles, work gloves, and, of course, the chosen bricks. Having all the necessary items on hand will streamline the installation process and minimize interruptions.
-
Create a Design Plan: Sketch out a design plan that outlines the layout and configuration of the brick edging. Consider whether you want a straight, curved, or intricate pattern and visualize how the edging will integrate with the surrounding landscape. This step allows you to experiment with different arrangements and ensures that the final result aligns with your vision.
-
Establish Boundaries: Use stakes and string to mark the boundaries of the edging, providing a clear visual guide for the installation process. This step is crucial for maintaining straight lines and consistent spacing between the bricks, resulting in a polished and professional-looking outcome.
By dedicating time to thorough planning and meticulous preparation, you set the stage for a seamless and visually striking brick edging installation. This foundational step lays the groundwork for the subsequent stages, ensuring that the project progresses smoothly and yields a cohesive and aesthetically pleasing result.
Step 2: Marking the edging line
Marking the edging line is a critical phase in the process of setting brick edging, as it establishes the precise layout and ensures that the edging aligns with your design vision. This step involves creating a clear and defined boundary that serves as a guide for the placement of the bricks. By meticulously marking the edging line, you set the stage for a visually appealing and structurally sound installation. Here's a detailed breakdown of the tasks involved in this crucial step:
-
Reference Points: Begin by identifying reference points that will dictate the placement of the edging line. These points may include existing structures, such as the edge of a garden bed or the perimeter of a pathway, as well as any predetermined design elements. By referencing these points, you can maintain consistency and alignment throughout the edging installation.
-
String and Stakes: Utilize string and stakes to outline the edging line with precision. Drive stakes into the ground at strategic intervals along the proposed edging, ensuring that they align with the desired layout. Next, run a taut string between the stakes, following the designated path of the edging line. This string serves as a visual guide, allowing you to assess the proposed layout and make any necessary adjustments before proceeding to the next phase.
-
Alignment and Leveling: Use a level to ensure that the string accurately represents the intended height and alignment of the edging line. This step is crucial for maintaining a consistent elevation and preventing unevenness in the final installation. By meticulously checking the alignment and leveling of the string, you can guarantee that the subsequent placement of bricks results in a uniform and visually appealing edging.
-
Flexibility for Curves: If your design incorporates curved sections, take the time to carefully adjust the string and stakes to accommodate these curves. This may involve repositioning the stakes and manipulating the string to achieve smooth and graceful curves that enhance the overall aesthetics of the edging.
-
Verification and Adjustment: Once the string is in place, take a moment to verify that the proposed edging line aligns with your design plan and the natural flow of the landscape. Make any necessary adjustments to ensure that the layout complements the surrounding elements and achieves the desired visual impact.
By meticulously marking the edging line, you establish a clear and precise guide for the subsequent stages of the brick edging installation. This foundational step sets the framework for the placement of the bricks, ensuring that the final result reflects your design vision and enhances the overall aesthetics of your outdoor space.
Step 3: Excavating the trench
Excavating the trench is a pivotal phase in the process of setting brick edging, as it involves creating a stable foundation that accommodates the placement of the bricks. This step requires precision and attention to detail to ensure that the trench provides adequate support and alignment for the edging. Here's a comprehensive overview of the tasks involved in excavating the trench:
-
Trench Dimensions: Begin by using a shovel to dig a trench along the marked edging line. The depth and width of the trench will depend on the size and intended placement of the bricks. Typically, a depth of 4 to 6 inches and a width that accommodates the bricks' dimensions are suitable for creating a stable base.
-
Uniform Depth: Maintain a consistent depth throughout the trench, using a tape measure and a level to verify the uniformity of the excavation. This ensures that the subsequent layers of base material and the bricks themselves rest on a level surface, preventing unevenness in the edging.
-
Straight Edges and Smooth Bottom: Pay close attention to the edges of the trench, ensuring that they remain straight and well-defined. Additionally, smooth out the bottom of the trench to eliminate any irregularities that may affect the stability and alignment of the bricks.
-
Removal of Debris: As you excavate the trench, periodically remove any debris, rocks, or roots that may impede the placement of the base material and the bricks. A clean and debris-free trench sets the stage for a seamless and structurally sound installation.
-
Assessment of Compaction: After excavating the trench, assess the compaction of the soil at the bottom to ensure that it provides a stable foundation for the subsequent layers. Use a tamper or a hand compactor to compact the soil, creating a firm base that minimizes the risk of settling over time.
-
Consideration for Sloped Areas: If the edging line traverses sloped terrain, take into account the gradient and adjust the depth of the trench accordingly. This adaptation ensures that the bricks align with the natural contours of the landscape, creating a visually pleasing and harmonious transition.
By meticulously excavating the trench, you establish a solid foundation that supports the structural integrity and visual appeal of the brick edging. This foundational step sets the stage for the subsequent layers of base material and the placement of the bricks, ensuring a durable and aesthetically pleasing outcome.
Step 4: Adding a base material
Once the trench has been meticulously excavated to the desired depth and dimensions, the next crucial step in setting brick edging involves adding a base material that provides stability, support, and proper alignment for the bricks. The base material serves as a foundational layer that facilitates the even placement of the bricks and enhances the overall durability of the edging. Here's a detailed exploration of the tasks involved in adding the base material:
-
Selecting the Appropriate Material: Choose a suitable base material, such as coarse sand or crushed gravel, that offers excellent drainage properties and compaction capabilities. The selected material should provide a stable and level surface for the bricks while allowing for adequate water permeability to prevent water accumulation beneath the edging.
-
Even Distribution: Begin by evenly distributing the chosen base material within the excavated trench, ensuring that it covers the entire surface area and reaches the desired depth. Use a rake or a hand tamper to spread and compact the material, creating a uniform and solid foundation for the bricks.
-
Compaction and Leveling: Employ a hand compactor or a tamper to compact the base material, ensuring that it achieves a firm and stable consistency. Pay close attention to the levelness of the base, using a straight board or a level to verify that the surface remains even and aligned with the intended edging line.
-
Assessment of Stability: After compacting the base material, assess its stability and uniformity to confirm that it provides a reliable foundation for the bricks. Walk along the compacted surface to identify any areas that may require additional compaction or leveling, addressing any inconsistencies to guarantee a solid base for the edging.
-
Consideration for Sloped Areas: In instances where the edging line traverses sloped terrain, adjust the thickness of the base material to accommodate the gradient and ensure that the bricks maintain a consistent and level placement. This adaptation accounts for the natural contours of the landscape, promoting a seamless integration of the edging with the surrounding environment.
By meticulously adding a suitable base material, you establish a robust foundation that supports the structural integrity and longevity of the brick edging. This essential step lays the groundwork for the precise placement of the bricks, ensuring a durable, visually appealing, and professionally executed outcome.
Read more: How To Install Sawtooth Brick Edging
Step 5: Laying the bricks
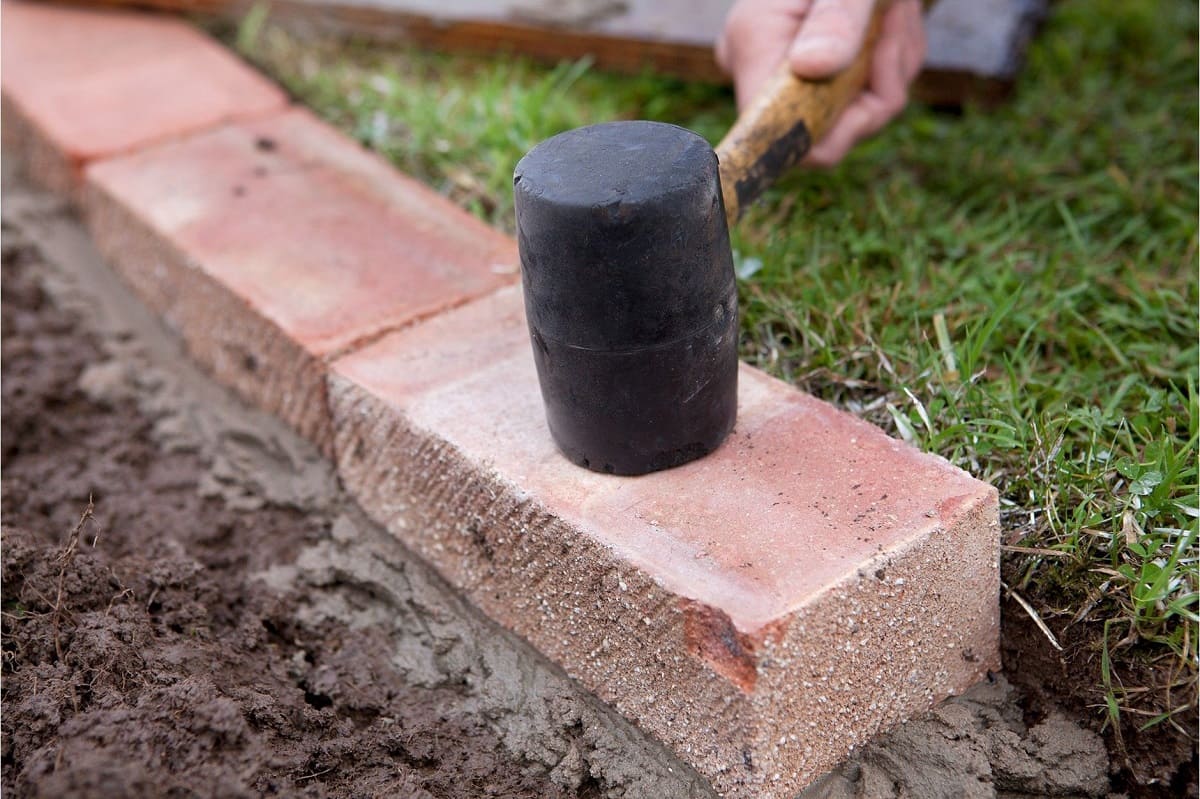
With the meticulous planning, precise marking, and foundational preparation complete, it's time to embark on the transformative phase of laying the bricks for the edging. This step requires a keen eye for detail, a steady hand, and a commitment to achieving a polished and visually striking outcome. Here's a comprehensive exploration of the tasks involved in laying the bricks for the edging:
-
Dry Layout: Before applying any adhesive or mortar, conduct a dry layout of the bricks along the excavated trench. This preliminary arrangement allows you to visualize the positioning of the bricks and make any necessary adjustments to achieve the desired pattern and alignment. Take the opportunity to experiment with different configurations, ensuring that the layout harmonizes with the surrounding landscape and complements the overall design.
-
Adhesive Application: Once satisfied with the dry layout, apply a suitable adhesive or mortar to the bottom of each brick before placing it in the trench. The adhesive enhances the stability and cohesion of the bricks, preventing shifting or displacement over time. Exercise precision and care during this process, ensuring that the adhesive is evenly distributed to promote a secure bond between the bricks and the base material.
-
Alignment and Spacing: As you lay each brick, pay close attention to its alignment and spacing relative to the edging line. Use a level to verify that the bricks are positioned uniformly and maintain a consistent height, creating a seamless and visually appealing edging. Additionally, employ spacers or small gaps between the bricks to allow for adequate expansion and contraction, promoting long-term durability and structural integrity.
-
Cutting and Trimming: In cases where the layout requires customized brick sizes or shapes to accommodate curves or intricate patterns, utilize a masonry saw to make precise cuts and trims. This attention to detail ensures that the bricks seamlessly integrate with the design plan, resulting in a cohesive and professional-looking edging that reflects your dedication to craftsmanship.
-
Verification of Alignment: Periodically step back and assess the alignment and overall visual impact of the laid bricks. Make any necessary adjustments to maintain a uniform and aesthetically pleasing edging, ensuring that the bricks complement the surrounding landscape and architectural elements.
-
Adherence to Design Plan: Throughout the laying process, refer to the initial design plan to confirm that the arrangement of the bricks aligns with your vision. This adherence to the design plan ensures that the final outcome reflects your intended aesthetic and seamlessly integrates with the overall landscape design.
By meticulously laying the bricks with attention to detail and precision, you bring the design plan to life, creating a visually captivating and structurally sound brick edging that enhances the charm and sophistication of your outdoor space.
When setting brick edging, make sure to dig a trench for the bricks to sit in, use a string line for straightness, and pack the soil tightly around the bricks for stability.
Step 6: Finishing touches and maintenance
As the bricks are meticulously laid and the edging takes shape, attention turns to the final touches that elevate the overall appearance and ensure the longevity of the brick edging. This phase encompasses the essential steps for refining the visual presentation and implementing maintenance practices that preserve the integrity of the installation.
Sealing and Edging Restraints
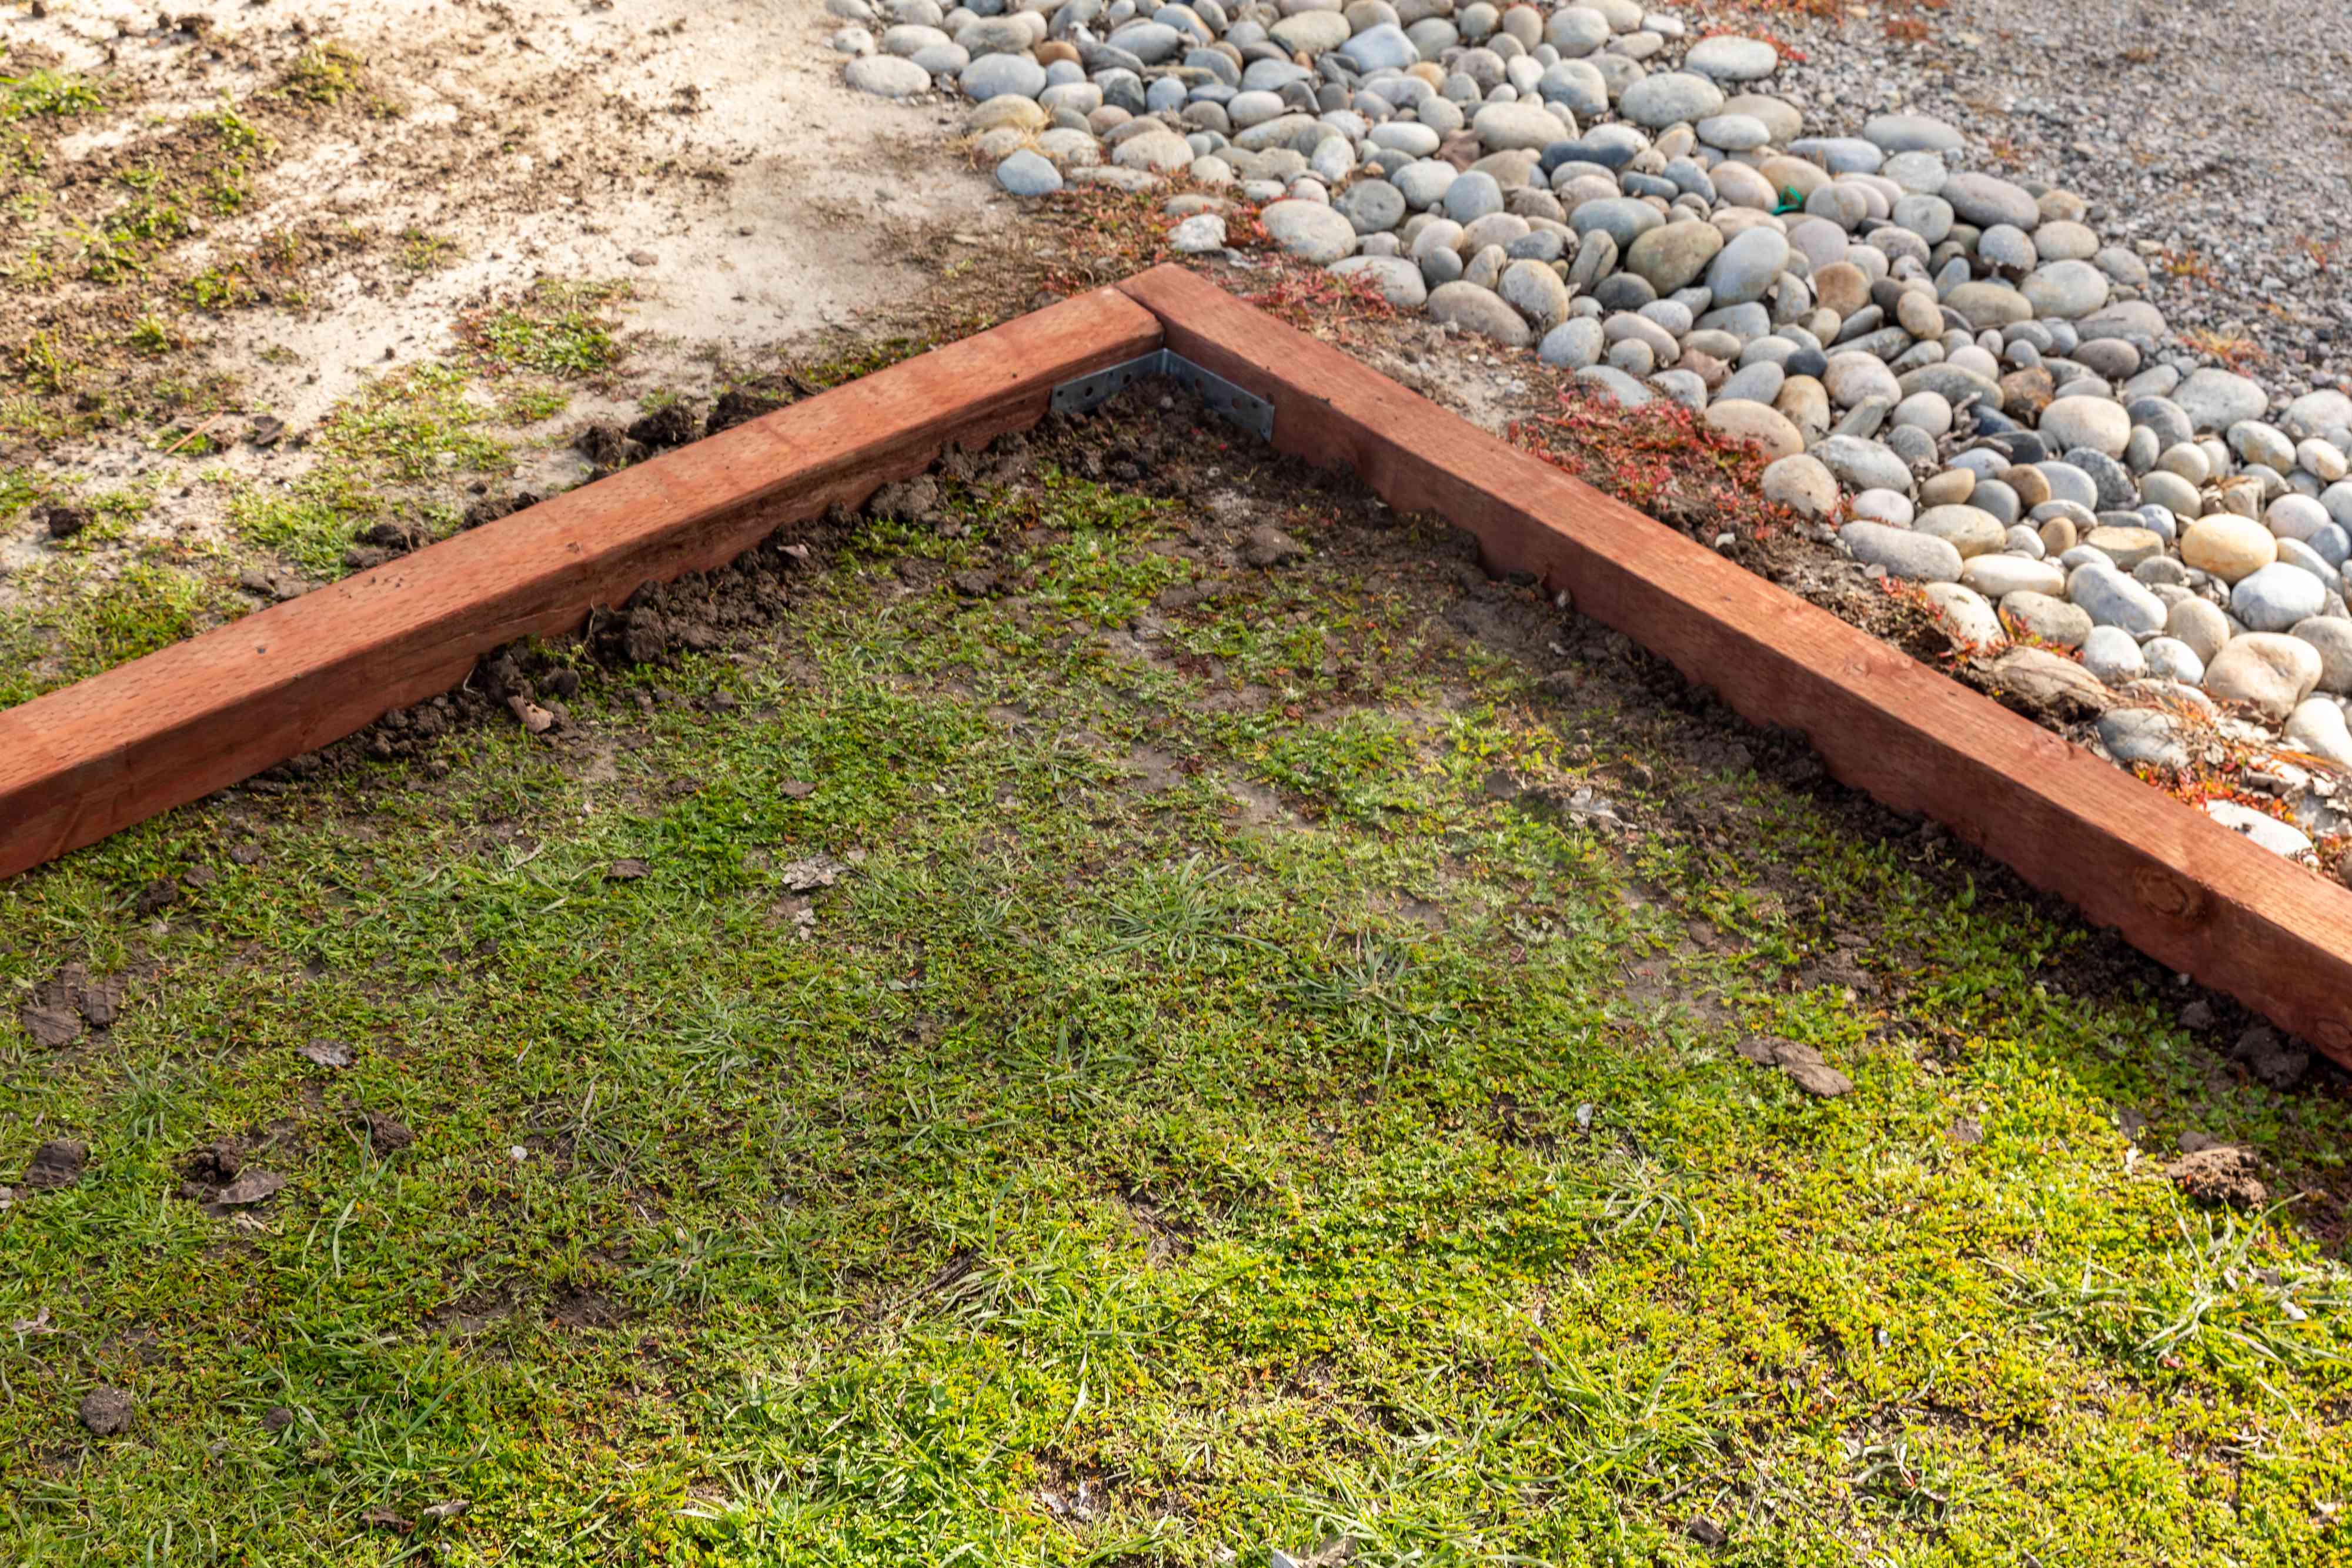
Applying a sealant to the laid bricks serves as a protective measure, safeguarding the surface against moisture infiltration and minimizing the effects of weathering. Additionally, incorporating edging restraints, such as metal or plastic strips, along the outer perimeter of the edging provides structural support and prevents the displacement of the bricks over time.
Backfilling and Compaction
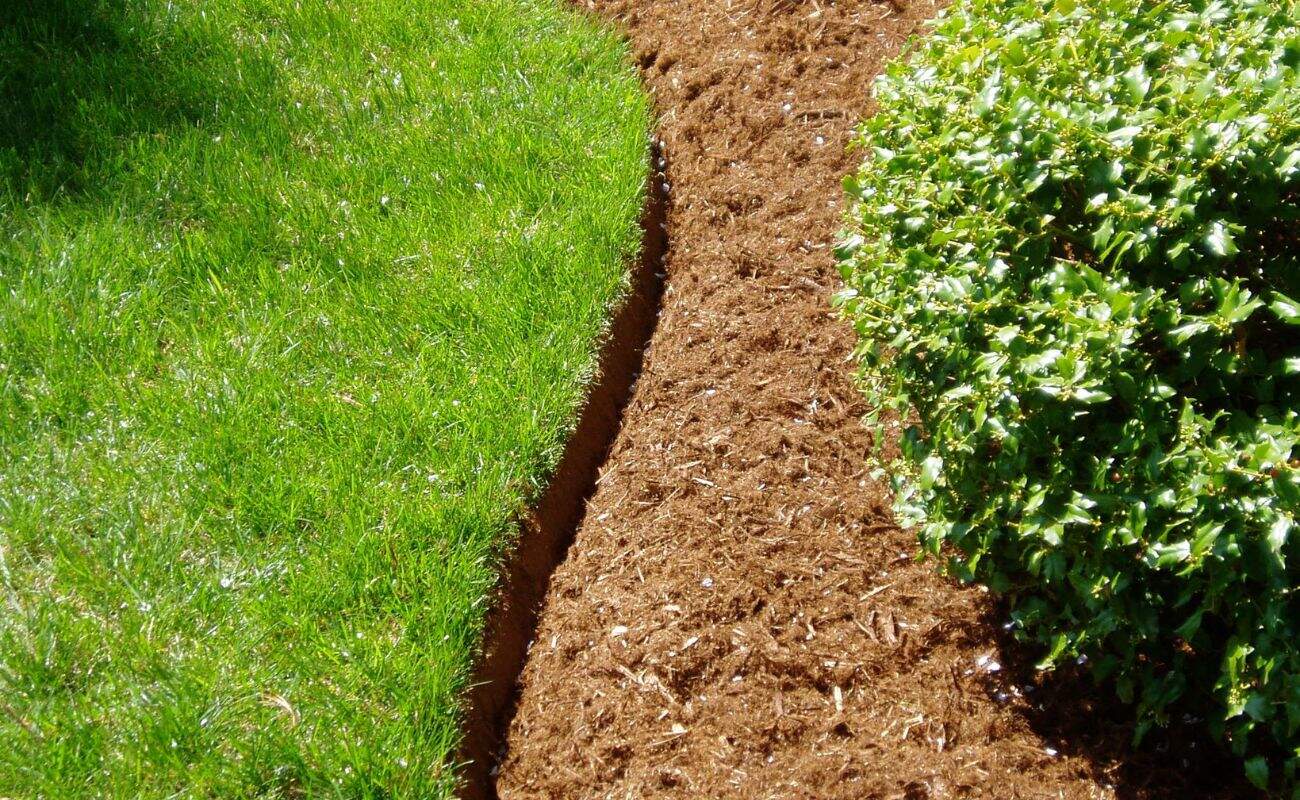
Once the bricks are securely in place, backfilling the space behind the edging with soil or mulch contributes to a cohesive and polished appearance. Proper compaction of the backfilled material ensures stability and prevents erosion, maintaining the defined boundaries of the edging.
Read more: How To Finish Napkin Edges
Weed Control and Drainage
Implementing weed control measures, such as a weed barrier fabric, beneath the backfilled material minimizes the growth of unwanted vegetation and preserves the pristine appearance of the edging. Additionally, ensuring adequate drainage around the edging area prevents water accumulation and promotes the longevity of the installation.
Regular Inspection and Cleaning
Engaging in regular inspections of the brick edging allows for the early detection of any issues, such as loose bricks or signs of deterioration. Furthermore, periodic cleaning, which may involve gentle washing and removal of debris, preserves the aesthetic appeal and prevents the accumulation of dirt and grime.
Seasonal Maintenance
Adhering to a seasonal maintenance routine, which may include resealing the bricks, replenishing the backfilled material, and addressing any structural concerns, prolongs the lifespan of the edging and upholds its visual allure throughout changing weather conditions.
By attending to these finishing touches and implementing a proactive maintenance regimen, the brick edging not only achieves a refined and polished appearance but also sustains its structural integrity and visual appeal for years to come. This conscientious approach ensures that the outdoor space maintains its captivating charm and reflects the dedication to maintaining a well-kept and aesthetically pleasing landscape.
Frequently Asked Questions about How To Set Brick Edging
Was this page helpful?
At Storables.com, we guarantee accurate and reliable information. Our content, validated by Expert Board Contributors, is crafted following stringent Editorial Policies. We're committed to providing you with well-researched, expert-backed insights for all your informational needs.


0 thoughts on “How To Set Brick Edging”