Home>Craft Storage>How To Make DIY Wind Chimes At Home


Craft Storage
How To Make DIY Wind Chimes At Home
Modified: December 6, 2023
The sight and sounds from a set of wind chimes can brighten up any outdoor space. Learn how to make your very own set of DIY wind chimes with this guide!
(Many of the links in this article redirect to a specific reviewed product. Your purchase of these products through affiliate links helps to generate commission for Storables.com, at no extra cost. Learn more)
Windy days are defined by flying kites, rustling leaves, and, of course, the sound of wind chimes. These trinkets make the most delightful little sounds whenever the wind fancies, and they bring smiles to any who happen to hear them. Picking up a pack at the store is all well and good, but what do you think of personalizing your own charming set? Let’s take a look at how to DIY your very own wind chimes!
What is a Wind Chime?
Wind chimes are decorative pieces that have bits of metal or other materials hanging on strings from a base. The hanging items bump into each other and make the titular chime when the wind or other forces move them. The sight and sound of wind chimes are typically pleasing to witness, and they’ve graced many different places over the many years since their invention. Many forms of wind chimes have been used in temples and prestigious homes, put to ward away spirits or to showcase wealth. Today, they’re a common sight in gardens and other outdoor spaces.
Read more: How To Make Silverware Wind Chimes
Why Make a DIY Wind Chime?
There’s something special about making things with your own hands, and wind chimes are especially gratifying. Hanging them up in your home guarantees pleasant sounds on windy days and an ornament pleasing to look at during morning coffees.
DIY winch chimes are also a great way to use up bits and bobs around the house that you have no use of. Old keys from lost locks? Perfect for a set of DIY key wind chimes. Seashells brought back from the coast? Some shell wind chimes would be beautiful. You can make a wind chime out of almost anything. Recycled DIY wind chimes are thus some of the easiest and most affordable ornaments to make.
DIY Wind Chimes Versus Store-Bought
You may wonder what advantages DIY wind chimes have over the store-bought variety. The truth is that unless you’re an experienced crafter, a DIY wind chime will probably not have the same level of polish as a store-bought one. In addition, it’s a lot easier to drop some cash on a pretty set than spending an afternoon making your own. So, why bother?
Well, for starters, it’s just a fun thing to do. There’s no need for the project to be complicated. The resulting wind chime can be as simple or as grand as you choose, and it can be done alone or even as a group activity. The point of it is to enjoy yourself. Getting a nifty little outdoor trinket, as a result, is just one of the benefits.
Secondly, you have far more control over the look of your DIY wind chimes. If you want a large wind chime, you can control the size of the base that the pieces hang from. Want smaller, daintier pieces on your set? Just pick out tinier items to put up. You can even purchase specific chime colors or paint them yourself to suit your decor.
Ultimately, the best wind chimes for you, whether store-bought or DIY, will depend on your preferences.
Pros and Cons of DIY Wind Chimes
Pros
- Entirely customizable
- Enjoyable creative activity
- Adjustable difficulty
- Can be made into a group activity
Cons
- More work than store-bought wind chimes
- Will likely not have a “factory-finished” look
How to Make a Set of DIY Wind Chimes
Now that you know the perks and problems of DIY wind chimes, it’s time to learn how they’re made. This section will cover the different types of wind chimes and go over how to handle their materials. The final assembly guide is right at the end so stay with us. For now, grab your crafting supplies, and let’s get started!
Read more: How To Hang Wind Chimes On Porch
Basic Tools
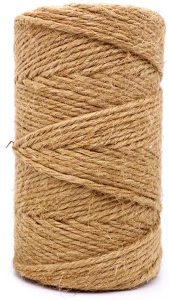
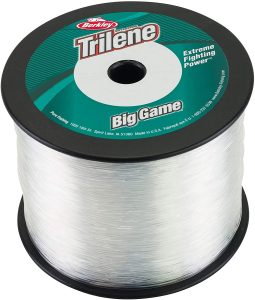
As with any creative project, there are a few basic tools you need on hand. String, for instance, is essential for all sets of wind chimes. It’s responsible for tying together and holding up the different materials so it needs to be sturdy and weather-proof. Twine or fishing line would do perfectly here, depending on the look you’re going for.
A drill is optional for certain types of DIY wind chimes, but it’s sure to prove useful for more complicated projects. While some hanging pieces like keys are easy to tie up, others benefit from a drilled hole for the string. At the same time, they make wind chime bases easier to make too. We’ll tackle these in the next session.
Things You’ll Need:

The Wind Chime Base
The base of a wind chime is where all other items hang from. They come in many shapes and sizes, but the ones for this guide are mainly round disks. The larger the base, the larger the resulting wind chime though, so choose your size wisely. Smaller bases are the easiest to work with and are ideal for beginners.
The strings on these types of DIY wind chimes are tied together at the top ends, making a sort of center point for the chimes to hang from. Any sort of round disk-like base will work, especially if you pick up a drill and puts in some elbow grease for the holes. Just be sure it’s not too heavy for your strings.
Things You’ll Need:
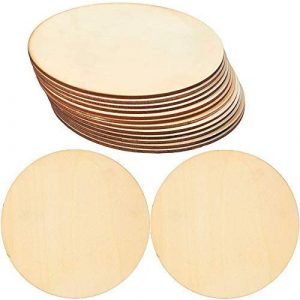
![[CBCMY] 20 Pieces Natural Wood Discs for DIY Wind Chimes](https://storables.com/wp-content/uploads/2022/04/CBCMY-20-Pieces-Natural-Wood-Discs-300x278.jpg)
Read more: What Is Chime Doorbell
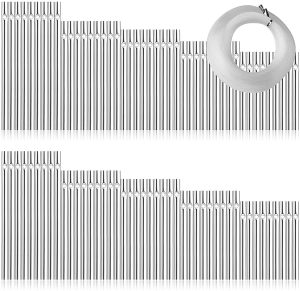
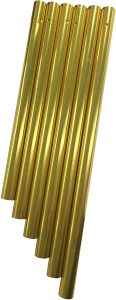
DIY Metal Wind Chimes
Everyone’s familiar with these metal chimes. They create crisp, clear sounds that are easy to identify and enjoy. Their differing lengths determine their pitch. The longer tubes make lower tones while shorter ones emit higher clinks. These chimes are usually arranged by size, but whether you choose to follow this practice or not is up to you. In this case, a little chaos still makes pleasing results.
These chimes are hung up a little differently from the others. The string is put through both holes at the top of each tube, and the tube is allowed to hang. The string forms a little V-shape, tied to the base in two places rather than one. This loose, horizontal placement of the string allows the chimes to hang perfectly vertical.
Things You’ll Need:

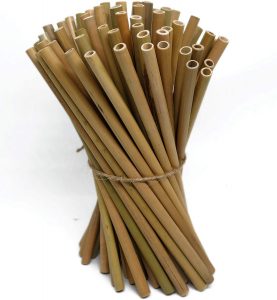
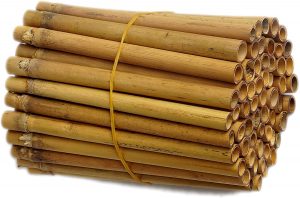
DIY Bamboo Wind Chimes
Now, bamboo wind chimes are a little less common, but they make some lovely sets. The deeper thunks that are produced by the wood are especially noteworthy. There’s an earthiness to them that feels at home in any garden.
These chimes are a little harder to work with, as you’ll need to drill and cut them yourself. Amazon has some well-sized bamboo straws and tubes that you can pick up to start with. While the straws will make pleasant but more clacky sounds, the tubes should produce more of the bamboo’s signature thocks. You can even cut them diagonally using a miter box and saw, bringing more of the sound out. We’d say bamboo wind chimes are a good but challenging novice-level project.
Things You’ll Need:
Read more: What Are Chime Candles
DIY Seashell Wind Chimes
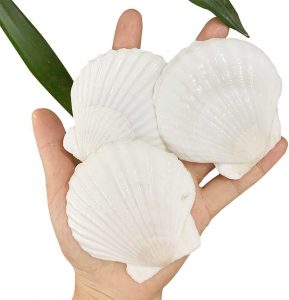
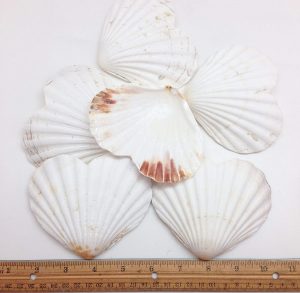
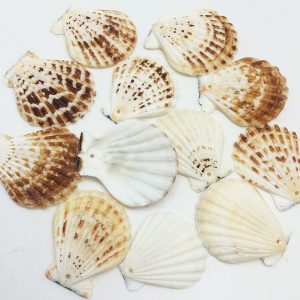
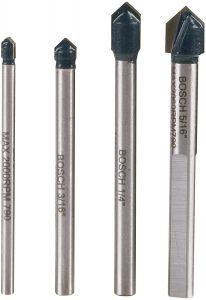
Seashells make for some of the most beautiful and unique wind chimes. While their sound may not match metal and bamboo chimes, their appearance makes up for it. Unfortunately, seashells are some of the hardest wind chime materials to work with. They’re prone to breaking with larger drill bits, so start with the smallest one. A drill bit that’s 1 millimeter or smaller would work best. Keep your hand steady and anticipate losing a few shells before you finally get the hang of it. Just have a few extras on hand, whether picked up during vacation or bought online, and you’ll have a working set in no time.
Ultimately, despite the work they take, seashell wind chimes are sure to charm you once completed. And, if you want to reduce that work, there are pre-drilled shells out there perfect for putting together a quick set. You just need to know where to look.
Things You’ll Need:
DIY Glass Wind Chimes
Glass wind chimes are even trickier than seashell sets and are definitely a project for more experienced crafters. To drill holes into your glass pieces, you’ll need a special set of carbide drill bits and matte tape. Tape the glass down and place a square of tape over the part you’ll be drilling. This is to help prevent the drill from slipping and to reinforce the glass.
Carefully begin drilling, spritzing both the bitt and the glass with water whenever you start seeing smoke. This will prevent the glass from heating up too much and breaking. Once you’re about halfway through the glass, flip it over and drill from the other side. The whole process requires a slow and steady hand.
While they’re a lot of work, using sea glass or mosaic shards on a set of wind chimes is sure to result in a stunning piece of art. Just remember that those pieces may still have sharp edges, so be careful where you place the finished product. We recommend sanding down any parts that may result in injury.
Things You’ll Need:


Read more: How To Replace A Doorbell Chime
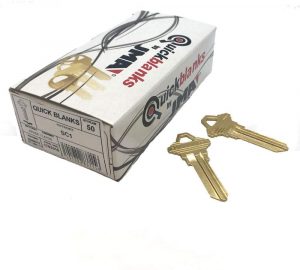
DIY Key Wind Chimes
If you’re looking for some DIY wind chimes that are both easy to make and eye-catching, then consider a set of key wind chimes. Many keys already have holes so they fit perfectly into the role of chime hangings. Your collection of old keys for long-lost locks can certainly create the perfect set of recycled wind chimes. And, if you don’t have enough of those, there are plenty of lovely vintage-styled skeleton keys online perfect for outdoor decor.
Things You’ll Need:


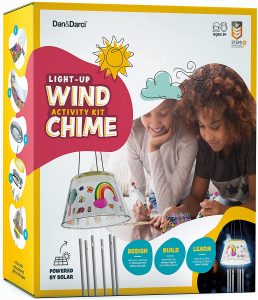
DIY Wind Chime Kits for Kids
Finally, if your little ones want in on the DIY wind chime fun, pick them up a full kit. These sets come with full instructions and plenty of prepared materials. You can have a nice, relaxing afternoon going through the project, which certainly beats scrambling to grab your drill out of their small hands. The resulting wind chime will be something you and your children can hang up together and treasure for a long time.
Things You’ll Need:
![[BeYumi] DIY Wind Chimes Craft Kit](https://storables.com/wp-content/uploads/2022/04/BeYumi-Wind-Chime-DIY-Craft-Kit-300x300.jpg)

Basic DIY Wind Chimes Assembly
Now that you have everything you need, it’s time to look at the assembly process. This set of instructions is mainly for the round-based DIY wind chimes, but the tips on spacing should apply to all sorts.
Step 1
Determine how long you want your wind chime strings to be. Their length will depend on your hanging materials. If the materials are heavy enough to pull the strings down and keep them from getting tangled, then use longer lengths. After you’ve determined the ideal length of your strings, add a few inches for both the top part of your wind chime and to tie around your materials.
Step 2
Check to see how many holes are in your base, or drill them in. If you choose the drill option, make sure to evenly space the distance from one drilled hole to the other. The ideal distance will, again, be determined by your materials. Determine how far they need to be from each other to still clink without crowding, and cut as many strings as you need.
Step 3
Tie up your different hanging materials, making sure to space them well along the strings. Leave space on top of each string to tie together later. Test your placement of the materials by holding them in place on the base and shaking them gently. If the pieces hit each other and don’t get tangled then you’re doing it right.
Step 4
Thread the extra space on the top of each string through the holes in your base. Then, simply tie the base in place so it doesn’t slip up or down the lines. Hold the tops of the strings together and adjust them so the wind chimes hang balanced. Finally, tie them all together, and voila! You have your finished wind chime.
Frequently Asked Questions about DIY Wind Chimes
-
Read more: How To Wind An Extension Cord
What kind of string is best for wind chimes?
Twine and fishing lines are some of the best string options for wind chimes. Twine has a beautiful natural look to it and the fishing line is especially sturdy. Twine is more prone to wear and tear from being exposed to outdoor weather, though. So, if your wind chime isn’t under some sort of overhang, then go for the fishing lines.
-
What does a wind chime symbolize?
It’s said that wind chimes attract positive energies while also subduing the effects of ill fortune. Depending on their material, wind chimes have come to represent clarity, wisdom, and growth.
-
What type of wind chimes are best?
Oftentimes, personal taste is what determines what wind chimes are best for you. On one hand, the sound of bamboo or metal wind chimes may catch your fancy. But you may also prefer the eye-catching sight of some key or seashell wind chimes. At any rate, what’s stopping you from making all the sets? That’s certainly one way to find out which you like best.
-
Where should wind chimes be placed in the house?
Wind chimes ought to be placed in an area frequented by gentle to strong gusts of wind. Depending on their material, certain wind chimes need stronger winds to move and make their chimes. Other types may be too dainty for more forceful gales, however. Lighter wind chimes may tangle or fly off so keep an eye on them before settling on their final placement.
Read more: How To Block Wind On A Balcony
Conclusion
We’ve covered a great number of DIY projects already, from twisted candles to picture frames. In the end, we can confidently say that wind chimes are among our favorite crafts. From picking your favorite materials to stringing them together, DIY wind chimes have proven utterly charming in sight and sound. So, what are you waiting for? Start making your own little collection of chimes today!
Was this page helpful?
At Storables.com, we guarantee accurate and reliable information. Our content, validated by Expert Board Contributors, is crafted following stringent Editorial Policies. We're committed to providing you with well-researched, expert-backed insights for all your informational needs.


0 thoughts on “How To Make DIY Wind Chimes At Home”