Home>Dining>Table Decor>How To Build A Mission Style End Table
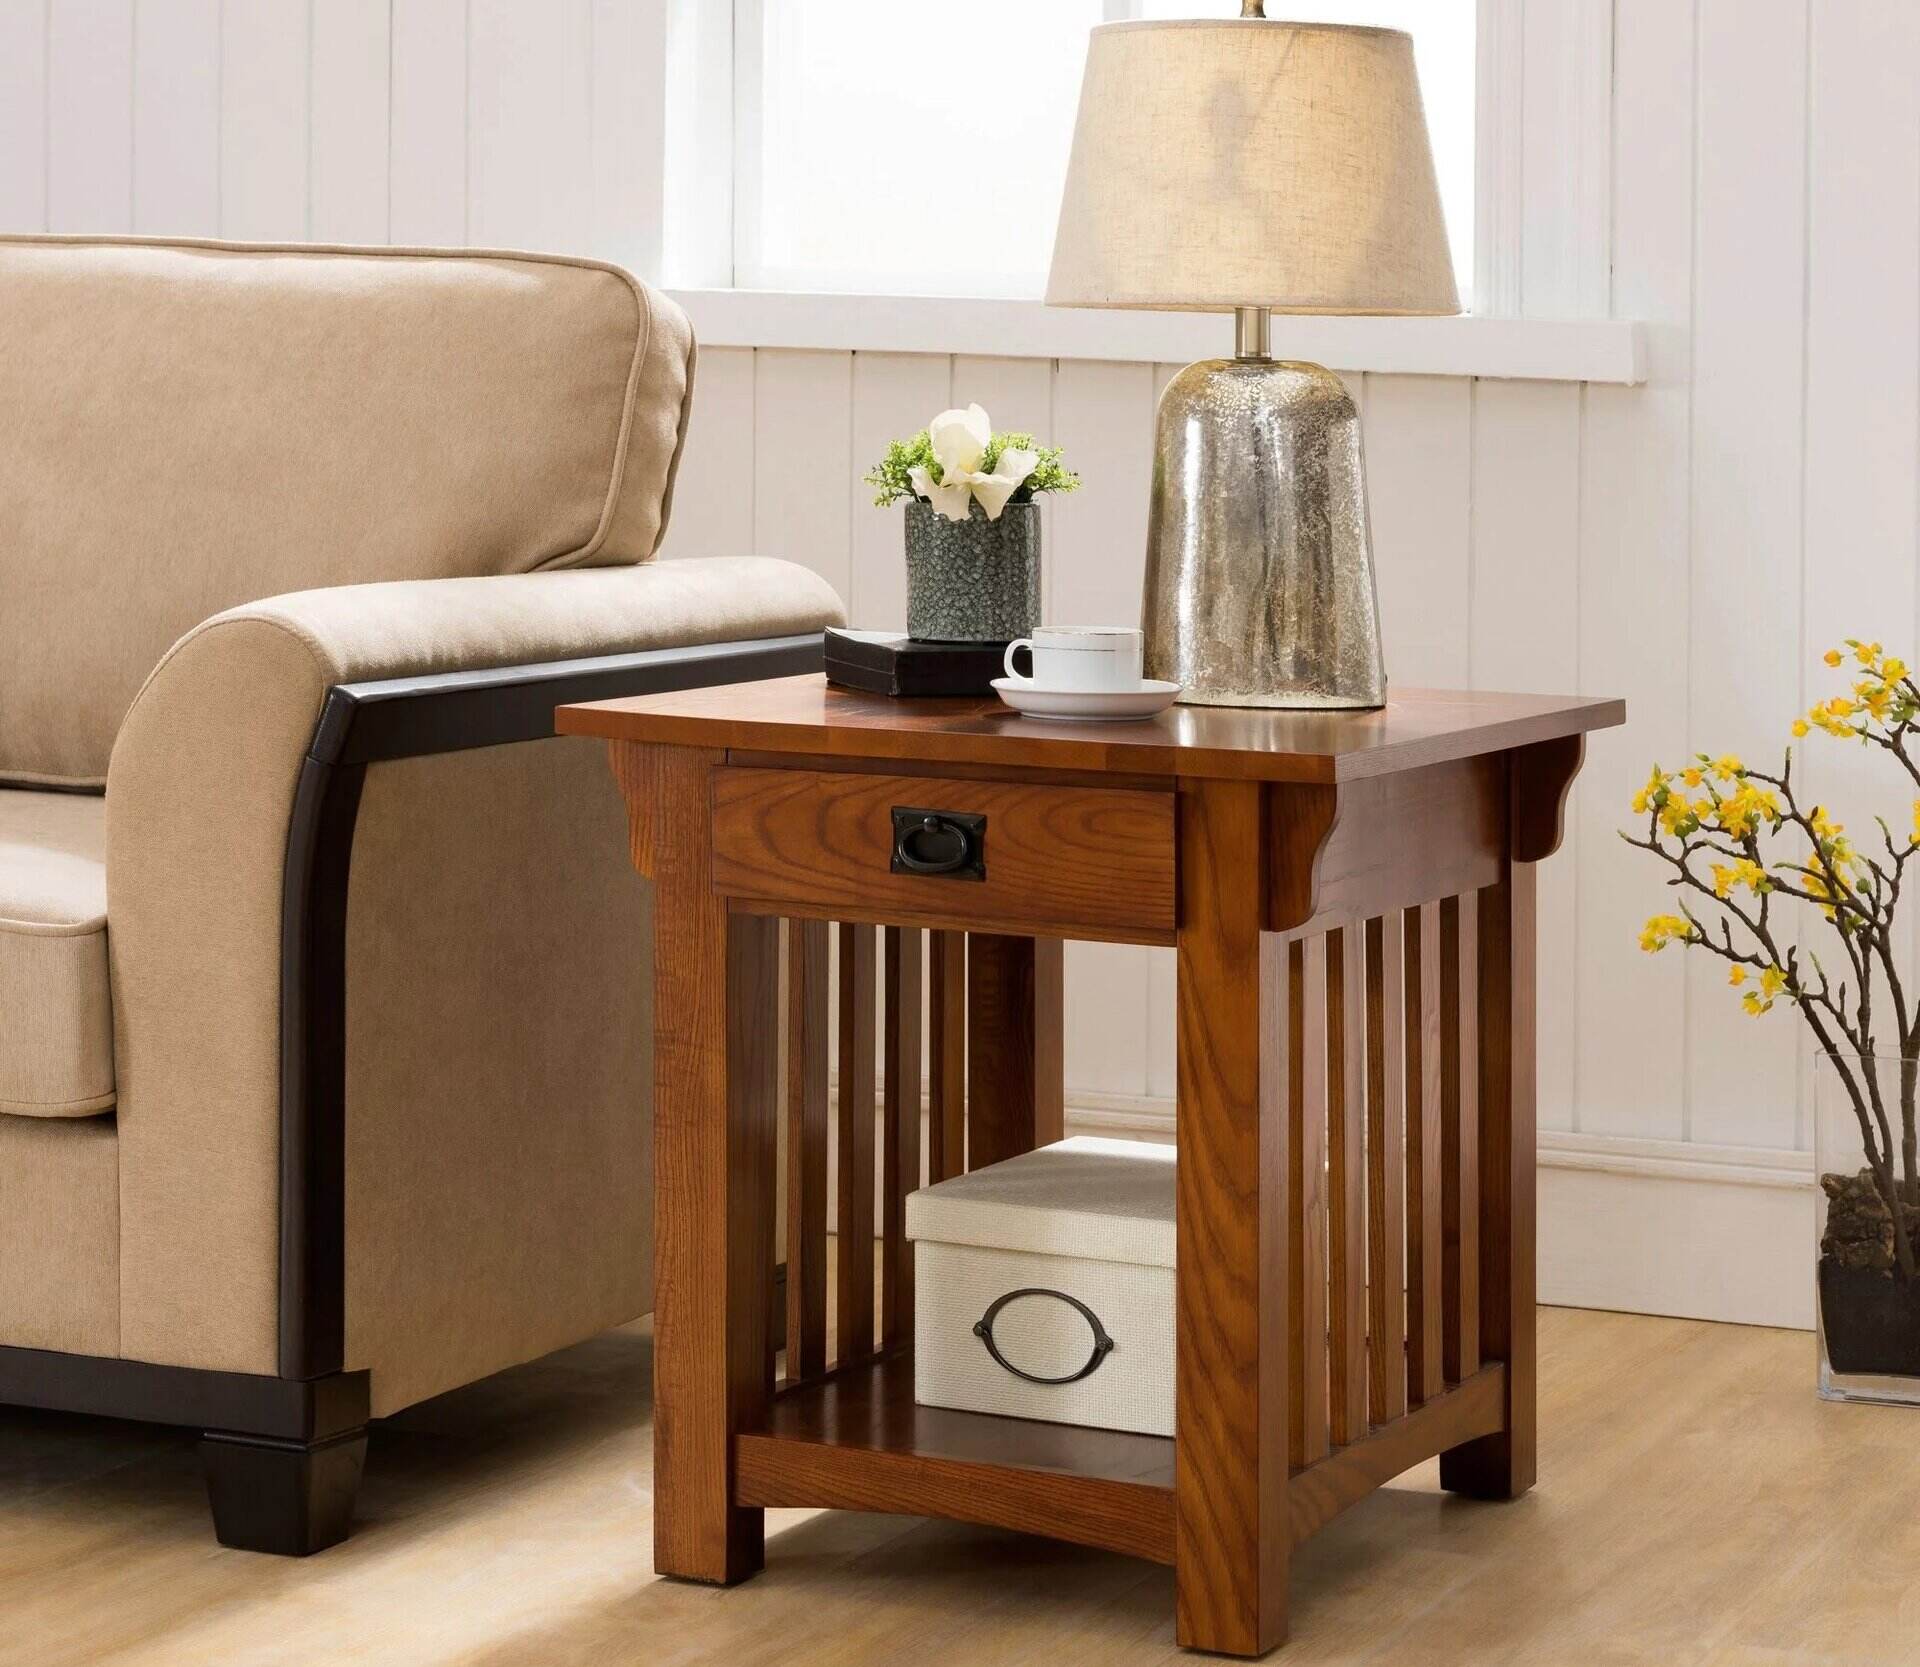
Table Decor
How To Build A Mission Style End Table
Modified: January 3, 2024
Discover step-by-step instructions on how to build a mission style end table and elevate your table decor with this timeless piece.
(Many of the links in this article redirect to a specific reviewed product. Your purchase of these products through affiliate links helps to generate commission for Storables.com, at no extra cost. Learn more)
Introduction
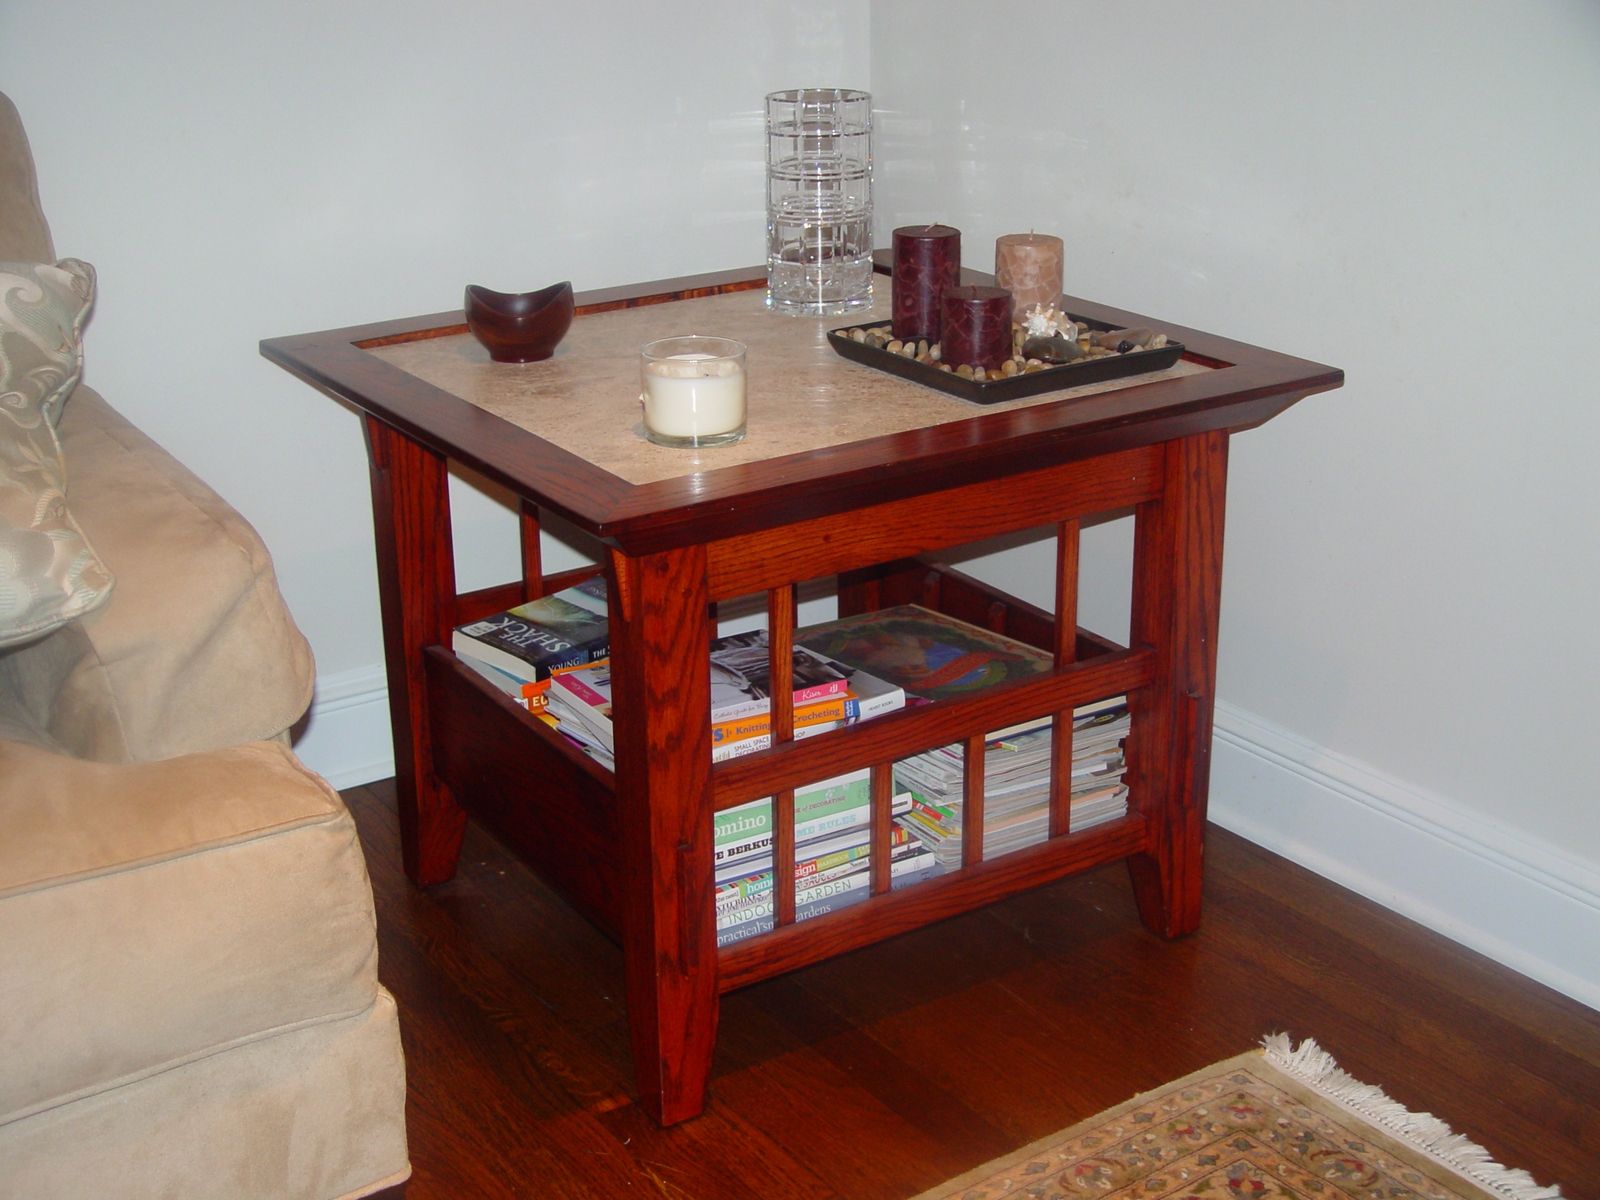
Welcome to this step-by-step guide on how to build a mission style end table. Whether you’re a woodworking enthusiast or a DIY lover, making your own furniture can be a rewarding and fulfilling experience. A mission style end table can add a touch of elegance and functionality to any room, and with a little time and effort, you can create a beautiful piece that will impress everyone who sees it.
In this article, we will walk you through each stage of the process, from gathering the necessary materials to the final sanding and finishing touches. Along the way, we will provide helpful tips and tricks to make your project run smoothly. So, grab your tools and let’s get started!
Materials and Tools Required:
- Wood – Oak is a popular choice for mission style furniture, but you can choose any type of wood that suits your preferences and budget.
- Table Saw – This will be used for cutting the wood pieces to size.
- Miter Saw – Ideal for making precise angled cuts.
- Router – Used for shaping the edges of the tabletop and creating decorative details.
- Drill – Essential for making pilot holes and attaching pieces together.
- Sandpaper – Different grits, ranging from coarse to fine, to smooth the surfaces.
- Wood Glue – To secure the joints and ensure durability.
- Clamps – These will hold the pieces together while the glue sets.
- Stain or Paint – Add the desired color and finish to your end table.
- Brushes and Rags – For applying stain or paint and wiping away excess.
- Protective Gear – Safety goggles, gloves, and a dust mask to keep you safe while working.
Now that you have a clear list of the materials and tools required, let’s move on to the first step: gathering the necessary materials.
Key Takeaways:
- Building a mission style end table requires precision, patience, and attention to detail. From cutting the wood pieces to adding final touches, this DIY project offers a rewarding and fulfilling experience for woodworking enthusiasts.
- Embrace the continuous learning process of woodworking and enjoy the satisfaction of creating a unique piece of furniture. Prioritize safety, take your time, and showcase your craftsmanship with a beautifully crafted mission style end table.
Read more: How To Build A Mission Style Dining Table
Materials and Tools Required:
Before you embark on your mission style end table project, it’s important to have all the necessary materials and tools at hand. This will ensure that you have a smooth and uninterrupted building process. Here is a comprehensive list of what you’ll need:
Materials:
- Wood – The most critical material for building your end table. Oak is a popular choice for mission style furniture due to its durability and beautiful grain patterns. However, you can also opt for other hardwoods like cherry or maple. Choose wood that is free from knots and defects, with a thickness of at least ¾ inch.
- Wood Glue – A high-quality wood glue is required to join the different wood pieces securely. Look for a glue that is specifically designed for woodworking and provides a strong bond.
- Screws – You’ll need screws of various lengths to attach the tabletop, legs, and aprons. Make sure to choose screws that are appropriate for the thickness of the wood you’re working with.
- Stain or Paint – The finish you choose will determine the overall appearance of your end table. Stain allows the natural beauty of the wood grain to shine through, while paint provides a more contemporary or vibrant look. Select a color that complements your room’s decor.
- Clear Coat or Varnish – Applying a clear coat or varnish will protect your end table from wear and tear and give it a polished finishing touch.
Tools:
- Table Saw – A table saw is a versatile and essential tool for any woodworking project. It will be used to rip the wood to the desired width and cut it to the required lengths.
- Miter Saw or Circular Saw – A miter saw or circular saw will come in handy for making precise angled cuts, especially for the legs and aprons of your end table.
- Router – A router is used for shaping the edges of the tabletop and creating decorative details, such as chamfers or roundovers.
- Drill – A drill is necessary for making pilot holes and driving screws into the wood. Make sure to have a set of drill bits that match the size of your screws.
- Sander – Sanding is a crucial step in achieving a smooth and professional finish. An orbital sander or sanding block will save you time and effort during this process.
- Clamps – Clamps are essential for holding the wood pieces together while the glue dries. They ensure a tight and secure joint.
- Measuring Tools – A tape measure, combination square, and a marking gauge will help you accurately measure and mark the wood for cutting and assembly.
- Safety Gear – Safety goggles, gloves, and a dust mask are essential for protecting yourself from flying wood chips, dust, and harmful fumes.
Having all of these materials and tools ready before you begin will make the building process much smoother and more enjoyable. Now that you’re equipped with everything you need, let’s move on to the first step: gathering the necessary materials.
Step 1: Gathering the Necessary Materials
In this first step, we will guide you through the process of gathering all the materials required for building your mission style end table. By having everything ready, you can proceed with the project without any interruptions.
Here’s a detailed breakdown of what you’ll need:
- Wood: Choose a high-quality hardwood for your end table, such as oak, cherry, or maple. The wood should be free from knots and defects to ensure a smooth and professional finish. Measure the length and width requirements specified in your plans or desired dimensions.
- Wood Glue: Invest in a reliable wood glue that provides a strong bond. Look for one that is specifically designed for woodworking projects and can withstand the test of time.
- Screws: Select screws of appropriate lengths depending on the thickness of your wood. Ensure that the screws have the necessary holding power to secure the different parts of the end table.
- Stain or Paint: Decide whether you want to stain the wood to enhance its natural beauty or paint it for a different look. Choose a color that complements your room’s decor and follow the manufacturer’s instructions for application.
- Clear Coat or Varnish: A clear coat or varnish will protect the wood from everyday wear and tear and provide a polished finish. Choose a finish that suits your preferences, be it glossy, satin, or matte.
Once you have your materials ready, it’s time to gather the necessary tools:
- Table Saw: A table saw will be essential for cutting the wood to the required sizes and dimensions. Ensure the saw has a sharp blade and is properly calibrated for accurate cuts.
- Miter Saw or Circular Saw: Use a miter saw or circular saw for making precise angled cuts, especially for the legs and aprons of your end table.
- Router: A router will come in handy for shaping the edges of the tabletop and creating decorative details. Choose the appropriate router bit based on your design preferences.
- Drill: A drill is necessary for making pilot holes and attaching the different parts of the end table together. Ensure you have the appropriate drill bits for your screws.
- Sander: Sanding is vital to achieve a smooth and polished finish. An orbital sander or sanding block will save you time and effort during this process.
- Clamps: Use clamps to hold the wood pieces together while the glue dries. This will ensure a tight and secure joint.
- Measuring Tools: Have measuring tools such as a tape measure, combination square, and marking gauge to accurately measure and mark the wood for cutting and assembly.
- Safety Gear: Prioritize safety by wearing safety goggles, gloves, and a dust mask to protect yourself from flying wood chips, dust, and harmful fumes.
Double-check that you have all the necessary materials and tools before proceeding to the next step. With everything ready, you can now begin building your mission style end table with confidence!
Read more: How To Style An End Table
Step 2: Cutting the Wood Pieces
Now that you have all the necessary materials and tools, it’s time to move on to the second step: cutting the wood pieces for your mission style end table. This step requires precision and careful measurements to ensure that the pieces fit together perfectly.
Follow these steps as a guide:
- Measure and Mark: Start by measuring and marking the dimensions of each wood piece according to your plans or desired specifications. Use a measuring tape, combination square, and marking gauge to ensure accurate measurements and straight lines.
- Set Up the Table Saw: Set up your table saw with a sharp and clean blade. Adjust the fence to the desired width for ripping the wood pieces. Ensure the table saw is stable and the blade is properly aligned.
- Rip the Wood: Rip the wood pieces to the required width using the table saw. Take your time and make smooth and controlled cuts, maintaining a consistent width throughout.
- Crosscut the Wood: Use a miter saw or circular saw to crosscut the wood pieces to the desired lengths. Be sure to align the saw blade with your cut line and make precise cuts. Double-check your measurements before cutting to avoid any mistakes.
- Angle Cuts (If Applicable): If your design includes angled cuts, carefully set the miter saw or circular saw to the desired angle. Use a stop block or clamps to ensure consistent and accurate cuts for all angled pieces.
- Router the Edges (Optional): If you want to add decorative details to the edges of your tabletop or other pieces, use a router with a suitable bit. Take your time and make smooth passes along the edges, creating the desired profile or design.
Remember to always prioritize safety when working with power tools. Wear safety goggles, gloves, and a dust mask to protect yourself from any potential hazards. Additionally, ensure that your work area is clear of any obstructions and that you have a stable and sturdy surface to support your wood pieces.
Once you have cut all the wood pieces to the required sizes and dimensions, take a moment to inspect them and make sure they fit together properly. Make any necessary adjustments or refinements before moving on to the next step.
Cutting the wood pieces is a critical step in the construction of your mission style end table. By taking your time and being precise, you’ll have a strong foundation for assembling the table in the following steps.
Step 3: Creating the Tabletop
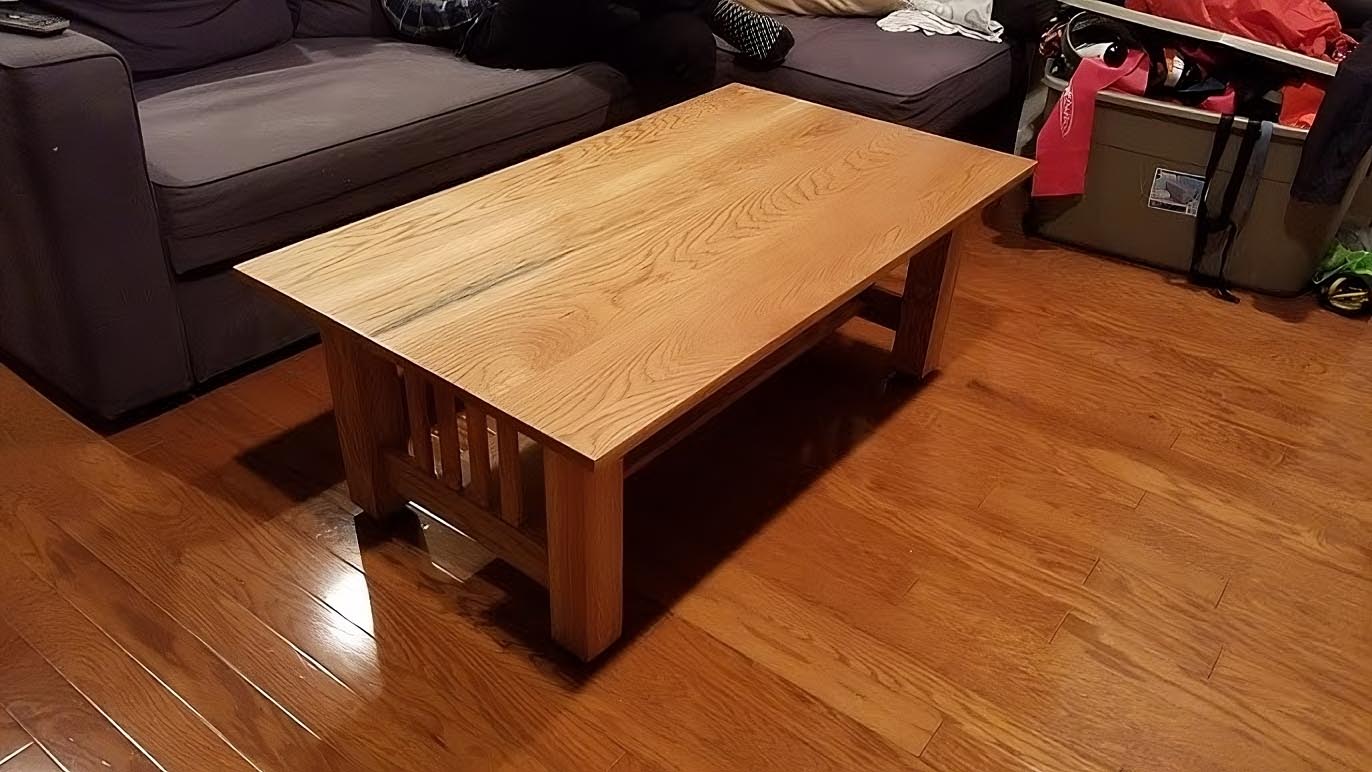
In step 3 of building your mission style end table, we will focus on creating the tabletop. The tabletop is not only a functional component but also a prominent visual feature of the table. Therefore, it’s important to pay attention to detail and ensure a smooth and aesthetically pleasing surface.
Here’s how you can create the tabletop:
- Arrange the Wood Pieces: Lay out the wood pieces that you’ve cut for the tabletop, side by side, in the desired order. Take a moment to visualize how the wood grain and colors come together to create a cohesive look.
- Glue the Wood Pieces: Apply a thin and even layer of wood glue on the edges of each wood piece. Use a brush or a glue spreader to ensure full coverage. Carefully place the pieces back together, aligning the edges perfectly. Apply pressure evenly on the wood pieces to squeeze out any excess glue.
- Secure the Wood Pieces: Use clamps to hold the wood pieces together while the glue dries. Place the clamps evenly along the length of the tabletop, making sure the pieces do not shift or slip. Leave the clamps in place as per the manufacturer’s recommended drying time for the glue.
- Remove Excess Glue: Once the glue is completely dry, remove the clamps and gently scrape off any excess glue that may have squeezed out from the joints. Be careful not to scratch or damage the wood surface while doing this.
- Sand the Tabletop: Use sandpaper or an orbital sander to smooth the surface of the tabletop. Start with a coarser grit to remove any unevenness or glue residue, then gradually move to finer grits for a smooth and polished finish. Sand in the direction of the wood grain to avoid creating scratches or swirl marks.
- Round the Corners (Optional): If you prefer rounded corners on your tabletop, use a router with a roundover bit to create the desired profile. Take small passes with the router, moving from one corner to another, until you achieve the desired shape. Sand the rounded corners lightly to smooth any rough edges.
Keep in mind that the dimensions of your tabletop should align with the overall dimensions of the end table. Double-check the measurements before gluing the wood pieces together to ensure a proper fit.
Creating the tabletop requires patience and attention to detail. By following these steps and taking the time to properly align and secure the wood pieces, you’ll achieve a beautiful and sturdy tabletop for your mission style end table.
Step 4: Assembling the Legs and Aprons
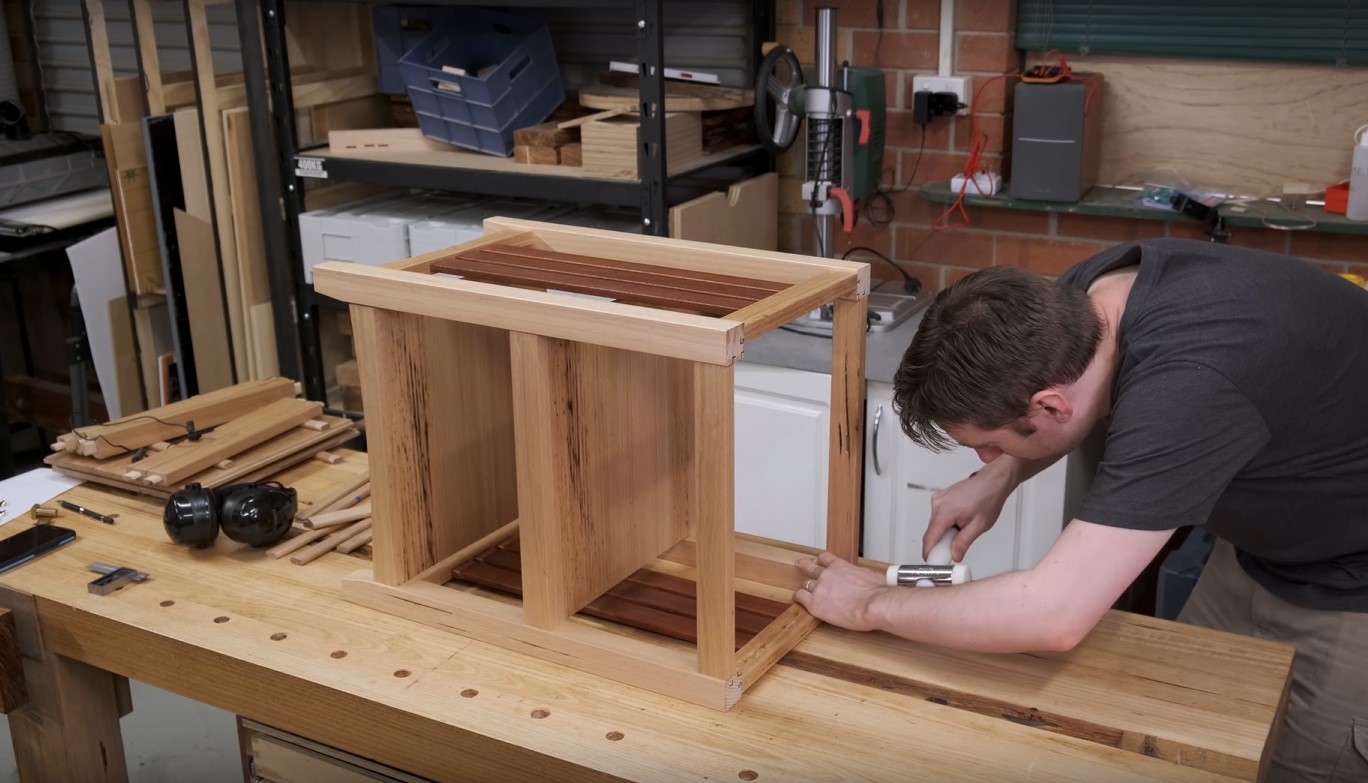
In step 4 of building your mission style end table, we will focus on assembling the legs and aprons. The legs provide support and stability to the table, while the aprons connect the legs and add structural integrity.
Here’s a step-by-step guide to assembling the legs and aprons:
- Pre-drill Pilot Holes: Start by marking the placement of the aprons on the legs. Use a measuring tape and marking gauge to ensure accurate positioning. Pre-drill pilot holes on the legs where the screws will be inserted to attach the aprons. This will prevent the wood from splitting during assembly.
- Apply Wood Glue: Apply a thin layer of wood glue on the ends of the aprons that will be attached to the legs. Use a brush or a glue spreader to distribute the glue evenly.
- Attach the Apron to the Leg: Align the pre-drilled holes on the legs with the corresponding holes on the aprons. Insert screws into the pilot holes and tighten them using a drill. Repeat this process for each leg and apron connection, ensuring that all connections are secure.
- Check for Square: Use a combination square or a measuring tape to check if the aprons are perpendicular to the legs, ensuring that the table remains square. Make any necessary adjustments by loosening the screws, aligning the pieces, and tightening the screws again.
- Add Support Blocks (Optional): If desired, you can add support blocks between the aprons and legs for added stability. Cut the support blocks from leftover wood and attach them with wood glue and screws. These blocks will reinforce the connections and prevent wobbling.
As you assemble the legs and aprons, make sure to double-check the measurements and positioning to ensure a balanced and sturdy table. The connections should be tight and secure, but be cautious not to over-tighten the screws, as it may cause the wood to split.
Once you have completed this step, you will have the basic structure of your mission style end table. The legs and aprons work together to provide a strong foundation for the tabletop and create a visually appealing design.
When building a mission style end table, be sure to use solid wood for the construction to achieve the authentic look and feel of the mission style. This will ensure the table is sturdy and durable.
Step 5: Attaching the Tabletop to the Base
Step 5 of building your mission style end table is all about attaching the tabletop to the base. This step brings together all the hard work you’ve put into creating the individual components and transforms them into a functional piece of furniture.
Follow these steps to attach the tabletop to the base:
- Position the Tabletop: Carefully place the tabletop upside down on a flat surface, ensuring that it is centered and aligned with the base.
- Install Tabletop Fasteners: Attach tabletop fasteners to the underside of the tabletop and to the aprons of the base. These fasteners allow the tabletop to expand and contract with changes in humidity, while keeping it securely attached to the base. Follow the manufacturer’s instructions for installing the fasteners.
- Align and Secure: With the help of a friend or clamps, carefully align the tabletop with the base, ensuring that it sits evenly on the aprons. Once aligned, secure the tabletop by driving screws through the tabletop fasteners into the aprons. Be careful not to over-tighten the screws, as it may cause the wood to crack or split.
- Test Stability: Gently test the stability of the table by applying slight pressure from different angles. If there is any wobbling or instability, check the connections and make any necessary adjustments.
When attaching the tabletop, it is crucial to ensure that it is centered and aligned properly to achieve a balanced and visually appealing end table. Take your time during this step to ensure a secure and stable attachment.
With the tabletop securely attached to the base, you’re one step closer to completing your mission style end table. This step brings the different components together, creating a cohesive and functional piece of furniture.
Read more: How To Build Your Own C-Style End Table
Step 6: Sanding and Finishing
Step 6 of building your mission style end table is all about sanding and finishing. This crucial step will give your table a smooth and professional look, as well as provide protection to the wood.
Follow these steps to sand and finish your end table:
- Sanding: Start by sanding the entire surface of the table, including the tabletop, legs, and aprons. Begin with a coarse-grit sandpaper to remove any rough edges, glue residue, or imperfections. Gradually move to finer-grit sandpapers until the wood feels smooth to the touch. Sand with the grain of the wood to avoid creating scratches or swirl marks.
- Filling Any Gaps: Inspect the table for any small gaps or imperfections that may need to be filled. Use a wood filler that matches the color of your wood to fill in these gaps. Apply the filler, let it dry according to the manufacturer’s instructions, and sand it down to achieve a smooth and even surface.
- Cleaning: Use a clean cloth or a vacuum cleaner with a brush attachment to remove any sanding residue and dust from the table. Ensure that the surface is clean and free of debris before moving on to the finishing step.
- Applying Stain or Paint: If you prefer a stained finish, apply a wood stain evenly to the entire table using a brush or a cloth. Allow the stain to penetrate the wood for the recommended time and then wipe away any excess. If you prefer a painted finish, apply multiple coats of paint, allowing each coat to dry completely before applying the next. Follow the manufacturer’s instructions for best results.
- Finishing Coat: Once the stain or paint has dried, apply a clear coat or varnish to protect the wood and enhance its beauty. Apply the clear coat in thin and even layers, using a brush or a cloth. Allow each coat to dry completely before applying additional coats. Sand lightly between coats with a fine-grit sandpaper to achieve a smooth finish.
Take your time during the sanding and finishing process to achieve the desired result. Smooth and even sanding, along with careful application of stain or paint and clear coat, will give your mission style end table a professional and polished appearance.
Remember to work in a well-ventilated area and follow the instructions and safety precautions provided by the manufacturers of the products you’re using.
Once you have completed the sanding and finishing process, your end table will be ready for the final touches in the next step.
Step 7: Final Touches and Tips
Congratulations! You’ve reached the final step of building your mission style end table. In step 7, we will focus on the final touches and provide some tips to ensure your end table is everything you envisioned.
Here are some final touches and tips to consider:
- Hardware and Accessories: Consider adding decorative hardware, such as drawer pulls or knobs, to enhance the overall look of your end table. Choose hardware that complements the mission style aesthetic and fits your personal taste.
- Protective Pads: Attach protective pads to the bottom of the table legs to prevent scratches on your floor and provide stability.
- Care and Maintenance: Develop a regular care routine for your end table. Dust it regularly with a soft cloth or duster and use a mild wood cleaner when necessary. Avoid placing hot or wet objects directly on the surface, and use coasters for drinks to protect the wood.
- Showcase Your Creation: Proudly display your mission style end table in your desired location. Arrange it with complementary decor items to showcase its beauty and functionality.
- Take Your Time: Building furniture takes time, patience, and skill. Don’t rush the process and enjoy each step along the way. Embrace any challenges as learning opportunities and be proud of the craftsmanship you put into your creation.
Remember, building your own end table is a rewarding experience. It allows you to express your creativity and create a unique piece of furniture that fits your personal style and needs.
Always prioritize safety while working with tools and materials. Wear protective gear, such as safety goggles and gloves, and follow proper procedures to ensure your well-being.
With these final touches and tips in mind, your mission style end table is now complete. Sit back, admire your craftsmanship, and enjoy the functionality and beauty of your handmade furniture.
Thank you for following along on this journey of building a mission style end table. We hope you found this guide helpful and inspiring. Happy woodworking!
Conclusion
Building a mission style end table is a rewarding and fulfilling endeavor that allows you to showcase your woodworking skills while creating a beautiful and functional piece of furniture. Throughout this step-by-step guide, we have walked you through each stage of the process, from gathering the necessary materials to adding the final touches.
By following the instructions and tips provided, you have learned how to cut wood pieces, create the tabletop, assemble the legs and aprons, attach the tabletop to the base, sand and finish the table, and add the final touches. Each step contributes to the overall construction and aesthetic of your mission style end table.
As you embarked on this project, you likely encountered new skills, techniques, and challenges along the way. Building furniture requires patience, attention to detail, and a passion for craftsmanship. The end result is a table that reflects your creativity and provides functionality in your space.
Remember that woodworking is a continuous learning process. As you gain experience, don’t be afraid to experiment with different wood types, finishes, and designs. Each new project brings an opportunity to refine your skills and discover new possibilities.
We hope this guide has equipped you with the knowledge and inspiration to build your own mission style end table. Whether you’re a seasoned woodworking enthusiast or a beginner taking on your first project, embrace the process and enjoy the satisfaction of creating something with your own hands.
Thank you for joining us on this woodworking journey. We wish you success in your future projects and many enjoyable moments with your mission style end table!
Frequently Asked Questions about How To Build A Mission Style End Table
Was this page helpful?
At Storables.com, we guarantee accurate and reliable information. Our content, validated by Expert Board Contributors, is crafted following stringent Editorial Policies. We're committed to providing you with well-researched, expert-backed insights for all your informational needs.


0 thoughts on “How To Build A Mission Style End Table”