Home>Dining>Table Decor>How To Build A Booth Style Corner Table For 8
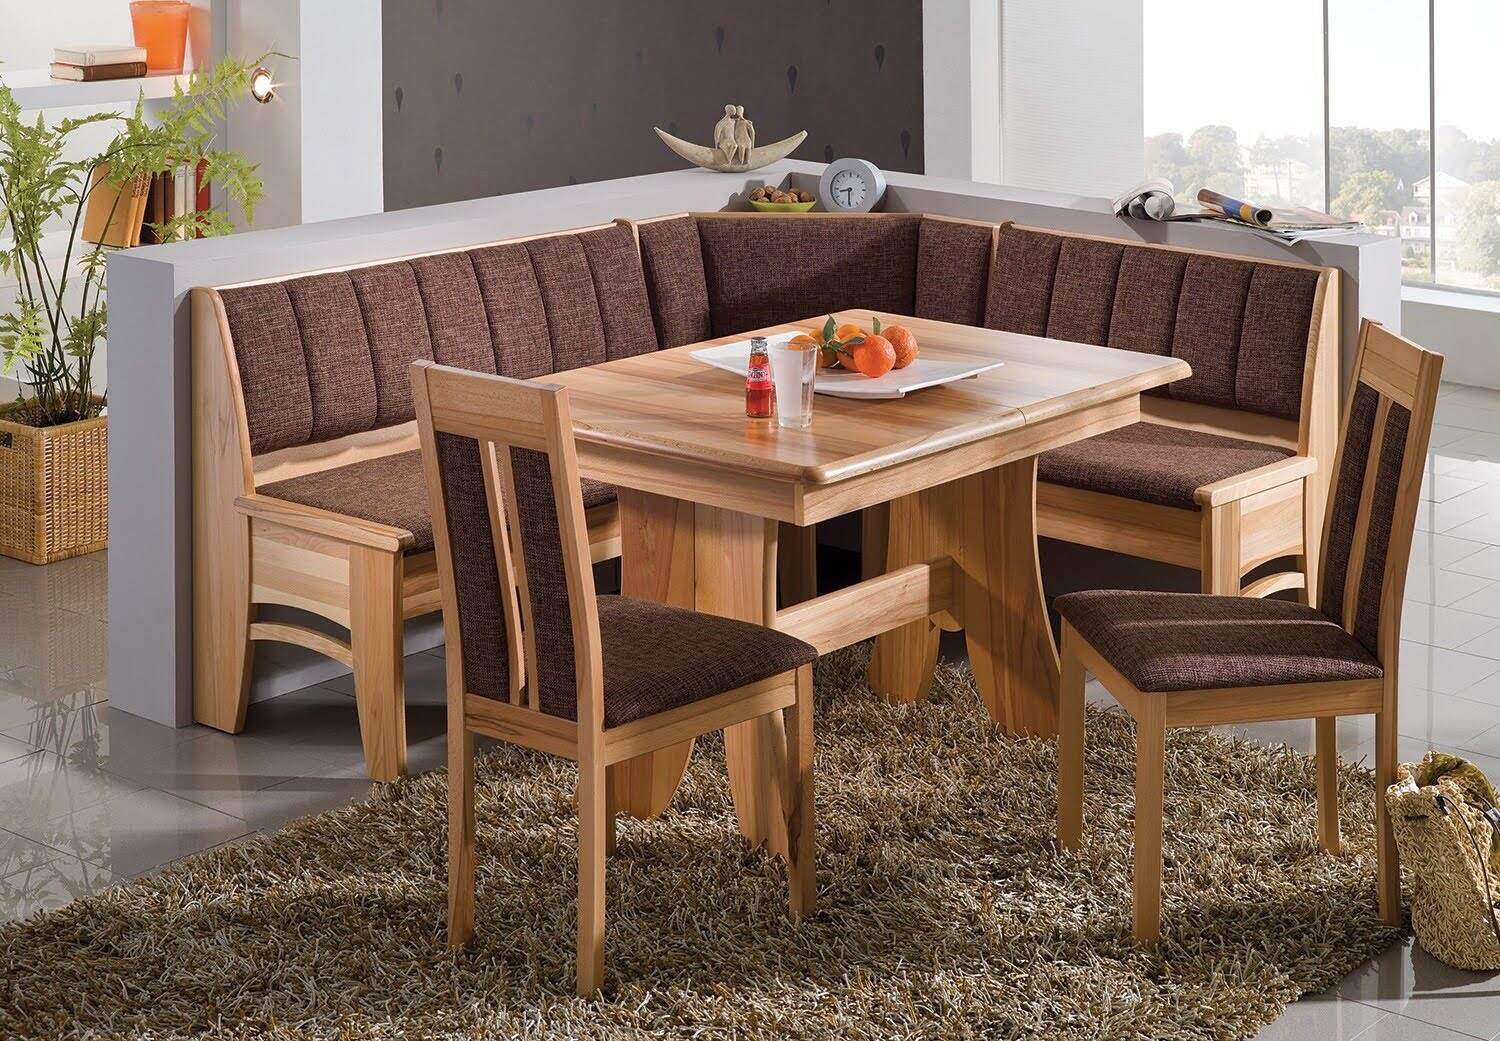
Table Decor
How To Build A Booth Style Corner Table For 8
Modified: December 7, 2023
Learn how to build a stylish booth-style corner table that seats 8 for your dining room. Find inspiration and ideas for table decor.
(Many of the links in this article redirect to a specific reviewed product. Your purchase of these products through affiliate links helps to generate commission for Storables.com, at no extra cost. Learn more)
Introduction
Welcome to our comprehensive guide on how to build a booth-style corner table for 8! If you’re looking to add a unique and cozy seating arrangement to your dining area or kitchen, a booth-style corner table is a fantastic option. Not only does it provide ample seating space, but it also brings a touch of charm to any room. Plus, with a bit of DIY skills and some basic tools, you can create a customized table that perfectly fits your space and style.
In this article, we will walk you through the step-by-step process of building your own booth-style corner table for 8. You’ll learn about the materials and tools you’ll need, how to take accurate measurements, cutting the wood, assembling the frame, attaching the tabletop, adding the booth seats, and finishing touches. Whether you’re an experienced woodworker or a beginner, this guide will help you create a beautiful and functional corner table that will be the center of attention in your home.
Before we get started, let’s take a look at the materials and tools you’ll need for this project.
Key Takeaways:
- Create a cozy and charming dining space by building a booth-style corner table for 8 using plywood, 2×4 lumber, and basic tools. Personalize with cushions, lighting, and decor for a unique touch.
- Embrace the DIY process and enjoy the satisfaction of crafting a functional and stylish furniture piece. Showcase your woodworking skills and create lasting memories around your custom-built booth-style corner table.
Read more: How To Build A Bar-Style Table
Materials Needed
Before you start building your booth-style corner table, gather the following materials:
- 1.5 inches thick plywood
- 2×4 lumber
- Screws (2.5 inches and 1.5 inches)
- Wood glue
- Wood filler
- Sandpaper (medium and fine grit)
- Stain or paint
- Polyurethane (optional)
In addition to the materials, you’ll need the following tools:
- Measuring tape
- Pencil
- Circular saw
- Drill
- Screwdriver
- Sanding block or orbital sander
- Paintbrush or foam brush
Make sure to gather all the materials and tools before starting the project. It’s helpful to set up a dedicated workspace with enough room to maneuver and saw the wood without any hindrances. Additionally, ensure you have proper safety equipment, such as safety glasses and gloves, to protect yourself during the construction process.
Now that you have your materials and tools ready, let’s dive into the step-by-step process of building your booth-style corner table.
Step 1: Measuring and Planning
The first step in building a booth-style corner table is to measure the space where you plan to install it. This will ensure that your table fits perfectly and leaves enough room for people to comfortably sit and move around.
Start by measuring the length of the wall where the table will be placed. Next, measure the desired depth of the table, keeping in mind the space you have available and the comfort of the diners. Ideally, a depth of around 24-30 inches allows for comfortable seating.
Once you have the measurements, consider the shape of the table. A corner table is typically L-shaped, with one straight side against the wall and the other forming the seating area. You can decide on the exact dimensions and angles based on your preferences and available space.
After you have determined the dimensions, it’s time to plan the layout of the table. Consider how many people you want the table to accommodate. For a booth-style corner table that seats 8, you’ll need to allow for enough legroom and space between each seat.
Take into account the dimensions of the chairs or benches you plan to use for the seating area. This will help you determine the width of the seating side of the table.
Using a pencil and measuring tape, mark out the measurements and layout on the wall and floor to visualize the final size and shape of the table. This way, you can make any necessary adjustments before proceeding to the next step.
With the measurements and layout finalized, you’re now ready to move on to the next step: cutting the wood.
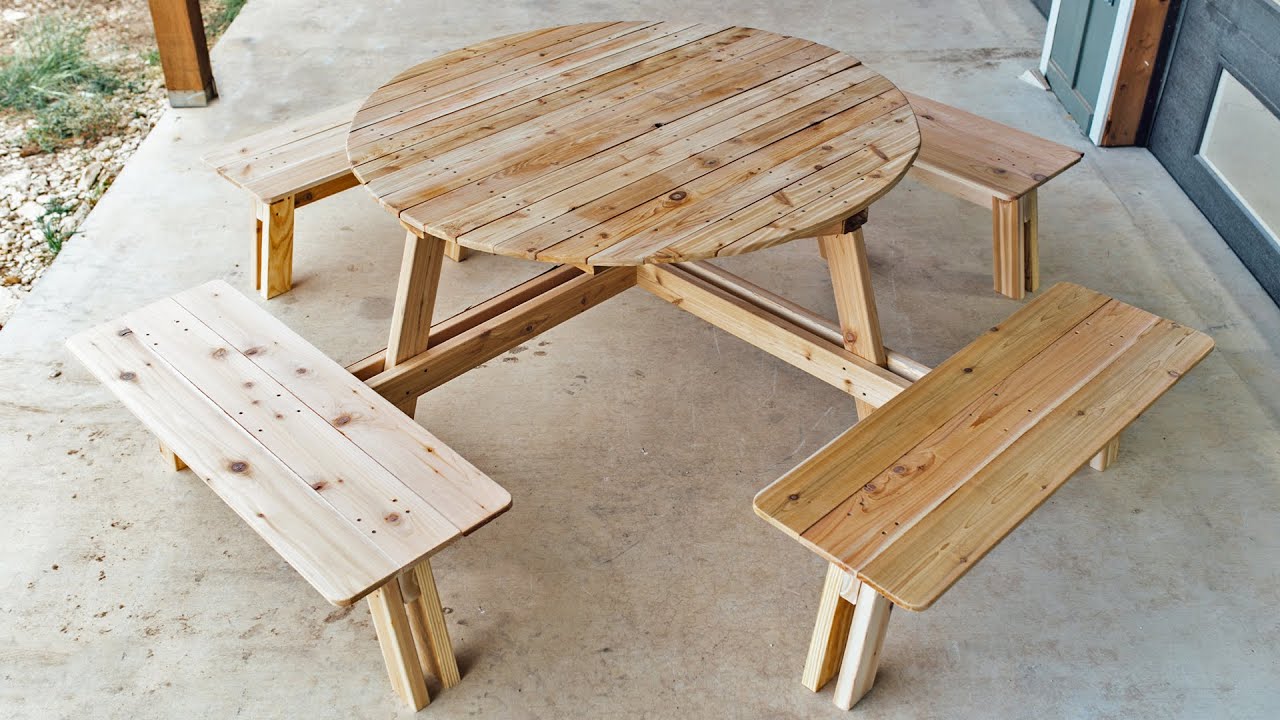
Step 2: Cutting the Wood
With your measurements and layout in hand, it’s time to cut the wood for your booth-style corner table. Start by gathering the 1.5-inch thick plywood and 2×4 lumber that you’ll be using for the construction.
Using a circular saw, carefully cut the plywood to the desired dimensions for the tabletop. Make sure to make clean, straight cuts to ensure a precise fit. If needed, smooth out any rough edges with sandpaper. Set the tabletop aside for now.
Next, you’ll need to cut the 2×4 lumber to create the frame of the table. Measure and cut the pieces according to your layout and dimensions. For the seating side of the table, cut long pieces for the bottom and back support, ensuring they match the length and height you decided on during the planning stage.
For the front face of the seating side, cut shorter pieces of 2×4 to serve as vertical supports for the seating area. These pieces will provide stability and support for the booth seats.
Once you have all the pieces cut, double-check their measurements and make any necessary adjustments. It’s always better to measure twice and cut once to avoid wasting materials.
As you’re cutting the wood, be sure to maintain a safe and organized work area. Use clamps to secure the wood during cutting and wear appropriate protective gear to prevent injuries.
With the wood pieces cut, you’re now ready to move on to the next step: assembling the frame of the booth-style corner table.
Step 3: Assembling the Frame
Now that you have all the necessary wood pieces cut, it’s time to assemble the frame for your booth-style corner table. This step will involve securely joining the 2×4 lumber pieces to create a sturdy and stable structure.
Start by laying out the bottom support piece on the floor, positioned according to your desired layout. Place the back support piece vertically onto the bottom support, aligning them correctly. These two pieces will form the primary support for the seating side of the table.
Using a drill and screws, carefully attach the bottom support to the back support. Make sure to countersink the screws to ensure a flush surface. Repeat this process for the other side of the seating area to create a symmetrical frame.
Next, attach the vertical support pieces to the front face of the frame. Position them evenly along the length of the seating area, leaving space between each vertical support for the seats.
Again, use screws to secure the vertical supports to the frame. Ensure that they are level and securely fastened. This will provide stability and structural integrity for the booth seats.
After the frame is assembled, it’s a good idea to reinforce the joints with wood glue. Apply wood glue to the joints and press the pieces together firmly. This will create a stronger bond and increase the longevity of your corner table.
Allow the wood glue to dry completely before moving on to the next step. This will typically take a few hours, but refer to the instructions on the glue for the recommended drying time.
With the frame assembled and reinforced, your booth-style corner table is starting to take shape. The next step will involve attaching the tabletop to complete the structure.
When building a booth style corner table for 8, make sure to use sturdy and durable materials such as hardwood or high-quality plywood to ensure the table can support the weight of the seating and provide long-lasting durability.
Step 4: Attaching the Tabletop
Now that you have the frame of your booth-style corner table assembled, it’s time to attach the tabletop. The tabletop will provide a flat and stable surface for dining and other activities.
Before attaching the tabletop, ensure that it aligns properly with the frame. Place the tabletop on the frame and make any necessary adjustments to ensure a perfect fit.
To attach the tabletop to the frame, use screws that are long enough to go through the tabletop and securely into the frame. Start by pre-drilling pilot holes into the corners and along the edges of the tabletop. This will prevent the wood from splitting when the screws are inserted.
Once the pilot holes are drilled, position the tabletop on the frame and carefully drive the screws through the holes and into the frame. Make sure to space the screws evenly for a secure attachment.
As you’re attaching the tabletop, make sure it is centered and aligned with the frame. Use a level to ensure that the table surface is flat and even.
After all the screws are securely fastened, test the tabletop for stability by applying a gentle pressure and checking for any wobbling or movement. If necessary, tighten any loose screws to ensure a solid connection.
Once the tabletop is securely attached, step back and admire your progress. Your booth-style corner table is now taking shape, with a solid frame and a functional tabletop. The next step will involve adding the booth seats to complete the seating area.
Take a moment to appreciate your hard work and gather your materials for the next step. With the seats in place, your booth-style corner table will be ready for you and your loved ones to enjoy meals and create lasting memories.
Step 5: Adding the Booth Seats
With the frame and tabletop of your booth-style corner table complete, it’s time to add the booth seats. Adding comfortable seating is essential to create a cozy and inviting dining experience.
Start by measuring and cutting pieces of plywood or lumber to serve as the seat bases. These pieces should have the same depth as the seating side of the table and be wide enough to comfortably accommodate a person sitting.
Place the seat bases on top of the vertical supports attached to the front face of the frame. Ensure that they are level and position them evenly along the length of the seating side.
Once the seat bases are in place, attach them securely to the vertical supports. Use screws or nails to fasten the seat bases to the supports, making sure they are firmly attached. Add additional support underneath the seat bases if necessary to prevent any sagging.
With the seat bases secured, it’s time to add the cushions for a comfortable seating experience. Measure and cut foam or upholstery padding to fit the size and shape of the seat bases.
Attach the foam or padding to the seat bases using adhesive or upholstery staples, ensuring it is secured tightly. This will provide a cushioned surface for comfortable seating.
Next, select the fabric of your choice for the seat covers. Measure and cut the fabric, allowing for a few extra inches on each side to wrap around the seat bases.
Wrap the fabric around the seat bases, pulling it taut and ensuring a smooth and wrinkle-free surface. Secure the fabric by stapling it to the underside of the seat bases, hiding the staples underneath the fabric for a clean finish.
Repeat these steps for all the seats, ensuring each seat is securely attached and has a comfortable cushion and fabric cover.
With the booth seats added, step back and admire your handiwork. Your booth-style corner table is now complete, providing a cozy and stylish seating area for you and your guests to enjoy. The final steps involve sanding, finishing, and adding any desired touches to complete the project.
Step 6: Sanding and Finishing
Now that your booth-style corner table is taking shape, it’s time to focus on the final touches. Step 6 involves sanding and finishing the wood surfaces to enhance the appearance and ensure a smooth and polished finish.
Start by using medium-grit sandpaper to sand down the entire table, including the frame, tabletop, and seat surfaces. Sand in the direction of the wood grain to avoid creating scratches. This will help to remove any rough spots and imperfections, creating a smooth surface.
After you have sanded with medium-grit sandpaper, switch to a finer-grit sandpaper to further smooth the surfaces. This will give the wood a softer and more refined feel.
Be sure to sand the edges and corners of the table as well, paying attention to any sharp edges that may need rounding off for a more comfortable dining experience.
Once you have completed the sanding process, use a clean cloth or brush to remove any dust or debris from the surfaces. This will ensure a clean and even application of the finish.
Now it’s time to apply the finish to protect the wood and enhance its natural beauty. You can choose to stain the wood for a rich and colorful look or apply a clear coat to showcase the natural grain. Apply the finish following the manufacturer’s instructions, using a brush or foam brush for an even application.
Allow the finish to dry completely before applying additional coats, if desired. Sand lightly between coats to remove any imperfections and create a smooth surface.
If you opt for a clear finish, you may also choose to apply a coat of polyurethane for added protection. This will provide durability and make the surface easier to clean and maintain over time.
Once the finish has dried and cured, take a moment to appreciate the transformation. Your booth-style corner table is now beautifully sanded and finished, ready to be the centerpiece of your dining area.
Now that the construction and finishing are complete, it’s time to add the final touches and decorations to personalize your booth-style corner table.
Step 7: Final Touches and Decoration
Congratulations! You’re nearing the end of your booth-style corner table project. Step 7 involves adding the final touches and decorations to personalize and make your table truly your own.
Start by taking a look at the overall design and theme of your space. Consider incorporating colors, patterns, and textures that complement your existing decor. This could include cushions, pillows, or seat covers in coordinating fabrics, or table accessories that reflect your personal style.
Add cushions or pillows to the booth seats to make them more comfortable and inviting. Choose fabrics and patterns that match your overall design aesthetic and provide an extra layer of coziness.
Consider adding a table runner or centerpiece to enhance the table’s visual appeal. A table runner can add a pop of color or texture, while a centerpiece can be a focal point and tie in the overall theme of your space.
You can also consider adding decorative accents such as vases, candles, or artwork to the walls surrounding your booth-style corner table. These touches can further personalize the space and create a warm and welcoming atmosphere.
Don’t forget about proper lighting! Install appropriate lighting fixtures above or around the table to ensure the area is well-lit and the ambiance is just right for your dining experiences.
Lastly, consider the functionality of your booth-style corner table. Are there additional storage options you can integrate? You may add shelves or cabinets underneath the seating area or incorporate drawers within the table frame to provide extra space for storing dining essentials.
Take your time to experiment and explore different decoration ideas. Personalize your booth-style corner table to reflect your unique style and make it a true reflection of your home.
Once you’re satisfied with the final touches and decorations, step back and admire your completed booth-style corner table project. Enjoy the cozy seating, the beautiful craftsmanship, and the memories that will be made around it.
Remember, this DIY project allows you to showcase your creativity and woodworking skills. Embrace the process, have fun, and enjoy the satisfaction of creating a one-of-a-kind piece for your home.
With your booth-style corner table complete, it’s time to invite friends and family over to enjoy memorable meals and gatherings in your new favorite corner of the house!
Conclusion
Congratulations on successfully building your booth-style corner table for 8! By following the step-by-step process outlined in this guide, you have created a custom furniture piece that is not only functional but also adds a touch of charm to your living space.
Throughout the construction process, you have learned how to accurately measure and plan, cut and assemble the frame, attach the tabletop, add the booth seats, and finish the table with sanding and final touches. Each step was crucial in bringing your vision to life and creating a comfortable and stylish seating arrangement for you and your loved ones.
Remember, as you embarked on this DIY project, it was essential to be precise in your measurements and diligent in the construction process to ensure a sturdy and well-built table. Safety was also a priority, so wearing proper protective equipment and following safety guidelines was crucial during the cutting, drilling, and assembly stages.
By using materials like plywood, 2×4 lumber, screws, wood glue, sandpaper, and a finish of your choice, you were able to create a booth-style corner table that perfectly suits your space and personal style.
With the addition of the final touches and decorations, you have personalized your booth-style corner table, making it a unique centerpiece in your dining area or kitchen. The cushions, pillows, table runner, centerpiece, and lighting have all contributed to creating a warm and inviting atmosphere that is sure to impress your guests and enhance your dining experiences.
Building a booth-style corner table allows you to showcase your creativity and woodworking skills while enjoying the satisfaction of creating a functional and beautiful furniture piece. It’s a labor of love that will surely be appreciated and enjoyed for years to come.
So, gather your loved ones, invite friends over, and start making memories around your booth-style corner table. Whether it’s for everyday meals, special occasions, or simply sharing laughter and stories, your booth-style corner table will be the perfect gathering spot.
Thank you for joining us on this DIY journey. We hope you found this guide helpful and inspiring. Happy woodworking!
Frequently Asked Questions about How To Build A Booth Style Corner Table For 8
Was this page helpful?
At Storables.com, we guarantee accurate and reliable information. Our content, validated by Expert Board Contributors, is crafted following stringent Editorial Policies. We're committed to providing you with well-researched, expert-backed insights for all your informational needs.
0 thoughts on “How To Build A Booth Style Corner Table For 8”