Home>Dining>Table Decor>Ideas On How To Build A Farmhouse Style Console Table
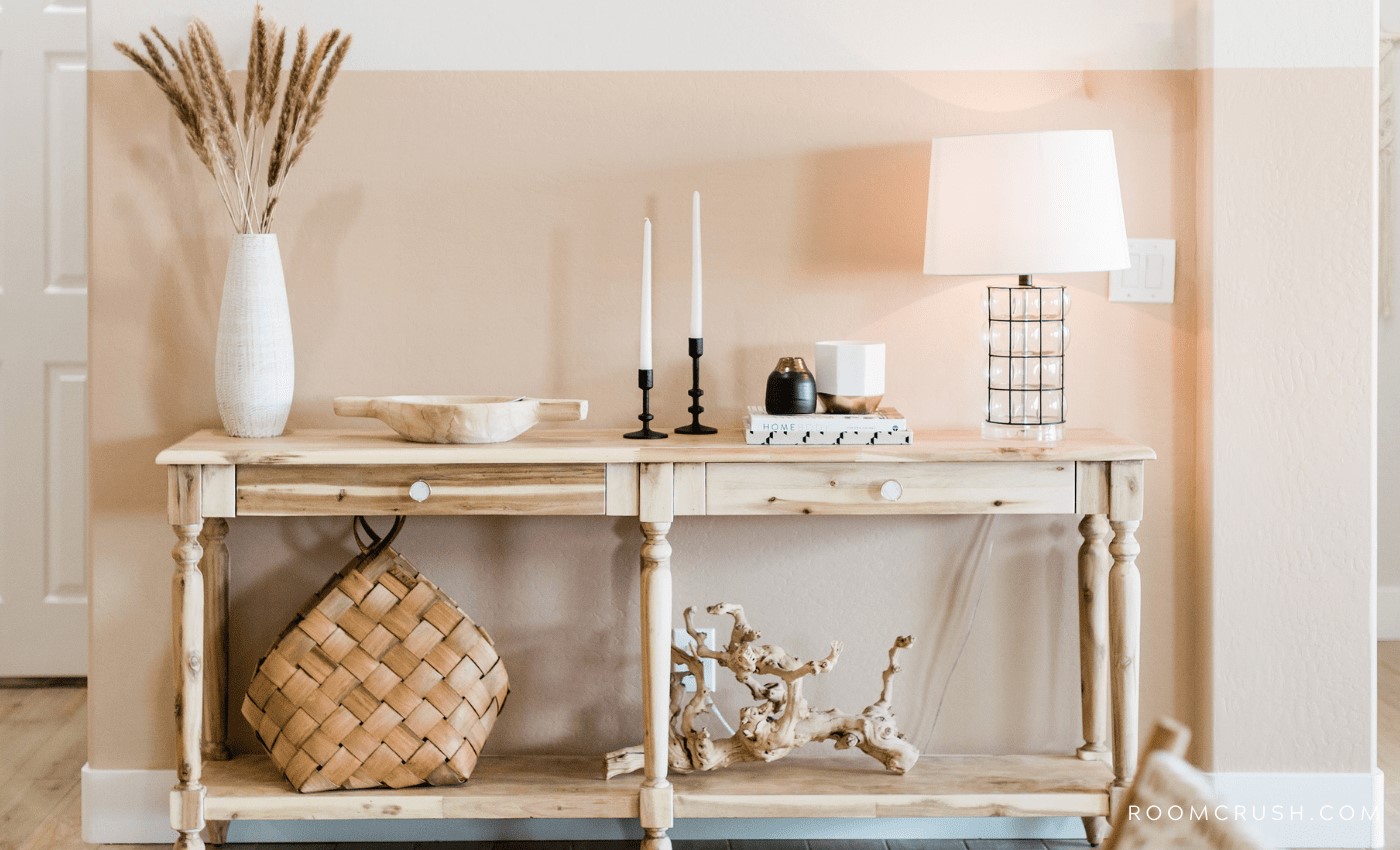
Table Decor
Ideas On How To Build A Farmhouse Style Console Table
Modified: May 6, 2024
Discover creative ideas and step-by-step instructions on building a stylish farmhouse console table. Enhance your home decor with this charming table-decor project.
(Many of the links in this article redirect to a specific reviewed product. Your purchase of these products through affiliate links helps to generate commission for Storables.com, at no extra cost. Learn more)
Introduction
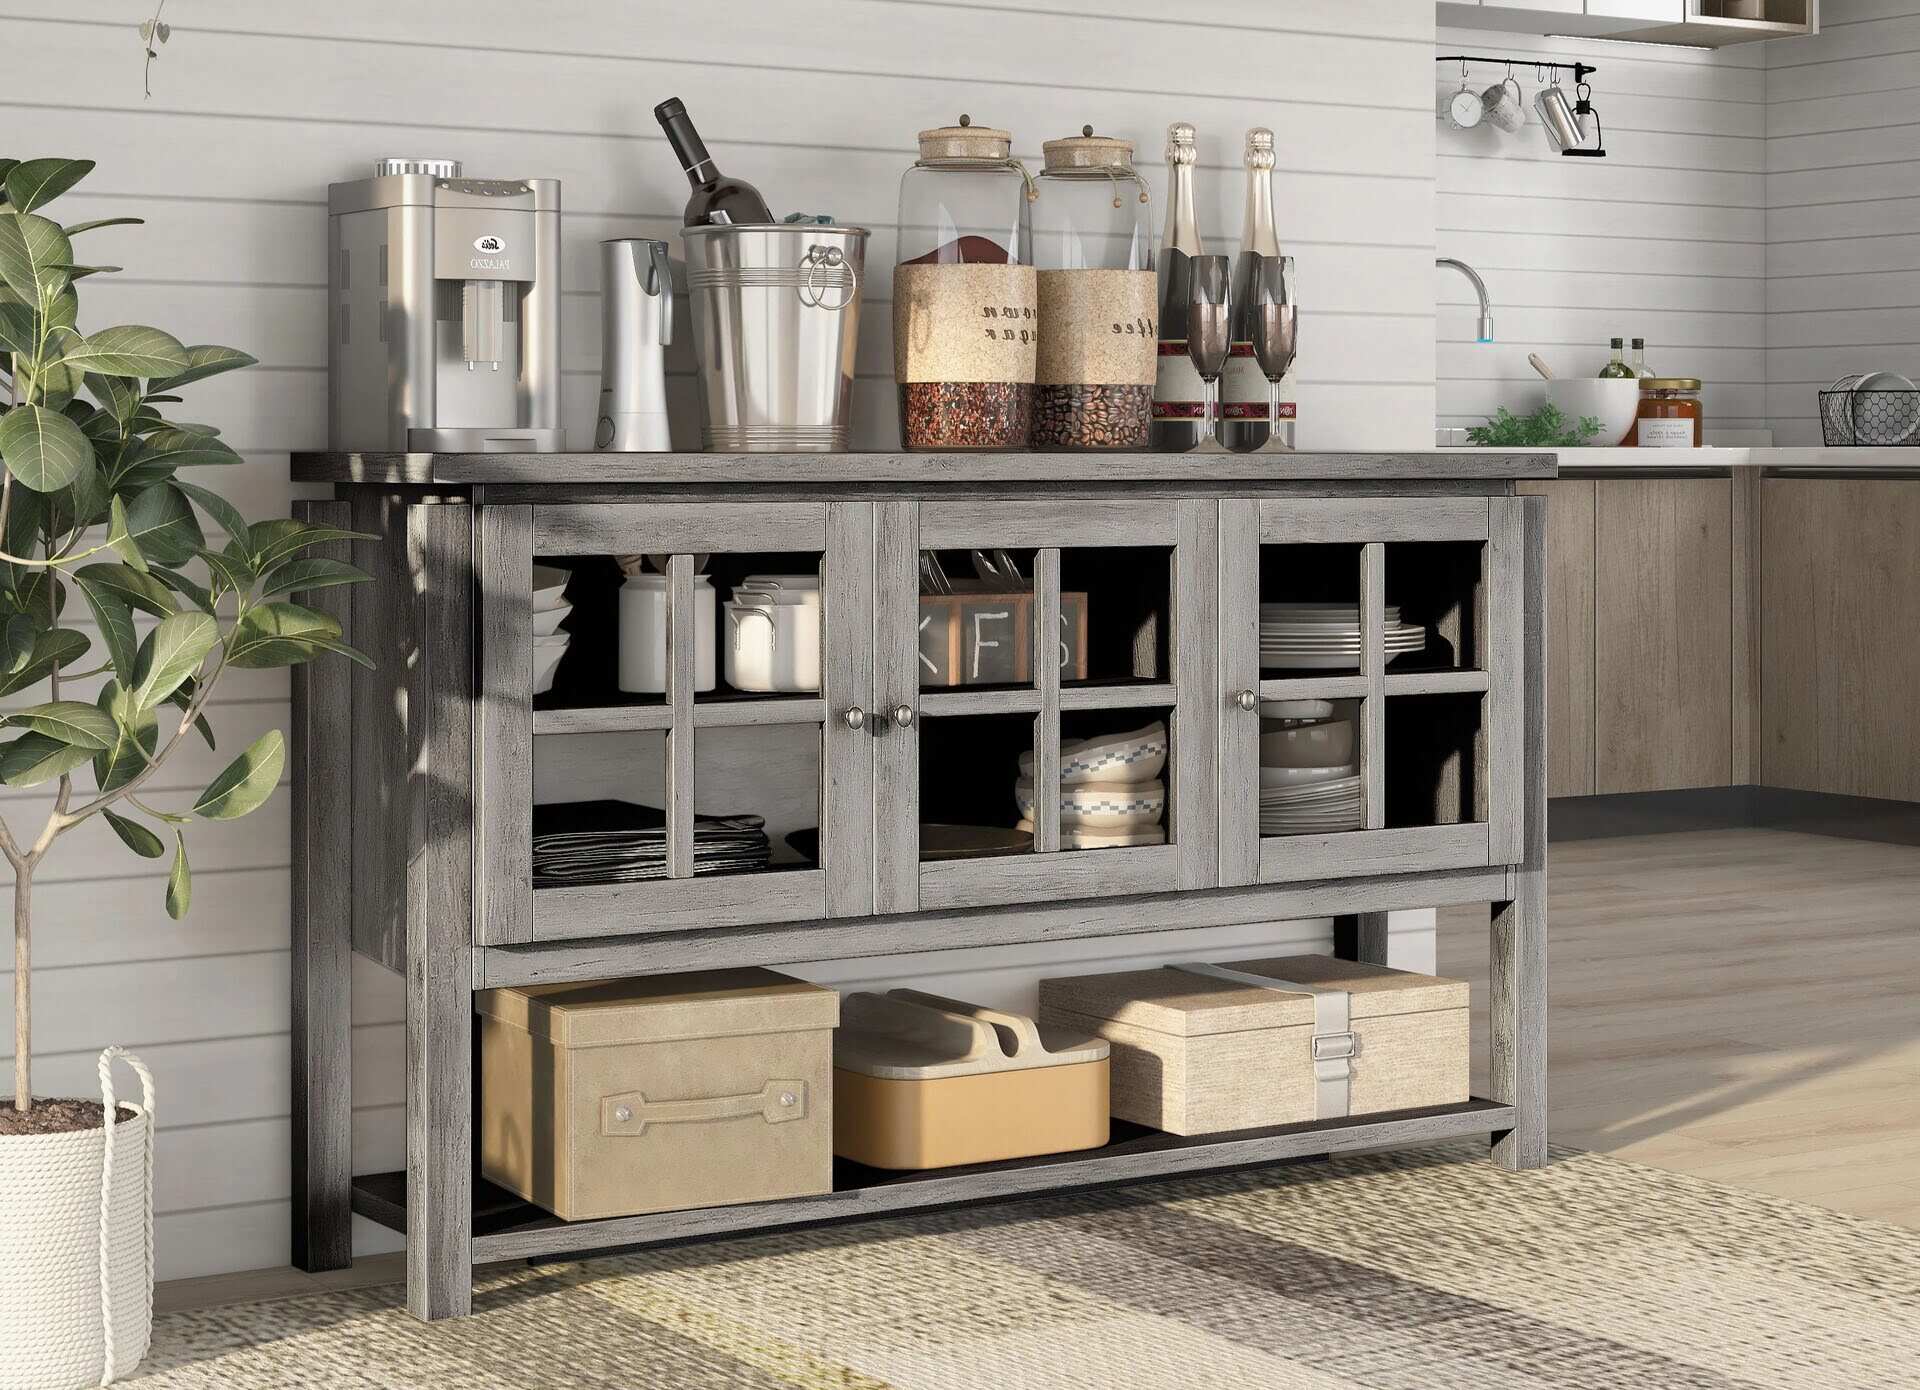
Welcome to our guide on how to build a farmhouse style console table. If you’re looking to add a touch of rustic charm to your home decor, a farmhouse style console table is the perfect way to do so. This versatile piece of furniture not only provides a functional storage space but also adds character and warmth to any room. Plus, building your own console table allows you to customize it to your exact specifications.
In this article, we’ll walk you through the step-by-step process of creating your very own farmhouse style console table. We’ll cover everything from choosing the right materials to adding the finishing touches. Whether you’re a seasoned DIYer or a beginner, we’ll provide all the information you need to successfully complete this project.
Before we dive into the construction process, let’s talk a bit about what makes a console table farmhouse style. This design is characterized by its simple and sturdy construction, often featuring a distressed finish or natural wood tones. The goal is to create a piece that looks like it’s been passed down through generations, exuding a cozy and lived-in feel.
Now, let’s gather our tools and get started on building our farmhouse style console table!
Key Takeaways:
- Create a charming farmhouse style console table using solid wood, distressed finishes, and decorative hardware for a cozy, lived-in feel that adds character to any room.
- Personalize your farmhouse console table by customizing dimensions, experimenting with finishes, and adding optional decorative elements to reflect your unique style and creativity.
Read more: How To Build A Console Table
Choosing the Right Materials
Choosing the right materials is crucial to achieving the desired farmhouse look for your console table. Here are some key materials to consider:
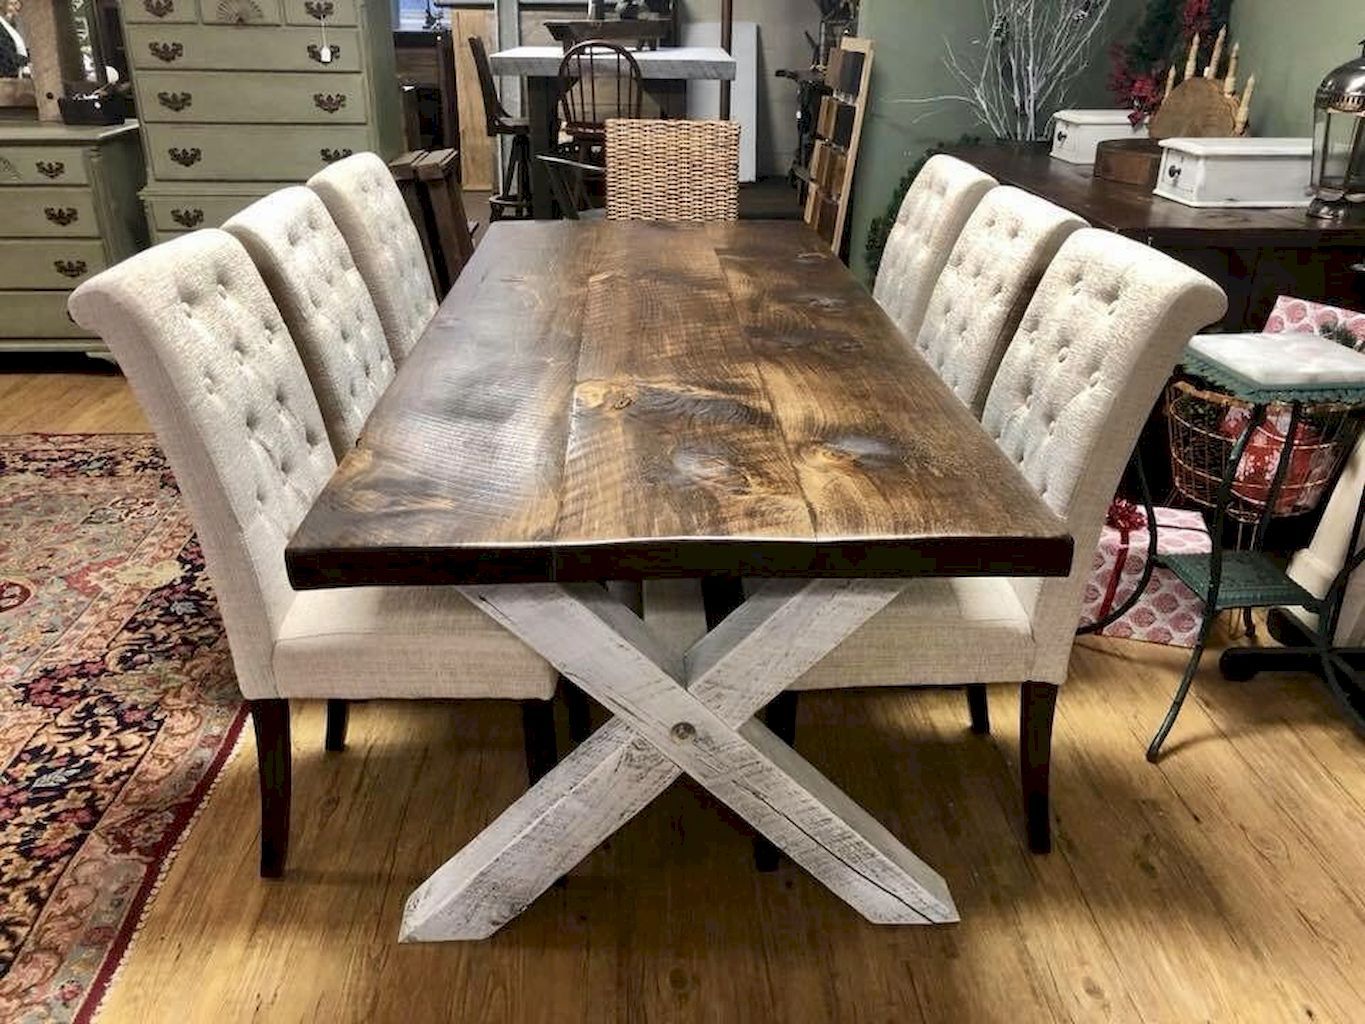
- Wood: Opt for solid wood, such as pine, oak, or reclaimed wood, for an authentic farmhouse feel. Avoid using treated or composite wood, as it may not provide the desired rustic look.
- Hardware: Look for iron or brass hardware with distressed finishes to enhance the farmhouse style. Decorative knobs and pulls can add a touch of charm to your console table.
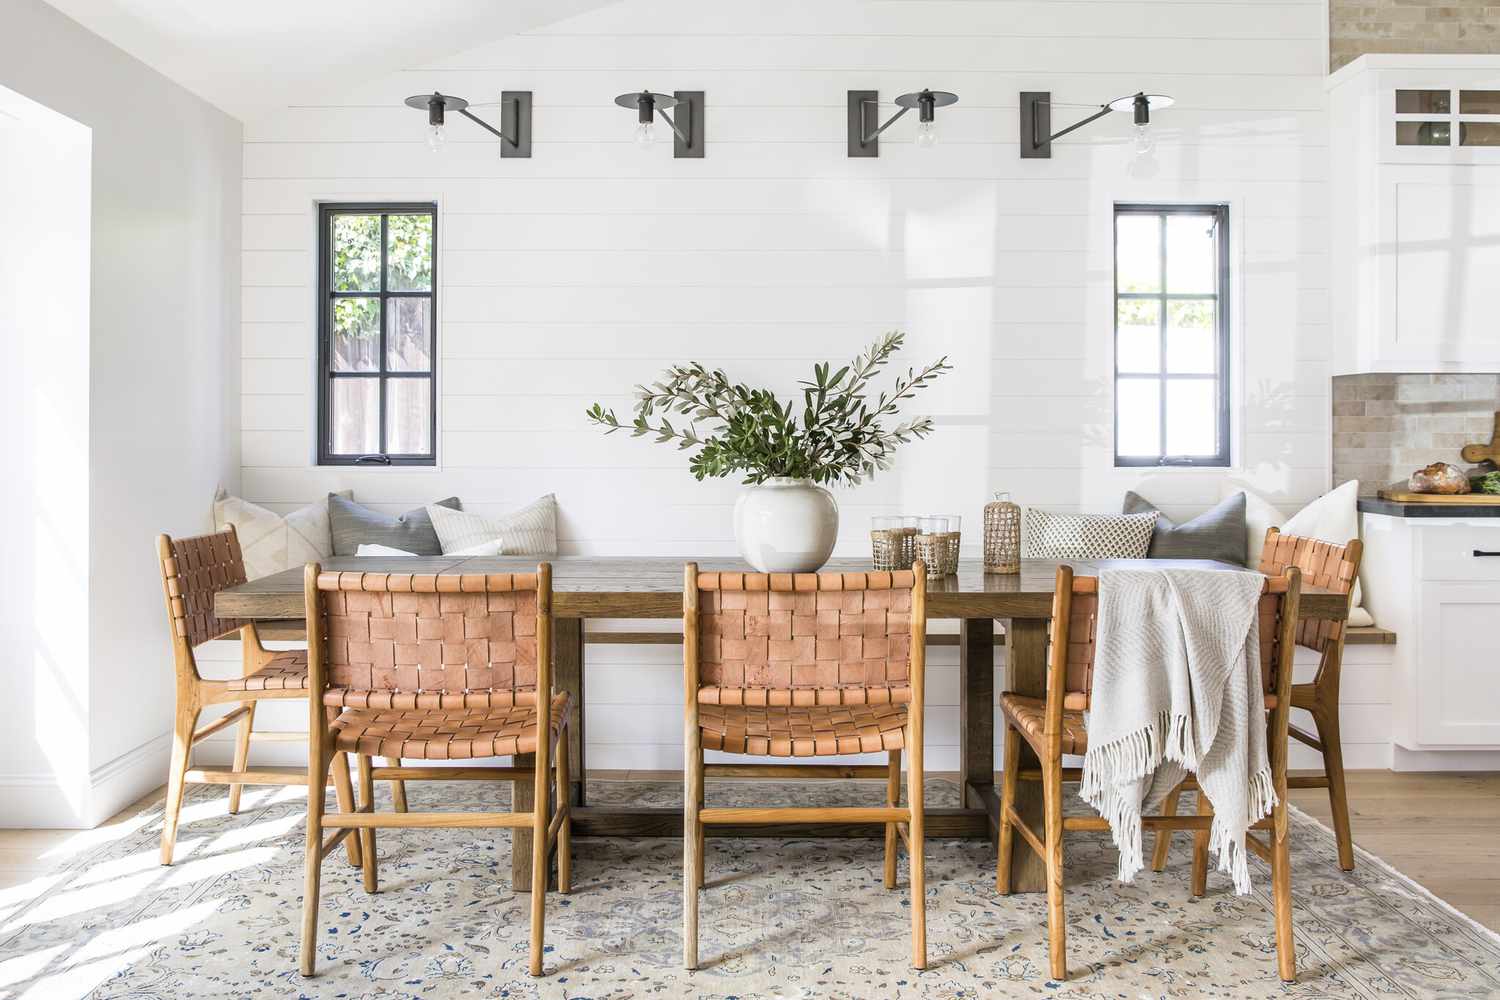
- Finishes: Consider using a weathered or distressed finish to give your console table an aged and worn appearance. Stains or paints in natural and earthy tones like browns, grays, and whites work well for achieving the farmhouse aesthetic.
- Additional Materials: Depending on your design preferences, you might also need screws, wood glue, sandpaper, and a clear protective coat to seal the wood and enhance durability.
When selecting wood for your console table, keep in mind the dimensions and design of the piece. You’ll need to choose boards that are thick enough to provide stability but not overly bulky. Consider the weight and size of the items you plan to place on the table to determine how sturdy it needs to be.
If you choose to use reclaimed wood, be sure to inspect it for structural integrity and remove any nails or debris. Reclaimed wood adds an extra layer of character and history to your console table, giving it a truly authentic farmhouse feel.
Remember, the materials you choose will greatly impact the final look and durability of your console table. Take your time when selecting them and consider how each element will contribute to the overall farmhouse aesthetic you’re aiming for.
Now that we have a good understanding of the materials required, let’s move on to the next step: measurements and planning.
Measurements and Planning
Before diving into the construction of your farmhouse style console table, it’s important to carefully plan and measure your space. This ensures that your finished piece will fit seamlessly into your home. Here are some key considerations when it comes to measurements and planning:
1. Location: Determine where you want to place your console table. Measure the area to ensure you have enough space for the dimensions you have in mind.
2. Height and Width: Decide on the desired height and width of your console table. Typically, console tables are around 30 inches in height for a comfortable tabletop height. The width can vary depending on the available space and your personal preference.
3. Depth: Consider the depth of the console table, keeping in mind any items you plan to display or store on it. A depth of around 14 to 18 inches is common for console tables.
4. Tabletop Overhang: If you want to add an aesthetic touch to your console table, consider adding a slight overhang to the tabletop. This can be around 1 to 2 inches and adds visual interest to the piece.
5. Shelves: If you plan to include shelves in your console table, ensure they are appropriately spaced and have enough height clearance for the items you want to display.
Once you have determined the measurements, sketch out a plan or create a digital design to visualize the final look of your console table. This will help you better understand the components and how they fit together.
When planning your console table, keep in mind the theme and decor of the room it will be placed in. Consider how the table will complement the existing furniture and overall style. You may also want to think about any specific design elements or features you want to incorporate, such as decorative paneling or unique leg designs.
With your measurements and plans in hand, you’re now ready to gather the necessary tools for the construction process. We’ll cover that in the next section.
Tools Needed
Building a farmhouse style console table requires a few essential tools to ensure a smooth construction process. Here are the tools you’ll need:
- Tape Measure: Use a tape measure to accurately measure and mark your wood pieces.
- Miter Saw or Circular Saw: A miter saw or circular saw will be essential for making precise cuts on your wood.
- Drill: A drill will be used to create holes for screws and other attachments.
- Screwdriver: Depending on the type of screws you’re using, a screwdriver or a drill with a screwdriver bit will be handy for fastening pieces together.
- Sandpaper or Sander: Sanding your wood pieces smoothens the surface and prepares it for finishing.
- Wood Glue: Wood glue is essential for securing joints and adding extra strength to your console table.
- Measuring Square: A measuring square helps ensure that your cuts and angles are precise.
- Clamps: Clamps help hold your wood pieces together securely while the glue dries and the joints set.
- Level: A level is useful for ensuring that your console table is level and balanced.
- Protective Gear: Safety should always be a priority. Don’t forget to wear goggles, ear protection, and a dust mask when working with power tools and sanding.
Having the right tools on hand will make the construction process much easier and more efficient. Before beginning construction, double-check that you have all the necessary tools and ensure they’re in good working condition.
Now that you have a solid understanding of the tools required, it’s time to move on to the step-by-step construction process. We’ll start with assembling the legs in the next section.
Step 1: Assembling the Legs
Let’s begin building our farmhouse style console table by assembling the legs. The legs serve as the foundation and support for the entire table. Follow these steps:
- Start by cutting your wood into four equal pieces for the legs. The measurements will depend on the height you want for your console table.
- Using a measuring square, ensure that each leg piece is cut to the same length.
- Apply wood glue to the top of each leg piece.
- Place two leg pieces vertically and at a right angle to each other, forming an ‘L’ shape.
- Press the glued ends together and use clamps to hold them in place.
- Allow the glue to dry completely before proceeding to the next step. Follow the drying time recommended by the manufacturer.
- Repeat the process for the remaining two leg pieces.
Once the wood glue is fully dried and the legs are securely assembled, you can move on to building the frame of the console table. This will provide stability and support for the tabletop and shelves. Stay tuned for the next step!
When building a farmhouse style console table, consider using reclaimed wood for a rustic look. You can also add metal accents for an industrial touch.
Read more: How To Redo A Table To Farmhouse Style
Step 2: Building the Frame
Now that we have assembled the legs, it’s time to move on to building the frame of our farmhouse style console table. Follow these steps to create a sturdy and stable frame:
- Begin by cutting your wood pieces for the frame. You will need two long pieces for the front and back, and two shorter pieces for the sides.
- Using a measuring square, ensure that your cuts are precise and the pieces are the correct length.
- Apply wood glue to the ends of the shorter side pieces.
- Place one side piece between the two front legs, aligning the edges.
- Secure the side piece to the legs by drilling screws through the legs into the side piece. Repeat this process on the other side.
- Apply wood glue to the ends of the longer front and back pieces.
- Place each front and back piece between the corresponding legs, aligning the edges.
- Secure the front and back pieces to the legs by drilling screws through the legs into the front and back pieces. This will form a rectangular frame.
- Double-check that the frame is square by using a measuring square. Adjust if necessary.
- Allow the wood glue to dry completely before moving on to the next step.
Once the frame is fully assembled and the wood glue is dry, you can proceed to the next step of attaching the tabletop. This will bring your console table one step closer to completion. Stay tuned!
Step 3: Attaching the Tabletop
With the frame of our farmhouse style console table complete, it’s time to move on to the next step: attaching the tabletop. Follow these steps to securely fasten the tabletop to the frame:
- Start by measuring and marking the placement of the tabletop on the frame. Ensure that it is centered and aligned with the frame’s edges.
- Apply wood glue along the top edges of the frame.
- Carefully place the tabletop onto the frame, aligning it with the marked placement.
- Press the tabletop firmly onto the frame to ensure a strong bond.
- Secure the tabletop to the frame by drilling screws through the underside of the tabletop into the frame.
- Space the screws evenly along the perimeter of the tabletop for optimal support.
- Double-check that the tabletop is aligned and centered before tightening the screws.
- Allow the wood glue to dry completely and tighten the screws as needed.
Attaching the tabletop not only provides stability but also completes the overall structure of the console table. The next step involves adding shelves, which will enhance the functionality and storage options. Let’s move on to the fourth step to continue building our console table.
Step 4: Adding the Shelves
Now that we have the tabletop securely attached, it’s time to add shelves to our farmhouse style console table. Follow these steps to create additional storage space:
- Measure and mark the desired height for your shelves on each side of the console table frame.
- Cut wood pieces for the shelves, ensuring that they fit between the marked heights.
- Apply wood glue along the edges of the shelf pieces.
- Place each shelf piece between the corresponding sides of the console table frame.
- Use a level to ensure that each shelf is straight and aligned.
- Secure the shelves by drilling screws through the sides of the frame into the shelf pieces.
- Space the screws evenly to ensure stability and weight-bearing capacity.
- Double-check that the shelves are level and securely attached.
- Allow the wood glue to dry completely before placing any items on the shelves.
Adding shelves to your console table not only provides practical storage solutions but also enhances the visual appeal of the piece. You can use the shelves to display decorative items, store books or baskets, or showcase your favorite farmhouse-style accessories.
With the shelves in place, your farmhouse style console table is nearly complete. However, there are a few optional finishing touches you can add to enhance its overall look and durability, which we’ll cover in the next step. Stay tuned!
Step 5: Optional Finishing Touches
Now that the construction of your farmhouse style console table is complete, it’s time to add some optional finishing touches to further enhance its look and durability. Here are a few ideas:
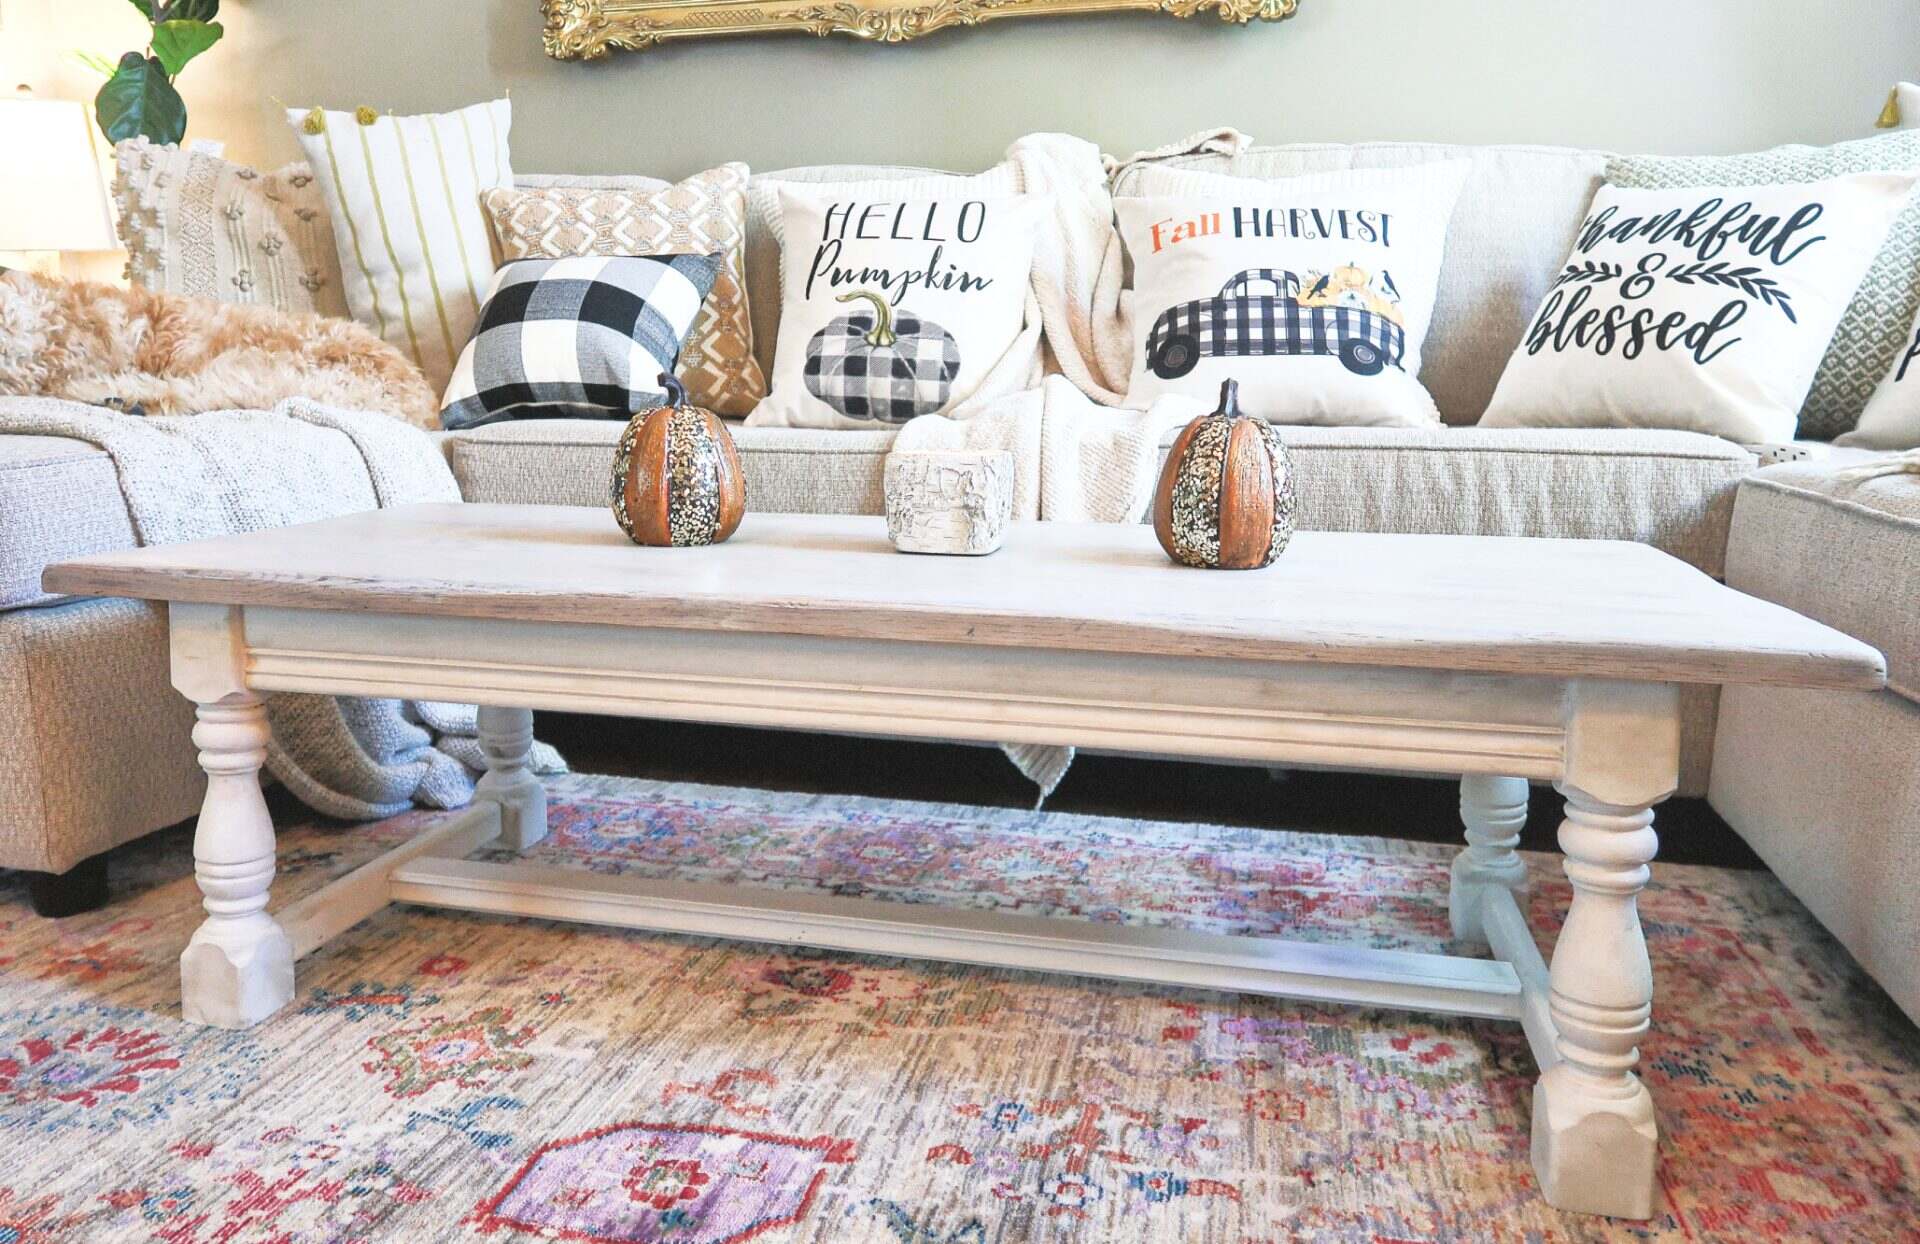
- Stain or Paint: Apply a stain or paint of your choice to the entire console table to achieve the desired color and finish. Consider using a weathered or distressed finish for that authentic farmhouse look.
- Sealant: Apply a clear protective sealant over the stained or painted surface to add durability and protect the wood from scratches or stains.
- Sanding: Lightly sand the surface of the console table before applying the stain, paint, or sealant to achieve a smooth finish.
- Distressing: If you want to achieve a more aged and weathered appearance, consider distressing the edges and surfaces of the console table using sandpaper or a distressing technique.
- Hardware: Add decorative hardware, such as antique brass knobs or iron pulls, to give your console table an extra touch of farmhouse charm.
- Decorative Elements: Consider adding decorative elements like decorative trim, paneling, or molding to further enhance the visual appeal of your console table.
These finishing touches will not only add character and style to your console table but also protect it from everyday wear and tear. Remember to allow the stain, paint, or sealant to dry completely before using or placing any items on the table.
With that, you have successfully completed building your farmhouse style console table! It’s now ready to be placed in your desired location and used for various purposes, whether it’s displaying decorations, organizing everyday essentials, or simply adding a touch of rustic charm to your space.
Remember, the beauty of building your own furniture lies in the ability to customize it to suit your personal style and needs. Feel free to experiment with different finishes, colors, and design elements to create a console table that truly reflects your unique taste.
We hope this guide has been helpful and that you enjoy the process of building and using your farmhouse style console table for years to come. Happy DIY crafting!
Conclusion
Congratulations on completing your farmhouse style console table! By following the step-by-step guide outlined in this article, you have successfully built a versatile and charming piece of furniture that adds character and functionality to your home. Whether it’s placed in your entryway, living room, bedroom, or any other space, your handmade console table will surely become a focal point of admiration.
Throughout the construction process, you carefully selected the right materials, measured and planned the dimensions, used the essential tools, and followed each step with precision. This attention to detail has resulted in a well-crafted console table that perfectly embodies the rustic, lived-in feel of farmhouse style décor.
Remember that building your own furniture isn’t just a creative and rewarding DIY project; it also allows you to customize the piece to your personal preferences. Feel free to experiment with different finishes, stains, paints, and hardware to further enhance the aesthetic appeal of your console table. Make it truly unique and reflective of your personal style.
As you showcase your favorite décor items, store essentials, or organize your belongings on the shelves, appreciate the craftsmanship and effort you put into creating a functional and beautiful piece of furniture. Your farmhouse style console table is not just an item of utility but also a testament to your creativity and skill.
We hope this guide has provided you with the inspiration and guidance you needed to embark on this DIY adventure. Building a farmhouse style console table can be an enjoyable and fulfilling experience, and we’re thrilled that you joined us on this journey. Now, go ahead and show off your handmade creation with pride!
Once you’ve mastered your farmhouse style console table, why not delve further into rustic decor with our collection of Farmhouse Furniture? Each piece exudes a unique charm that could transform any space. Eager to tackle more projects with your own hands? Our guide on why DIY Projects are so rewarding will surely spark your creativity. And for enthusiasts looking to hone their crafting skills, don’t miss our roundup of the best Woodworking techniques and tips set to dominate in 2024.
Frequently Asked Questions about Ideas On How To Build A Farmhouse Style Console Table
Was this page helpful?
At Storables.com, we guarantee accurate and reliable information. Our content, validated by Expert Board Contributors, is crafted following stringent Editorial Policies. We're committed to providing you with well-researched, expert-backed insights for all your informational needs.

0 thoughts on “Ideas On How To Build A Farmhouse Style Console Table”