Home>Dining>Tableware>How To Replace The Cushion On A Dining Room Chair
Tableware
How To Replace The Cushion On A Dining Room Chair
Modified: September 1, 2024
Learn how to easily replace the cushion on your dining room chair with our step-by-step guide. Make your tableware more comfortable and stylish in no time!
(Many of the links in this article redirect to a specific reviewed product. Your purchase of these products through affiliate links helps to generate commission for Storables.com, at no extra cost. Learn more)
Introduction
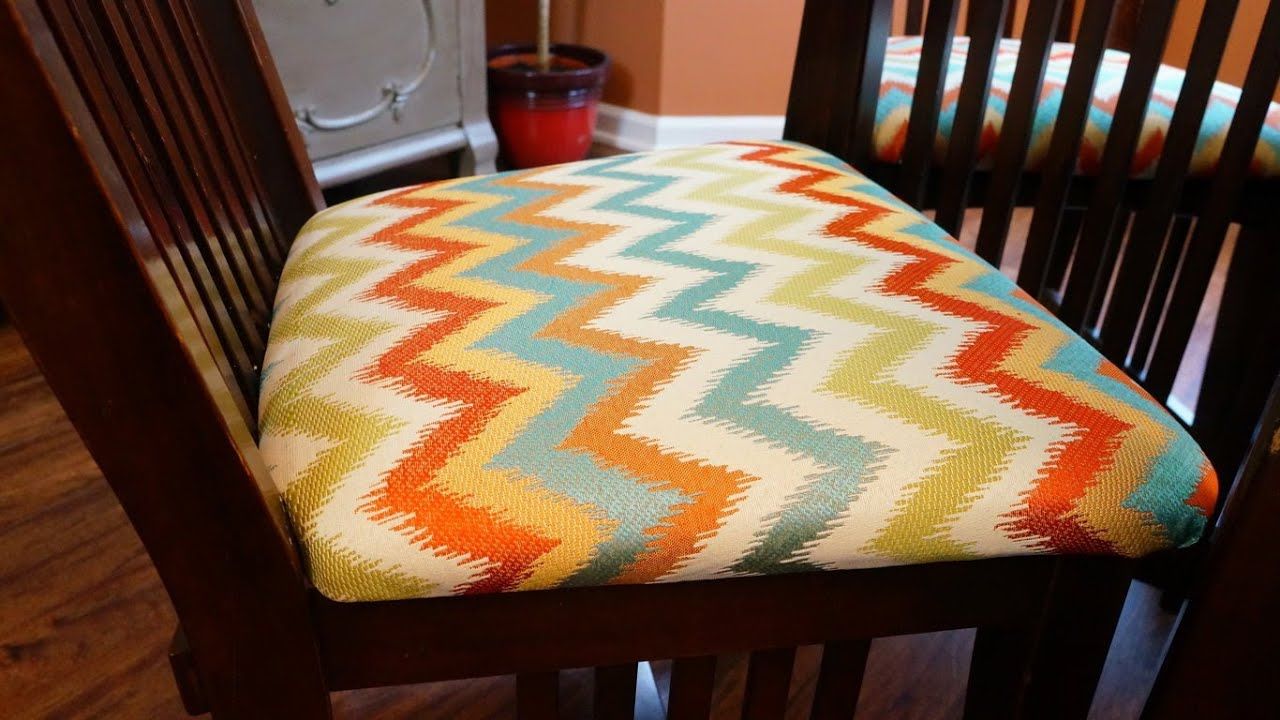
Welcome to this comprehensive guide on how to replace the cushion on a dining room chair. Over time, the cushion on your dining room chair may become worn out, flattened, or stained, detracting from its overall appearance and comfort. Fortunately, with a few simple steps, you can easily replace the cushion and breathe new life into your chair.
Replacing the cushion is an important maintenance task that can extend the lifespan of your dining room chair while improving its overall comfort and aesthetic appeal. Whether you’re an experienced DIY enthusiast or a beginner looking to tackle your first upholstery project, this guide will provide you with the step-by-step instructions you need to successfully replace the cushion on your dining room chair.
Before we dive into the details, it’s essential to gather the necessary tools and materials for this project. Having everything you need at hand will make the process smoother and more efficient. So let’s move on to the first step: gathering the necessary tools and materials.
Key Takeaways:
- Revitalize your dining room chairs by replacing worn-out cushions with high-quality fabric and foam. Follow the step-by-step guide for a DIY project that enhances comfort and aesthetics.
- Gather the necessary tools and materials, remove the old cushion, measure and cut the new cushion material, attach and secure the new cushion, and test for optimal comfort. Enjoy a refreshed dining experience with your newly replaced cushions!
Read more: How To Make Dining Room Chair Cushions
Step 1: Gather the necessary tools and materials
Before you begin replacing the cushion on your dining room chair, it’s important to gather all the necessary tools and materials. Having everything you need at the onset will save you time and ensure a smooth process. Here’s a list of the items you’ll need:
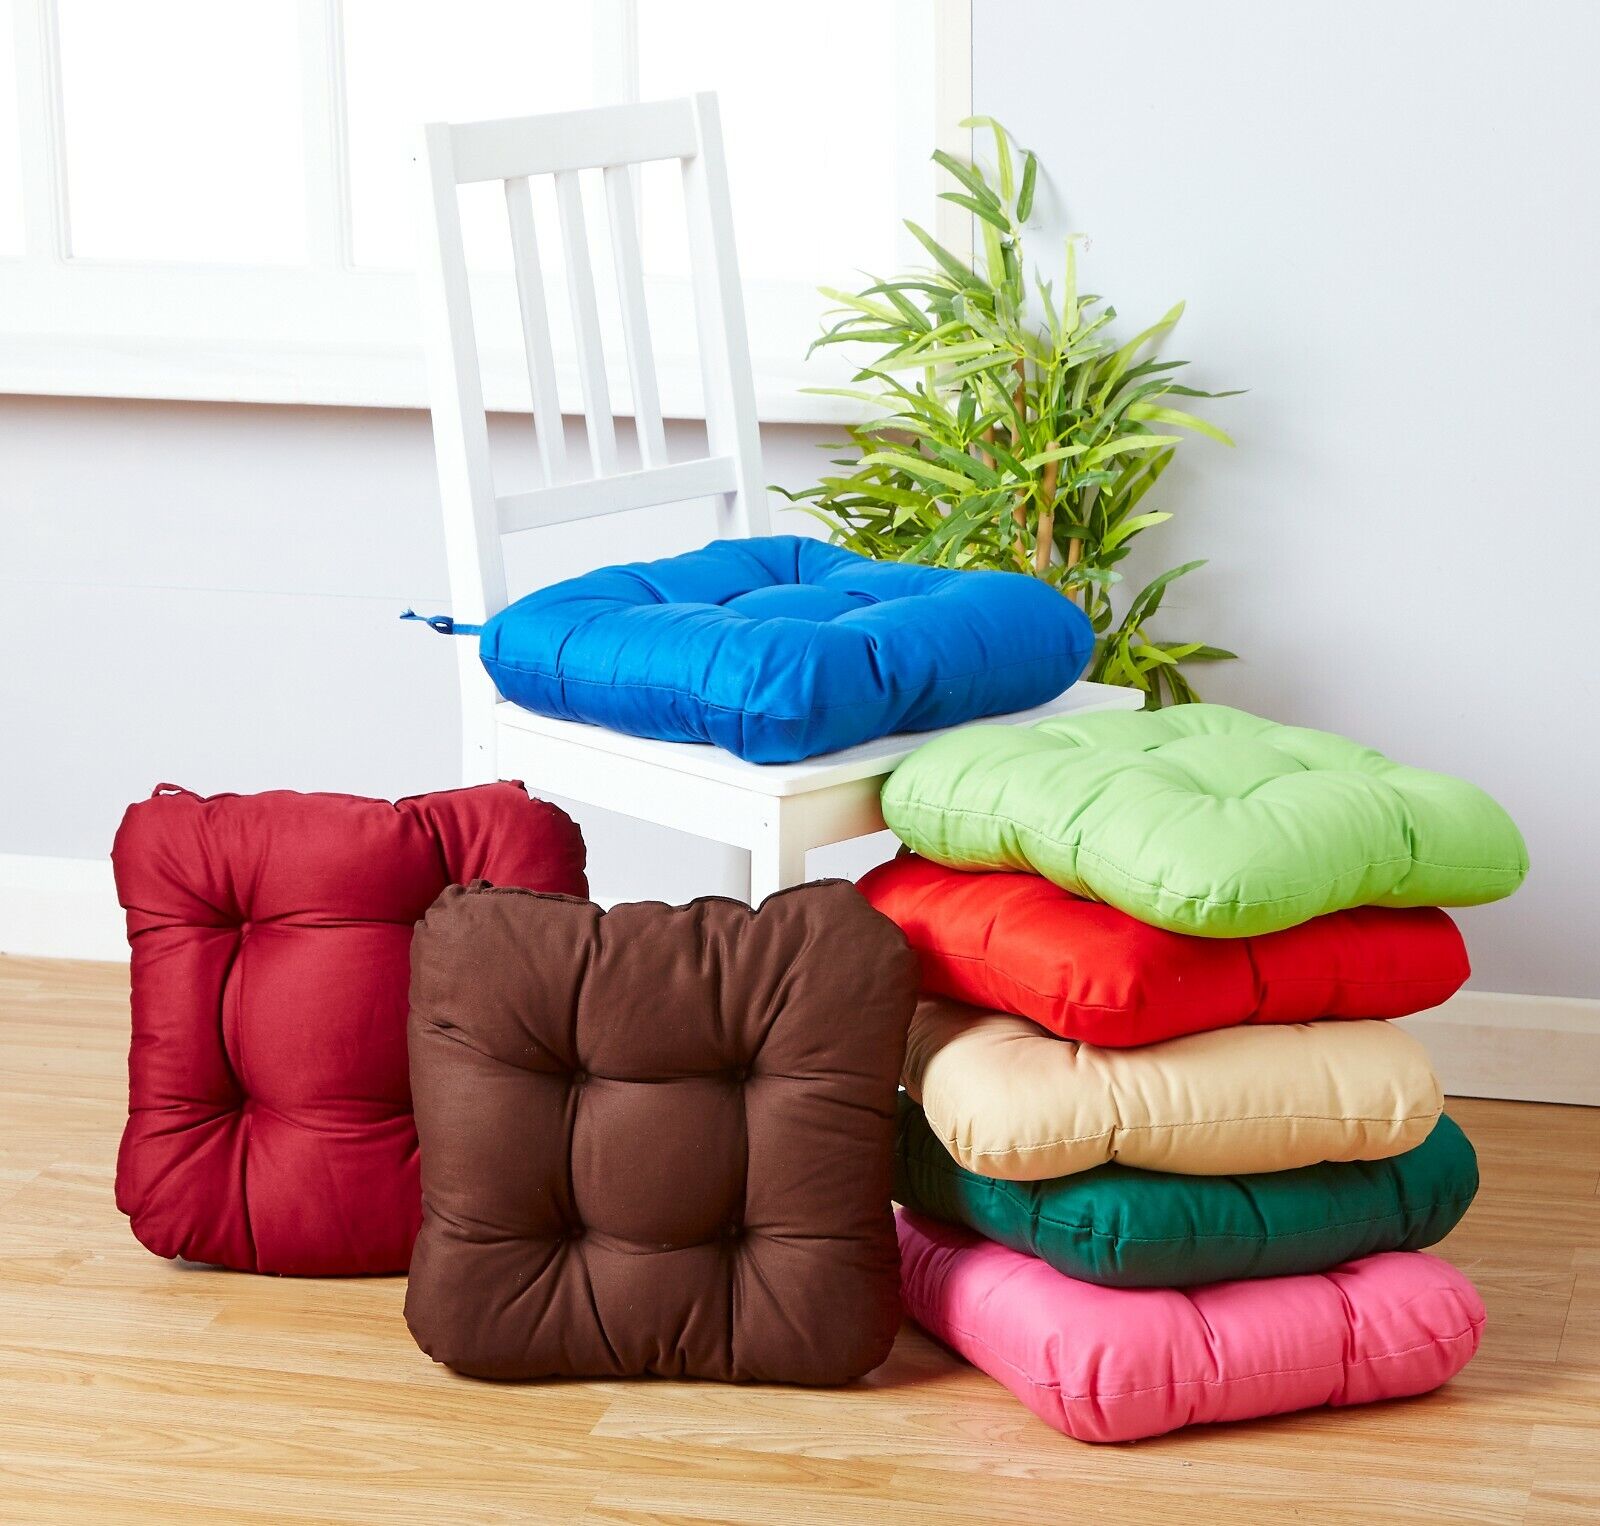
- Fabric for the new cushion: Choose a fabric that is durable, easy to clean, and complements your dining room decor. Measure the dimensions of your chair seat to determine the amount of fabric needed.
- Cushion foam: Look for high-density foam that provides both comfort and support for extended sitting periods. Measure the dimensions of your chair seat to ensure an accurate fit.
- Sharp scissors or a utility knife: You’ll need these tools to cut the fabric and foam to the desired size.
- Measuring tape or ruler: Accurate measurements are crucial for a perfect fit, so make sure you have a measuring tool handy.
- Staple gun and staples: A staple gun is necessary for securing the fabric to the chair frame. Choose staples that are long enough to penetrate both the fabric and the chair frame.
- Flathead screwdriver or pliers: These tools will be useful for removing any existing staples or fasteners from the chair.
- Optional: Batting or fabric liner: If desired, you can add an extra layer of padding or a fabric liner between the foam and the fabric for added comfort and to prevent the fabric from slipping.
By gathering these tools and materials beforehand, you’ll be well-prepared to tackle the next steps of replacing the cushion on your dining room chair. Remember to choose high-quality materials that will withstand regular use and provide lasting comfort.
Now that you have all the necessary tools and materials, you’re ready to move on to the next step: removing the old cushion from the chair.
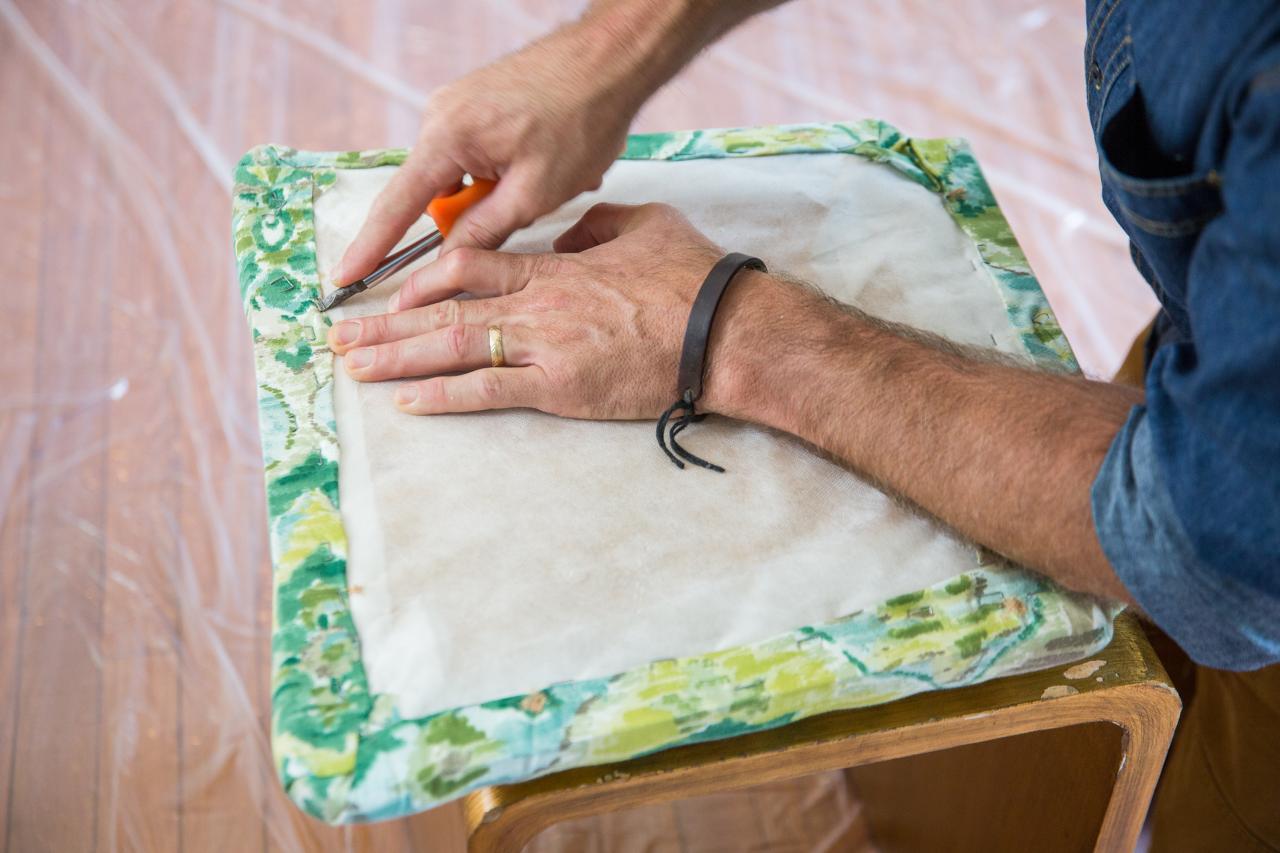
Step 2: Remove the old cushion from the chair
Now that you have gathered all the necessary tools and materials, it’s time to remove the old cushion from your dining room chair. Follow these steps to safely and effectively remove the old cushion:
- Turn the dining room chair upside down so that the seat is facing upwards. This will give you easier access to the cushion.
- Inspect the underside of the seat for any screws or fasteners that might be securing the cushion in place. Use a screwdriver or pliers to remove these screws or fasteners if necessary.
- If there are no visible screws or fasteners, check for any upholstery staples that may be holding the fabric in place. Use a flathead screwdriver or pliers to carefully remove these staples, taking caution not to damage the fabric or the chair frame.
- Once all the screws, fasteners, and staples are removed, gently lift the old cushion away from the chair frame. Take note of how the cushion was originally positioned so that you can replicate it with the new cushion.
- Inspect the chair frame for any debris or remnants of the old cushion. Use a vacuum or a brush to clean the frame and ensure a clean surface for the new cushion.
By following these steps, you’ll be able to remove the old cushion without causing any damage to the chair frame or the fabric. Remember to take your time and be gentle when removing any screws, fasteners, or staples. Now that the old cushion is removed, you’re ready to proceed to the next step: measuring and cutting the new cushion material.
Step 3: Measure and cut the new cushion material
Now that the old cushion has been removed, it’s time to measure and cut the new cushion material. Follow these steps to ensure a precise fit for your dining room chair:
- Place the old cushion on top of the new cushion foam to use as a template. Align the edges of the old cushion with the edges of the foam.
- Use a measuring tape or ruler to measure the dimensions of the old cushion. Take note of the length, width, and thickness.
- Transfer the measurements onto the new cushion foam. Use a pen or marker to mark the cutting lines.
- Using sharp scissors or a utility knife, carefully cut along the marked lines to create the new cushion foam. Take your time and make precise cuts to ensure an exact fit.
- If you’re using additional layers such as batting or a fabric liner, repeat the above steps to cut those materials to size as well.
It’s important to measure and cut the new cushion material accurately to ensure a seamless and comfortable fit. Taking the time to double-check your measurements and make precise cuts will result in a cushion that fits perfectly on your dining room chair.
Once you have cut the new cushion material to the correct size, you’re ready to move on to the next step: attaching the new cushion to the chair.
When replacing the cushion on a dining room chair, measure the seat dimensions before purchasing a new cushion to ensure a proper fit. This will help avoid the hassle of returning an ill-fitting cushion.
Step 4: Attach the new cushion to the chair
Now that you have measured and cut the new cushion material, it’s time to attach it to the chair frame. Follow these steps to secure the new cushion in place:
- Position the new cushion foam onto the chair frame, aligning it with the edges.
- If you’re using additional layers such as batting or a fabric liner, place them on top of the cushion foam.
- Take the fabric you have chosen for the cushion and lay it over the cushion foam and additional layers, making sure it is centered and aligned.
- Starting on one side, pull the fabric taut and secure it to the chair frame using a staple gun. Place a staple in the center of each side to keep the fabric in place.
- Continue stapling the fabric to the chair frame, working from the center toward the corners. Pull the fabric taut as you go to ensure a smooth and wrinkle-free finish.
- At the corners, fold the fabric neatly and staple it securely to create a neat corner. Trim any excess fabric if necessary.
- Once all sides are stapled, double-check the fabric tension and adjust if needed.
It’s important to maintain even tension on the fabric as you staple it to the chair frame. This will ensure a professional-looking finish and prevent the fabric from sagging over time.
Make sure the fabric is smooth and wrinkle-free before moving on to the next step. A well-stapled and neatly folded fabric will enhance the overall appearance of the dining room chair.
With the new cushion securely attached to the chair, you’re one step closer to enjoying a refreshed and comfortable dining experience. Now, let’s move on to the next step: securing the cushion in place.
Read more: How To Make Dining Chair Cushions
Step 5: Secure the cushion in place
With the new cushion attached to the chair frame, it’s time to secure it in place to ensure stability and longevity. Follow these steps to properly secure the cushion:
- Turn the dining room chair upright and sit on it to ensure that the cushion is properly positioned and comfortable.
- If the cushion feels loose or unstable, locate the screws or fasteners that were removed earlier in Step 2.
- Using a screwdriver or pliers, reattach the screws or fasteners to secure the cushion to the chair frame. Make sure they are tightened securely but not overly tightened.
- If there were no visible screws or fasteners, you can use adhesive hook-and-loop tape to secure the cushion to the chair frame.
- Attach one piece of the hook-and-loop tape to the underside of the chair frame and the corresponding piece to the bottom of the cushion. Ensure that they align correctly so that the cushion stays in place.
- Press the cushion firmly onto the hook-and-loop tape to create a strong bond between the cushion and the chair frame.
- Double-check the cushion’s stability by sitting on the chair and applying gentle pressure. If it feels secure and does not shift or move, you have successfully secured the cushion.
Securing the cushion is essential for maintaining proper alignment and preventing any movement that can cause discomfort or damage to the cushion and chair frame. Taking the time to ensure a secure attachment will provide you with a stable and long-lasting dining room chair.
Now that the cushion is secured in place, it’s time to move on to the final step: testing the newly replaced cushion.
Step 6: Test the newly replaced cushion
With the cushion securely attached to the chair, it’s time to test the comfort and functionality of the newly replaced cushion. Follow these steps to ensure that the cushion meets your expectations:
- Sit on the dining room chair and evaluate the comfort level of the cushion. Pay attention to the support it provides and whether it feels appropriately firm or soft.
- Make sure that the cushion fits well and does not slide or shift when you sit or move on the chair.
- Test the cushion by sitting for an extended period, mimicking how you typically use the chair during meal times or gatherings.
- If you notice any discomfort or issues with the cushion, such as uneven padding or incorrect positioning, you may need to make necessary adjustments.
- If adjustments are needed, carefully remove any staples that secure the fabric to the chair frame, make the necessary modifications to the cushion or fabric, and then reattach the fabric using the staple gun.
Testing the newly replaced cushion is crucial to ensure that it provides the desired comfort and functionality. This step allows you to make any necessary adjustments before considering the project complete.
Congratulations! You have successfully replaced the cushion on your dining room chair. The effort and time you have invested will not only enhance the appearance of your chair but also improve your comfort while using it.
Remember to keep the tools and materials you used for this project in a safe place for future use or any potential repairs or replacements. With proper care and maintenance, your newly replaced cushion will provide you with years of enjoyable dining experiences.
We hope this step-by-step guide has been helpful in guiding you through the process of replacing the cushion on your dining room chair. Enjoy your newly refreshed chair and the comfort it brings!
Conclusion
Replacing the cushion on a dining room chair is a worthwhile endeavor that can revitalize the look and comfort of your furniture. By following the step-by-step guide outlined in this article, you’ll be able to tackle this project with confidence, regardless of your level of DIY experience.
Throughout the process, we learned how to gather the necessary tools and materials, remove the old cushion, measure and cut the new cushion material, attach the new cushion to the chair, secure the cushion in place, and finally, test the newly replaced cushion.
By carefully selecting high-quality fabrics and foam and, ensuring accurate measurements and secure attachments, you can create a comfortable and aesthetically pleasing dining room chair. It’s important to take your time, pay attention to detail, and make any necessary adjustments to ensure a perfect fit and optimal comfort.
Remember to consider personal preferences such as the desired level of firmness, fabric design, and color. This will allow you to create a customized cushion that not only enhances the visual appeal of your dining room but also provides a comfortable seating experience for you and your guests.
Regular maintenance and care will help extend the lifespan of your newly replaced cushion. Clean any spills or stains promptly, and periodically check the cushion’s stability and condition to address any issues early on.
Replacing the cushion on a dining room chair is a DIY project that allows you to unleash your creativity and add a personal touch to your furniture. It’s a cost-effective way to give your dining room a fresh, new look without having to replace the entire set of chairs.
We hope that this comprehensive guide has provided you with the knowledge and inspiration needed to successfully replace the cushion on your dining room chair. Enjoy your newly refreshed seating and the comfort it brings to your dining experiences!
Frequently Asked Questions about How To Replace The Cushion On A Dining Room Chair
Was this page helpful?
At Storables.com, we guarantee accurate and reliable information. Our content, validated by Expert Board Contributors, is crafted following stringent Editorial Policies. We're committed to providing you with well-researched, expert-backed insights for all your informational needs.


0 thoughts on “How To Replace The Cushion On A Dining Room Chair”