
Articles
How To Connect A Porch Roof To House
Modified: January 8, 2024
Learn how to connect a porch roof to your house with these helpful articles. Find step-by-step instructions and expert tips for a successful installation.
(Many of the links in this article redirect to a specific reviewed product. Your purchase of these products through affiliate links helps to generate commission for Storables.com, at no extra cost. Learn more)
Introduction
Building a porch on your house is a great way to increase your living space and add value to your home. A porch roof not only provides protection from the elements but also adds an aesthetic appeal to the overall appearance of your house. Connecting a porch roof to your house might seem like a daunting task, but with the right materials, tools, and guidance, it can be a straightforward project that you can accomplish on your own.
In this article, we will take you through the step-by-step process of connecting a porch roof to your house. From gathering the necessary materials to adding the finishing touches, we will provide you with clear instructions and helpful tips to ensure a successful and secure roof connection.
Before you begin this project, it is important to have a basic understanding of carpentry and construction techniques. Additionally, ensure that you have obtained any necessary permits and that you comply with local building codes. Safety should always be a top priority, so make sure to wear appropriate protective gear and use caution when working with power tools.
Now, let’s dive into the details of how to connect a porch roof to your house.
Key Takeaways:
- Connecting a porch roof to your house is a manageable DIY project that adds value and aesthetic appeal to your home. Prioritize safety, gather the right materials, and follow the step-by-step process for a successful installation.
- From preparing the house wall to adding finishing touches, each step in the process plays a crucial role in creating a stable and durable porch roof. Embrace the opportunity to enhance your living space and enjoy the benefits for years to come.
Read more: How To Build A Porch Roof Attached To House
Step 1: Gather the necessary materials
Before you start connecting the porch roof to your house, you’ll need to gather all the materials and tools that you’ll need for the project. Here’s a list of the essential items you’ll need:
1. Ledger board: This is a wooden board that will be attached to the exterior wall of your house to support the porch roof. Make sure to choose a sturdy and weather-resistant material, such as pressure-treated lumber.
2. Support beam: The support beam will run perpendicular to the ledger board and provide additional stability to the porch roof. It should be made from a strong and durable material, such as treated lumber or steel.
3. Rafters: Rafters are the angled beams that will support the roof structure. The number and size of rafters will depend on the size and design of your porch roof. Ensure that the rafters are of the appropriate length and made from a strong material like wood or steel.
4. Roofing materials: Choose roofing materials that complement the style of your house and provide adequate protection from the elements. Common options include asphalt shingles, metal roofing, or even a thatched roof for a more rustic look.
5. Fasteners: You’ll need various types of fasteners, such as nails, screws, and brackets, to secure the different elements of the porch roof together. Make sure to select fasteners that are compatible with your chosen materials and provide sufficient strength.
6. Tools: To complete this project, you’ll need a range of carpentry tools, including a circular saw, a power drill, a level, a tape measure, a hammer, and a ladder. Additionally, having a helper or two can make the installation process smoother and safer.
7. Safety equipment: It’s crucial to prioritize safety during the construction process. Equip yourself with safety goggles, gloves, a hard hat, and sturdy footwear to protect yourself from any potential hazards.
Before purchasing materials, take accurate measurements and consult with local building codes to ensure you’re adhering to regulations. Additionally, consider consulting with a professional to assist you in selecting the appropriate materials and to provide guidance throughout the project.
Now that you have all the necessary materials, you’re ready to move on to the next step: determining the attachment method for connecting the porch roof to your house.
Step 2: Determine the attachment method
Determining the attachment method is a crucial step in connecting your porch roof to your house. The attachment method will depend on the structure of your house, the type of porch roof you want to install, and any specific local building codes that you need to comply with. Here are a few common attachment methods:
1. Ledger board attachment: One common method is attaching a ledger board directly to the exterior wall of the house. This involves securely fastening the ledger board to the wall studs using lag bolts or structural screws. The ledger board serves as the main support for the porch roof and is connected to the beams and rafters.
2. Freestanding structure: In some cases, it may be necessary to build a freestanding structure for your porch roof. This is often done when attaching a ledger board to the house is not feasible or allowed by local building codes. A freestanding structure requires additional support columns and footings to ensure stability and safety.
3. Roof tie-in: If you have an existing roof above the location where you want to build your porch roof, you can tie-in the new roof to the existing one. This involves seamlessly integrating the new roofing materials with the existing roof, ensuring proper drainage and a secure connection.
When determining the attachment method, consider factors such as the slope of the porch roof, the weight it will bear, and the climate conditions in your area. Consulting with a professional architect or structural engineer can help determine the most suitable attachment method for your specific situation.
It’s important to note that whatever attachment method you choose, it must be in compliance with local building codes and regulations. These codes ensure the structural integrity and safety of your porch roof, so be sure to obtain any necessary permits and inspections before proceeding with the installation.
Once you have determined the attachment method, you can move on to preparing the house for the roof connection. This involves proper measuring and marking of the attachment points on the house wall, ensuring a precise and secure installation.
Step 3: Prepare the house for roof connection
Before you can connect the porch roof to your house, it’s crucial to properly prepare the house wall for the attachment. This step involves measuring, marking, and making necessary adjustments to ensure a secure and successful roof connection. Here’s how to prepare the house for the roof connection:
1. Measure and mark: Begin by measuring and marking the locations where the ledger board will be attached to the house wall. Use a tape measure and level to ensure accurate measurements and straight lines. Mark the locations of the studs on the wall, as these will serve as the anchoring points for the ledger board.
2. Clear the area: Remove any obstructions or debris from the area where the ledger board will be installed. This includes trim, siding, or any other impediments that may interfere with the installation process. It’s important to have a clean and flat surface to work with.
3. Flashing installation: Install metal flashing to protect the ledger board and prevent water infiltration. The flashing should be placed behind the siding and extend over the top of the ledger board. This creates a moisture barrier and helps channel water away from the connection point.
4. Seal the wall: Apply a high-quality exterior-grade sealant along the area where the ledger board will be attached. This provides an additional layer of moisture protection and helps create a tight seal between the ledger board and the house wall.
5. Make necessary adjustments: If the wall surface is not level, use a saw or sander to make any necessary adjustments. Ensuring a level surface is crucial for a proper and secure roof connection.
6. Install blocking: If there are gaps or inconsistencies between the wall studs, install blocking to provide additional support for the ledger board. Blocking can be made from pressure-treated lumber and should be securely attached to the studs.
By properly preparing the house wall, you are creating a solid foundation for the porch roof attachment. Take your time to ensure accurate measurements and make any necessary adjustments before moving on to the next step.
In the next step, we will guide you through the process of cutting and installing the ledger board, which is a crucial element in connecting the porch roof to your house.
Step 4: Cut and install the ledger board
Cutting and installing the ledger board is an essential step in connecting your porch roof to your house. The ledger board serves as the main support for the porch roof and is securely attached to the house wall. Here’s a step-by-step guide on how to cut and install the ledger board:
1. Measure and cut the ledger board: Using the measurements and markings from the previous step, measure and cut the ledger board to the appropriate length. Ensure that the board is cut accurately and straight to provide a stable foundation for the porch roof.
2. Pre-drill holes: Before attaching the ledger board to the house wall, pre-drill pilot holes for the lag bolts or structural screws. The size of the holes should match the diameter of the fasteners you are using. Pre-drilling helps prevent the wood from splitting during installation.
3. Align the ledger board: Position the ledger board against the house wall, making sure it is level and aligned with the markings and stud locations. Use a level to ensure that the board is perfectly horizontal.
4. Attach the ledger board: Securely fasten the ledger board to the house wall by driving lag bolts or structural screws through the pre-drilled pilot holes. Make sure to tighten the fasteners firmly, but be careful not to overtighten and damage the wood.
5. Check for levelness: After attaching the ledger board, use a level to double-check that it is still perfectly horizontal. Any adjustments can be made by slightly loosening the fasteners and repositioning the board.
6. Apply silicone sealant: Apply a generous bead of silicone sealant along the top and bottom edges of the ledger board. This helps create a watertight seal and prevents moisture from seeping behind the board.
7. Double-check stability: Give the ledger board a gentle shake to ensure it is securely attached to the house wall. If there is any excessive movement, double-check the fasteners and make any necessary adjustments to ensure a stable connection.
Once the ledger board is securely installed, it provides the foundation for the porch roof. It’s important to take your time and ensure the ledger board is level and properly aligned before moving on to the next steps of the roof connection process.
In the next step, we will guide you through the process of installing the support beam, which adds additional stability to the porch roof structure.
Read more: How To Attach A Gable Porch Roof To A House
Step 5: Attach the ledger board to the house
Attaching the ledger board to the house is a critical step in connecting your porch roof. The ledger board serves as the main support for the roof structure and is securely fastened to the house wall. Here’s a step-by-step guide on how to attach the ledger board to the house:
1. Position the ledger board: Position the ledger board against the house wall in the desired location for your porch roof. Make sure it is level and aligned with the markings and stud locations from the previous steps. Use a level to ensure that the ledger board is perfectly horizontal.
2. Mark the fastener locations: Using a pencil or marker, mark the locations where the lag bolts or structural screws will penetrate the house wall. These marks should align with the pre-drilled pilot holes in the ledger board.
3. Pre-drill pilot holes: Remove the ledger board and pre-drill pilot holes on the marked locations of the house wall. The size of the pilot holes should match the diameter of the lag bolts or structural screws you are using. Pre-drilling helps prevent the wall from splitting during installation.
4. Install lag bolts or structural screws: With the ledger board removed, insert the lag bolts or structural screws into the pre-drilled pilot holes on the house wall. Use a wrench or impact driver to securely fasten the bolts or screws, making sure they are tightly and evenly secured.
5. Reinstall the ledger board: Once all the lag bolts or structural screws are in place, carefully align the ledger board with the fasteners on the house wall. Gently lower the board onto the fasteners, ensuring it is level and aligned with the markings and stud locations.
6. Tighten the fasteners: Using a wrench or impact driver, tighten the lag bolts or structural screws, ensuring they are firmly secured. Be careful not to overtighten, as it can damage the ledger board or the house wall.
7. Check for levelness: After attaching the ledger board, use a level to double-check that it is still perfectly horizontal. Make any necessary adjustments by slightly loosening the fasteners and repositioning the board.
8. Apply sealant: Apply a generous bead of silicone sealant along the top and bottom edges of the ledger board where it meets the house wall. This helps create a watertight seal and prevents moisture from seeping behind the board.
Attaching the ledger board securely to the house is crucial for the stability and safety of your porch roof. Take your time to ensure the ledger board is level, properly aligned, and tightly fastened before proceeding to the next steps in the roof connection process.
In the next step, we will guide you through installing the support beam, which adds additional stability to the porch roof structure.
When connecting a porch roof to a house, make sure to properly flash and seal the connection to prevent water damage. Use appropriate fasteners and consider consulting a professional for structural support.
Step 6: Install the support beam
Installing the support beam is an important step in connecting your porch roof to your house. The support beam provides additional stability and reinforcement to the porch roof structure. Here’s a step-by-step guide on how to install the support beam:
1. Determine the length and size: Measure the distance between the outer edge of the ledger board and the desired location of the support beam. Use this measurement to cut the support beam to the appropriate length. The size of the support beam will depend on the design and load requirements of your porch roof.
2. Position the support beam: Place the support beam on top of the ledger board, perpendicular to it. Ensure that the support beam is centered and aligned with the markings on the ledger board. Use a level to make sure it is perfectly horizontal.
3. Mark the attachment points: Once the support beam is positioned correctly, mark the locations where it will attach to the ledger board. These marks will indicate where you will need to drill pilot holes for the fasteners.
4. Pre-drill pilot holes: Remove the support beam and pre-drill pilot holes on the marked locations of the ledger board. The size of the pilot holes should match the diameter of the fasteners you are using. Pre-drilling helps prevent the wood from splitting during installation.
5. Attach the support beam: With the pilot holes drilled, place the support beam back onto the ledger board, aligning it with the markings. Drive lag bolts or structural screws through the pilot holes and into the ledger board, securely fastening the support beam in place. Make sure to tighten the fasteners evenly and firmly.
6. Check for levelness: Use a level to double-check that the support beam is perfectly horizontal. Make any necessary adjustments by slightly loosening the fasteners and repositioning the beam.
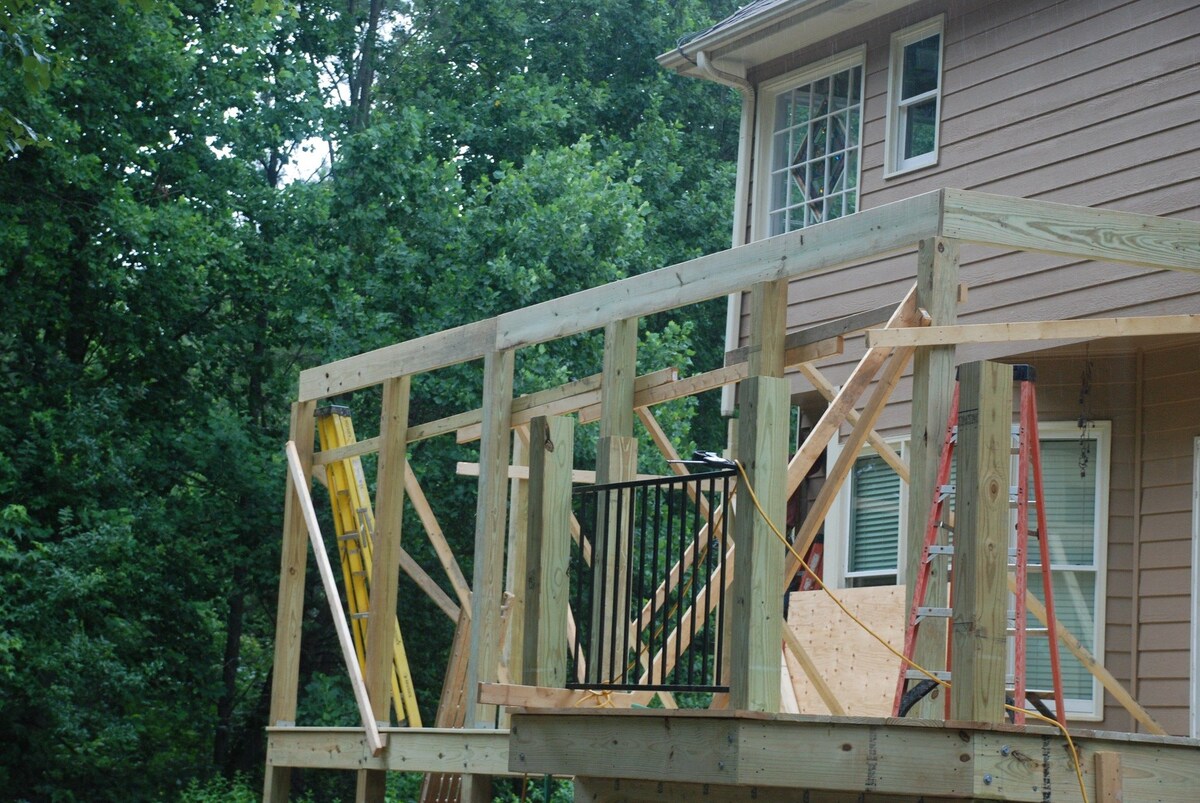
7. Install additional support if needed: Depending on the length and load requirements of your porch roof, you may need to install additional support posts underneath the support beam. These posts can be made of pressure-treated lumber or metal and should be securely anchored to the ground.
By installing the support beam, you are adding strength and stability to your porch roof structure. Ensure that the support beam is securely attached and level before moving on to the next steps in the roof connection process.
In the next step, we will guide you through installing the porch roof rafters, which form the framework for the roof structure.
Step 7: Install the porch roof rafters
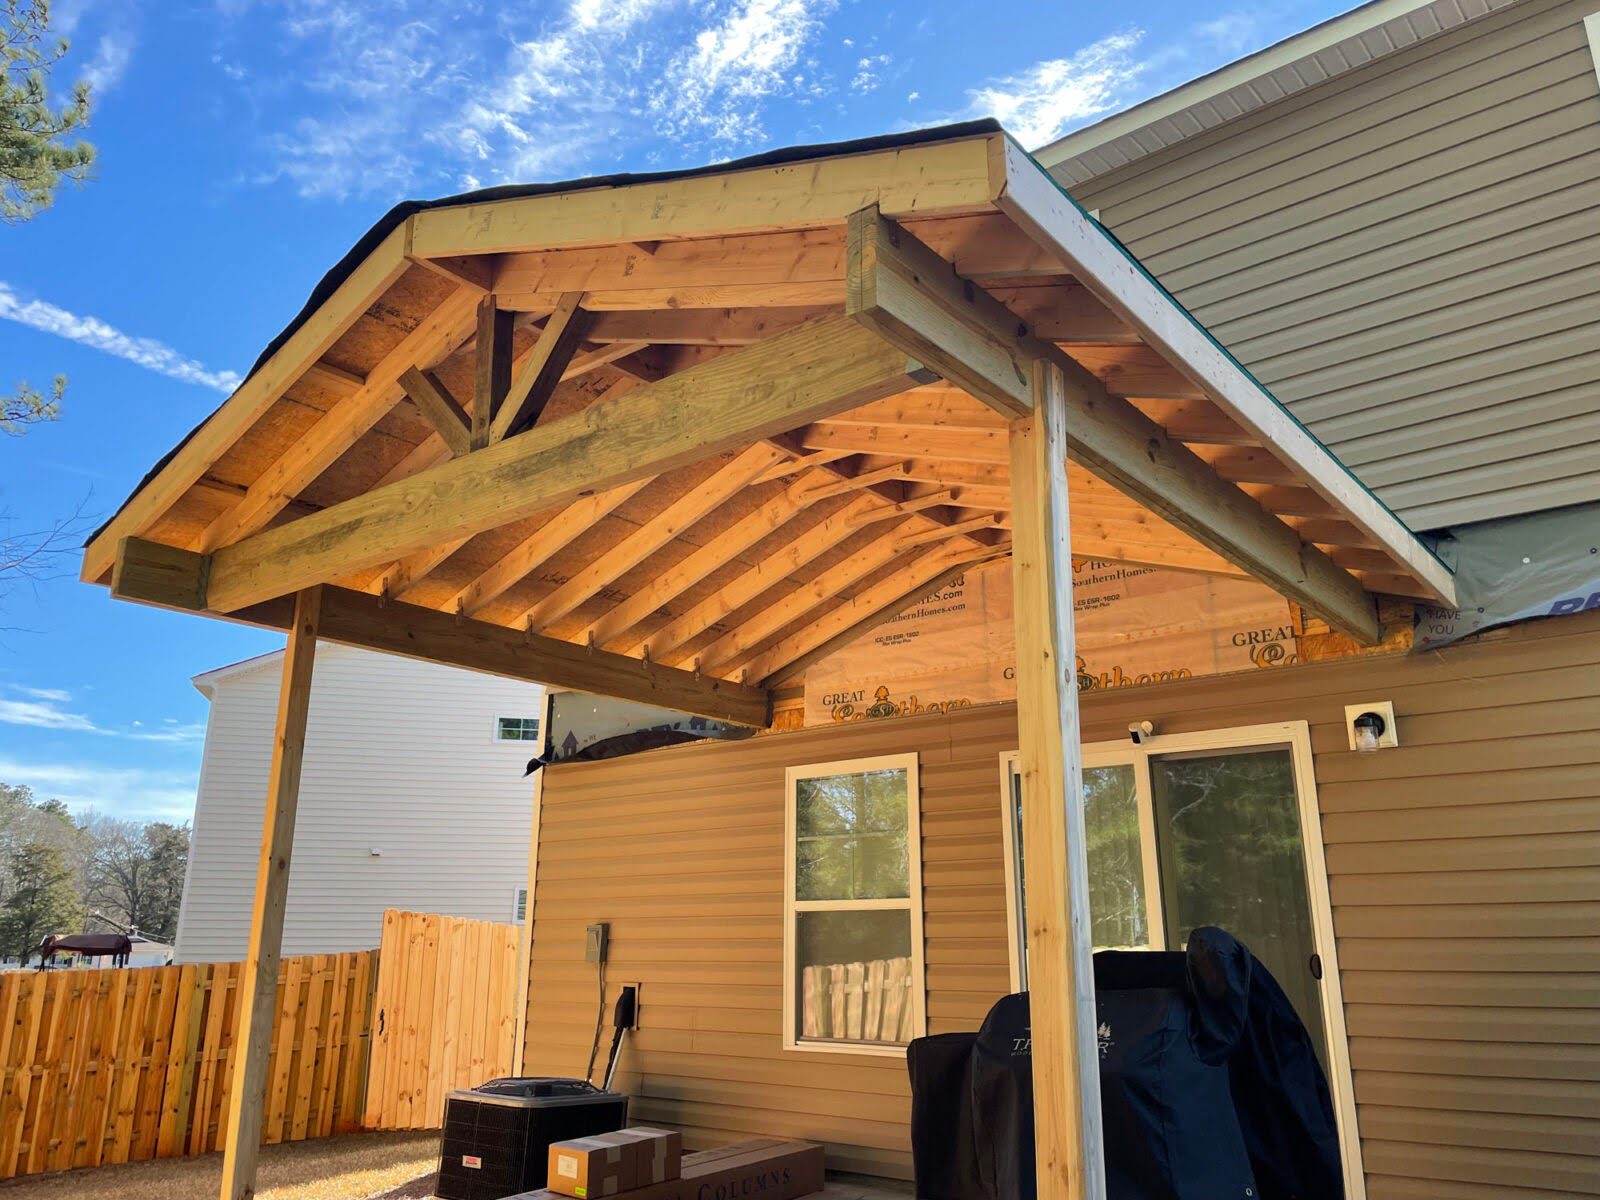
Installing the porch roof rafters is a key step in completing the framework of your porch roof. The rafters provide the structural support and stability for the roof. Here’s a step-by-step guide on how to install the porch roof rafters:
1. Determine the number and size: Depending on the design and size of your porch roof, determine the number and size of the rafters needed. Consider factors such as the roof slope, load requirements, and spacing between rafters.
2. Cut the rafters: Using the appropriate measurements, cut the rafters to the desired length. Ensure that each rafter is cut precisely and accurately to ensure a proper and secure fit.
3. Mark the rafter positions: With the support beam in place, mark the positions where the rafters will attach. These marks will indicate the locations where you will need to install the rafter hangers or brackets.
4. Install rafter hangers or brackets: Depending on the design and attachment method, install rafter hangers or brackets onto the support beam. These hangers or brackets will hold the rafters in place and provide a strong connection point.
5. Attach the rafters: Lift each rafter into place and position it in the rafter hanger or bracket. Make sure the rafter is securely seated and aligned with the marks on the support beam. Fasten the rafters to the hangers or brackets using screws or nails, ensuring a tight and stable connection.
6. Check for levelness and alignment: Using a level, check the alignment and levelness of each rafter. Make any necessary adjustments by shifting the position of the rafter or adjusting the placement of the hangers or brackets.
7. Secure the rafters: Once all the rafters are attached and properly aligned, secure them in place by adding additional screws or nails as needed. This will further enhance the stability and strength of the roof structure.
8. Install ridge board (if necessary): If your porch roof requires a ridge board, install it at the peak of the roof, connecting the tops of the rafters. The ridge board adds support and helps distribute the weight of the roof evenly.
Remember to follow safety guidelines and work with caution when installing the rafters. Ensure that the rafters are securely attached and properly aligned to ensure a stable and durable porch roof structure.
In the next step, we will guide you through securing the porch roof to the house, finalizing the connection between the two structures.
Step 8: Secure the porch roof to the house
Securing the porch roof to the house is a crucial step in ensuring the stability and longevity of your porch structure. By securely connecting the roof to the house, you create a strong and durable structure that can withstand various weather conditions. Here’s a step-by-step guide on how to secure the porch roof to the house:
1. Position the roof rafters: Ensure that the porch roof rafters are positioned correctly and aligned with the ledger board and support beam. Double-check the levelness and alignment of the rafters using a level.
2. Mark the attachment points: Mark the locations on the house wall where the rafters will be secured. These marks will indicate where you need to drill pilot holes to attach the roof to the house.
3. Pre-drill pilot holes: Carefully remove the porch roof rafters and pre-drill pilot holes on the marked locations of the house wall. The size of the pilot holes should match the diameter of the fasteners you are using.
4. Attach the porch roof to the house: Align the porch roof rafters with the pre-drilled pilot holes on the house wall. Securely fasten the rafters to the wall using lag bolts or structural screws. Make sure to tighten the fasteners firmly, but be cautious not to overtighten and damage the wood or the house wall.
5. Double-check stability: After attaching the porch roof to the house, check for any excessive movement. Give the structure a gentle shake to ensure that it is securely connected and does not shift or wobble.
6. Install additional support if necessary: Depending on the size and design of your porch roof, you may need to install additional support braces or brackets to reinforce the connection between the porch roof and the house. These additional supports can provide extra stability and ensure a secure attachment.
7. Apply sealant and flashing: Use silicone sealant to fill any gaps between the porch roof and the house wall. Apply flashing to create a water-tight barrier, preventing moisture from seeping behind the porch roof and causing damage.
By securely attaching the porch roof to the house, you create a strong and stable structure that can withstand various weather conditions. Ensure that all fasteners are tightened properly and that all connections are secure. Double-check the stability and take any necessary steps to reinforce the structure if needed.
In the next step, we will guide you through adding the finishing touches to complete the porch roof connection and enhance its appearance.
Read more: How To Attach Gable Porch Roof To House
Step 9: Add finishing touches
Now that you have securely connected the porch roof to your house, it’s time to add the finishing touches to complete the project. These final touches will not only enhance the appearance of your porch roof but also provide additional protection and functionality. Here are some steps to consider for adding those finishing touches:
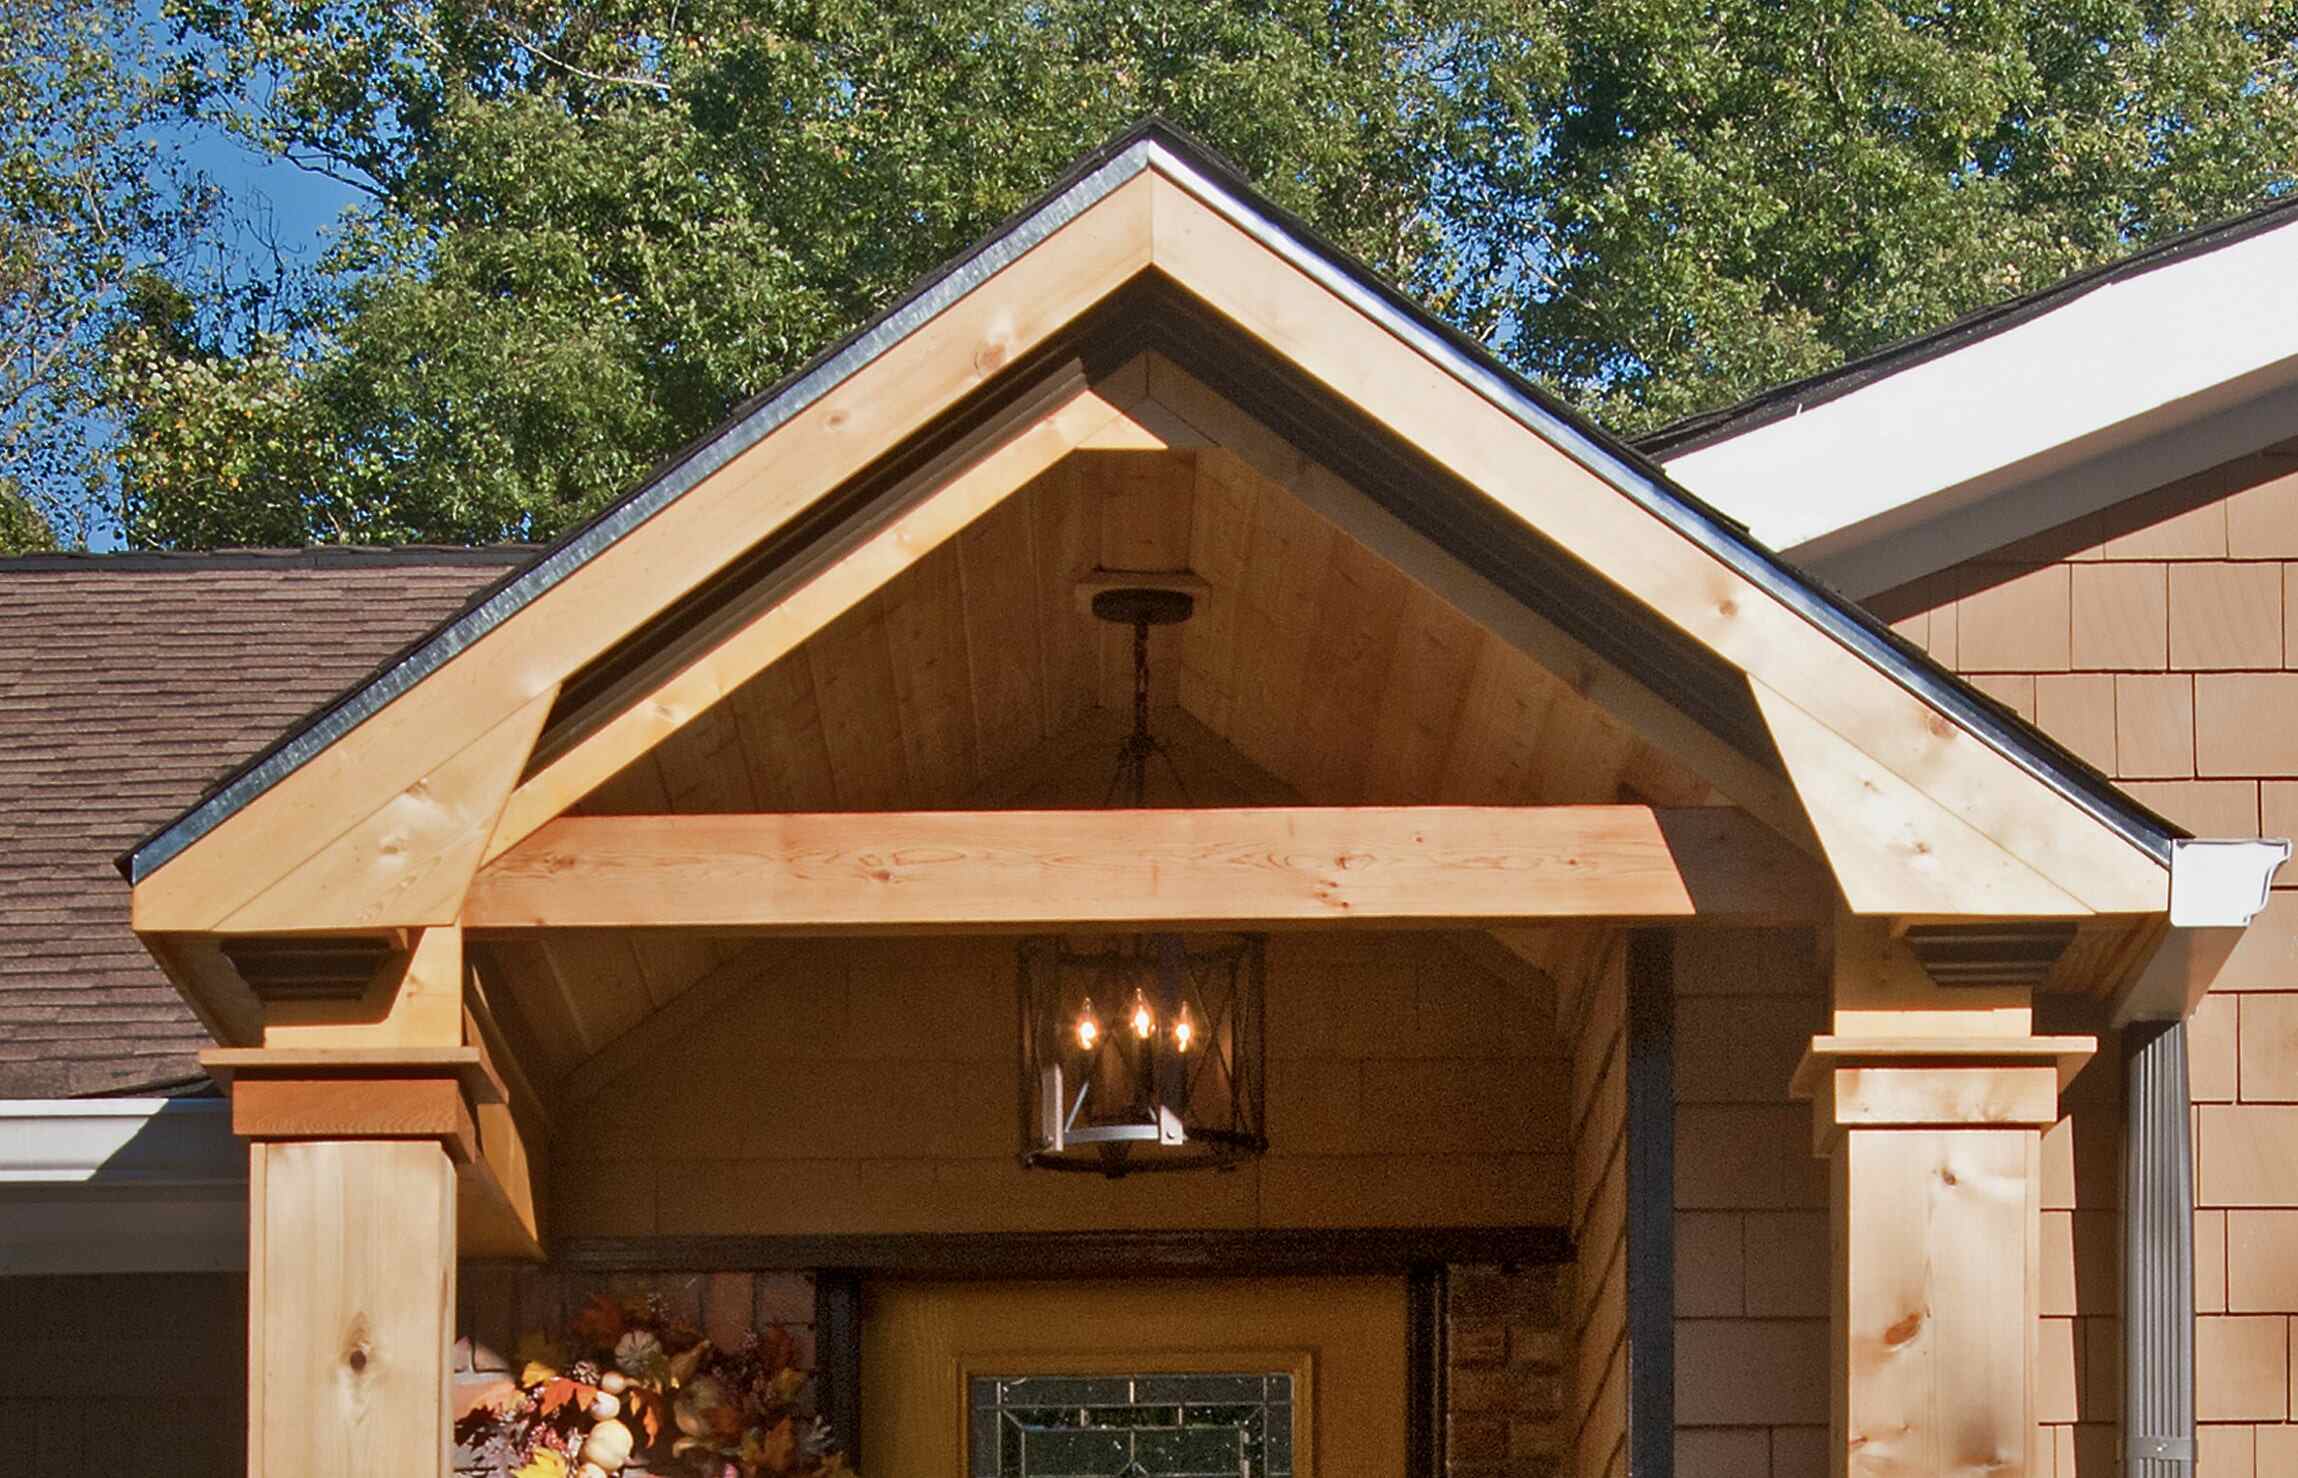
1. Install fascia and soffit: Install fascia boards along the outer edge of the porch roof to create a clean and finished look. These boards will hide the rafters and provide a polished appearance. Additionally, consider installing soffit panels underneath the porch roof to improve ventilation and prevent moisture buildup.
2. Apply roof covering: Install the chosen roofing material to cover the porch roof and protect it from the elements. Whether it’s asphalt shingles, metal roofing, or another option, ensure that the roof covering is properly installed according to the manufacturer’s instructions.
3. Add guttering and downspouts: Install guttering along the edges of the porch roof to collect rainwater and direct it away from the house. Connect downspouts to the guttering system to channel the water safely to the ground and prevent excessive runoff.
4. Apply a protective finish: If you used natural wood for any visible portions of the porch roof, consider applying a protective finish to enhance its durability and appearance. A protective coating or stain can provide resistance against moisture, UV rays, and other weather elements.
5. Incorporate lighting and accessories: Enhance the functionality and ambiance of your porch roof by adding appropriate lighting fixtures. Consider options like overhead lights, wall sconces, or even string lights to create a warm and inviting atmosphere. You can also add accessories such as ceiling fans, hooks for hanging plants, or outdoor furniture to further personalize the space.
6. Regular maintenance: Once the porch roof is complete, it’s important to perform regular maintenance to keep it in top condition. Clean the debris from gutters, inspect for any signs of damage or wear, and address any maintenance or repair needs promptly.
By adding these finishing touches, your porch roof will not only be functional but also aesthetically pleasing. Take the time to carefully consider these details to create a space that reflects your style and enhances the overall appeal of your home.
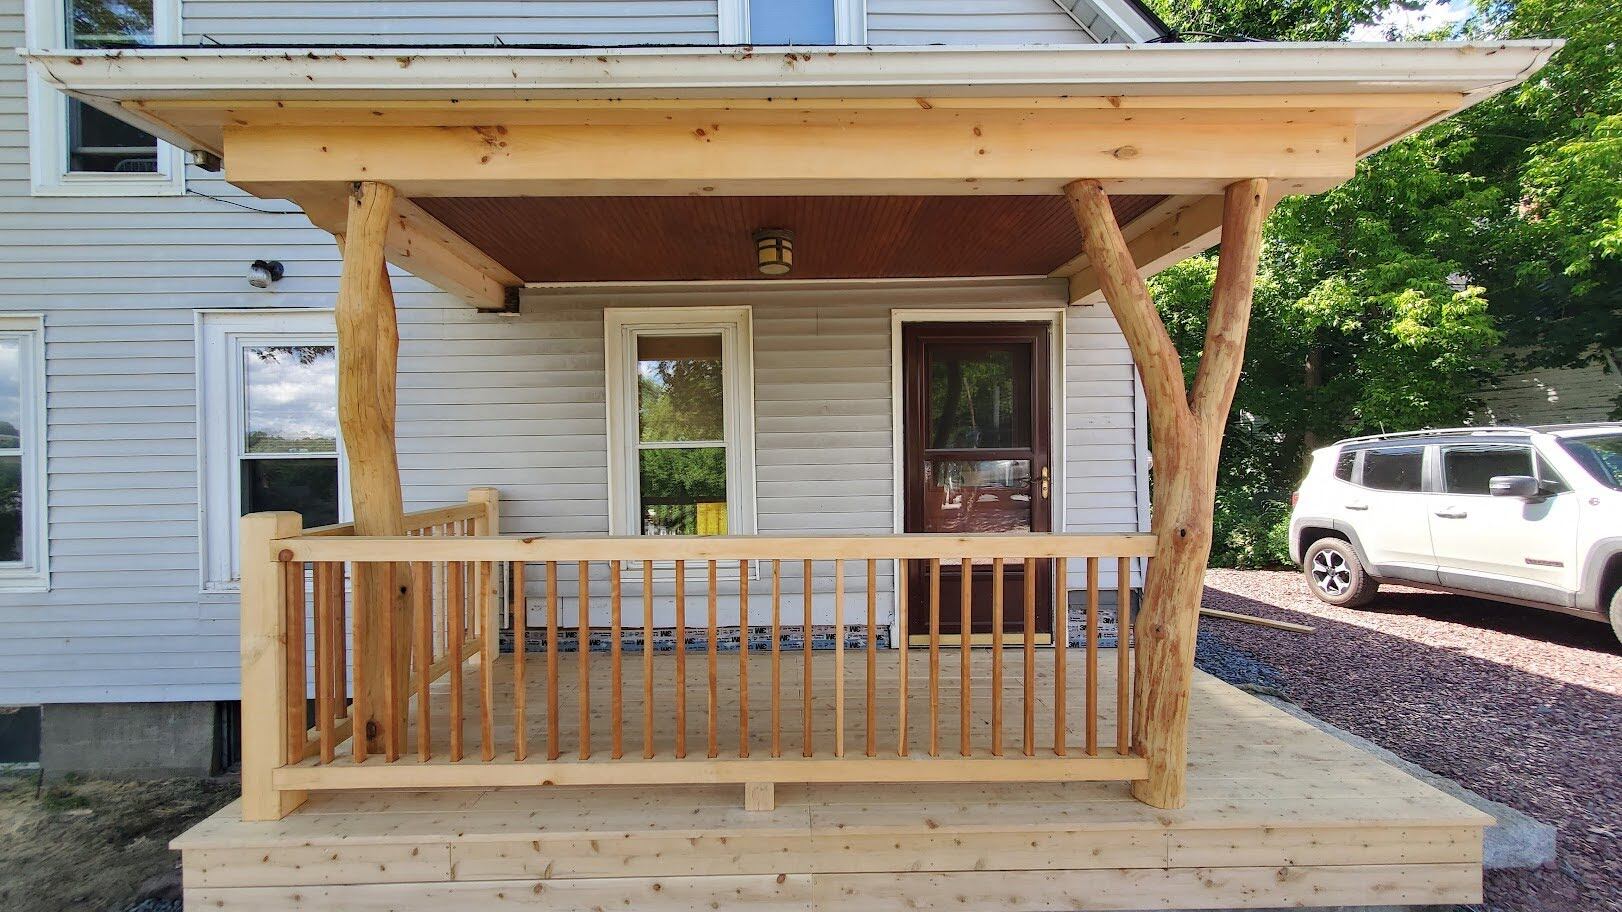
Congratulations! You have successfully connected a porch roof to your house. Enjoy your new outdoor space and relish the satisfaction of completing a project that enhances both the value and enjoyment of your home.
Conclusion
Connecting a porch roof to your house is a rewarding project that adds value, style, and functionality to your home. By following the step-by-step process outlined in this article, you can successfully complete the project and create a beautiful porch roof that enhances your living space.
Throughout the process, remember to prioritize safety, consult local building codes, and gather the necessary materials and tools. By taking the time to gather the right materials and plan the project properly, you can ensure a smooth and successful installation.
From gathering the necessary materials to adding the finishing touches, each step plays a crucial role in creating a stable and durable porch roof. Whether you choose to attach the porch roof with a ledger board, build a freestanding structure, or tie it into an existing roof, the attachment method should comply with local building codes and ensure the structural integrity of the porch roof.
Once the porch roof is securely attached, the installation of support beams, rafters, and the final details bring the project to completion. Ensure all connections are secure, level, and aligned properly to ensure the stability and longevity of your porch roof.
With the porch roof in place, you can enjoy a protected outdoor space that provides shelter from the elements and adds architectural appeal to your home. Whether you plan to use your porch for relaxing, entertaining, or as an extension of your living space, the finished product will provide a welcoming environment for you and your guests.
Remember to perform regular maintenance and inspections to keep your porch roof in optimal condition. Clean the gutters, check for any signs of damage, and address any maintenance needs promptly.
By following this comprehensive guide, you have acquired the knowledge and skills to successfully connect a porch roof to your house. Embrace the opportunity to create a space that enhances the beauty and functionality of your home, and enjoy the benefits for years to come.
Frequently Asked Questions about How To Connect A Porch Roof To House
Was this page helpful?
At Storables.com, we guarantee accurate and reliable information. Our content, validated by Expert Board Contributors, is crafted following stringent Editorial Policies. We're committed to providing you with well-researched, expert-backed insights for all your informational needs.





0 thoughts on “How To Connect A Porch Roof To House”