Home>diy>Architecture & Design>How To Make A House Floor Plan
Architecture & Design
How To Make A House Floor Plan
Modified: December 7, 2023
Learn how to create a functional and stylish house floor plan with our expert tips and guidance. Enhance your architectural design skills with our easy-to-follow tutorials.
(Many of the links in this article redirect to a specific reviewed product. Your purchase of these products through affiliate links helps to generate commission for Storables.com, at no extra cost. Learn more)
Introduction
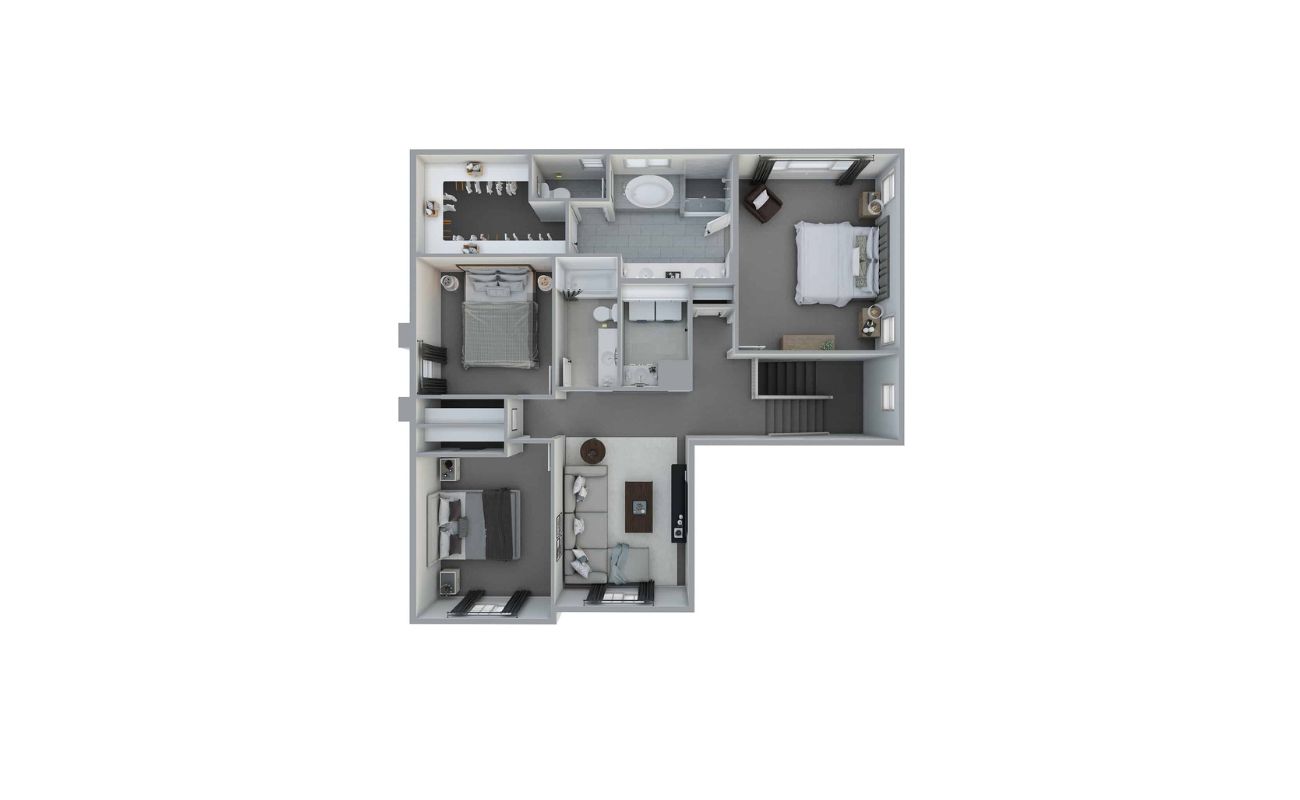
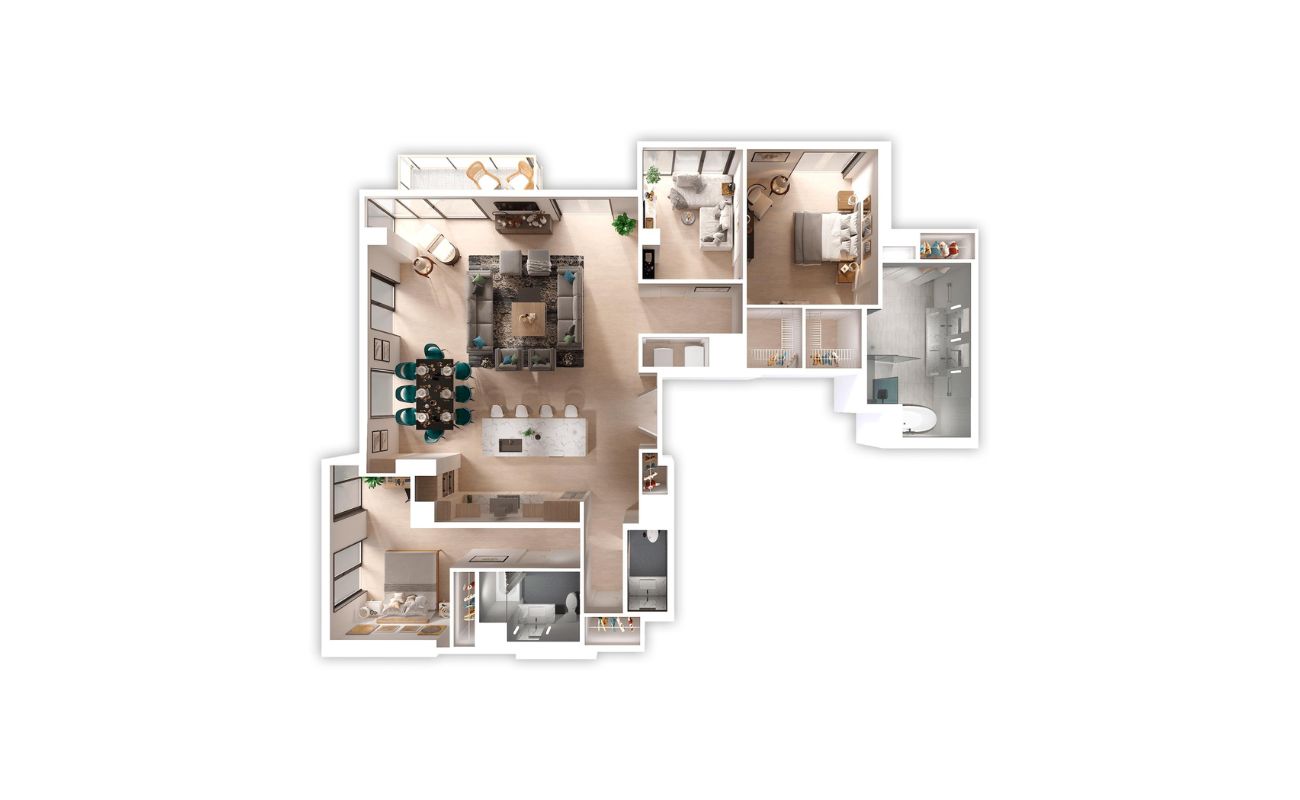
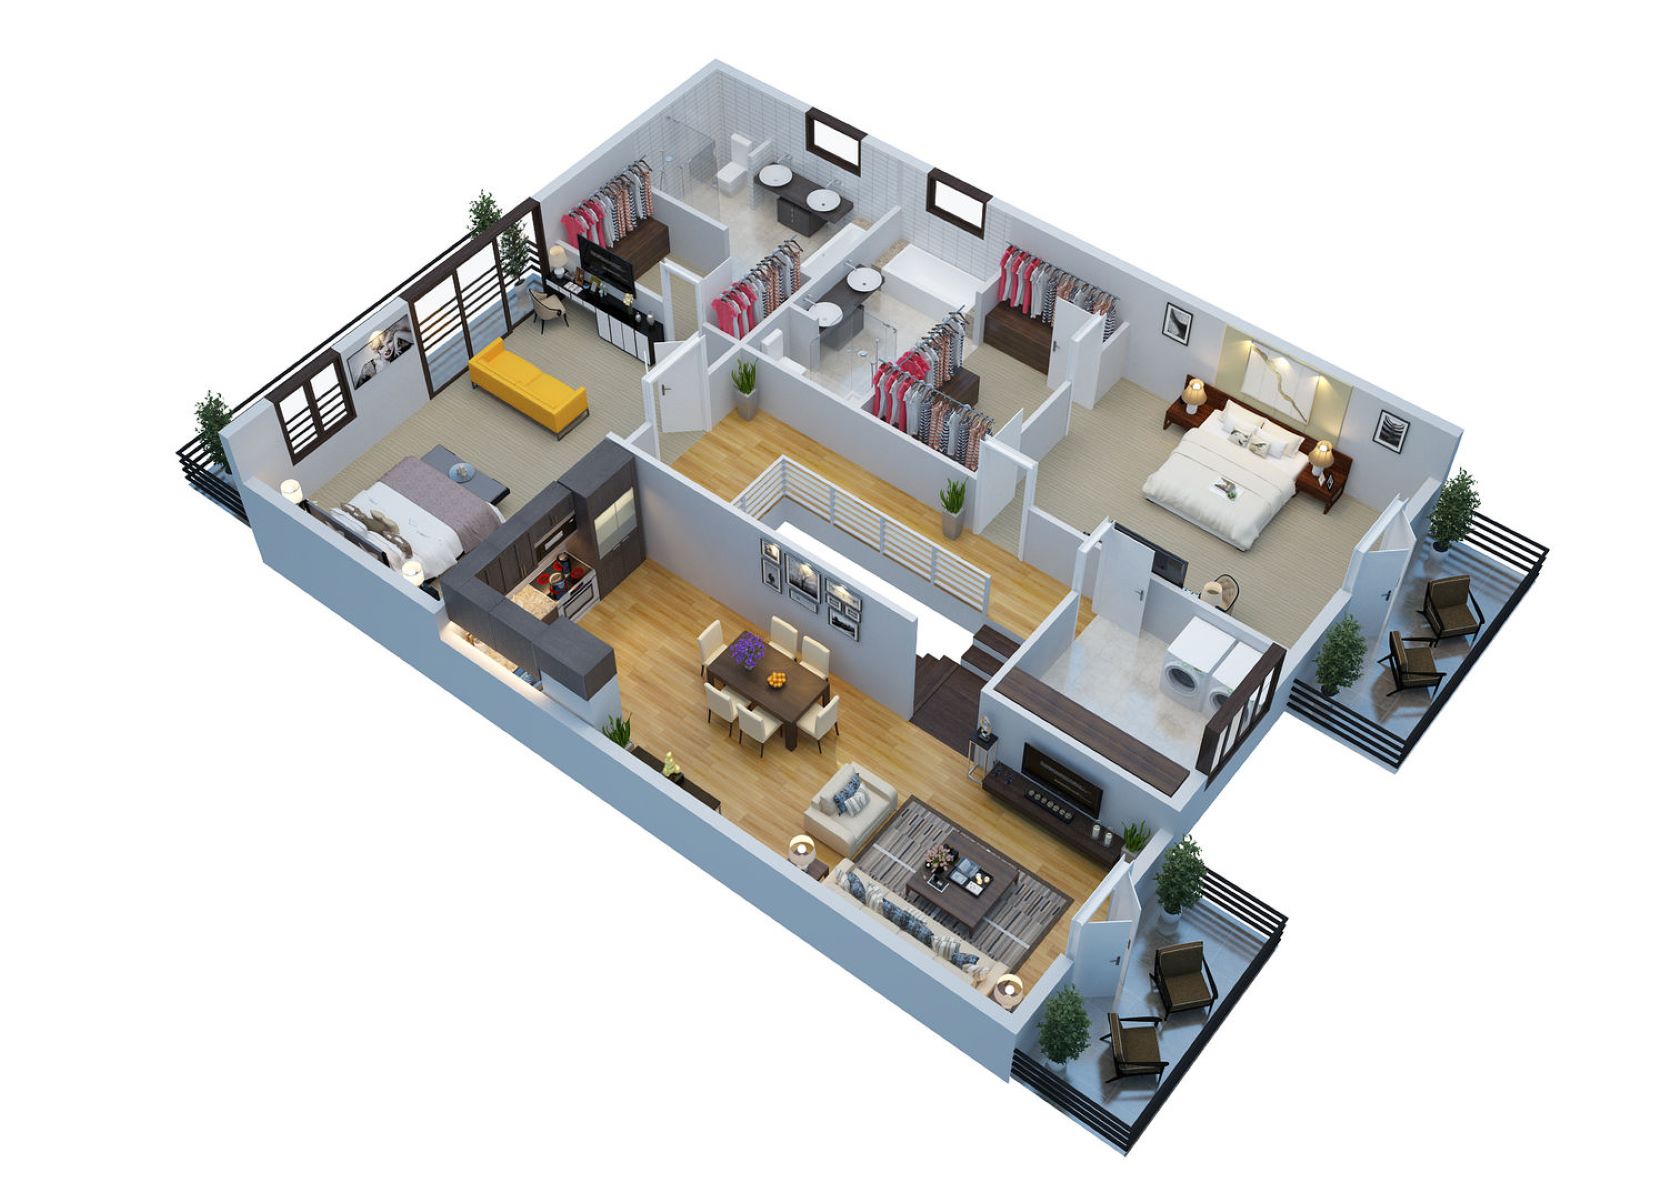
Designing the layout for a house is an exciting and crucial step in the construction process. A well-thought-out floor plan not only maximizes the functionality and flow of the space but also adds to the overall aesthetic appeal of the home. Whether you’re building your dream house from scratch or renovating an existing property, creating a house floor plan is a fundamental aspect of the design process.
In this article, we will outline a step-by-step guide on how to create a house floor plan. From determining your needs and goals to adding the finishing touches, we will explore the key factors to consider at each stage of the process. By following these steps, you can ensure that your house floor plan meets your requirements and reflects your personal style.
So, let’s dive into the world of architectural design and unlock the secrets to crafting the perfect house floor plan!
Key Takeaways:
- Designing a house floor plan involves understanding your needs, measuring the space, creating a rough sketch, determining room layouts, and adding finishing touches to create a personalized and functional living space.
- Incorporating windows, doors, furniture placement, and essential fixtures into your house floor plan is crucial for optimizing functionality, natural light, and overall aesthetic appeal.
Read more: How To Design A House Floor Plan
Step 1: Determine your needs and goals
Before diving into the specifics of creating a house floor plan, it’s important to first clarify your needs and goals. Take some time to think about how you intend to use the space and what features are essential for your lifestyle.
Start by considering the number of bedrooms and bathrooms required for your family or future occupants. Think about your daily routines and how the layout can accommodate your activities. Are you someone who enjoys hosting dinner parties or do you need a dedicated home office space? Understanding your unique needs will help guide the rest of the design process.
Furthermore, consider any special requirements that may arise from factors such as accessibility needs, elderly family members, or potential future expansions. Taking these factors into account from the beginning will save you time and resources in the long run.
Additionally, think about the style and design aesthetic that you desire for your home. Are you drawn to modern, minimalist layouts or do you prefer a more traditional and cozy atmosphere? Having a clear vision of your preferred architectural style will help inform the design choices you make throughout the floor planning process.
Lastly, establish your budget. Determining your financial limitations will allow you to prioritize your needs and make informed decisions regarding the size and scope of your project.
By taking the time to assess your needs, goals, and budget, you will be better equipped to create a house floor plan that fulfills your requirements and brings your vision to life.
Step 2: Measure the space
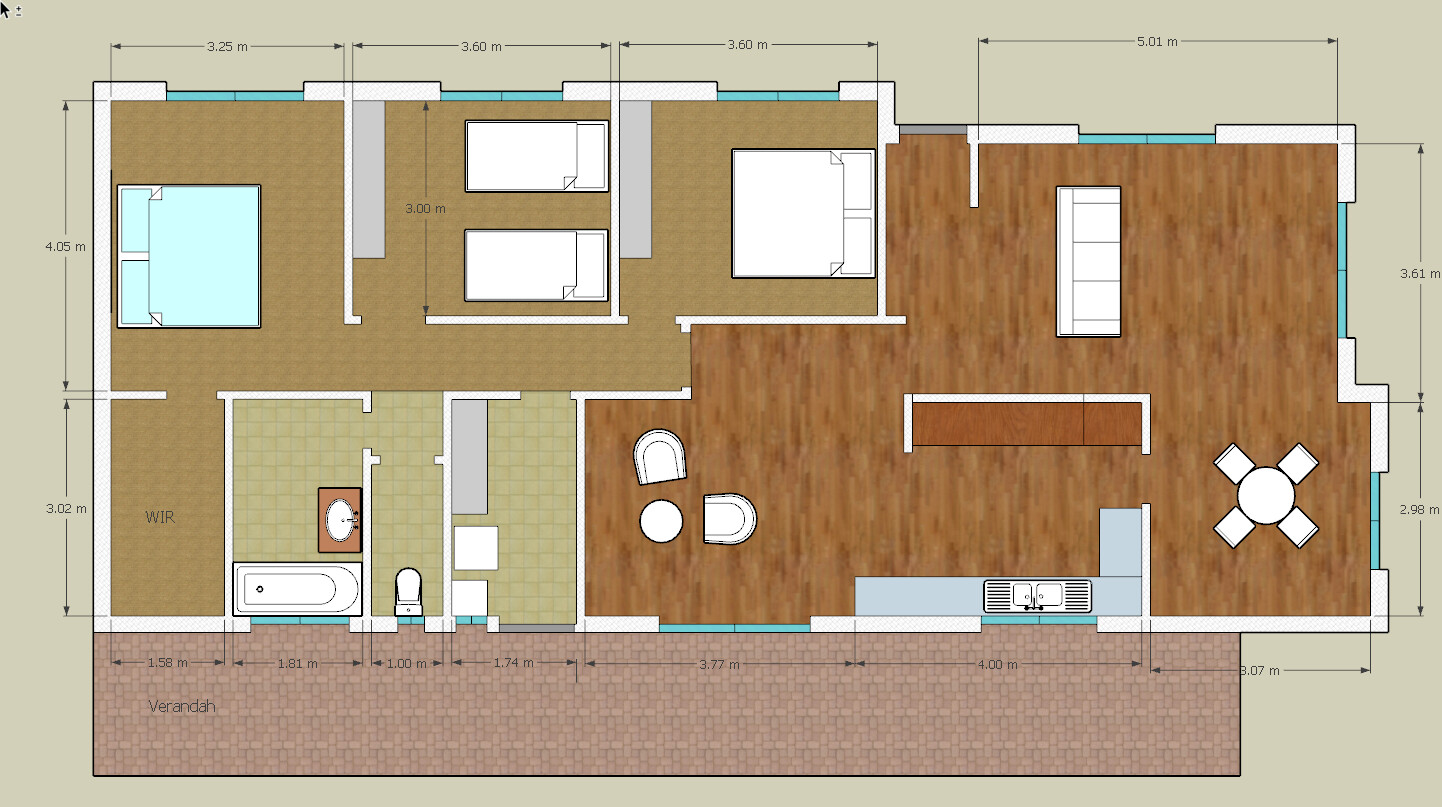
With a clear understanding of your needs and goals, it’s time to gather accurate measurements of the space you’re working with. Measuring the area is essential to ensure that your floor plan accurately reflects the dimensions of the rooms and the overall layout.
Start by grabbing a measuring tape and a notebook to record your measurements. Begin at one corner of the room and measure the length of each wall, making sure to note any alcoves, nooks, or architectural features that may affect the layout.
When measuring, be precise and double-check your measurements to avoid any errors that could lead to costly mistakes down the line. Measure the height of the walls as well, as this information will be crucial when determining door and window placements.
If you’re working with an existing structure, pay attention to the location of electrical outlets, plumbing fixtures, and any other fixed elements that cannot be easily moved. These will need to be considered in the design process, as they can impact the layout and placement of furniture.
If you’re starting from scratch or have the opportunity to modify the existing space, it’s helpful to mark the desired locations of utilities, such as electrical outlets and plumbing connections, to ensure that your floor plan aligns with your needs.
Remember to measure not only the interior space but also any outdoor areas, such as patios, decks, or garden spaces, that you may want to incorporate into your floor plan.
By meticulously measuring the space, you will have a solid foundation to begin creating your house floor plan. Accurate measurements will help you visualize how your future home will fit within the existing space and allow for efficient utilization of every inch.
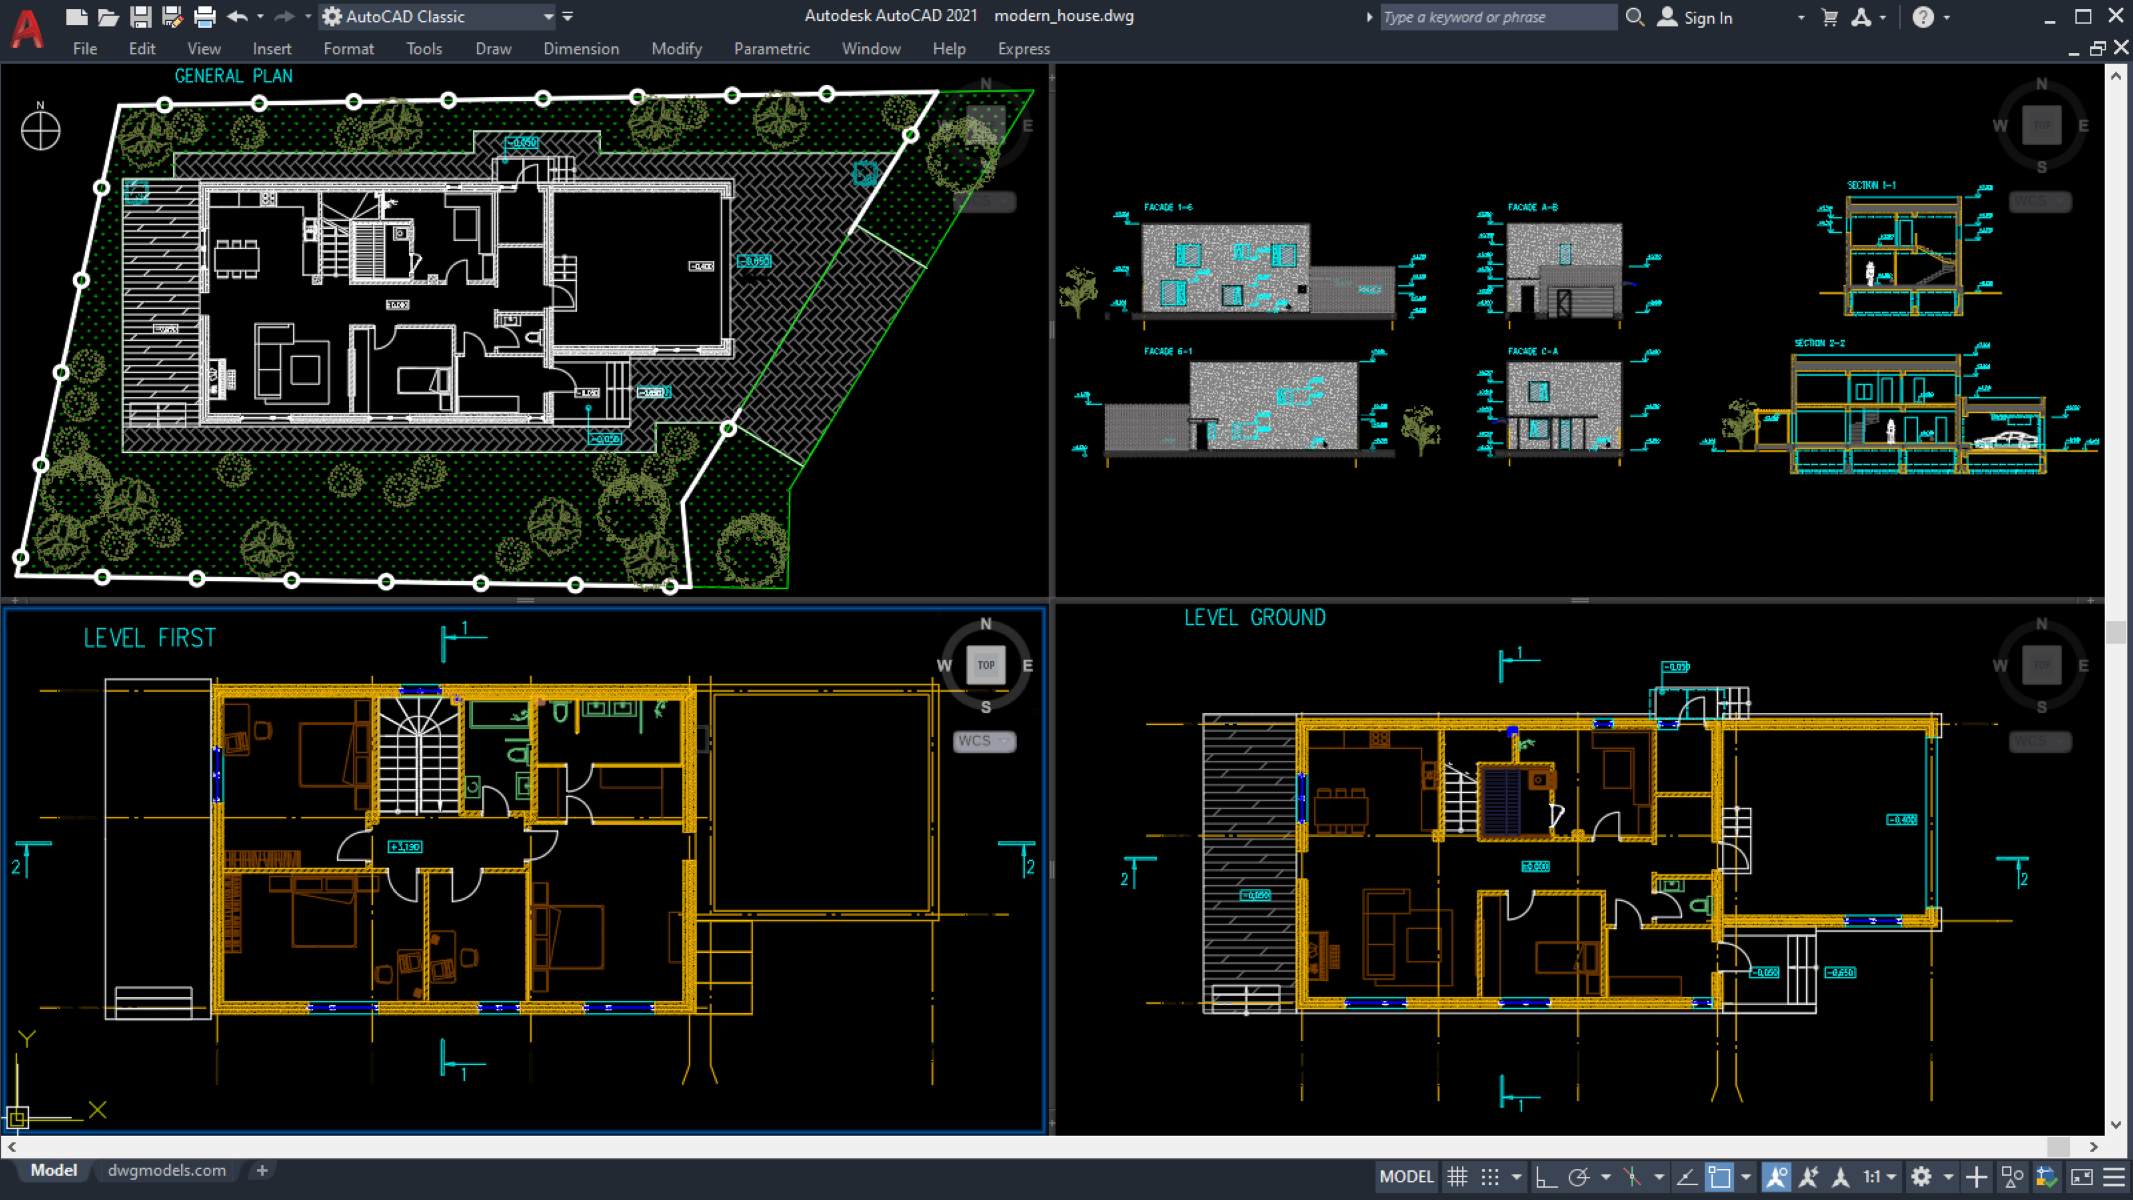
Step 3: Create a rough sketch
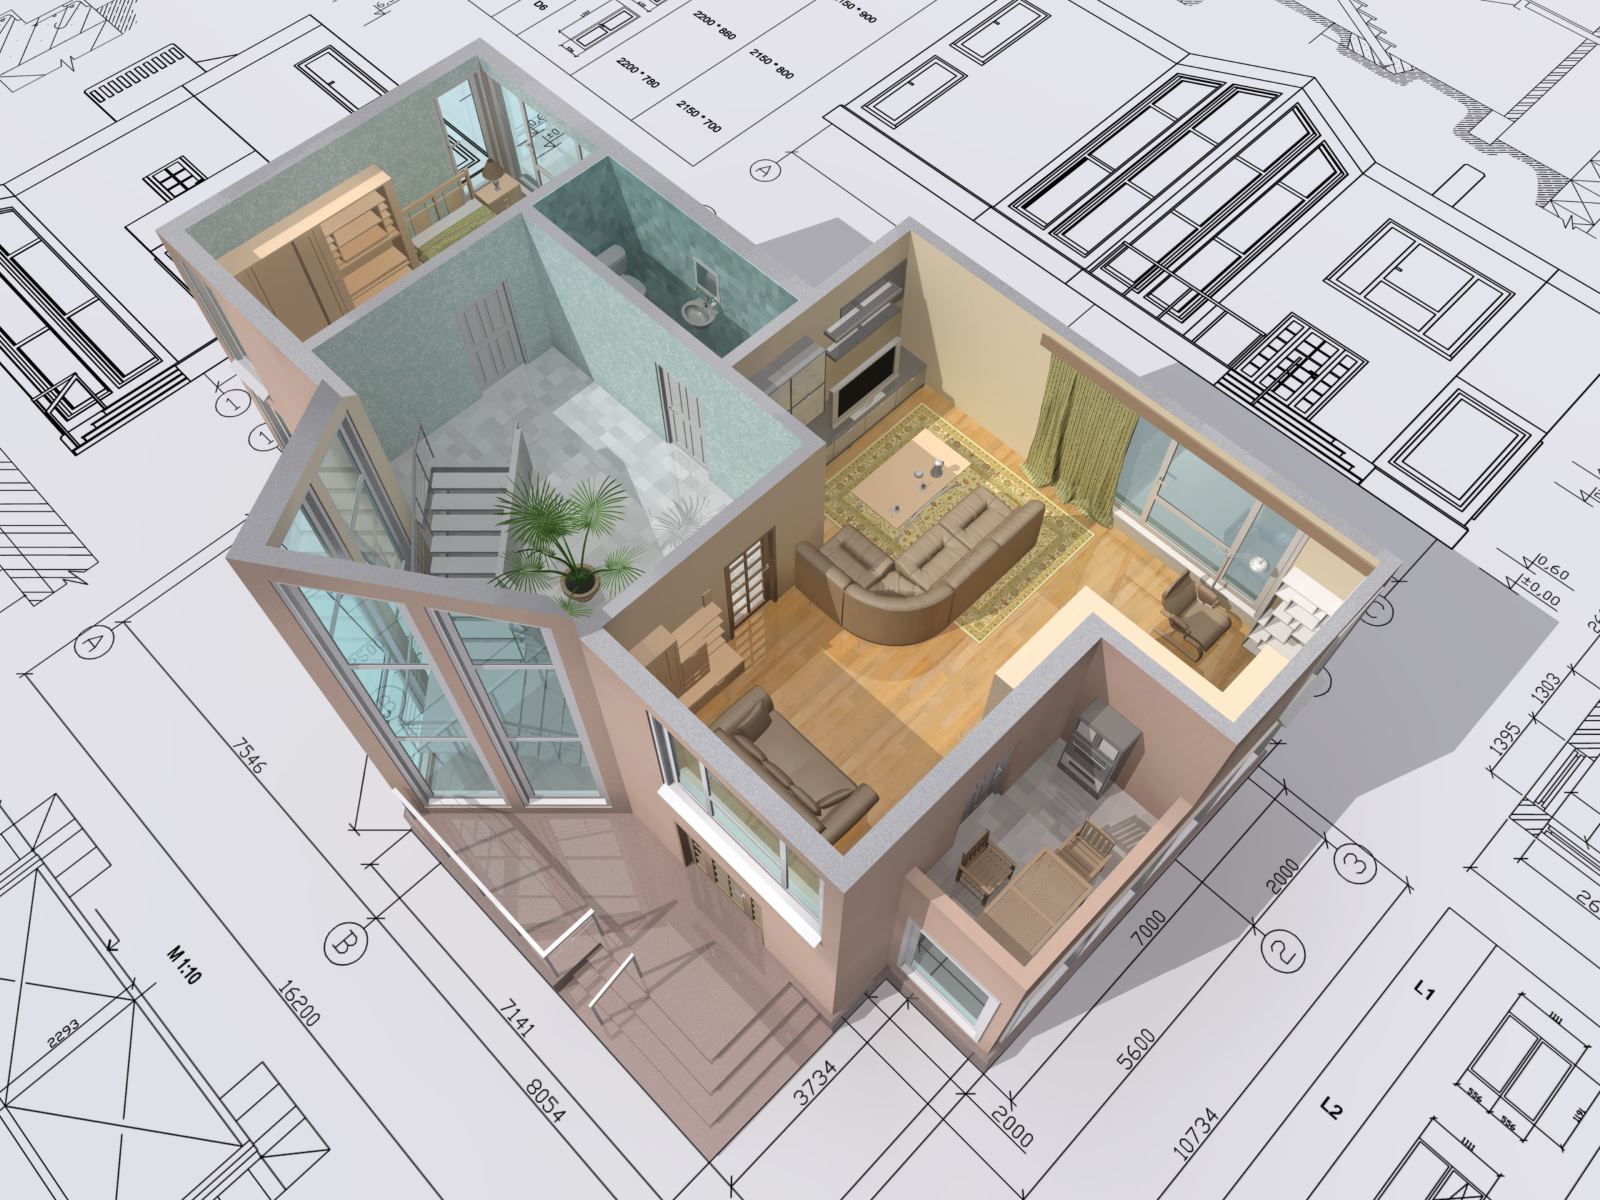
Now that you have gathered the necessary measurements, it’s time to create a rough sketch of your house floor plan. This will serve as a preliminary visual representation of the layout and help you visualize the overall design.
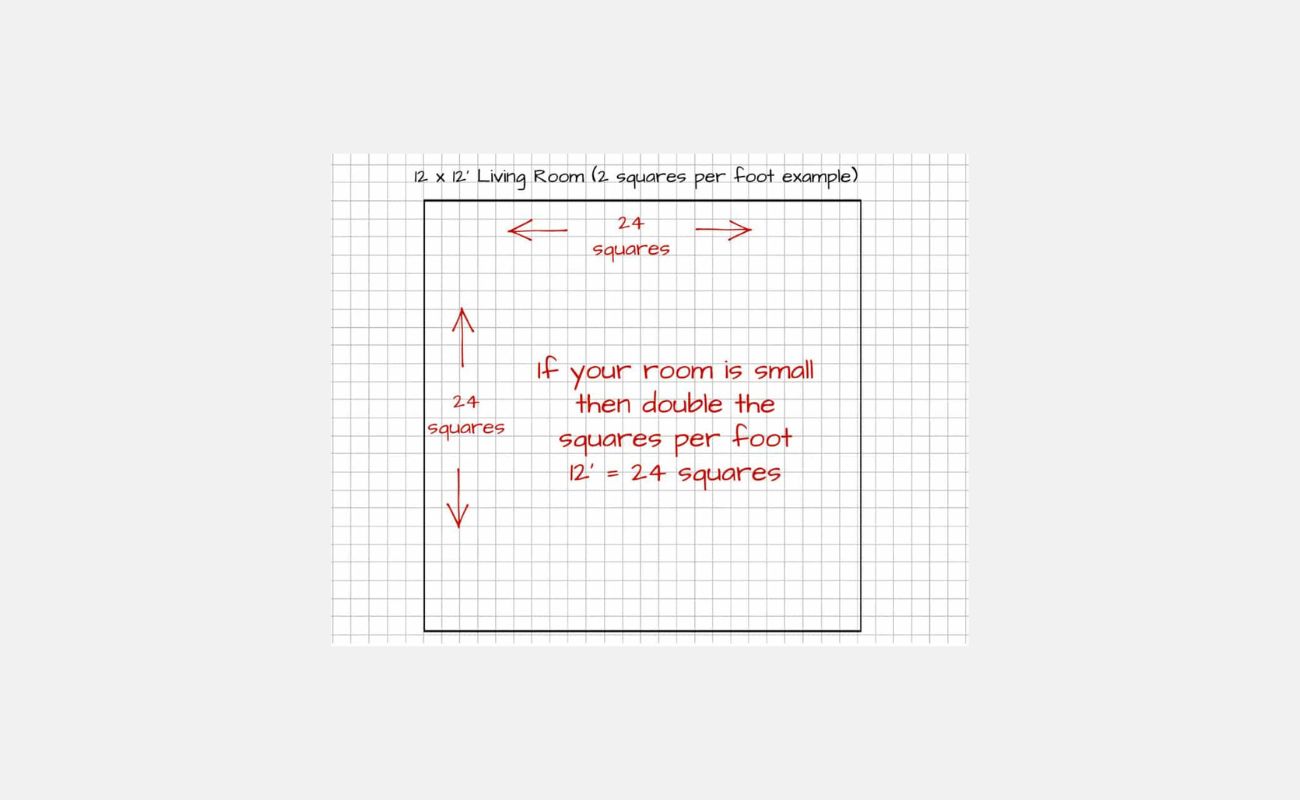
Start by drawing a basic outline of the entire floor plan on graph paper or using a digital design tool. Begin with the exterior walls and work your way inward, including any hallways, room divisions, and structural elements such as staircases or columns.
Keep in mind that this is an initial sketch, so don’t worry about being too precise or detailed at this stage. Focus on capturing the overall flow and general arrangement of the rooms. However, ensure that your sketch accurately reflects the proportions and dimensions of the space based on the measurements you took in the previous step.
It’s helpful to use different symbols or colors to represent different rooms and areas. For example, you can use rectangles for bedrooms, circles for bathrooms, and squares for living areas. This will make it easier to visualize the various spaces and their relationship to one another.
As you sketch, consider elements such as traffic flow, natural light, and privacy. Aim for a layout that allows for easy movement between rooms and ensures that each space receives sufficient natural light. Additionally, think about how you can maintain privacy in bedrooms and bathrooms by placing them away from high-traffic areas.
Don’t be afraid to experiment with different arrangements and configurations. This rough sketching phase is the perfect opportunity to explore different possibilities and find a layout that best suits your needs and preferences.
Once you’re satisfied with the basic sketch, you can move on to the next step of refining the details and adding more specific design elements to your house floor plan.
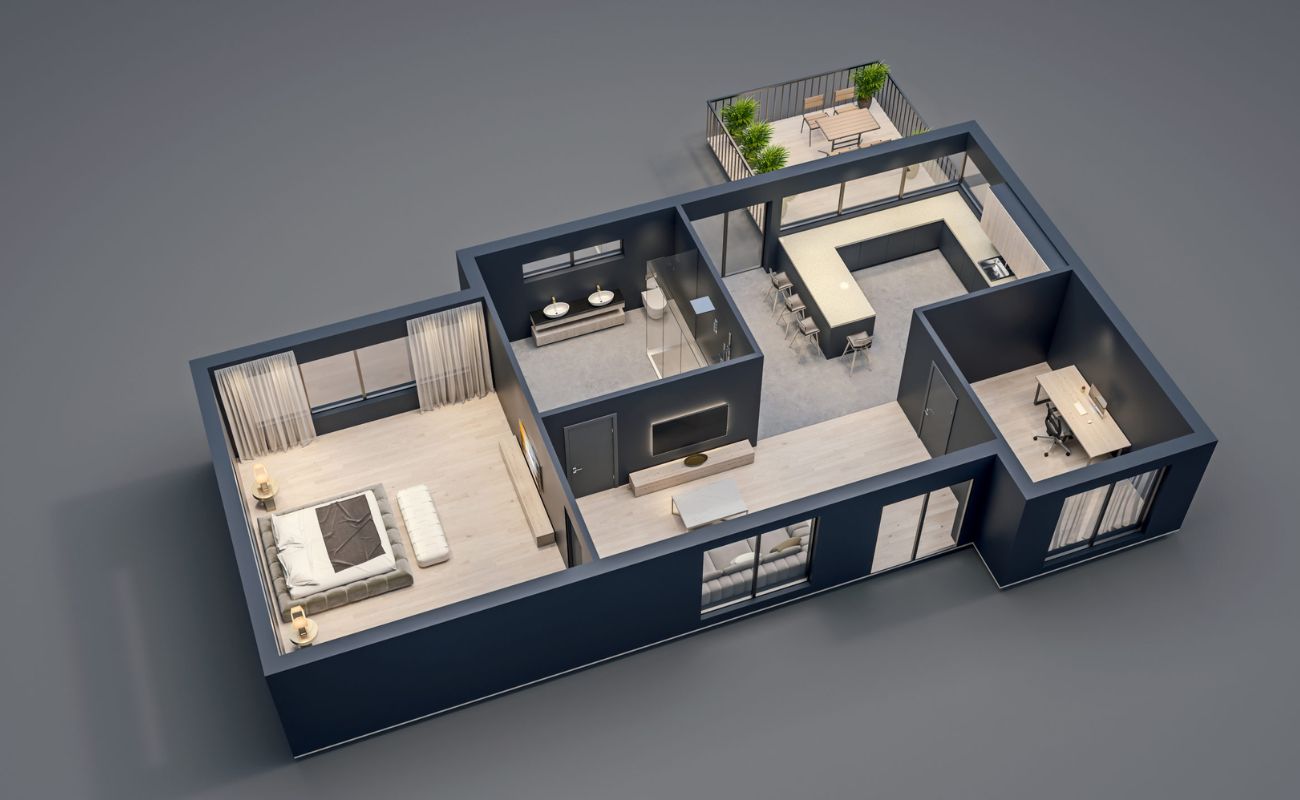
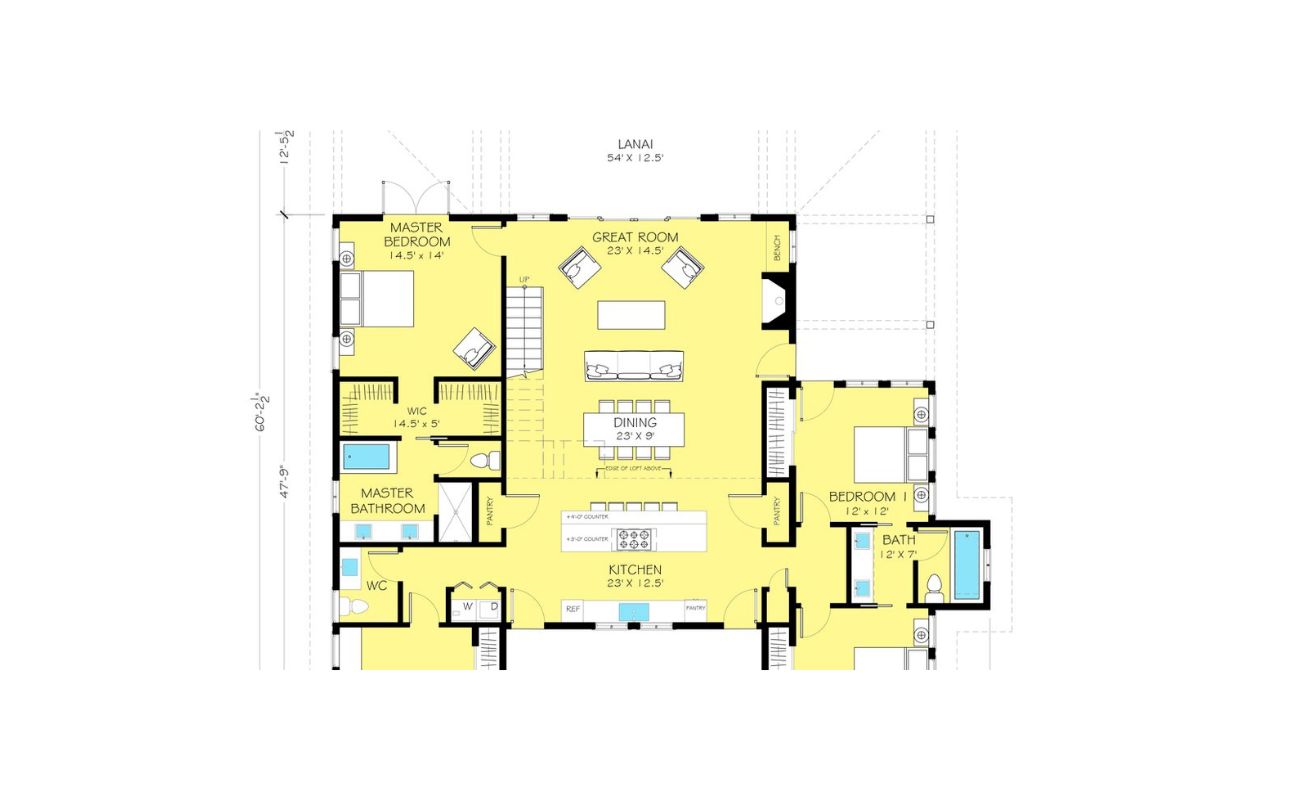
Step 4: Determine the room layout
With the rough sketch in place, it’s time to focus on determining the specific layout of each room within your house floor plan. This step involves carefully considering the function and purpose of each space and how they will relate to one another.
Start by prioritizing the placement of essential rooms such as bedrooms, bathrooms, and the kitchen. These rooms are typically the core elements of a house and should be given careful consideration when allocating space.
Consider the size and orientation of each room. Bedrooms should be spacious and comfortable, allowing for furniture placement and sufficient walking space. Bathrooms should be easily accessible and ideally located near the bedrooms or main living areas.
When it comes to the kitchen, think about the workflow and functionality. The placement of major appliances such as the refrigerator, stove, and sink should be efficient, allowing for easy access and movement within the space. Consider incorporating an island or a designated space for dining if it fits your needs and style.
Next, determine the layout of the living areas such as the living room, dining room, and family room. Consider how these spaces will flow together and create a cohesive and comfortable environment for daily activities and gatherings. Think about options for open-concept designs that encourage interaction and communication between different areas.
If you have specific needs or desires, such as a home office, a laundry room, or a dedicated media room, now is the time to allocate space for them within your floor plan. Consider the size and location of these rooms to ensure they serve their intended purpose effectively.
During this step, it’s essential to consider factors such as natural light, views, and privacy. Arrange rooms in a way that takes advantage of natural light, with windows strategically placed to enhance the ambiance and energy efficiency of the space. Pay attention to the views outside and consider how the placement of rooms can optimize access to pleasant views or create privacy in areas where it’s needed.
Remember, the room layout should be a reflection of your lifestyle and preferences. Take the time to consider how you will use each space and how it relates to your day-to-day activities. This will help you create a functional and harmonious house floor plan that suits your needs and enhances your quality of life.
Step 5: Add windows and doors
Windows and doors are essential elements in a house floor plan as they not only provide functional access and natural light but also contribute to the overall aesthetic appeal of the space. Adding windows and doors to your floor plan requires careful consideration of their placement and size to optimize both functionality and visual impact.
Start by assessing the orientation and views of your property. Consider where the sunlight enters throughout the day and how you can maximize natural light in each room. Strategically placing windows on the south-facing side can harness sunlight and provide warmth, while windows on the north-facing side can offer more even lighting conditions.
Think about the purpose of each room and how the windows will serve that purpose. Bedrooms may benefit from larger windows for natural light, while bathrooms may require smaller windows for privacy. Living areas and kitchens can benefit from larger and strategically placed windows to create an open and airy atmosphere.
When adding doors, consider the flow and accessibility of each room. Place doors in locations that make sense for easy movement between spaces and optimize privacy where needed. Think about the swing direction of each door and ensure it does not obstruct pathways or furniture arrangements.
Another consideration when adding windows and doors is their size and style. Choose window and door styles that complement the architectural design and overall aesthetic of your home. Consider the visual impact both from the interior and exterior and how they will affect the overall curb appeal.
Additionally, take into account the energy efficiency aspect of windows and doors. Consider choosing high-quality, energy-efficient windows that can help with insulation and reduce heating and cooling costs in the long run.
By thoughtfully incorporating windows and doors into your house floor plan, you can create a space that is filled with natural light, offers optimal functionality, and showcases the beauty of your home inside and out.
When making a house floor plan, consider the flow of the space, natural light, and functionality of each room. Take accurate measurements and use graph paper to sketch out the layout to scale.
Step 6: Include furniture placement
Now that you have established the layout and design of your house floor plan, it’s time to consider furniture placement. Proper furniture arrangement ensures that your space is not only functional but also comfortable and visually appealing.
Begin by considering the function of each room and the type of furniture that will be needed. Determine the focal points of each room, such as a fireplace, TV, or a beautiful view, and plan the furniture arrangement accordingly. Consider how you want the furniture to facilitate conversation, provide comfort, and enhance the overall flow of the space.
Measure your furniture to ensure that it will fit properly within each room. This step is crucial, as oversized or improperly placed furniture can make a room feel cramped or hinder the flow of movement. Arrange furniture in a way that creates clear pathways and allows for easy access to doorways and windows.
Keep in mind the scale and proportion of the furniture in relation to the size of the room. Oversized furniture in a small space can make it feel crowded, while small furniture in a large room can appear insignificant. Aim for a balanced and harmonious arrangement that complements the scale of each room.
Consider the functionality and use of each area when arranging furniture. In the living room, position seating areas to facilitate conversation and create a comfortable gathering space. In the dining room, ensure that there is ample space for chairs to be pulled out without obstruction. In bedrooms, place furniture in a way that supports a restful and peaceful environment.
Don’t forget to consider storage options when arranging furniture. Integrate furniture pieces that provide storage solutions, such as built-in shelves, cabinets, or ottomans with hidden compartments. This will help optimize space utilization and keep your home organized.
Visualize how the furniture placement will impact the flow and functionality of the space. Consider the sightlines and how different elements in each room will interact with one another. Experiment with different arrangements until you find the most efficient and visually pleasing layout.
By incorporating furniture placement into your house floor plan, you can create living spaces that are functional, comfortable, and visually appealing. Take the time to consider the needs of each room and how furniture can optimize its use and enhance the overall design of your home.
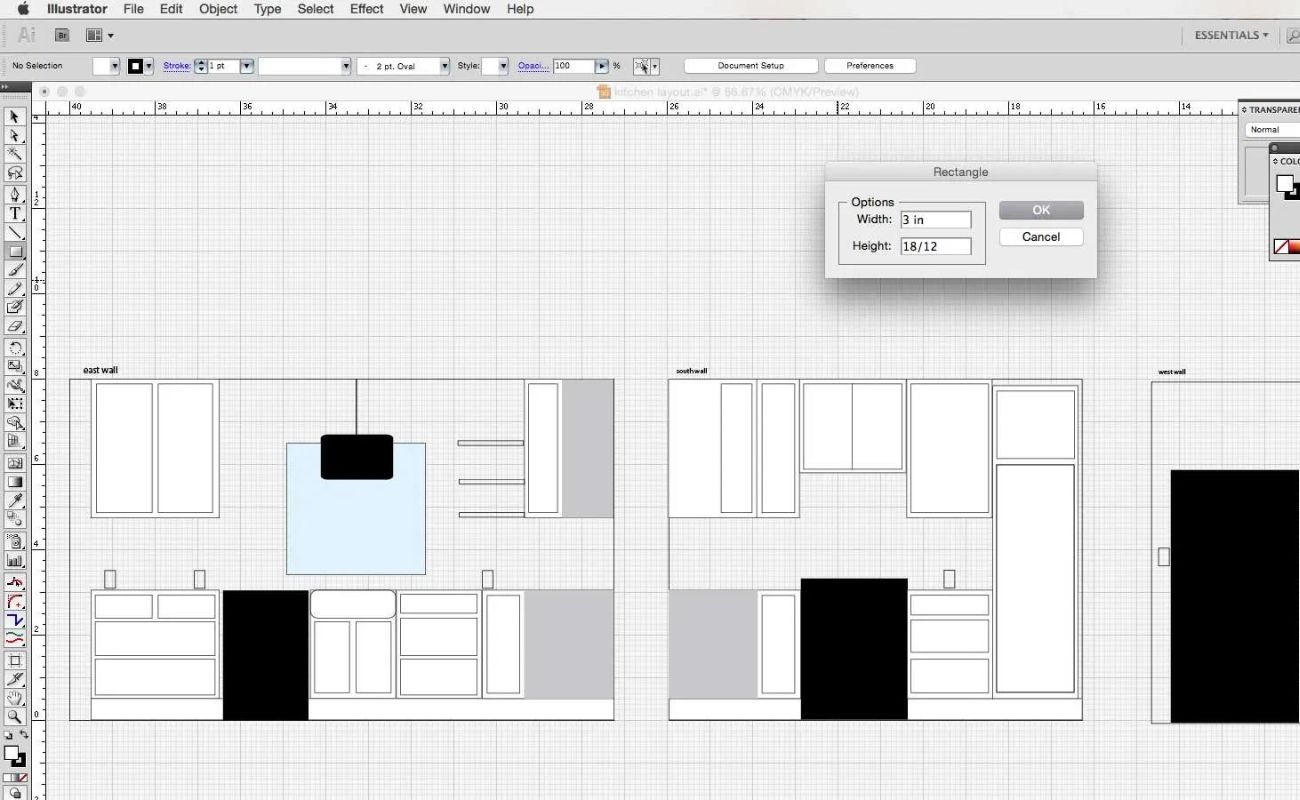
Step 7: Add electrical and plumbing fixtures
Once you have determined the layout and furniture placement in your house floor plan, it’s time to incorporate essential electrical and plumbing fixtures. These fixtures are crucial to ensure the functionality and convenience of your home, so careful consideration must be given to their placement.
Start by identifying the key areas in your home that require electrical outlets. Think about where you will need outlets for appliances, lighting fixtures, and electronic devices. Plan for outlets to be conveniently located in areas such as the kitchen countertops, living room walls, bedrooms, and home office spaces.
Consider the specific needs of each room when adding electrical fixtures. In the kitchen, incorporate outlets for large appliances, such as the refrigerator, stove, and microwave, as well as additional outlets for small kitchen gadgets and countertop appliances. In bedrooms and living areas, ensure that there are enough outlets for lamps, entertainment systems, and charging stations.
When it comes to plumbing fixtures, focus on the placement of sinks, toilets, and showers or bathtubs. Consider practicality and comfort when deciding where to position these fixtures. Ensure that plumbing lines are easily accessible and properly connected.
In bathrooms, consider the layout that suits your needs, whether it’s a single or double vanity, a bathtub, or a shower stall. Think about the convenience of having a toilet in a separate area for privacy. Incorporate storage options, such as bathroom cabinets or shelves, to accommodate toiletries and towels.
While incorporating electrical and plumbing fixtures, it’s essential to follow building codes and regulations to ensure safety and compliance. Consult with professionals if you’re unsure about specific requirements or need assistance with installation.
By incorporating electrical and plumbing fixtures into your house floor plan, you will have a well-equipped and functioning home. Proper placement of outlets and fixtures will enhance the functionality and convenience of your space, making everyday tasks easier and more efficient.
Step 8: Consider structural elements
When creating a house floor plan, it’s essential to take into account the structural elements of your home. These elements provide support, stability, and safety, and should be carefully considered to ensure a well-designed and structurally sound space.
Start by taking note of existing structural elements, such as load-bearing walls, beams, and columns. These elements play a vital role in supporting the weight of your home and should not be removed or altered without consulting a structural engineer.
Consider the placement of stairs if your floor plan includes multiple levels. Determine the most convenient and aesthetically pleasing location for the stairs, ensuring that they are easily accessible and fit comfortably within the overall design of your home.
Take into account the height of the ceilings and the placements of windows. Higher ceilings can create a sense of space and openness, while strategically placed windows can provide natural light and ventilation.
If you’re designing an open-concept layout, consider the need for support beams or columns to maintain the structural integrity of the space. These elements can also be incorporated as architectural features, adding character and visual interest to your home.
Additionally, think about the overall weight distribution and how it will impact the structural components of your home. For example, if you plan to include heavy furniture or appliances on an upper level, ensure that the necessary structural support exists to handle the weight.
During this step, it’s crucial to consult with architects or structural engineers to ensure that your design aligns with your home’s structural requirements. They will be able to provide expert advice and guidance to make sure that your floor plan is safe and complies with building codes.
By considering the structural elements in your house floor plan, you can create a space that is not only visually appealing but also safe and structurally solid. Taking the time to incorporate these elements will give you peace of mind knowing that your home is built on a strong foundation.
Read more: How To Make A Restaurant Floor Plan
Step 9: Add finishing touches
As you near the completion of your house floor plan, it’s time to add the finishing touches that will truly bring your vision to life. These details will enhance the aesthetics and functionality of your space, creating a warm and inviting atmosphere.
Start by considering the materials and finishes that you want to incorporate into your home. This includes options such as flooring, wall finishes, cabinetry, countertops, and fixtures. Choose materials and finishes that align with your personal style and complement the overall design concept of your home.
Consider the color palette for each room and how it will contribute to the mood and ambiance. Select colors that create a cohesive and harmonious flow between spaces while reflecting your personal taste. Experiment with different shades and combinations to find the perfect balance.
Lighting is another important aspect of the finishing touches. Determine the types of lighting fixtures that will best suit each area and enhance the functionality and aesthetics. Consider a combination of ambient, task, and accent lighting to create the desired atmosphere and highlight architectural features or artwork.
Think about the placement of built-in storage options, such as closets, shelves, and cabinets. This will help optimize space utilization and keep your home organized. Incorporate design elements, such as moldings, trim, and decorative accents, to add depth and visual interest.
Lastly, don’t forget about the exterior of your home. Consider landscaping options, outdoor living spaces, and the placement of amenities such as patios, decks, or gardens. These elements contribute to the overall curb appeal and can create beautiful outdoor areas for relaxation and entertainment.
Throughout this step, pay attention to the small details that make a big difference. Consider how accessories, such as artwork, curtains, rugs, and decorative items, can enhance the overall aesthetic and personalization of each room.
By adding the finishing touches to your house floor plan, you will create a space that feels complete and reflects your unique style and personality. These final details will transform your house into a home, making it a place you can truly call your own.
Conclusion
Congratulations! By following the step-by-step guide outlined in this article, you have learned how to create a comprehensive and engaging house floor plan. From determining your needs and goals to adding the finishing touches, each step plays a vital role in shaping the perfect home for you and your family.
A well-designed floor plan not only maximizes functionality and flow but also creates a space that reflects your personal style and enhances your quality of life. By considering factors such as room layout, furniture placement, electrical and plumbing fixtures, and structural elements, you can create a home that meets your needs and fulfills your vision.
Remember to continuously reassess and refine your floor plan throughout the process. Explore different options, experiment with arrangements, and seek professional guidance when needed. Your house floor plan should evolve and adapt as your preferences and lifestyle evolve.
Once your floor plan is finalized, it’s time to bring it to life and start constructing or renovating your dream home. Working with architects, designers, and builders, ensure that your floor plan is implemented accurately and meets all building codes and regulations.
Creating a house floor plan is an exciting journey that allows you to shape your living space according to your unique needs and style. Take the time to carefully consider each step, infuse it with creativity, and prioritize your happiness and comfort. Your home should be a reflection of your personality, a sanctuary that welcomes you at the end of each day.
So, armed with your newfound knowledge, go forth and create the house of your dreams. Happy designing!
Frequently Asked Questions about How To Make A House Floor Plan
Was this page helpful?
At Storables.com, we guarantee accurate and reliable information. Our content, validated by Expert Board Contributors, is crafted following stringent Editorial Policies. We're committed to providing you with well-researched, expert-backed insights for all your informational needs.


0 thoughts on “How To Make A House Floor Plan”