Home>diy>Architecture & Design>How To Design A House In Revit
Architecture & Design
How To Design A House In Revit
Modified: August 23, 2024
Learn how to design a house in Revit with our comprehensive guide. Explore the world of architecture design and create stunning structures.
(Many of the links in this article redirect to a specific reviewed product. Your purchase of these products through affiliate links helps to generate commission for Storables.com, at no extra cost. Learn more)
Introduction
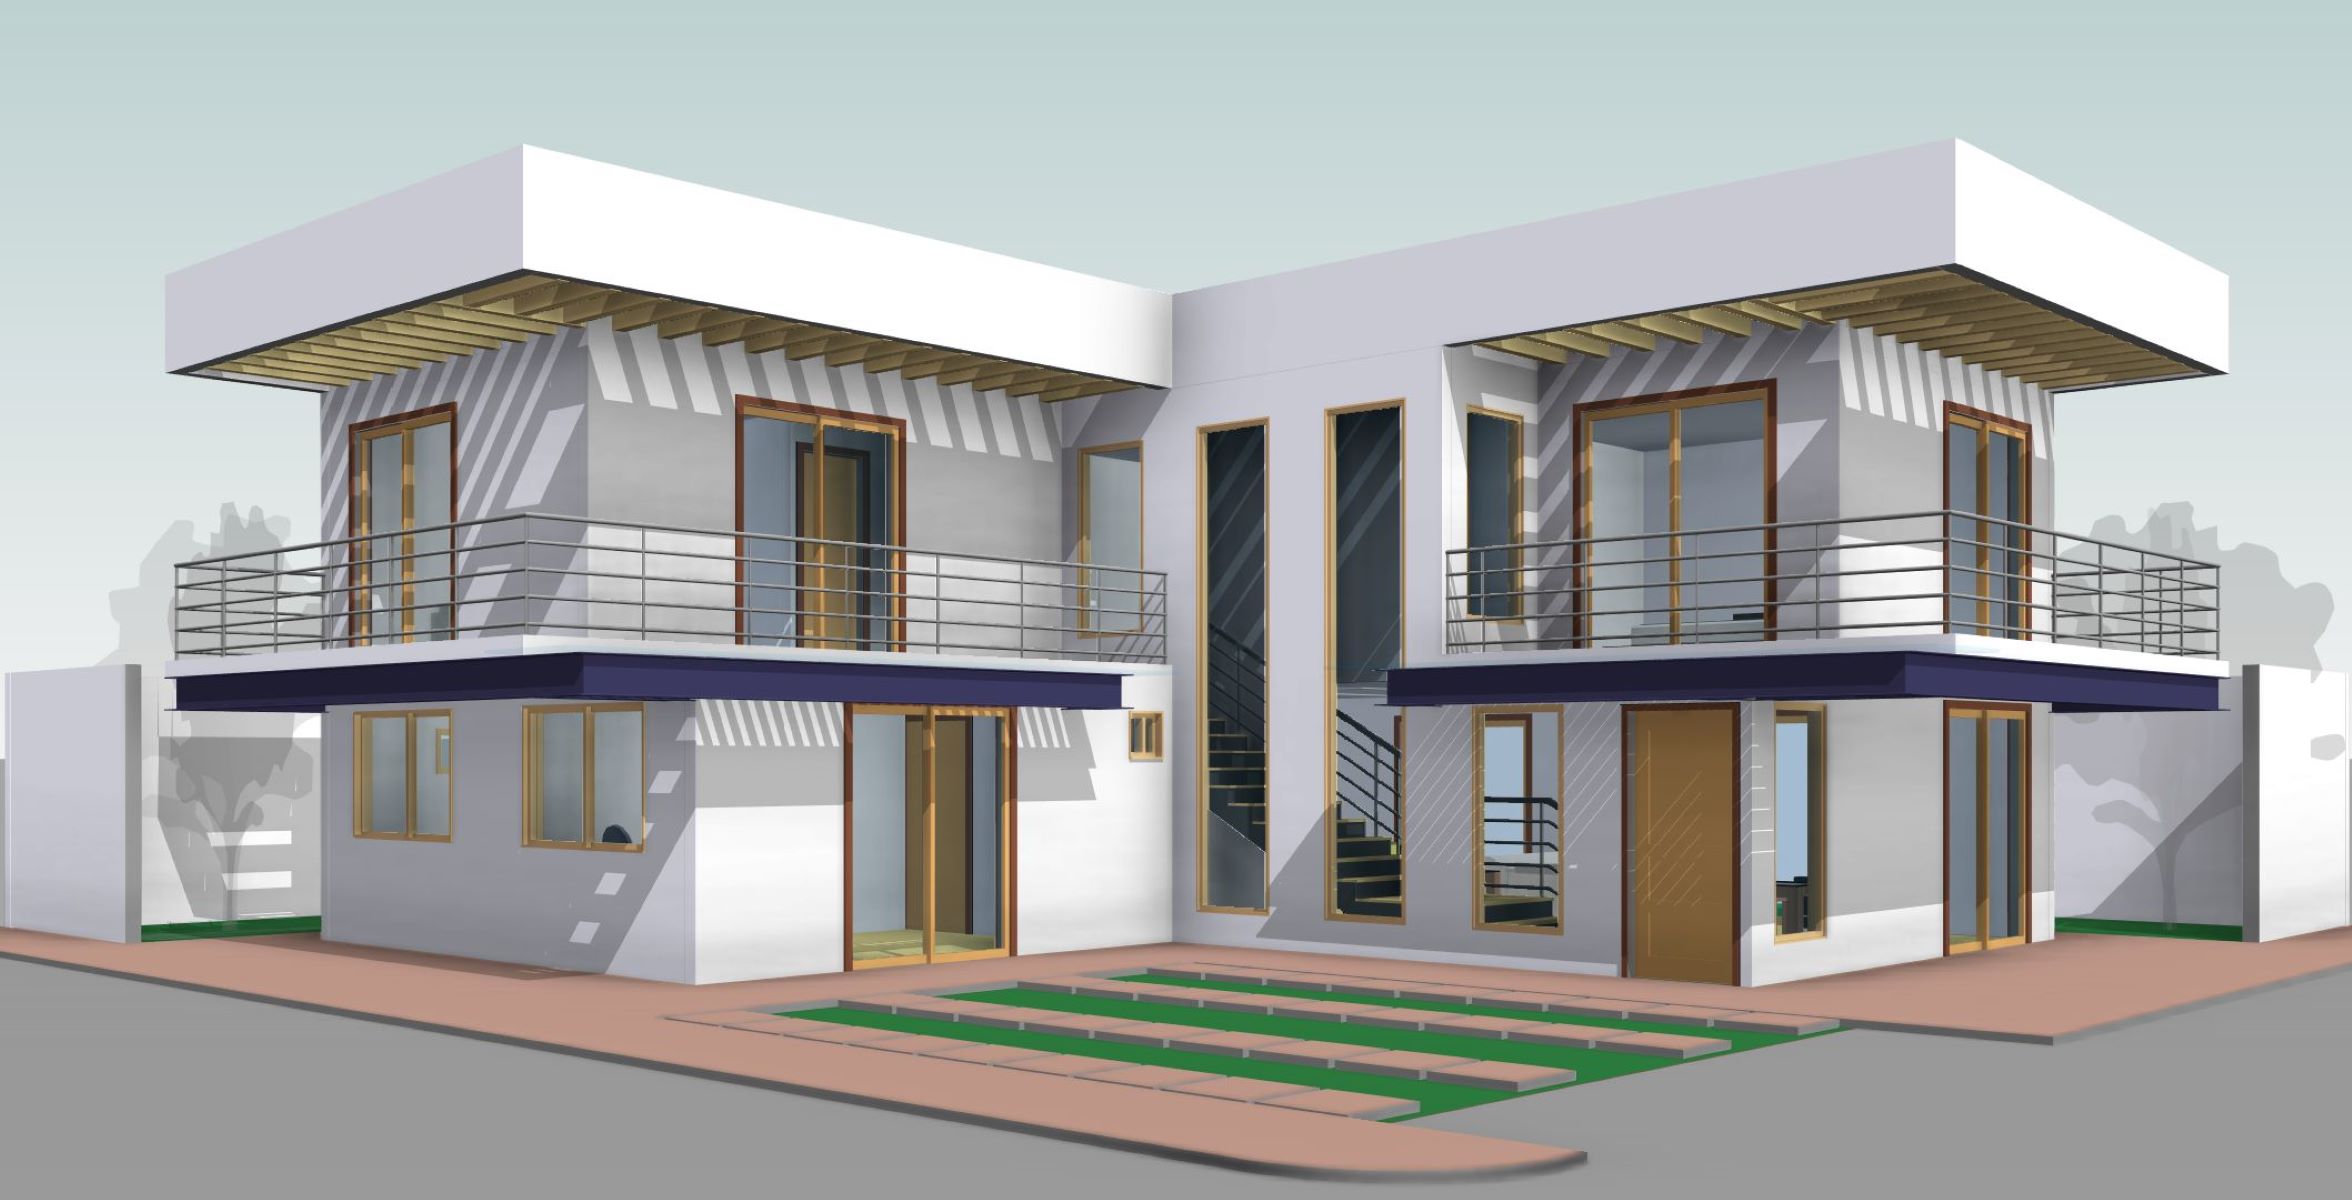
Welcome to the exciting world of architectural design using Revit! Whether you’re a professional architect or an aspiring designer, Revit offers the perfect platform to create stunning house designs.
Revit is a powerful architectural software developed by Autodesk that allows designers to create, visualize, and document building designs. With its robust features and intuitive interface, Revit has become a go-to tool for architects and designers around the world.
In this article, we will guide you through the process of designing a house in Revit, from setting up the project to adding the final touches. We will explore the various tools, techniques, and best practices that will help you create a well-structured and visually appealing house design.
Before we dive into the intricacies of designing a house in Revit, it’s important to understand the basic principles and advantages of using this software. Revit is a Building Information Modeling (BIM) software, which means that it allows users to create a virtual 3D model of a building, complete with all its elements and information.
One of the key benefits of using Revit is its parametric design capabilities. This means that any change made to one element of the design will automatically update all related elements. For example, if you change the height of a wall, the roof and floor will adjust accordingly.
This parametric design approach helps save time and ensures that the entire design remains coordinated. It also allows for easy exploration of design options, as you can quickly make changes and evaluate their impact on the overall design.
Furthermore, Revit offers a wide range of tools and features specifically tailored for architectural design. From creating detailed floor plans and elevations to adding realistic materials and lighting, Revit provides all the necessary tools to bring your house design to life.
Whether you’re designing a cozy cottage, a modern mansion, or anything in between, Revit offers the flexibility to accommodate your unique design style and requirements.
In the following sections, we will take a step-by-step approach to designing a house in Revit. We will cover everything from setting up the project and creating the basic structure to designing the interior spaces and adding the final finishing touches.
So, let’s get started and unleash your creativity as we embark on a journey to design a beautiful house in Revit!
Key Takeaways:
- Embrace the power of Revit’s parametric design capabilities to create a well-coordinated and visually appealing house design. Utilize its extensive library of families and robust tools to unleash your creativity and bring architectural visions to life.
- From setting up the project to finalizing the design, Revit offers a comprehensive platform for designing stunning houses. Emphasize attention to detail, collaboration, and continuous learning to create visually rich and immersive environments.
Read more: Coral Color: How To Revitalize Your House
Understanding Revit for House Design
Before we begin designing a house in Revit, let’s take a closer look at the key elements and features that make this software ideal for architectural design.
Revit utilizes a parametric modeling approach, which means that the design elements are not simply drawn in isolation, but are intelligent objects that are connected to one another. This parametric nature of Revit allows for efficient design changes and updates throughout the project.
One of the core concepts in Revit is the use of families. Families are pre-built components that represent objects or elements in a design, such as doors, windows, walls, and furniture. These families can be easily customized, allowing you to create a library of reusable objects specific to your design style.
In addition to families, Revit also uses views to present different perspectives of the design. A view can represent a plan, elevation, section, or 3D view of the house. These views can be easily navigated and edited, providing a comprehensive understanding of the design from multiple angles.
Another important aspect of Revit is the ability to generate detailed construction documentation. By utilizing data from the 3D model, Revit can automatically generate accurate and consistent drawings, schedules, and specifications. This streamlines the documentation process and ensures accuracy throughout the design and construction phases.
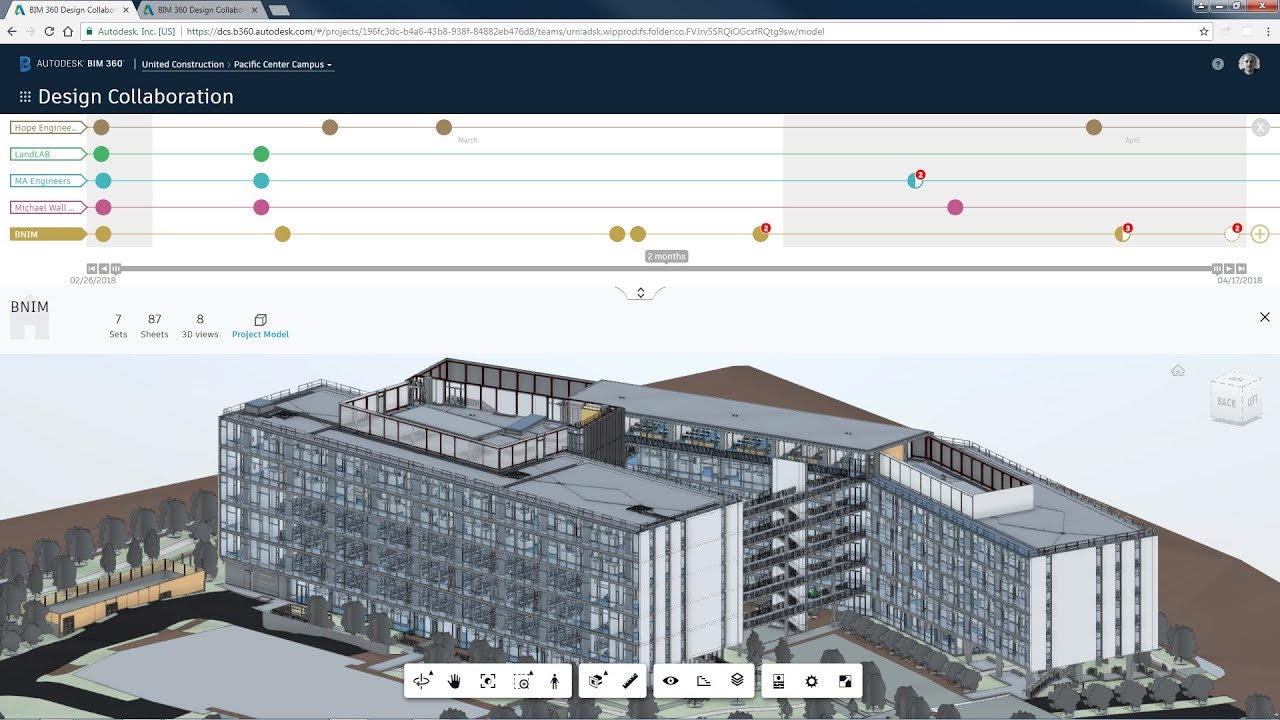
Revit also enables collaboration among multiple team members working on the same project. With features such as worksharing, different team members can work on different parts of the project simultaneously, reducing design conflicts and improving coordination.
Furthermore, Revit offers a wide range of analysis tools that help evaluate the performance of the design. From energy analysis to structural analysis, these tools provide valuable insights that aid in making informed design decisions.
It is worth noting that while Revit is a powerful tool, it does come with a learning curve. Familiarizing yourself with the various tools and workflows may take some time, but with practice and experimentation, you will gain proficiency in designing houses in Revit.
In the next sections, we will delve into the practical aspects of using Revit for house design. We will explore the step-by-step process of setting up the project, creating the basic structure, designing the floor plan, adding walls, doors, and windows, creating the roof, and more.
So, let’s harness the power of Revit and embark on a journey to design a remarkable house!
Setting up the Project in Revit
Before we can start designing a house in Revit, we need to set up the project properly. Setting up the project involves defining key project parameters, such as units of measurement, design phases, and project location.
To begin, open Revit and select “New Project” from the main menu. You will be prompted to choose a template for your project. Revit offers several templates, including architectural, structural, and MEP (mechanical, electrical, and plumbing) disciplines. For house design, select the architectural template.
Once the template is loaded, navigate to the “Project Information” menu. Here, you can enter important project details, such as project name, address, and client information. You can also set the units of measurement, which will determine how measurements are displayed throughout the project.
Additionally, it is important to define the project location, as this information is used to accurately calculate sun positions, daylighting, and energy analysis. To set the project location, click on the “Site” tab and select “Location” from the “Project Location” panel. Enter the latitude and longitude coordinates or search for the location using an address.
Next, it’s crucial to establish the project’s phases or stages. Typical phases for a house design project include schematic design, design development, and construction documents. Defining these phases helps organize the design process and allows for better management of revisions and updates.
Additionally, consider setting up worksets if multiple team members will be collaborating on the project. Worksets allow different team members to work on different parts of the project simultaneously. This enhances collaboration and minimizes conflicts between team members.
Once you have set up the basic project parameters, it’s time to start designing the house! In the following sections, we will explore the step-by-step process of creating the basic structure, designing the floor plan, adding walls, doors, and windows, creating the roof, and more.
Remember to save your project regularly to avoid losing any progress. Revit automatically creates backup files, but it’s always a good practice to save incrementally to ensure you have multiple versions of your project.
Now that the project is set up, let’s move on to the exciting part of designing a house in Revit!
Creating the Basic Structure of the House
Now that we have set up our project in Revit, it’s time to create the basic structure of the house. The basic structure includes the foundation, walls, and floors, which form the backbone of the design.
To begin, navigate to the “Architecture” tab and select “Wall” from the “Build” panel. Choose a wall type from the available options or customize a new wall type to suit your design requirements. Click and drag to draw the exterior walls of the house. You can adjust the length and height of the walls by entering specific values or dragging the handles.
Next, we need to create the foundation. Go to the “Structure” tab and select “Foundation” from the “Build” panel. Choose the appropriate foundation type and draw the outline of the foundation along with any necessary footings. The foundation should align with the walls, providing a sturdy base for the house.
After creating the walls and foundation, it’s time to add the floors. Navigate to the “Architecture” tab and select “Floor” from the “Build” panel. Choose the type of floor you want to create, and then click and drag to define the area of the floor. Adjust the height and thickness of the floor as needed.
Revit allows you to easily adjust the height of the walls and floors throughout the project. This parametric nature of Revit ensures that changes made to one element automatically update all related elements, maintaining a coordinated design.
Once the basic structure is in place, you can add openings for doors and windows. Navigate to the “Architecture” tab and select “Door” or “Window” from the “Build” panel. Choose the desired type of door or window and click on the walls where you want to place them. Revit will automatically create the necessary openings and adjust the wall geometry accordingly.
Remember, it’s important to pay attention to the dimensions and positioning of doors and windows, as they have a significant impact on the overall aesthetic and functionality of the house.
As you continue to add more elements to the house, such as stairs, columns, and roofs, Revit’s parametric capabilities will ensure that the entire design remains coordinated. This not only saves time but also allows for easy exploration of design options and quick adjustments to the overall structure.
By creating the basic structure of the house in Revit, we have laid the foundation for our design. In the next sections, we will delve into the details of designing the floor plan, adding walls, doors, and windows, creating the roof, and more. So, let’s move forward and bring our house design to life!
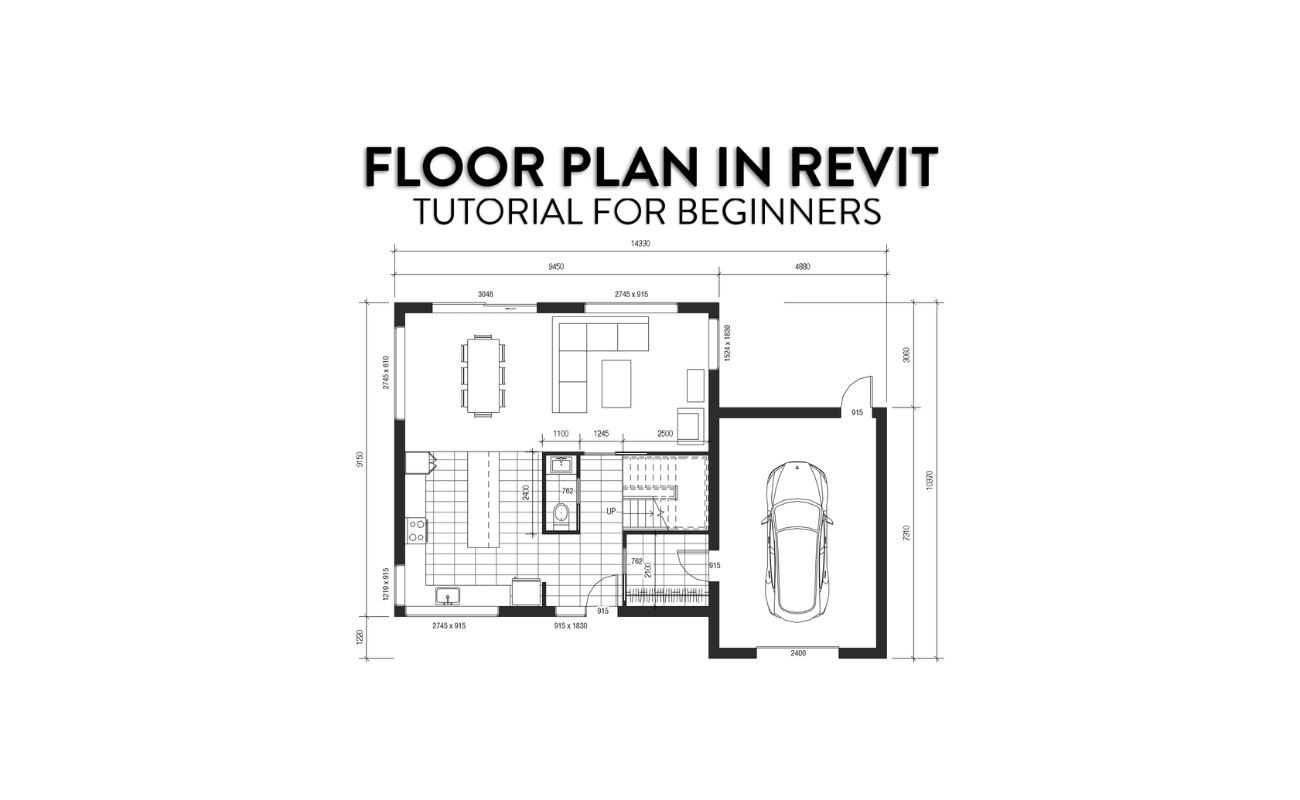
Designing the Floor Plan
The floor plan is a key component of any house design, as it visually represents the layout and organization of the interior spaces. Designing a well-thought-out floor plan in Revit involves creating rooms, defining room boundaries, and optimizing the flow and functionality of the space.
To begin, navigate to the “Architecture” tab and select “Room” from the “Build” panel. Click on the interior walls to define the boundaries of each room. Revit will automatically calculate the area of each room and assign room tags.
Once the rooms are defined, you can customize their names and properties to reflect their respective functions, such as bedroom, living room, kitchen, and so on. This will help in organizing the design and enable easy navigation throughout the project.
Revit allows you to adjust the shape and size of rooms by editing the boundaries. Simply select the room, click on “Edit Boundary” in the properties menu, and modify the shape as needed. This flexibility ensures that you can customize the layout according to your design requirements.
When designing the floor plan, it’s important to consider factors such as circulation, natural light, and views. Optimizing the flow between spaces creates a harmonious and functional layout. Consider the placement of doors and windows to maximize natural light and take advantage of any scenic views.
In addition to rooms, you can also add other important elements to the floor plan, such as closets, bathrooms, and utility spaces. Use the same process of creating rooms and defining their boundaries to incorporate these additional features into the design.
Revit offers a range of annotation tools to enhance the floor plan presentation. Use dimensions, text, and symbols to convey important information about the layout. You can also add furniture and fixtures to provide a sense of scale and demonstrate how the space can be utilized.
As you design the floor plan, keep in mind the overall aesthetic and functionality of the house. Balance the open areas with private spaces, and ensure that there is sufficient circulation space between different rooms.
By creating a well-designed floor plan in Revit, you lay the groundwork for the rest of the house design. In the following sections, we will explore adding walls, doors, and windows, creating the roof, designing the interior spaces, and more. So let’s keep the momentum going and continue shaping our house design in Revit.
Read more: What Is BIM In Revit?
Adding Walls, Doors, and Windows
Once the floor plan is defined, it’s time to add walls, doors, and windows to create the structure and openings of the house. These elements play a crucial role in defining the aesthetic, functionality, and comfort of the interior spaces.
In Revit, adding walls is a straightforward process. Navigate to the “Architecture” tab and select “Wall” from the “Build” panel. Choose the desired wall type and click on the floor plan to place the walls accordingly. Revit automatically adjusts the wall height and joins them where they intersect.
When adding interior walls, consider the desired room sizes and configurations. Use the room boundaries as a guide to ensure that the walls align with the floor plan layout and create well-defined spaces. Adjust the length and height of the walls as needed to match the design intent.
Next, we will add doors to create openings between rooms and provide access to different areas of the house. Navigate to the “Architecture” tab and select “Door” from the “Build” panel. Choose the door type and click on the walls where you want to place the doors. Revit will automatically create the necessary openings and adjust the wall geometry accordingly.
While placing doors, consider factors such as traffic flow, privacy, and accessibility. Place doors strategically to provide efficient circulation between spaces while maintaining privacy in bedrooms, bathrooms, and other private areas. Adjust door sizes and configurations to accommodate different needs.
Similarly, we will add windows to introduce natural light, ventilation, and views into the house. Navigate to the “Architecture” tab and select “Window” from the “Build” panel. Choose the window type and click on the walls where you want to place the windows. Revit will automatically create the necessary openings and adjust the wall geometry accordingly.
When placing windows, take into account the orientation of the house and the desired views. Position windows to maximize natural light and embrace scenic views. Consider the size and style of windows to match the overall design aesthetic and enhance the visual appeal of the house.
Revit allows you to customize the dimensions, materials, and parameters of walls, doors, and windows. Use the properties menu to modify these elements and fine-tune their appearance. You can also create custom wall types, door styles, and window types to suit your design requirements.
By adding walls, doors, and windows in Revit, you bring the house design to life, creating distinct spaces and establishing functional connections. In the next sections, we will explore creating the roof, adding floors and ceilings, designing the interior spaces, and more. So let’s continue shaping our house design in Revit with confidence and creativity.
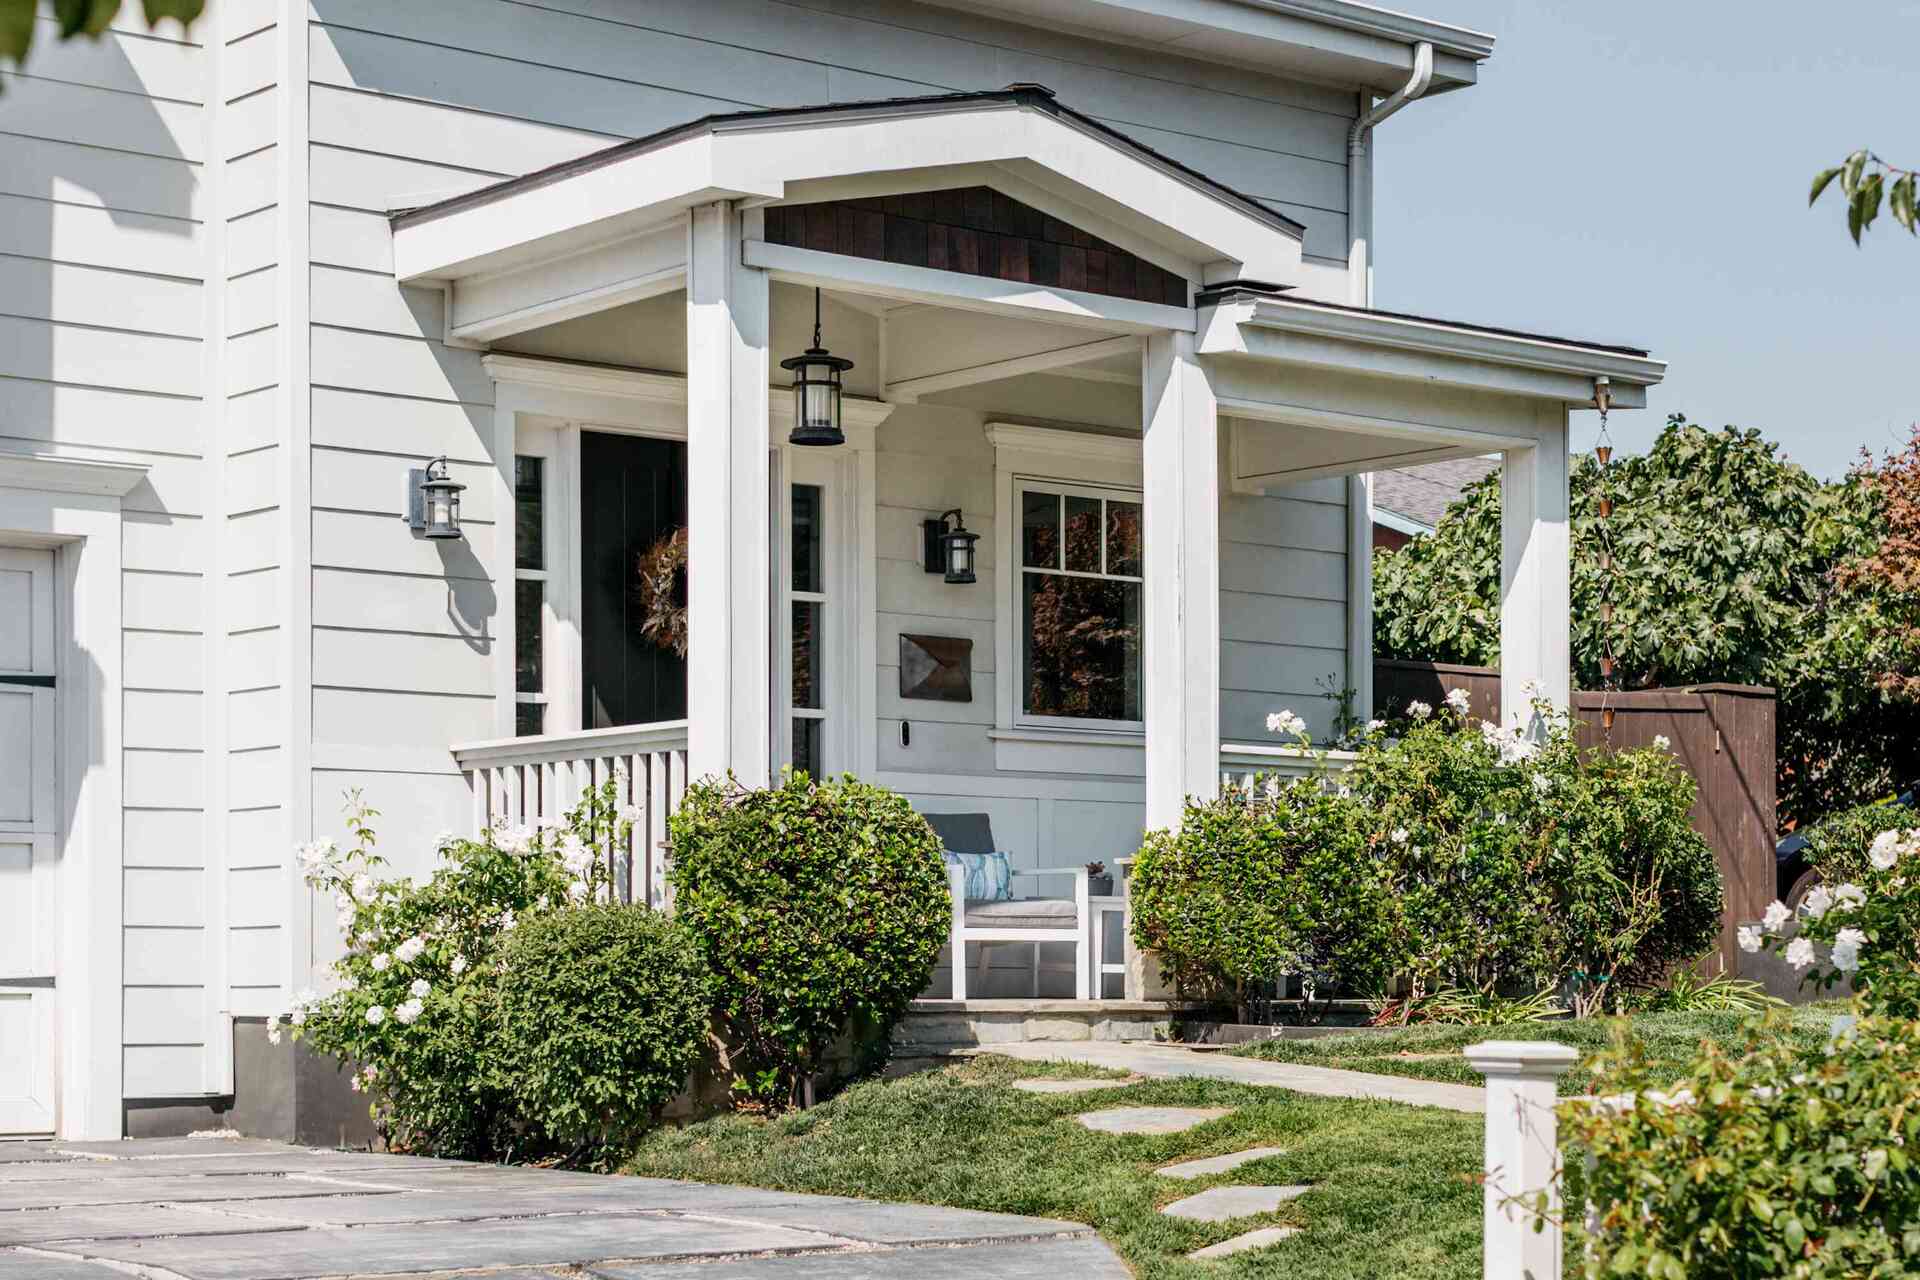
Creating the Roof
The roof is an essential architectural feature that not only protects the house from the elements but also adds character and style to the overall design. In Revit, creating the roof involves defining its shape, adjusting slopes, and selecting the appropriate roofing materials.
To begin, navigate to the “Architecture” tab and select “Roof” from the “Build” panel. Revit offers several roof types, including flat, gable, hip, shed, and more. Choose the roof type that best suits your design intent.
Next, draw the roof footprint by clicking on the walls or outlines of the building. Revit will automatically generate a roof based on the selected roof type and the defined footprint. You can modify the shape of the roof by adjusting its boundary lines, dragging the edges, or using the roof slope control handles.
Revit provides different tools to control the slopes of the roof, allowing you to create complex roof designs with varying pitch angles. Use the slope arrow tool to adjust the slope of individual roof faces or use the slope control handles to modify multiple faces simultaneously.
After defining the roof shape and slopes, it’s time to select the appropriate roofing material. Revit offers a library of pre-defined roofing materials, including shingles, tiles, metal, and more. Choose the material that matches your design style and apply it to the roof surfaces. You can also customize the properties of the roofing material to achieve the desired visual effect.
In addition to the main roof, you may also need to add secondary roof features such as dormer windows or skylights. These elements add interest and functionality to the roof design. Use the appropriate tools in Revit to create these secondary roof features and adjust their placement.
Once the roof is in place, it’s important to review and fine-tune the design. Make sure there are no gaps or overlaps between the walls and the roof. Check the slopes for any inconsistencies and adjust them as necessary. Pay attention to the overall aesthetic and ensure that the roof design complements the architectural style of the house.
By creating the roof in Revit, you add the finishing touch to the exterior of the house. The roof not only provides functional benefits but also enhances the overall visual appeal and architectural character. In the upcoming sections, we will explore adding floors and ceilings, designing the interior spaces, applying materials and textures, and more. So let’s continue our journey to bring the house design to life in Revit!
When designing a house in Revit, start by creating a clear and organized project structure with well-defined levels, grids, and reference planes. This will help you maintain consistency and accuracy throughout the design process.
Adding Floors and Ceilings
Adding floors and ceilings in Revit is a crucial step in creating a well-defined and cohesive interior space. Floors provide a solid foundation for the occupants, while ceilings contribute to the acoustics, aesthetics, and overall comfort of the house.
To add floors, navigate to the “Architecture” tab and select “Floor” from the “Build” panel. Choose the appropriate floor type, such as concrete, wood, tile, or carpet. Click and drag to create the floor within the boundaries of each room. Revit will automatically adjust the floor height to match the level of the room.
Consider the materials and textures of the floors to achieve the desired aesthetic and functionality. Adjust the thickness and properties of the floor to accurately represent the real-world construction.
It is worth mentioning that in some cases, such as multi-story buildings, the floor thickness may vary between levels. In such situations, customize the floor types accordingly to accurately represent the different levels throughout the house.
Similarly, when adding ceilings, navigate to the “Architecture” tab and select “Ceiling” from the “Build” panel. Choose the desired ceiling type, such as gypsum board, suspended ceiling, or exposed beams. Click and drag to create the ceiling within the boundaries of each room. Revit will automatically adjust the ceiling height based on the level assigned to the room.
Consider the design intent and functionality of each room when choosing the appropriate ceiling type. For example, suspended ceilings are commonly used in areas that require easy access to mechanical and electrical systems, while gypsum board ceilings provide a seamless and finished look.
Add materials and textures to the floors and ceilings to enhance the visual appeal and accurately represent the real-world finishes. Revit provides a vast library of materials or allows you to create custom ones based on your design requirements.
It’s important to ensure that the floors and ceilings align with the walls and create a seamless transition throughout the interior spaces. Pay attention to the junctions between walls and floors/ceilings to avoid any gaps or inconsistencies.
By adding floors and ceilings in Revit, you establish the physical boundaries and spatial qualities of the interior spaces. These elements contribute to the overall functionality, aesthetics, and comfort of the house. In the next sections, we will explore designing the interior spaces, adding furniture and fixtures, applying materials and textures, and more. So let’s continue our journey to bring the house design to life in Revit!
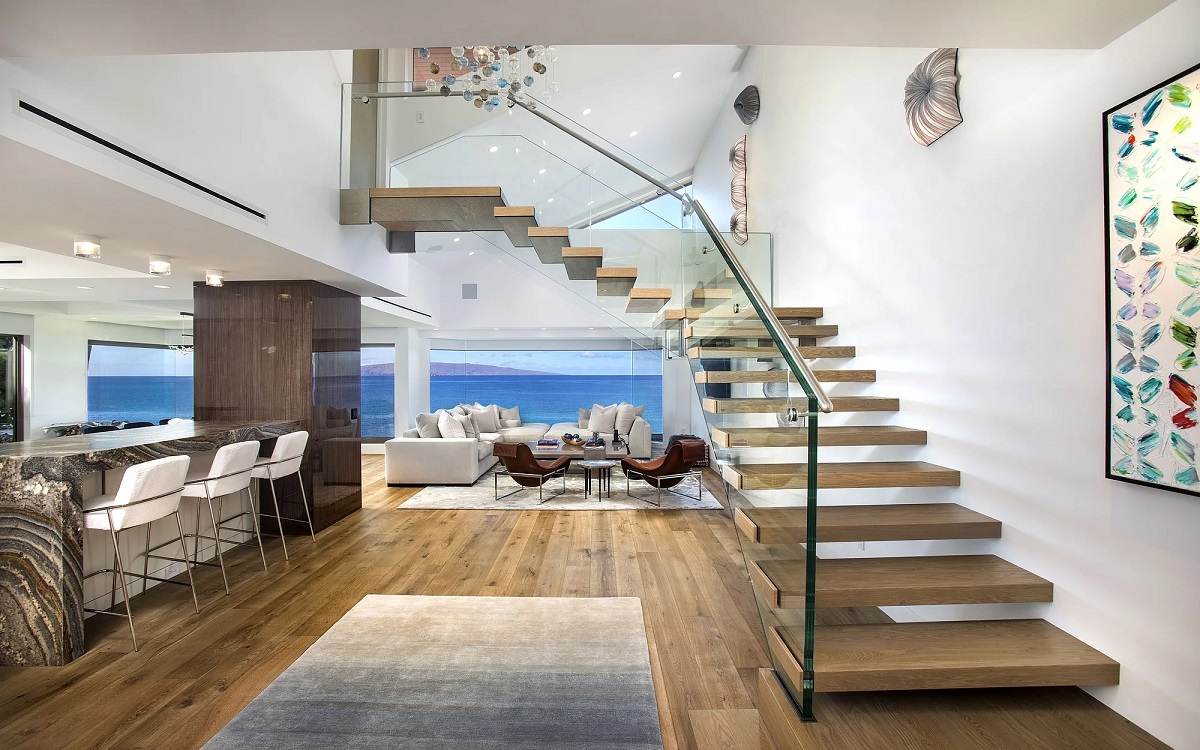
Designing the Interior Spaces
Designing the interior spaces in Revit allows you to create visually appealing and functional rooms that reflect the style and needs of the occupants. From selecting furniture and fixtures to arranging the layout, every detail contributes to the ambiance and comfort of the house.
Start by selecting the appropriate furniture and fixtures for each room. Revit offers a wide range of pre-built families for furniture items such as sofas, tables, beds, and cabinets. You can also import custom furniture families or create your own using Revit’s family editor.
Place the furniture items within the room boundaries, considering factors such as accessibility, traffic flow, and functionality. Pay attention to the scale and proportion of the furniture in relation to the room. Experiment with different layouts to find the arrangement that works best for the space.
In addition to furniture, add other elements such as lighting fixtures, electrical outlets, and HVAC ducts to enhance the functionality and aesthetics of the rooms. Revit provides an extensive library of families for these items, allowing you to easily customize the lighting and electrical plan of the house.
While designing the interior spaces, consider factors such as natural lighting and ventilation. Place windows strategically to maximize natural light and airflow. Incorporate curtains or blinds to control the amount of light entering the room. Utilize artificial lighting fixtures to create a warm and welcoming atmosphere.
Revit’s 3D visualization capabilities allow you to explore the interior spaces from different perspectives and evaluate the design options. Utilize the various view modes, such as realistic shading or rendering, to get a better understanding of how the spaces will look and feel once completed.
Closely analyze the ergonomics and functionality of each room. Take into account the intended use of the space and ensure that it meets the specific needs of the occupants. Consider elements such as storage, workspaces, and circulation paths when arranging the layout and selecting the appropriate furniture.
As you design the interior spaces, remember to apply materials and textures to the walls, floors, and ceilings. Revit provides a range of options for finishes, including paints, wallpapers, tiles, and wood textures. Apply the desired materials to achieve the desired aesthetic and accurately represent the real-world finishes.
By designing the interior spaces in Revit, you bring life and personality to the house. Every room becomes a reflection of the occupants’ lifestyle and taste. In the next sections, we will explore adding furniture and fixtures, applying materials and textures, lighting and rendering, and more. Let’s continue our journey to create a stunning house in Revit!
Read more: How To Import CAD Into Revit
Adding Furniture and Fixtures
Adding furniture and fixtures is one of the key steps in designing the interior spaces of a house in Revit. Furniture and fixtures not only provide functionality but also contribute to the overall aesthetics and character of the rooms.
To begin, navigate to the “Architecture” tab and select “Component” from the “Build” panel. Revit offers a vast library of pre-built families for furniture and fixtures, including sofas, tables, chairs, beds, sinks, toilets, and more.
Select the desired family from the library and click on the floor plan to place the furniture or fixture within the room. Revit will adjust the 3D representation based on the specific family parameters and your placement on the floor plan.
When placing furniture and fixtures, consider factors such as function, scale, and layout. Think about how the furniture will be used and how it will interact with other elements in the room. Ensure sufficient space for movement and clearances around furniture items.
Revit allows you to adjust the properties and parameters of the furniture and fixtures to match your design requirements. Modify the size, materials, color, and other settings to achieve the desired aesthetic and functionality.
It’s important to pay attention to the details and scale of the furniture in relation to the room. Avoid overcrowding by selecting appropriate sizes and quantities of furniture items. Consider the proportions and visual balance within the space.
In addition to furniture, don’t forget to add other fixtures and accessories such as lighting fixtures, curtains, artwork, and decorative items. These elements enhance the ambiance and add finishing touches to the interior design.
Revit’s parametric capabilities ensure that any changes made to the floor plan or room boundaries will automatically update the placement and arrangement of the furniture and fixtures. This allows for quick adjustments to the design without the need for manual modifications.
As you add furniture and fixtures, keep in mind the overall stylistic theme and functionality of the house. Establish a cohesive design language and ensure that the interior spaces reflect the desired atmosphere and purpose.
By adding furniture and fixtures in Revit, the interior spaces come to life, showcasing the intended use and personal style of the occupants. In the upcoming sections, we will explore applying materials and textures, lighting and rendering, finalizing the design, and more. Let’s continue our journey to create a captivating house in Revit!
Applying Materials and Textures
Applying materials and textures is a crucial step in creating a realistic and visually appealing house design in Revit. Materials help bring surfaces to life, while textures add depth and detail to the overall appearance.
To begin, navigate to the “Architecture” tab and select the desired element, such as a wall, floor, or ceiling. In the properties menu, click on the “Materials” tab to access the material library.
Revit provides a wide range of pre-defined materials, including paints, wallpapers, tiles, wood finishes, and more. Browse through the library and select the material that best matches your design intent. You can also import custom materials or create your own by adjusting the properties and settings.
Apply the materials by clicking on the desired surface of the element. Revit will automatically assign the selected material to the surface. You can adjust the scale, orientation, and offset of the material to achieve the desired look.
In addition to the appearance, consider the properties of the materials, such as reflectivity, transparency, and roughness. These properties can be adjusted in the material editor to create realistic renderings and visualizations of the house design.
Textures add an extra layer of detail and realism to the materials. Revit allows you to apply texture images to surfaces, giving them a tactile quality. Add textures to materials such as fabrics, carpets, and natural materials to enhance their visual appeal.
Revit offers various mapping options for textures, allowing you to control the placement and orientation. Experiment with different mapping methods, such as planar, cylindrical, or spherical mapping, to achieve the desired effect.
When applying materials and textures, remember to consider the overall design concept and consistency. Create a coherent palette of materials and colors that complement one another and reflect the desired style and atmosphere.
Revit’s 3D visualization capabilities enable you to see the applied materials and textures in real-time. Utilize the various view modes and renderings to evaluate the visual impact of the materials and make any necessary adjustments.
By applying materials and textures in Revit, you transform the house design into a visually rich and immersive environment. The choice of materials and attention to detail contribute to the overall quality and realism of the design. In the following sections, we will explore lighting and rendering, finalizing the design, and more. Let’s continue our journey to create a captivating house in Revit!
Lighting and Rendering
Lighting plays a significant role in creating the atmosphere and visual impact of a house design. Proper lighting design enhances the aesthetics, functionality, and mood of the interior and exterior spaces. In Revit, you have the ability to simulate and visualize various lighting scenarios through rendering.
Begin by assessing the natural lighting conditions of the design. Consider the orientation of the house and the placement of windows and openings. Revit’s sun path tool allows you to analyze the sun’s position throughout the day, aiding in the strategic placement of windows for optimal natural light.
In addition to natural lighting, select and place artificial lighting fixtures in appropriate areas of the house. Revit offers a broad range of lighting fixtures, including ceiling lights, pendant lights, spotlights, and more. Utilize the lighting fixture families and place them within the rooms to provide functional and atmospheric lighting.
Configure the properties of each lighting fixture, such as color temperature, intensity, and angle, to create the desired lighting effect. Avoid over-illuminating spaces and aim for a balanced distribution of light throughout the house.
Revit’s rendering capabilities allow you to visualize the effects of lighting within the design. You can utilize the built-in rendering engine or external rendering software that integrates with Revit for more advanced renderings. Set up the rendering parameters, such as resolution and quality, to generate high-quality renderings.
Experiment with different lighting scenarios and renderings to observe the impact of various light sources on the mood and ambiance of the spaces. Adjust the lighting properties and placement as needed to achieve the desired lighting effect.
In addition to still images, Revit’s rendering capabilities enable you to create walk-through animations, helping to showcase the design in a dynamic and engaging way. Utilize camera views and keyframe animations to create a virtual tour of the house, highlighting the design features and lighting effects.
Rendering in Revit helps in presenting the design to clients, stakeholders, or for marketing purposes. It provides a realistic representation of the house, allowing viewers to immerse themselves in the spaces and understand the design intent.
By paying attention to lighting and rendering in Revit, you can bring your house design to life, creating a captivating visual experience that showcases the beauty and functionality of the spaces. In the next sections, we will explore finalizing the design, documenting the project, and more. Let’s continue our journey to complete the house design in Revit!
Finalizing the Design
Finalizing the design is an important step in the house design process in Revit. It involves reviewing the overall design, making necessary adjustments, and ensuring that all elements are coordinated and aligned with the intended vision.
Begin by conducting a thorough review of the entire project, including the floor plan, walls, windows, doors, roof, interior spaces, and finishes. Pay attention to any inconsistencies, overlaps, or errors that may have occurred during the design process.
Make sure that all the elements are properly connected and aligned. Check the dimensions to ensure accuracy, and adjust any areas that need refinement.
Consider the functionality and flow of the spaces. Evaluate the accessibility, circulation, and room layouts to ensure that they meet the intended purpose and requirements. Assess the proportions and relationships between rooms and make any necessary modifications to improve the overall balance and usability.
Take a close look at the materials and textures applied throughout the design. Ensure that they accurately represent the intended finishes and achieve the desired aesthetic. Adjust the materials and textures as needed to achieve visual consistency and harmony within the spaces.
Verify that the lighting and rendering accurately showcase the design intent. Make any necessary adjustments to the placement and properties of lighting fixtures to enhance the illumination and atmosphere of the spaces.
Collaborate with clients, stakeholders, or other team members to gather feedback and incorporate any necessary changes. Solicit input to ensure that the design meets the expectations and requirements of all parties involved.
Document the design to capture all the necessary details for construction or further development. Generate accurate drawings, schedules, and specifications from the 3D model in Revit. Ensure that all dimensions, annotations, and notes are clear and consistent.
Before finalizing the design, conduct a final review to ensure that all aspects have been addressed. Check for any remaining issues, inconsistencies, or errors. Validate that the design aligns with local building codes and regulations.
Once the design has been thoroughly reviewed and finalized, you can confidently proceed to the construction phase or use the design for presentations, marketing, or other purposes.
By taking the time to finalize and refine the design in Revit, you ensure that the house design meets all requirements and accurately reflects the intended vision. In the concluding sections, we will explore documenting the project and conclude our journey in creating a remarkable house design in Revit!
Read more: How To Export Revit To CAD
Conclusion
Designing a house in Revit is an exciting and rewarding journey that allows you to bring your architectural vision to life. Throughout this article, we have explored the step-by-step process of designing a house in Revit, from setting up the project to finalizing the design.
We began by understanding the powerful features of Revit, such as its parametric modeling approach and extensive library of families. We learned how to set up the project, define project parameters, and establish the project location and phases.
We then delved into the creation of the basic structure, including the walls, foundation, and floors. We designed the floor plan, adding rooms and defining their boundaries, and continued by adding walls, doors, and windows to create openings and circulation paths.
Next, we explored the creation of the roof, adding floors and ceilings, and designing the interior spaces. We learned how to place furniture and fixtures, apply materials and textures, and critically examine the lighting and rendering to enhance the overall design quality.
Lastly, we focused on finalizing the design by conducting a thorough review, making necessary adjustments, and documenting the project for construction or presentation purposes.
Throughout the process, we emphasized the importance of creativity, attention to detail, and collaboration. By harnessing the power of Revit and utilizing its robust tools, we have created a comprehensive and visually appealing house design.
Remember, designing a house in Revit requires practice, experimentation, and continuous learning. Embrace the possibilities that Revit offers, and allow your creativity to flourish as you explore different design options and solutions.
With Revit as your guide, you have the ability to create stunning and functional houses that meet the needs and desires of the occupants. Whether you’re an architect, designer, or homeowner, Revit offers a powerful platform to bring your architectural dreams to reality.
So, seize the opportunity, explore Revit’s capabilities, and embark on your journey to design remarkable houses that will leave a lasting impression. Happy designing!
Frequently Asked Questions about How To Design A House In Revit
Was this page helpful?
At Storables.com, we guarantee accurate and reliable information. Our content, validated by Expert Board Contributors, is crafted following stringent Editorial Policies. We're committed to providing you with well-researched, expert-backed insights for all your informational needs.


0 thoughts on “How To Design A House In Revit”