Articles
How To Store Music On IPhone
Modified: January 23, 2024
Learn how to store music on your iPhone with these helpful articles. Find tips, tricks, and step-by-step guides to keep your favorite tunes organized and accessible.
(Many of the links in this article redirect to a specific reviewed product. Your purchase of these products through affiliate links helps to generate commission for Storables.com, at no extra cost. Learn more)
Introduction
Listening to music on your iPhone has become an essential part of our daily lives. Whether it’s during commutes, workouts, or simply relaxing at home, having your favorite tunes at your fingertips can elevate your mood and enhance your overall experience. However, if you have a vast music library, you may find yourself struggling with limited storage space on your iPhone. Fortunately, there are several methods you can utilize to store your music on your iPhone without sacrificing precious storage capacity.
In this article, we will explore five different methods to store music on your iPhone. Whether you prefer using iTunes, iCloud, third-party apps, AirDrop, or external storage devices, we have got you covered. Each method offers its own unique advantages and flexibility, allowing you to choose the one that best suits your needs and preferences. So without further ado, let’s dive in and discover how you can optimize your iPhone’s storage space and keep your music library accessible on the go.
Key Takeaways:
- Optimize your iPhone’s storage with iTunes, iCloud, third-party apps, AirDrop, or external storage. Choose the method that suits your preferences and enjoy your music hassle-free on the go.
- Explore various methods to store music on your iPhone, from syncing with iTunes to utilizing external storage devices. Customize your music storage options and keep your favorite tunes accessible wherever you are.
Read more: How To Store Music
Method 1: Using iTunes
One of the most common methods to store music on your iPhone is by using iTunes. iTunes is a versatile media player and library that allows you to manage and sync your music collection with your iOS devices. Here’s how you can use iTunes to store music on your iPhone:
- Connect your iPhone to your computer using a USB cable.
- Launch iTunes on your computer and ensure that it is the latest version.
- Select your iPhone icon located at the top left corner of the iTunes window.
- In the left sidebar, click on “Music” to access your music library.
- Choose the songs, albums, or playlists that you want to sync with your iPhone.
- Click on the “Sync” button at the bottom right corner of the iTunes window.
- Wait for the sync process to complete. Once done, disconnect your iPhone from the computer.
By following these steps, you can easily transfer your music from iTunes to your iPhone and enjoy your favorite tracks whenever and wherever you want. Keep in mind that iTunes also offers the option to automatically sync your entire music library or selected playlists, providing you with a hassle-free experience.
Additionally, iTunes allows you to customize your music storage options. You can choose to have your music library stored entirely on your iPhone or opt for the “Optimize Storage” feature, which intelligently manages your storage space by keeping the highly played or recently added songs on your iPhone while the rest are stored in the cloud. This way, you can have access to a vast music library without occupying too much space on your device.
Remember to regularly update your iTunes library to ensure that your music collection on your iPhone stays up to date. Overall, utilizing iTunes to store music on your iPhone provides a seamless and reliable method that caters to users who prefer managing their music collection on their computer and syncing it with their mobile devices.
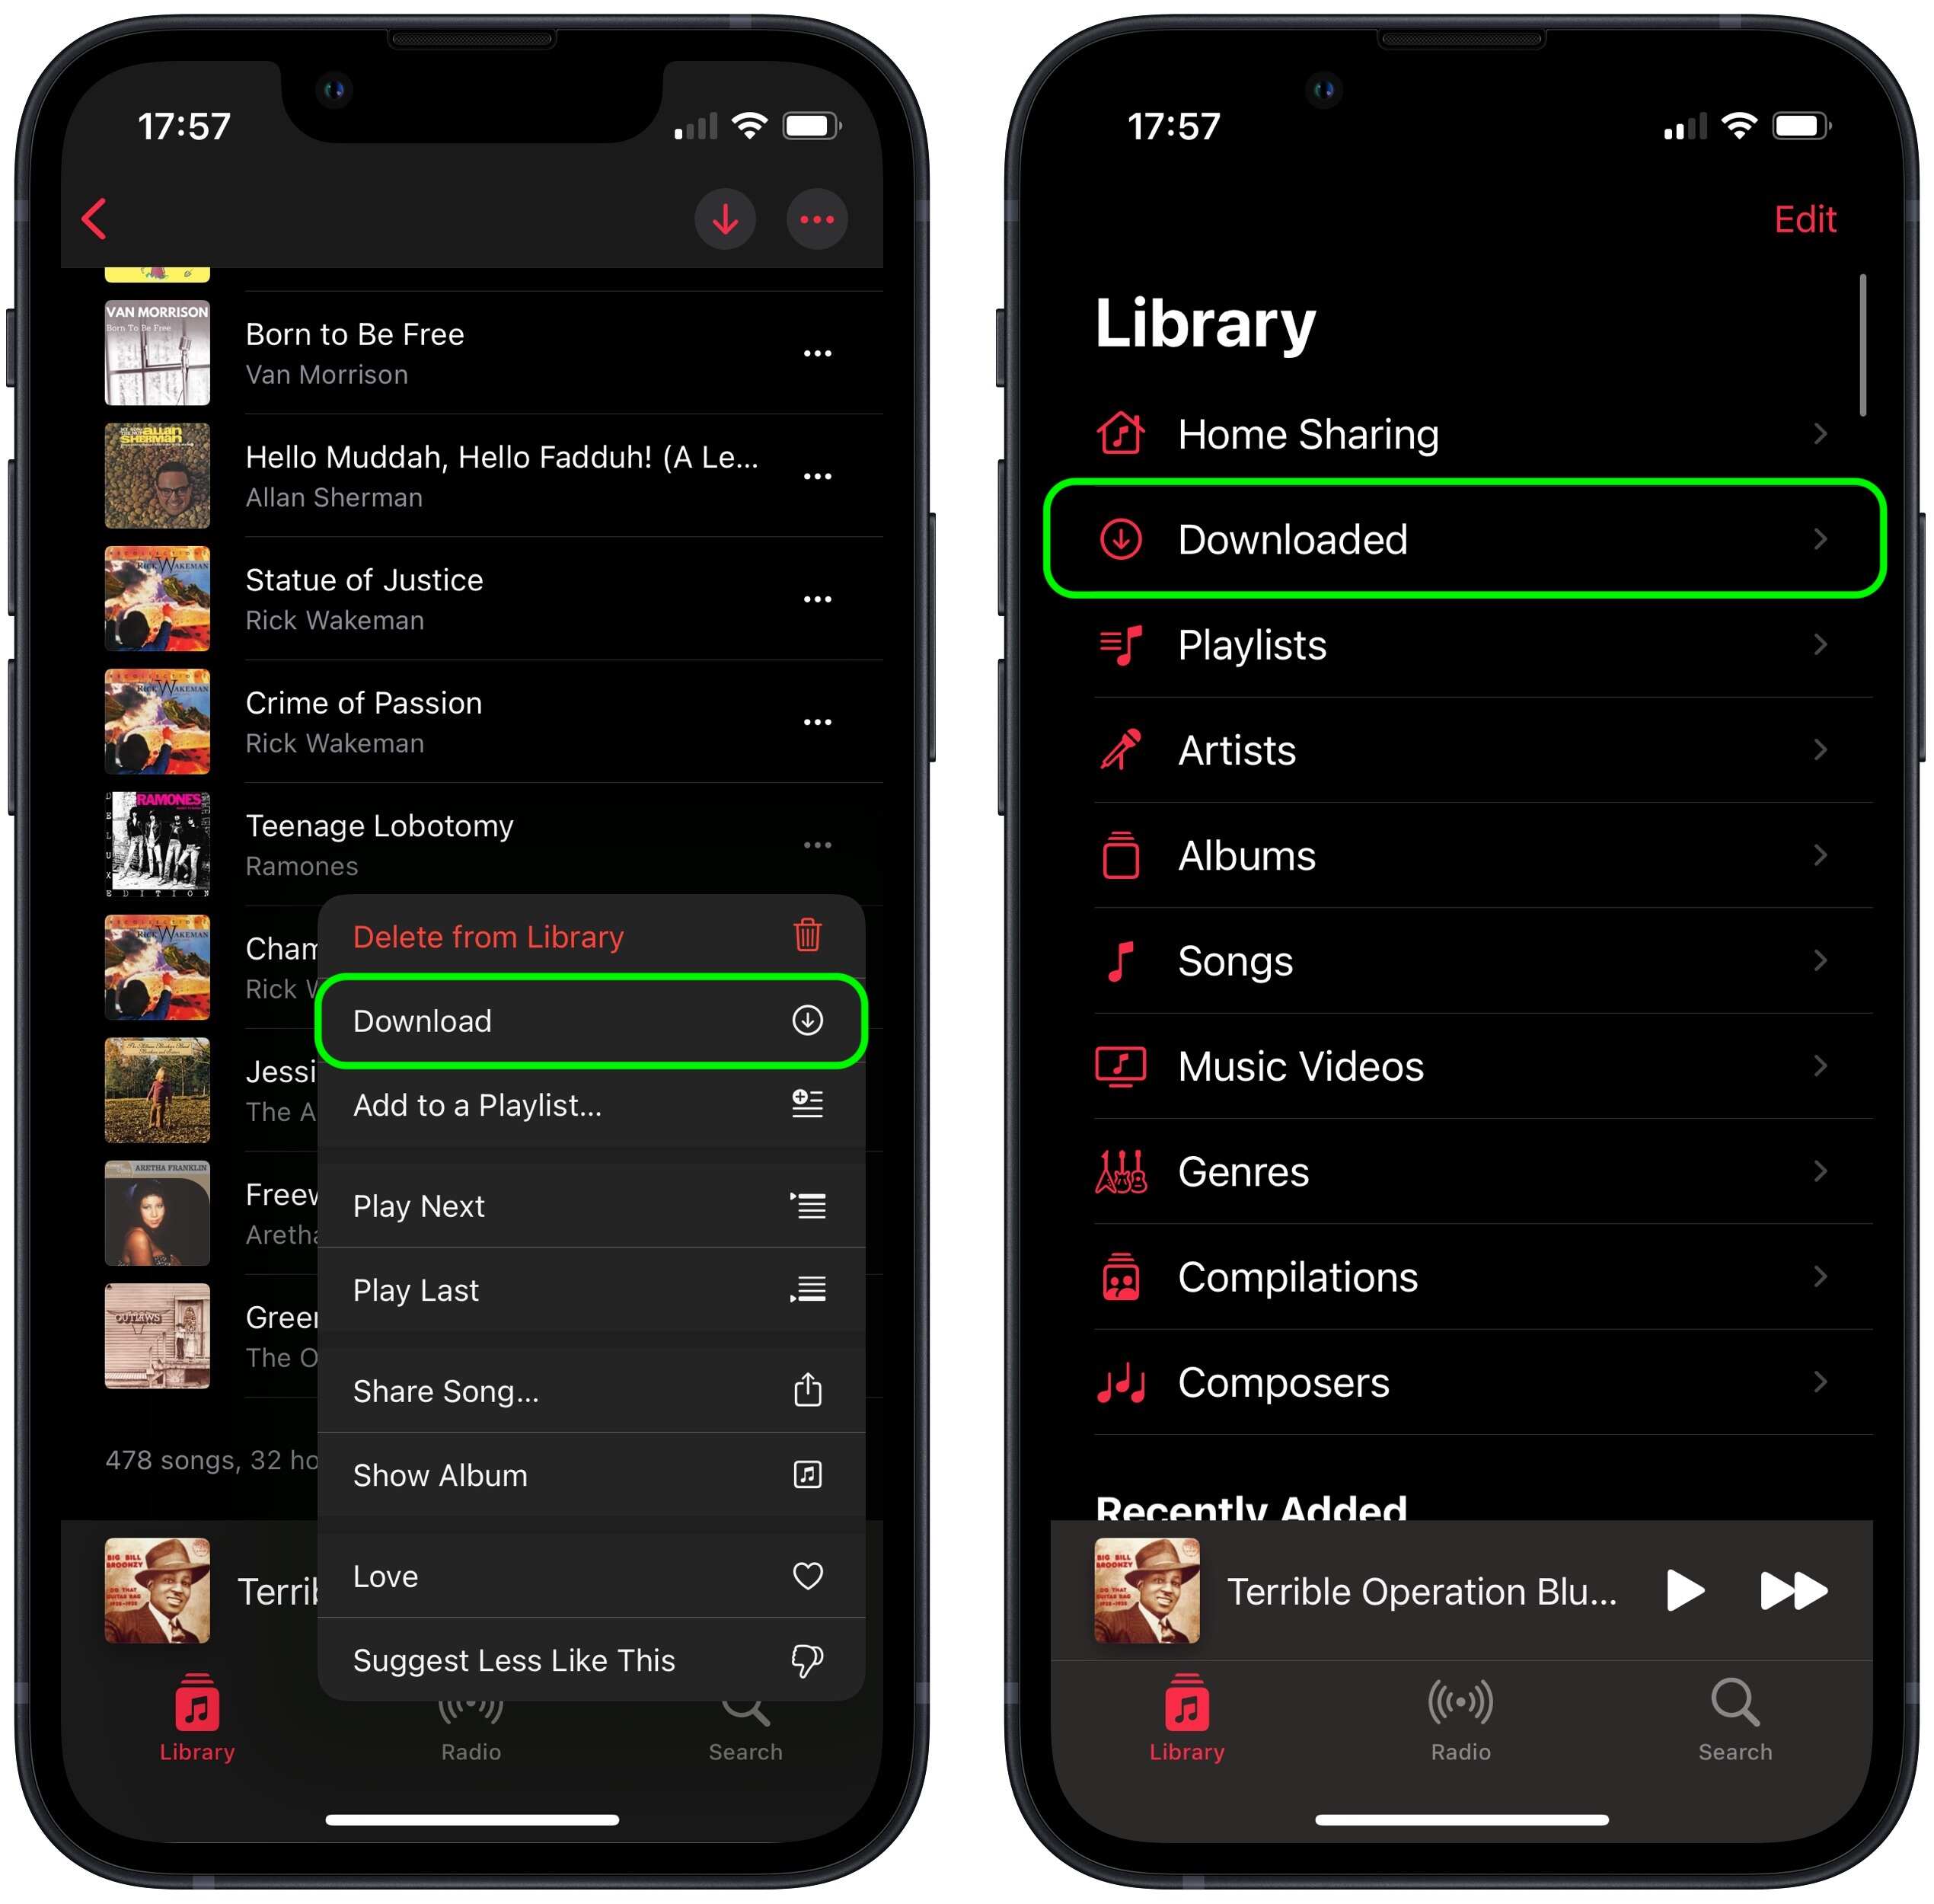
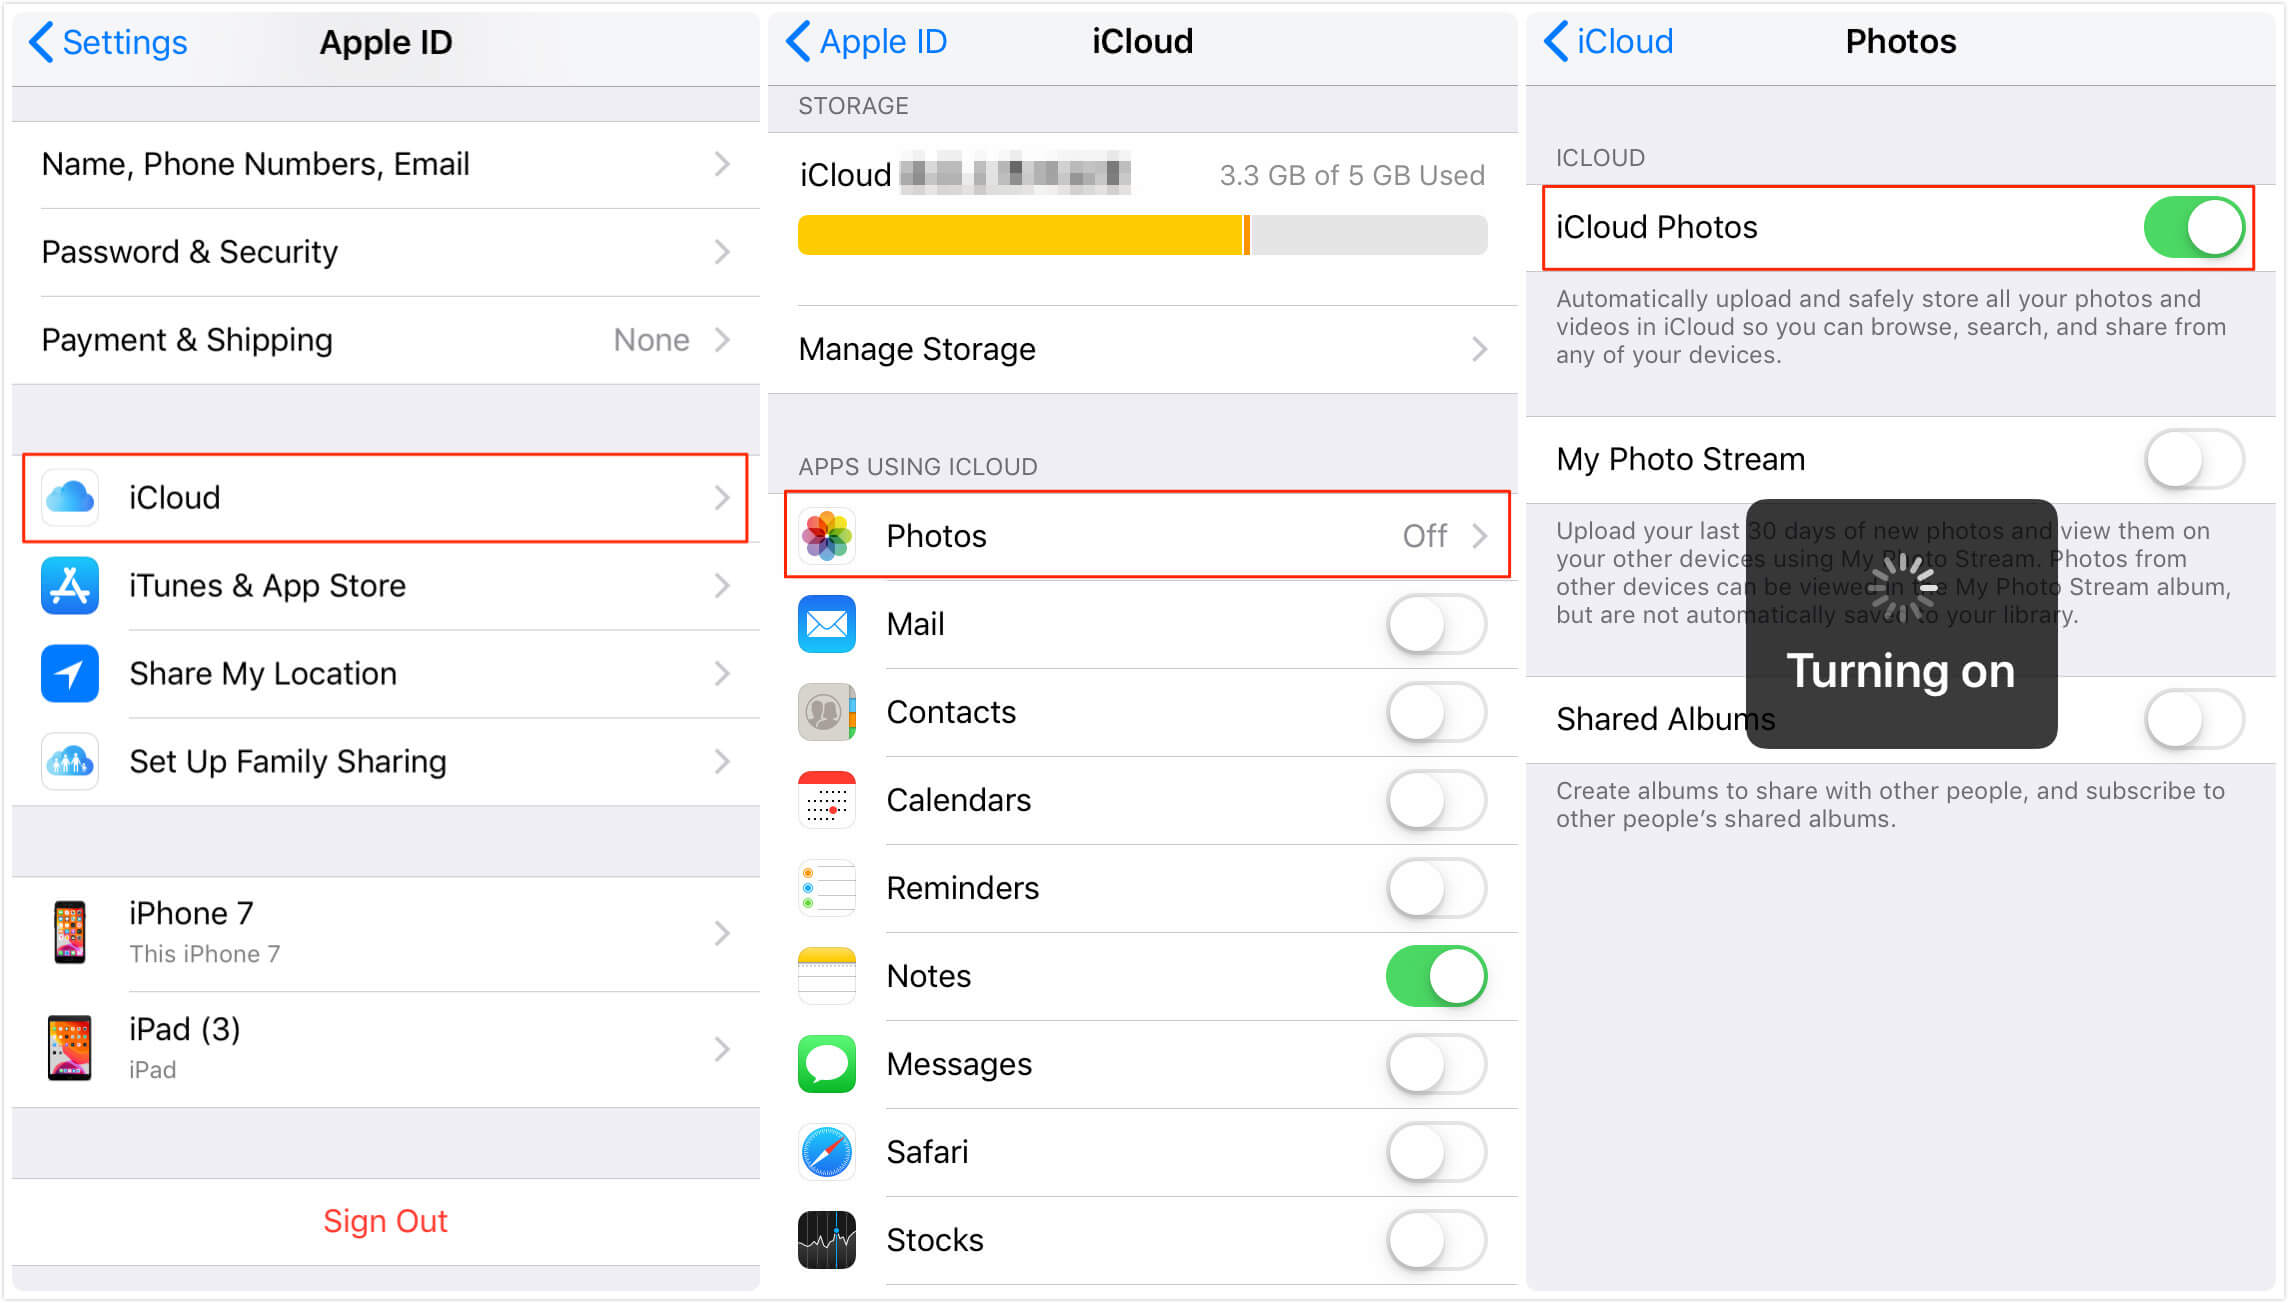
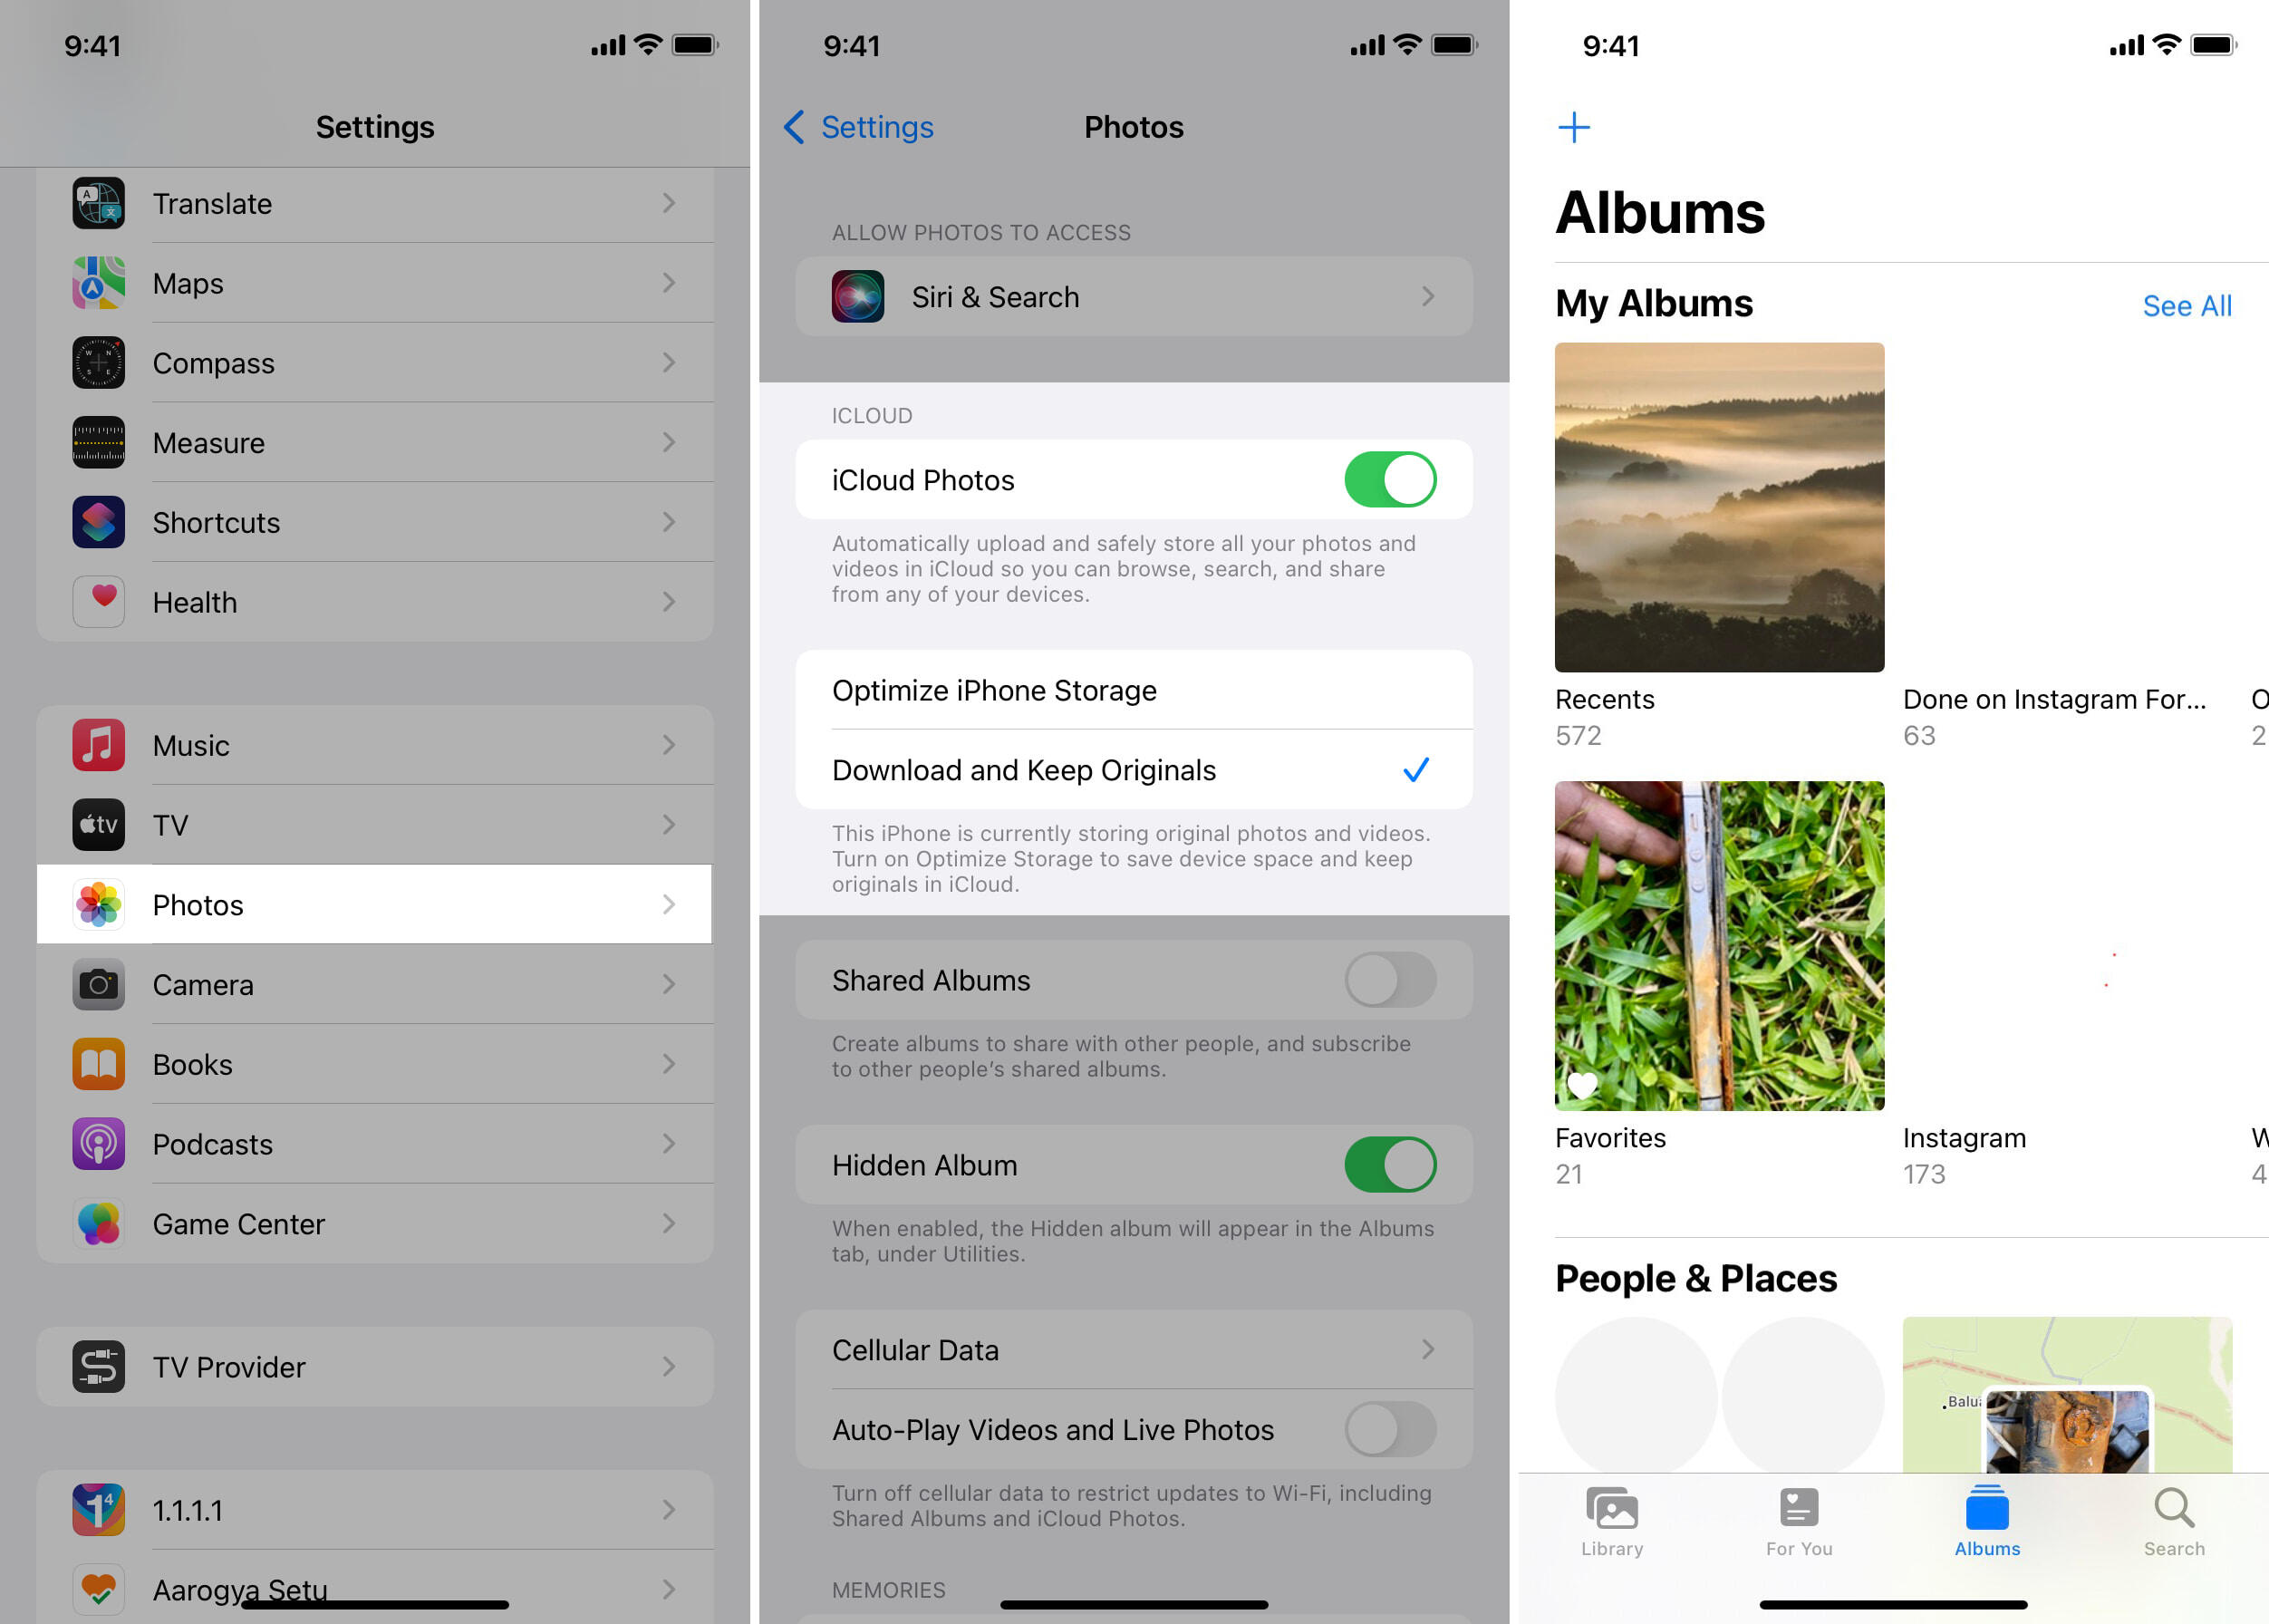
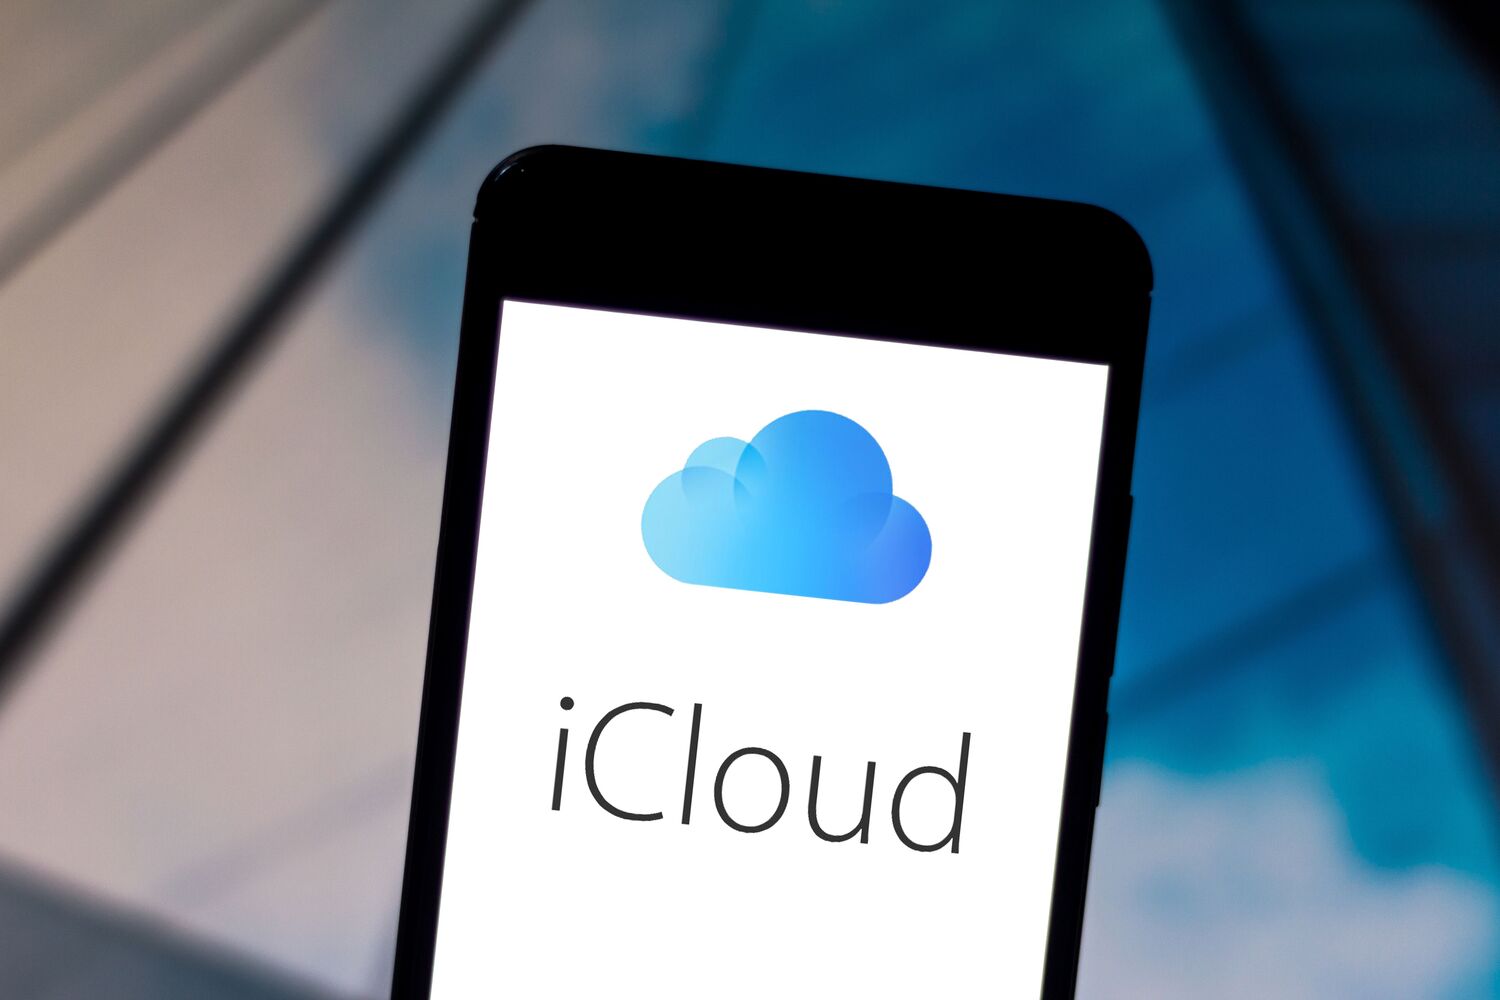
Method 2: Using iCloud
iCloud is a cloud storage service offered by Apple that allows you to store various types of data, including music, photos, documents, and more. By utilizing iCloud, you can easily store your music on your iPhone without taking up any physical storage space. Here’s how you can use iCloud to store music on your iPhone:
- Ensure that you have an iCloud account set up and activated on your iPhone.
- Open the “Settings” app on your iPhone and tap on your Apple ID profile at the top.
- Select “iCloud” and then enable the “iCloud Music Library” option.
- Open the “Music” app on your iPhone.
- Tap on the “Library” tab at the bottom of the screen.
- You will find your entire music library listed in the app’s interface, including songs purchased from iTunes, Apple Music tracks, and songs synced from your computer.
- To add more music to your iPhone, you can either purchase songs from iTunes, download tracks from Apple Music, or use the “Upload” feature to add your personal music files to the iCloud Music Library.
- Once the songs are added to your iCloud Music Library, they will automatically appear in the Music app on your iPhone, allowing you to stream them directly without using any physical storage space.
The advantage of using iCloud to store music on your iPhone is the ability to access your entire music library from any device. Whether you have an iPhone, iPad, Mac, or even a Windows PC, you can access your music collection by signing in to your iCloud account. This makes it incredibly convenient for users who want to have their entire music library at their fingertips without having to transfer or sync files manually.
It’s important to note that using iCloud to store music requires an active internet connection. You need to be connected to Wi-Fi or have cellular data enabled to stream your music. However, iCloud also offers the option to download songs for offline listening, allowing you to save them directly to your iPhone for times when you don’t have an internet connection.
By utilizing iCloud to store music on your iPhone, you can free up valuable storage space while still having access to your entire music library whenever you want. It’s a convenient and flexible option that caters to users who prefer streaming music rather than storing files locally on their device.
Method 3: Using a Third-Party App
If you’re looking for alternative methods to store music on your iPhone, you can consider using third-party apps. These apps provide additional functionality and flexibility when it comes to managing and storing your music collection. Here’s how you can use a third-party app to store music on your iPhone:
- Visit the App Store on your iPhone and search for a reputable music storage app.
- Select and download the app that best suits your needs. Some popular options include Google Play Music, Spotify, and SoundCloud.
- Launch the app and sign in with your account or create a new one if required.
- Depending on the app, you may have the option to upload your own music files or access a vast library of songs and playlists.
- If you choose to upload your own music, follow the app’s instructions to add your files to the app’s library.
- Once your music is uploaded or accessible through the app, you can stream it directly on your iPhone without taking up any storage space.
- Many third-party apps also offer the ability to download songs for offline listening so you can enjoy your music even without an internet connection.
Using a third-party app to store music on your iPhone gives you the option to explore different music streaming platforms and discover new songs and artists. These apps often provide additional features such as personalized playlists, recommendations based on your listening habits, and social sharing options to connect with friends and discover new music together.
Keep in mind that some third-party apps may require a subscription fee to access certain features or remove ads. However, there are also free options available that offer a wide range of music and basic storage capabilities. It’s essential to read reviews and explore the features and pricing options of different apps before making your choice.
Overall, using a third-party app can be a great way to expand your music library and enjoy a seamless music streaming experience on your iPhone. Whether you prefer to upload your own music or discover new tracks, there’s a wealth of options available to cater to your personal preferences and enhance your listening pleasure.
When storing music on your iPhone, consider using a streaming service like Apple Music or Spotify to save storage space. You can also use the “Optimize Storage” feature in the Music settings to automatically manage your music library.
Method 4: Using AirDrop
AirDrop is a convenient feature available on Apple devices that allows you to wirelessly share files, including music, between compatible devices. If you have music files on another Apple device and want to transfer them to your iPhone, you can use AirDrop to accomplish this quickly and easily. Here’s how you can use AirDrop to store music on your iPhone:
- Ensure that both devices, the one from which you want to transfer the music and your iPhone, have AirDrop enabled.
- On the source device, open the music app or file manager that contains the songs you want to transfer.
- Select the songs, albums, or playlists you want to transfer via AirDrop.
- Tap the “Share” or “Options” button, and in the available sharing options, select your iPhone from the AirDrop list.
- On your iPhone, you will receive a notification asking if you want to accept the AirDrop transfer. Tap “Accept” to initiate the transfer.
- Once the transfer is complete, the music files will be saved directly on your iPhone.
AirDrop provides a hassle-free method to transfer music files across Apple devices without the need for cables or complicated settings. It’s fast, secure, and doesn’t require an internet connection, making it an ideal option for sharing music with friends or transferring files between your own devices.
One of the key advantages of using AirDrop is that it retains the original audio quality of the music files during the transfer process. This ensures that you experience the same high-quality audio on your iPhone as on the source device. Additionally, AirDrop allows you to transfer multiple files at once, saving you time and effort compared to transferring files individually.
It’s important to note that AirDrop has some requirements and limitations. Both devices need to be within close proximity to each other, and both must have Wi-Fi and Bluetooth enabled. AirDrop also works best when transferring smaller-sized music files, as larger file sizes may take longer to transfer. Additionally, AirDrop is only available on Apple devices, so non-Apple devices cannot utilize this method for storing music on an iPhone.
Overall, AirDrop provides a convenient and efficient way to transfer music files to your iPhone without the need for cables or external devices. Whether you’re sharing music with friends or transferring from your own devices, AirDrop simplifies the process and ensures that your favorite tunes are readily available on your iPhone.
Read more: How To Store Music In ICloud
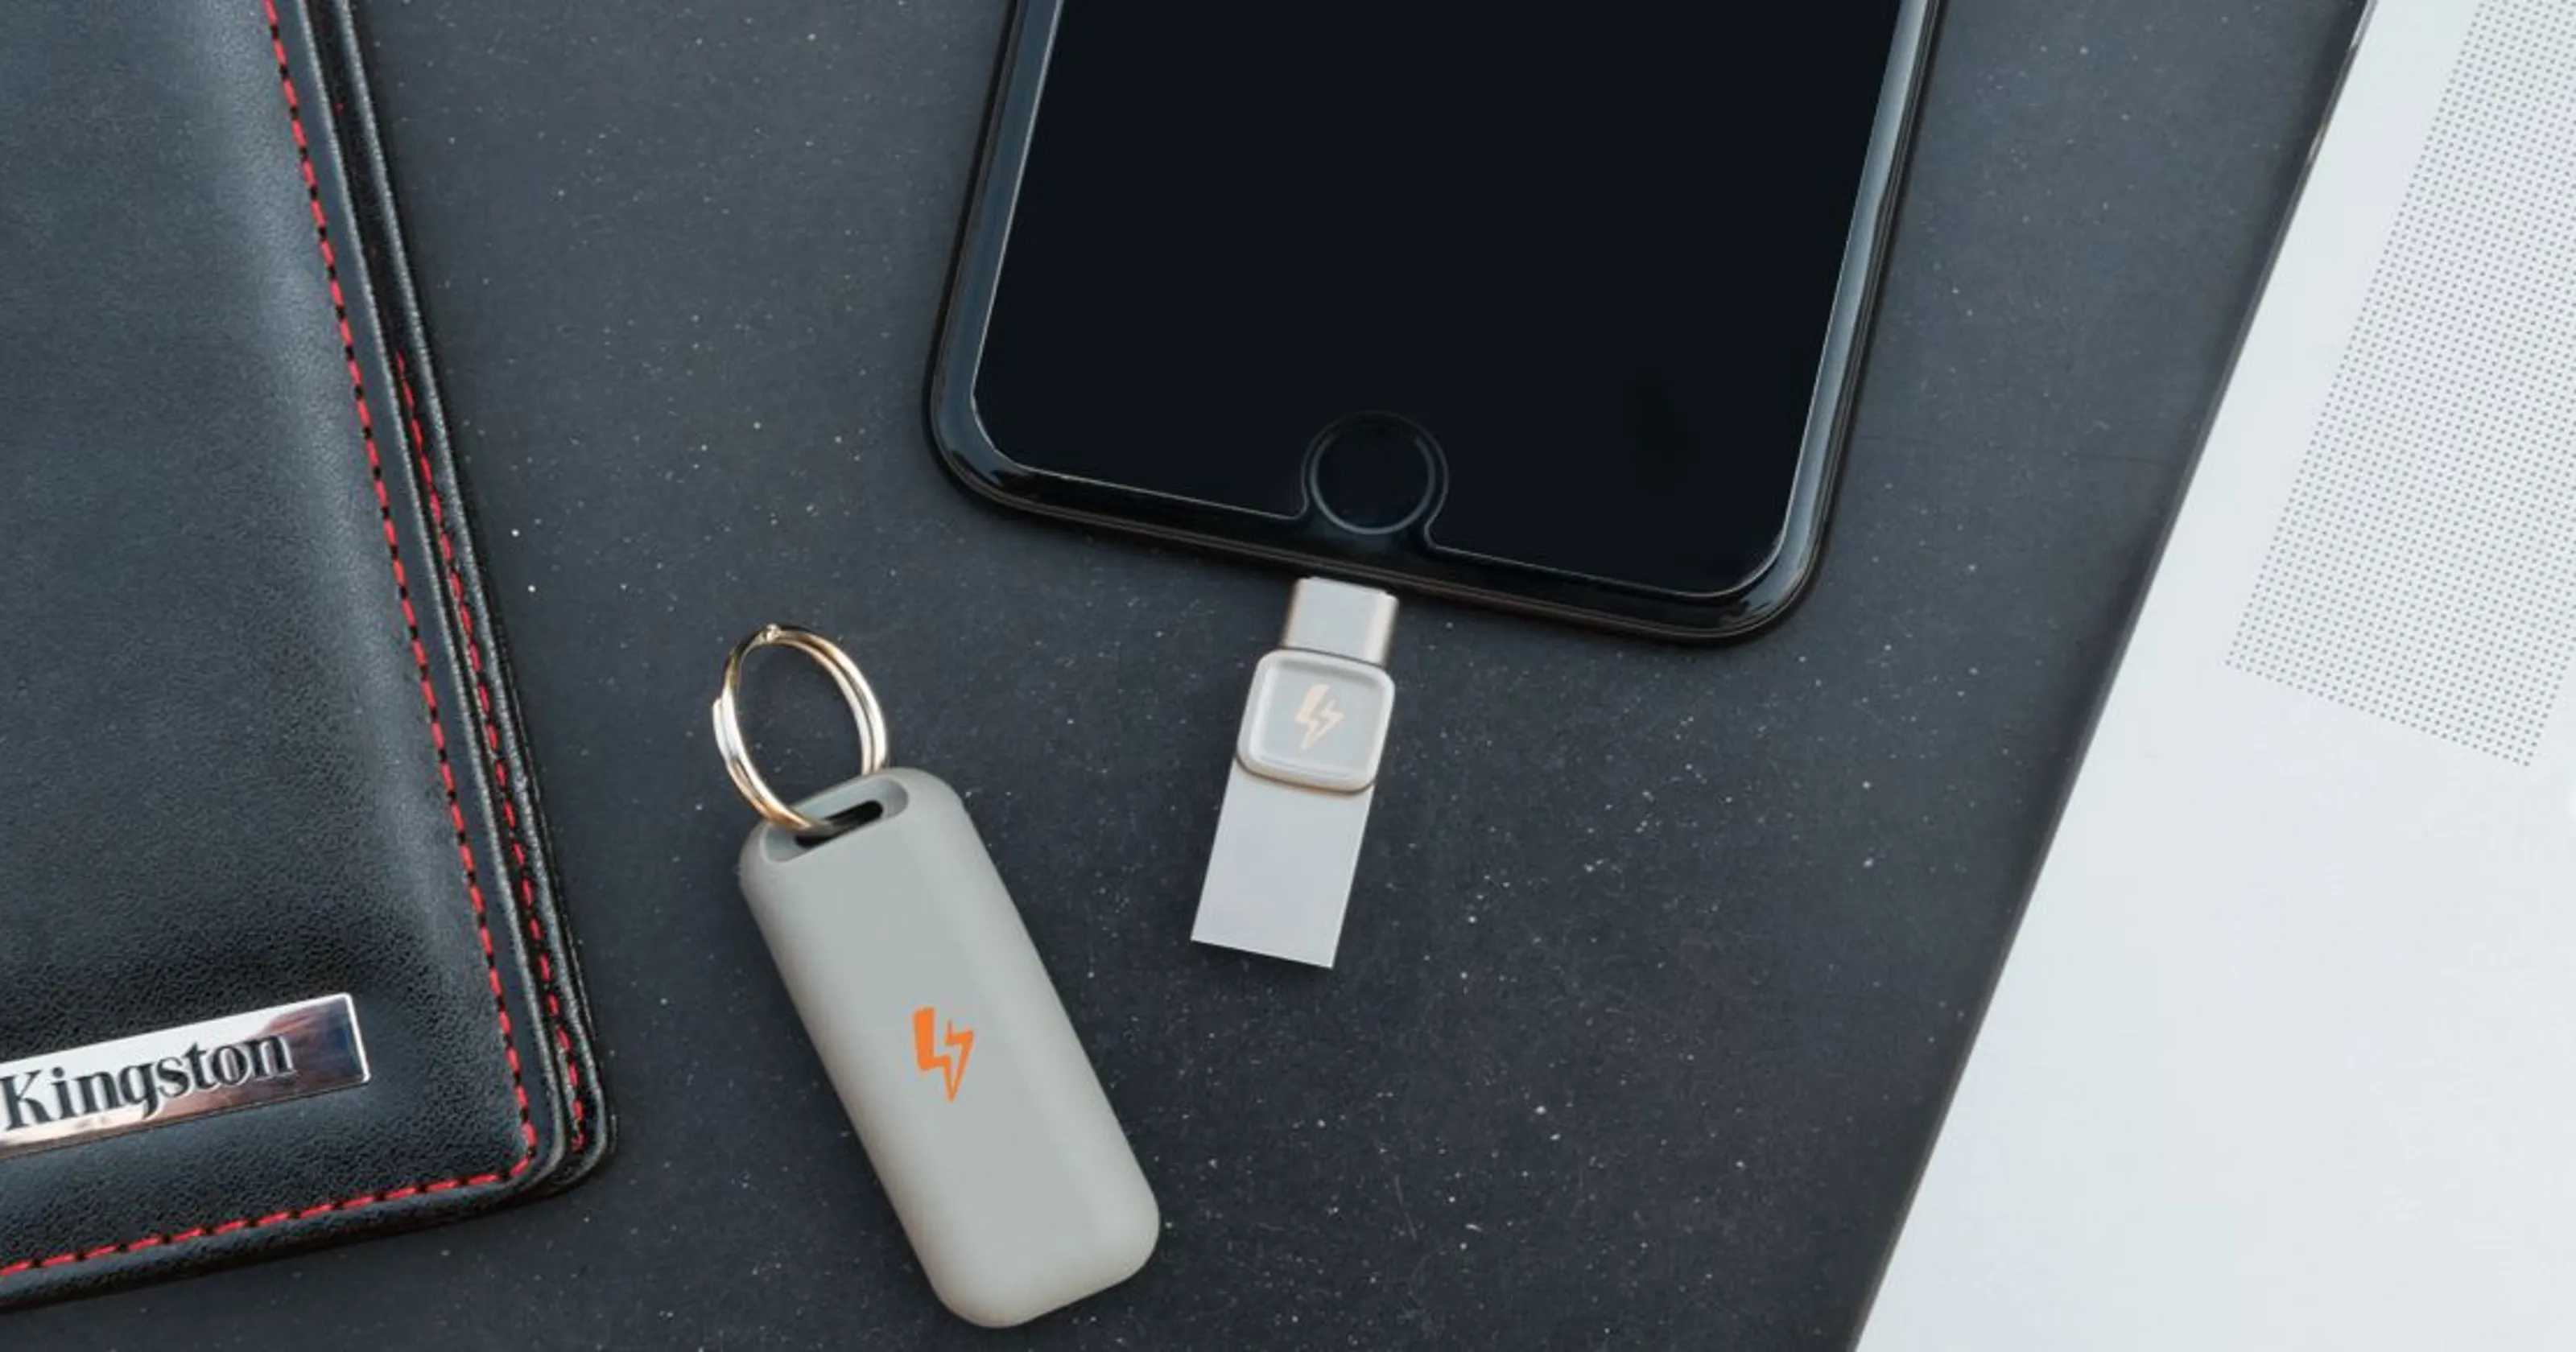
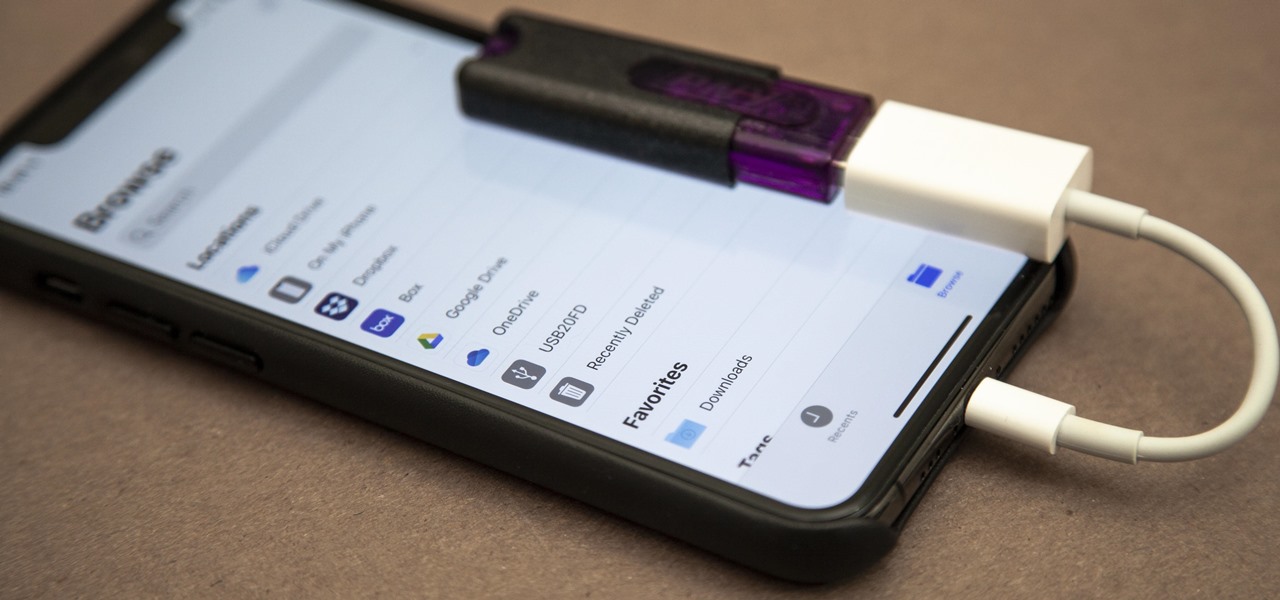
Method 5: Using External Storage Devices
If you have a large music library that exceeds the storage capacity of your iPhone, using external storage devices can be an effective solution. There are several external storage options available that allow you to expand your iPhone’s storage and store your music files externally. Here’s how you can use external storage devices to store music on your iPhone:
- Choose an external storage device that is compatible with your iPhone. Options include USB flash drives, external hard drives, and wireless storage devices.
- Connect the external storage device to your computer and transfer your music files onto it. Ensure that the files are in a compatible format supported by your iPhone, such as MP3, AAC, or WAV.
- On your iPhone, download a file manager app from the App Store that supports external storage devices. These apps allow you to access and manage files stored on external devices.
- Connect the external storage device to your iPhone using the appropriate adapter or cable.
- Open the file manager app on your iPhone and navigate to the external storage device. You should be able to see and access your music files on the device.
- Select the music files you want to store on your iPhone and copy them to the local storage of your iPhone using the file manager app.
- Once the transfer is complete, you can disconnect the external storage device from your iPhone.
Using external storage devices allows you to carry a large music library with you without occupying significant internal storage on your iPhone. It’s a practical option for individuals who have extensive music collections and want easy access to their songs on the go.
It’s worth noting that external storage devices offer storage flexibility, allowing you to transfer and manage various types of files in addition to music. This means you can utilize the same external device to store photos, videos, and documents, maximizing its utility.
When choosing an external storage device, consider factors such as storage capacity, durability, and compatibility with both your iPhone and computer. Additionally, make sure to keep your external storage device in a safe place to prevent data loss or damage.
Overall, utilizing external storage devices provides a practical and convenient method to store music on your iPhone without compromising internal storage capacity. It offers flexibility, expandability, and the ability to manage large music libraries efficiently. Whether you’re a music enthusiast or a professional who needs easy access to a vast collection of songs, external storage devices are an excellent solution to store and manage your music on your iPhone.
Conclusion
Storing music on your iPhone is crucial for enjoying your favorite tunes wherever you go. With limited storage capacity, it’s essential to explore various methods to optimize your iPhone’s storage while keeping your music collection accessible. In this article, we examined five different methods to store music on your iPhone: using iTunes, iCloud, third-party apps, AirDrop, and external storage devices.
iTunes offers a seamless way to sync your music library from your computer to your iPhone, allowing you to manage and customize your storage options. iCloud provides the convenience of storing your music in the cloud, freeing up valuable internal storage space while ensuring your entire music library is accessible on all your devices. Third-party apps offer alternative platforms for streaming and exploring a vast variety of music, giving you the flexibility to upload your own music or discover new tracks. AirDrop simplifies the process of wirelessly transferring music files between compatible Apple devices, ensuring high-quality audio without the need for cables or internet connections. External storage devices enable you to expand your iPhone’s storage capacity and carry your extensive music library with you, providing easy access to your favorite songs on the go.
When selecting the method that suits you best, consider factors such as your personal preferences, storage requirements, ease of use, and compatibility with your devices. Each method offers its own advantages and flexibility, catering to different user needs.
It’s important to regularly organize and update your music library to keep it fresh and relevant. Whether you choose to use one method or a combination of methods, ensure that you maintain a backup of your music files to prevent data loss.
By implementing one of these methods, you can effectively store your music on your iPhone, optimize your storage space, and enjoy your favorite tunes hassle-free. So go ahead, choose the method that suits you best, and take your music experience on your iPhone to the next level.
Frequently Asked Questions about How To Store Music On IPhone
Was this page helpful?
At Storables.com, we guarantee accurate and reliable information. Our content, validated by Expert Board Contributors, is crafted following stringent Editorial Policies. We're committed to providing you with well-researched, expert-backed insights for all your informational needs.


0 thoughts on “How To Store Music On IPhone”