Home>diy>Building & Construction>Where To Start Building A Tiny House
Building & Construction
Where To Start Building A Tiny House
Modified: October 31, 2024
Looking for where to start building a tiny house? Discover essential tips and resources for building construction projects to help you get started on your tiny house journey.
(Many of the links in this article redirect to a specific reviewed product. Your purchase of these products through affiliate links helps to generate commission for Storables.com, at no extra cost. Learn more)
Introduction
Welcome to the world of tiny houses, where creativity, design, and functionality come together to create cozy and efficient living spaces. Building a tiny house is not only a practical solution for those looking to downsize and live a simpler lifestyle, but it’s also a creative endeavor that allows you to tailor your living space to your unique needs and preferences.
Whether you’re an aspiring homeowner, an architectural enthusiast, or simply someone who appreciates the beauty of a well-designed and well-built structure, embarking on the journey of building a tiny house can be an exciting and rewarding experience.
In this article, we will guide you through the process of building a tiny house, starting from choosing the right location to adding the final personalized touches. So, let’s dive in and explore the steps involved in creating your dream tiny house.
Key Takeaways:
- Embrace the journey of building a tiny house, infusing personal style and functionality into every aspect. Patience, flexibility, and attention to detail are key to creating a unique and rewarding living space.
- From choosing the right location to adding final touches, building a tiny house is a creative and personalized adventure. Careful planning and innovative design allow for a cozy, sustainable, and functional home.
Read more: Where To Start Building A House
Choosing the Right Location
When it comes to building a tiny house, the location is a crucial aspect to consider. The right spot can maximize your enjoyment of the space while also ensuring that you comply with local zoning and building regulations.
First and foremost, assess your needs and preferences. Consider factors such as climate, proximity to amenities, and access to nature. Do you prefer a rural setting with scenic views, or do you want to be closer to urban areas? Understanding your lifestyle and priorities will help you narrow down your search for the perfect location.
Research is essential in this stage. Look for areas that have zoning regulations that allow for the construction of tiny houses. Some municipalities might have specific requirements such as minimum square footage or designated tiny house communities. Additionally, familiarize yourself with any building permits or codes that will need to be followed.
Consider the accessibility of utilities as well. Check if the location has access to water, electricity, and sewage services. If not, you will need to explore alternative options, such as installing a well or utilizing solar power.
It’s also important to take into account the cost of land and any associated fees, such as property taxes or homeowner association dues. Evaluate your budget and determine what you can afford without compromising on other aspects of the tiny house build.
Lastly, think about the long-term viability of the location. Are there any plans for future developments or changes to the area that may impact your living situation? Evaluate the potential growth and stability of the region before finalizing your decision.
Remember, the location of your tiny house will shape your everyday life, so take the time to thoroughly research and choose a spot that aligns with your vision and lifestyle.
Researching Zoning and Building Regulations
Before embarking on your tiny house building journey, it’s crucial to familiarize yourself with the zoning and building regulations in the area where you plan to construct your home. These regulations vary from one jurisdiction to another, so it’s essential to do thorough research to ensure compliance and avoid any legal issues down the line.
Start by contacting the local planning or building department to inquire about the specific requirements for tiny house construction. They will provide you with valuable information about zoning regulations, building codes, and any permits or licenses needed for your project.
Some areas have specific zoning designations for tiny houses, while others may require you to build within established residential areas. Additionally, minimum square footage requirements and setbacks from property lines might be enforced, so it’s important to understand these limitations to plan your build accordingly.
Building codes dictate the safety and structural standards that must be met during construction. They cover aspects such as electrical, plumbing, insulation, and fire safety. It’s crucial to understand and follow these codes to ensure the safety and compliance of your tiny house.
While some areas have embraced the tiny house movement and have created specific regulations to accommodate it, others may have more restrictive regulations. In some cases, you might need to apply for variances or waivers to work within the existing regulations. Consulting with professionals, such as architects or contractors experienced in tiny house construction, can be helpful in navigating these complex regulations.
It’s also important to consider any additional regulations that may apply, such as HOA (Homeowners Association) rules or covenants if you plan to build in a community with such guidelines. Review these rules carefully and ensure that your tiny house plans align with them.
By conducting thorough research and understanding the zoning and building regulations in your area, you can avoid potential setbacks and legal issues. It’s worth taking the time to educate yourself on these requirements to ensure a smooth and successful tiny house building process.
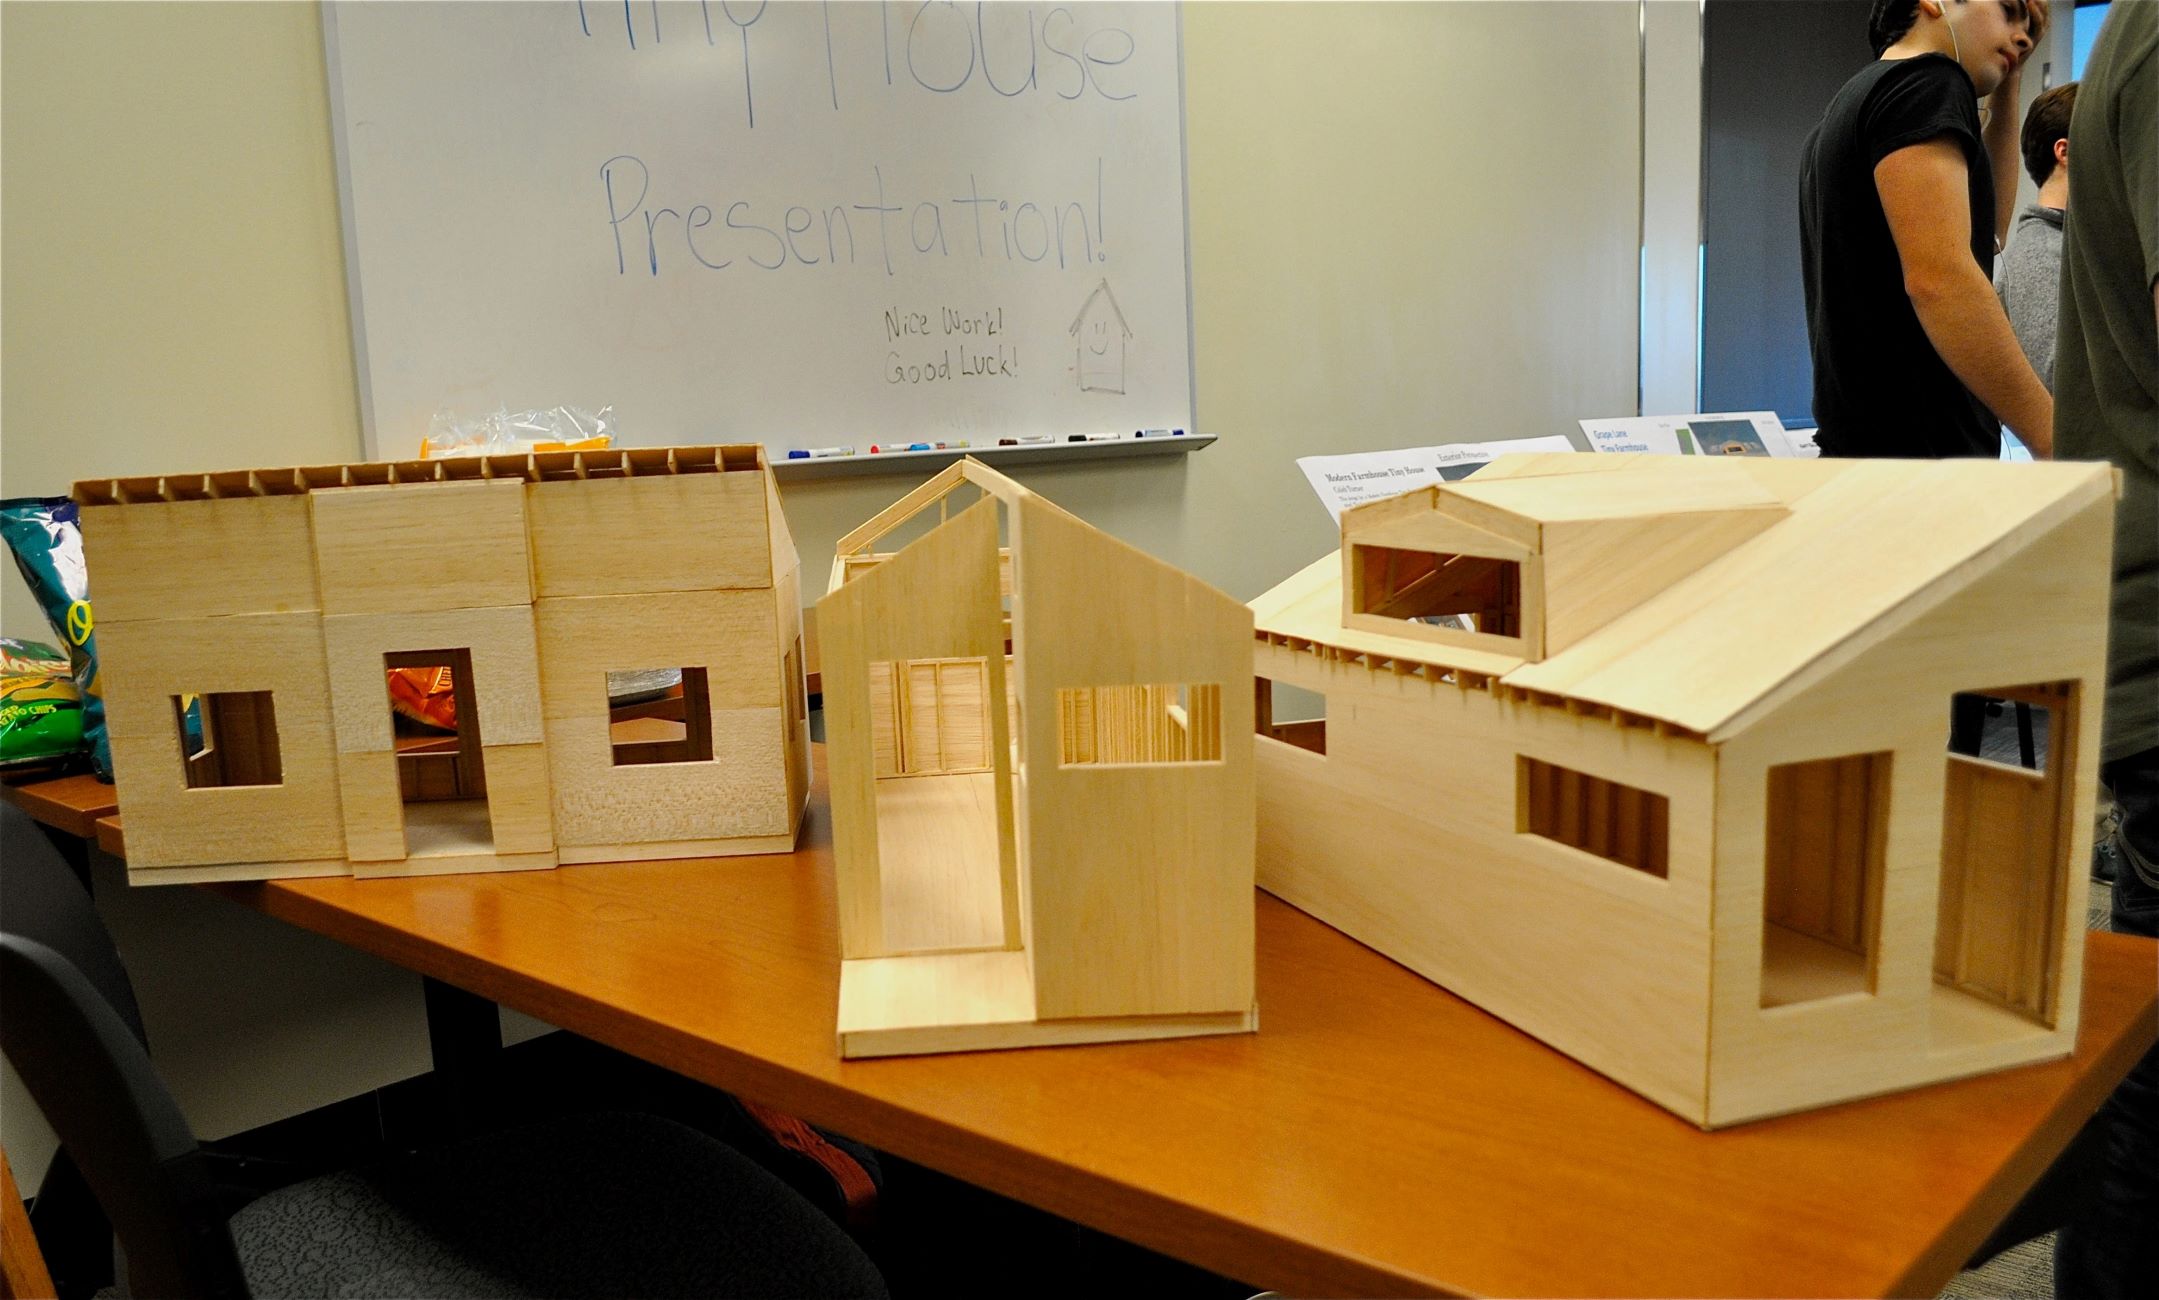
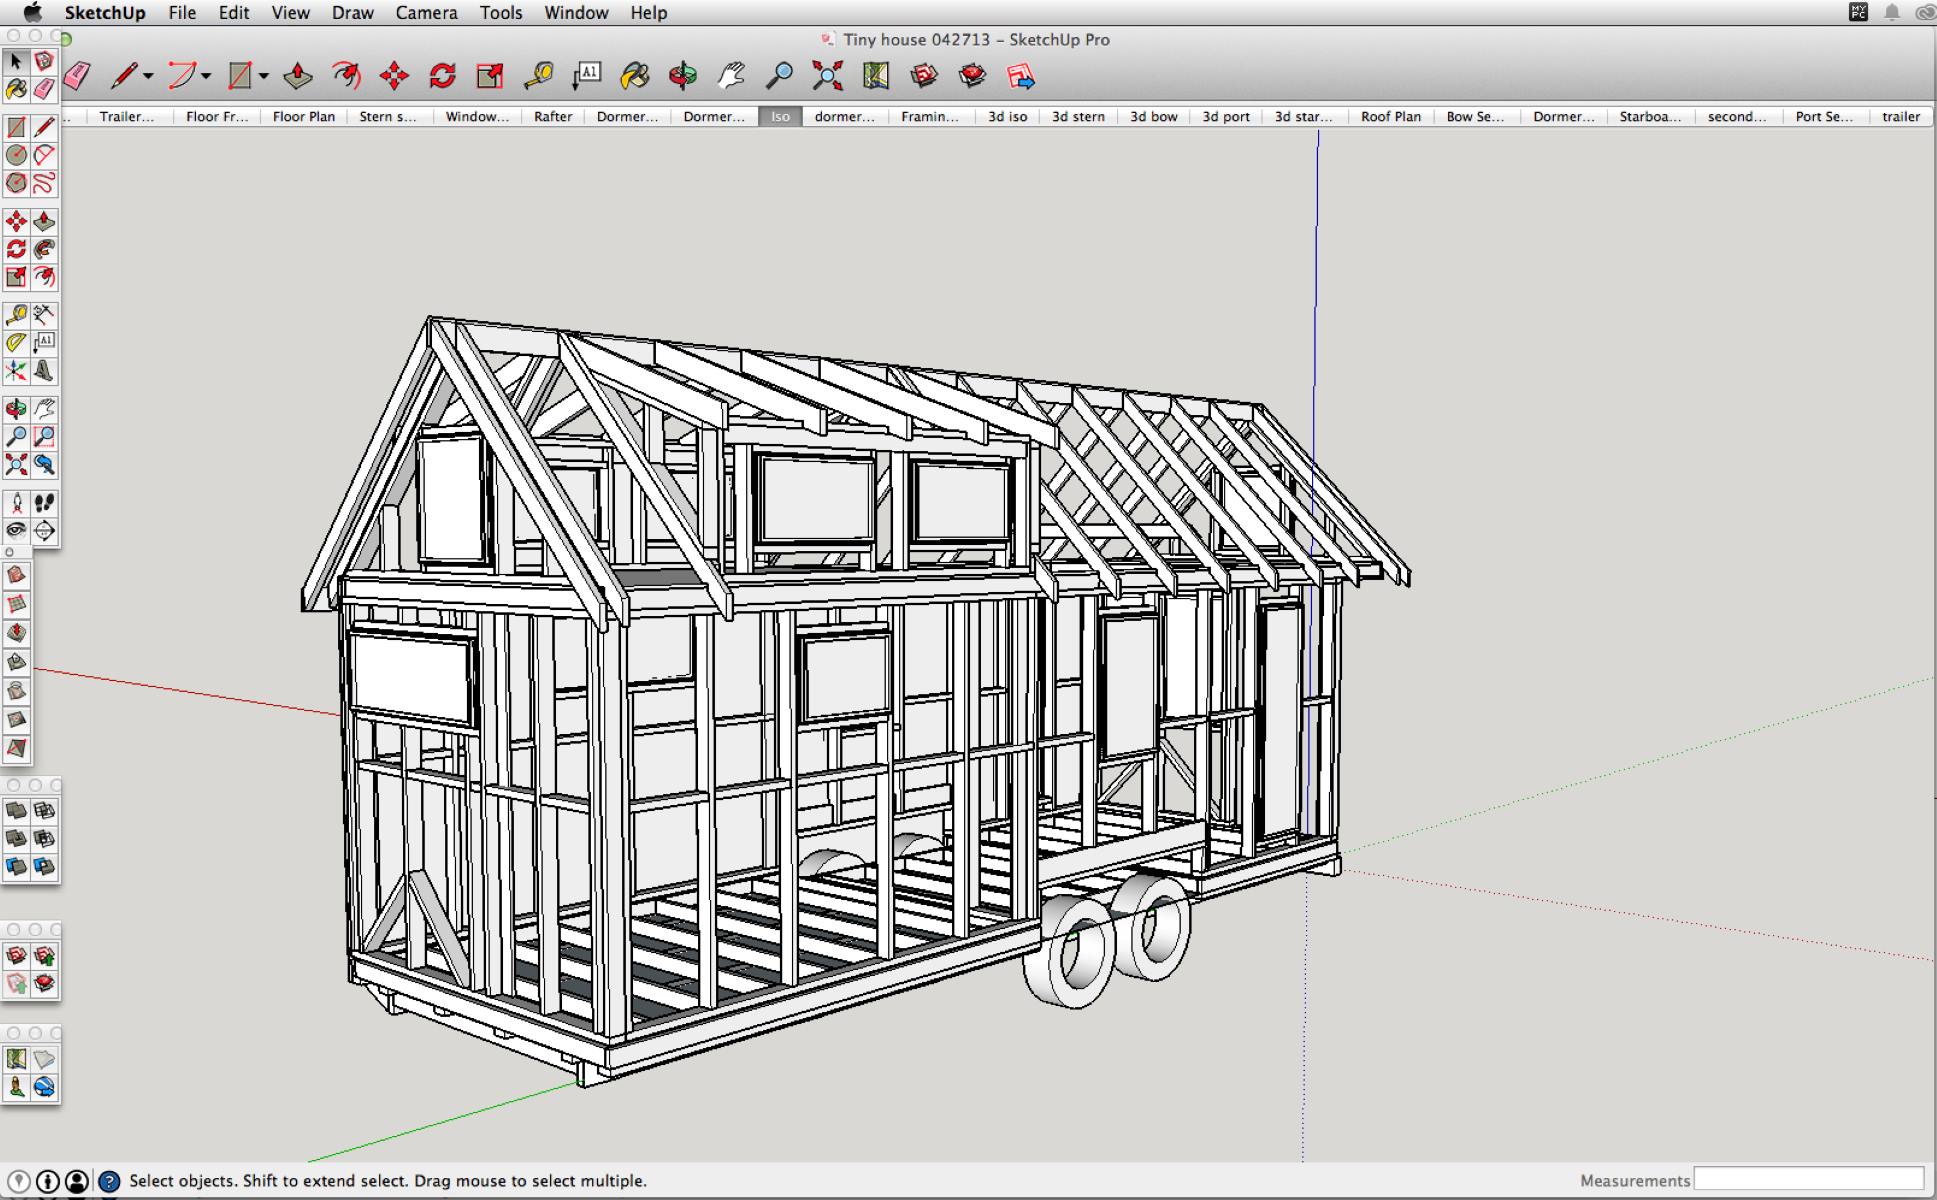
Designing Your Tiny House
The design phase of building a tiny house is where your creativity can truly shine. It’s an opportunity to create a space that reflects your personal style, maximizes functionality, and accommodates your specific needs. Here are some key considerations when designing your tiny house:
Space Optimization: Every square inch matters in a tiny house, so efficient use of space is crucial. Consider utilizing multifunctional furniture, such as a sofa that can transform into a bed, or storage solutions that maximize vertical space. Think about your daily activities and prioritize the areas that are most important to you.
Layout: Determine the overall layout of your tiny house. Common layouts include open plan designs, where there are minimal internal walls to maximize the sense of space, and more compartmentalized layouts that separate different areas of the house. Take into account factors such as flow, privacy, and ease of movement when designing the layout.
Natural Light: Incorporating ample natural light into your design can make a small space feel more open and airy. Consider large windows, skylights, and glass doors to let in as much natural light as possible. Carefully position windows to take advantage of scenic views and to create a connection with the outdoors.
Storage: Creative storage solutions are essential in a tiny house. Look for innovative ways to make the most of every nook and cranny, such as built-in shelving, under-bed storage, or hidden compartments. Customizing storage to fit your specific needs will help keep your tiny house organized and clutter-free.
Utilities: Plan for your utility needs early in the design phase. Determine the locations of electrical outlets, plumbing fixtures, and heating and cooling systems. Consider energy-efficient options like solar panels and composting toilets to reduce your environmental footprint.
Aesthetics: Personalize the design of your tiny house to reflect your style. Consider colors, textures, and materials that create a welcoming and cozy atmosphere. Don’t be afraid to think outside the box and incorporate unique elements that make your tiny house truly one-of-a-kind.
Flexibility: Think about future adaptability when designing your tiny house. Life circumstances can change, so designing your space to be versatile and easily adaptable to different needs will ensure its longevity and functionality over time.
Be sure to sketch out your ideas and create detailed floor plans before the construction begins. This will help you visualize the space and make any necessary adjustments to ensure a seamless and functional design.
The design phase is an exciting opportunity to unleash your creativity and create a space that perfectly suits your needs and style. Enjoy the process of designing your tiny house, and let your imagination guide you towards creating a home that is uniquely yours.
Gathering Materials and Tools
Gathering the necessary materials and tools is a crucial step in the process of building a tiny house. Having all the required supplies at hand will ensure a smooth construction process and help you stay organized. Here are some key considerations when gathering materials and tools:
Materials: Start by creating a detailed list of the materials needed for your tiny house construction. This list will typically include lumber, insulation, roofing materials, siding, windows, doors, flooring, and any additional materials required for plumbing and electrical work. Research local suppliers and compare prices to get the best value for your budget.
Tools: Building a tiny house will require a variety of tools, both basic and specialized. Basic tools include a tape measure, level, hammer, screwdriver, drill, and saw. Depending on the complexity of your design, you may also need specialized tools such as a miter saw, circular saw, or welder. If you don’t already have the necessary tools, consider renting or borrowing them to minimize costs.
Safety Equipment: Don’t forget to prioritize safety by gathering the appropriate safety equipment. This should include safety goggles, gloves, a hard hat, dust masks, and hearing protection. Having these items on hand will help protect you during the construction process.
Supplier Research: Take the time to research reputable suppliers for your materials. Look for suppliers that offer quality products at reasonable prices. It’s also advisable to read reviews or ask for recommendations from experienced builders to ensure you’re purchasing from reliable sources.
Estimating Quantities: Accurately estimating the quantities of materials needed is essential to avoid over- or under-ordering. Use your detailed floor plans and blueprints to calculate the required amounts of each material. It’s always a good idea to add a small buffer in your estimates to account for any potential waste or unforeseen circumstances during construction.
Organization: Once you have gathered all your materials and tools, it’s important to keep them organized and easily accessible. Consider investing in storage solutions such as shelves, bins, and toolboxes to keep everything neat and tidy. Labeling your materials and tools can also save time and effort during the construction process.
Recycling and Reusing: Building sustainably is becoming increasingly important. Look for opportunities to recycle or repurpose materials when possible. For example, salvaged lumber can add unique character to your tiny house while reducing the environmental impact of your construction.
By carefully gathering the necessary materials and tools, you’ll be well-prepared to tackle each phase of the construction process. Take the time to plan and organize, and make sure you have everything you need before you start building your dream tiny house.
Read more: How To Build A Foundation For A Tiny House
Setting a Budget
Setting a realistic budget is an essential step in the process of building a tiny house. A well-planned budget will help you stay on track financially and ensure that you can complete your project without encountering any financial roadblocks. Here are some key considerations when setting your budget:
Determine Your Funding: Start by assessing your available funds and determining how much you can afford to allocate towards your tiny house construction. Consider your savings, any available loans or grants, and any additional income sources you may have. Having a clear understanding of your funding sources will help you set a realistic budget.
Research Costs: Research and gather information about the costs associated with building a tiny house. Consider factors such as the size of the house, the complexity of the design, and the materials and finishes you plan to use. Look for average costs of similar projects in your area, and make a list of the costs involved in each phase of the construction process.
Account for Contingencies: It’s important to factor in contingencies in your budget to account for any unexpected expenses or changes in plans. Set aside a percentage of your budget (usually around 10-15%) as a contingency fund. This will provide a buffer in case of unforeseen circumstances or cost overruns.
Prioritize Your Expenses: Determine which elements of your tiny house are most important to you and allocate your budget accordingly. Decide where you want to allocate more funds, such as high-quality materials, energy-efficient systems, or custom finishes, and adjust your budget to accommodate these priorities.
Consider DIY versus Hiring Professionals: Assess your skill level and decide how much of the construction process you can handle yourself. DIY projects can help save money, but keep in mind that some aspects might require expertise, such as plumbing or electrical work. If needed, budget for hiring professionals to ensure the safety and quality of your construction.
Keep Track of Expenses: Throughout the construction process, keep track of all your expenses. Maintain a detailed spreadsheet or use budgeting apps to monitor your spending. This will help you stay within your allocated budget and identify any areas where adjustments may be needed.
Be Realistic: It’s important to set a budget that is realistic and within your means. While it’s nice to have all the bells and whistles, be mindful of your financial situation and avoid overextending yourself. Remember that the goal of building a tiny house is to create an affordable and sustainable living space.
By setting a well-planned budget, you can ensure that your tiny house project stays financially sustainable. Take the time to research costs, prioritize your expenses, and track your spending throughout the process. With careful budgeting, you’ll be able to build your dream tiny house without breaking the bank.
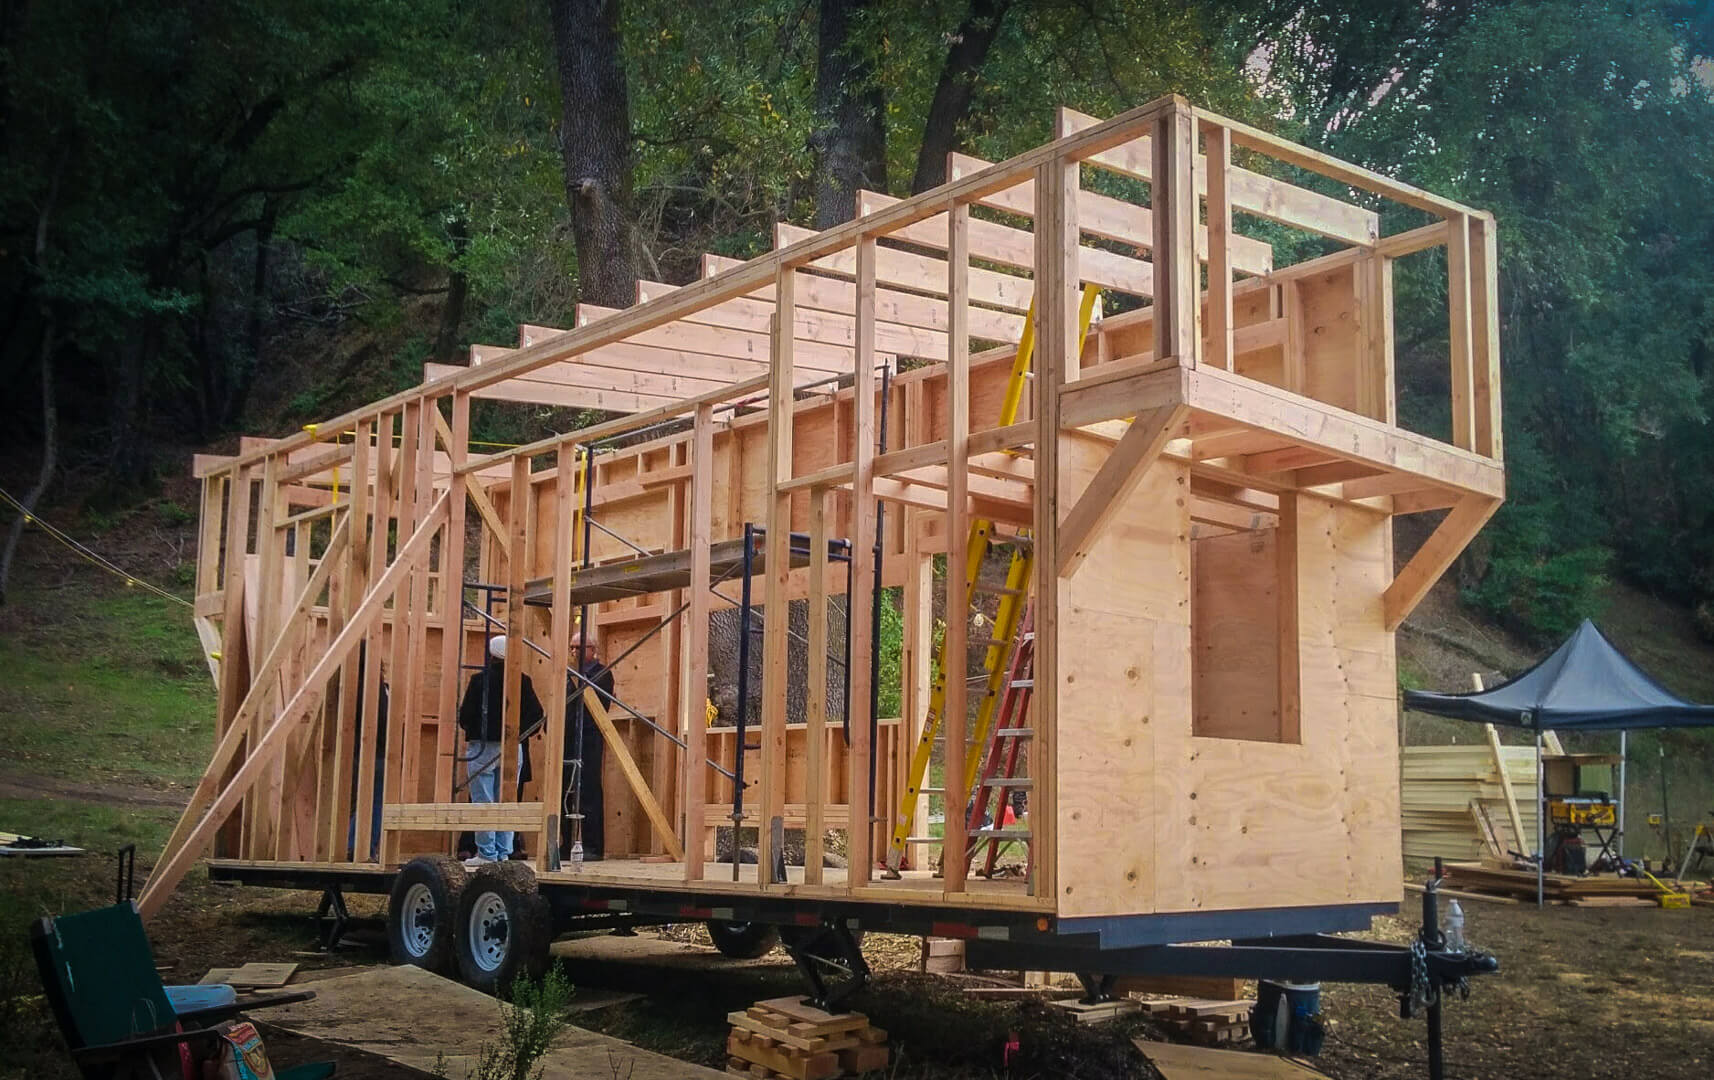
Building Foundation and Floor
The foundation and floor of your tiny house provide the structural support and stability for the entire building. It’s crucial to carefully plan and construct these elements to ensure a solid and durable foundation for your tiny home. Here are the key steps involved in building the foundation and floor:
Site Preparation: Begin by preparing the site where your tiny house will be located. Clear the area of any vegetation, rocks, or debris. Level the ground, ensuring it is flat and stable. Consider installing a moisture barrier, such as a layer of gravel or a vapor barrier, to prevent moisture from seeping into the foundation.
Foundation Options: There are several foundation options for a tiny house, depending on your specific needs and the regulations in your area. Some common options include concrete piers or blocks, skids or trailers, or even a permanent concrete slab. Explore the pros and cons of each type of foundation and choose the one that best suits your situation.
Building the Subfloor: Once the foundation is in place, it’s time to construct the subfloor. Start by framing the floor using treated lumber for added durability and resistance to moisture. Ensure that the framing is square and level, using a carpenter’s square and a level to check for accuracy.
Insulating the Floor: Insulate the subfloor to improve energy efficiency and provide better thermal comfort. Install insulation between the floor joists, ensuring a snug fit to prevent air leakage. Use an appropriate insulation material, such as fiberglass batts or rigid foam boards, and consider adding a vapor barrier to prevent moisture buildup.
Installing the Flooring: Choose the flooring material that best fits your aesthetic preferences and lifestyle. Common options for tiny houses include hardwood, laminate, vinyl, or tile flooring. Install the flooring according to the manufacturer’s instructions, ensuring a secure and level installation.
Securing the Floor: To ensure stability and prevent movement, secure the floor to the foundation or trailer using appropriate fasteners. Use anchor bolts, brackets, or screws to secure the subfloor to the foundation or trailer frame. This step is crucial for structural integrity, especially if your tiny house will be transported.
Incorporating Utility Systems: During the floor construction phase, consider the placement and installation of utility systems such as plumbing and electrical. Plan the layout and consult with professionals if needed to ensure proper installation and access points for future maintenance.
It’s important to follow local building codes and regulations during the construction of the foundation and floor. Additionally, consult with professionals if you’re unsure about any aspect of the process, especially when it comes to utility systems and structural integrity.
By carefully constructing the foundation and floor, you’ll create a sturdy base for your tiny house. Take your time, use quality materials, and pay attention to details to ensure a solid foundation that will support your dream tiny home for years to come.
When starting to build a tiny house, begin by researching local zoning laws and building codes to ensure compliance before purchasing land or materials.
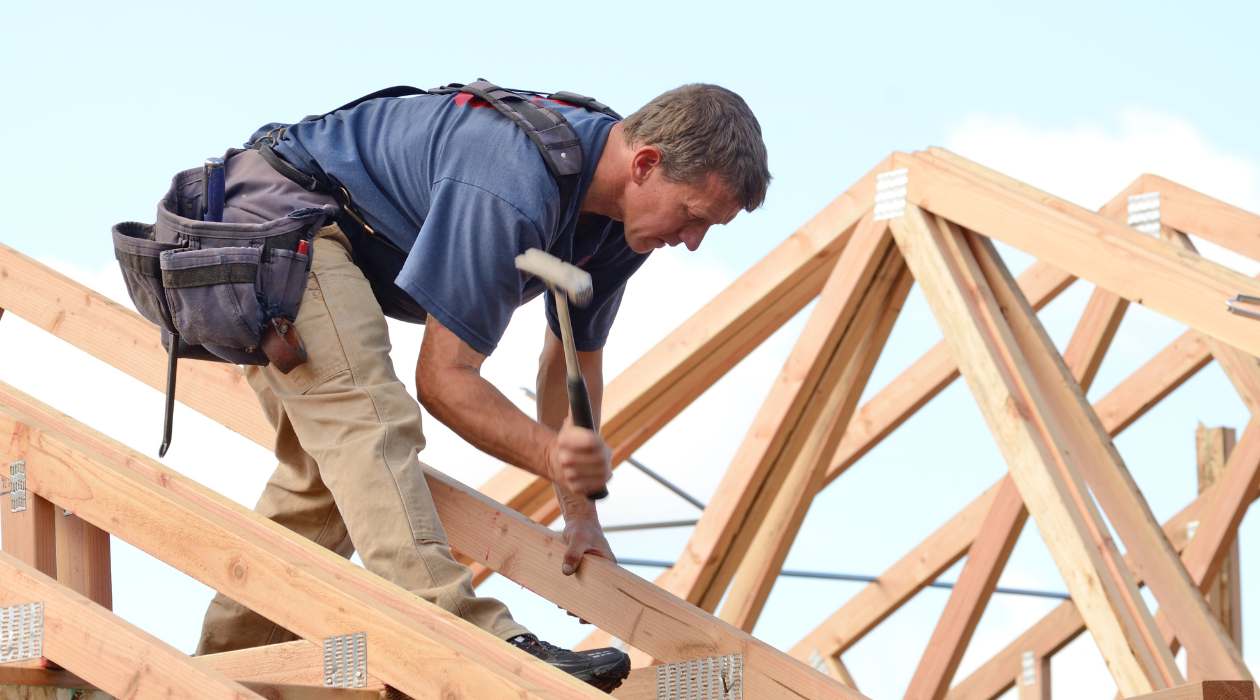
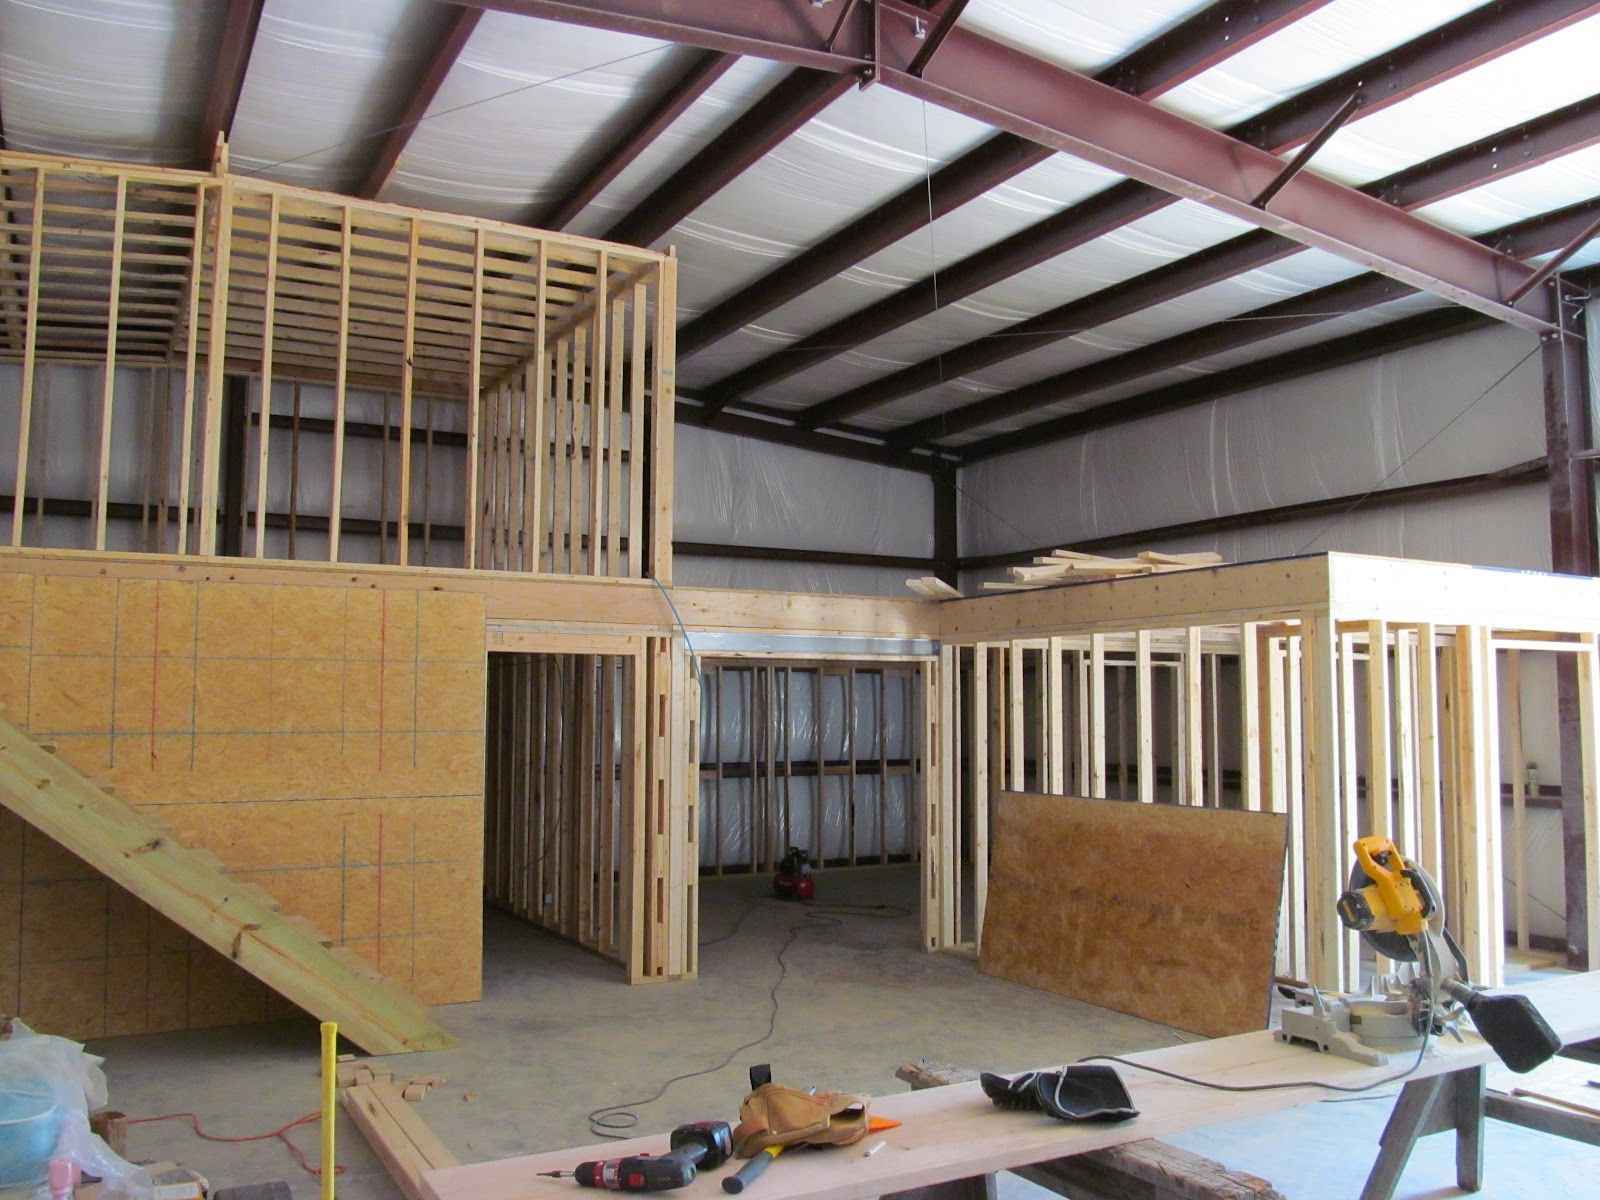
Constructing Walls and Roof
The walls and roof of your tiny house provide protection from the elements and give your home its structure and shape. Building these components requires careful planning, precise measurements, and attention to detail. Here are the key steps involved in constructing the walls and roof of your tiny house:
Wall Framing: Start by framing the walls according to your design specifications. Use studs made of sturdy lumber, typically 2×4 or 2×6, to create the frame. Ensure that the walls are square by using a carpenter’s square, and check for levelness using a level. Leave spaces for windows and doors as per your floor plan.
Insulation: Insulate the wall cavities to improve energy efficiency and comfort. Use appropriate insulation material, such as fiberglass batts or spray foam insulation, and install it between the wall studs. Ensure a snug fit to prevent air leakage and follow the manufacturer’s guidelines for proper installation.
Exterior Sheathing: Apply exterior sheathing to the outside of the framed walls for added strength and to create a base for the exterior cladding. Common sheathing materials include oriented strand board (OSB) or plywood. Secure the sheathing to the wall studs using nails or screws, following the manufacturer’s recommendations.
Windows and Doors: Install windows and doors in the framed wall openings. Choose energy-efficient options that fit your design aesthetic. Follow the manufacturer’s instructions for proper installation, ensuring they are securely attached and properly sealed to prevent air and moisture infiltration.
Roof Trusses or Rafters: Depending on your design, either install prefabricated roof trusses or build roof rafters on-site. Trusses are pre-made triangular frames that consist of top and bottom chords connected by diagonal bracing. Rafters are sloping beams that support the roof. Ensure the trusses or rafters are properly aligned and securely installed.
Roof Sheathing: Apply roof sheathing, such as OSB or plywood, over the roof trusses or rafters. Securely fasten the sheathing to provide a stable surface for the roofing materials. Pay attention to sealing any gaps or joints to prevent water infiltration.
Roofing: Choose the roofing material that suits your climate and aesthetic preferences. Options range from asphalt shingles to metal roofing or even green roofs for added sustainability. Install the roofing material according to the manufacturer’s instructions, ensuring proper waterproofing and sufficient overlap between materials.
Flashing and Weatherproofing: Pay attention to flashing and weatherproofing details to ensure a watertight and durable roof. Install flashing around roof edges, valleys, and any roof penetrations, such as chimneys or vent pipes. Apply appropriate weatherproofing materials, such as roofing felt or a synthetic underlayment, before installing the final roofing material.
Throughout the construction of the walls and roof, ensure you follow local building codes and regulations. It’s crucial to consult with professionals if you’re unsure about any aspect of the construction process, especially when it comes to structural integrity and weatherproofing.
By carefully constructing the walls and roof of your tiny house, you’ll create a secure and sheltered living space that reflects your design vision. Take your time, use quality materials, and pay attention to details to ensure a strong and durable home for years to come.
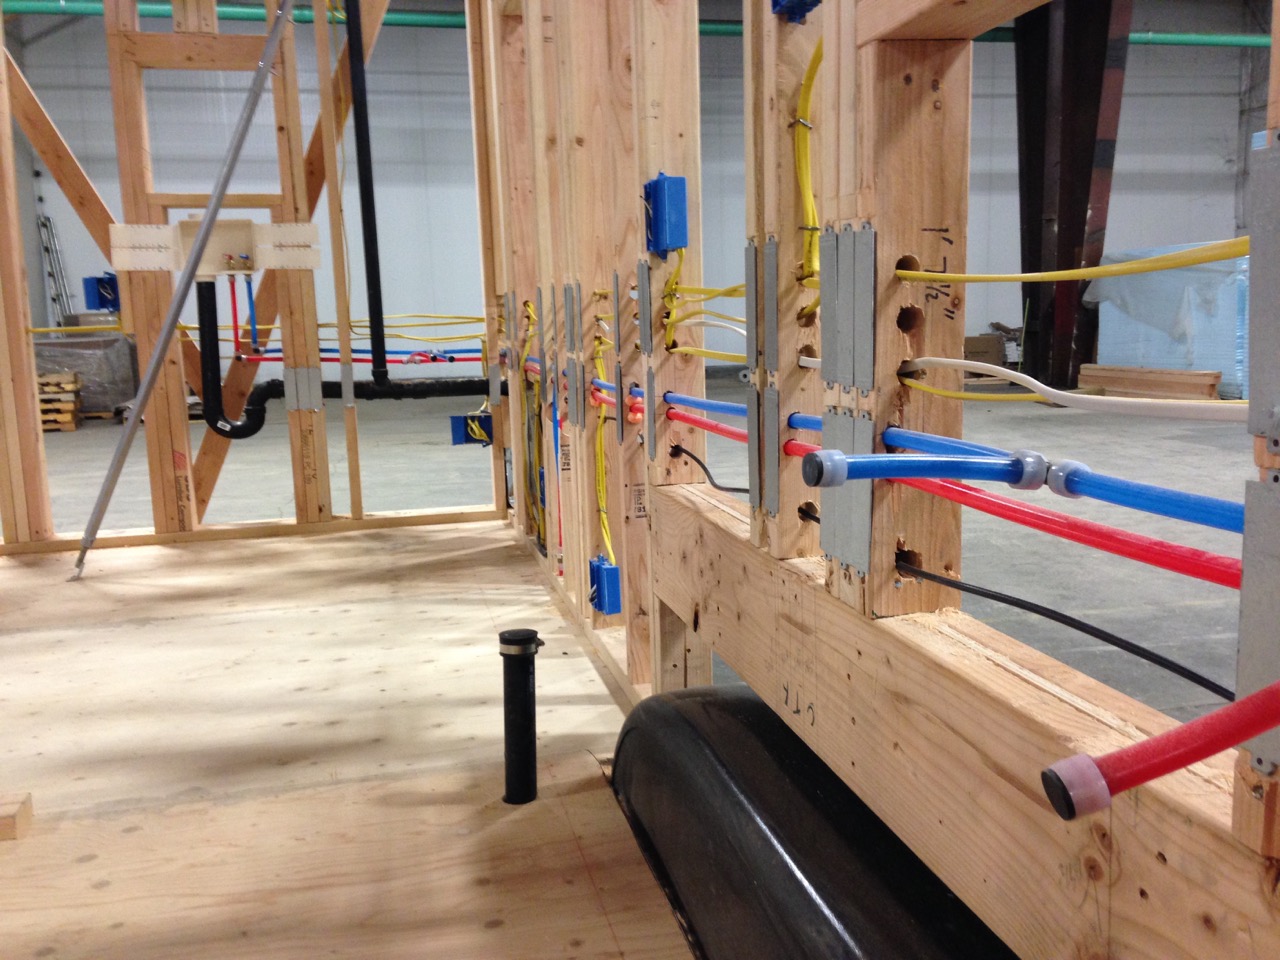
Installing Plumbing and Electrical Systems
Installing plumbing and electrical systems in your tiny house is crucial for a comfortable and functional living space. These systems provide essential amenities and modern conveniences. Here are the key steps involved in installing plumbing and electrical systems:
Plumbing:
- Planning: Start by planning the layout of your plumbing system. Determine the locations of fixtures such as sinks, showers, toilets, and water heaters. Consider both the functionality and aesthetics of the space.
- Piping: Install the water supply and drainage pipes according to your design and local plumbing codes. Use materials such as copper, PEX (cross-linked polyethylene), or PVC (polyvinyl chloride), depending on your preferences and local regulations.
- Faucets and Fixtures: Install faucets, showers, and other fixtures securely and properly seal the connections to prevent leaks. Consider using low-flow fixtures to conserve water and maximize efficiency.
- Water Heater: Install a water heater suitable for the size and needs of your tiny house. This can be a tankless water heater or a compact tank-style water heater. Position it securely and connect it to the water supply and appropriate venting if required.
- Waste Water System: Connect your plumbing system to a waste water tank or a sewer/septic system. Install a drain pipe that allows waste water to flow away from the fixtures and properly vent the system to prevent odors and pressure buildup.
Electrical:
- Design: Plan the layout of electrical outlets, switches, and lighting fixtures in your tiny house. Consider the placement of outlets for convenience and functionality.
- Wiring: Install electrical wiring following local electrical codes. Use appropriate wiring materials, such as non-metallic sheathed cable (Romex), and ensure proper sizing to handle the electrical load. It’s highly recommended to consult with a licensed electrician for complex wiring tasks.
- Electrical Panel: Install an electrical panel to distribute power throughout your tiny house. This panel should be properly sized and equipped with circuit breakers or fuses to protect the electrical system from overloads or faults.
- Outlets and Switches: Install electrical outlets, switches, and lighting fixtures according to the planned layout. Ensure proper grounding and secure connections.
- Lighting: Install lighting fixtures that fit your design aesthetic and provide adequate illumination for each area of your tiny house. Consider energy-efficient options like LED lighting to minimize power consumption.
- Appliance Hookups: Connect appliances, such as refrigerators, stoves, or air conditioning units, to the electrical system as per manufacturer’s instructions.
It’s important to hire a professional electrician and plumber to ensure the safety and compliance of your plumbing and electrical systems. They can provide expert guidance and ensure that all the installations meet the necessary codes and regulations. Don’t forget to have your work inspected by the relevant authorities before closing up walls or ceilings.
By properly installing plumbing and electrical systems, you’ll create a fully functional tiny house that meets your needs and provides the modern conveniences you desire.
Insulating and Waterproofing
Insulating and waterproofing your tiny house is essential to ensure a comfortable and durable living space. Proper insulation helps regulate temperature, conserves energy, and enhances soundproofing, while effective waterproofing protects the structure from moisture damage. Here are the key steps involved in insulating and waterproofing:
Insulating:
- Choose Insulation Types: Select the appropriate insulation materials for your tiny house, considering factors such as budget, climate, and personal preferences. Common options include fiberglass batts, cellulose, spray foam, or rigid foam boards.
- Install Wall Insulation: Install insulation between the wall studs, ensuring a snug fit to prevent air leaks. Use a vapor barrier if required by your climate. Pay attention to any electrical or plumbing penetrations and properly insulate around them.
- Insulate the Roof and Ceiling: Place insulation materials in the attic or roof space of your tiny house, depending on your design. This will help regulate temperature and prevent heat loss. Consider installing baffles or vents to promote proper airflow and prevent moisture buildup.
- Floor Insulation: Insulate the floor of your tiny house to improve energy efficiency and thermal comfort. Install insulation materials between or below the floor joists, following the manufacturer’s instructions. Ensure proper sealing to prevent air leakage.
- Address Air Leakage: Pay attention to air sealing to minimize drafts and improve energy efficiency. Seal gaps around windows and doors, electrical outlets, and plumbing penetrations with caulking or weatherstripping. Properly seal any cracks or gaps in the walls, ceilings, or floor.
Waterproofing:
- Exterior Weatherproofing: Protect your tiny house from the elements by applying a weather-resistant barrier on the exterior. This can be in the form of house wrap, building paper, or a liquid-applied membrane. Ensure proper overlapping and sealing to prevent water infiltration.
- Roof Waterproofing: Install a high-quality roofing material that has excellent waterproofing properties. Properly install flashing around roof penetrations such as chimneys or vents to prevent water leaks. Ensure that the roof is sloped correctly to facilitate water drainage.
- Window and Door Waterproofing: Properly seal windows and doors to prevent water penetration. Install flashing around their frames and use suitable weatherstripping to create a tight seal.
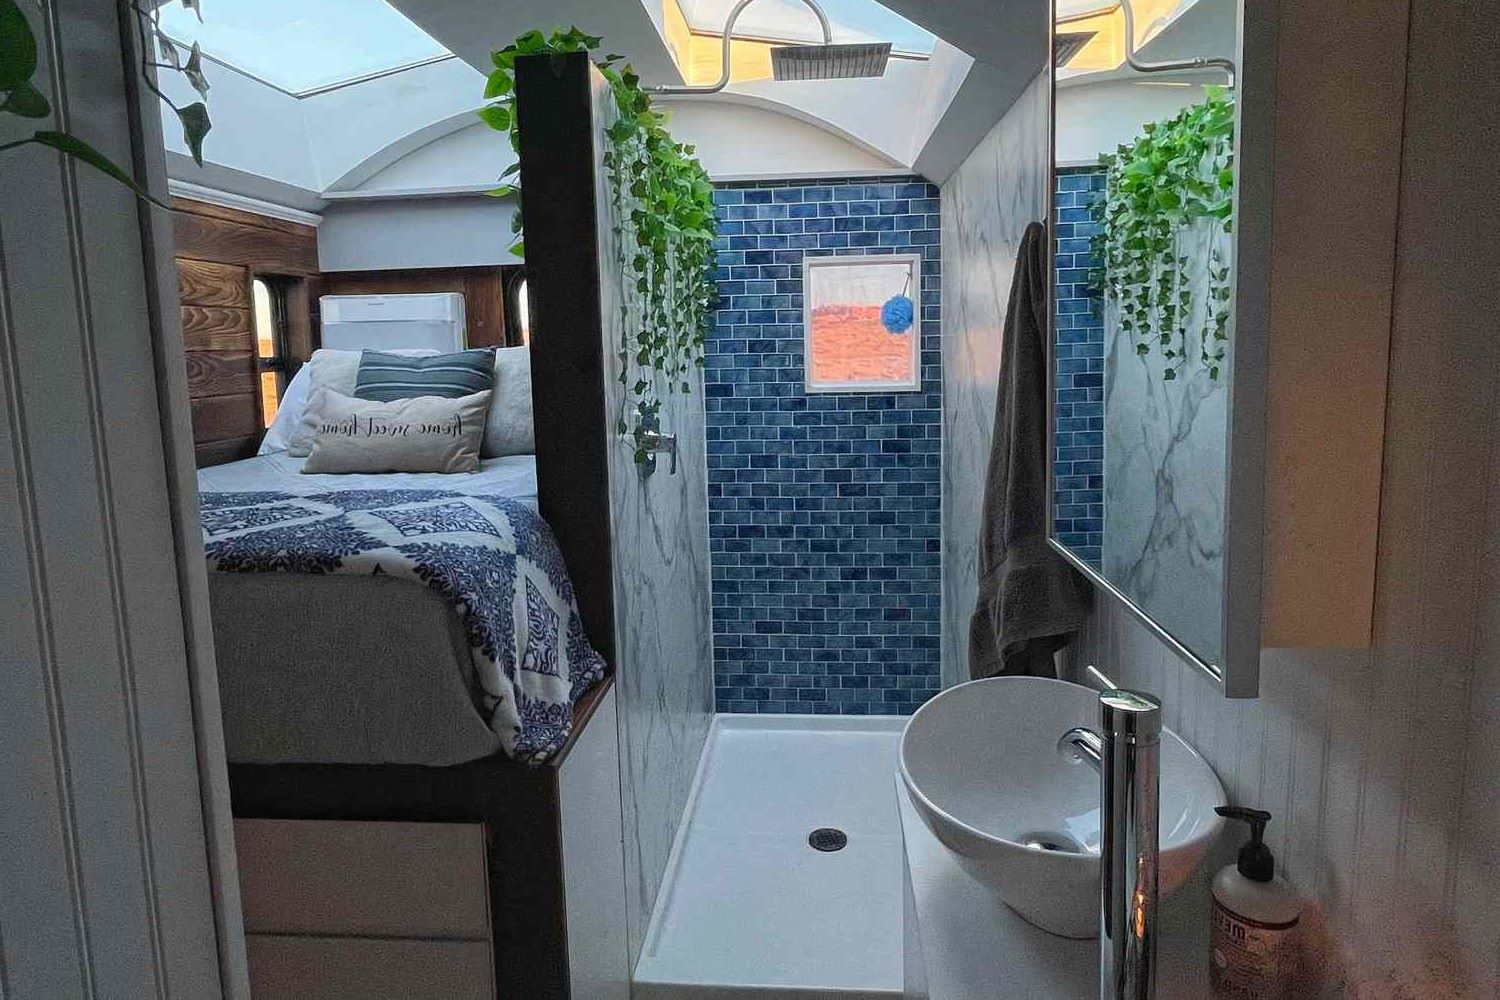
- Bathroom and Kitchen Waterproofing: Pay extra attention to wet areas such as bathrooms and kitchens. Install waterproof membranes in shower stalls and behind kitchen sinks to prevent water damage to the surrounding walls and floor.
- Proper Ventilation: Ensure adequate ventilation in your tiny house to control moisture levels and prevent condensation. Install exhaust fans in bathrooms and kitchens to remove excess moisture. Consider opening windows or using a mechanical ventilation system to promote air circulation.
Insulating and waterproofing your tiny house is a critical step in creating a comfortable and long-lasting living space. Follow local building codes and regulations, and consider consulting professionals to ensure proper installation.
By properly insulating and waterproofing your tiny house, you’ll create an energy-efficient and resilient structure that will provide year-round comfort and protection.
Interior Finishing
Interior finishing is the stage where your tiny house truly starts to feel like a home. This step involves adding the final touches and details that will give your space its unique personality and style. Here are the key aspects to consider during the interior finishing of your tiny house:
Walls:
- Wall Coverings: Select wall coverings that match your design aesthetic. Options include paint, wallpaper, wood paneling, or reclaimed materials. Ensure proper installation and consider using low-VOC (volatile organic compounds) paint or eco-friendly finishes for a healthier indoor environment.
- Trim and Molding: Install trim and molding along the edges of walls and windows to add a finishing touch. Choose from a variety of styles and materials that complement your design, such as baseboards, crown molding, or chair rails.
- Accent Walls: Consider creating an accent wall using a different material, color, or texture. It can add visual interest and highlight a specific area, such as a sleeping loft or a seating nook.
- Wall Decor: Add artwork, shelves, or decorative elements to personalize your space. Consider your available wall space and choose pieces that reflect your personality and enhance the overall ambiance.
Flooring:
- Flooring Materials: Choose flooring materials that are durable, easy to clean, and suit your design preferences. Options include hardwood, laminate, vinyl, or tile. Consider the functionality of each area when selecting the appropriate flooring material.
- Area Rugs: Add warmth and texture to your tiny house by incorporating area rugs. They can define separate living areas, add comfort underfoot, and enhance the visual appeal of your space.
Lighting:
- Ambient Lighting: Install overhead lights or ceiling-mounted fixtures to provide overall illumination. Consider energy-efficient options like LED lights and control them with dimmer switches to create the desired ambiance.
- Task Lighting: Incorporate task lighting in specific areas where focused illumination is needed, such as reading nooks, kitchen countertops, or workstations. Use under-cabinet lights, desk lamps, or adjustable wall-mounted lights for targeted lighting.
- Decorative Lighting: Enhance the atmosphere of your tiny house by including decorative lighting elements, such as pendant lights, chandeliers, or wall sconces. These can serve as both functional and aesthetic features.
Storage:
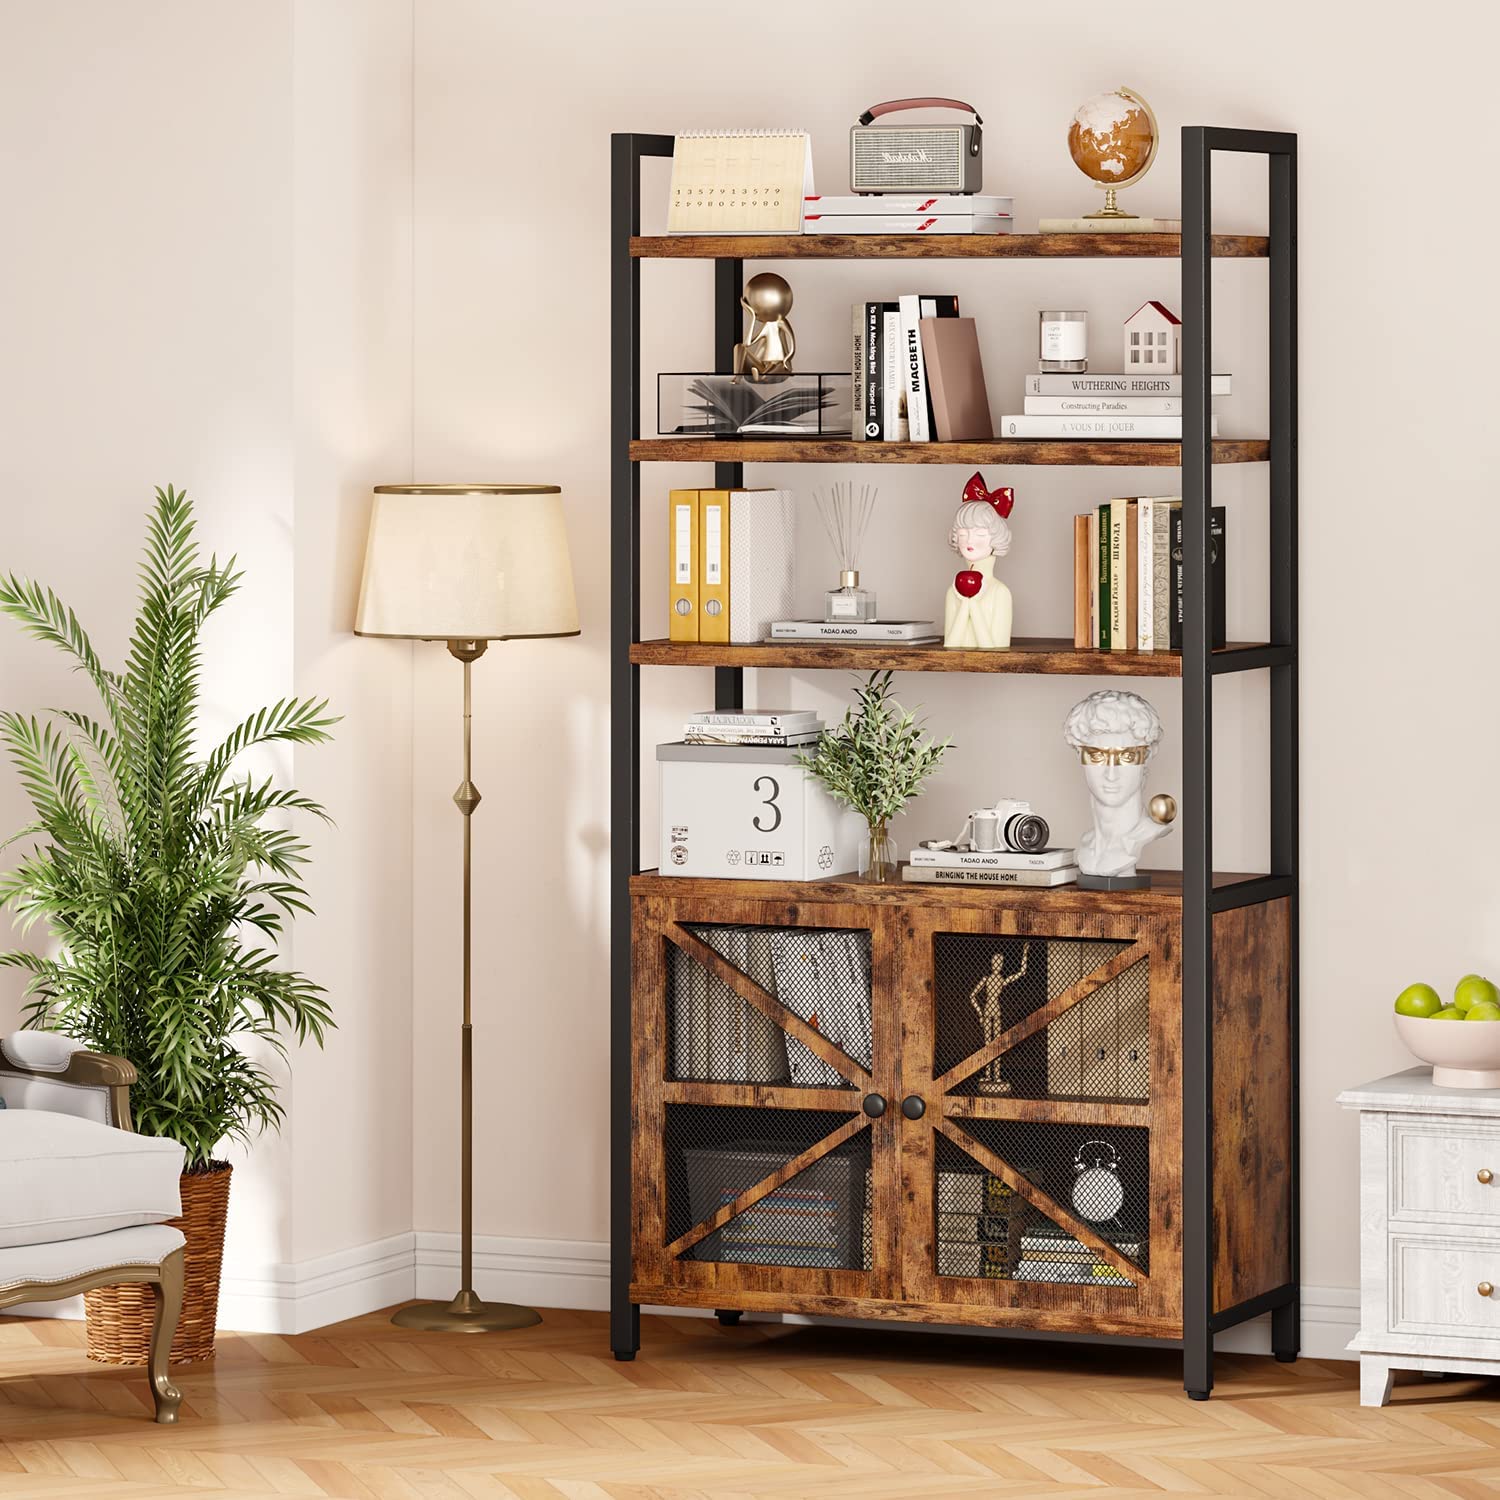
- Built-in Storage: Maximize the use of space by incorporating built-in storage solutions. Install shelves, cabinets, or drawers in strategic locations such as under stairs, along walls, or in lofts. Consider utilizing vertical space and multi-functional furniture for additional storage options.
- Open Shelving: Install open shelves in the kitchen or other areas to display decorative items or frequently used items that add a personal touch to your tiny house. Be mindful of keeping them organized and visually appealing.
Finishing Touches:
- Window Treatments: Choose window treatments that provide privacy, light control, and enhance the overall aesthetics. Options include curtains, blinds, shades, or window films. Consider the size and style of your windows when selecting the appropriate treatment.
- Decorative Elements: Personalize your tiny house with decorative elements such as pillows, throws, artwork, plants, or small accessories. Add items that bring joy and reflect your style, but be mindful of not cluttering the limited space.
- Functional Design: Consider the functionality of your interior space and ensure that it meets your specific needs. Arrange furniture and storage in a way that maximizes space utilization and promotes ease of movement.
The interior finishing stage allows you to add the final touches that transform your tiny house into a cozy and inviting home. Consider your personal style, functionality, and the overall ambiance you want to create throughout the process.
Remember to enjoy the journey of making your tiny house uniquely yours and create a space that reflects your personality, interests, and lifestyle.
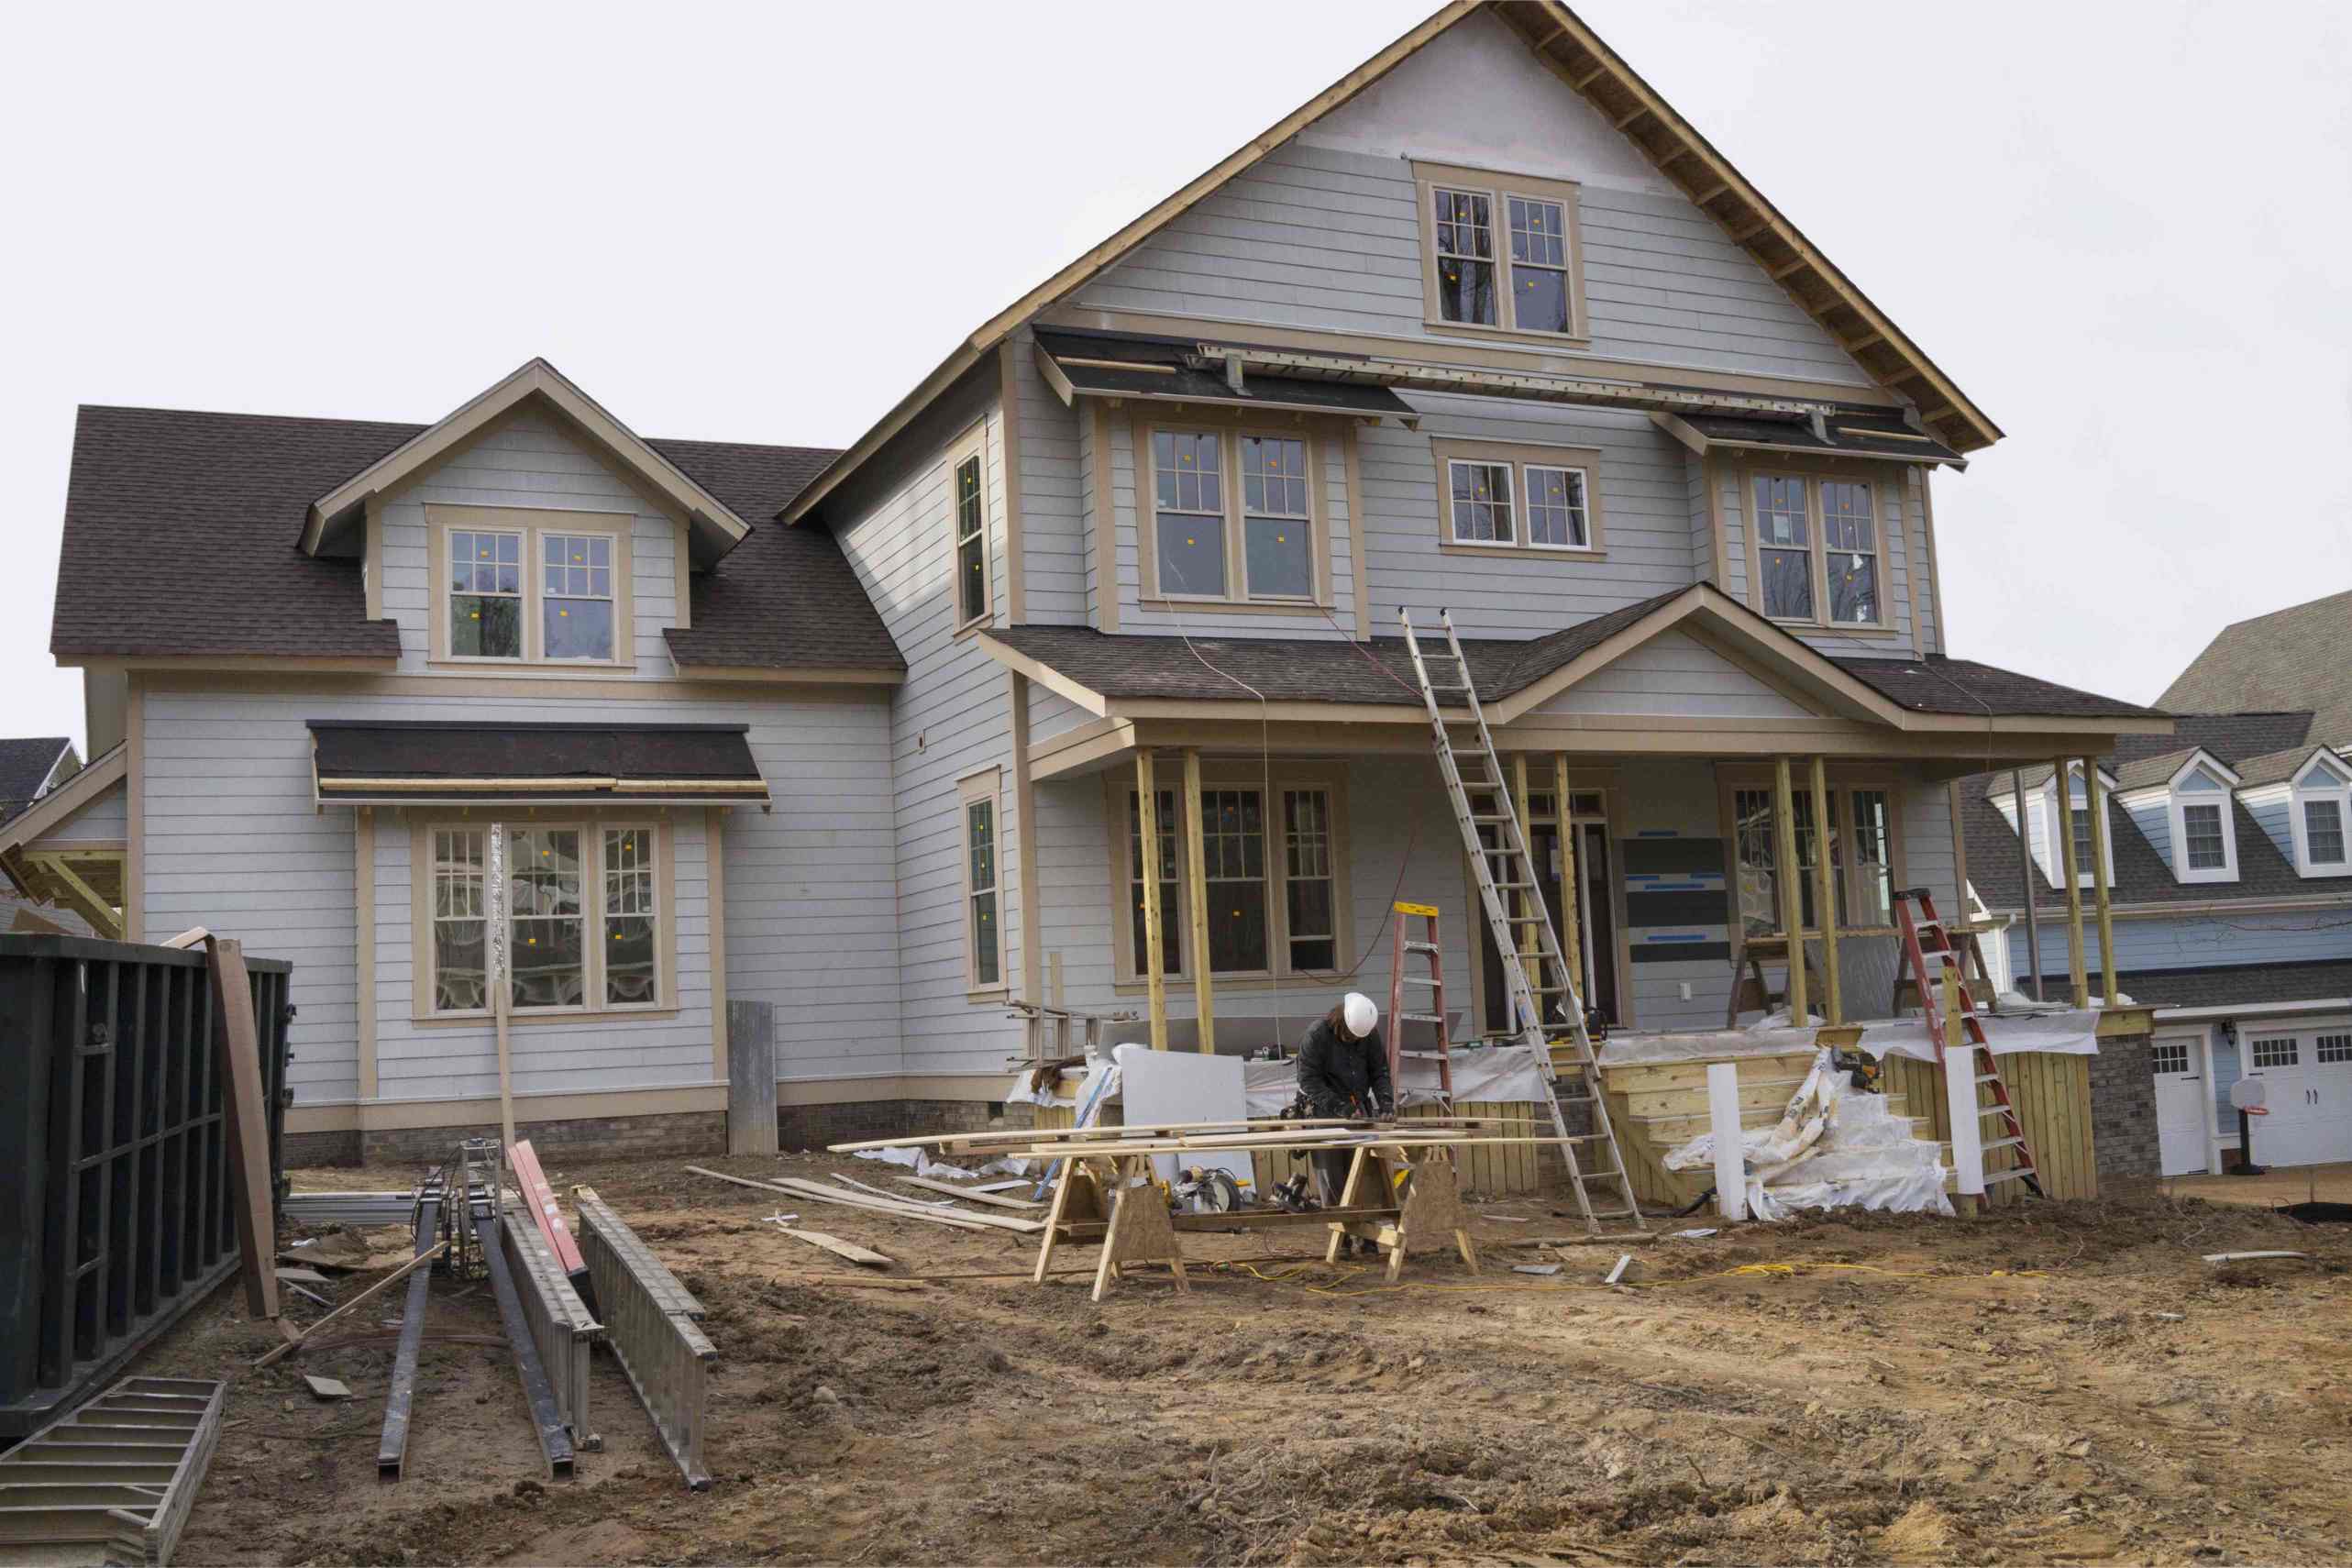
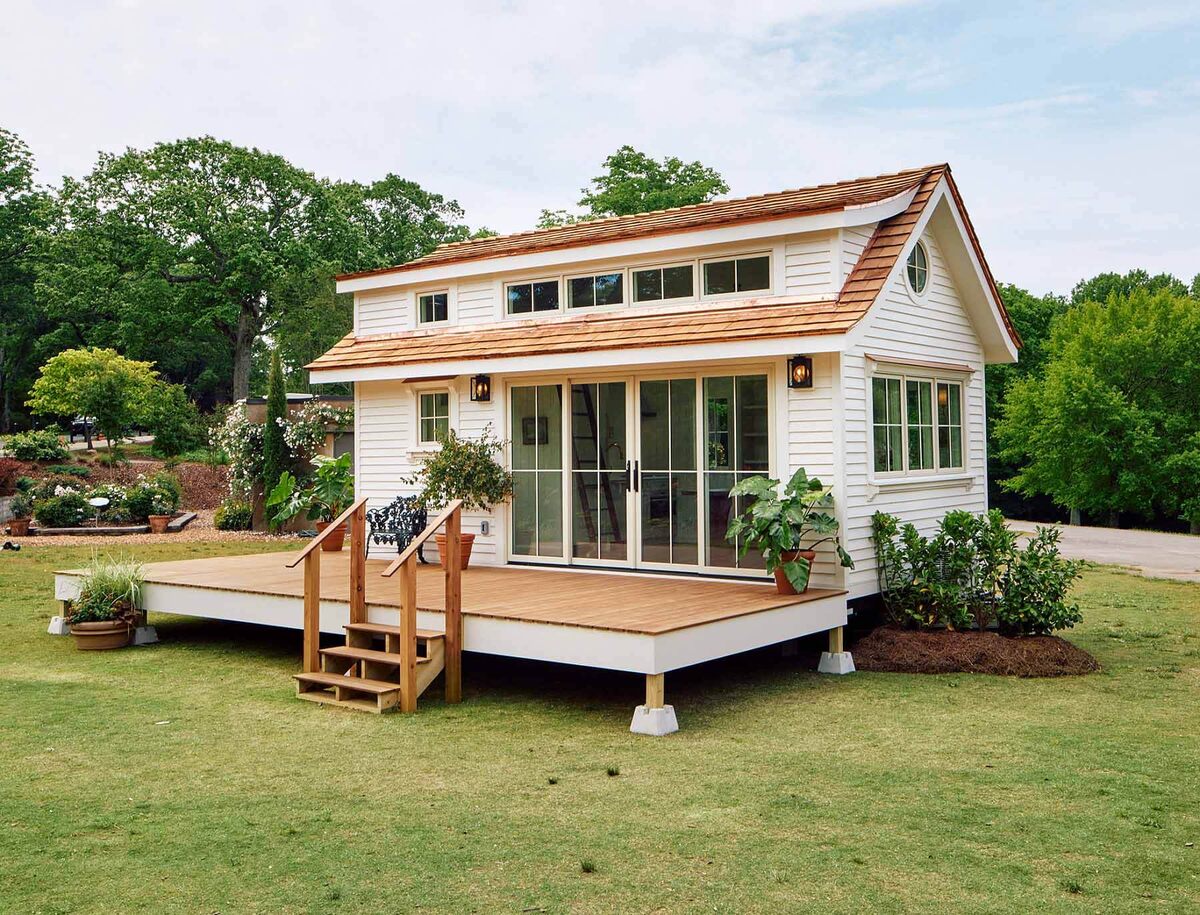
Exterior Finishing
The exterior finishing of your tiny house is just as important as the interior, as it creates the first impression and adds to the overall appeal and durability of your home. Here are the key aspects to consider when finishing the exterior of your tiny house:
Siding:
- Material Selection: Choose a siding material that suits your design preference, budget, and climate. Common options include vinyl, wood, fiber cement, or metal. Consider factors such as maintenance requirements, durability, and visual appeal when selecting the appropriate siding material.
- Installation: Follow the manufacturer’s instructions for the proper installation of the siding. Ensure that the siding is securely attached and properly sealed to protect against moisture and air infiltration.
- Color and Finish: Select the color and finish of the siding that complements your design aesthetic. Consider using eco-friendly, low-VOC paints and finishes to reduce environmental impact.
- Trim and Accents: Incorporate trim and accents to enhance the exterior appearance of your tiny house. Install trim along the edges of windows and doors and consider adding decorative elements such as shutters or brackets.
Roofing:
- Material Selection: Choose a roofing material that suits your climate and design preferences. Options include asphalt shingles, metal roofing, clay or concrete tiles, or even green roofs. Consider the durability, maintenance requirements, and energy efficiency of the roofing material.
- Installation: Follow the manufacturer’s instructions and local building codes for proper installation of the roofing material. Ensure that the roof is properly flashed around penetrations and properly sealed to prevent water infiltration.
- Gutters and Downspouts: Install gutters and downspouts to properly manage rainwater runoff. This helps protect the foundation and landscaping around your tiny house. Ensure that they are securely attached and direct the water away from the structure.
Doors and Windows:
- Selection: Choose durable and energy-efficient doors and windows that fit your design style and required functionality. Consider factors such as natural light, ventilation, security, and energy efficiency when selecting the appropriate doors and windows for your tiny house.
- Installation: Properly install doors and windows, ensuring they are tightly sealed to prevent air and water leaks. Follow the manufacturer’s instructions and use weatherstripping or caulking to create a tight seal.
- Finish: Apply appropriate finishes or paints to doors and windows to protect them from the elements and enhance their aesthetic appeal.
Exterior Details:
- Outdoor Living Space: Design and create an outdoor living space that complements your tiny house. Consider adding a porch, deck, or patio to provide additional living and entertaining space.
- Landscaping: Enhance the exterior of your tiny house with landscaping elements such as plants, trees, flowers, or a small vegetable garden. Choose low-maintenance plants that thrive in your climate and are suitable for the size of your outdoor space.
- Exterior Lighting: Install exterior lighting to enhance the safety and ambiance around your tiny house. Consider path lights, spotlights, or string lights to illuminate walkways, entrances, and outdoor living spaces.
- Personal Touches: Add personal touches to the exterior of your tiny house, such as signage, a mailbox, house numbers, or decorative elements. These small details can add charm and make your tiny house feel like home.
Remember to comply with local building codes and regulations when finishing the exterior of your tiny house. It’s also a good idea to consult with professionals for specialized tasks or if you are unsure about any aspect of the process.
By paying attention to the exterior finishing of your tiny house, you’ll create a visually appealing and well-protected home that reflects your design style and enhances your overall tiny house living experience.
Adding Final Touches and Personalization
As you near the completion of your tiny house, it’s time to add those final touches that make it truly feel like your own. Adding personalization to your space allows you to infuse your unique style and personality into every corner. Here are some ideas to consider when adding those final touches:
Furniture and Décor:
- Choose furniture that suits your functional needs and design aesthetic. Opt for pieces that are multi-functional to maximize limited space.
- Select décor items, such as pillows, throws, artwork, and decorative accents, that reflect your personal style and create a cozy and inviting atmosphere.
- Showcase personal mementos, photographs, or artwork that holds special meaning to you. Displaying these sentimental items can bring a sense of warmth and nostalgia to your tiny house.
Storage Solutions:
- Explore unique storage solutions that align with your design style. Consider using creatively designed shelves, hooks, and storage containers to keep your space organized and tidy.
- Make use of vertical space by incorporating tall storage units, such as floor-to-ceiling bookshelves or cabinets.
- Consider customizing storage solutions to fit specific items. For example, create built-in storage spaces for bicycles, outdoor gear, or hobby supplies.
Textiles and Fabrics:
- Use textiles and fabrics to add texture, color, and coziness to your tiny house. Consider incorporating curtains, rugs, bedding, and cushions that reflect your personal style.
- Experiment with different patterns, prints, and textures to create visual interest and make your space feel more dynamic.
- Add removable, washable covers to furniture or cushions to ensure easy maintenance and longevity.
Greenery and Plants:
- Bring the outdoors inside by incorporating plants and greenery into your tiny house. Choose low-maintenance indoor plants that thrive in your space and add a touch of natural beauty.
- Consider vertical gardening options, such as hanging planters or wall-mounted plant holders, to maximize space and bring life to your walls.
- Create an herb garden in your tiny house kitchen by using window boxes or small pots.
Smart Home Technology:
- Integrate smart home technology into your tiny house to enhance convenience and efficiency. Consider installing voice-controlled devices, smart thermostats, or wireless speakers.
- Explore smart lighting options that allow you to control the ambiance and brightness of your space with a simple voice command or a smartphone app.
- Consider incorporating energy monitoring systems that allow you to track and optimize your energy consumption.
Customize Outdoor Space:
- Create an inviting outdoor living area by adding comfortable seating, an outdoor dining set, or a hammock. This allows you to extend your living space and enjoy the outdoors.
- Add a personal touch to your outdoor space by including potted plants, outdoor lighting, or decorative elements that reflect your style.
- Consider practical additions such as an outdoor shower or a small storage shed to accommodate outdoor equipment.
Remember, the final touches and personalization of your tiny house should reflect your tastes, lifestyle, and the things that bring you joy. Take your time to curate and design a space that truly feels like home to you.
As you complete your tiny house journey, relish in the satisfaction of creating a personalized oasis that perfectly suits your needs and desires.
Read more: What Do You Need To Start Building A House
Conclusion
Building a tiny house is an exciting and rewarding adventure that allows you to create a unique and personalized living space. Throughout the process, from choosing the right location to adding the final touches, careful planning and attention to detail are essential. By following the steps outlined in this guide, you can successfully navigate the construction process while creating a cozy and functional tiny house.
Remember that every decision you make during the building process has the potential to impact the comfort, functionality, and overall satisfaction of your tiny house. Take the time to research, consult with professionals when needed, and, most importantly, infuse your personal style and preferences into every aspect of your tiny house design.
Whether you’re downsizing, seeking a sustainable lifestyle, or simply looking for a creative endeavor, building a tiny house offers a unique opportunity to tailor your living space to meet your specific needs. Embrace the freedom to incorporate innovative storage solutions, energy-efficient technologies, and environmentally friendly materials to create a sustainable and comfortable home.
As you embark on your tiny house journey, remember that patience and flexibility are key. Building a tiny house requires adaptability and problem-solving skills as challenges may arise along the way. Embrace the process and view each hurdle as an opportunity for growth and learning.
Finally, remember that your tiny house is a reflection of your dreams and aspirations. It is a manifestation of your desire for a simpler, more intentional lifestyle. Enjoy the process, cherish the memories, and savor the satisfaction of building a home that is uniquely yours.
Now, armed with the knowledge and guidance provided in this article, it’s time to turn your vision into reality. A world of cozy and efficient living awaits you in your very own tiny house!
Frequently Asked Questions about Where To Start Building A Tiny House
Was this page helpful?
At Storables.com, we guarantee accurate and reliable information. Our content, validated by Expert Board Contributors, is crafted following stringent Editorial Policies. We're committed to providing you with well-researched, expert-backed insights for all your informational needs.

0 thoughts on “Where To Start Building A Tiny House”