Home>diy>Architecture & Design>How To Design A Tiny House For A School Project
Architecture & Design
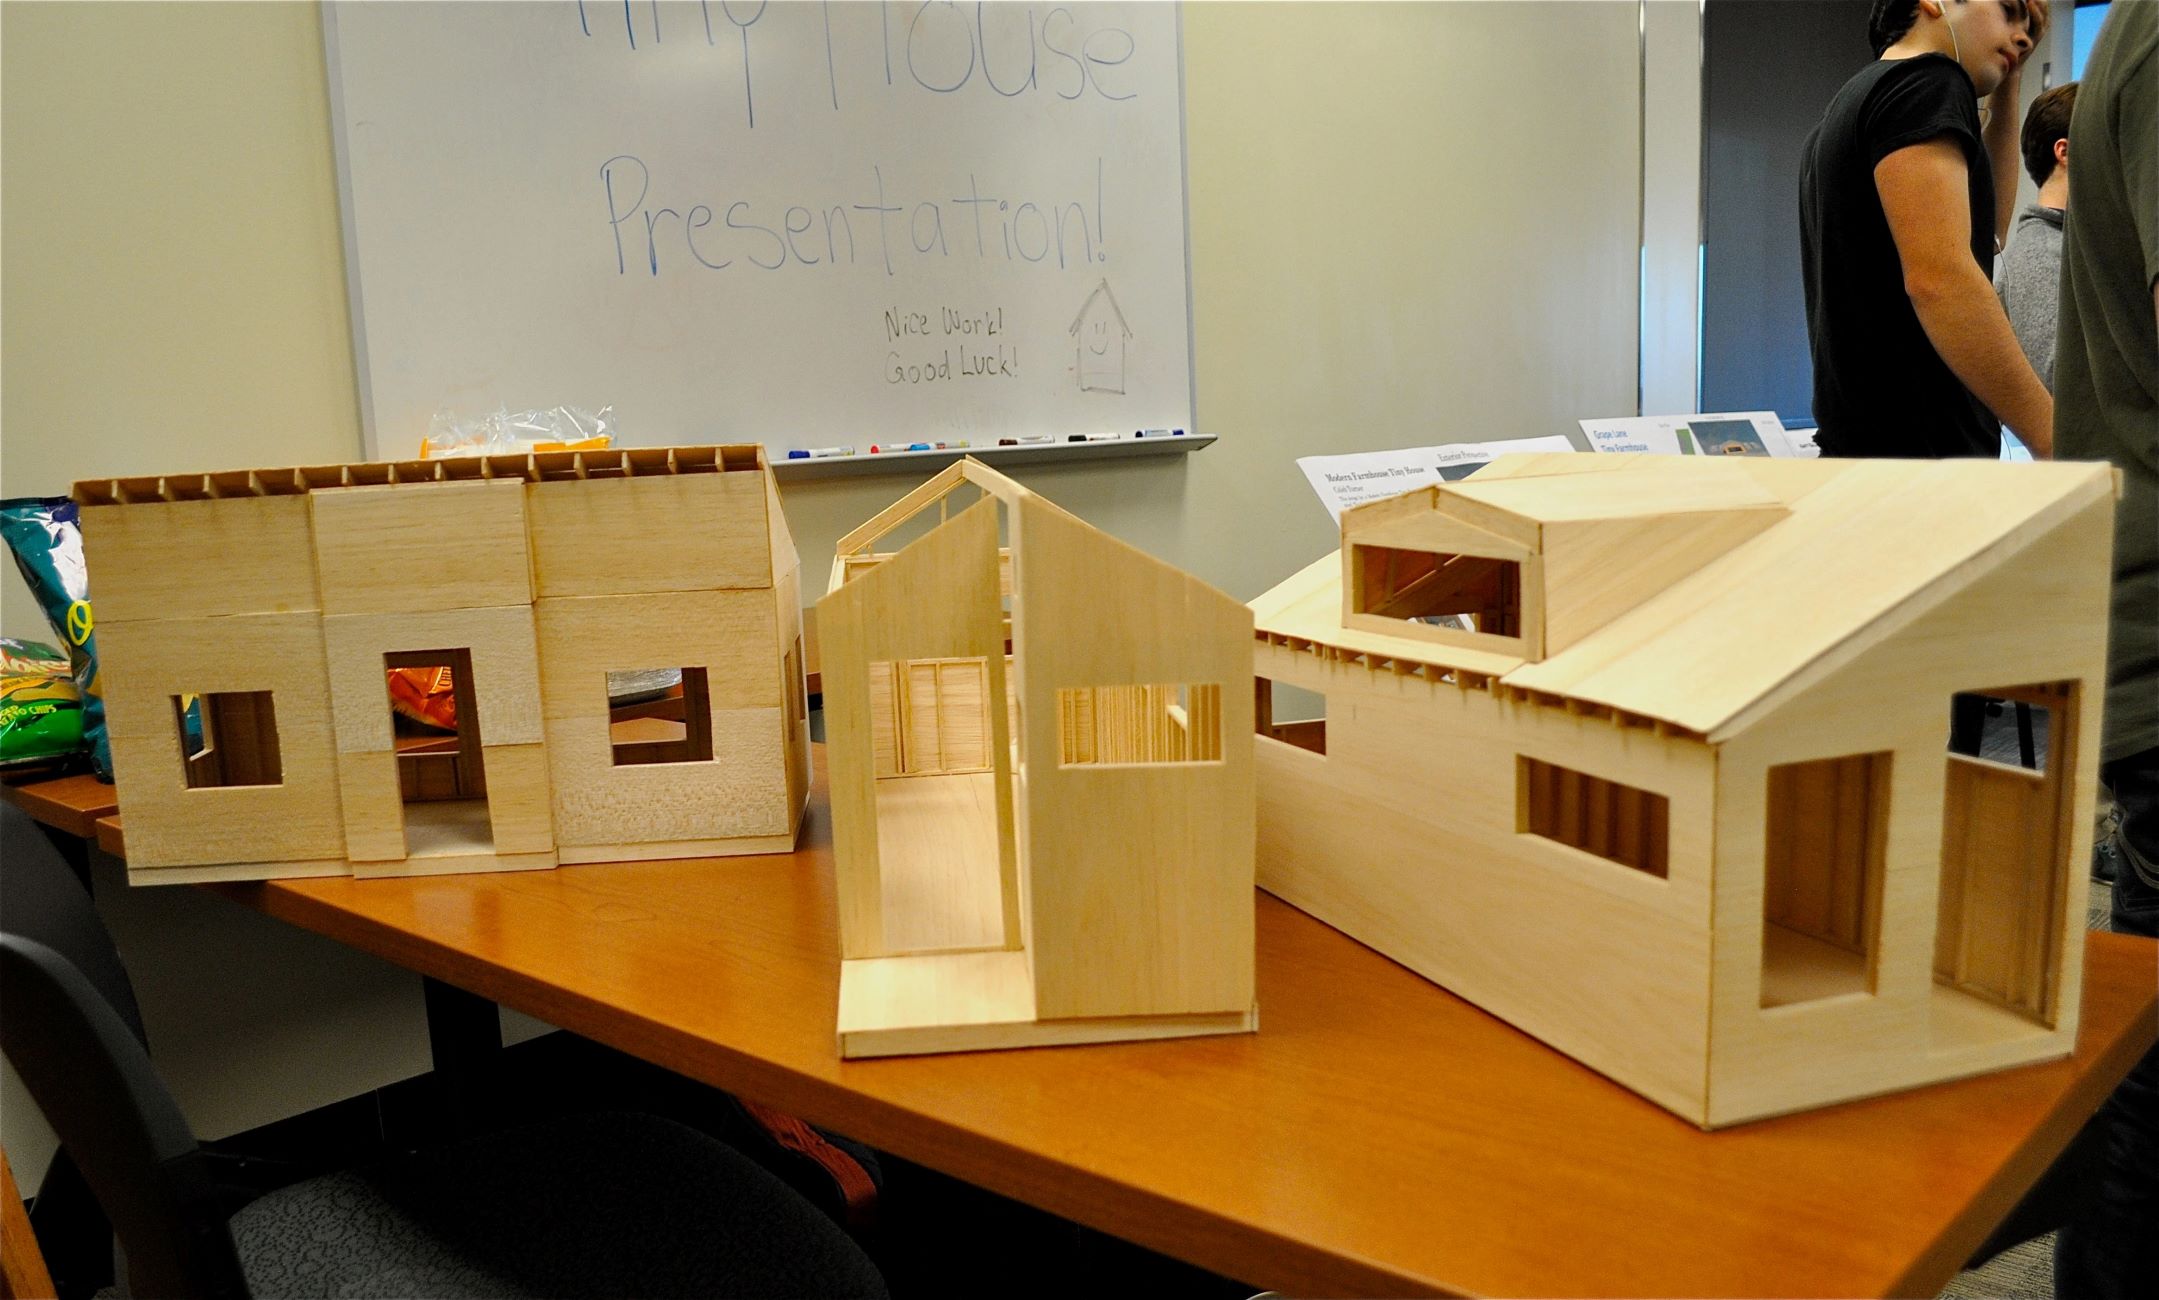
How To Design A Tiny House For A School Project
Modified: October 28, 2024
Learn how to create an impressive tiny house for your school project with our expert tips on architecture design.
(Many of the links in this article redirect to a specific reviewed product. Your purchase of these products through affiliate links helps to generate commission for Storables.com, at no extra cost. Learn more)
Introduction
Designing a tiny house for a school project is an exciting opportunity to showcase your creativity, problem-solving skills, and architectural vision. Whether you’re tasked with creating a miniature dwelling for a hypothetical client or building a scale model of a sustainable home, this project allows you to delve into the world of architecture and design.
In this article, we will guide you through the step-by-step process of designing a tiny house for a school project. From understanding the project requirements to finalizing the design, we will explore various considerations and techniques that will help you create a functional and visually appealing miniature home.
So, let’s embark on this design journey and discover the key steps that will lead you to a successful project.
Key Takeaways:
- Embrace creativity, sustainability, and functionality in designing a tiny house for a school project. From understanding requirements to finalizing the design, prioritize innovation and problem-solving for a well-rounded architectural vision.
- Optimize space, enhance natural light, and integrate essential utilities for a comfortable and efficient tiny house. Emphasize multi-purpose furniture, efficient storage, and sustainable design to create a functional and visually appealing living space.
Read more: How To Build A Foundation For A Tiny House
Step 1: Understanding the Project Requirements
The first step in designing a tiny house for a school project is to thoroughly understand the project requirements. This involves closely reviewing the assignment brief, consulting with your instructor, and determining the scope of the project.
Start by identifying the purpose of the tiny house. Is it meant to be a primary residence, a vacation home, or a temporary shelter? This will influence various design decisions, such as the layout, size, and amenities.
Next, consider the target audience for your design. Are you creating a tiny house for a single individual, a couple, or a small family? Understanding the needs and preferences of the occupants will help you tailor the design to suit their lifestyle.
Another important aspect to consider is the available budget and resources. Determine if there are any limitations on the materials, features, or technologies you can use in your design. This will help you make informed decisions and ensure that your design is realistic and achievable.
Finally, consider any specific requirements or constraints imposed by the assignment. This may include adhering to certain architectural styles, incorporating sustainable design principles, or integrating specific features such as a workspace or outdoor area.
By thoroughly understanding and documenting the project requirements, you will have a clear roadmap for your design process. This will ensure that your final design meets the objectives of the project and fulfills the needs of the occupants.
Step 2: Researching Tiny House Designs
Research is a crucial step in the design process as it allows you to gather inspiration, explore different design options, and understand the best practices in tiny house architecture.
Start by immersing yourself in the world of tiny house designs. Look for books, websites, and magazines that feature innovative and creative tiny homes. Pay attention to the different architectural styles, space-saving solutions, and unique design elements that are commonly used in tiny house designs.
Furthermore, examine case studies of real-life tiny house projects to gain insights into the challenges and successes experienced by other designers and builders. This can provide valuable lessons and help you avoid common pitfalls in your own design.
As you research, also consider the geographical location of your tiny house project. The climate, terrain, and cultural context of the area can influence the design and construction techniques you choose. For example, if the project is in a hot and humid environment, you may need to prioritize natural ventilation and shading strategies in your design.
Additionally, studying the principles of sustainable design and energy efficiency is essential. Tiny houses are often built with eco-friendliness in mind, so familiarize yourself with concepts like passive solar design, rainwater harvesting, and renewable energy systems. Incorporating these elements into your design will not only make it environmentally friendly but also enhance the overall functionality and comfort of the tiny house.
By conducting thorough research, you will gather a wealth of knowledge that will inform your design decisions and allow you to create a unique and well-informed tiny house design.
Step 3: Setting Design Goals
Setting clear design goals is essential to ensure that your tiny house project stays focused and cohesive. These goals will serve as guiding principles throughout the design process, helping you make decisions that align with your vision and purpose for the project.
Start by identifying the main objectives you want to achieve with your tiny house design. Are you aiming for maximum functionality and space utilization? Or perhaps your focus is on creating an aesthetically pleasing and visually appealing home. Understanding your priorities will help you establish the foundation for your design goals.
Consider the specific needs and preferences of the occupants as well. Are they seeking a minimalist lifestyle, or do they require ample storage space for their belongings? Do they value privacy and separation of living areas, or is open concept living more desirable? By taking these factors into account, you can tailor your design goals to meet the individual requirements of the occupants.
Another important consideration when setting design goals is the overall theme or style you wish to achieve. Are you inclined towards a contemporary design with sleek lines and modern finishes? Or do you prefer a rustic and cozy aesthetic? Dedicating time to explore various styles and aesthetics will help you define a cohesive design direction for your tiny house.
Additionally, consider the long-term sustainability and energy efficiency of your design. Are you aiming to create a self-sufficient tiny house that minimizes its environmental impact? If so, incorporating sustainable building materials and energy-efficient systems should be a priority in your design goals.
Lastly, keep in mind any project-specific goals or requirements outlined in the assignment. This could include incorporating specific features, addressing accessibility needs, or incorporating unique design elements.
By setting clear design goals, you will have a roadmap for your design decisions. These goals will guide you through the selection of materials, layout choices, and overall design direction, ultimately ensuring that your tiny house project is a reflection of your vision and purpose.
Step 4: Determining Space Requirements
Determining the space requirements of your tiny house is a crucial step in creating a functional and comfortable living space. Understanding the needs of the occupants and optimizing the available space will help you design a layout that maximizes efficiency without sacrificing comfort.
Start by assessing the number of occupants and their lifestyle. Consider factors such as sleeping arrangements, dining preferences, and workspace requirements. Determine the minimum number of bedrooms or sleeping areas needed and decide if a loft, Murphy bed, or convertible furniture can serve dual purposes without compromising on space.
In addition to sleeping areas, think about the common living spaces such as the kitchen, living room, and bathroom. Assess the activities that will take place in each area and determine the minimum space required for functional movement and usability.
Consider the storage needs as well. Tiny houses often require creative storage solutions to maximize space. Evaluate the amount and type of belongings the occupants will have and design storage solutions that efficiently utilize vertical space, such as built-in cabinets and hidden storage compartments.
It’s important to keep in mind that the size and layout of a tiny house are highly dependent on local codes and regulations. Check with your instructor or local authorities to ensure compliance with any applicable regulations regarding minimum square footage, ceiling height, and other requirements.
Furthermore, consider the possibility of expanding the usable space beyond the physical boundaries of the tiny house. Explore the option of incorporating outdoor living areas, such as a deck or patio, to extend the living space during favorable weather conditions.
By carefully determining the space requirements, you will be able to create a functional and well-planned layout for your tiny house that optimizes space utilization and meets the needs of the occupants.
Read more: Where To Start Building A Tiny House
Step 5: Creating a Floor Plan
A well-designed floor plan is vital to the success of your tiny house project. It determines the overall flow, functionality, and spatial coherence of the living space. Creating a thoughtful and efficient floor plan will optimize the use of the available space and ensure a comfortable and enjoyable living experience.
Start by sketching out rough ideas for your floor plan. Consider the different zones or areas you identified in the previous step, such as sleeping, living, dining, and working areas. Explore various layout options and experiment with different furniture arrangements to find the most efficient use of space.
When creating a floor plan for a tiny house, it’s important to prioritize functionality and optimize for multi-purpose spaces. Look for opportunities to combine functions and eliminate unnecessary walls or partitions. For example, a kitchen island can also serve as a dining table or workspace, and a sofa can double as a guest bed.
Consider the flow of movement within the tiny house. Ensure that there is enough space for comfortable navigation between different areas and that there are no obstructions or cramped corners. Aim for an open and airy feel while maintaining privacy where needed, utilizing clever design techniques like pocket doors or sliding partitions.
Take advantage of vertical space by incorporating loft areas for sleeping or storage. Lofts provide valuable additional space without expanding the overall footprint of the tiny house. However, be mindful of ceiling height and access to the loft to ensure safety and ease of use.
Consider the placement of windows and doors in your floor plan. Strategically positioned windows can maximize natural light and provide views, while doors should offer practical access to outdoor spaces and optimize indoor-outdoor flow.
As you refine your floor plan, consider consulting with others, such as classmates or instructors, for feedback and suggestions. They may offer fresh insights and ideas that can further improve your design before finalizing it.
Remember, flexibility is key when creating a tiny house floor plan. Be open to adjustments and iterations as you continue to fine-tune your design based on feedback and further analysis. The end goal is to create a layout that is both functional and visually appealing while maximizing the use of the available space.
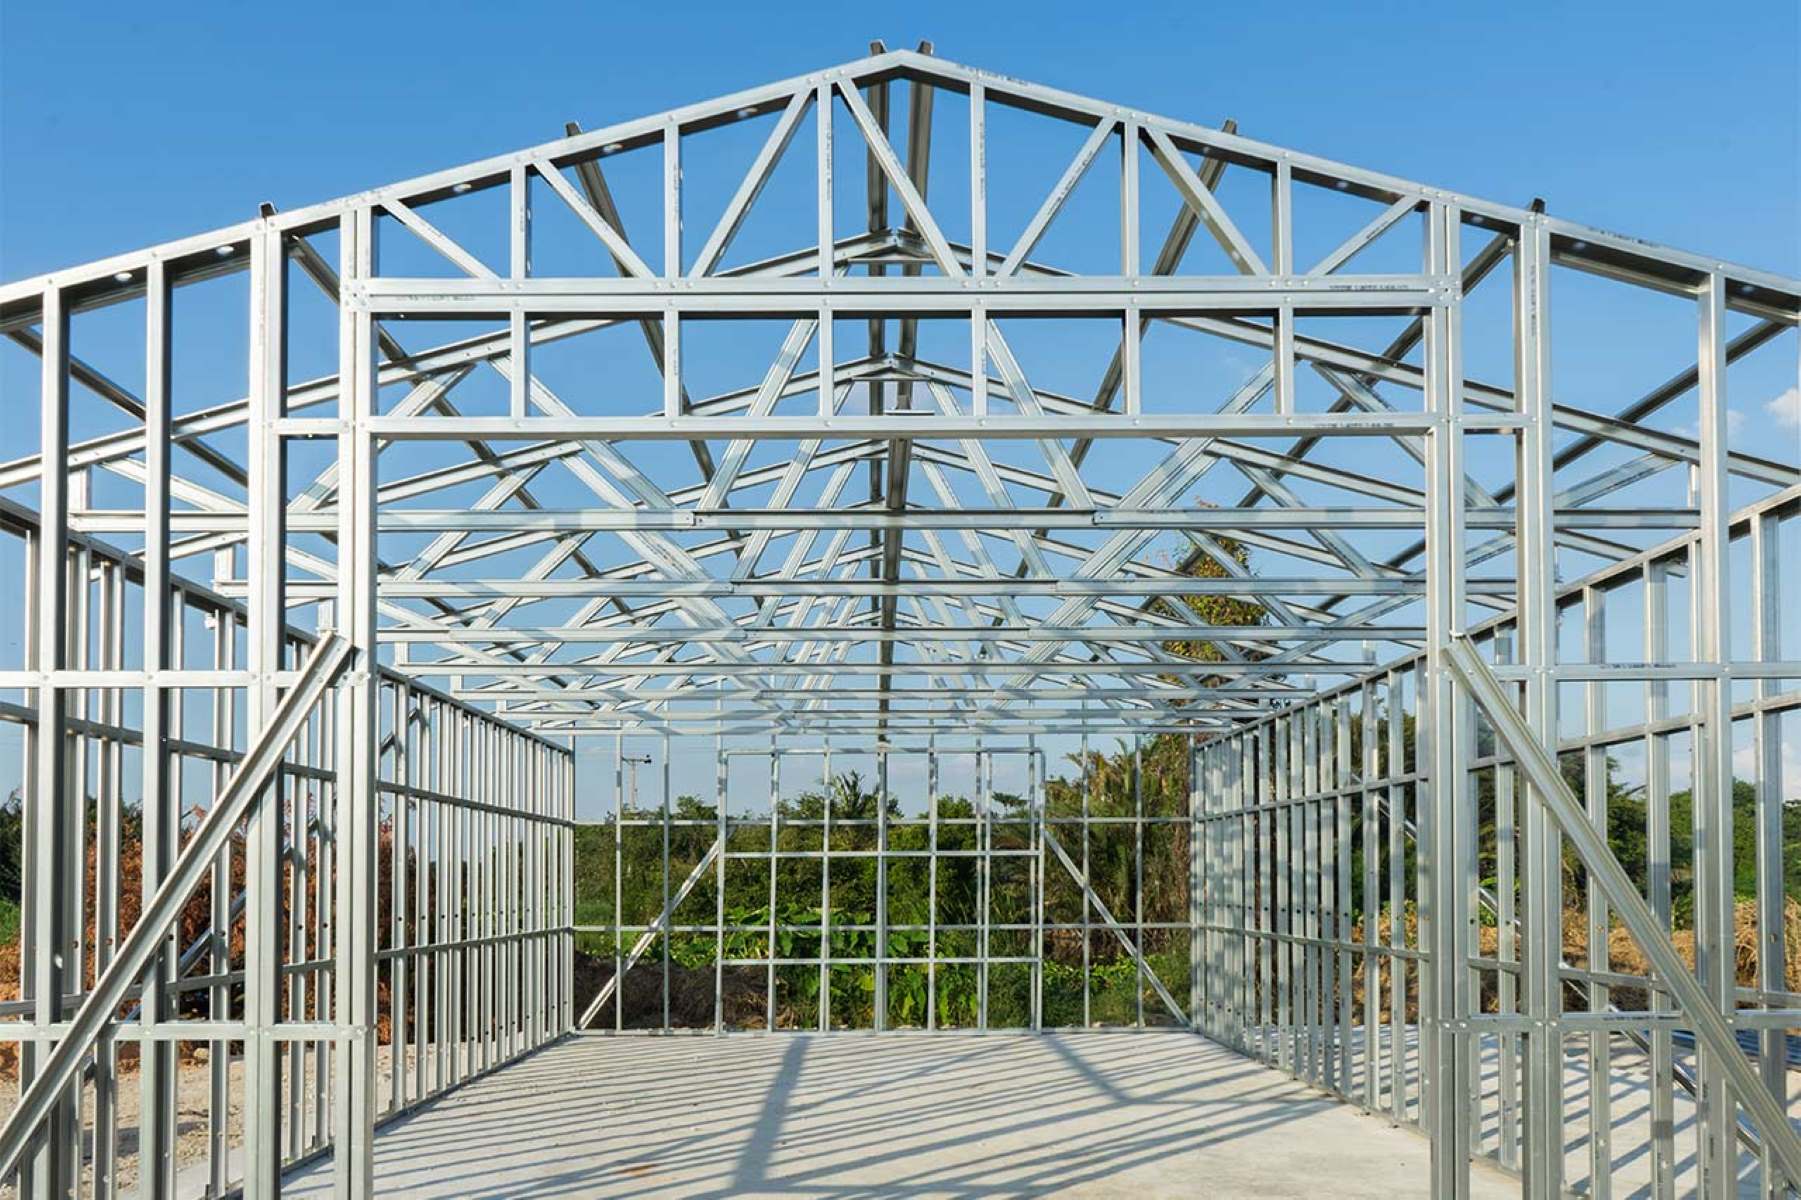
Step 6: Exploring Different Materials and Construction Techniques
The choice of materials and construction techniques can greatly impact the durability, sustainability, and overall aesthetic of your tiny house. In this step, we will explore the various options available and help you make informed decisions to ensure the successful construction of your project.
Start by researching different materials commonly used in tiny house construction. Traditional options include wood, steel, and concrete, but there are also eco-friendly alternatives such as reclaimed wood, bamboo, and recycled materials. Consider the pros and cons of each material, including cost, availability, strength, and the desired aesthetic, before making a decision.
Assess the climate and weather conditions in the location where the tiny house will be situated. This will affect the choice of materials and construction techniques. For example, if you are in an area prone to extreme temperatures or high humidity, you may need to prioritize insulation and moisture-resistant materials.
Explore different construction techniques suitable for tiny houses. Traditional stick framing is widely used, but you may also consider alternative methods such as steel framing, SIPs (structural insulated panels), or even modular construction. Each technique has its own advantages in terms of speed, efficiency, ease of construction, and cost.
When choosing materials and construction techniques, don’t forget to consider the sustainability aspect of your design. Incorporating eco-friendly and renewable materials, as well as utilizing energy-efficient insulation and systems, can minimize environmental impact and enhance the overall sustainability of your tiny house.
Additionally, consider the overall maintenance requirements of the materials you choose. Opt for materials that are durable, easy to clean, and resistant to wear and tear. This will ensure the longevity of your tiny house and reduce the need for frequent repairs and replacements.
It’s essential to consult with experts, such as architects or experienced builders, to explore construction options and ensure compliance with building codes and regulations. They can provide valuable guidance and help you make informed decisions based on the specific requirements of your tiny house project.
By exploring different materials and construction techniques, you can select the best options that align with your design goals, budget, sustainability objectives, and the specific needs of your tiny house project.
When designing a tiny house for a school project, consider using multi-functional furniture to maximize space and prioritize energy-efficient design to reduce environmental impact.
Step 7: Incorporating Sustainability and Energy Efficiency
Designing a sustainable and energy-efficient tiny house not only benefits the environment but also creates a more comfortable and cost-effective living space. In this step, we will explore various ways to incorporate sustainability and energy efficiency into your tiny house design.
Start by considering passive design strategies. Passive solar design utilizes the sun’s energy to heat and cool the living space naturally. Position windows strategically to maximize solar gain in the winter and provide shading in the summer. Additionally, consider the use of thermal mass materials, such as concrete or adobe, to store and release heat as needed.
Insulation is crucial for maintaining a comfortable indoor temperature and reducing energy waste. Evaluate different insulation materials and techniques to minimize heat loss and gain. Pay attention to areas such as walls, roof, and floor to ensure effective insulation throughout the tiny house.
Explore the use of energy-efficient appliances and fixtures. Opt for energy-star rated appliances that consume less electricity or consider alternative options such as propane or solar-powered devices. Install LED or CFL lights that use less energy compared to traditional incandescent bulbs.
Consider incorporating renewable energy sources into your tiny house design. Solar panels are an excellent option for generating clean energy. Assess the available space on the roof or nearby grounds to determine the appropriate size and number of solar panels to meet your energy needs.
Water efficiency is another important aspect of sustainable design. Incorporate low-flow fixtures such as faucets and showerheads to reduce water consumption. Consider rainwater harvesting systems to collect and reuse water for non-potable uses such as irrigation or flushing toilets.
Look for opportunities to upcycle or repurpose materials in your tiny house design. Salvaged wood, reclaimed furniture, or recycled materials can add character and sustainability to your project. Additionally, choose eco-friendly paints, sealants, and adhesives that have minimal VOC (volatile organic compounds) emissions.
Integrate landscaping and outdoor elements into your design. Planting trees strategically can provide shade during hot summer months and contribute to the overall cooling of your tiny house. Create outdoor living spaces that encourage a connection with nature and promote sustainable practices.
Lastly, educate yourself about green building certifications and standards such as LEED (Leadership in Energy and Environmental Design). Consider incorporating their principles into your design to ensure compliance with sustainable building practices and to enhance the market value of your tiny house in the future.
By incorporating sustainability and energy efficiency into your tiny house design, you will create a more environmentally-friendly living space that is comfortable, cost-effective, and aligned with sustainable values.
Step 8: Designing Functional and Multi-purpose Furniture
In a tiny house where space is limited, designing functional and multi-purpose furniture is essential to maximize usability and create a versatile living environment. In this step, we will explore strategies for designing furniture that not only serves its primary purpose but also offers additional functionality and storage.
Start by assessing the specific needs and activities that will take place in your tiny house. Consider the essential furniture pieces such as a bed, seating, dining table, and workspace. Look for opportunities to integrate additional functions into these pieces without compromising their primary purpose.
Consider convertible furniture options that can easily transform or adapt to different uses. For example, a sofa bed can serve as a seating area during the day and turn into a comfortable bed at night. A dining table with foldable or extendable leaves can accommodate varying numbers of occupants and save space when not in use.
Look for furniture pieces that offer built-in storage solutions. Utilize ottomans or benches with hidden compartments, beds with under-bed storage drawers, and coffee tables with shelves or compartments. These designs help declutter the living space and maximize storage options without sacrificing valuable floor area.
Designing furniture that can be folded or collapsed is particularly advantageous in a tiny house. Folding chairs, collapsible tables, and wall-mounted desks can be easily stowed away when not in use, freeing up valuable floor space for other activities.
Consider the use of modular furniture systems that allow for customization and adaptability. Modular pieces can be rearranged and reconfigured to accommodate changing needs and preferences. This flexibility is especially valuable in a small living space where every inch counts.
Additionally, think about furniture designs that optimize the use of vertical space. Incorporate shelves, cabinets, and storage units that extend upward, making use of the available wall space. Vertical storage solutions help keep the living area organized and clutter-free.
Be creative in your furniture designs and explore unconventional options. Look for inspiration in tiny house communities, boat interiors, and RV designs, as these spaces often require innovative and space-saving furniture solutions.
Lastly, don’t forget about comfort and aesthetics when designing furniture. Choose materials, finishes, and upholstery that are not only functional but also visually appealing and comfortable. A well-designed and aesthetically pleasing interior can contribute to the overall satisfaction and enjoyment of the tiny house living experience.
By designing functional and multi-purpose furniture, you can optimize the use of space in your tiny house while ensuring comfort, versatility, and a clutter-free living environment.
Read more: How To Use Sketchup To Design A Tiny House
Step 9: Adding Storage Solutions
In a tiny house where space is limited, efficient storage solutions are crucial for maintaining an organized and clutter-free living environment. In this step, we will explore various methods to maximize storage and create clever storage solutions that optimize the available space.
Start by assessing the specific storage needs of your tiny house. Consider the belongings, supplies, and equipment that need to be stored, and identify the different categories of items you need to accommodate.
Utilize vertical space effectively by incorporating floor-to-ceiling storage units, shelves, and cabinets. Mounting storage units on the walls can help free up valuable floor space and provide ample storage for items such as books, kitchenware, and personal belongings.
Look for opportunities to utilize underutilized areas for storage, such as the area under stairs, under beds, or within walls. Incorporating drawers, pull-out cabinets, or built-in compartments in these areas can significantly increase storage capacity without encroaching on the living space.
Consider incorporating multi-functional furniture that doubles as storage. For example, ottomans and benches with hidden compartments, beds with under-bed storage drawers, and coffee tables with built-in shelves or cabinets provide excellent opportunities for storing items while also serving their primary purpose.
Maximize the use of vertical wall space by installing hanging systems, hooks, and racks. These are ideal for storing items such as kitchen utensils, clothing, bags, and other accessories. They keep frequently used items within reach while minimizing clutter on countertops and surfaces.
Invest in space-saving storage solutions such as vacuum-sealed bags for clothing and bedding, collapsible storage containers, and nesting storage bins. These solutions help optimize storage capacity while providing flexibility to adapt to changing storage needs.
Consider designing custom storage solutions tailored to the specific dimensions and needs of your tiny house. Custom cabinets, built-in shelving, and adjustable storage systems allow for efficient use of space and provide a seamless and integrated look within the overall design.
Utilize creative storage solutions such as magnetic strips for organizing metal utensils, pegboards for storing tools, and hanging shoe organizers for a variety of items. These simple yet effective solutions maximize storage within small spaces and significantly improve organization.
Finally, prioritize good organization habits and declutter regularly to ensure that your storage solutions remain effective and functional. Regularly assess and evaluate the items you store, and consider donating or selling items that are no longer needed.
By taking a strategic approach to storage and incorporating clever solutions, you can maximize the use of space in your tiny house while keeping your belongings organized and easily accessible.
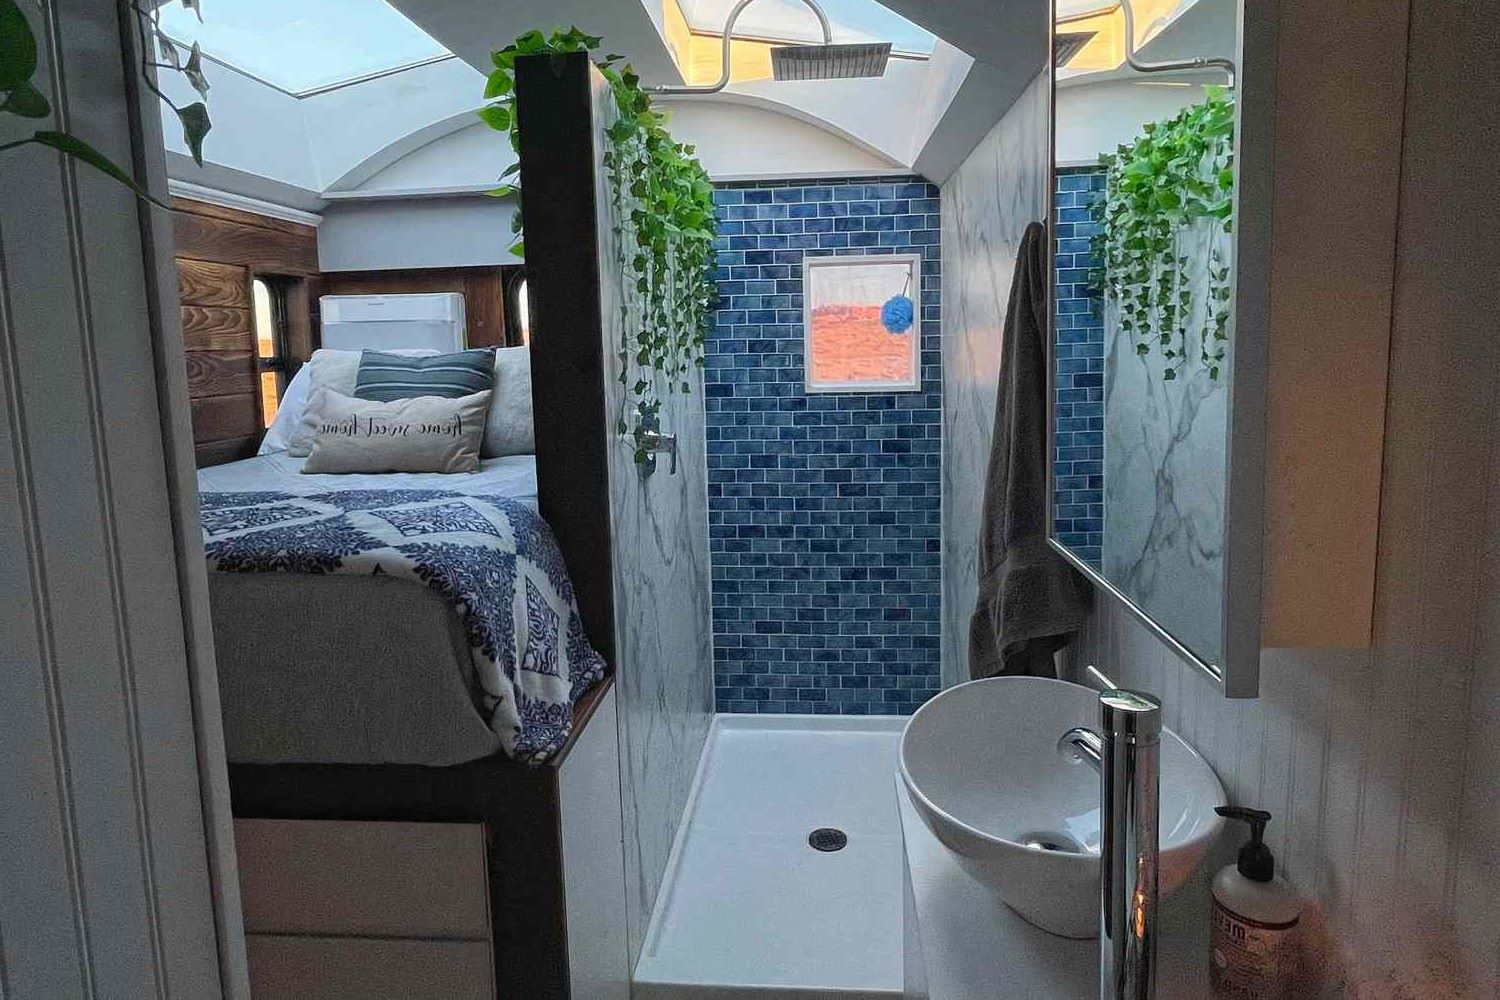
Step 10: Enhancing Natural Light and Ventilation
Natural light and ventilation play a vital role in creating a comfortable and inviting living environment in a tiny house. In this step, we will explore strategies to enhance natural light and optimize airflow to transform your tiny house into a well-lit and well-ventilated space.
Maximize natural light by strategically placing windows and openings in your tiny house. Consider the orientation of the sun and position windows to capture the maximum amount of daylight throughout the day. Additionally, use larger windows or glass doors to create an illusion of spaciousness and allow ample sunlight to penetrate deep into the living space.
Consider installing skylights or roof windows to bring in additional natural light from above. Skylights not only provide a source of daylight but also create a visual connection with the sky, making the space feel more open and expansive.
Utilize light-colored and reflective surfaces in your design to enhance the distribution of natural light. Choose lighter paint colors for walls, ceilings, and cabinetry to increase the brightness and diffusion of daylight, making the space feel larger and more open.
Keep in mind that privacy may be a concern in a tiny house, especially if it is located in close proximity to other buildings or in an urban environment. Incorporate window treatments such as blinds, curtains, or frosted glass to provide privacy when needed while still allowing natural light to enter the space.
Optimize natural ventilation by strategically positioning windows and openings to create cross ventilation. This allows for a natural flow of air, promoting fresh air intake and exhaust. Consider the prevailing wind direction in your location and design openings accordingly to harness the natural breeze.
Incorporate operable windows that can be opened and closed to control airflow throughout the tiny house. This allows for adjustment based on temperature, weather conditions, and personal preferences. Additionally, consider installing vent fans in areas such as the bathroom and kitchen to remove excess moisture and odors.
Consider incorporating passive design strategies such as overhangs or shading devices to mitigate excessive heat gain from direct sunlight. These features not only provide shade but also help regulate the heat entering the living space, enhancing thermal comfort.
Be mindful of the placement and selection of window coverings. Utilize sheer curtains or blinds that allow diffused light to enter while still providing privacy. Additionally, consider adjustable window coverings that can be easily open or closed to control the amount of light and privacy desired.
Regularly maintain and clean windows, skylights, and ventilation openings to ensure they operate efficiently and allow maximum light and airflow. Keeping these features well-maintained contributes to a healthier and more comfortable living environment.
By strategically enhancing natural light and optimizing ventilation, you can create a bright, airy, and pleasant living space in your tiny house, enhancing comfort and overall well-being.
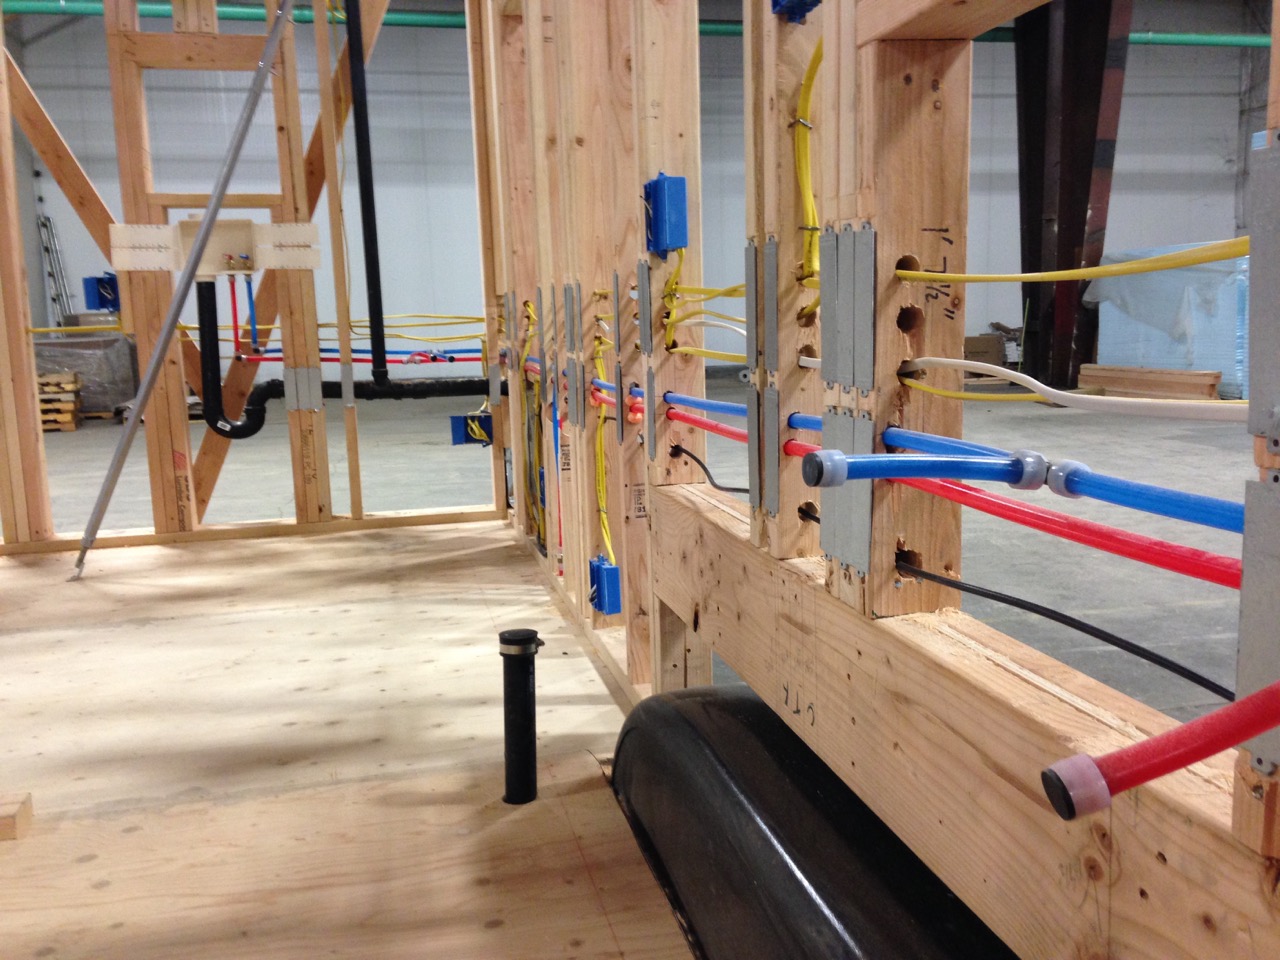
Step 11: Including Essential Utilities and Systems
Ensuring the inclusion of essential utilities and systems is crucial for the functionality and livability of your tiny house. In this step, we will explore the key utilities and systems you need to consider when designing your tiny house.
Start by determining your energy needs. Consider whether you will be connected to the grid or if you prefer off-grid living. Design a power system that suits your requirements, such as solar panels, wind turbines, or a generator, to provide electricity for lighting, appliances, and other electrical needs.
Think about your water supply. Assess whether you will have access to a fresh water connection or if you need to collect and store rainwater. Install a water storage tank, a filtration system, and suitable plumbing fixtures to ensure a reliable and safe water supply within your tiny house.
Consider your waste management system. Incorporate a composting toilet or a conventional flush toilet connected to a septic tank or sewer system, depending on your location and preferences. Design a graywater system that safely and efficiently disposes of wastewater from sinks, showers, and appliances.
Heating and cooling are important considerations in a tiny house to maintain comfort throughout the year. Evaluate heating options such as a wood-burning stove, electric heaters, or a radiant heating system. For cooling, options may include window air conditioners, vent fans, or passive cooling techniques like shading and natural ventilation.
Ensure proper insulation throughout the tiny house to conserve energy and maintain comfortable indoor temperatures. Consider insulation materials such as spray foam, cellulose, or rigid foam panels, and install them in walls, roofs, and floors to minimize heat transfer and enhance energy efficiency.
Integrate a ventilation system to promote indoor air quality and regulate moisture levels. Consider installing ceiling fans or ventilation fans in areas prone to moisture, such as the bathroom and kitchen, to remove excess humidity and prevent mold growth. Incorporate windows and openings that can be easily opened to allow for fresh air circulation.
Include appropriate lighting fixtures that balance energy efficiency with functionality and aesthetics. Utilize energy-efficient LED or CFL lights throughout the tiny house to minimize energy consumption while providing ample illumination for various activities.
Consider incorporating technology and smart systems into your tiny house. Utilize smart thermostats, energy monitoring systems, and home automation to efficiently manage and control energy usage. These systems can help optimize energy consumption and enhance the overall comfort and convenience of your tiny house.
Lastly, consult with professionals such as electricians, plumbers, and HVAC specialists to ensure compliance with local codes and regulations. Their expertise will help ensure the successful integration and functioning of essential utilities and systems within your tiny house.
By encompassing essential utilities and systems in your tiny house design, you can create a functional and self-sufficient living space that meets your needs and enhances your comfort and convenience.
Step 12: Finalizing the Design and Creating Renderings
After going through the previous steps of the design process for your tiny house, it’s time to finalize your design and bring it to life. In this final step, we will explore how to refine your design, address any remaining details, and create visual renderings that showcase the beauty and functionality of your tiny house.
Start by reviewing your design in detail, paying attention to the overall layout, materials, and finishes. Make any necessary adjustments or refinements to ensure that your design meets all the requirements and goals you have set throughout the process.
Consider the aesthetics of your tiny house. Select finishes, colors, and textures that reflect your personal style and create a cohesive look. Aim for a balance between functionality, visual appeal, and durability in your material choices.
Create detailed plans, elevations, and sections of your design. These technical drawings provide the necessary information for construction and serve as a visual representation of your design intent. Ensure accurate measurements, clear labeling, and annotations for easy understanding.
Utilize 3D modeling software or hire a professional to create realistic renderings of your design. Renderings allow you to visualize your tiny house in a more realistic manner, showcasing its exterior and interior features, lighting, and finishes. These visuals can help you and others better understand the spatial qualities and overall aesthetics of your design.
Consider creating a virtual walkthrough of your tiny house design. This immersive experience allows you to explore your design in a virtual environment, providing valuable insights into the flow and functionality of the space. Virtual walkthroughs can be shared with others to gather feedback and inspiration.
Address any remaining details in your design, such as the selection of fixtures, appliances, and interior furnishings. Research and choose items that align with your design goals, space constraints, and budget. Consider their size, functionality, and compatibility with the overall style of your tiny house.
As a final step, review your design one last time, ensuring that all elements align with your original goals and requirements. Ensure that the design is practical, aesthetically appealing, and fulfills the needs of the occupants.
Remember to document your final design, including all plans, renderings, and relevant information. This documentation will serve as a valuable resource throughout the construction process and help you communicate your design intent to builders, contractors, or other stakeholders.
By finalizing your design and creating visual renderings, you can effectively convey the vision and potential of your tiny house project. These visuals will not only serve as a reference for construction but also enable you to share and celebrate your design accomplishments with others.
Conclusion
Designing a tiny house for a school project is a rewarding and immersive experience that allows you to explore the world of architecture, creativity, and problem-solving. Throughout the design process, we have covered a comprehensive range of steps, from understanding the project requirements to finalizing the design and creating visual renderings. By following these steps, you can ensure that your tiny house design is functional, visually appealing, and aligned with your goals and objectives.
Throughout the journey, we have emphasized the importance of understanding project requirements, conducting thorough research, setting design goals, and optimizing space utilization. We have explored techniques for incorporating sustainability, enhancing natural light, maximizing ventilation, and integrating essential utilities and systems. Additionally, we discussed the importance of designing multi-purpose furniture and incorporating efficient storage solutions to maximize functionality.
The final step of finalizing the design and creating renderings allows you to bring your vision to life, showcasing the beauty and functionality of your tiny house. By refining your design, addressing details, and creating visual representations, you can effectively communicate your design intent and celebrate your accomplishments.
Remember, each tiny house project is unique, and the design process is an opportunity for creativity and innovation. Be open to iterating and adapting your design as new ideas emerge and feedback is received. Seek inspiration from various sources, collaborate with others, and embrace sustainable and efficient solutions to enhance both the environmental and personal aspects of your tiny house design.
As you embark on your journey to design a tiny house for your school project, remember to enjoy the process and embrace the challenges that come your way. Emphasize both functionality and aesthetics, demonstrate your architectural knowledge, and showcase your creativity in the pursuit of a well-designed and inviting living space.
Good luck with your tiny house project, and may your design be a testament to your skills, passion, and dedication to the world of architecture and design.
Frequently Asked Questions about How To Design A Tiny House For A School Project
Was this page helpful?
At Storables.com, we guarantee accurate and reliable information. Our content, validated by Expert Board Contributors, is crafted following stringent Editorial Policies. We're committed to providing you with well-researched, expert-backed insights for all your informational needs.


0 thoughts on “How To Design A Tiny House For A School Project”