Home>diy>Building & Construction>How To Build A Foundation For A Tiny House
Building & Construction
How To Build A Foundation For A Tiny House
Modified: October 20, 2024
Learn the essential steps for building a solid foundation for your tiny house with our comprehensive guide. Expert tips and techniques for efficient building construction.
(Many of the links in this article redirect to a specific reviewed product. Your purchase of these products through affiliate links helps to generate commission for Storables.com, at no extra cost. Learn more)
Introduction
Building a foundation for a tiny house is an essential step in the construction process. A strong and stable foundation not only supports the weight of the structure but also ensures its durability and longevity. By taking the time to properly plan and execute the foundation, you can create a solid base for your tiny house, providing a safe and secure living space.
In this article, we will guide you through the step-by-step process of building a foundation for a tiny house. From choosing the right location to securing the structure, we will cover all the necessary details to help you successfully complete this crucial stage of construction.
Before we dive into the specific steps, it is important to note that building codes and regulations may vary depending on your location. It is recommended to consult with local authorities and obtain the necessary permits before proceeding with any construction project.
Now, let’s get started on building the foundation for your tiny house!
Key Takeaways:
- Building a strong foundation for a tiny house involves crucial steps such as choosing the right location, clearing the site, setting foundation blocks, and installing the floor system to ensure durability and stability.
- Securing the structure of a tiny house is the final step, ensuring safety and stability. Attention to detail, adherence to building codes, and customization create a comfortable and unique living space.
Read more: How To Build A Foundation For A House
Step 1: Choosing the Right Location
Choosing the right location for your tiny house foundation is a crucial decision that can greatly impact the overall functionality and enjoyment of your home. Here are some important factors to consider when selecting the perfect spot:
- Sunlight and Views: Before settling on a location, consider the amount of sunlight the site receives throughout the day. Maximizing natural light in your tiny house can help reduce energy costs and create a more pleasant living environment. Additionally, consider whether the site offers any scenic views or desirable surroundings that will enhance your overall living experience.
- Accessibility: Think about accessibility when choosing the location for your tiny house. Consider the proximity to main roads, public transportation, and amenities such as grocery stores, medical facilities, and schools. You’ll also want to ensure that the site can be easily accessed by utility providers for water, electricity, and sewage connections.
- Utilities: Speaking of utilities, it’s essential to determine the availability of necessary services in your chosen location. Check if there are existing connections for electricity, water, and sewage. If not, consider the feasibility and cost of installing these services based on the distance from existing infrastructure.
- Zoning and Building Codes: Research the local zoning regulations and building codes in your area. Ensure that your desired location is compliant and permits construction of a tiny house on a foundation. Check if there are any specific setback requirements, size limitations, or design guidelines that you need to adhere to.
- Environmental Factors: Assess the environmental factors that may affect your chosen location. Consider the risk of flooding, wildfires, or extreme weather conditions in the area. It’s important to choose a site that is safe and minimizes any potential risks to the structure and its occupants.
Remember, finding the right location for your tiny house foundation is a personal decision that should align with your lifestyle and priorities. Take the time to visit potential sites, consider these factors, and evaluate your options before finalizing your decision.
Step 2: Clearing the Site
Once you have chosen the perfect location for your tiny house foundation, the next step is to clear the site. Clearing the site involves removing any vegetation, debris, or obstructions that may hinder the construction process. Here’s how you can effectively clear the site:
- Mark the boundaries: Begin by marking the boundaries of your desired foundation area. Use stakes and string to outline the perimeter, ensuring that you have a clear understanding of the space you will be working with.
- Remove vegetation: Before you can start preparing the ground, it is important to remove any vegetation, including grass, shrubs, and trees, within the marked area. You can use a shovel, a weed trimmer, or a small excavator to clear the vegetation, depending on the size of the area and the extent of the growth.
- Clear the debris: After removing the vegetation, thoroughly clear the site of any debris, rocks, or other objects that may hinder the construction process. This will ensure a clean and leveled surface for the next steps of foundation preparation.
- Grade the site: Properly grading the site is essential to ensure proper drainage and stability. Use a level or a transit to determine the high and low points of the site and make adjustments as necessary. It is important to create a slight slope away from the foundation to prevent water accumulation.
- Dispose of waste: Properly dispose of vegetation, debris, and any waste generated during the site clearing process. You can either rent a dumpster, hire a waste removal service, or check with local authorities for disposal options.
Clearing the site is a crucial step in preparing the foundation for your tiny house. It provides a clean and level surface, ensuring a solid and stable base for the construction process to follow. Take your time to complete this step thoroughly to set the stage for a successful foundation installation.
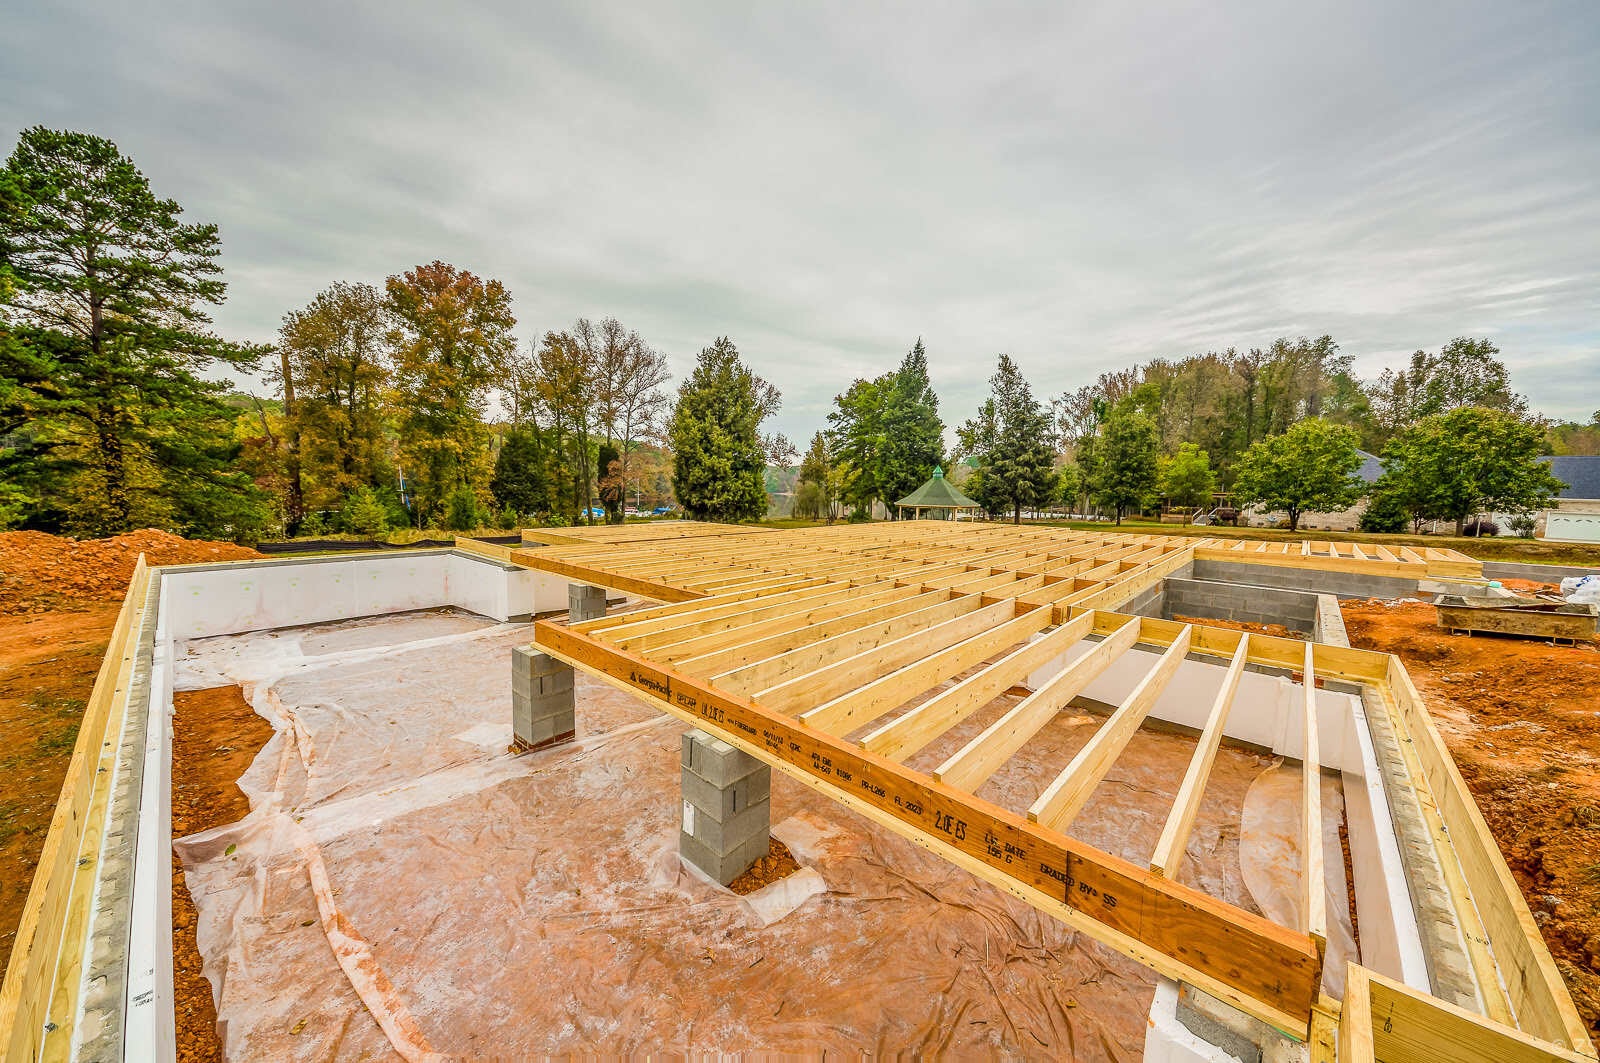
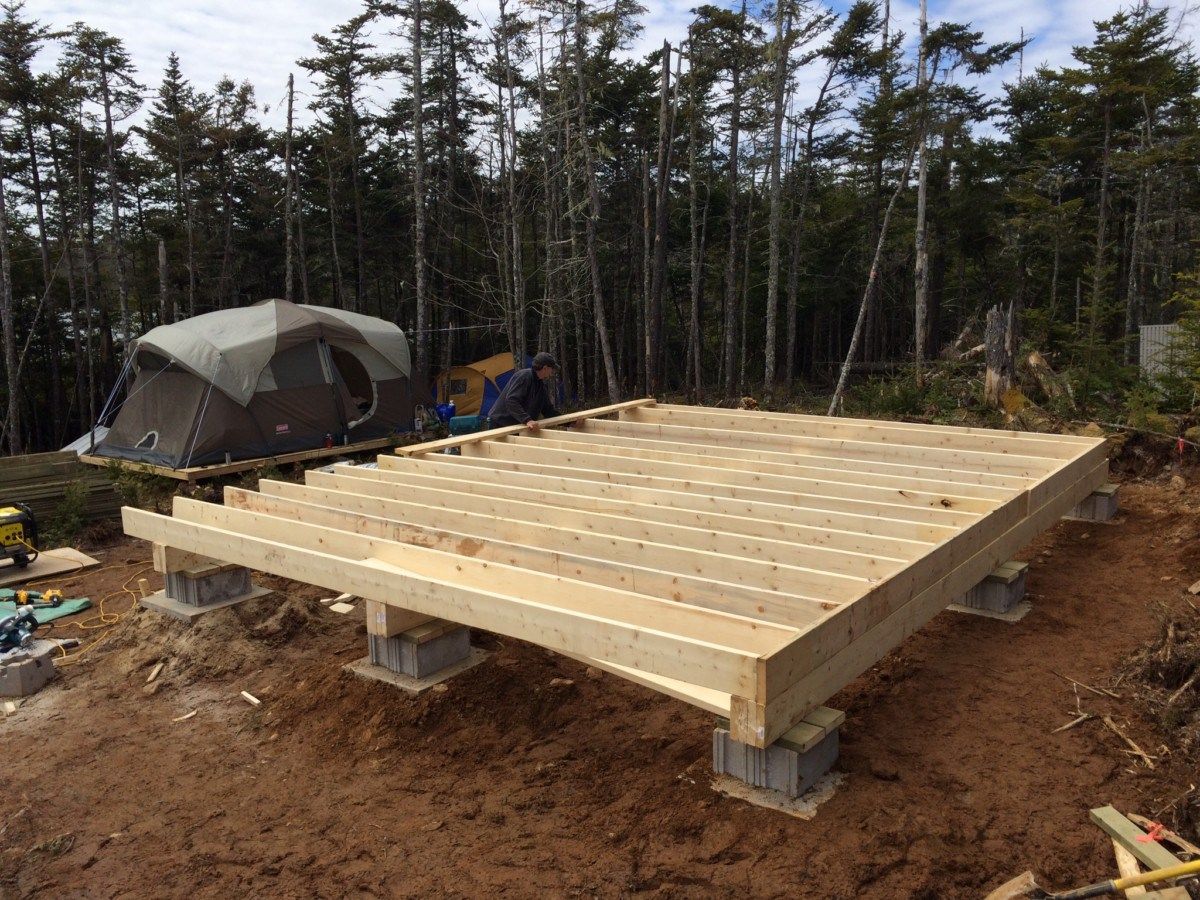
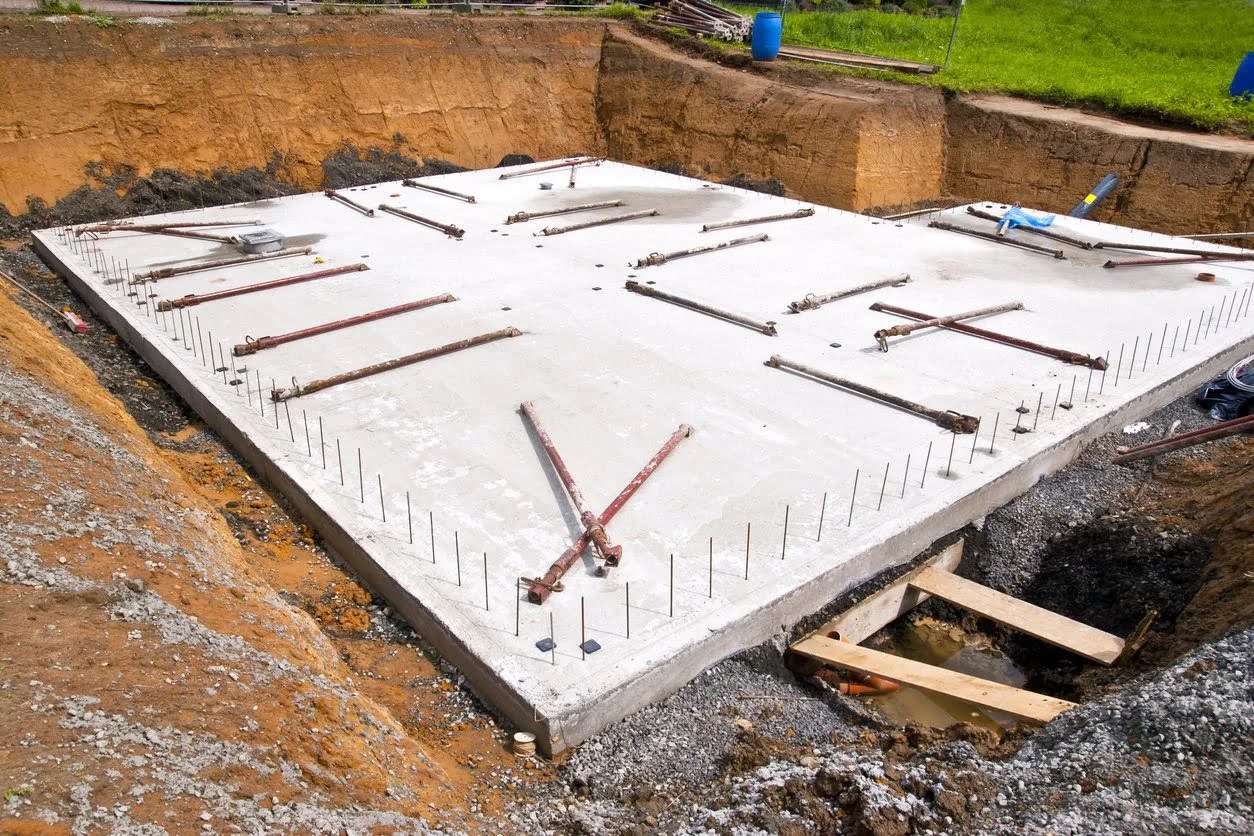
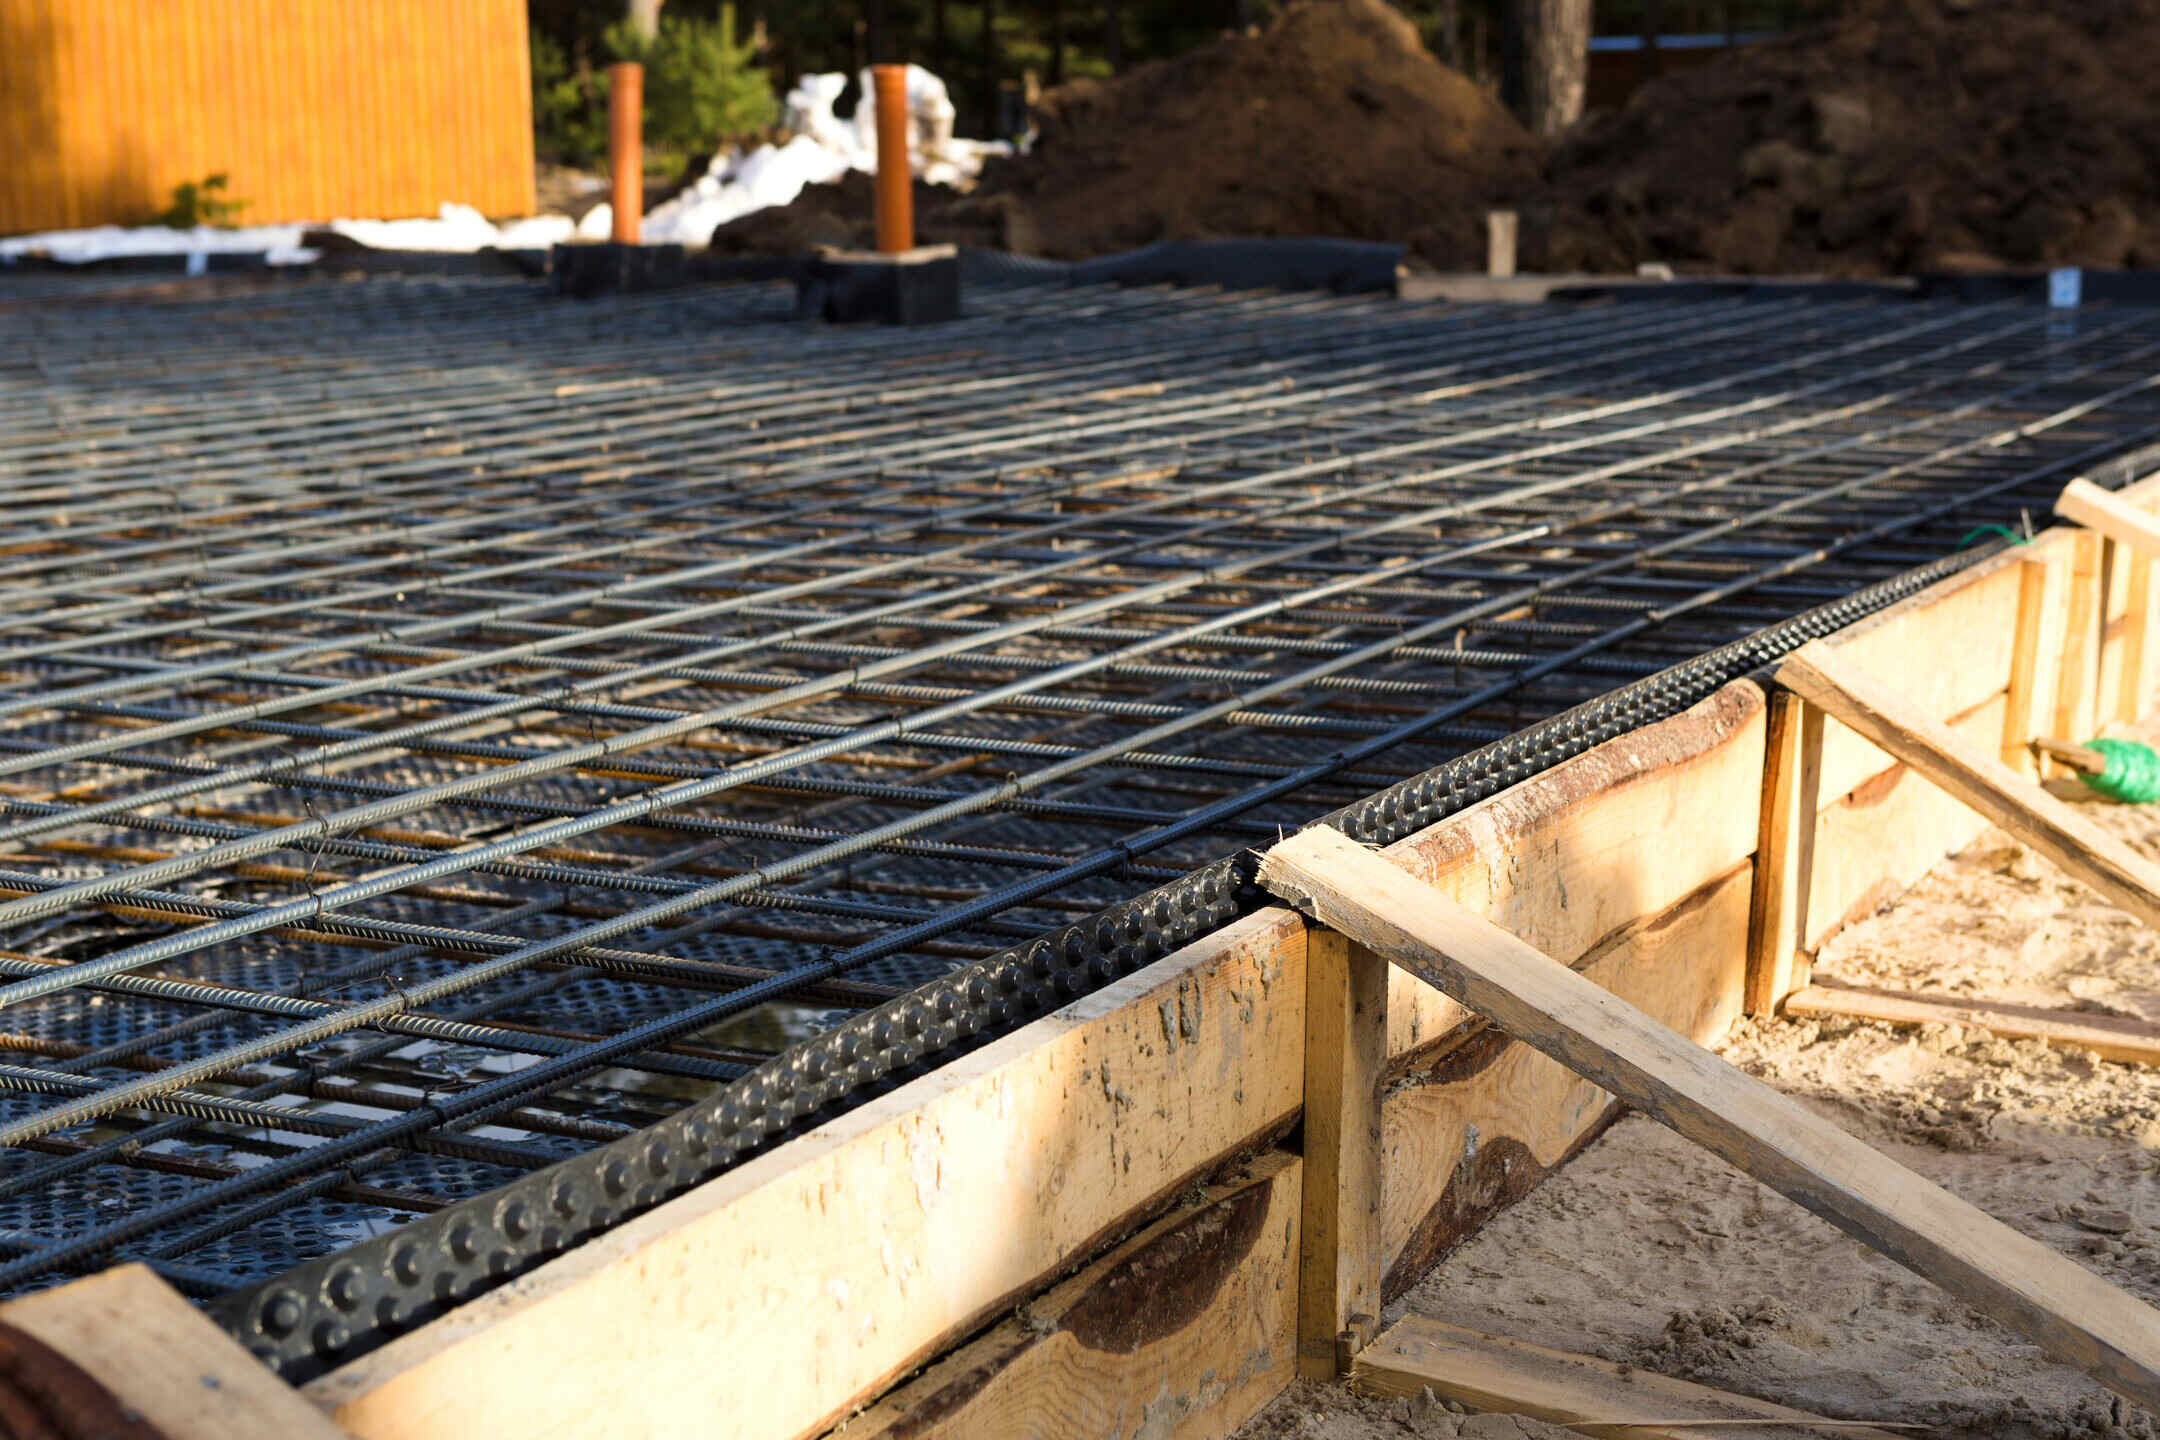
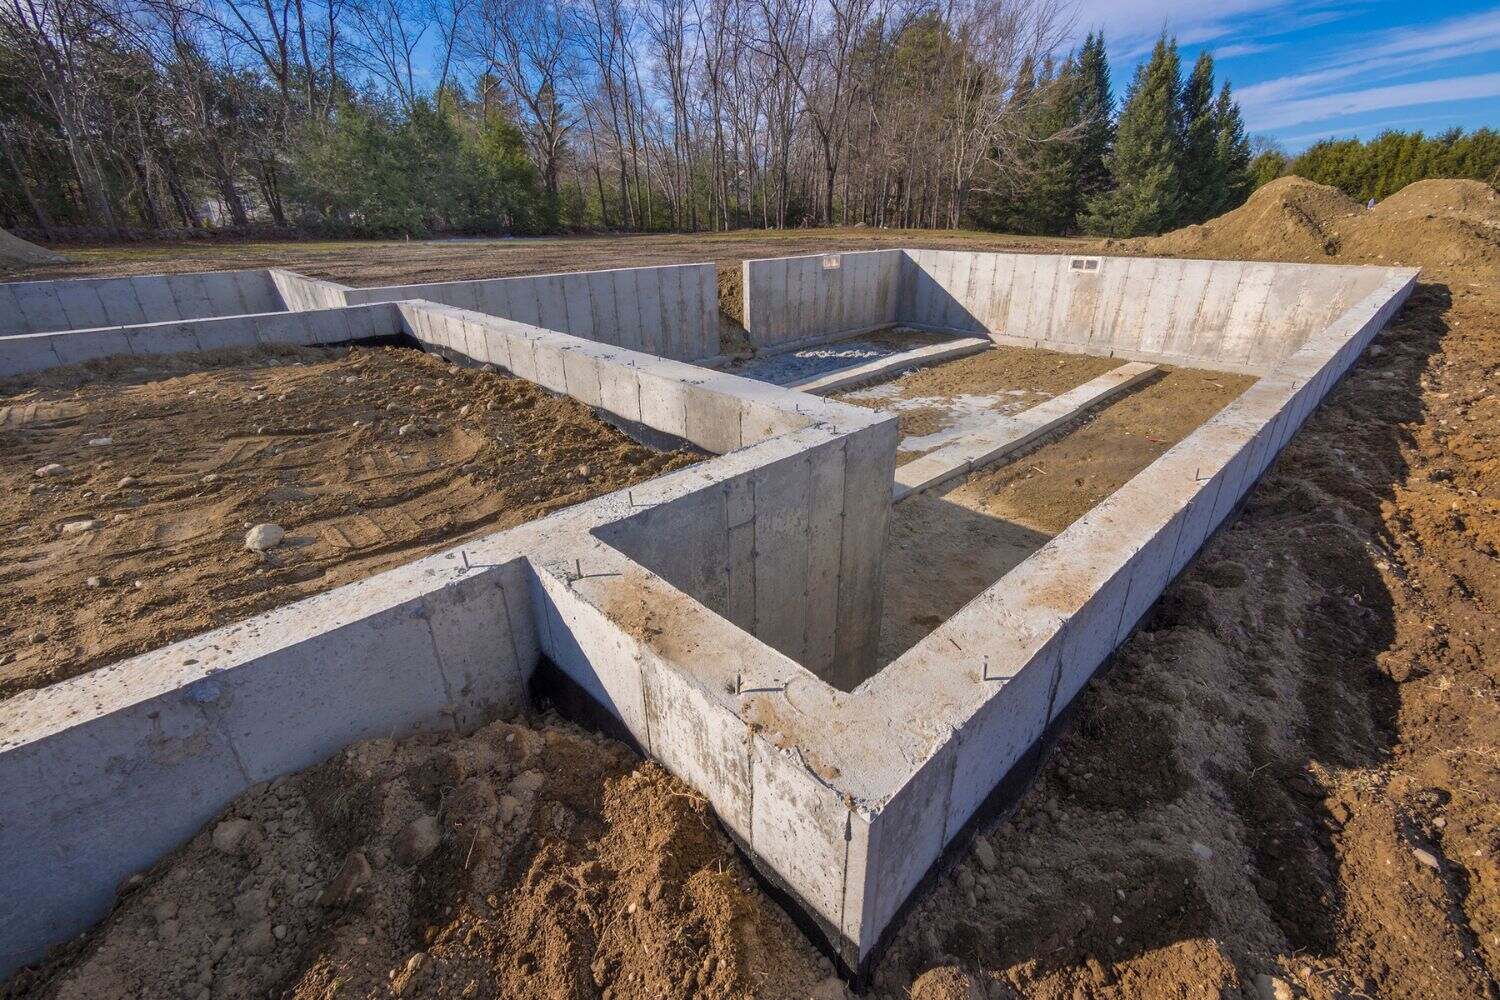
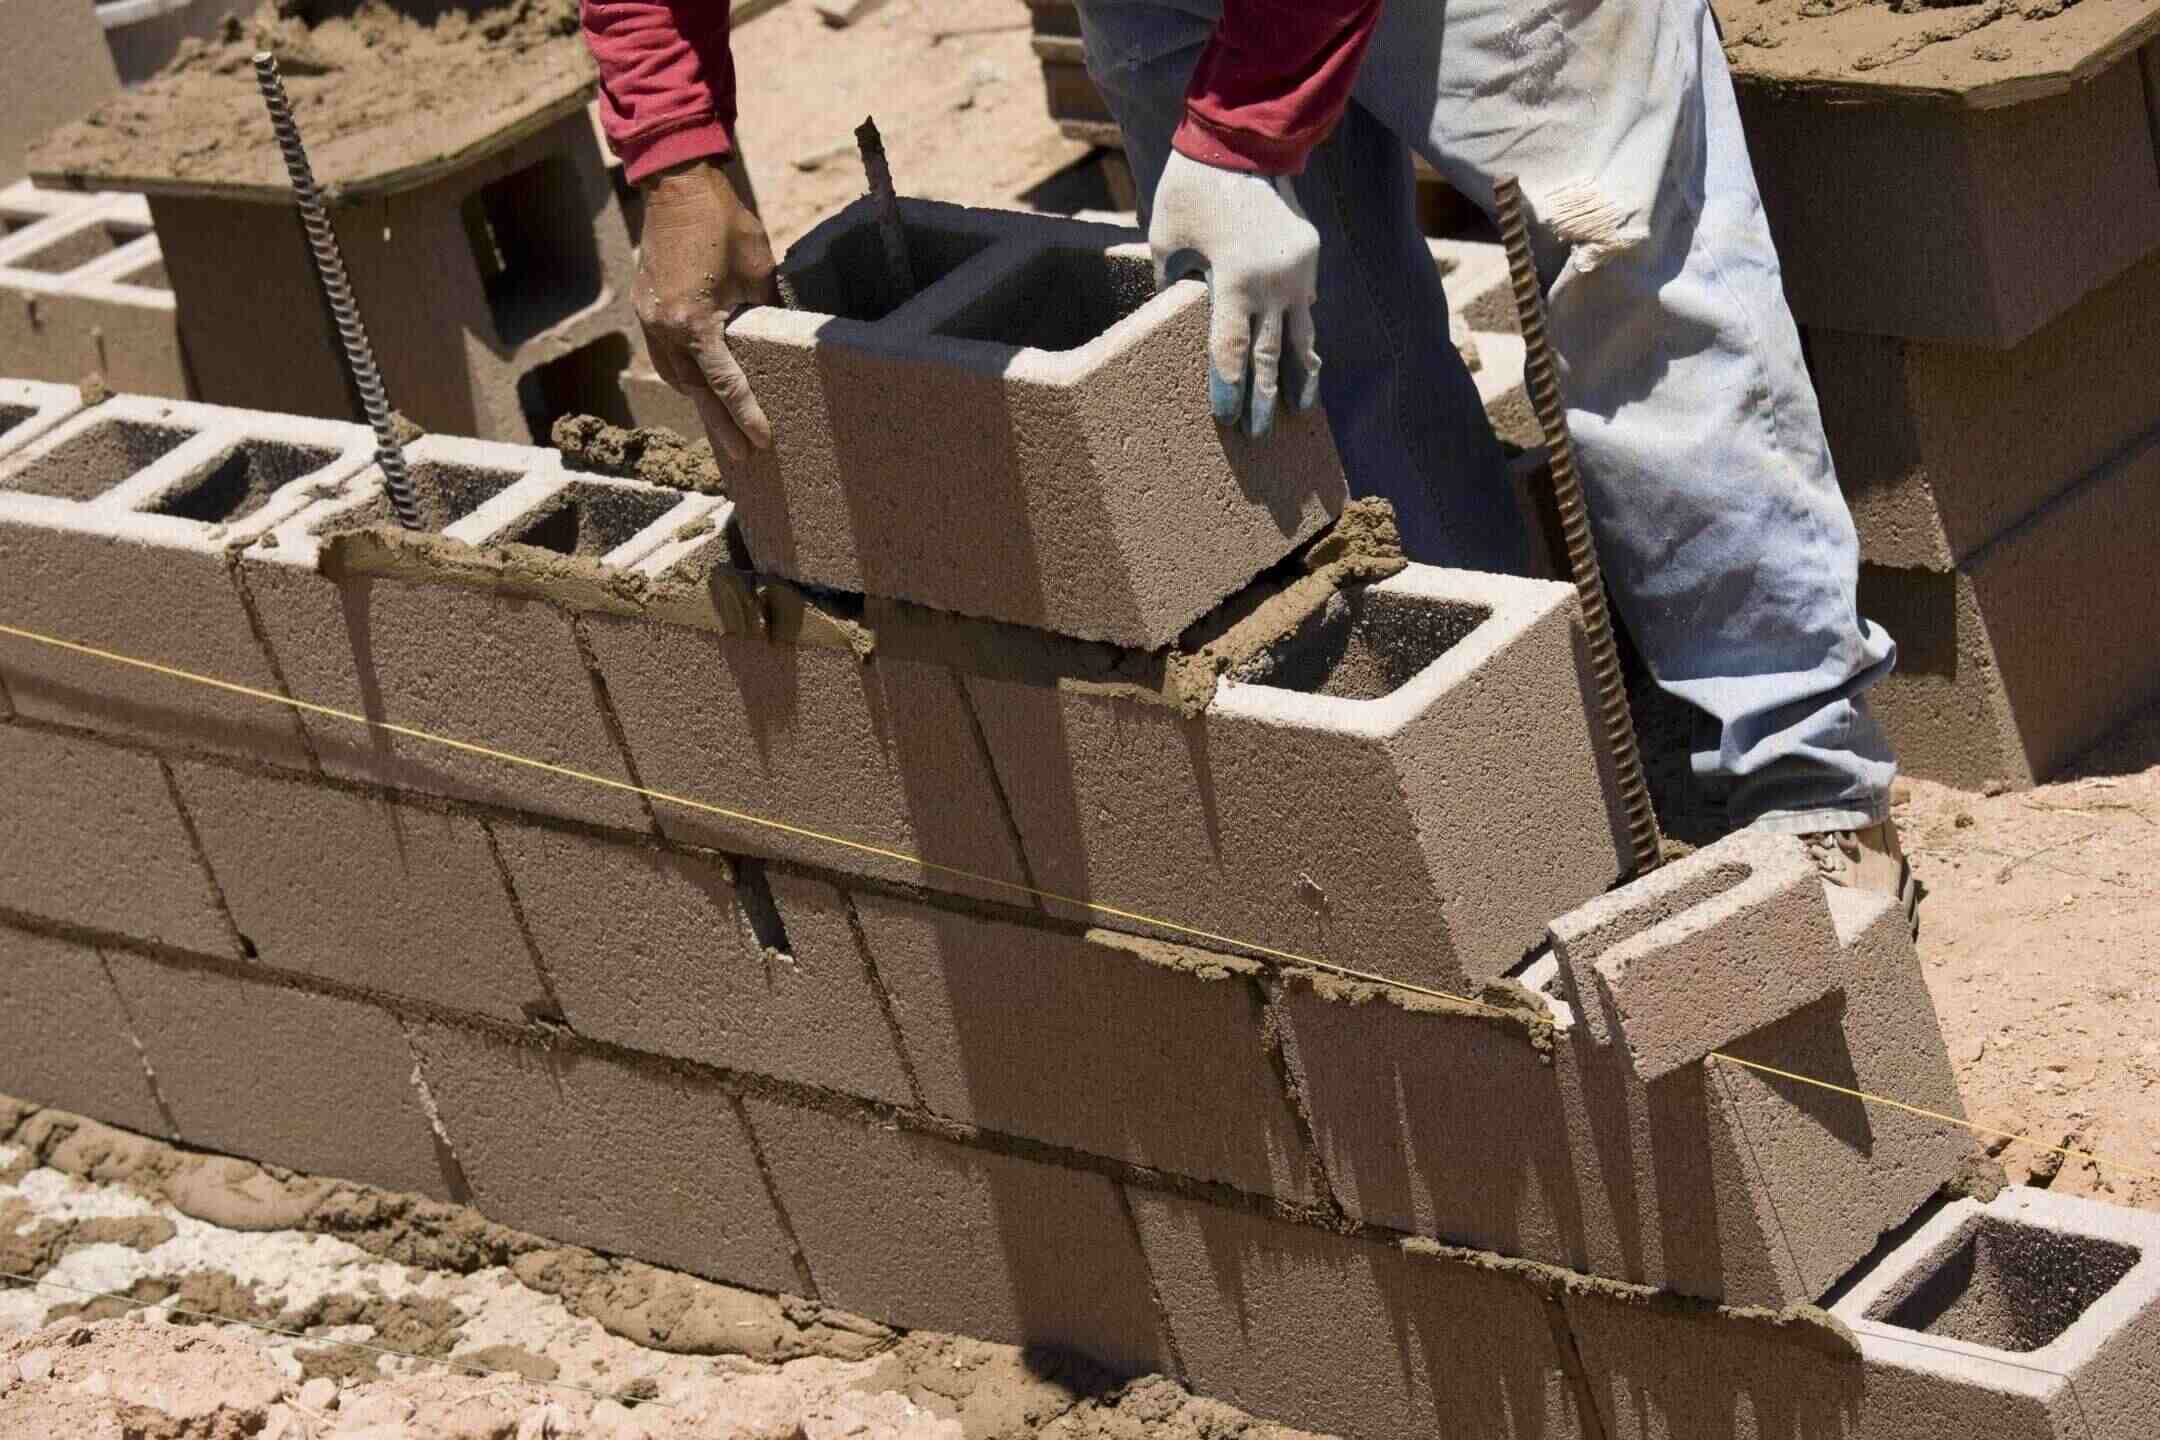
Step 3: Setting the Foundation Blocks
Once the site is cleared and leveled, it’s time to move on to setting the foundation blocks for your tiny house. The foundation blocks, also known as piers or footings, provide support and stability to the structure. Here’s how you can set the foundation blocks:
- Measure and mark: Start by measuring and marking the locations where the foundation blocks will be placed. Refer to your building plans or consult with a professional to determine the appropriate spacing and positioning of the blocks.
- Excavate holes: Use a shovel or a small excavator to dig holes at the marked locations. The depth of the holes will depend on the frost line in your area and the recommended foundation depth for your specific tiny house design. Ensure that the holes are deep enough to provide a stable base for the blocks.
- Add gravel: Once the holes are excavated, add a layer of gravel at the bottom of each hole. This will help with drainage and prevent moisture from accumulating around the foundation blocks.
- Place the blocks: Carefully place the foundation blocks into the excavated holes, ensuring that they are level and properly aligned. Use a level and a tape measure to make any necessary adjustments and ensure that each block is at the correct height.
- Secure the blocks: To ensure that the foundation blocks remain in place, use concrete or grout to secure them in the holes. Follow the manufacturer’s instructions for mixing and pouring the concrete, and allow it to cure according to the recommended time frame.
- Double-check the alignment: Once the concrete has cured, double-check the alignment and levelness of the foundation blocks. Make any final adjustments as needed to ensure that they are all uniformly positioned.
Setting the foundation blocks is a critical step in the construction of your tiny house. These blocks provide the necessary support to distribute the weight of the structure evenly and ensure its stability. Take your time to accurately place and secure the foundation blocks to create a solid and reliable foundation for your tiny house.
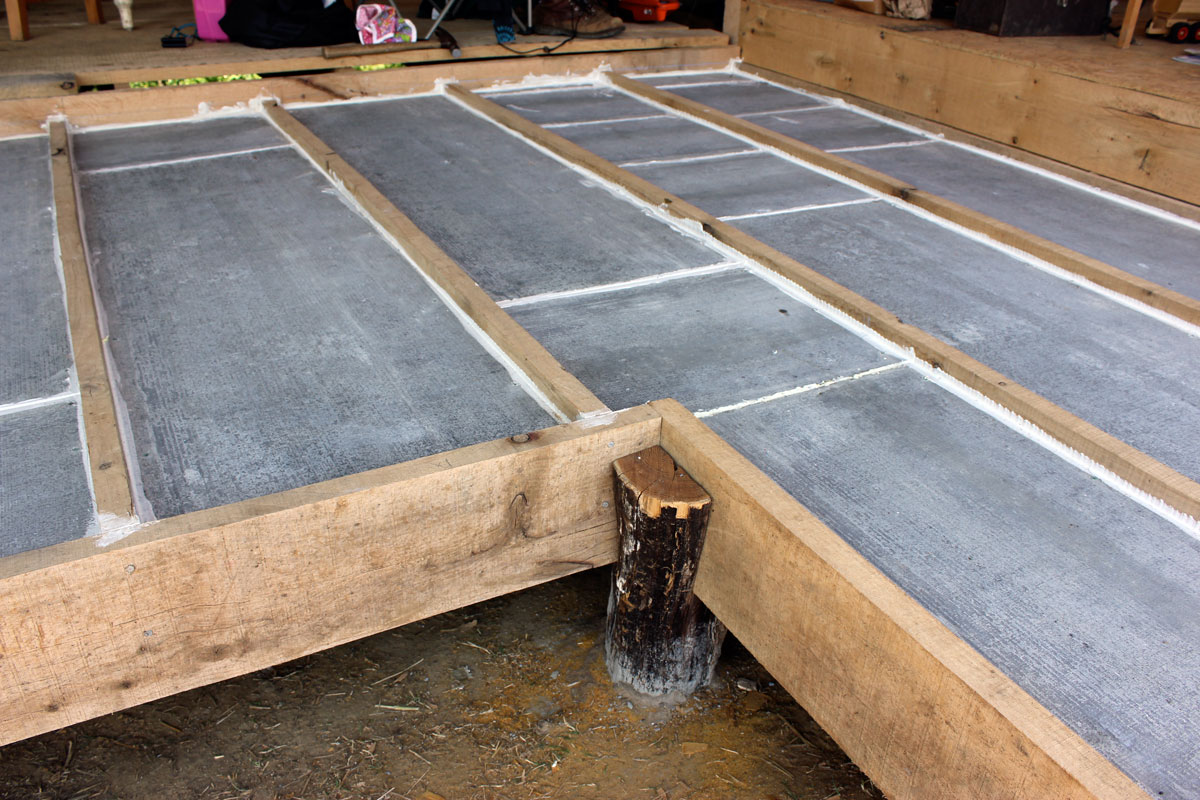
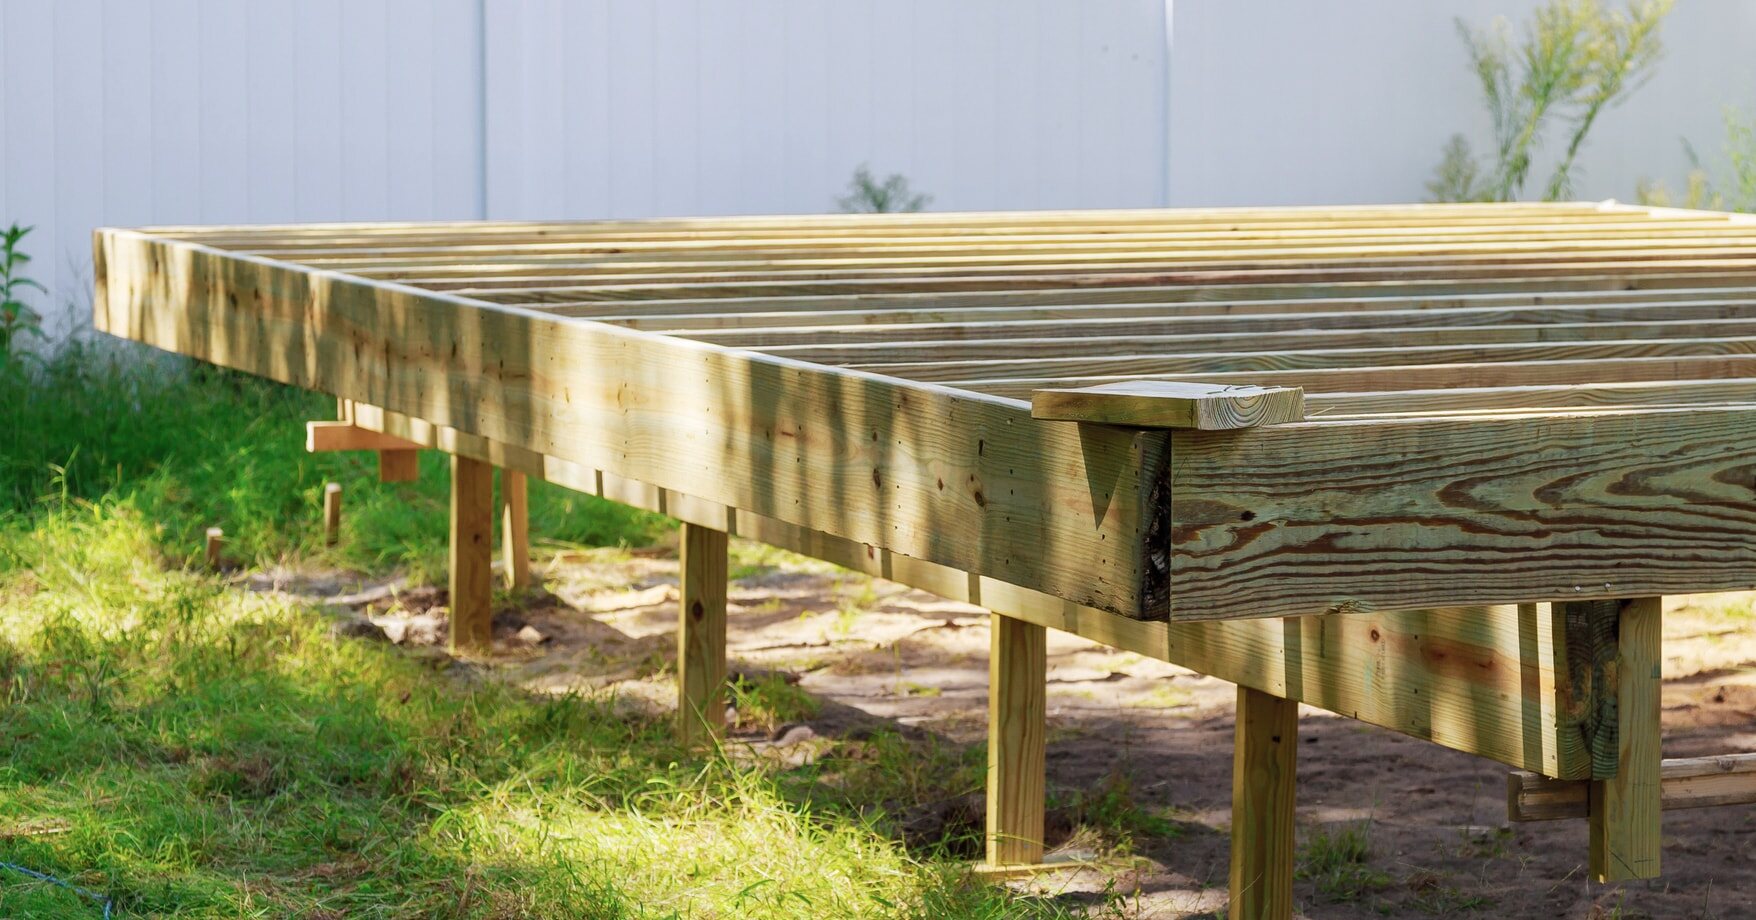
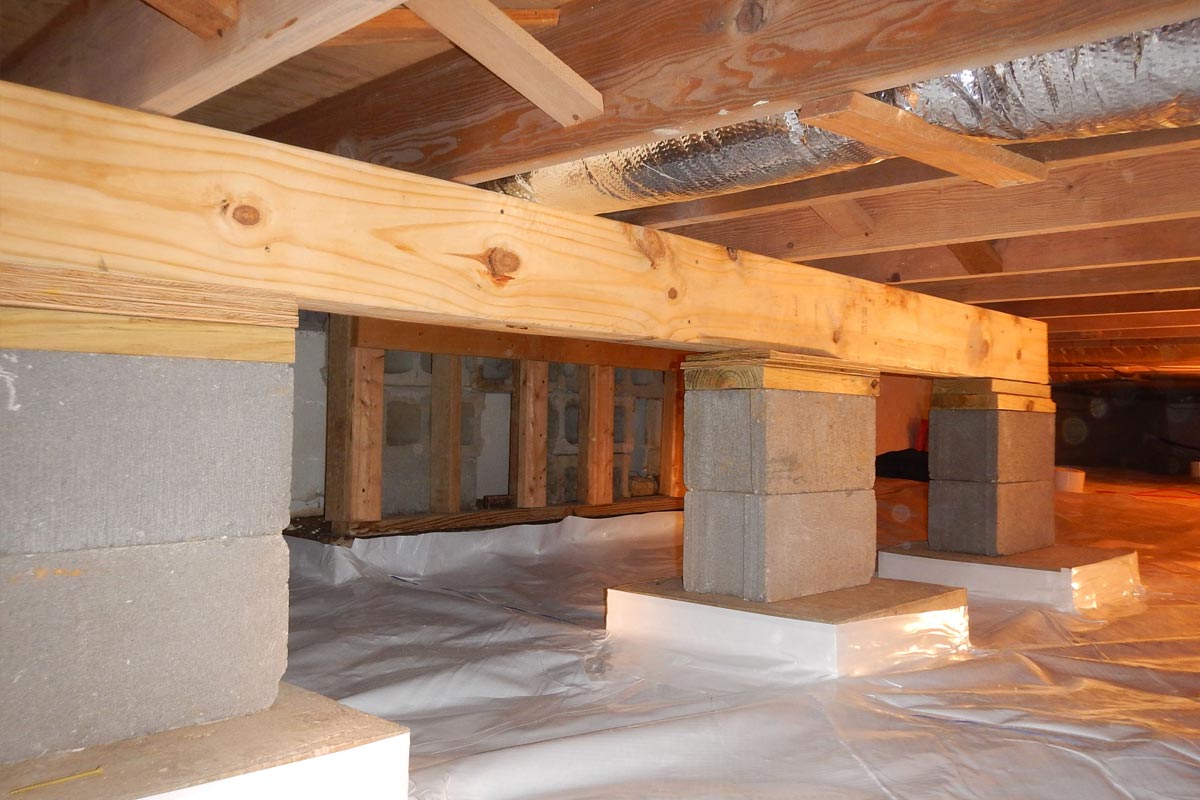
Step 4: Installing the Floor System
With the foundation blocks in place, it’s time to move on to installing the floor system of your tiny house. The floor system consists of joists, subflooring, and insulation, providing a sturdy and insulated base for your home. Here’s how you can efficiently install the floor system:
- Prepare the joists: Start by preparing the joists, which are the horizontal beams that provide support for the subfloor. Cut the joists to the appropriate lengths according to your building plans, ensuring that they fit securely between the foundation blocks.
- Position the joists: Lay out the joists on the foundation blocks, spacing them according to the specifications in your building plans. Ensure that they are properly aligned and perpendicular to the direction of the subflooring.
- Secure the joists: Use joist hangers or nails to securely attach the joists to the foundation blocks. Ensure that they are level and flush with each other, creating a consistent and sturdy support system.
- Add insulation: Once the joists are in place, it’s time to install insulation between them. Insulation helps to regulate temperature, reduce noise, and increase energy efficiency in your tiny house. Cut insulation batts to fit snugly between the joists, ensuring complete coverage.
- Install subflooring: After the insulation is in place, it’s time to install the subflooring. Choose a durable material such as plywood or oriented strand board (OSB). Cut the subflooring panels to fit between the joists and lay them down, ensuring a tight and secure fit.
- Secure the subflooring: Use screws or nails to secure the subflooring panels to the joists. Space fasteners according to the manufacturer’s recommendations, ensuring that the subflooring is securely fixed in place.
Installing the floor system is an integral part of building a secure and comfortable tiny house. The floor system provides a solid base for the rest of the construction while offering insulation to regulate temperature and minimize sound transmission. Ensure that the joists are securely attached, the insulation is properly installed, and the subflooring is tightly secured to create a sturdy and energy-efficient foundation for your tiny house.
Read more: Where To Start Building A Tiny House
Step 5: Building the Subfloor
Now that the floor system is in place, it’s time to build the subfloor of your tiny house. The subfloor acts as the structural layer that supports the weight of the interior and exterior finishes. Follow these steps to effectively build the subfloor:
- Measure and cut: Start by measuring the dimensions of the floor area and cut the subflooring material accordingly. Choose a durable and moisture-resistant material such as plywood or OSB for the subfloor.
- Lay the first subflooring panel: Begin at one corner of the floor area and lay the first subflooring panel, ensuring that it is flush with the edge of the floor system. Use screws or nails to secure the panel to the floor system, ensuring a tight and secure fit.
- Continue with additional panels: Lay the remaining subflooring panels, staggering the seams to create a stronger subfloor structure. Apply construction adhesive along the edges of each panel before securing them to the floor system with screws or nails. Ensure that the panels are level and properly aligned as you go.
- Fill gaps: Once all the subflooring panels are in place, fill any gaps between them with construction adhesive to create a seamless and solid subfloor surface. This will help prevent squeaking and ensure a sturdy foundation for the next stages of construction.
- Install blocking: Depending on your tiny house design, you may need to install blocking between the subflooring joists. Blocking adds extra support and reduces flex in the subfloor. Cut and install the blocking, securing it with screws or nails.
- Seal the subfloor: To protect the subfloor from moisture and increase its lifespan, consider sealing it with a moisture-resistant sealer. Apply the sealer according to the manufacturer’s instructions and allow it to dry completely before proceeding with the next construction steps.
Building a solid subfloor is essential for the overall integrity and longevity of your tiny house. A strong subfloor provides a stable base for the interior finishes and ensures that the structure can withstand daily use. By following these steps, you can construct a reliable and durable subfloor that will support your tiny house for years to come.
When building a foundation for a tiny house, make sure to properly level the ground and use durable, long-lasting materials such as concrete or pressure-treated wood to ensure stability and longevity.
Step 6: Installing the Insulation
Proper insulation is crucial for maintaining a comfortable and energy-efficient living space in your tiny house. Insulation helps regulate temperature, reduce sound transmission, and increase energy savings. Here’s how you can effectively install insulation in your tiny house:
- Select the insulation type: There are various insulation materials available, including fiberglass batts, rigid foam panels, and spray foam. Choose the insulation type that best suits your needs and meets the building code requirements in your area.
- Measure and cut: Measure the distance between the wall studs, ceiling joists, and floor joists where insulation will be installed. Cut the insulation materials to the appropriate size using a utility knife or insulation cutter.
- Install in walls: For walls, insert the insulation between the studs, ensuring a snug fit. Use a putty knife or your hands to gently press the insulation into place. Fill any gaps or voids with additional insulation material.
- Install in attic or ceiling: In the attic or ceiling, unfaced insulation can be rolled or laid out between the joists. Take care not to compress the insulation, as this can reduce its effectiveness. Install additional layers or thicker insulation as needed to achieve the desired R-value.
- Install in floor: In the floor, place the insulation between the floor joists. Use insulation hangers or wire to hold the insulation in place if necessary. Ensure that the insulation is properly aligned and covers the entire floor area.
- Secure the insulation: To hold the insulation in place, you can use insulation hangers, wire, or staples. Be careful not to compress the insulation, as this can reduce its effectiveness. Leave a small gap around electrical fixtures to prevent overheating.
- Seal air gaps: Inspect the installation for any gaps or air leaks around windows, doors, outlets, and other areas. Use caulk or weatherstripping to seal any air gaps and improve the insulation’s performance.
Installing proper insulation is vital to creating a comfortable and energy-efficient tiny house. Taking the time to install insulation correctly will help maintain a consistent indoor temperature, reduce noise, and lower heating and cooling costs. By following these steps, you can efficiently insulate your tiny house and create a cozy and efficient living environment.
Step 7: Laying the Floorboards
The next step in the construction of your tiny house is laying the floorboards. The floorboards are the visible flooring surface that adds aesthetic appeal and durability to your living space. Follow these steps to effectively lay the floorboards:
- Preparation: Ensure that the subfloor is clean, dry, and free of any debris or protruding nails. Inspect the subfloor for any uneven areas and make necessary corrections before proceeding.
- Choose the flooring material: Select the flooring material that best suits your style, budget, and durability needs. Options include hardwood, laminate, vinyl, or tile flooring. Consider factors such as maintenance requirements, durability, and aesthetic appeal when making your selection.
- Measure and cut: Measure the dimensions of the room and determine how the floorboards will fit. Take into account any obstacles such as doorways or vents. Use a saw or appropriate cutting tool to cut the floorboards to size.
- Begin installation: Start the installation in one corner of the room. Place the first floorboard against the longest straight wall, leaving a small gap between the wall and the board to allow for expansion. Use a pneumatic nailer, screws, or adhesive to secure the board to the subfloor.
- Continue with the remaining boards: Lay the subsequent floorboards, tongue-and-groove, or click-locking them together. Ensure that each board is securely joined and aligned with the previous one. Use a tapping block and mallet to ensure a tight fit.
- Trim and fit around obstructions: For areas with obstacles such as pipes, vents, or door frames, carefully mark and cut the floorboards to fit around them. Use a jigsaw or other appropriate cutting tool to create precise cuts.
- Stagger the boards: To create a more visually appealing and structurally sound floor, stagger the boards so that the end joints do not align in adjacent rows. This will provide more stability and a seamless appearance to your flooring.
- Finishing touches: Once all the floorboards are in place, check for any loose boards or gaps between them. Use appropriate tools to ensure they are secure and fill any gaps with wood filler. Sand the floor surface if necessary and apply a protective finish or sealant to enhance its appearance and durability.
Laying the floorboards is an exciting step that adds charm and functionality to your tiny house. Take your time during the installation process to ensure that the floorboards are properly aligned and securely fastened. By following these steps, you can create a beautiful and durable floor surface that enhances the overall aesthetic appeal of your tiny house.
Step 8: Erecting the Exterior Walls
Once the foundation and floor system are in place, it’s time to move on to erecting the exterior walls of your tiny house. The exterior walls provide structural support, insulation, and protection from the elements. Follow these steps to effectively erect the exterior walls:
- Prepare the wall sections: Measure and cut the wall studs and plates according to your building plans. Lay them out in sections, ensuring that they are properly aligned and correctly spaced.
- Mark the locations: Transfer the measurements of door and window openings to the wall sections. Mark the locations for electrical outlets, switches, and other fixtures as well.
- Assemble the wall sections: Start by assembling and securing the bottom and top plates to the wall studs. Use nails or screws to securely fasten them together. Ensure that the corners are square and the studs are evenly spaced.
- Install the door and window frames: If applicable, install the door and window frames within the marked openings. Ensure that they are level, plumb, and securely attached to the wall sections.
- Raise and position the wall sections: With the help of others, carefully raise the wall sections into position. Use temporary braces to hold them in place temporarily. Ensure that the walls are plumb and level before securing them.
- Secure the walls: Use nails or screws to permanently secure the wall sections to the floor system, starting at the corners. Ensure that the walls are securely fastened and aligned correctly.
- Add additional wall sections: Repeat the above steps to erect the remaining wall sections until the entire perimeter of the tiny house is enclosed. Ensure that the sections are properly aligned with each other.
- Seal the corners and gaps: Apply caulking or sealant to the corners and gaps between the wall sections. This will enhance the overall integrity and weather resistance of the walls.
Erecting the exterior walls is a significant milestone in the construction of your tiny house. Take care to ensure that the walls are straight, level, and properly aligned. By following these steps, you can successfully construct the exterior walls of your tiny house, bringing you one step closer to completing your dream home.
Step 9: Installing the Roof System
Now that the exterior walls are in place, it’s time to move on to installing the roof system of your tiny house. The roof system provides protection against the elements and completes the overall structure. Follow these steps to effectively install the roof system:
- Prepare the roof trusses: Measure and cut the roof trusses according to your building plans. Ensure that they are properly aligned, braced, and securely fastened together.
- Position the trusses: With the help of others, carefully position the roof trusses on top of the exterior walls. Ensure that they are evenly spaced and aligned with the markings on the walls and the building plans.
- Secure the trusses: Use nails, screws, or metal connectors to securely attach the roof trusses to the top plates of the exterior walls. Ensure that they are properly aligned, plumb, and level.
- Add roof insulation: Before installing the roofing materials, consider adding insulation between the roof trusses to improve energy efficiency and thermal comfort in your tiny house. Choose insulation material that suits your needs and complies with the building codes.
- Install the roofing material: Select the roofing material that best suits the design, climate, and durability requirements of your tiny house. Options include asphalt shingles, metal roofing, or clay tiles. Follow the manufacturer’s instructions to properly install the chosen roofing material.
- Address roof penetrations: Install roof flashing around vents, chimneys, and other roof penetrations to prevent water leakage. Follow the manufacturer’s instructions and use appropriate sealants to ensure a watertight seal.
- Install the fascia and soffit: Attach the fascia boards and soffit material to the edges of the roof trusses. This will provide a finished appearance, protect the eaves, and help with ventilation.
- Check for proper drainage: Ensure that the roof has proper drainage by inspecting the gutters and downspouts. Make sure they are correctly installed and direct water away from the foundation of your tiny house.
Installing the roof system is a critical step in completing the structure of your tiny house. It provides protection from the elements and enhances the overall appearance of your home. By following these steps, you can successfully install the roof system and take a significant step towards completing your dream tiny house.
Step 10: Securing the Structure
Once the major components of your tiny house, including the foundation, walls, and roof, are in place, the final step is to secure the structure. This step ensures the stability, safety, and longevity of your tiny house. Follow these essential steps to effectively secure the structure:
- Inspect for structural integrity: Conduct a thorough inspection of the entire structure, paying attention to any signs of weakness or damage. Check for loose connections, gaps, or any areas that require reinforcement.
- Reinforce joints and connections: Use appropriate hardware, such as brackets, screws, or nails, to reinforce joints and connections throughout the structure. This will provide additional strength and stability.
- Secure windows and doors: Check that all windows and doors are securely installed and functioning properly. Make any necessary adjustments or repairs to ensure they are watertight and provide proper insulation.
- Install siding: If desired, install siding material on the exterior walls to enhance the appearance and protection of your tiny house. Follow the manufacturer’s instructions for proper installation.
- Paint or finish the exterior: Apply a protective finish or paint to the exterior of your tiny house. This will enhance the durability of the materials and provide added resistance to weather and UV damage.
- Install insulation and drywall: Install insulation and drywall on the interior walls to improve energy efficiency and create a finished appearance. Ensure that the drywall is properly secured and seams are smoothly finished.
- Install flooring: Lay down the desired flooring material, following proper installation techniques. Ensure that the flooring is secure, level, and properly finished along the edges.
- Install fixtures and utilities: Install electrical fixtures, plumbing fixtures, and any other necessary utilities per your specific design and requirements. Consult with professionals if needed to ensure proper installation and safety.
- Test and inspect: Once the structure is secured and all components are in place, thoroughly test and inspect each system to ensure they are functioning properly. This includes checking electrical connections, plumbing systems, and any other utilities.
- Obtain necessary inspections and certifications: Depending on local regulations, arrange for necessary inspections and certifications to ensure your tiny house meets the required codes and standards.
Securing the structure is the final step in the construction process and ensures that your tiny house is safe, stable, and ready for occupancy. By meticulously following these steps and taking the necessary measures, you can complete the final touches of your tiny house and create a comfortable living space that you can enjoy for years to come.
Conclusion
Congratulations! You have successfully completed the construction of your tiny house foundation. Building a strong and stable foundation is essential for the longevity and safety of your home. By following the steps outlined in this article, you have created a solid base that will support your tiny house for years to come.
From choosing the right location and clearing the site to setting the foundation blocks, installing the floor system, and erecting the exterior walls, each step has been crucial in creating a well-built and structurally sound foundation for your tiny house. The installation of insulation, laying the floorboards, and securing the structure have enhanced the comfort, energy efficiency, and durability of your home.
Remember, throughout the construction process, it is important to adhere to local building codes and regulations. Consult with professionals and obtain the necessary permits to ensure compliance and safety.
As you move forward, consider the specific design and layout of your tiny house. Customize the interior finishes, fixtures, and utilities to create a space that reflects your personal style and meets your unique needs.
Building a tiny house is an exciting journey filled with creativity and the satisfaction of constructing your own home. By investing time, effort, and attention to detail, you have built a foundation that will provide a solid base for many years of joy and comfort in your tiny house.
Now, it’s time to continue the construction process and bring your vision to life. Enjoy the process and the fulfillment of living in a space that is truly your own.
Frequently Asked Questions about How To Build A Foundation For A Tiny House
Was this page helpful?
At Storables.com, we guarantee accurate and reliable information. Our content, validated by Expert Board Contributors, is crafted following stringent Editorial Policies. We're committed to providing you with well-researched, expert-backed insights for all your informational needs.

0 thoughts on “How To Build A Foundation For A Tiny House”