Home>Furniture & Design>Bathroom Accessories>How To Do Caulking In The Bathtub
Bathroom Accessories
How To Do Caulking In The Bathtub
Modified: August 17, 2024
Learn how to properly caulk your bathtub with our step-by-step guide. Find the best bathroom accessories and tools for a successful caulking project. Achieve a professional finish and prevent water damage.
(Many of the links in this article redirect to a specific reviewed product. Your purchase of these products through affiliate links helps to generate commission for Storables.com, at no extra cost. Learn more)
Introduction
Caulking is an essential maintenance task for keeping your bathtub in top condition. Over time, the caulk around the bathtub can deteriorate, leading to water leaks and potential damage to the surrounding walls and floors. By learning how to properly caulk your bathtub, you can prevent these issues and maintain a clean and watertight bathroom.
In this comprehensive guide, we will walk you through the step-by-step process of caulking your bathtub like a pro. Whether you're a seasoned DIY enthusiast or a novice homeowner, mastering the art of caulking will not only enhance the aesthetics of your bathroom but also contribute to its longevity.
By following the instructions outlined in this guide, you'll be equipped with the knowledge and skills to tackle this task with confidence. From gathering the necessary materials to achieving a smooth and professional finish, we've got you covered every step of the way.
So, roll up your sleeves, grab your caulking gun, and let's dive into the world of bathtub caulking. With a little patience and attention to detail, you'll soon be on your way to a beautifully sealed bathtub that's ready to withstand the test of time.
Key Takeaways:
- Properly caulking your bathtub is crucial for preventing water leaks and maintaining a clean bathroom. Gather the right materials, prepare the surface, apply the caulk, and let it dry for a long-lasting seal.
- Mastering the art of bathtub caulking enhances the aesthetics and longevity of your bathroom. With attention to detail and patience, you can achieve a professional and durable seal that protects against water damage.
Read more: How Long For Bathtub Caulk To Dry
Step 1: Gather the necessary materials
Before embarking on the caulking journey, it's crucial to gather all the essential materials to ensure a smooth and efficient process. Here's a comprehensive list of items you'll need:
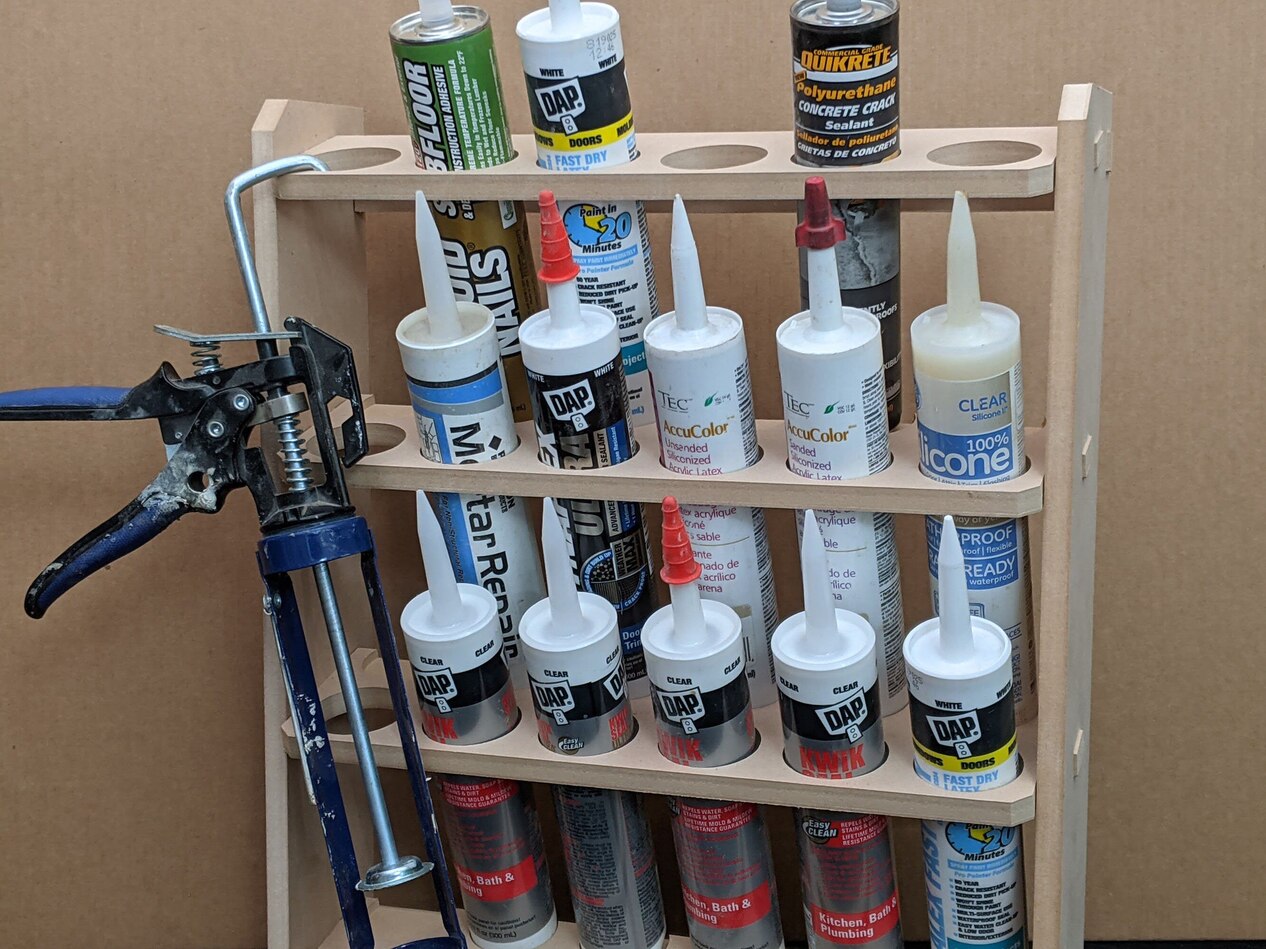
1. Caulk
Selecting the right caulk is paramount to the success of your bathtub caulking project. Opt for a high-quality silicone or acrylic caulk that is specifically formulated for bathroom use. These types of caulk are designed to withstand moisture and mold, providing long-lasting protection for your bathtub.
2. Caulking gun
A caulking gun is a must-have tool for dispensing the caulk evenly and precisely. Choose a sturdy caulking gun that feels comfortable in your hand and allows for smooth application.
3. Utility knife or caulk removal tool
If there is old caulk present, a utility knife or caulk removal tool will come in handy for carefully removing the existing caulk. This step is crucial for ensuring a clean and effective re-caulking process.
Read more: How To Remove Old Caulking From Bathtub
4. Masking tape
Masking tape is essential for creating clean and straight caulk lines along the edges of the bathtub. It helps to prevent excess caulk from spreading onto unwanted areas, resulting in a professional-looking finish.
5. Rubbing alcohol or denatured alcohol
Before applying the new caulk, it's important to thoroughly clean the area to remove any dirt, grime, or soap residue. Rubbing alcohol or denatured alcohol can be used to wipe down the surfaces, ensuring optimal adhesion for the new caulk.
6. Gloves
Protect your hands with a pair of durable gloves to prevent direct contact with the caulk and to keep your hands clean throughout the process.
7. Damp cloth or sponge
Having a damp cloth or sponge on hand will allow you to quickly and neatly wipe away any excess caulk, ensuring a tidy and professional-looking result.
8. Respirator or mask
While working with caulk, especially in enclosed spaces, it's advisable to wear a respirator or mask to protect yourself from inhaling potentially harmful fumes.
By gathering these essential materials, you'll be well-prepared to tackle the task of caulking your bathtub with confidence and precision. With the right tools at your disposal, you can ensure a successful and long-lasting seal that will keep your bathtub looking pristine for years to come.
Step 2: Prepare the bathtub
Before diving into the actual caulking process, it's crucial to prepare the bathtub to ensure optimal adhesion and a clean, professional finish. Proper preparation sets the stage for a successful caulking job and contributes to the longevity of the seal. Here's a detailed breakdown of the steps involved in preparing the bathtub for caulking:
1. Clean the surface
Begin by thoroughly cleaning the area around the bathtub where the old caulk was removed. Use a mild detergent or a bathroom cleaner to remove any soap scum, dirt, or residue that may have accumulated. This step is essential for promoting strong adhesion and preventing the new caulk from adhering to any leftover grime.
2. Dry the area
After cleaning the surface, ensure that it is completely dry before proceeding with the caulking process. Use a clean, dry cloth to wipe down the area and remove any lingering moisture. Properly drying the surface helps the caulk adhere effectively and prevents any potential issues with mold or mildew down the line.
Read more: What Is The Best Caulk To Use On A Bathtub
3. Apply masking tape
To achieve clean and precise caulk lines, apply masking tape along the edges of the bathtub where the caulk will be applied. The tape serves as a barrier, preventing the caulk from spreading onto the surrounding surfaces and ensuring a neat and professional-looking finish. Take your time to apply the tape carefully, ensuring that it follows the desired caulk line.
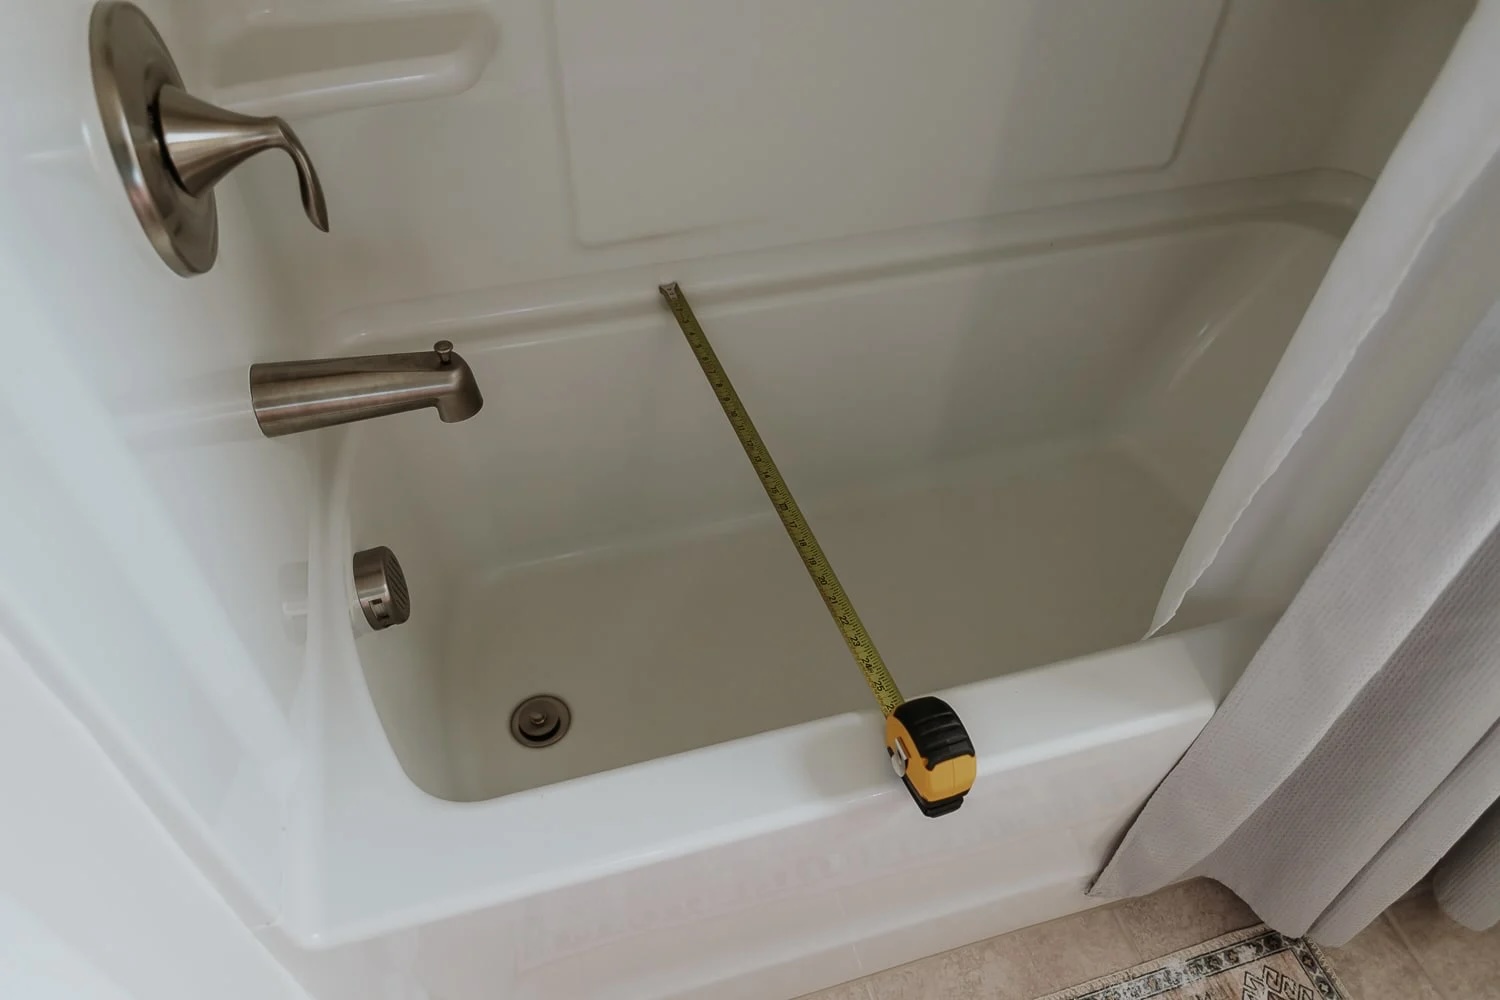
4. Check for gaps and cracks
Inspect the area around the bathtub for any gaps, cracks, or areas that may require additional attention. Addressing any existing gaps or damage before applying the caulk is crucial for creating a watertight seal and preventing future issues. Use a flashlight to carefully examine the edges and corners, making note of any areas that may need extra care.
5. Remove any remaining caulk residue
If there are any remnants of old caulk or adhesive present, use a caulk removal tool or a utility knife to carefully eliminate any remaining residue. Ensuring that the surface is free of old caulk promotes better adhesion and a smoother application of the new caulk.
By meticulously preparing the bathtub for caulking, you set the stage for a successful and long-lasting seal. Taking the time to clean, dry, and inspect the area ensures that the new caulk will adhere effectively and provide the necessary protection against water damage. With the bathtub primed and ready, you're now prepared to move on to the next step in the caulking process.
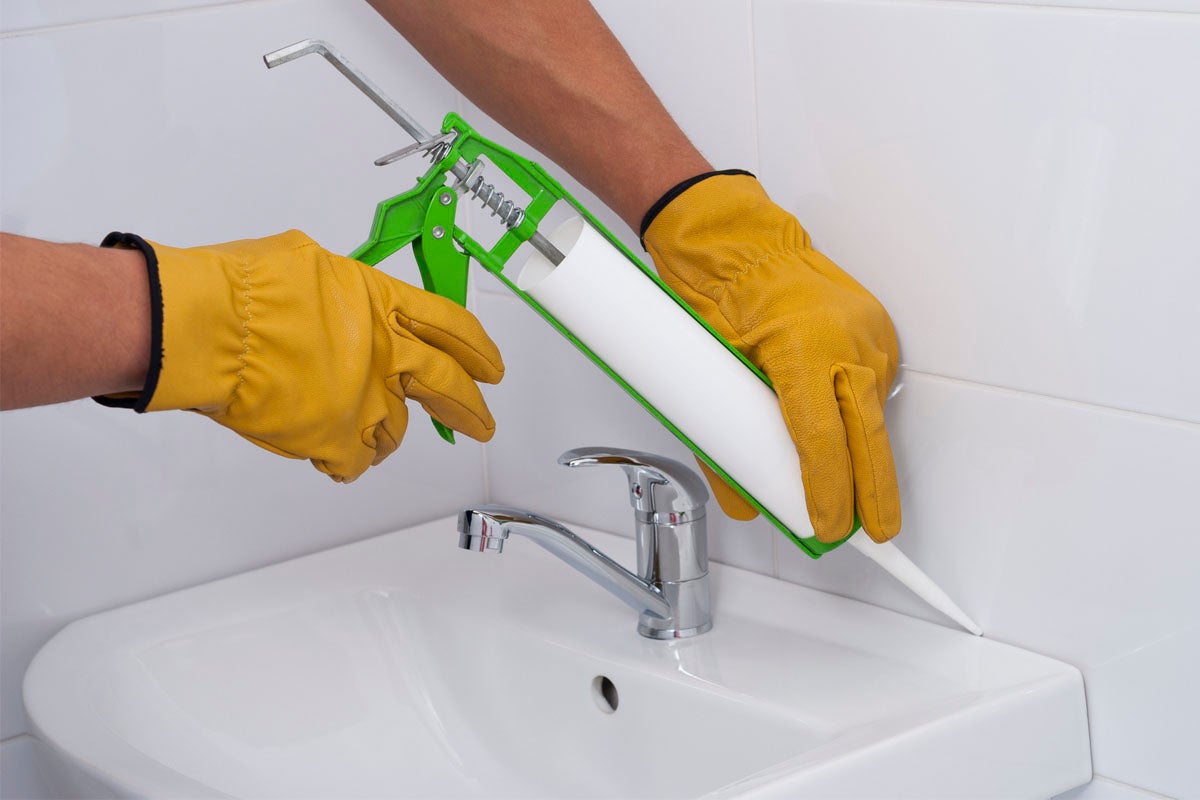
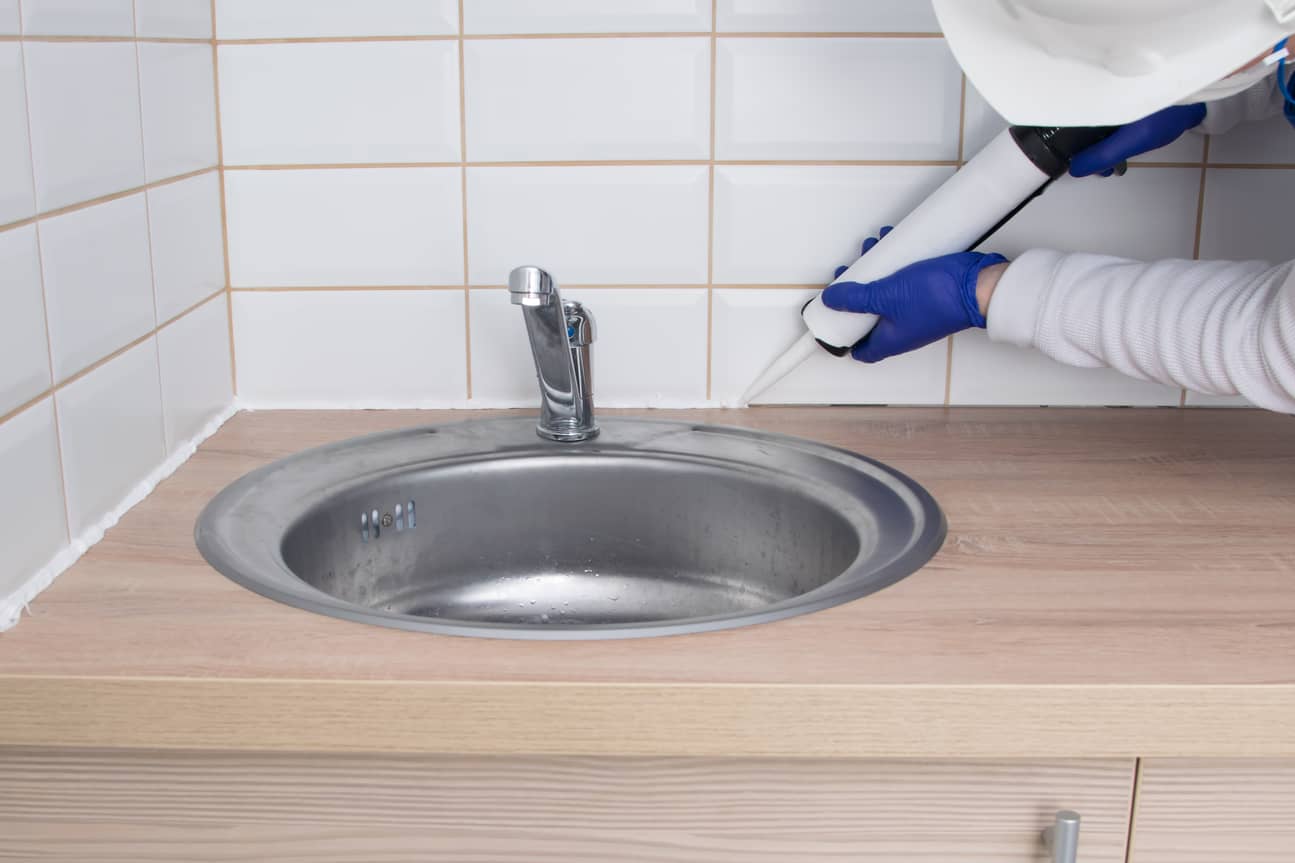
Step 3: Apply the caulk
With the bathtub meticulously prepared, it's time to delve into the pivotal step of applying the caulk. This stage requires precision and attention to detail to ensure a seamless and effective seal. Here's a comprehensive guide on how to expertly apply the caulk to your bathtub:
-
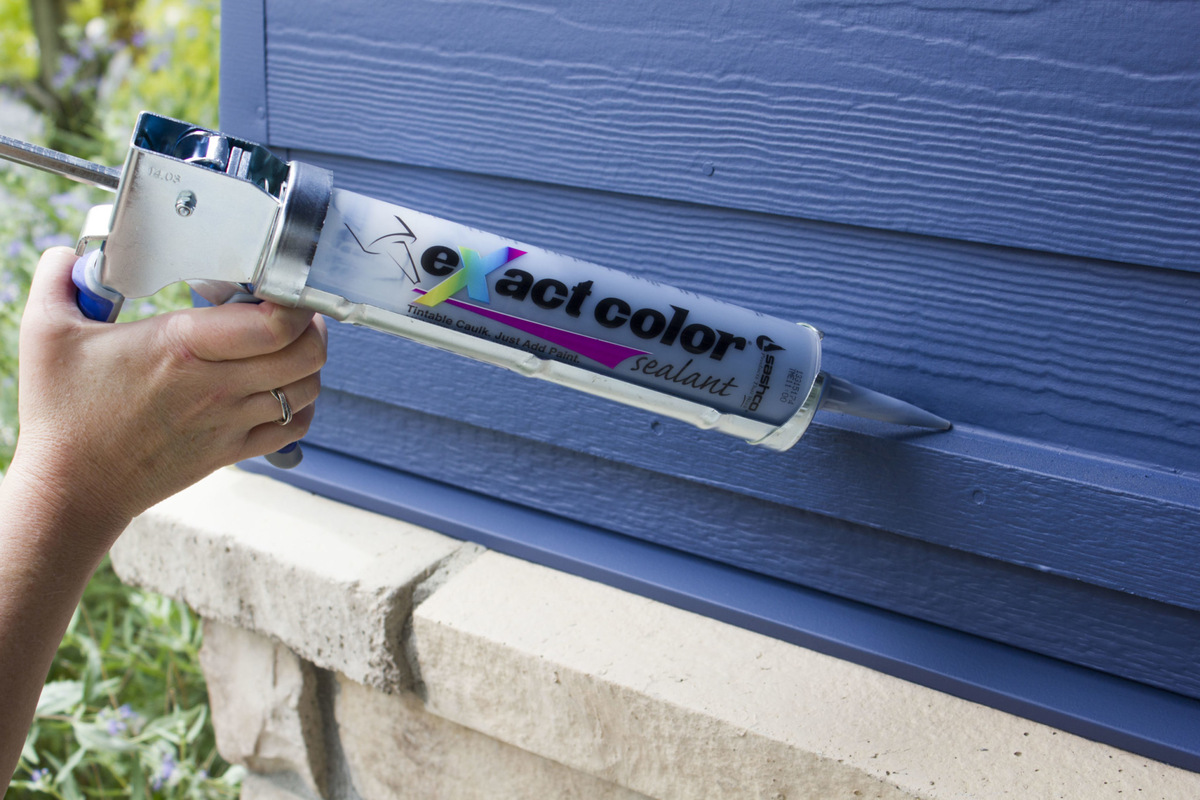
Load the caulking gun: Begin by loading the caulking gun with the tube of caulk. To do this, cut the tip of the caulk tube at a 45-degree angle using a utility knife. The opening should be wide enough to dispense an appropriate amount of caulk without creating excess waste. Insert the caulk tube into the caulking gun, ensuring a secure fit.
-
Start at one end: Position the loaded caulking gun at one end of the bathtub where the caulk line will begin. Hold the gun at a 45-degree angle to the surface, allowing for smooth and controlled application. Squeeze the trigger gently to dispense the caulk, starting with a small bead along the edge of the bathtub.
-
Maintain a steady pace: As you move along the edge, maintain a steady and consistent pace to ensure an even application of the caulk. The goal is to create a continuous and uniform bead of caulk that effectively seals the joint between the bathtub and the surrounding surfaces. Keep the pressure on the caulking gun consistent to achieve a smooth application.
-
Use a continuous motion: Avoid stopping and starting during the caulking process to maintain a seamless caulk line. If necessary, practice the motion on a spare surface to familiarize yourself with the technique before applying the caulk to the bathtub. A continuous and fluid motion helps achieve a professional-looking finish.
-
Fill the gaps: Pay close attention to any gaps or voids along the edge of the bathtub, ensuring that the caulk effectively fills these areas. Use the caulking gun to apply additional caulk as needed, addressing any spots that may require extra sealing. The goal is to create a watertight barrier that prevents moisture from seeping into the surrounding areas.
-
Work in sections: Divide the caulking process into manageable sections to maintain control and precision. By working in smaller segments, you can focus on achieving a consistent and neat caulk line without feeling rushed or overwhelmed. Take your time to ensure that each section receives the attention it deserves.
By following these detailed steps, you can expertly apply the caulk to your bathtub, creating a durable and professional seal that safeguards against water damage. With the caulk evenly dispensed and meticulously applied, you're now ready to move on to the next crucial phase of the caulking process.
Read more: What To Do In The Bathtub
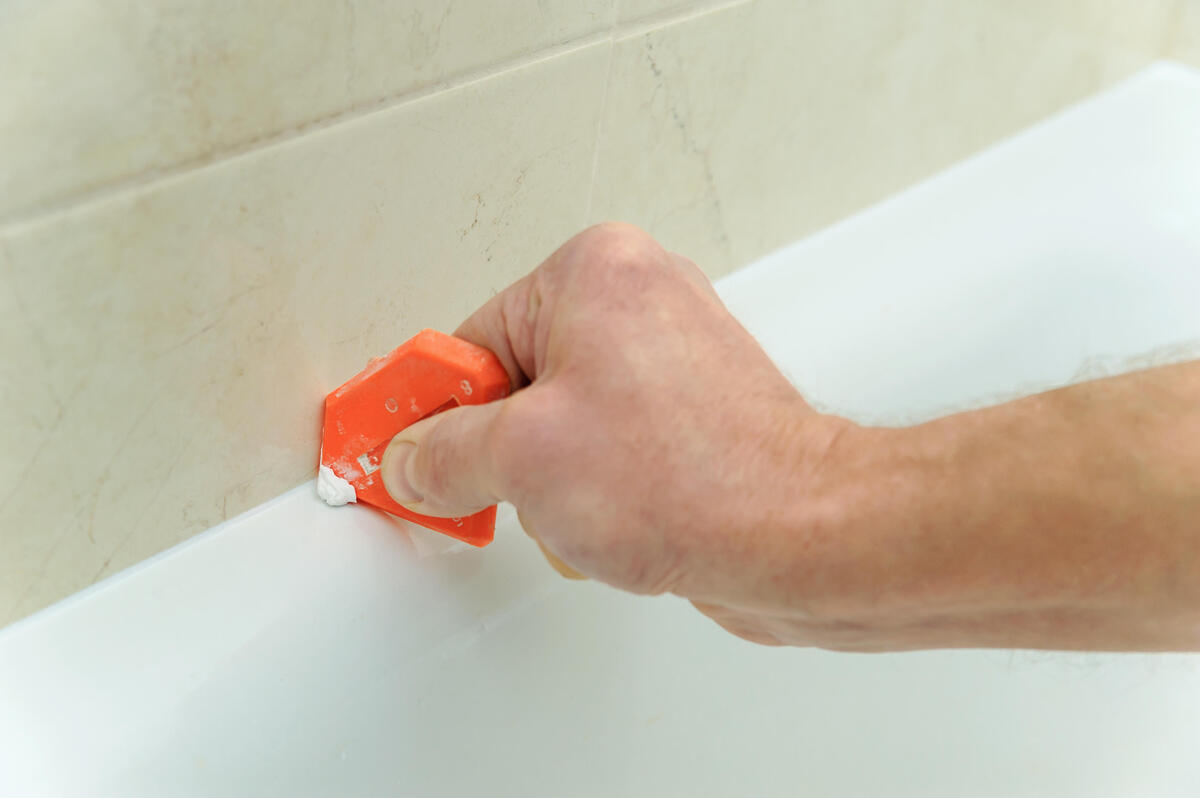
Step 4: Smooth out the caulk
Once the caulk has been applied along the edges of the bathtub, the next critical step is to smooth out the caulk to achieve a clean and professional finish. This process not only enhances the visual appeal of the caulking job but also ensures that the seal is watertight and effectively protects against moisture infiltration. Here's a detailed guide on how to expertly smooth out the caulk for optimal results:
-
Dampen your finger or a tool: Before smoothing out the caulk, dampen your finger or a specialized tool such as a caulk finishing tool or a plastic spoon with water or rubbing alcohol. This prevents the caulk from sticking to your finger or the tool, allowing for a smoother and more controlled finishing process.
-
Apply gentle pressure: Using your dampened finger or the smoothing tool, apply gentle and consistent pressure along the bead of caulk. The goal is to create a uniform and neatly shaped caulk line that seamlessly blends with the surrounding surfaces. Be mindful of maintaining a steady hand and applying even pressure to achieve a professional-looking finish.
-
Smooth in one continuous motion: Work in one continuous motion to smooth out the caulk, starting from one end of the bead and moving towards the other. Avoid lifting your finger or the tool repeatedly, as this can disrupt the smoothness of the caulk line. A continuous and fluid motion helps create a seamless finish that enhances the overall appearance of the bathtub.
-
Wipe away excess caulk: As you smooth out the caulk, periodically wipe away any excess caulk that accumulates on your finger or the smoothing tool. Use a damp cloth or sponge to clean up any stray caulk, ensuring that the final result is tidy and professional. This step contributes to achieving a polished and refined caulk line.
-
Inspect for imperfections: After smoothing out the caulk, carefully inspect the entire caulk line for any imperfections or areas that may require additional attention. Address any uneven spots or inconsistencies by gently refining the caulk with your finger or the smoothing tool, ensuring that the entire seal is uniform and visually appealing.
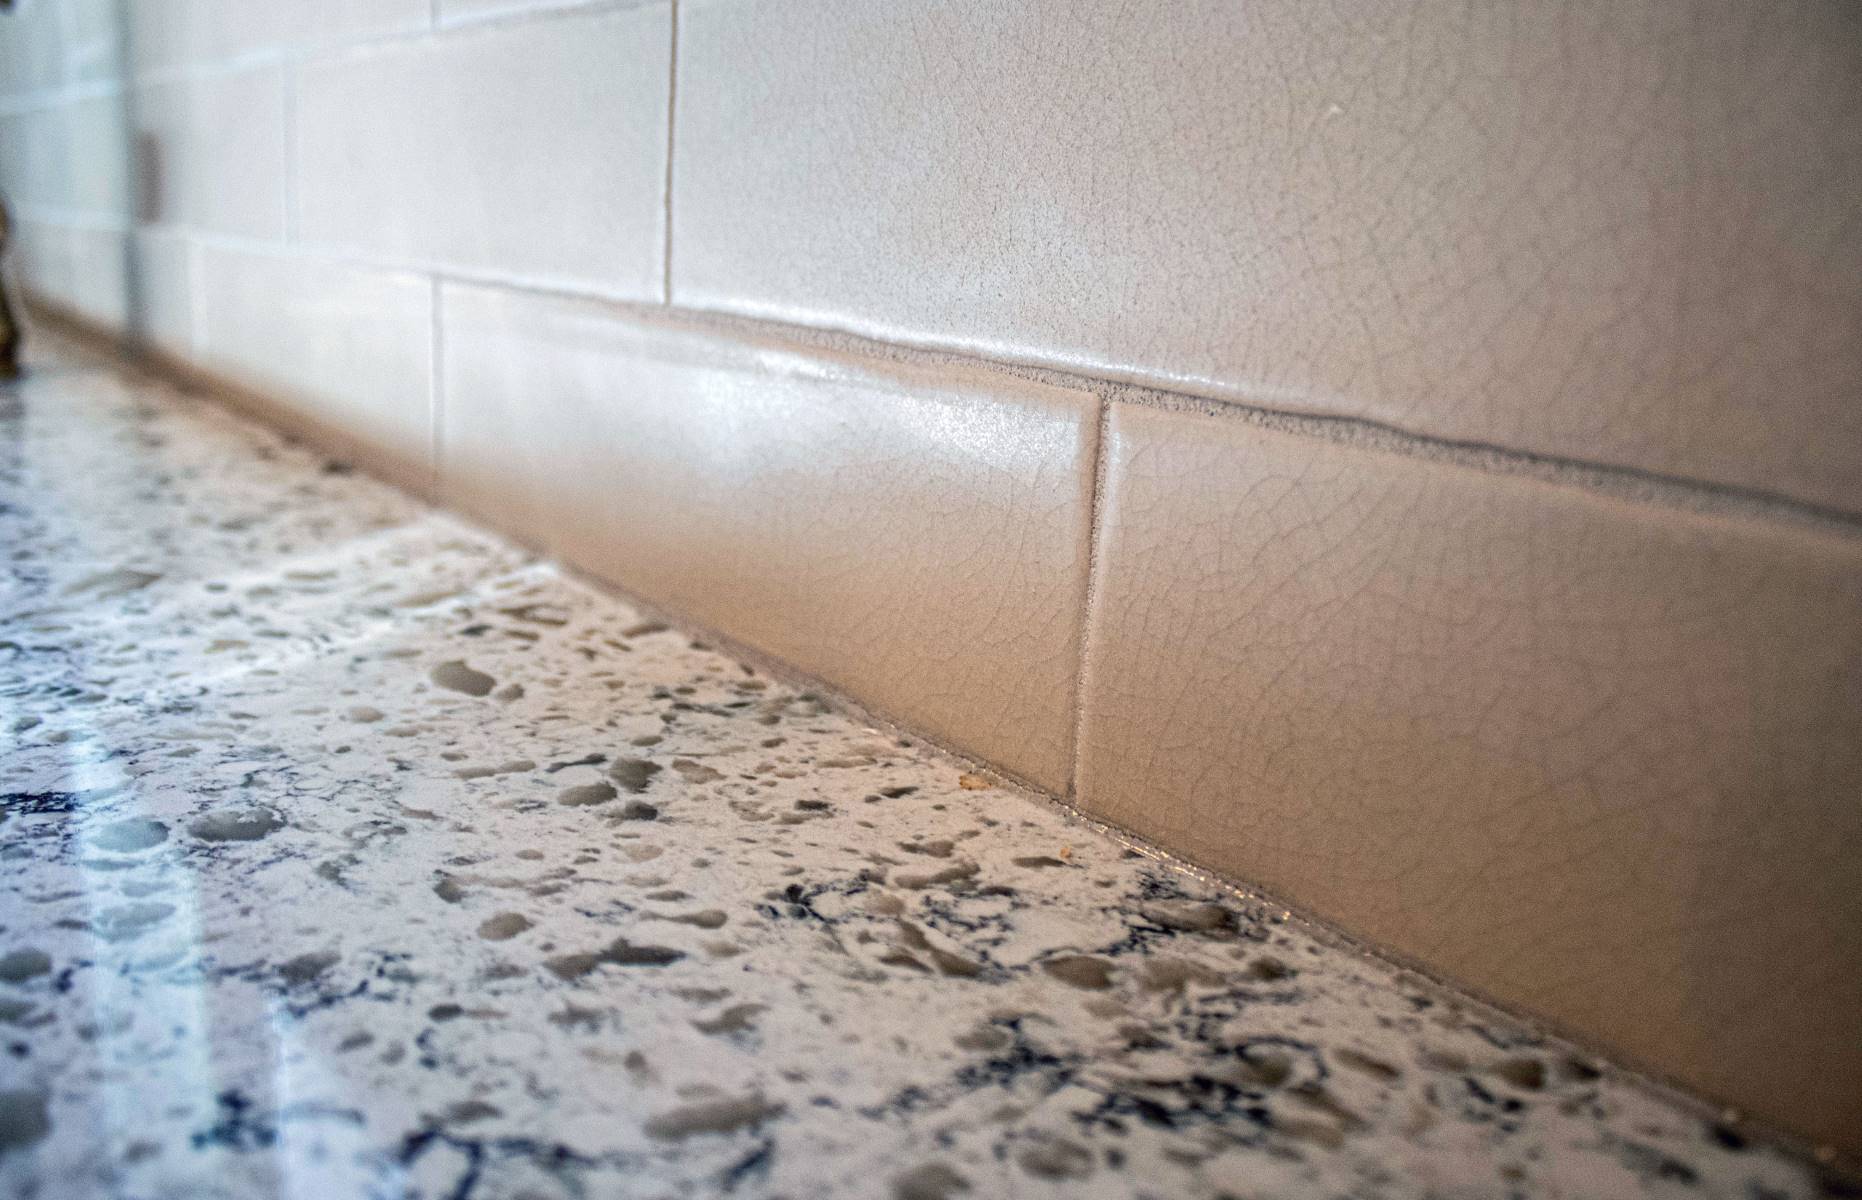
By meticulously smoothing out the caulk, you can elevate the overall quality of the caulking job and achieve a seamless and professional finish. This step is crucial for ensuring that the caulk not only provides effective protection against water damage but also enhances the aesthetic appeal of your bathtub. With the caulk expertly smoothed out, you're now ready to proceed to the final phase of the caulking process.
Step 5: Let the caulk dry
After the meticulous application and smoothing out of the caulk along the edges of the bathtub, the final crucial step is to allow the caulk to dry thoroughly. This phase is essential for ensuring that the caulk sets properly, creating a durable and watertight seal that effectively protects the bathtub and its surroundings. Here's a detailed guide on the importance of letting the caulk dry and the best practices for achieving optimal results.
Importance of allowing the caulk to dry
Proper drying time is critical for the caulk to form a strong bond with the surfaces and achieve its maximum sealing potential. Allowing the caulk to dry undisturbed ensures that it cures effectively, providing long-term protection against water infiltration and maintaining the integrity of the seal. Rushing this phase can compromise the quality of the caulking job and lead to premature deterioration of the seal, potentially resulting in water leaks and damage.
Best practices for letting the caulk dry
-
Follow manufacturer's instructions: Refer to the caulk manufacturer's guidelines for specific drying times and recommendations. Different types of caulk may require varying durations to fully cure, so it's essential to adhere to the provided instructions for optimal results.
-
Minimize moisture exposure: During the drying period, it's crucial to minimize exposure to moisture, as this can impede the curing process. Avoid using the bathtub or shower during this time, and ensure that the surrounding environment remains dry to facilitate proper drying.
-
Exercise patience: While it may be tempting to use the bathtub soon after caulking, exercising patience is key. Allowing ample time for the caulk to dry ensures that it achieves its maximum strength and durability, contributing to a long-lasting and effective seal.
-
Monitor the drying progress: Keep an eye on the caulk to gauge its drying progress. Look for changes in texture and consistency, as well as any alterations in color that indicate the curing process is underway. This attentive monitoring ensures that the caulk is given adequate time to dry before being subjected to regular use.
-
Perform a touch test: To determine if the caulk is fully dry, perform a gentle touch test on a small inconspicuous area. If the caulk feels firm and no longer tacky to the touch, it is likely dry and ready for normal use. However, it's advisable to err on the side of caution and allow additional drying time if there is any uncertainty.
By allowing the caulk to dry according to best practices, you can ensure that the seal achieves its full potential and provides reliable protection for your bathtub. This phase is a critical component of the caulking process, contributing to the overall effectiveness and longevity of the seal. With the caulk thoroughly dried and cured, you can enjoy the peace of mind that comes with a professionally sealed bathtub that is ready to withstand the rigors of daily use.
Read more: How To Caulk Stairs
Conclusion
In conclusion, mastering the art of caulking your bathtub is a valuable skill that contributes to the maintenance and longevity of your bathroom. By following the step-by-step process outlined in this guide, you can confidently tackle the task of caulking with precision and expertise. From gathering the necessary materials to allowing the caulk to dry, each phase plays a crucial role in achieving a professional and long-lasting seal.
Proper preparation sets the stage for a successful caulking job, ensuring that the bathtub is clean, dry, and free of any remnants of old caulk. This meticulous preparation promotes optimal adhesion and contributes to the effectiveness of the seal. Additionally, the careful application and smoothing out of the caulk are essential for creating a watertight barrier that safeguards against water damage and enhances the visual appeal of the bathtub.
Allowing the caulk to dry undisturbed is the final step in the process, and it is paramount for the seal to achieve its maximum strength and durability. By exercising patience and adhering to best practices for drying, you can ensure that the caulk forms a reliable and long-lasting bond with the surfaces, providing ongoing protection for your bathtub.
By mastering the art of bathtub caulking, you not only contribute to the maintenance of your home but also gain the satisfaction of knowing that you have the skills to preserve the integrity of your bathroom. With a beautifully sealed bathtub, you can enjoy a clean and watertight environment that enhances the overall appeal and functionality of your living space.
So, armed with the knowledge and expertise gained from this guide, you're ready to embark on your bathtub caulking journey with confidence. With attention to detail and a commitment to quality, you can achieve a professional and durable seal that ensures the long-term beauty and functionality of your bathroom. Happy caulking!
Frequently Asked Questions about How To Do Caulking In The Bathtub
Was this page helpful?
At Storables.com, we guarantee accurate and reliable information. Our content, validated by Expert Board Contributors, is crafted following stringent Editorial Policies. We're committed to providing you with well-researched, expert-backed insights for all your informational needs.


0 thoughts on “How To Do Caulking In The Bathtub”