Home>Furniture & Design>Bathroom Accessories>How To Caulk Around Bathtub
Bathroom Accessories
How To Caulk Around Bathtub
Modified: March 2, 2024
Learn how to properly caulk around your bathtub to prevent water damage and mold growth. Find the best bathroom accessories and tools for a professional finish.
(Many of the links in this article redirect to a specific reviewed product. Your purchase of these products through affiliate links helps to generate commission for Storables.com, at no extra cost. Learn more)
Introduction
Caulking around a bathtub is a crucial maintenance task that helps prevent water damage and keeps your bathroom looking fresh and clean. Over time, the caulk around the bathtub can deteriorate, leading to leaks and unsightly gaps. By learning how to properly caulk around your bathtub, you can maintain a watertight seal and enhance the overall aesthetics of your bathroom.
Proper caulking not only serves a functional purpose but also contributes to the visual appeal of your bathroom. It creates a seamless transition between the bathtub and the surrounding tiles or walls, giving the space a polished and finished look. Additionally, a well-executed caulking job can prevent water from seeping into the walls and subfloor, thus averting potential structural damage and mold growth.
In this comprehensive guide, we will walk you through the step-by-step process of caulking around your bathtub. Whether you're a seasoned DIY enthusiast or a novice homeowner looking to tackle your first home improvement project, this guide will equip you with the knowledge and confidence to achieve professional-quality results.
By following the instructions outlined in this guide, you'll be able to maintain the integrity of your bathroom, prolong the lifespan of your bathtub, and elevate the overall ambiance of the space. So, roll up your sleeves, gather your materials, and let's dive into the rewarding task of caulking around your bathtub.
Key Takeaways:
- Proper caulking around your bathtub not only prevents water damage and mold growth but also enhances the overall appearance of your bathroom, creating a polished and finished look.
- By following the step-by-step process of caulking, you can achieve professional-quality results, prolong the lifespan of your bathtub, and elevate the ambiance of your bathroom space.
Read more: How To Caulk Around A Sink
Step 1: Gather Your Materials
Before embarking on the task of caulking around your bathtub, it's essential to gather all the necessary materials and tools. Having the right supplies at hand will streamline the process and ensure a successful outcome. Here's a comprehensive list of items you'll need:
-
Caulk: Select a high-quality caulk that is specifically designed for use in wet areas, such as the bathroom. Silicone-based caulks are a popular choice due to their durability and resistance to mold and mildew. Choose a color that complements your bathtub and tiles for a cohesive look.
-
Caulk Gun: A caulking gun is essential for dispensing the caulk evenly and with precision. Opt for a sturdy caulking gun that allows for smooth application and control.
-
Utility Knife or Caulk Removal Tool: If there is old caulk present, a utility knife or caulk removal tool will be necessary to carefully remove the existing caulk. This step is crucial for ensuring a clean and effective application of the new caulk.
-
Painter's Tape: Use painter's tape to mask off the areas adjacent to the bathtub, such as the tile or the edge of the tub. This will create clean, straight lines and prevent excess caulk from spreading onto unintended surfaces.
-
Rubbing Alcohol or Denatured Alcohol: Before applying the new caulk, it's important to thoroughly clean the area to remove any residue or debris. Rubbing alcohol or denatured alcohol can be used to wipe down the surfaces and ensure proper adhesion of the new caulk.
-
Caulk Smoothing Tool: A caulk smoothing tool, also known as a caulk finishing tool or caulk spreader, is instrumental in achieving a professional finish. This tool helps to shape and smooth the caulk, creating a neat and uniform bead along the bathtub's edges.
-
Cloth or Paper Towels: Keep a cloth or paper towels handy for wiping away any excess caulk and for cleaning up any spills or smudges.
By assembling these materials before you begin, you'll be well-prepared to tackle the task of caulking around your bathtub. With the right tools at your disposal, you can proceed to the next steps with confidence, knowing that you have everything you need to achieve a successful and visually appealing result.
Step 2: Prepare the Area
Before applying new caulk around your bathtub, it's crucial to prepare the area to ensure optimal adhesion and a professional-looking finish. Proper preparation sets the stage for a successful caulking job and helps to prevent potential issues down the line. Here's a detailed breakdown of the essential steps to prepare the area:
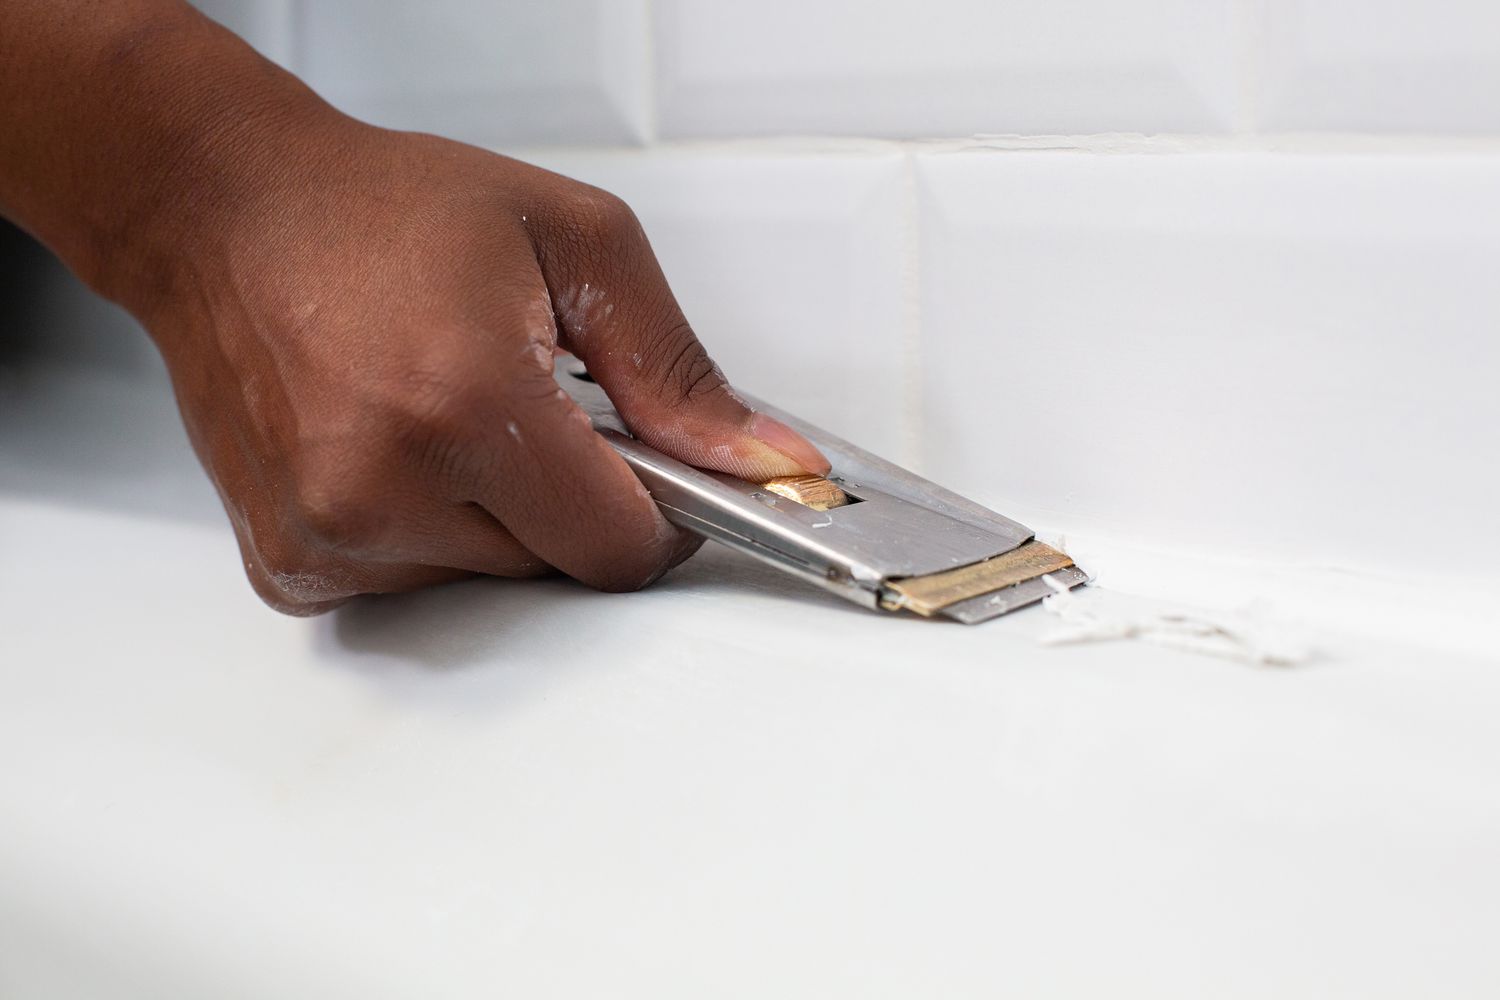
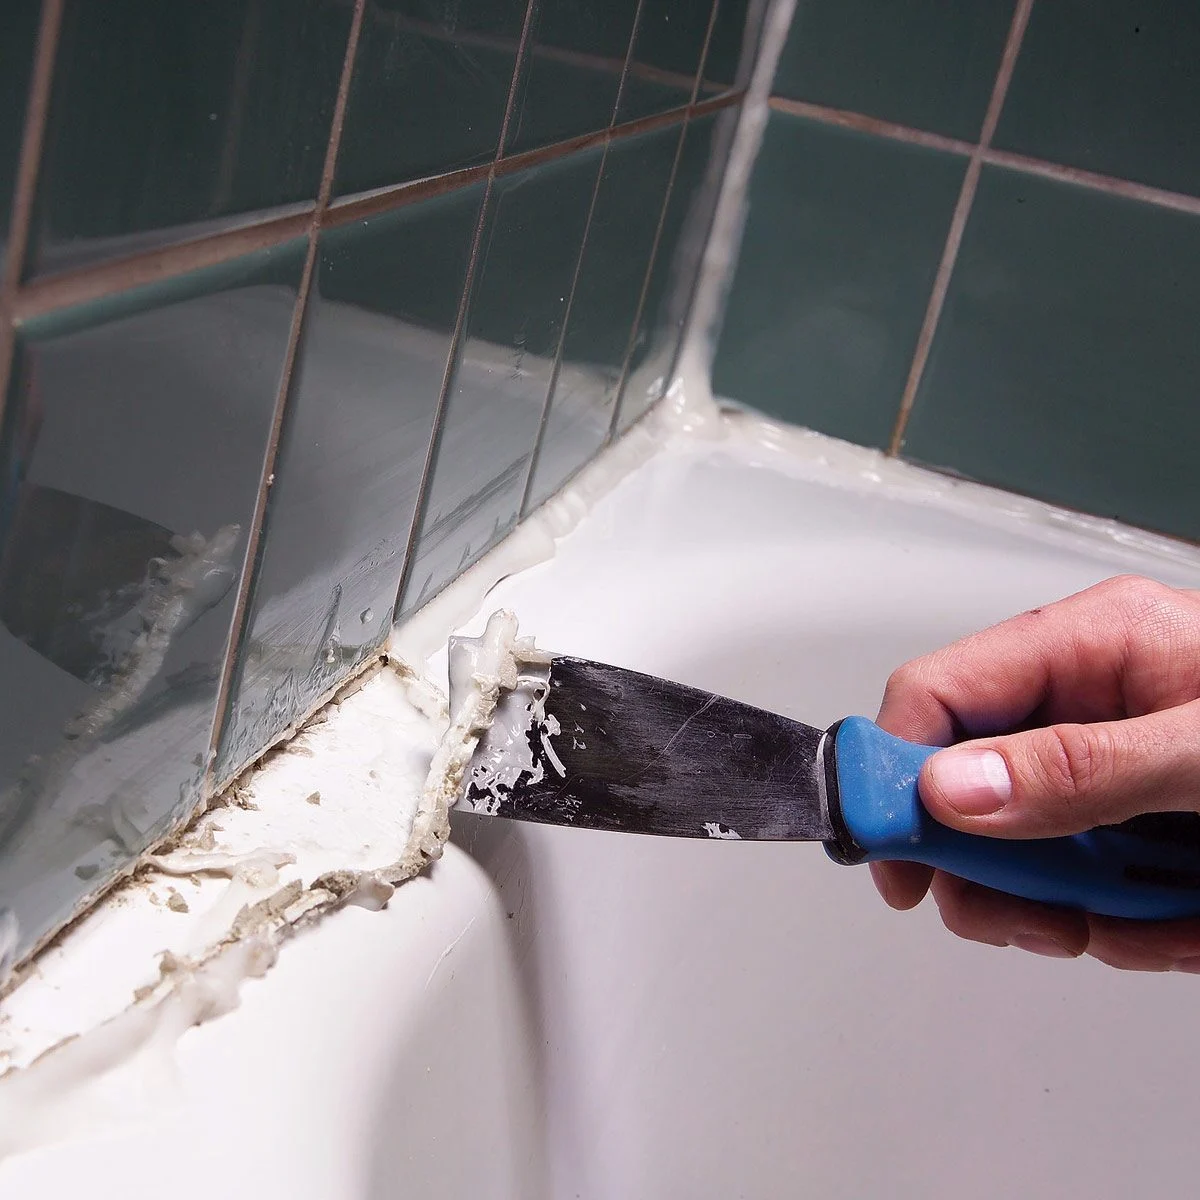
Remove Old Caulk:
Using a utility knife or a specialized caulk removal tool, carefully remove any remnants of the old caulk from the joint between the bathtub and the adjacent surfaces. It's important to thoroughly clean out the old caulk to create a clean and smooth surface for the new caulk to adhere to. Ensure that the area is completely free of old caulk and debris before proceeding to the next step.
Clean and Dry the Surface:
After removing the old caulk, thoroughly clean the area surrounding the bathtub with a solution of rubbing alcohol or denatured alcohol. This will effectively remove any residual caulk, soap scum, or other contaminants that could hinder the adhesion of the new caulk. Once cleaned, allow the surface to dry completely before proceeding. A dry surface is essential for ensuring proper adhesion and long-term durability of the new caulk.
Read more: How To Replace Bathtub Caulking
Mask Off Adjacent Surfaces:
To achieve clean, straight lines and prevent the accidental spread of caulk onto adjacent surfaces, use painter's tape to mask off the areas surrounding the bathtub. Apply the painter's tape along the edges of the bathtub, as well as any adjacent tiles or walls that you want to protect from excess caulk. This step will help maintain a tidy workspace and ensure a professional-looking finish.
Ventilate the Area:
Proper ventilation is essential when working with caulk and cleaning agents. Open windows and doors to allow for adequate airflow in the bathroom. This will help dissipate any fumes from the cleaning agents and caulk, creating a more comfortable and safe working environment.
By meticulously preparing the area before applying new caulk, you'll set the stage for a successful and visually appealing result. Taking the time to remove old caulk, clean and dry the surface, mask off adjacent surfaces, and ensure proper ventilation will contribute to a seamless and professional-looking caulking job around your bathtub.
Step 3: Apply the Caulk
With the area prepared and the necessary materials at hand, it's time to apply the caulk around your bathtub. This step requires precision and attention to detail to ensure a seamless and watertight seal. Follow these detailed instructions to achieve a professional-quality application:
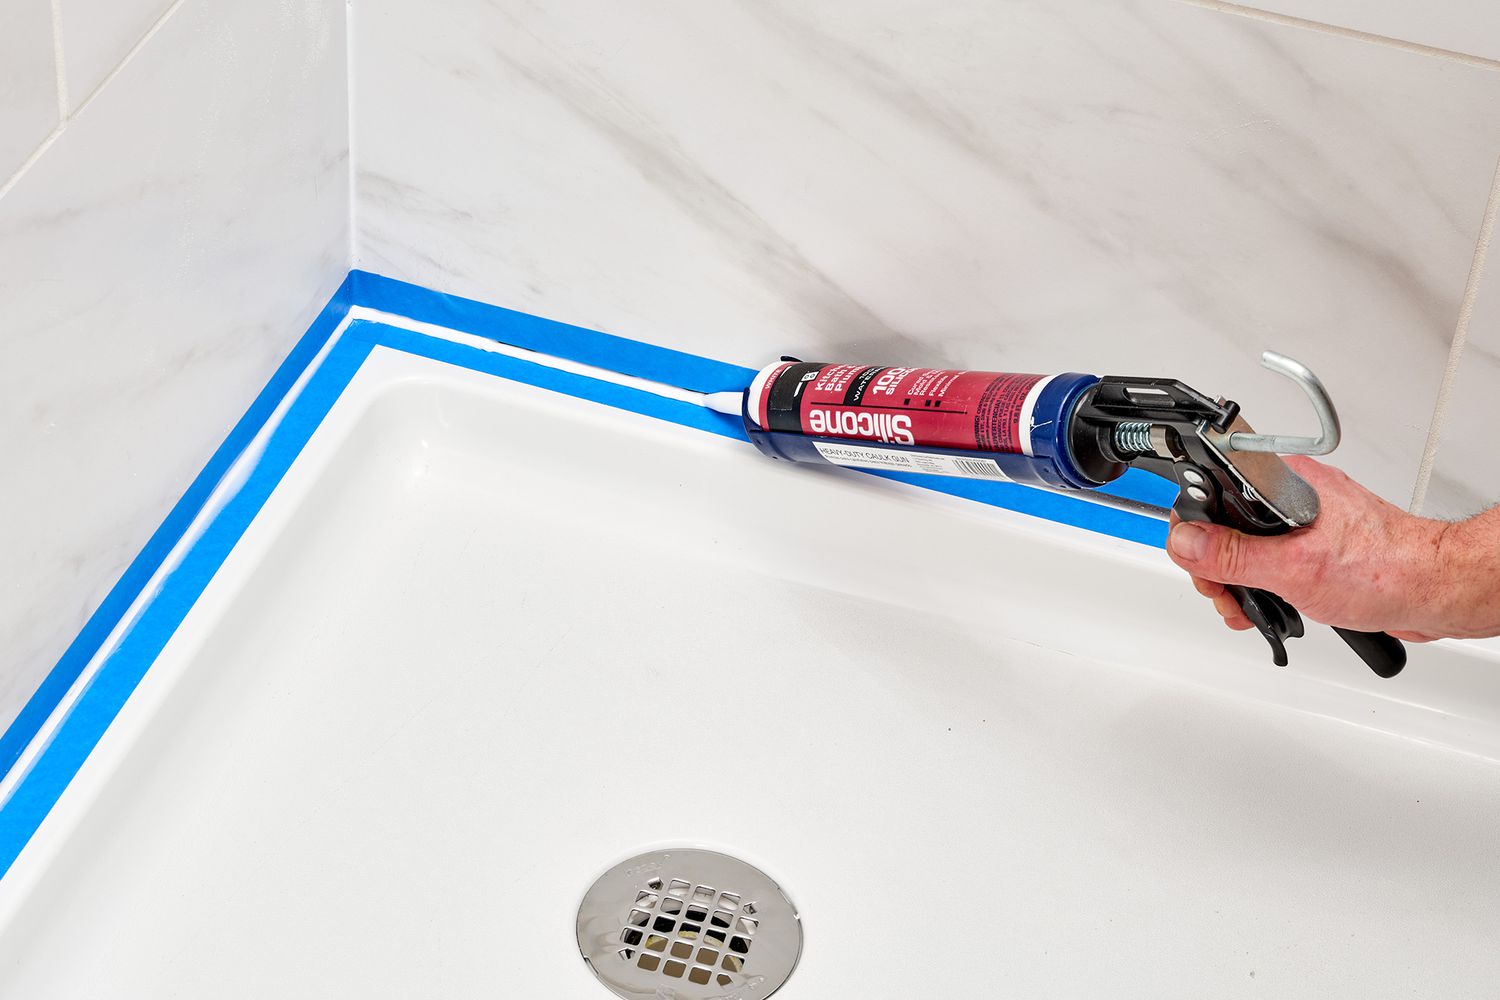
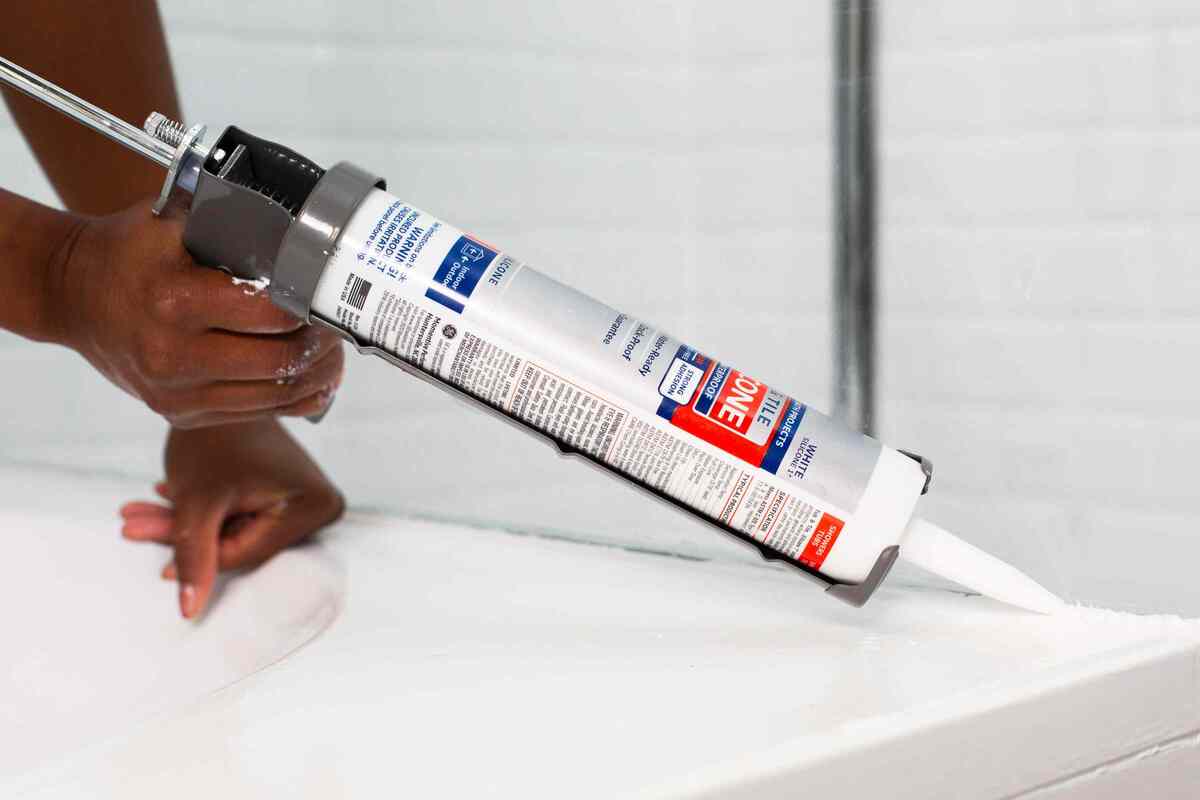
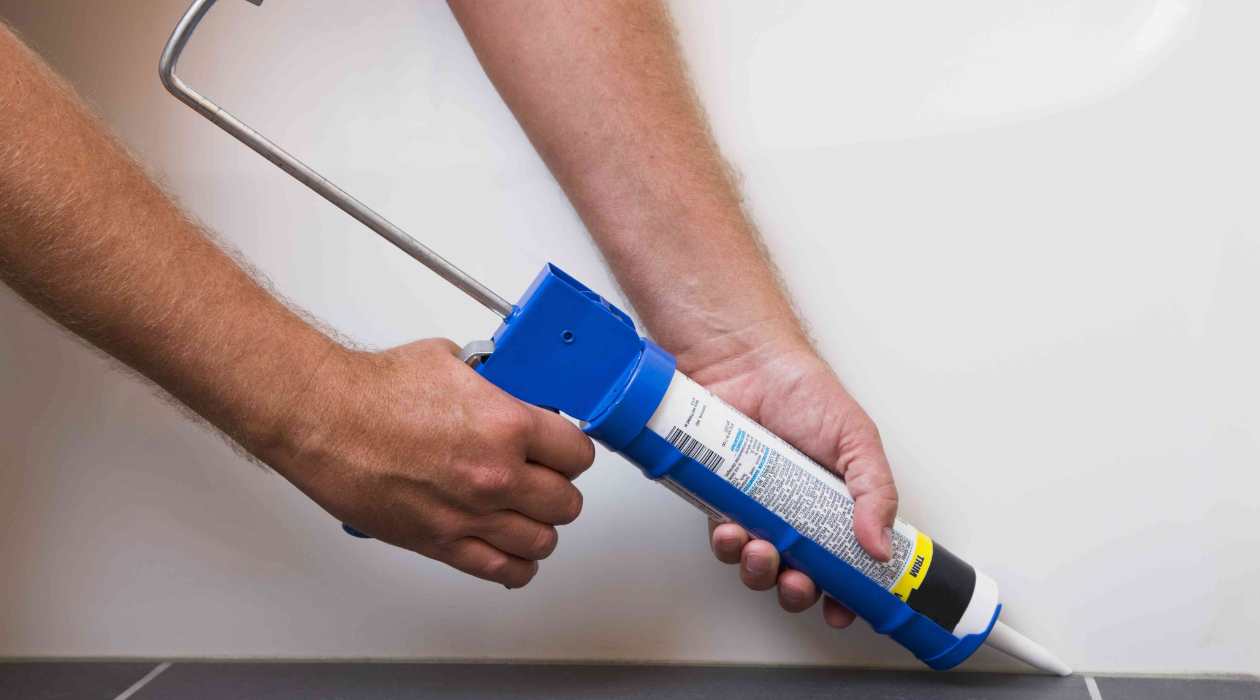
Load the Caulk Gun:
Insert the tube of caulk into the caulking gun and ensure it is securely in place. Use the built-in cutter on the caulking gun to pierce the seal at the tip of the caulk tube. This will allow the caulk to flow smoothly once pressure is applied to the trigger.
Read more: How To Do Caulking In The Bathtub
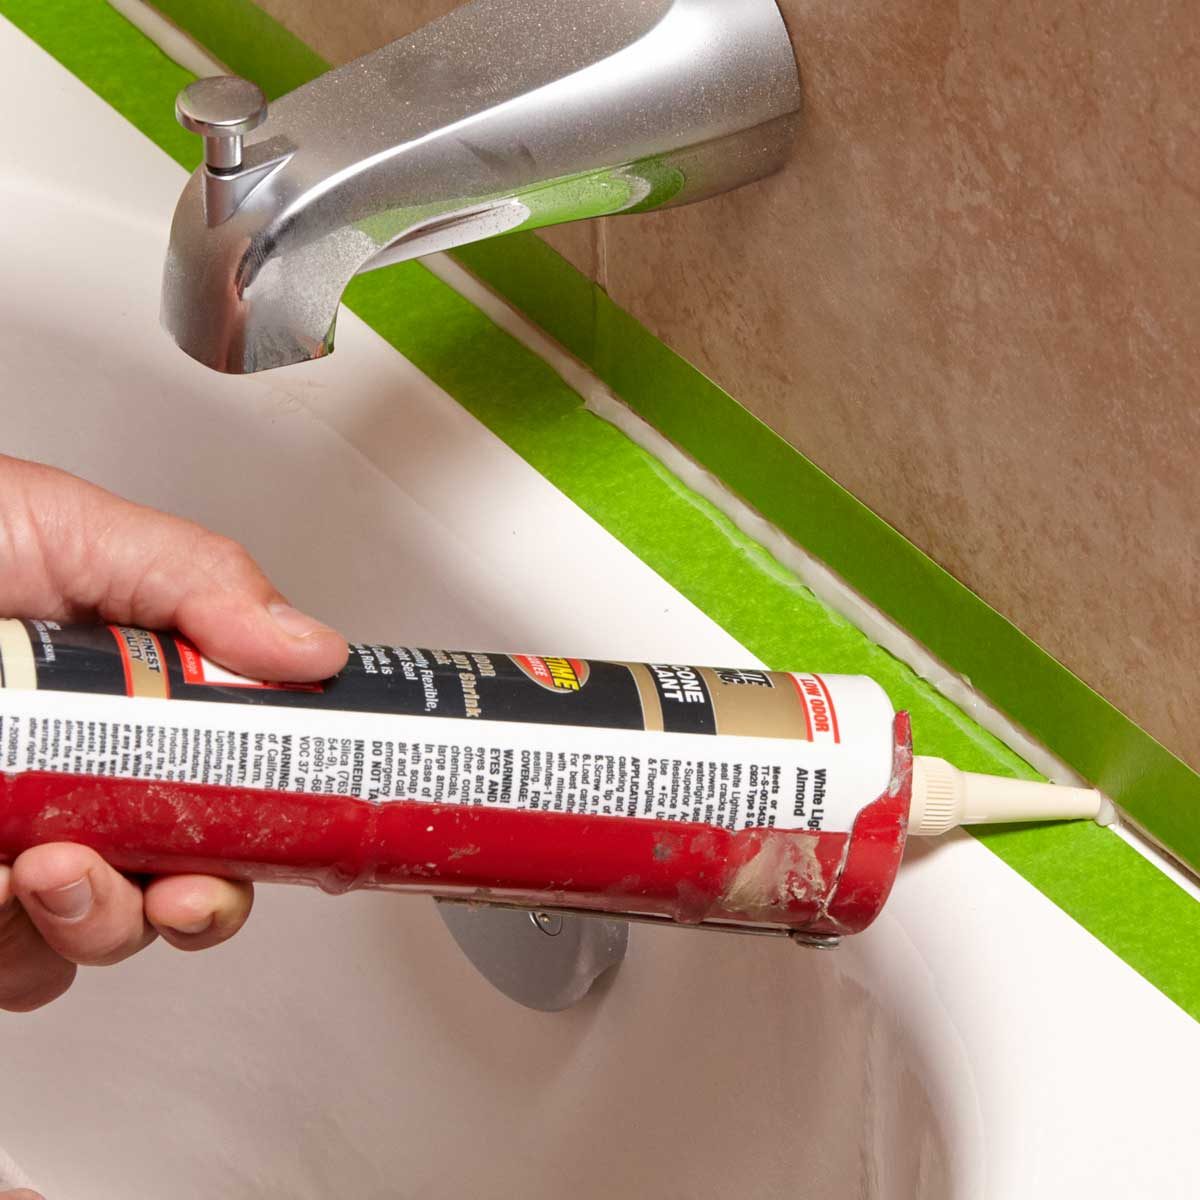
Begin Caulking:
Starting at one end of the bathtub joint, hold the caulking gun at a 45-degree angle and gently squeeze the trigger to dispense a steady bead of caulk along the seam. Maintain a consistent pace and pressure to ensure an even application. As you move along the joint, keep the tip of the caulk tube in contact with the surface to create a uniform bead.
Smooth the Caulk:
After applying the caulk, use a caulk smoothing tool or your finger (dipped in water and with gentle pressure) to smooth and shape the bead of caulk. This step helps to create a neat and professional finish while ensuring that the caulk fully fills the joint between the bathtub and the adjacent surfaces.
Work in Sections:
To prevent the caulk from drying before you can smooth it, work in manageable sections. Apply the caulk and then promptly smooth it before moving on to the next section. This approach will help you maintain control over the application and achieve a consistent finish throughout the entire caulking process.
Check for Gaps and Imperfections:
As you progress, periodically inspect the caulked joint for any gaps or imperfections. If necessary, apply additional caulk to fill in any missed areas or uneven spots. Taking the time to ensure thorough coverage will contribute to a durable and visually appealing result.
By following these steps, you can confidently apply the caulk around your bathtub, creating a clean and watertight seal that enhances the overall appearance of your bathroom. Proper application of the caulk is essential for maintaining the integrity of the bathtub and surrounding surfaces, as well as preventing water damage and mold growth. With attention to detail and a methodical approach, you can achieve professional-quality caulking results that will stand the test of time.
Read more: How To Re-Caulk A Bathtub
Step 4: Smooth the Caulk
After applying the bead of caulk along the bathtub joint, the next crucial step is to smooth and shape the caulk to achieve a professional and polished finish. This process not only enhances the visual appeal of the caulking job but also ensures that the caulk effectively seals the joint, preventing water infiltration and potential damage to the surrounding areas.
To begin, it's essential to have the right tools for smoothing the caulk. A caulk smoothing tool, also known as a caulk finishing tool or caulk spreader, is designed specifically for this purpose. Alternatively, a simple yet effective method involves using a wet finger to smooth the caulk. Dipping your finger in water helps prevent the caulk from sticking to your skin, allowing for a more controlled and precise smoothing process.
When smoothing the caulk, apply gentle and consistent pressure to the bead while moving along the joint. The goal is to create a uniform and neatly shaped seal that seamlessly blends with the surrounding surfaces. By running the smoothing tool or your wet finger along the caulk, you can eliminate any unevenness and excess caulk, resulting in a clean and professional appearance.
It's important to work swiftly but methodically when smoothing the caulk, as silicone-based caulks begin to set relatively quickly. Working in small sections allows you to focus on achieving a consistent finish throughout the entire caulking process. Periodically wiping off any excess caulk from the smoothing tool or your finger helps maintain precision and ensures that the caulk adheres properly to the surfaces.
As you smooth the caulk, pay close attention to the transitions between the bathtub and the adjacent surfaces. Creating a seamless and well-integrated joint not only enhances the aesthetic appeal but also reinforces the watertight seal, providing long-term protection against moisture and potential water damage.
By taking the time to thoroughly smooth the caulk, you can achieve a professional-quality finish that enhances the overall appearance of your bathtub and contributes to the longevity of the caulking job. This attention to detail ensures that the caulk not only looks visually appealing but also functions effectively in maintaining a watertight seal, providing peace of mind and long-term durability.
Step 5: Clean Up
After successfully applying and smoothing the caulk around your bathtub, the final step involves thorough cleanup to ensure a pristine finish and a tidy workspace. Proper cleanup not only enhances the visual appeal of the caulking job but also contributes to a professional and polished look in your bathroom. Here's a detailed guide on how to effectively clean up after caulking around your bathtub:
Wipe Away Excess Caulk:
Using a damp cloth or paper towels, carefully wipe away any excess caulk that may have spread onto the bathtub, tiles, or surrounding surfaces during the application and smoothing process. Pay close attention to the edges of the caulk bead to achieve a clean and uniform appearance along the joint.
Remove Painter's Tape:
Gently peel off the painter's tape that was used to mask off adjacent surfaces. Pull the tape away at a 45-degree angle to ensure clean lines and prevent any residual caulk from being pulled up. Discard the used painter's tape in a trash receptacle.
Read more: How To Trim Around Bathtub
Dispose of Waste:
Properly dispose of any used caulk tubes, empty caulk cartridges, and other disposable materials in accordance with local waste disposal guidelines. If there are any leftover materials, seal them in a plastic bag before discarding to prevent any residual caulk from coming into contact with other items.
Clean Caulking Tools:
Thoroughly clean the caulking gun, caulk smoothing tool, and any other reusable tools used during the caulking process. Use a damp cloth or paper towels to remove any caulk residue from the tools, ensuring that they are ready for future use.
Inspect and Touch Up:
Carefully inspect the caulked joint for any missed spots, uneven areas, or imperfections. If necessary, touch up the caulk to ensure a consistent and seamless finish. Addressing any minor issues at this stage will contribute to a professional and durable caulking job.
Final Inspection:
Take a step back and conduct a final visual inspection of the caulked area. Ensure that the caulk bead is uniform, smooth, and seamlessly integrated with the bathtub and adjacent surfaces. This thorough inspection allows you to address any remaining cleanup or touch-up tasks before the caulk fully sets.
By diligently following these cleanup steps, you can achieve a flawless and professional finish after caulking around your bathtub. A meticulous approach to cleanup not only enhances the visual appeal of the caulking job but also ensures that the surrounding area is left clean and free of any caulk residue. With the cleanup complete, you can admire your handiwork and enjoy the refreshed and polished look of your bathtub and bathroom space.
Read more: How Long For Bathtub Caulk To Dry
Conclusion
Caulking around your bathtub is a fundamental aspect of maintaining a functional, visually appealing, and water-resistant bathroom space. By following the comprehensive steps outlined in this guide, you have gained the knowledge and confidence to tackle this essential home maintenance task with ease and precision.
Properly caulking around your bathtub not only serves practical purposes, such as preventing water damage and mold growth, but also contributes to the overall aesthetics of your bathroom. The seamless transition between the bathtub and the surrounding surfaces creates a polished and finished look, elevating the ambiance of the space.
Through meticulous preparation, precise application, and thorough cleanup, you have successfully achieved a professional-quality caulking job. By adhering to the recommended steps, you have ensured that the caulk forms a durable and watertight seal, providing long-term protection for your bathtub and the surrounding areas.
As you step back and admire your handiwork, take pride in knowing that your attention to detail has resulted in a visually appealing and functional enhancement to your bathroom. The clean and uniform caulk bead seamlessly integrated with the bathtub and adjacent surfaces not only enhances the overall appearance but also reinforces the structural integrity of the space.
Moving forward, the newly caulked bathtub will continue to serve as a focal point of your bathroom, exuding a sense of cleanliness, freshness, and attention to detail. The professional-quality caulking job you have accomplished will contribute to the longevity of your bathtub and the overall appeal of your bathroom, providing peace of mind and satisfaction for years to come.
By mastering the art of caulking around your bathtub, you have not only enhanced the aesthetics and functionality of your bathroom but also acquired valuable skills that can be applied to future home maintenance projects. Your dedication to maintaining a well-kept and visually appealing home reflects a commitment to creating a comfortable and inviting living space for yourself and your loved ones.
As you reflect on the successful completion of this task, take pride in the fact that your efforts have contributed to the overall well-being and longevity of your home. With a beautifully caulked bathtub, you can now revel in the satisfaction of a job well done and enjoy the refreshed and polished look of your bathroom space.
Frequently Asked Questions about How To Caulk Around Bathtub
Was this page helpful?
At Storables.com, we guarantee accurate and reliable information. Our content, validated by Expert Board Contributors, is crafted following stringent Editorial Policies. We're committed to providing you with well-researched, expert-backed insights for all your informational needs.


0 thoughts on “How To Caulk Around Bathtub”