Home>Furniture & Design>Bathroom Accessories>How To Install An Exhaust Fan In The Bathroom
Bathroom Accessories
How To Install An Exhaust Fan In The Bathroom
Modified: February 18, 2024
Learn how to install an exhaust fan in your bathroom with our step-by-step guide. Improve ventilation and air quality with the right bathroom accessories.
(Many of the links in this article redirect to a specific reviewed product. Your purchase of these products through affiliate links helps to generate commission for Storables.com, at no extra cost. Learn more)
Introduction
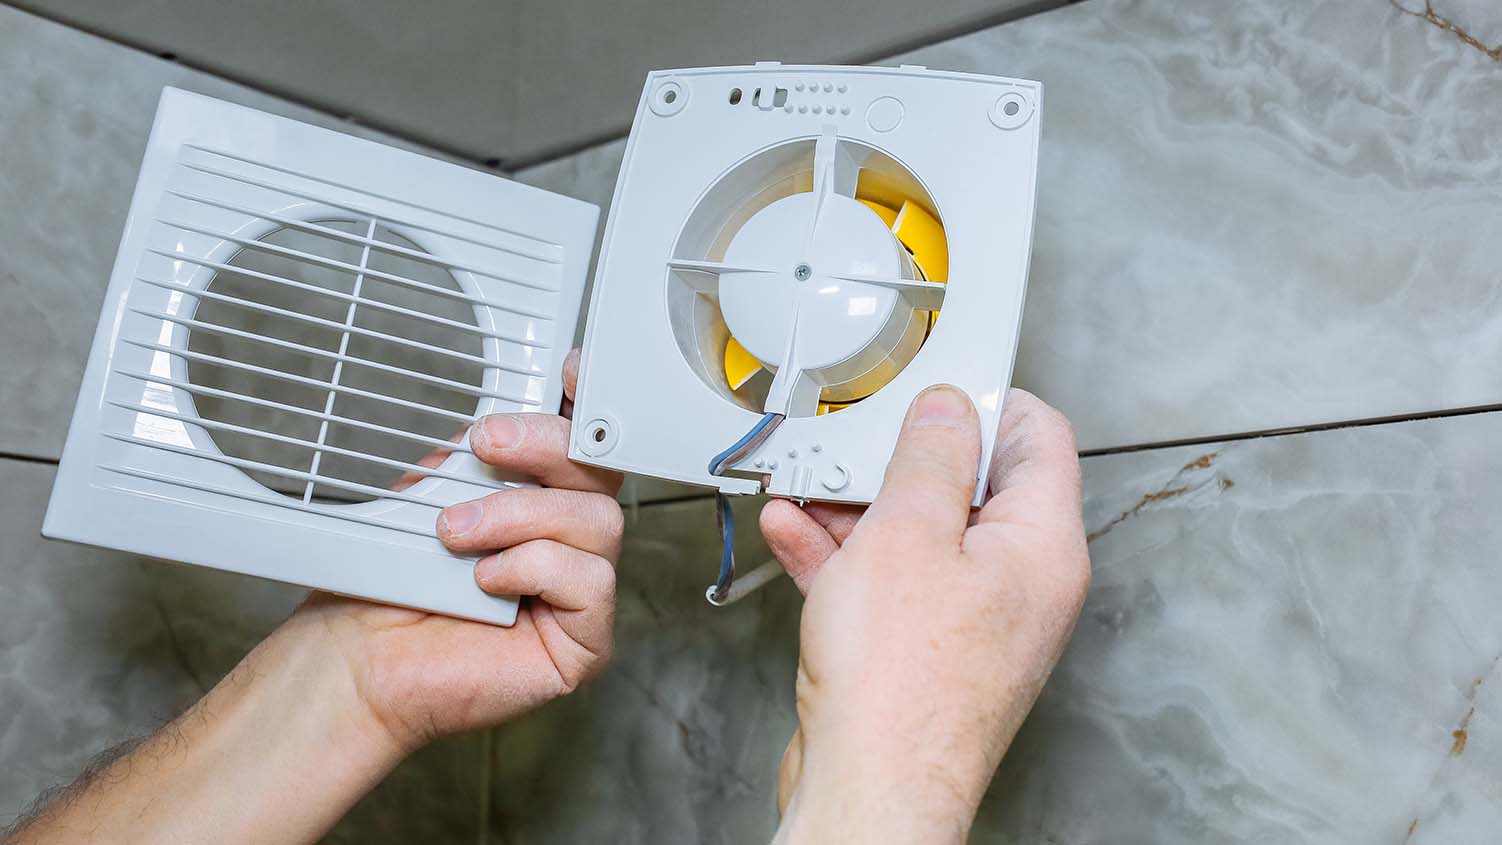
Installing an exhaust fan in your bathroom is a crucial step in maintaining good indoor air quality and preventing issues such as mold and mildew. A properly installed exhaust fan helps to remove excess moisture, odors, and airborne contaminants, creating a more comfortable and healthier environment. Whether you're upgrading an existing fan or installing a new one, this comprehensive guide will walk you through the step-by-step process, ensuring that you can tackle this project with confidence.
A well-ventilated bathroom not only contributes to a more pleasant experience for you and your family but also helps to preserve the integrity of your home by preventing moisture-related damage. By following the steps outlined in this guide, you can effectively manage humidity levels and protect your bathroom from the harmful effects of excess moisture.
In the following sections, you will learn how to gather the necessary tools and materials for the installation, choose the optimal location for the exhaust fan, cut a hole for the fan, and complete the installation process. Additionally, you will be guided through the crucial steps of connecting the wiring and testing the exhaust fan to ensure its proper functionality.
By the end of this guide, you will have the knowledge and skills to successfully install an exhaust fan in your bathroom, providing you with a valuable home improvement accomplishment and the assurance of a healthier, more comfortable living space. Let's dive into the step-by-step process of installing an exhaust fan to enhance the functionality and overall well-being of your bathroom.
Key Takeaways:
- Proper ventilation in the bathroom is crucial for a healthier home. By following the steps in this guide, you can confidently install an exhaust fan to effectively manage moisture and enhance air quality.
- Choosing the right location, cutting a precise hole, and testing the fan’s functionality are essential for a successful exhaust fan installation. Enjoy a fresher and more comfortable bathroom environment with this valuable home improvement accomplishment!
Read more: How To Install An Exhaust Fan
Step 1: Gather necessary tools and materials
Before embarking on the installation of an exhaust fan in your bathroom, it's essential to gather all the required tools and materials. Having the right equipment at your disposal will streamline the installation process and ensure a successful outcome. Here's a comprehensive list of the tools and materials you'll need:
Tools:
- Screwdriver: Both flathead and Phillips screwdrivers will be necessary for various components of the installation.
- Utility Knife: This will be used for cutting and trimming materials as needed.
- Measuring Tape: Accurate measurements are crucial for determining the placement of the exhaust fan and cutting the hole in the ceiling or wall.
- Pencil: To mark the areas for cutting and installation.
- Drywall Saw or Jigsaw: For cutting the hole in the ceiling or wall for the exhaust fan.
- Drill: Required for making holes for screws and wiring.
- Wire Cutters and Strippers: Essential for preparing the electrical wiring for connection.
- Ladder or Step Stool: To access the installation area safely and comfortably.
Materials:
- Exhaust Fan: Select a high-quality exhaust fan that is suitable for the size of your bathroom and meets your ventilation needs.
- Ventilation Ducting: Ensure you have enough flexible or rigid ducting to connect the exhaust fan to the exterior vent.
- Vent Cap: This component is installed on the exterior wall or roof to allow the expelled air to exit while preventing debris and pests from entering.
- Screws: Choose the appropriate screws for securing the exhaust fan and ducting in place.
- Electrical Cable and Connectors: For wiring the exhaust fan to the power source.
- Duct Tape or Foil Tape: To seal the joints of the ducting and ensure efficient airflow.
- Mounting Hardware: If not included with the exhaust fan, ensure you have the necessary hardware for securing the fan in place.
By gathering these tools and materials, you'll be well-prepared to proceed with the subsequent steps of choosing the installation location, cutting the hole, and completing the exhaust fan installation in your bathroom. With everything in hand, you can approach the project with confidence and efficiency, setting the stage for a successful and effective ventilation upgrade.
Step 2: Choose the right location for the exhaust fan
Selecting the optimal location for your bathroom's exhaust fan is a critical decision that directly impacts its effectiveness in removing moisture and odors. The strategic placement of the fan ensures efficient ventilation and contributes to the overall air quality within the space. When determining the ideal location, several factors should be taken into consideration to maximize the fan's performance.
Read more: Who Can Install Bathroom Exhaust Fan
Consider the Size and Layout of the Bathroom
The size and layout of your bathroom play a significant role in determining the most suitable location for the exhaust fan. In smaller bathrooms, it's essential to position the fan in an area where it can effectively capture and expel moisture and odors. Additionally, consider the presence of any obstacles such as lighting fixtures or structural elements that may impact the installation process.
Evaluate the Proximity to Moisture Sources
Identifying the primary sources of moisture in the bathroom, such as the shower, bathtub, or sink, is crucial when choosing the fan's location. Placing the exhaust fan near these moisture-prone areas ensures that it can promptly remove excess humidity, preventing the accumulation of moisture on surfaces and minimizing the risk of mold and mildew growth.
Assess Accessibility for Installation
Accessibility is another key factor to consider when selecting the location for the exhaust fan. Ensure that the chosen spot allows for convenient installation and future maintenance. Accessibility also extends to the routing of ducting to the exterior vent, as the fan's location should facilitate a direct and efficient path for expelling the moist air outside.
Optimal Placement for Air Circulation
Strategically positioning the exhaust fan to promote effective air circulation is essential for achieving thorough ventilation. Placing the fan near the center of the room or in a location that allows for even distribution of airflow helps to ensure that the entire bathroom benefits from proper ventilation, reducing the likelihood of stagnant air pockets.
Read more: How To Install An Exhaust Fan In The Kitchen
Compliance with Building Codes and Regulations
Before finalizing the location for the exhaust fan, it's important to verify that the chosen placement complies with local building codes and regulations. Certain guidelines may dictate the minimum distance between the fan and potential moisture sources, as well as the required ventilation capacity based on the bathroom's size.
By carefully considering these factors and evaluating the unique characteristics of your bathroom, you can confidently determine the most suitable location for the exhaust fan. This thoughtful approach sets the stage for an effective and efficient ventilation system that contributes to a healthier and more comfortable bathroom environment.
Step 3: Cut a hole for the exhaust fan
Cutting a precise hole for the exhaust fan is a crucial step in the installation process, as it facilitates the proper placement and secure mounting of the fan. Before initiating the cutting process, it's essential to carefully measure and mark the designated area where the fan will be installed. Here's a detailed guide on how to cut a hole for the exhaust fan in your bathroom:
-
Measure and Mark: Using a measuring tape and a pencil, accurately measure and mark the location for the exhaust fan on the ceiling or wall. Ensure that the dimensions of the marked area align with the specifications provided by the manufacturer for the fan's housing.
-
Prepare the Cutting Tools: Depending on the material of the ceiling or wall, prepare the appropriate cutting tool. For cutting through drywall, a drywall saw is suitable, while a jigsaw may be required for cutting through other materials such as plaster or wood. Ensure that the chosen tool is sharp and suitable for creating a clean and precise cut.
-
Safety Precautions: Prior to cutting, take necessary safety precautions by wearing protective eyewear and ensuring that the area is clear of any obstructions. If using a power tool, such as a jigsaw or a rotary cutting tool, exercise caution and follow the manufacturer's safety guidelines.
-
Cut the Opening: Carefully cut along the marked lines to create the opening for the exhaust fan. Exercise patience and precision to achieve a clean and accurate cut, as this will directly impact the fit and stability of the fan during installation.
-
Verify Fit and Adjustments: Once the hole is cut, verify that the dimensions align with the requirements of the exhaust fan. Test-fit the fan housing in the opening to ensure a proper fit. If adjustments are necessary, carefully trim the edges of the hole to achieve the ideal dimensions for secure mounting.
-
Clear Debris and Clean Edges: Remove any debris or excess material from the cut area, ensuring that the edges are clean and free of obstructions. This prepares the opening for the next phase of the installation, allowing for a smooth and secure placement of the exhaust fan.
By following these steps, you can effectively cut a precise hole for the exhaust fan, laying the foundation for a seamless and secure installation. Attention to detail and precision during this phase contributes to the overall success of the ventilation upgrade, ensuring that the exhaust fan is securely positioned for optimal performance in your bathroom.
Step 4: Install the exhaust fan
With the hole prepared and the location chosen, it's time to proceed with the installation of the exhaust fan in your bathroom. This step-by-step process will guide you through the essential tasks required to securely mount the fan and prepare it for efficient operation.
-
Position the Fan Housing: Carefully place the exhaust fan housing into the prepared hole, ensuring a snug fit. If the fan includes mounting brackets or screws, follow the manufacturer's instructions to secure the housing in place. Proper positioning is crucial for the stability and functionality of the exhaust fan.
-
Connect the Ducting: If not already connected, attach the ventilation ducting to the exhaust port of the fan. Secure the connection using duct clamps or foil tape to prevent air leaks. The ducting should provide a clear path for expelling the moist air to the exterior vent, promoting effective ventilation.
-
Secure the Fan Housing: Once the fan housing and ducting are in place, secure the housing by fastening it to the surrounding ceiling or wall. Use appropriate screws or mounting hardware to ensure that the fan is firmly anchored and stable. This step is essential for preventing any movement or vibration during operation.
-
Install the Vent Cap: If the exhaust vent leads to the exterior of the building, install a vent cap on the exterior wall or roof. The vent cap serves as a protective barrier, allowing the expelled air to exit while preventing debris, pests, and inclement weather from entering the ducting.
-
Complete Electrical Connections: If you're comfortable working with electrical wiring, proceed to connect the fan to the power source according to the manufacturer's instructions and local electrical codes. Ensure that the wiring is properly secured and insulated to prevent any electrical hazards.
-
Test the Fan Operation: Before completing the installation, test the exhaust fan to verify its functionality. Turn on the fan and observe its operation, ensuring that it effectively expels air through the ducting. This test confirms that the fan is properly installed and ready to fulfill its ventilation role.
By following these steps, you can successfully install the exhaust fan in your bathroom, establishing a reliable and efficient ventilation system. The completion of this phase marks a significant milestone in enhancing the air quality and moisture control within your bathroom, contributing to a healthier and more comfortable living environment.
Step 5: Connect the wiring
Connecting the wiring for the exhaust fan is a critical aspect of the installation process, ensuring that the fan receives the necessary power supply for efficient operation. Proper electrical connections are essential for the safe and reliable functionality of the fan, and attention to detail during this phase is paramount. Here's a detailed guide on how to connect the wiring for your bathroom's exhaust fan:
-
Turn Off Power: Before beginning any electrical work, it's crucial to turn off the power supply to the area where the fan will be installed. Locate the circuit breaker or fuse that controls the bathroom's electrical circuit and switch it off to prevent any electrical hazards during the wiring process.
-
Prepare the Wiring: If the bathroom already has an existing electrical circuit for a fan or light fixture, assess the wiring to determine its compatibility with the new exhaust fan. If necessary, prepare the wiring by stripping the insulation from the ends to expose the conductors, ensuring that they are in good condition and free from damage.
-
Follow Manufacturer's Instructions: Refer to the manufacturer's instructions provided with the exhaust fan to understand the specific wiring requirements for the model you are installing. Different fans may have varying wiring configurations, and it's essential to adhere to the recommended guidelines to ensure proper functionality and safety.
-
Identify Wires and Connections: The typical wiring setup for an exhaust fan involves connecting the fan's wiring to the corresponding wires in the electrical circuit. Identify the hot (black), neutral (white), and ground (green or bare copper) wires in both the fan and the electrical supply, ensuring that the connections are correctly matched.
-
Make Secure Connections: Using wire connectors or wire nuts, join the corresponding wires from the fan to the electrical circuit. Connect the black wire from the fan to the hot wire in the electrical supply, the white wire from the fan to the neutral wire, and the green or bare copper wire from the fan to the ground wire. Ensure that the connections are secure and insulated to prevent any exposed wiring.
-
Secure and Tidy Wiring: Once the connections are made, carefully tuck the wiring into the electrical junction box or housing provided with the exhaust fan. Avoid overcrowding the box and ensure that the wires are neatly arranged to allow for the fan to be securely mounted without interference from the wiring.
-
Test the Electrical Connection: After completing the wiring connections, turn the power supply back on and test the electrical operation of the exhaust fan. Verify that the fan functions as intended and that the wiring connections are secure and free from any issues such as loose connections or electrical faults.
By following these steps, you can confidently connect the wiring for your bathroom's exhaust fan, ensuring that the electrical aspects of the installation are handled with precision and safety in mind. Proper electrical connections are integral to the overall functionality and reliability of the exhaust fan, contributing to a well-executed ventilation upgrade for your bathroom.
Read more: How To Fix Bathroom Exhaust Fan
Step 6: Test the exhaust fan
After completing the installation of the exhaust fan in your bathroom, the final crucial step is to test its functionality to ensure that it operates as intended. This testing phase allows you to verify that the fan effectively expels moist air, odors, and airborne contaminants, contributing to improved air quality and moisture control within the bathroom. Here's a detailed guide on how to test the exhaust fan:
-
Power On the Fan: Begin by turning on the exhaust fan to initiate its operation. Depending on the model, the fan may have a simple on/off switch or a more advanced control panel with adjustable settings. Activate the fan to start the airflow and observe its performance.
-
Check Airflow: Stand near the exhaust fan's vent and feel the airflow to ensure that it is strong and consistent. The fan should promptly draw in moist air from the bathroom and expel it through the ducting to the exterior vent. Verify that the expelled air is effectively removed from the space.
-
Listen for Noise: While the fan is running, listen for any unusual or excessive noise that may indicate issues with the fan's motor or components. A well-installed and functioning exhaust fan should operate quietly, without disruptive or irregular sounds.
-
Observe Ventilation: Assess the overall ventilation within the bathroom while the fan is in operation. Check for the reduction of moisture on surfaces, the dissipation of odors, and the improvement in air circulation. A properly functioning exhaust fan should contribute to a fresher and more comfortable environment.
-
Evaluate Timer and Sensor Functions (if applicable): If the exhaust fan includes additional features such as a timer or humidity sensor, test these functions to ensure their proper operation. Adjust the settings and observe how the fan responds to changes in humidity levels or the duration of its operation.
-
Inspect Exterior Vent: If the exhaust vent leads to the exterior of the building, inspect the vent cap or cover to ensure that it opens and closes as intended. Verify that the vent cap effectively prevents the entry of debris, pests, and adverse weather conditions while allowing for the expulsion of air.
-
Confirm Proper Shutdown: After testing the fan's operation, turn it off and observe its shutdown process. The fan should gradually come to a stop without abrupt or erratic behavior, indicating a controlled and reliable shutdown sequence.
By meticulously testing the exhaust fan, you can confirm its proper functionality and address any potential issues before concluding the installation process. This thorough testing phase ensures that the exhaust fan fulfills its essential role in maintaining a well-ventilated, comfortable, and moisture-free bathroom environment, providing you with the assurance of a successful ventilation upgrade.
Conclusion
In conclusion, the installation of an exhaust fan in your bathroom is a significant investment in the overall well-being of your home environment. By following the comprehensive steps outlined in this guide, you have acquired the knowledge and skills necessary to successfully install an exhaust fan, effectively managing moisture levels and enhancing air quality within your bathroom.
The process began with gathering the essential tools and materials, ensuring that you were well-prepared to tackle the installation with confidence. Choosing the optimal location for the exhaust fan involved careful consideration of the bathroom's layout, moisture sources, accessibility, and compliance with building codes. By strategically positioning the fan, you have set the stage for efficient ventilation and moisture control.
The meticulous task of cutting a precise hole for the exhaust fan was essential in ensuring a secure and stable fit for the fan housing. Attention to detail during this phase contributes to the overall success of the installation, setting the foundation for a reliable ventilation system.
The subsequent installation of the exhaust fan, including securing the housing, connecting the ducting, and completing the electrical wiring, has culminated in the establishment of a functional and efficient ventilation system. The thorough testing phase allowed you to verify the fan's proper operation, ensuring that it effectively expels moist air and contributes to a fresher and more comfortable bathroom environment.
By completing the installation of an exhaust fan in your bathroom, you have taken a proactive step in safeguarding your home against the detrimental effects of excess moisture, such as mold and mildew growth. The improved air quality and moisture control provided by the exhaust fan contribute to a healthier and more comfortable living space for you and your family.
As you reflect on the successful installation of the exhaust fan, take pride in the accomplishment of enhancing your home's functionality and contributing to a more pleasant and sustainable living environment. With a well-ventilated and moisture-controlled bathroom, you can enjoy the peace of mind that comes with a healthier and more comfortable home.
Congratulations on completing the installation of your bathroom's exhaust fan, and may your efforts result in a lasting improvement to your home's overall well-being.
Frequently Asked Questions about How To Install An Exhaust Fan In The Bathroom
Was this page helpful?
At Storables.com, we guarantee accurate and reliable information. Our content, validated by Expert Board Contributors, is crafted following stringent Editorial Policies. We're committed to providing you with well-researched, expert-backed insights for all your informational needs.


0 thoughts on “How To Install An Exhaust Fan In The Bathroom”