Home>Furniture & Design>Bathroom Accessories>How To Install A Kitchen Exhaust Fan
Bathroom Accessories
How To Install A Kitchen Exhaust Fan
Modified: February 29, 2024
Learn how to install a kitchen exhaust fan with our step-by-step guide. Find the best bathroom accessories for your home improvement project.
(Many of the links in this article redirect to a specific reviewed product. Your purchase of these products through affiliate links helps to generate commission for Storables.com, at no extra cost. Learn more)
Introduction
Installing a kitchen exhaust fan is a crucial step in maintaining a healthy and comfortable kitchen environment. Whether you are renovating your kitchen or simply upgrading your ventilation system, a well-functioning exhaust fan can effectively remove cooking odors, excess heat, and airborne grease particles. By following the proper installation process, you can ensure that your kitchen remains fresh and clean while also preventing the buildup of harmful indoor air pollutants.
A kitchen exhaust fan, also known as a range hood or vent hood, serves as a powerful tool for improving indoor air quality. It works by drawing in the air laden with cooking byproducts and expelling it outside, thereby preventing the accumulation of grease on kitchen surfaces and minimizing the risk of respiratory issues caused by poor air circulation. Additionally, a well-installed exhaust fan can contribute to the overall safety of your kitchen by reducing the likelihood of fire hazards associated with grease buildup.
In this comprehensive guide, we will walk you through the step-by-step process of installing a kitchen exhaust fan. From selecting the right fan for your kitchen space to testing the fan's functionality, each stage of the installation process will be thoroughly explained to ensure a successful and efficient outcome. By following these instructions, you can take control of your kitchen's air quality and create a more enjoyable cooking environment for yourself and your family.
Now, let's delve into the details of each step involved in the installation of a kitchen exhaust fan, empowering you to enhance the functionality and comfort of your kitchen space.
Key Takeaways:
- Choose the right exhaust fan by considering kitchen size, airflow capacity, noise levels, and additional features. This sets the stage for efficient ventilation and odor control in your kitchen.
- Meticulously measure and mark the installation area to ensure a precise and seamless installation process. This lays the foundation for optimal ventilation and airflow in your kitchen.
Read more: How To Install An Exhaust Fan
Step 1: Choose the Right Exhaust Fan
Selecting the appropriate kitchen exhaust fan is the foundational step in ensuring effective ventilation and air quality control. When choosing a fan, several factors must be considered to match the specific needs and layout of your kitchen. Here's a detailed guide to help you make an informed decision:
Consider the Size and Layout of Your Kitchen
Begin by evaluating the size and layout of your kitchen space. Larger kitchens with expansive cooking areas may require a more powerful exhaust fan to effectively capture and remove cooking byproducts. Additionally, consider the presence of any obstacles or architectural features that may impact the installation of the fan, such as overhead cabinets or kitchen islands. Understanding the dimensions and layout of your kitchen will guide you in selecting a fan that can accommodate the space and provide optimal ventilation.
Evaluate the Fan's Airflow Capacity
The airflow capacity of an exhaust fan, measured in cubic feet per minute (CFM), is a critical factor in determining its effectiveness. To select the right CFM rating for your kitchen, consider the size of the cooking surface and the heat-producing appliances, such as stovetops and ovens. As a general guideline, aim for a fan with a CFM rating that can efficiently exchange the air in your kitchen multiple times per hour, ensuring thorough ventilation and odor removal.
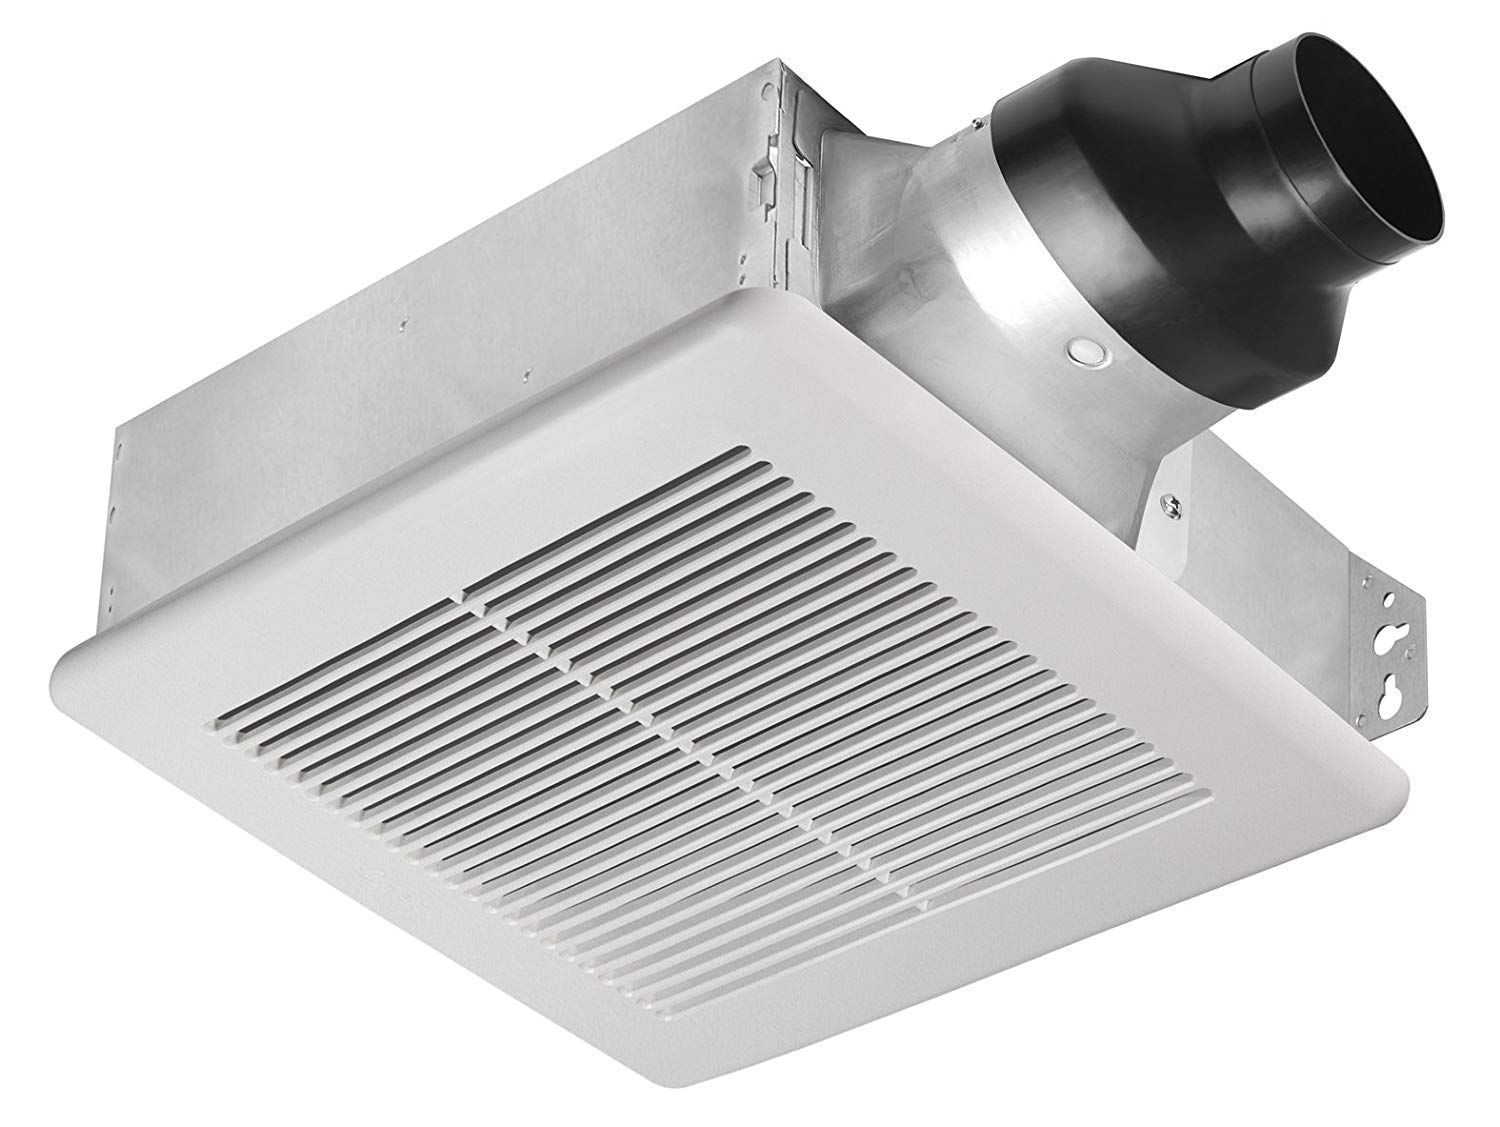
Explore Different Fan Types
Exhaust fans are available in various types, including wall-mounted, under-cabinet, island, and downdraft models. Each type offers distinct installation options and ventilation capabilities. For instance, a wall-mounted fan is suitable for kitchens with limited space, while an island fan is designed for kitchens with cooktops located on an island. Consider the layout and design of your kitchen to determine the most suitable fan type that aligns with your ventilation needs and aesthetic preferences.
Read more: How To Install Kitchen Exhaust Fan
Prioritize Noise Levels
When selecting an exhaust fan, consider the noise levels generated during operation. Opt for a fan with a low sone rating, indicating quieter performance, especially if your kitchen is situated near living areas or if you prefer a quieter cooking environment. Balancing airflow capacity with minimal noise output will contribute to a more pleasant and peaceful kitchen atmosphere.
Energy Efficiency and Additional Features
Lastly, consider the energy efficiency of the exhaust fan, as well as any additional features that enhance its functionality, such as adjustable fan speeds, built-in lighting, and removable grease filters. Energy-efficient models can help reduce long-term operating costs, while supplementary features can improve the overall usability and convenience of the fan.
By carefully considering these factors, you can confidently select an exhaust fan that aligns with the specific requirements of your kitchen, ensuring optimal ventilation and air quality management.
This comprehensive guide will empower you to make an informed decision when choosing the right exhaust fan for your kitchen, setting the stage for a successful installation process.
Step 2: Measure and Mark the Installation Area
Before commencing the installation of your kitchen exhaust fan, it is essential to accurately measure and mark the designated installation area. This crucial step lays the foundation for a seamless and precise installation process, ensuring that the fan is positioned optimally for effective ventilation. Here's a detailed breakdown of the tasks involved in this phase:
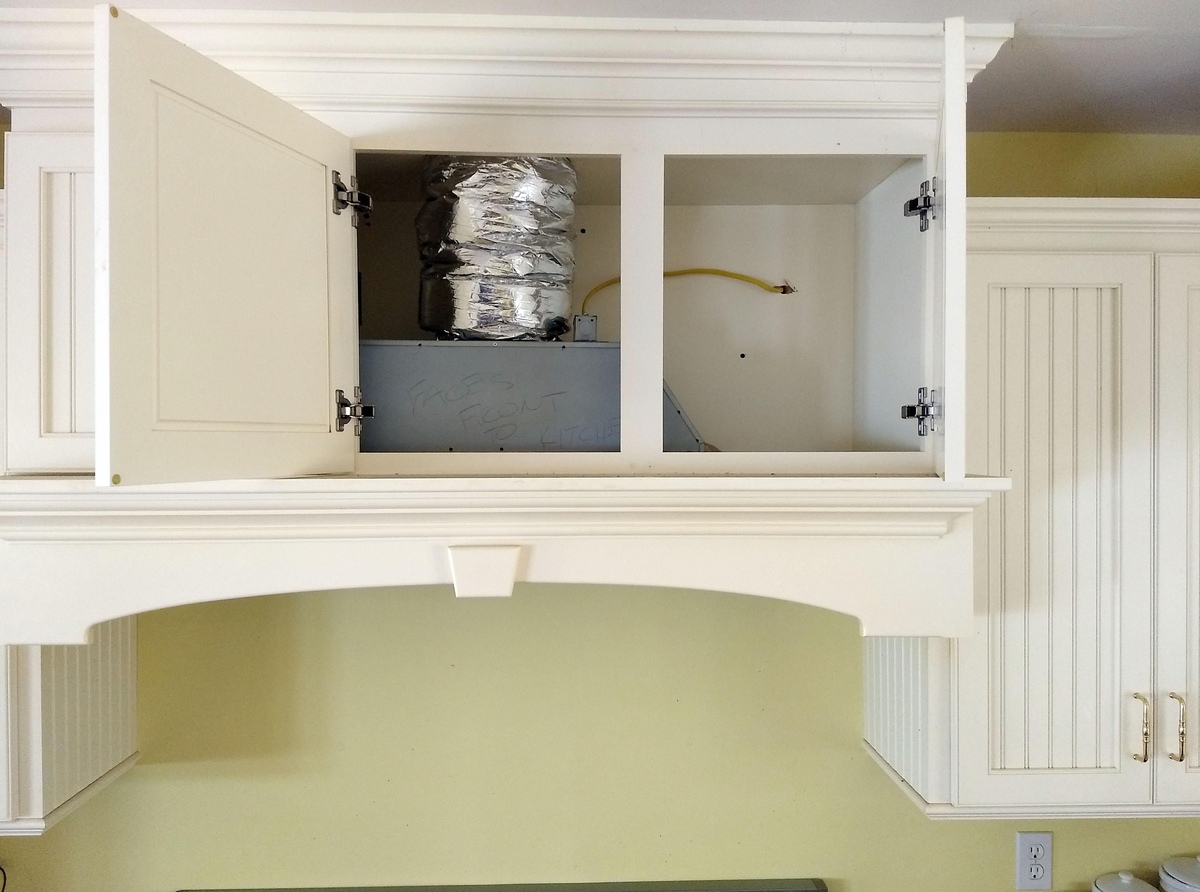
Assess the Ideal Placement
Begin by identifying the most suitable location for installing the exhaust fan. Typically, the fan is positioned directly above the cooking surface to capture cooking byproducts efficiently. If you have a range or cooktop, the fan should be centered and aligned with the cooking area to maximize its effectiveness. Consider the height at which the fan should be installed to ensure that it adequately captures steam, odors, and airborne grease particles generated during cooking.
Read more: How To Install An Exhaust Fan In The Kitchen
Measure the Installation Area
Using a measuring tape, carefully determine the dimensions of the installation area where the exhaust fan will be mounted. Accurate measurements are crucial for ensuring that the fan fits seamlessly within the designated space. Take precise measurements of the width and depth of the installation area, accounting for any surrounding fixtures or obstructions that may impact the fan's placement.
Mark the Cutout Lines
Once the measurements are obtained, use a pencil or marker to mark the cutout lines on the ceiling or wall, indicating the exact area where the opening for the fan will be created. Ensure that the marked lines align with the dimensions of the exhaust fan, allowing for a precise and secure fit during the installation process. Double-check the markings to verify their accuracy before proceeding to the next phase.
Consider Ductwork Requirements
If ductwork is necessary for your exhaust fan installation, take into account the pathway through which the duct will be routed to expel the air outside. Assess the most practical and efficient route for the ductwork, considering any structural elements or obstacles that may influence its installation. Mark the areas where the ductwork will be connected to the fan, ensuring that the marked locations align with the intended pathway for the duct.
Verify Structural Integrity
Before proceeding with the installation, assess the structural integrity of the installation area, especially if the fan will be mounted on a ceiling or wall. Ensure that the chosen location can support the weight of the exhaust fan and any additional components, such as ductwork or mounting brackets. If necessary, reinforce the area to provide adequate support for the fan, promoting long-term stability and safety.
By meticulously measuring and marking the installation area, you can lay the groundwork for a successful and precise installation of your kitchen exhaust fan. This meticulous approach ensures that the fan is positioned optimally, setting the stage for efficient ventilation and improved air quality in your kitchen.
Step 3: Cut the Hole for the Fan
Once the installation area has been accurately measured and marked, the next pivotal step in installing a kitchen exhaust fan is to cut the hole that will accommodate the fan unit. This process demands precision and careful execution to ensure a seamless fit for the fan and facilitate efficient ventilation. Here's a detailed breakdown of the tasks involved in this crucial phase:
Gather Essential Tools and Safety Gear
Before initiating the cutting process, gather the necessary tools and safety gear to facilitate a smooth and secure operation. Essential tools may include a jigsaw or reciprocating saw, a drill with a hole saw attachment (if applicable), a measuring tape, a pencil or marker, and safety goggles. Additionally, ensure that you have access to a sturdy stepladder or platform to safely reach the installation area.
Mark the Cutting Lines
Using the previously marked cutout lines as a guide, carefully transfer the measurements onto the ceiling or wall surface where the hole will be cut. Double-check the accuracy of the markings to ensure that they align with the dimensions of the exhaust fan. Utilize a level to confirm that the lines are straight and properly aligned, as precise markings are essential for achieving a clean and accurate cut.
Begin the Cutting Process
With the cutting lines clearly marked, proceed to carefully cut along the designated lines using a jigsaw or reciprocating saw. Exercise caution and maintain a steady hand to achieve smooth and precise cuts. If the installation area requires a round opening for ductwork, utilize a drill with a hole saw attachment to create the necessary opening. Take your time to ensure that the cuts are clean and accurate, as they will directly impact the fit and stability of the exhaust fan.
Read more: How To Install An Exhaust Fan In The Wall
Verify the Fit and Alignment
Once the hole has been cut, carefully test the fit of the exhaust fan unit to ensure that it aligns seamlessly with the opening. Verify that the dimensions of the hole correspond to the specifications of the fan, allowing for a snug and secure fit. Additionally, assess the alignment of the fan within the opening to confirm that it is centered and level, as proper alignment is crucial for optimal performance and aesthetic appeal.
Clean and Prepare the Installation Area
After confirming the fit and alignment of the exhaust fan, clean the surrounding area to remove any debris or dust generated during the cutting process. Clear away any obstructions that may hinder the installation of the fan, ensuring a clean and accessible space for the subsequent installation steps. This preparatory measure sets the stage for a seamless transition to the next phase of the installation process.
By meticulously executing the process of cutting the hole for the fan, you can ensure that the installation area is primed for the secure and precise placement of the exhaust fan. This meticulous approach sets the stage for a successful installation, laying the groundwork for effective ventilation and improved air quality in your kitchen.
Step 4: Install the Ductwork
Installing the ductwork is a critical phase in the installation of a kitchen exhaust fan, as it establishes the pathway through which airborne contaminants and odors will be expelled from the kitchen to the outdoors. Proper installation of the ductwork is essential for ensuring efficient ventilation and maintaining a healthy indoor environment. Here's a detailed guide to the process of installing the ductwork for your kitchen exhaust fan:
Select the Optimal Duct Type
Begin by selecting the appropriate duct type for your kitchen exhaust system. Common options include rigid metal ducts, flexible aluminum ducts, and ductboard. Rigid metal ducts are durable and provide smooth airflow, making them suitable for long duct runs. Flexible aluminum ducts offer flexibility and ease of installation, ideal for navigating around obstacles. Ductboard, composed of fiberglass insulation faced with aluminum, provides thermal insulation and sound attenuation. Consider the layout of your kitchen and the available space to determine the most suitable duct type for your installation.
Read more: How To Install An Exhaust Fan In A Window
Plan the Duct Route
Carefully plan the route that the ductwork will follow to expel the air outside. Assess the most direct and efficient pathway, considering any structural elements, obstructions, or building codes that may influence the duct route. Aim to minimize the number of bends and turns in the ductwork to maintain optimal airflow and ventilation efficiency. Additionally, ensure that the duct route complies with local building codes and regulations governing kitchen ventilation systems.
Measure and Cut the Duct Sections
Using precise measurements obtained during the installation area assessment, carefully measure and cut the duct sections to fit the designated pathway. Utilize appropriate cutting tools, such as tin snips or a duct cutter, to achieve clean and accurate cuts. Ensure that the duct sections align seamlessly with the planned route, allowing for secure connections and a smooth airflow path. If using flexible ducts, exercise caution to prevent kinks or sharp bends that may impede airflow.
Secure the Duct Sections
Once the duct sections are cut to size, proceed to secure them in place using appropriate fastening methods. For rigid metal ducts, utilize metal screws or clamps to secure the sections together, ensuring a tight and secure connection. When working with flexible ducts, use metal or plastic duct ties to fasten the sections, preventing any sagging or disconnection. Pay close attention to the connections to eliminate air leaks and maintain the integrity of the ductwork system.
Install Duct Supports and Seals
To maintain the stability and integrity of the ductwork, install supports at regular intervals to prevent sagging and ensure consistent airflow. Additionally, seal the joints and connections using foil tape or duct mastic to eliminate air leaks and maintain the efficiency of the ventilation system. Proper sealing is crucial for preventing the escape of airborne contaminants and odors into the kitchen space, promoting a clean and healthy environment.
By meticulously following these steps, you can effectively install the ductwork for your kitchen exhaust fan, establishing a reliable pathway for expelling airborne contaminants and maintaining optimal indoor air quality. This meticulous approach sets the stage for a successful and efficient ventilation system, ensuring a fresh and comfortable kitchen environment.
Read more: How To Install An Attic Exhaust Fan
Step 5: Mount the Exhaust Fan
Mounting the exhaust fan is a pivotal stage in the installation process, as it involves securing the fan unit in its designated location and ensuring a stable and reliable setup for effective ventilation. Proper mounting is essential for optimizing the fan's performance and maintaining a clean and healthy kitchen environment. Here's a detailed breakdown of the tasks involved in this critical phase:
Position the Fan Unit
Begin by positioning the exhaust fan unit within the designated installation area, aligning it precisely with the cutout or mounting location. Ensure that the fan is centered and level, maintaining alignment with the cooking surface to facilitate efficient capture of cooking byproducts and odors. If the fan is designed to be wall-mounted or installed beneath a cabinet, verify that it is positioned at the appropriate height to effectively capture airborne contaminants.
Secure the Mounting Brackets
If the exhaust fan unit requires mounting brackets for installation, carefully attach the brackets to the surrounding structure, such as the ceiling or wall, using appropriate fasteners. Ensure that the brackets are securely anchored to provide stable support for the fan unit. Verify the alignment and levelness of the brackets to guarantee a secure and balanced foundation for mounting the fan.
Lift and Secure the Fan Unit
With the mounting brackets in place, carefully lift the exhaust fan unit and position it onto the secured brackets. Exercise caution to prevent any damage to the fan during the mounting process. Once the fan is positioned on the brackets, secure it in place by fastening the unit to the brackets using the provided hardware. Double-check the stability and alignment of the fan to ensure a secure and level installation.
Read more: Who Can Install Bathroom Exhaust Fan
Connect the Ductwork
If the exhaust fan requires ductwork for ventilation, proceed to connect the duct to the fan unit according to the manufacturer's instructions. Ensure a tight and secure connection to prevent air leaks and maintain optimal airflow. If the ductwork extends to the exterior of the building, confirm that it is properly routed and sealed to expel the air outside, preventing the accumulation of airborne contaminants in the kitchen.
Verify Stability and Functionality
After mounting the exhaust fan, carefully verify the stability of the installation by gently testing the fan unit for any signs of movement or instability. Additionally, conduct a visual inspection to ensure that the fan is securely mounted and aligned with the surrounding structure. Once the fan is securely in place, verify its functionality by briefly testing its operation to confirm that it effectively expels air and operates as intended.
By meticulously following these steps, you can successfully mount the exhaust fan, establishing a reliable and effective ventilation system in your kitchen. This meticulous approach ensures that the fan is securely installed, setting the stage for improved air quality and a more comfortable cooking environment.
Step 6: Connect the Wiring
Connecting the wiring for your kitchen exhaust fan is a crucial step that ensures the fan unit is powered and operational, allowing it to effectively expel airborne contaminants and maintain a clean and healthy kitchen environment. Proper wiring connections are essential for the safe and reliable functionality of the fan, and meticulous attention to detail is required to execute this phase effectively.
Begin by carefully reviewing the manufacturer's instructions and specifications for the electrical requirements of the exhaust fan. Identify the power source designated for the fan, typically located within the vicinity of the installation area. Prior to initiating any wiring connections, ensure that the power source is switched off at the circuit breaker to prevent the risk of electrical hazards.
Next, carefully route the electrical wiring from the power source to the exhaust fan unit, following the designated pathway and ensuring that the wiring is securely fastened and protected from potential damage. Utilize appropriate electrical conduits or cable management systems to maintain a neat and organized wiring layout, minimizing the risk of interference with other components or structures.
Once the wiring is routed to the fan unit, proceed to make the necessary electrical connections according to the manufacturer's specifications. This typically involves connecting the corresponding wires from the fan unit to the power supply, ensuring that the connections are secure and insulated to prevent electrical faults or short circuits. If the fan unit includes additional features such as lighting or adjustable fan speeds, carefully integrate these components into the wiring system, following the provided guidelines to ensure proper functionality.
After completing the wiring connections, carefully verify the integrity of the electrical connections and insulation to prevent any exposed wiring or potential safety hazards. Once the connections are confirmed to be secure and properly insulated, restore power to the circuit breaker and conduct a thorough test of the exhaust fan's electrical functionality. Verify that the fan unit operates as intended, including the activation of any additional features such as lighting or variable fan speeds.
By meticulously executing the process of connecting the wiring for your kitchen exhaust fan, you can ensure that the fan unit is powered safely and reliably, contributing to the efficient ventilation and maintenance of a clean and comfortable kitchen environment. This meticulous approach sets the stage for the successful operation of the exhaust fan, promoting improved air quality and a more enjoyable cooking experience.
Step 7: Test the Fan
After completing the installation of your kitchen exhaust fan, the final crucial step is to thoroughly test the functionality of the fan to ensure that it operates as intended and effectively expels airborne contaminants and odors from your kitchen. Proper testing is essential for verifying the performance of the exhaust fan and addressing any potential issues before finalizing the installation process.
To begin the testing phase, switch on the exhaust fan and observe its operation closely. Listen for any unusual noises or vibrations that may indicate mechanical issues or improper installation. The fan should run smoothly and quietly, effectively drawing in air laden with cooking byproducts and expelling it outside. If the fan produces excessive noise or exhibits irregular operation, promptly investigate the source of the issue and address it to ensure optimal functionality.
As the fan operates, assess its ability to capture and expel cooking odors, steam, and airborne grease particles. Stand near the cooking surface and observe the airflow pattern to confirm that the fan effectively captures the cooking byproducts and directs them towards the exhaust duct. Additionally, verify that the expelled air is directed outside the building and does not recirculate back into the kitchen, ensuring that the ventilation system functions as intended.
If your exhaust fan includes adjustable fan speeds or lighting features, test these additional functionalities to confirm their proper operation. Adjust the fan speed settings to assess the variations in airflow and noise levels, ensuring that the fan provides flexibility in managing ventilation based on your cooking activities. Similarly, activate the lighting components, if applicable, to verify their functionality and assess their contribution to illuminating the cooking area.
During the testing phase, it is essential to verify that the exhaust fan complies with any local building codes and regulations governing kitchen ventilation systems. Confirm that the fan's airflow capacity aligns with the requirements for effective ventilation based on the size and layout of your kitchen. Additionally, ensure that the fan's electrical connections and wiring adhere to safety standards and regulations, promoting a secure and compliant installation.
By meticulously testing the exhaust fan, you can confirm its reliable functionality and address any potential issues that may impact its performance. This thorough evaluation ensures that the fan operates as an efficient and essential component of your kitchen, contributing to improved air quality and a more pleasant cooking environment for you and your family.
Conclusion
In conclusion, the installation of a kitchen exhaust fan is a fundamental aspect of maintaining a healthy and comfortable kitchen environment. By following the comprehensive steps outlined in this guide, you can effectively enhance the functionality and air quality of your kitchen space. From selecting the right exhaust fan to meticulously testing its operation, each phase of the installation process contributes to the creation of a fresh and enjoyable cooking environment.
The initial step of choosing the right exhaust fan involves careful consideration of factors such as kitchen size, airflow capacity, noise levels, and additional features. By selecting a fan that aligns with your specific requirements, you can lay the foundation for efficient ventilation and odor control in your kitchen.
Measuring and marking the installation area sets the stage for a precise and seamless installation process. Accurate measurements and careful marking ensure that the exhaust fan fits securely within the designated space, facilitating optimal ventilation and airflow.
The subsequent steps of cutting the hole for the fan, installing the ductwork, and mounting the exhaust fan demand meticulous attention to detail and precision. These tasks are essential for establishing a reliable ventilation system that effectively expels airborne contaminants and maintains a clean and healthy kitchen environment.
Connecting the wiring and thoroughly testing the fan's functionality are critical final steps that ensure the safe and reliable operation of the exhaust fan. Proper wiring connections and thorough testing contribute to the efficient and effective performance of the fan, promoting improved air quality and a more enjoyable cooking experience.
By diligently following each step of the installation process, you can take control of your kitchen's air quality and create a space that is conducive to healthy and enjoyable cooking. The successful installation of a kitchen exhaust fan not only enhances ventilation but also contributes to the overall safety and cleanliness of your kitchen environment.
In essence, the installation of a kitchen exhaust fan empowers you to maintain a fresh, clean, and comfortable cooking space, ensuring that your culinary endeavors are accompanied by a healthy and pleasant atmosphere.
Frequently Asked Questions about How To Install A Kitchen Exhaust Fan
Was this page helpful?
At Storables.com, we guarantee accurate and reliable information. Our content, validated by Expert Board Contributors, is crafted following stringent Editorial Policies. We're committed to providing you with well-researched, expert-backed insights for all your informational needs.


0 thoughts on “How To Install A Kitchen Exhaust Fan”