Home>Furniture & Design>Bathroom Accessories>How To Install A Bathroom Exhaust Fan Through The Roof
Bathroom Accessories
How To Install A Bathroom Exhaust Fan Through The Roof
Modified: October 20, 2024
Learn how to properly install a bathroom exhaust fan through the roof with our step-by-step guide. Ensure proper ventilation and air quality in your bathroom. Ideal for bathroom accessories.
(Many of the links in this article redirect to a specific reviewed product. Your purchase of these products through affiliate links helps to generate commission for Storables.com, at no extra cost. Learn more)
Introduction
Installing a bathroom exhaust fan through the roof is a crucial step in maintaining good indoor air quality and preventing moisture-related issues in your home. Proper ventilation not only helps to eliminate odors and excess humidity but also reduces the risk of mold and mildew growth, which can lead to structural damage and health concerns. By following the steps outlined in this guide, you can ensure that the installation process is carried out effectively and safely.
A well-ventilated bathroom is essential for creating a comfortable and healthy living environment. When excess moisture from showers and baths lingers in the air, it can promote the growth of mold and mildew, which not only causes unpleasant odors but also poses a risk to respiratory health. Additionally, inadequate ventilation can lead to peeling paint, warped cabinetry, and even structural deterioration over time.
By installing a bathroom exhaust fan that vents through the roof, you can effectively remove excess moisture and odors from the bathroom, improving air quality and preventing potential damage to your home. This comprehensive guide will walk you through the step-by-step process of installing a bathroom exhaust fan through the roof, ensuring that you have the necessary knowledge and skills to complete the project with confidence.
Whether you are replacing an old exhaust fan or installing a new one for the first time, this guide will provide you with the essential information and tips to make the installation process smooth and successful. From gathering the necessary tools and materials to testing the exhaust fan after installation, each step is crucial in ensuring that your bathroom is properly ventilated and free from excess moisture and odors.
By following the detailed instructions and recommendations provided in this guide, you can take proactive measures to improve the air quality in your home and safeguard it against the damaging effects of poor ventilation. Let's dive into the step-by-step process of installing a bathroom exhaust fan through the roof and create a healthier, more comfortable living space for you and your family.
Key Takeaways:
- Properly installing a bathroom exhaust fan through the roof is crucial for maintaining a healthy home environment by removing excess moisture and odors, preventing mold growth, and preserving the structural integrity of the house.
- By carefully choosing the fan location, cutting a precise hole in the roof, and testing the fan’s operation, homeowners can create a comfortable and inviting bathroom environment while safeguarding their home against the damaging effects of poor ventilation.
Step 1: Gather the Necessary Tools and Materials
Before embarking on the installation of a bathroom exhaust fan through the roof, it is essential to gather all the required tools and materials. Having the right equipment at hand will streamline the installation process and ensure that you can complete the project efficiently and safely. Here's a comprehensive list of the necessary tools and materials you will need:
Tools:
- Safety Gear: Prioritize safety by wearing protective gear, including gloves, safety goggles, and a dust mask, to shield yourself from debris and potential hazards during the installation process.
- Ladder: A sturdy ladder is essential for accessing the roof and working at elevated heights. Ensure that the ladder is in good condition and positioned securely to provide a stable platform for the installation.
- Measuring Tape: Accurate measurements are crucial for cutting the hole in the roof and positioning the exhaust fan correctly. A reliable measuring tape will help you determine the precise dimensions for the installation.
- Marker or Pencil: Marking the location for the exhaust fan and outlining the cutting area on the roof will require a marker or pencil to ensure accuracy during the initial stages of the installation.
- Power Drill: A power drill equipped with the appropriate drill bits will be necessary for creating pilot holes and securing the exhaust fan in place.
- Reciprocating Saw or Hole Saw: Depending on the type of roof material, a reciprocating saw or hole saw will be essential for cutting the opening in the roof to accommodate the exhaust fan.
- Screwdriver: A screwdriver, preferably with interchangeable heads, will be used for fastening screws and securing the components of the exhaust fan during installation.
- Adjustable Wrench: An adjustable wrench will be required for tightening nuts and bolts, particularly when connecting the ductwork to the exhaust fan.
- Caulking Gun: To ensure a watertight seal around the exhaust fan, a caulking gun and weather-resistant sealant will be necessary for protecting the installation from water infiltration.
Materials:
- Bathroom Exhaust Fan Kit: Select a high-quality bathroom exhaust fan kit that is suitable for roof venting. Ensure that the kit includes all the essential components, such as the fan unit, ductwork, and roof vent, to facilitate a seamless installation process.
- Roof Flashing Kit: A roof flashing kit designed for exhaust fan installations will provide the necessary components to create a weatherproof seal around the vent opening on the roof.
- Ductwork: Depending on the distance between the bathroom and the roof, acquire the appropriate length of ductwork to connect the exhaust fan to the roof vent. Ensure that the ductwork is made of durable, heat-resistant material to facilitate efficient airflow.
- Roofing Screws and Nails: Secure the roof flashing and exhaust fan in place using roofing screws and nails designed for outdoor applications. These fasteners should be resistant to corrosion and capable of withstanding exposure to the elements.
- Vent Cap: A vent cap or hood will prevent debris, pests, and inclement weather from entering the exhaust vent while allowing for unrestricted airflow.
- Duct Tape or Metal Clamps: Use duct tape or metal clamps to secure the connections between the ductwork and the exhaust fan, ensuring airtight and secure joints that prevent air leakage.
By ensuring that you have all the necessary tools and materials at your disposal, you can approach the installation of a bathroom exhaust fan through the roof with confidence and preparedness. This proactive approach will streamline the process and minimize potential delays, allowing you to create a well-ventilated and comfortable bathroom environment for your home.
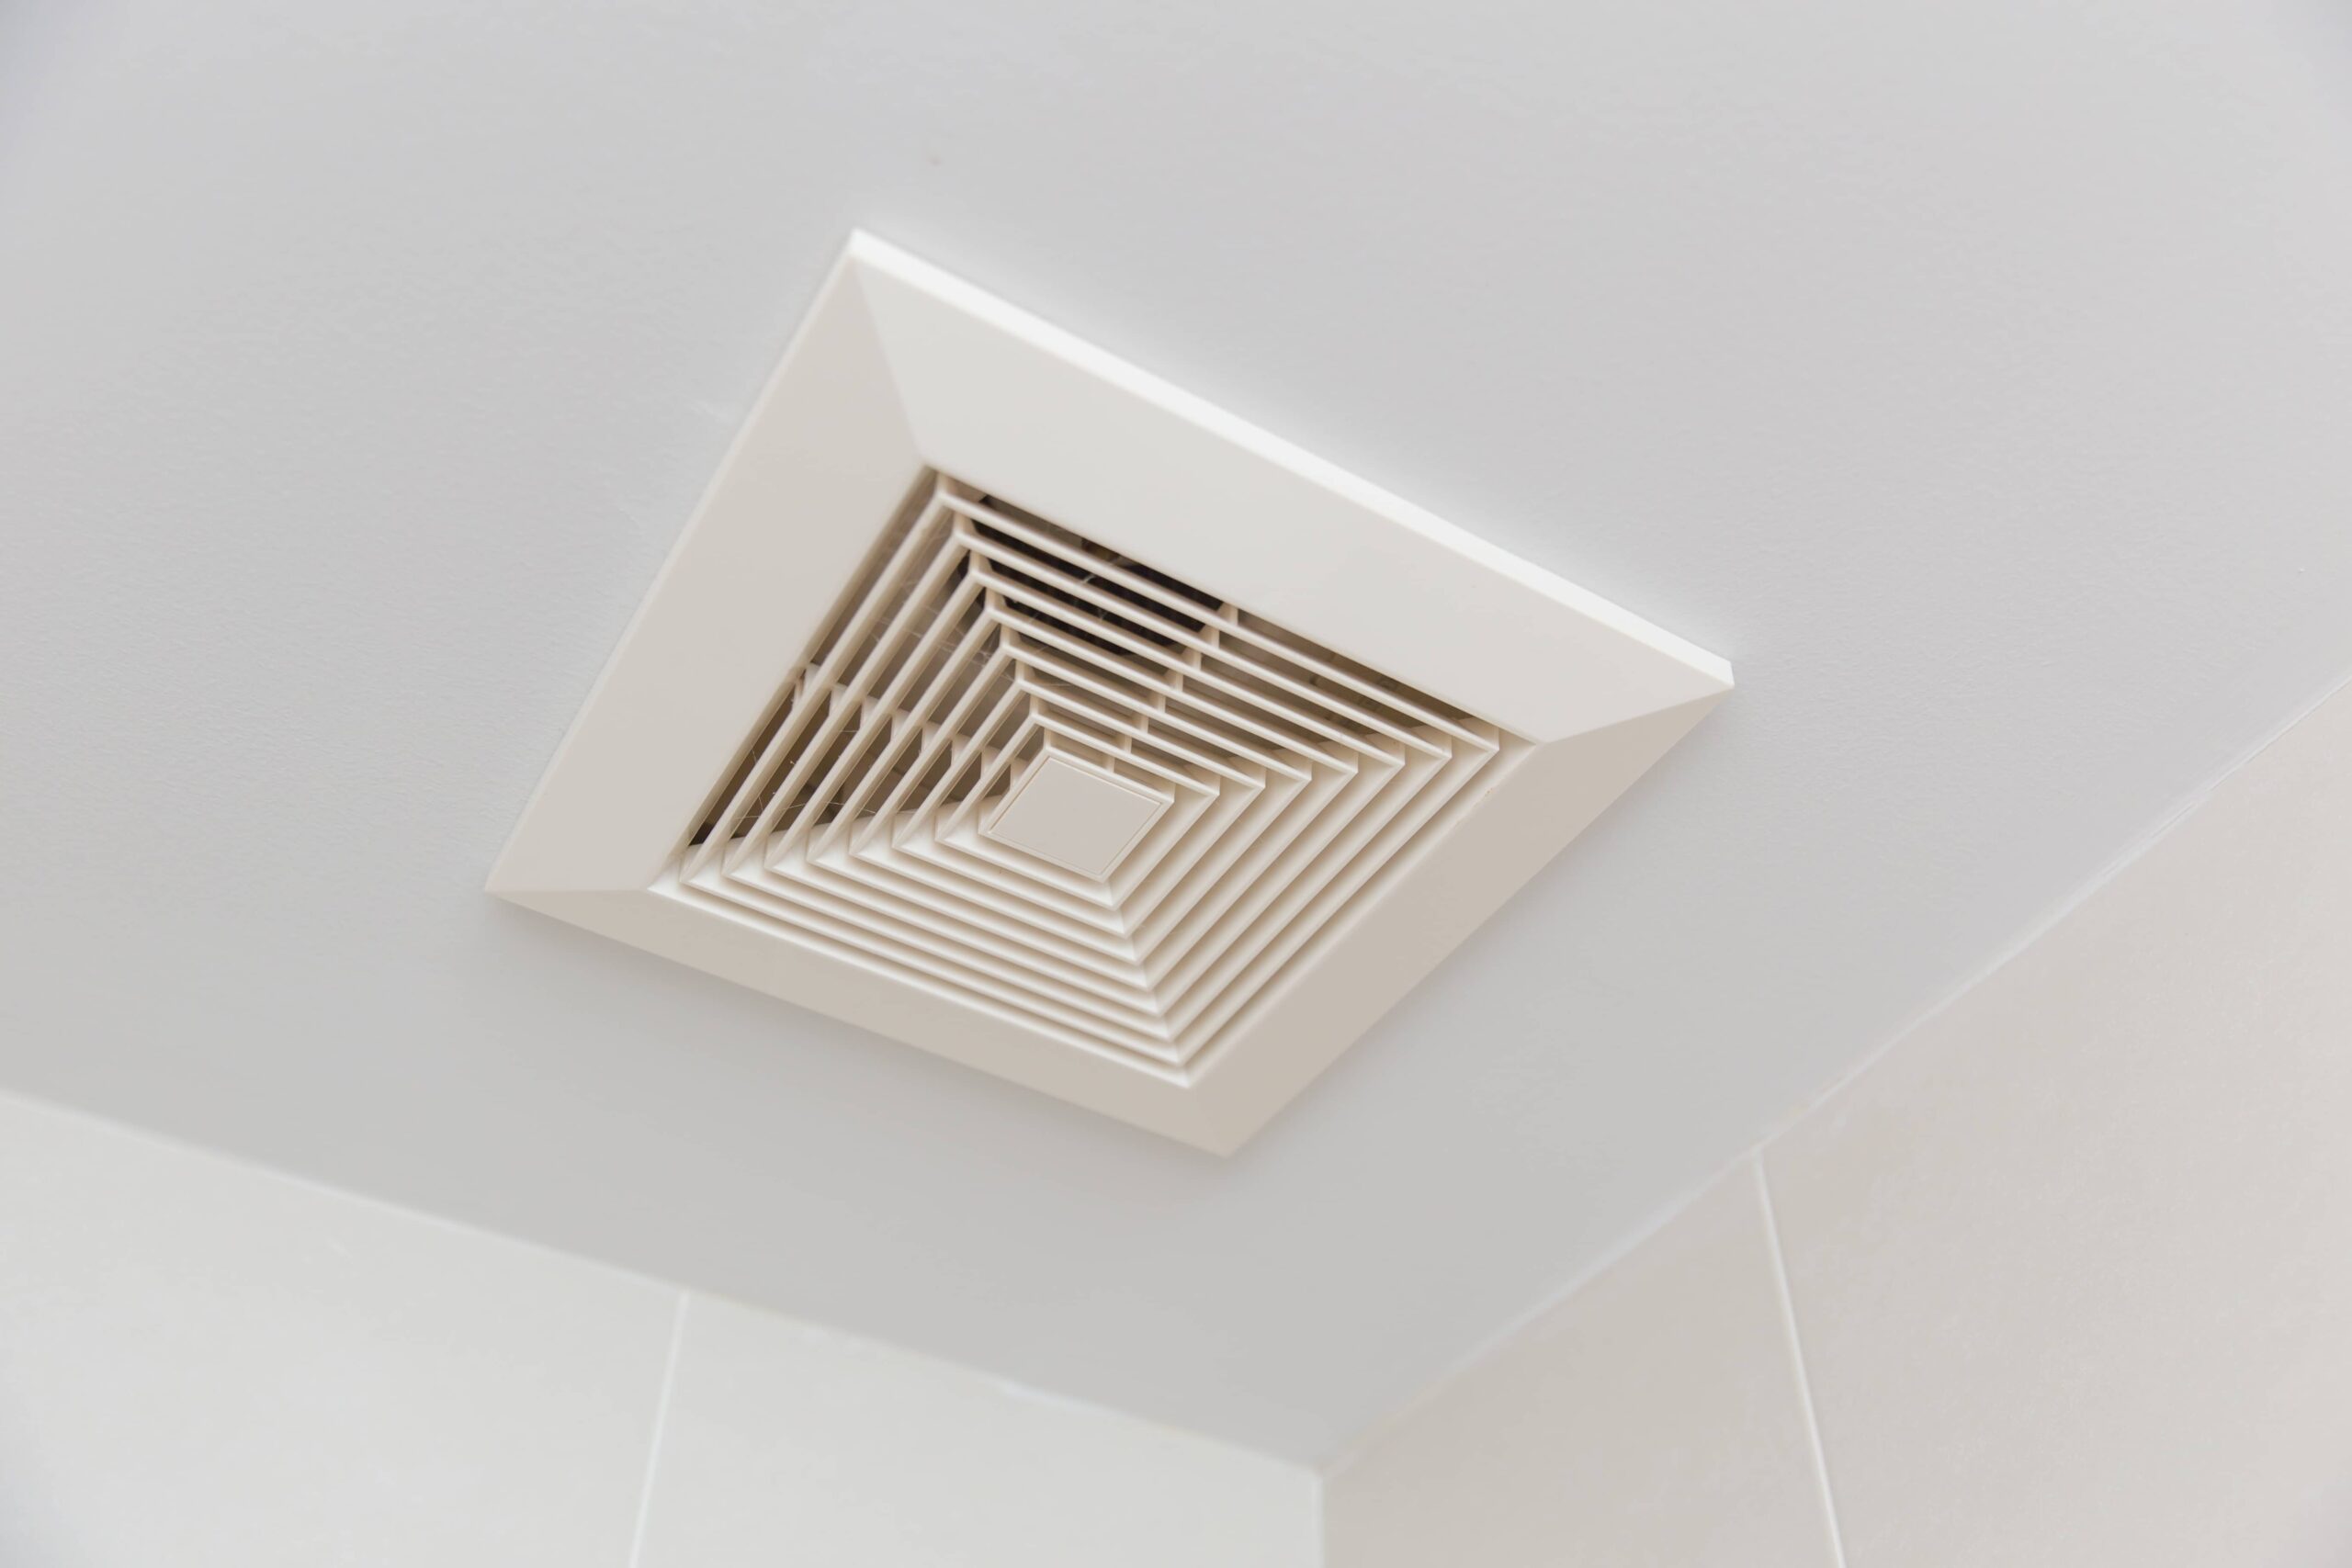
Step 2: Choose the Right Location for the Exhaust Fan
Selecting the optimal location for the bathroom exhaust fan is a critical decision that directly impacts its effectiveness in removing moisture and odors from the air. The ideal placement ensures efficient ventilation while complementing the overall aesthetics and functionality of the bathroom. Here are essential considerations to guide you in choosing the right location for the exhaust fan:
Read more: How To Install An Exhaust Fan
Airflow Efficiency:
The primary objective of the exhaust fan is to effectively remove humid air and odors from the bathroom. Therefore, it is crucial to position the fan in an area where it can efficiently capture and expel the moist air. Ideally, the exhaust fan should be installed near the shower or bathtub to promptly eliminate steam and moisture generated during bathing. Additionally, placing the fan away from the bathroom door and windows can enhance its ability to circulate and ventilate the entire space effectively.
Structural Integrity:
When selecting the location for the exhaust fan, it is essential to consider the structural integrity of the ceiling. Ensure that the chosen area allows for easy access to the attic or roof space for routing the ductwork. Moreover, the selected location should be free from obstructions such as electrical wiring, plumbing, or structural supports that could impede the installation process.
Noise Considerations:
While the primary function of the exhaust fan is ventilation, it is also important to consider the noise level generated during operation. To minimize noise disruption, avoid placing the exhaust fan directly above living areas or bedrooms. Instead, position the fan in a central location within the bathroom to distribute the sound more evenly and reduce its impact on adjacent living spaces.
Aesthetic Integration:
The placement of the exhaust fan should harmonize with the overall design and layout of the bathroom. Consider integrating the fan into the existing ceiling structure or selecting a discreet location that complements the visual appeal of the space. Additionally, choosing a location that allows for seamless integration of the ductwork and roof vent can contribute to a clean and unobtrusive installation.
Accessibility for Maintenance:
Selecting a location that facilitates easy access for maintenance and cleaning is essential for ensuring the long-term functionality of the exhaust fan. Opt for a location that allows for straightforward removal and replacement of the fan unit and access to the ductwork for periodic cleaning and maintenance.
By carefully considering these factors, you can strategically choose the right location for the bathroom exhaust fan, optimizing its performance, minimizing noise impact, and seamlessly integrating it into the overall design of the bathroom. This thoughtful approach ensures that the exhaust fan not only effectively ventilates the space but also enhances the comfort and functionality of the bathroom environment.
Step 3: Cut a Hole in the Roof
Cutting a hole in the roof is a pivotal step in the installation of a bathroom exhaust fan. This process requires precision and careful consideration to ensure that the opening accommodates the venting system while maintaining the integrity of the roof structure. Here's a detailed guide on how to cut a hole in the roof for the exhaust fan installation:
1. Measure and Mark the Location:
Using the measurements provided by the exhaust fan manufacturer, identify the precise location on the roof where the vent opening will be created. Ascend to the roof with the necessary safety gear and mark the outline of the opening using a marker or pencil. Double-check the measurements to ensure accuracy before proceeding to the next step.
2. Prepare for Cutting:
Before cutting into the roof, ensure that the area is clear of debris and obstructions. Position the ladder securely and assess the roof's material to determine the appropriate cutting tools. For asphalt shingles, a reciprocating saw with a fine-toothed blade is recommended, while a hole saw may be suitable for other roofing materials.
Read more: Who Can Install Bathroom Exhaust Fan
3. Cut the Opening:
Carefully cut along the marked outline, following the manufacturer's specifications for the size of the vent opening. Exercise caution to avoid damaging the underlying roof structure and maintain a steady hand to achieve clean and precise cuts. If the roof is made of metal, use a specialized cutting tool designed for metal roofing to ensure a smooth and accurate opening.
4. Remove Roofing Materials:
After cutting the outline, carefully remove the roofing materials within the marked area. Clear away any debris and ensure that the opening is clean and free from any obstructions that could impede the installation of the roof flashing and vent components.
5. Install Roof Flashing:
Once the opening is prepared, install the roof flashing kit according to the manufacturer's instructions. The flashing components should create a watertight seal around the vent opening, providing protection against moisture infiltration and ensuring the long-term durability of the installation.
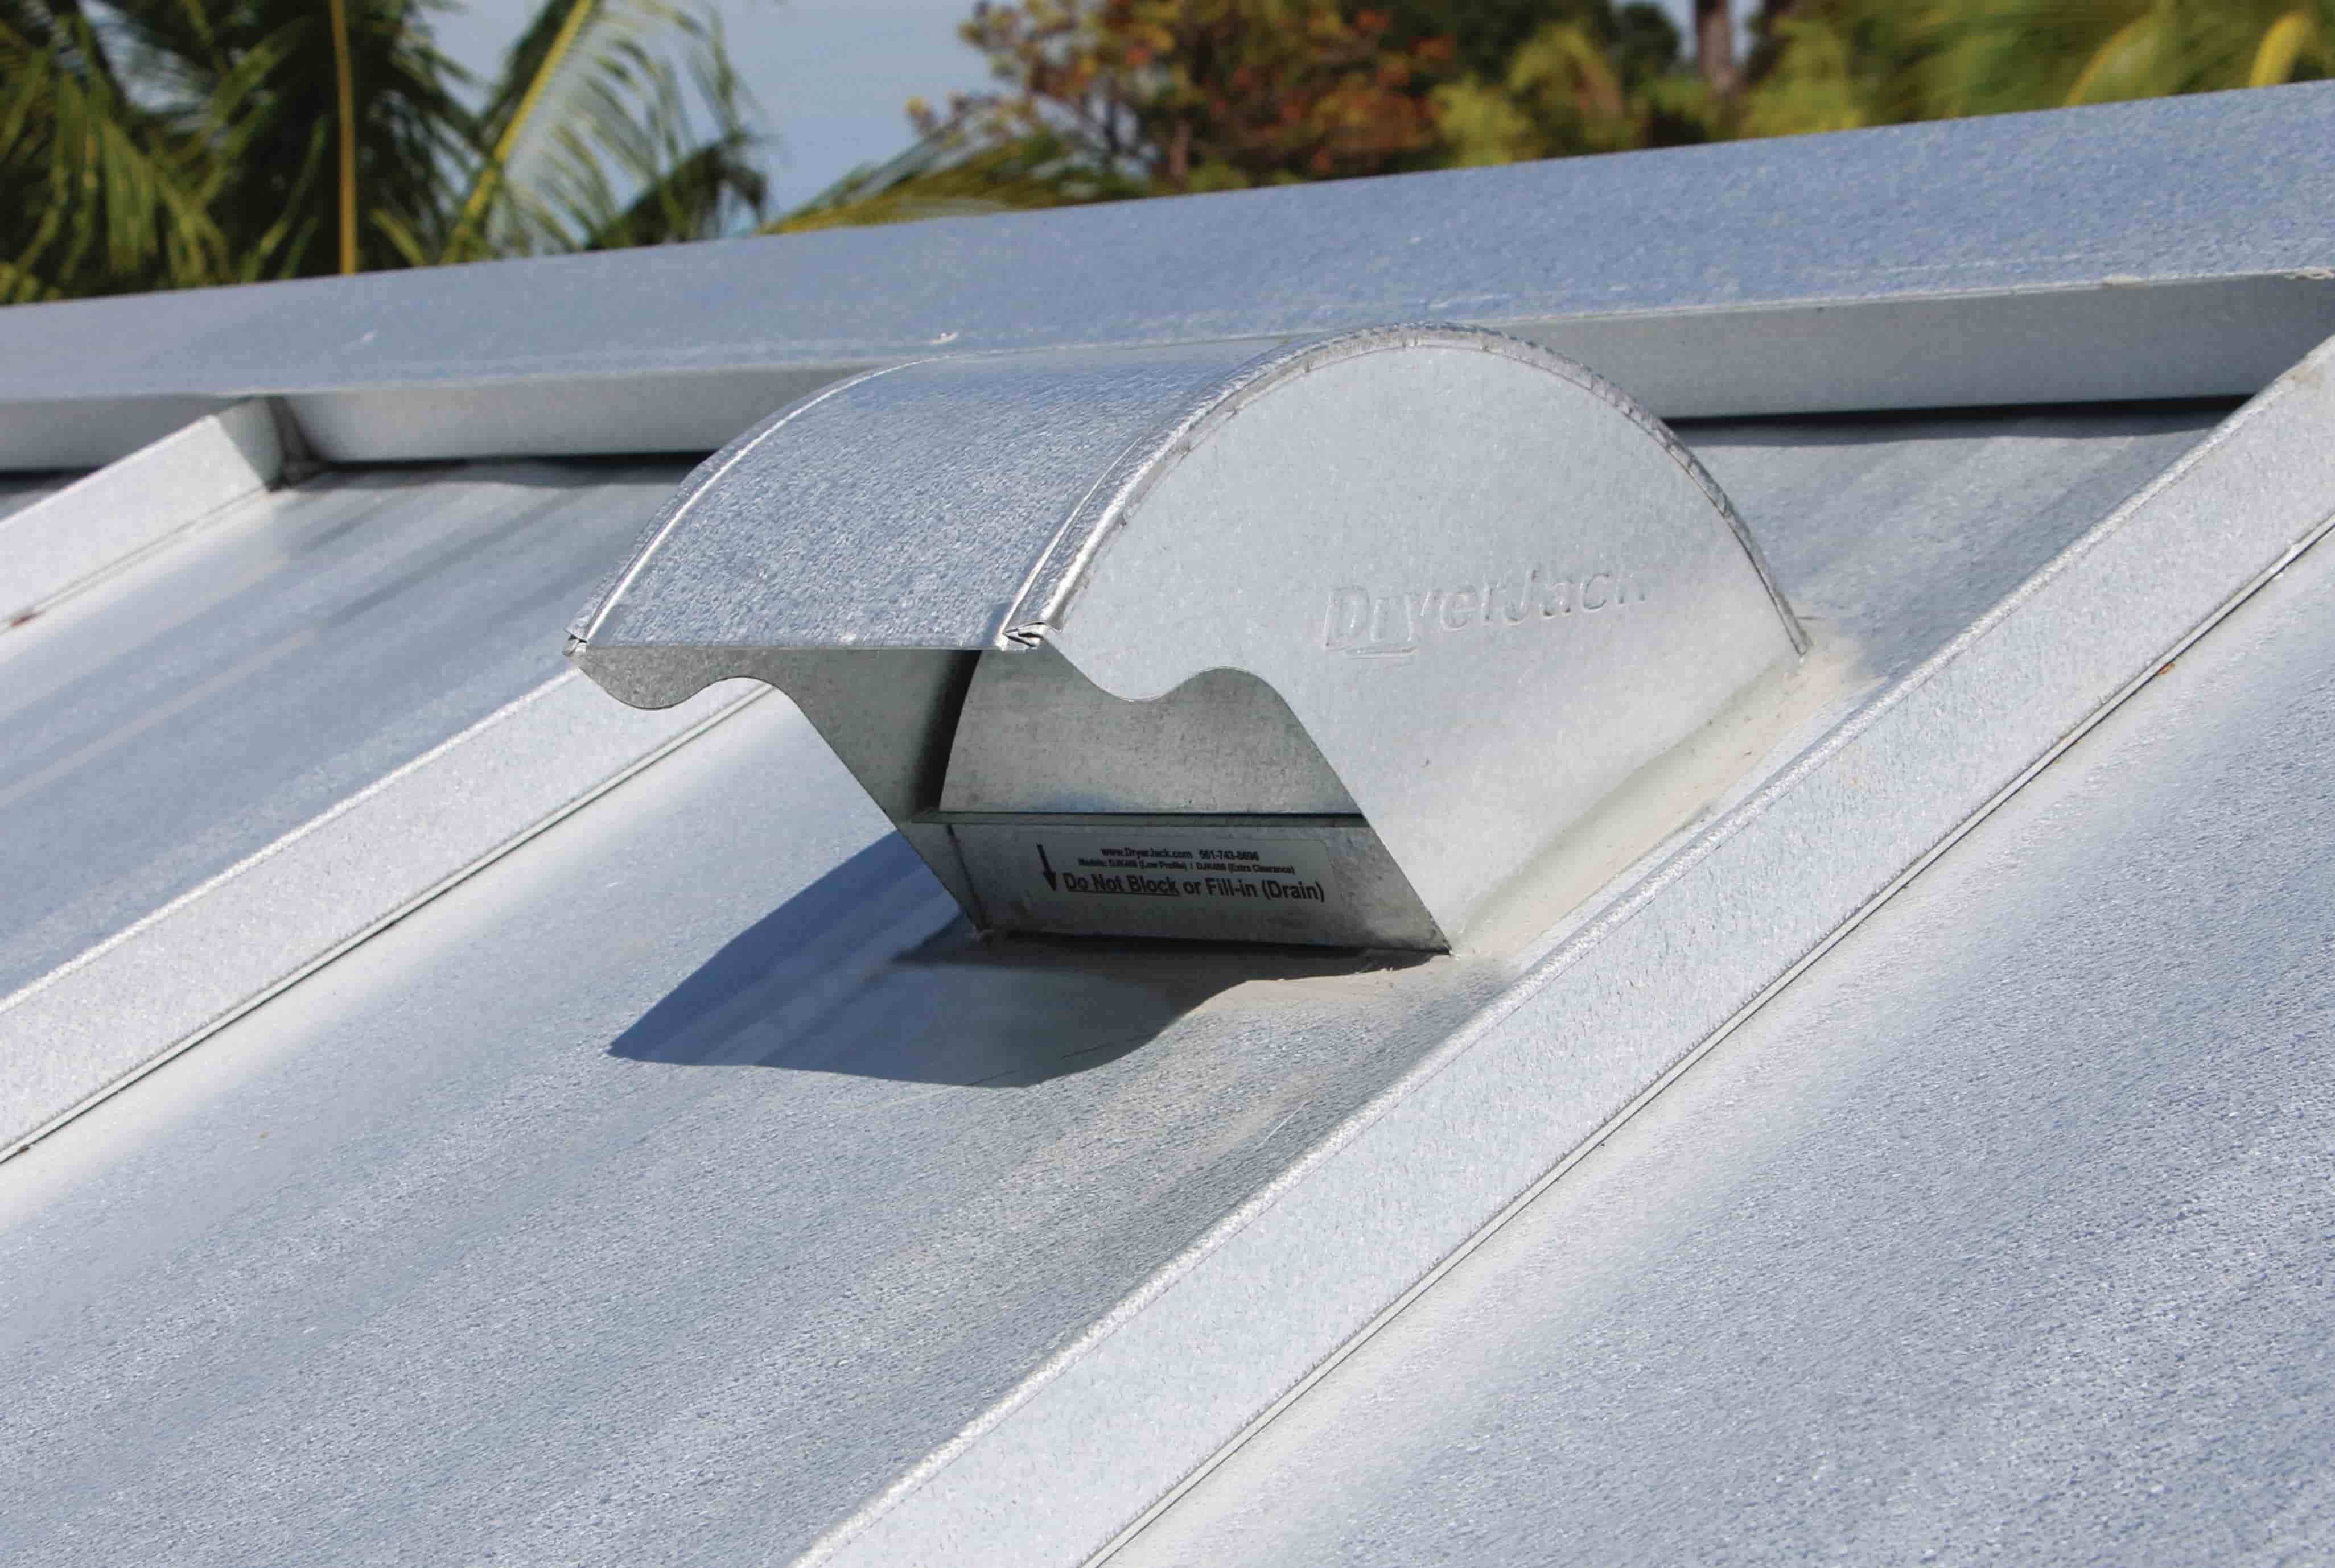
6. Secure the Roof Vent:
Position the roof vent over the flashing and secure it in place using roofing screws or nails. Ensure that the vent is aligned properly and firmly attached to the roof, preventing any potential movement or dislodgment due to wind or environmental factors.
By following these detailed steps, you can effectively cut a hole in the roof for the installation of the bathroom exhaust fan. This meticulous process ensures that the vent opening is accurately positioned, securely sealed, and ready to accommodate the exhaust fan and ductwork, facilitating efficient ventilation and moisture control in the bathroom.
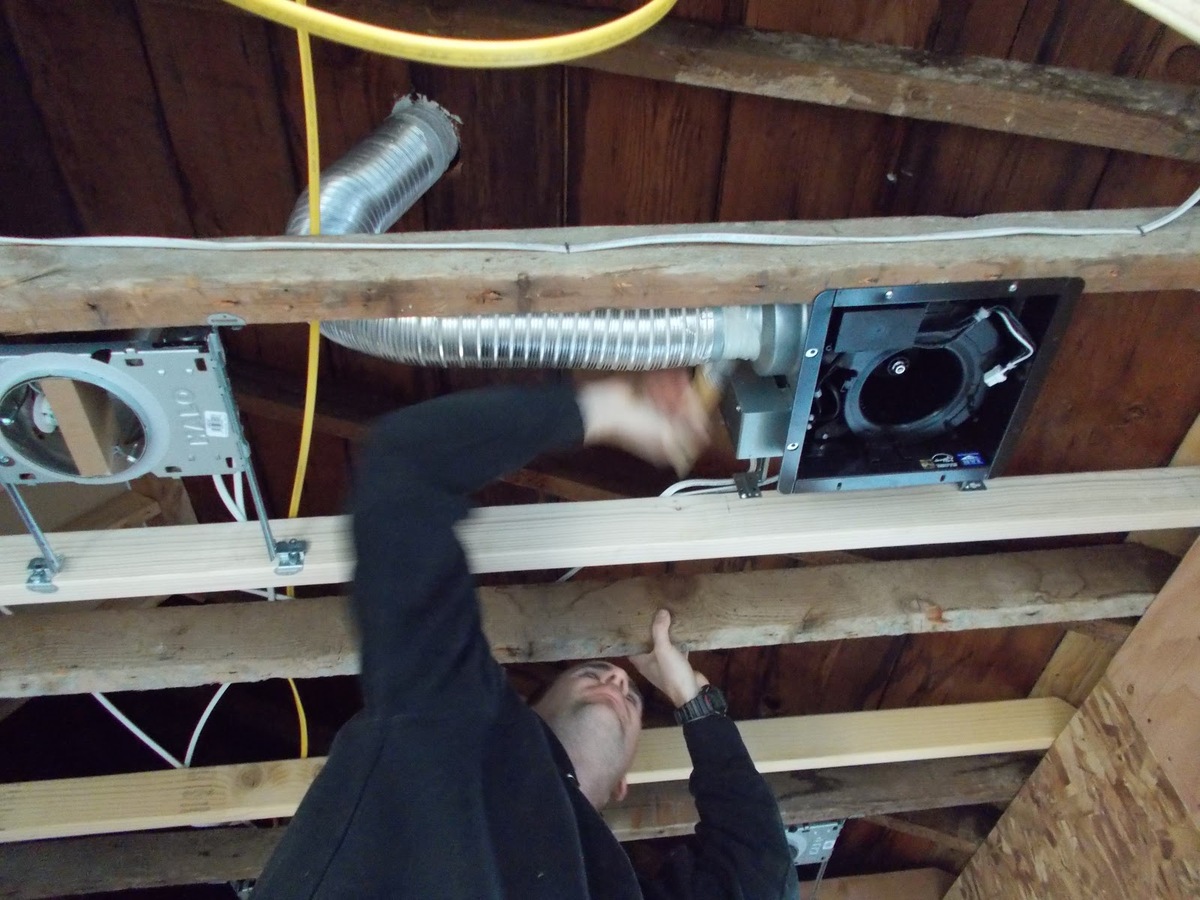
Step 4: Install the Exhaust Fan
With the roof prepared to accommodate the exhaust fan, the next crucial step is the installation of the fan unit itself. This process involves securing the exhaust fan in the designated location, connecting the ductwork, and ensuring a secure and airtight fit to facilitate efficient ventilation. Here's a comprehensive guide on how to install the exhaust fan through the roof:
-
Position the Fan Unit:
Carefully position the exhaust fan in the predetermined location within the bathroom ceiling. Ensure that the fan unit aligns with the vent opening on the roof and is oriented to facilitate the smooth connection of the ductwork. -
Secure the Fan Unit:
Using the provided mounting brackets or hardware, secure the exhaust fan to the ceiling joists or rafters. Ensure that the fan unit is firmly anchored in place to prevent any movement or vibration during operation. -
Connect the Electrical Wiring:
Follow the manufacturer's instructions to connect the electrical wiring of the exhaust fan. Adhere to all safety guidelines and local electrical codes when wiring the fan unit to the power source. If necessary, consult a qualified electrician to ensure proper and safe electrical connections. -
Attach the Ductwork:
Connect the ductwork to the exhaust port of the fan unit, ensuring a secure and airtight fit. Use metal clamps or high-quality duct tape to fasten the ductwork to the fan, preventing air leakage and ensuring efficient airflow through the ventilation system. -
Route the Ductwork to the Roof:
Carefully route the ductwork from the exhaust fan to the roof vent, ensuring that it follows a direct and unobstructed path. Avoid sharp bends or kinks in the ductwork that could impede airflow and reduce the effectiveness of the ventilation system. -
Seal the Connections:
Apply weather-resistant sealant or duct tape to seal the connections between the ductwork and the roof vent. This step is crucial for preventing moisture infiltration and maintaining a watertight seal around the vent opening. -
Test the Fan Operation:
Before completing the installation, test the operation of the exhaust fan to ensure that it functions properly. Verify that the fan effectively expels air through the roof vent and assess its performance in removing moisture and odors from the bathroom.
By following these detailed steps, you can successfully install the exhaust fan through the roof, creating an effective and efficient ventilation system for your bathroom. This meticulous process ensures that the fan unit is securely positioned, the ductwork is properly connected, and the entire installation is ready to provide optimal airflow and moisture control.
Step 5: Connect the Ductwork
Connecting the ductwork is a critical aspect of installing a bathroom exhaust fan through the roof, as it directly impacts the efficiency and effectiveness of the ventilation system. Properly securing the ductwork ensures that moist air and odors are effectively expelled from the bathroom, contributing to improved air quality and moisture control. Here's a detailed guide on how to connect the ductwork for the exhaust fan installation:
-
Select the Right Ductwork: Before connecting the ductwork to the exhaust fan, ensure that you have chosen the appropriate type and size of ducting. Opt for rigid metal ductwork, such as galvanized steel or aluminum, as it provides durability and smooth airflow. Avoid using flexible ducting, especially in long runs, as it can restrict airflow and accumulate debris over time.
-
Measure and Cut the Ductwork: Accurately measure the distance between the exhaust port of the fan unit and the roof vent to determine the required length of ductwork. Use aviation snips or a duct cutter to trim the ductwork to the precise dimensions, ensuring a proper fit without unnecessary bends or slack that could impede airflow.
-
Secure the Duct to the Fan Unit: Slide the duct over the exhaust port of the fan unit and secure it in place using metal clamps or high-quality duct tape. Ensure that the connection is airtight to prevent air leakage and maintain efficient airflow through the ductwork.
-
Route the Ductwork: Carefully route the ductwork from the exhaust fan to the roof vent, following a direct and unobstructed path. Avoid sharp bends or kinks in the ductwork, as these can restrict airflow and diminish the performance of the ventilation system. If the ductwork needs to navigate through the attic, secure it to the rafters or joists using straps or hangers to prevent sagging or dislodgment.
-
Seal the Connections: Apply weather-resistant sealant or metal foil tape to seal the connections between the ductwork and the roof vent. This step is crucial for preventing moisture infiltration and maintaining a watertight seal around the vent opening. Ensure that the sealant or tape forms a secure bond and effectively prevents air and water leakage.
-
Insulate the Ductwork (if necessary): In regions with cold climates, consider insulating the ductwork to prevent condensation and heat loss. Wrap the ductwork with insulation sleeves or use insulating tape to maintain consistent temperatures and prevent moisture buildup within the ducts.
By meticulously connecting the ductwork to the exhaust fan and roof vent, you can ensure that the ventilation system operates at peak efficiency, effectively removing moisture and odors from the bathroom. This meticulous process contributes to improved air quality and moisture control, creating a healthier and more comfortable environment in your home.
Step 6: Seal and Insulate the Installation
After installing the bathroom exhaust fan through the roof and connecting the ductwork, the next crucial step is to seal and insulate the installation to ensure optimal performance and long-term durability. Proper sealing and insulation not only prevent air and moisture leakage but also contribute to energy efficiency and the prevention of condensation within the ventilation system. Here's a detailed guide on how to effectively seal and insulate the exhaust fan installation:
1. Seal the Roof Vent and Ductwork Connections:
Apply weather-resistant sealant or metal foil tape to seal the connections between the ductwork and the roof vent. This step is critical for preventing moisture infiltration and maintaining a watertight seal around the vent opening. Ensure that the sealant or tape forms a secure bond and effectively prevents air and water leakage. Additionally, inspect the roof vent for any gaps or potential points of entry for water or pests, and seal them accordingly to safeguard the installation against external elements.
Read more: How To Fix Bathroom Exhaust Fan
2. Insulate the Ductwork (if necessary):
In regions with cold climates, consider insulating the ductwork to prevent condensation and heat loss. Wrap the ductwork with insulation sleeves or use insulating tape to maintain consistent temperatures and prevent moisture buildup within the ducts. Proper insulation not only protects the ductwork from temperature variations but also contributes to energy efficiency by minimizing heat transfer and reducing the risk of condensation, which can lead to mold growth and structural damage.
3. Secure and Insulate the Roof Flashing:
Inspect the roof flashing around the vent opening to ensure that it is securely fastened and provides a watertight seal. If necessary, apply additional sealant or flashing adhesive to reinforce the connection and prevent water infiltration. Consider insulating the area around the roof vent with expanding foam or insulation to minimize heat loss and maintain a consistent temperature within the attic or roof space.
4. Verify the Integrity of Seals and Insulation:
After completing the sealing and insulation process, thoroughly inspect the entire installation to verify the integrity of the seals and insulation. Check for any signs of air or moisture leakage, and address any areas that require additional sealing or insulation. Properly sealed and insulated installations not only enhance the efficiency of the ventilation system but also contribute to the long-term functionality and durability of the exhaust fan.
By meticulously sealing and insulating the installation, you can ensure that the bathroom exhaust fan operates at peak efficiency, effectively removing moisture and odors from the bathroom while maintaining energy efficiency and structural integrity. This proactive approach contributes to a healthier and more comfortable living environment, safeguarding your home against the detrimental effects of poor ventilation and moisture-related issues.
Step 7: Test the Exhaust Fan
After completing the installation of the bathroom exhaust fan through the roof, it is crucial to conduct thorough testing to ensure that the ventilation system functions effectively and efficiently. Testing the exhaust fan allows you to verify its performance in removing moisture and odors from the bathroom, as well as identify any potential issues that may require adjustments or further attention. Here's a detailed guide on how to test the exhaust fan and validate its operation:
-
Power On the Fan: Begin by powering on the exhaust fan to initiate its operation. Activate the fan using the designated switch or control, and allow it to run for a few minutes to facilitate the circulation of air and the expulsion of moisture from the bathroom.
-
Observe Airflow: While the fan is running, carefully observe the airflow around the exhaust port and the roof vent. Verify that the fan effectively expels air through the roof vent, indicating that it is functioning as intended in removing humid air and odors from the bathroom. Additionally, assess the strength and consistency of the airflow to ensure that it provides sufficient ventilation for the space.
-
Listen for Noise Levels: Pay attention to the noise levels generated by the exhaust fan during operation. While some level of sound is expected, excessive noise or irregular sounds may indicate potential issues with the fan unit or the ductwork. Assess the noise levels to determine if they align with the manufacturer's specifications and are acceptable for the intended usage of the bathroom.
-
Check for Proper Ventilation: Assess the overall ventilation within the bathroom to determine if the exhaust fan effectively removes steam and odors. Verify that the bathroom air feels fresher and less humid after the fan has been running, indicating that it has successfully ventilated the space and improved air quality.
-
Inspect for Any Issues: During the testing phase, carefully inspect the exhaust fan, ductwork, and roof vent for any signs of air or moisture leakage, loose connections, or other potential issues. Address any identified issues promptly to ensure that the ventilation system operates optimally and remains free from performance limitations.
-
Verify Compliance with Local Codes: Ensure that the exhaust fan installation and operation comply with local building codes and regulations. Verify that the fan unit is appropriately sized for the bathroom space and that the ventilation system meets the required standards for airflow and moisture removal.
By conducting a comprehensive test of the exhaust fan, you can validate its functionality and performance, ensuring that it effectively removes moisture and odors from the bathroom while promoting improved air quality and comfort. This proactive approach allows you to address any potential issues and fine-tune the ventilation system to meet the specific needs of your home, creating a healthier and more pleasant living environment.
Read more: How To Install Roof Vent For Bathroom Fan
Conclusion
In conclusion, the installation of a bathroom exhaust fan through the roof is a significant investment in maintaining a healthy and comfortable living environment. By following the comprehensive steps outlined in this guide, homeowners can effectively address moisture-related issues, improve indoor air quality, and safeguard their homes against the damaging effects of poor ventilation.
Proper ventilation in the bathroom is essential for mitigating the accumulation of excess moisture, which can lead to mold growth, structural deterioration, and potential health concerns. The strategic placement of the exhaust fan, careful cutting of the roof opening, meticulous installation of the fan unit and ductwork, and thorough testing of the ventilation system are all crucial components of a successful installation process.
By gathering the necessary tools and materials and selecting the optimal location for the exhaust fan, homeowners can lay the foundation for a seamless installation. Cutting a precise hole in the roof and installing the fan unit with attention to detail ensures that the ventilation system operates efficiently and effectively. Connecting the ductwork, sealing and insulating the installation, and conducting thorough testing are essential steps that contribute to the long-term functionality and performance of the exhaust fan.
Ultimately, a well-ventilated bathroom not only enhances the comfort and livability of a home but also contributes to the preservation of its structural integrity. The proactive approach to installing a bathroom exhaust fan through the roof empowers homeowners to create a healthier living environment, mitigate the risk of moisture-related issues, and promote energy efficiency through effective ventilation.
By adhering to the guidelines and recommendations provided in this comprehensive guide, homeowners can take proactive measures to improve indoor air quality, protect their homes from the detrimental effects of poor ventilation, and create a more comfortable and inviting bathroom environment for themselves and their families. The installation of a bathroom exhaust fan through the roof is an investment in the long-term well-being of the home, ensuring that it remains a safe, healthy, and enjoyable living space for years to come.
Frequently Asked Questions about How To Install A Bathroom Exhaust Fan Through The Roof
Was this page helpful?
At Storables.com, we guarantee accurate and reliable information. Our content, validated by Expert Board Contributors, is crafted following stringent Editorial Policies. We're committed to providing you with well-researched, expert-backed insights for all your informational needs.


0 thoughts on “How To Install A Bathroom Exhaust Fan Through The Roof”