Home>Furniture & Design>Bathroom Accessories>How To Install A Bathroom Exhaust Fan Without Attic Access
Bathroom Accessories
How To Install A Bathroom Exhaust Fan Without Attic Access
Modified: August 30, 2024
Learn how to install a bathroom exhaust fan without attic access to improve ventilation and air quality. Find step-by-step instructions for a hassle-free installation. Ideal for bathroom accessories.
(Many of the links in this article redirect to a specific reviewed product. Your purchase of these products through affiliate links helps to generate commission for Storables.com, at no extra cost. Learn more)
Introduction
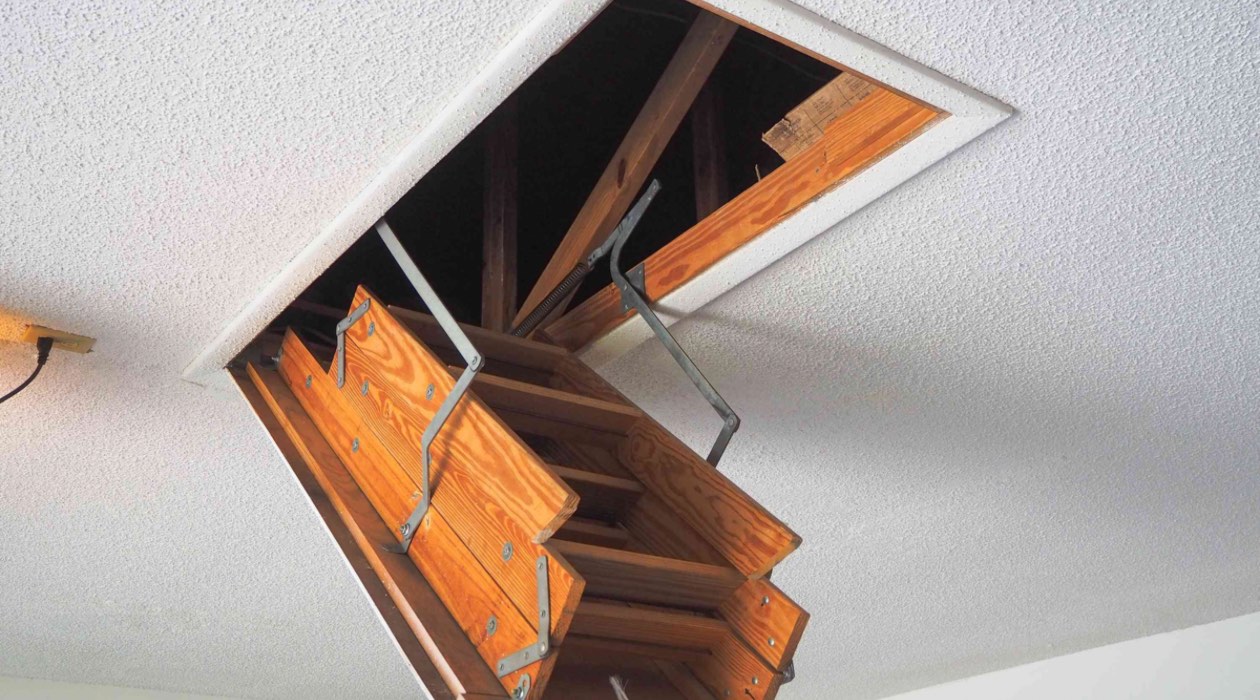
Installing a bathroom exhaust fan without attic access may seem like a daunting task, but with the right tools, materials, and know-how, it can be a manageable project. A bathroom exhaust fan is a crucial component of any bathroom, as it helps to remove excess moisture and odors, improving air quality and preventing mold and mildew growth. While many homes have attic access for easy installation, some bathrooms are not equipped with this feature, making the installation process a bit more challenging.
In this comprehensive guide, we will walk you through the step-by-step process of installing a bathroom exhaust fan without attic access. From gathering the necessary tools and materials to cutting a hole in the ceiling and connecting the wiring, we will cover everything you need to know to successfully complete this project. By following these instructions, you can ensure that your bathroom remains well-ventilated and free from excess moisture, creating a more comfortable and healthy environment for you and your family.
Whether you're a seasoned DIY enthusiast or a novice homeowner looking to take on a new project, this guide will provide you with the knowledge and confidence to tackle the installation of a bathroom exhaust fan without attic access. With a bit of patience and careful attention to detail, you can successfully enhance the functionality of your bathroom while contributing to a cleaner and more pleasant living space. So, let's roll up our sleeves and get ready to transform your bathroom into a well-ventilated oasis!
Key Takeaways:
- Installing a bathroom exhaust fan without attic access is manageable with the right tools and steps. It helps remove moisture and odors, creating a healthier and more comfortable bathroom environment.
- Choosing the right location, cutting a hole in the ceiling, and testing the fan are crucial steps. They ensure the fan operates effectively, contributing to improved air quality and comfort in the bathroom.
Step 1: Gather Necessary Tools and Materials
Before embarking on the installation of a bathroom exhaust fan without attic access, it's essential to gather all the necessary tools and materials to ensure a smooth and efficient process. Here's a comprehensive list of items you'll need:
Tools:
- Measuring Tape: To accurately measure the dimensions for the exhaust fan and the hole in the ceiling.
- Pencil: For marking the cutting lines on the ceiling.
- Drywall Saw or Jigsaw: For cutting the hole in the ceiling to accommodate the exhaust fan.
- Screwdriver: To secure the exhaust fan in place and connect the wiring.
- Drill: If the exhaust fan requires screws for installation, a drill will be necessary to create pilot holes.
- Utility Knife: For cutting through any insulation or ceiling material as needed.
- Wire Strippers and Electrical Tape: For connecting the wiring of the exhaust fan to the electrical supply.
- Ladder or Step Stool: To access the ceiling safely and comfortably.
Materials:
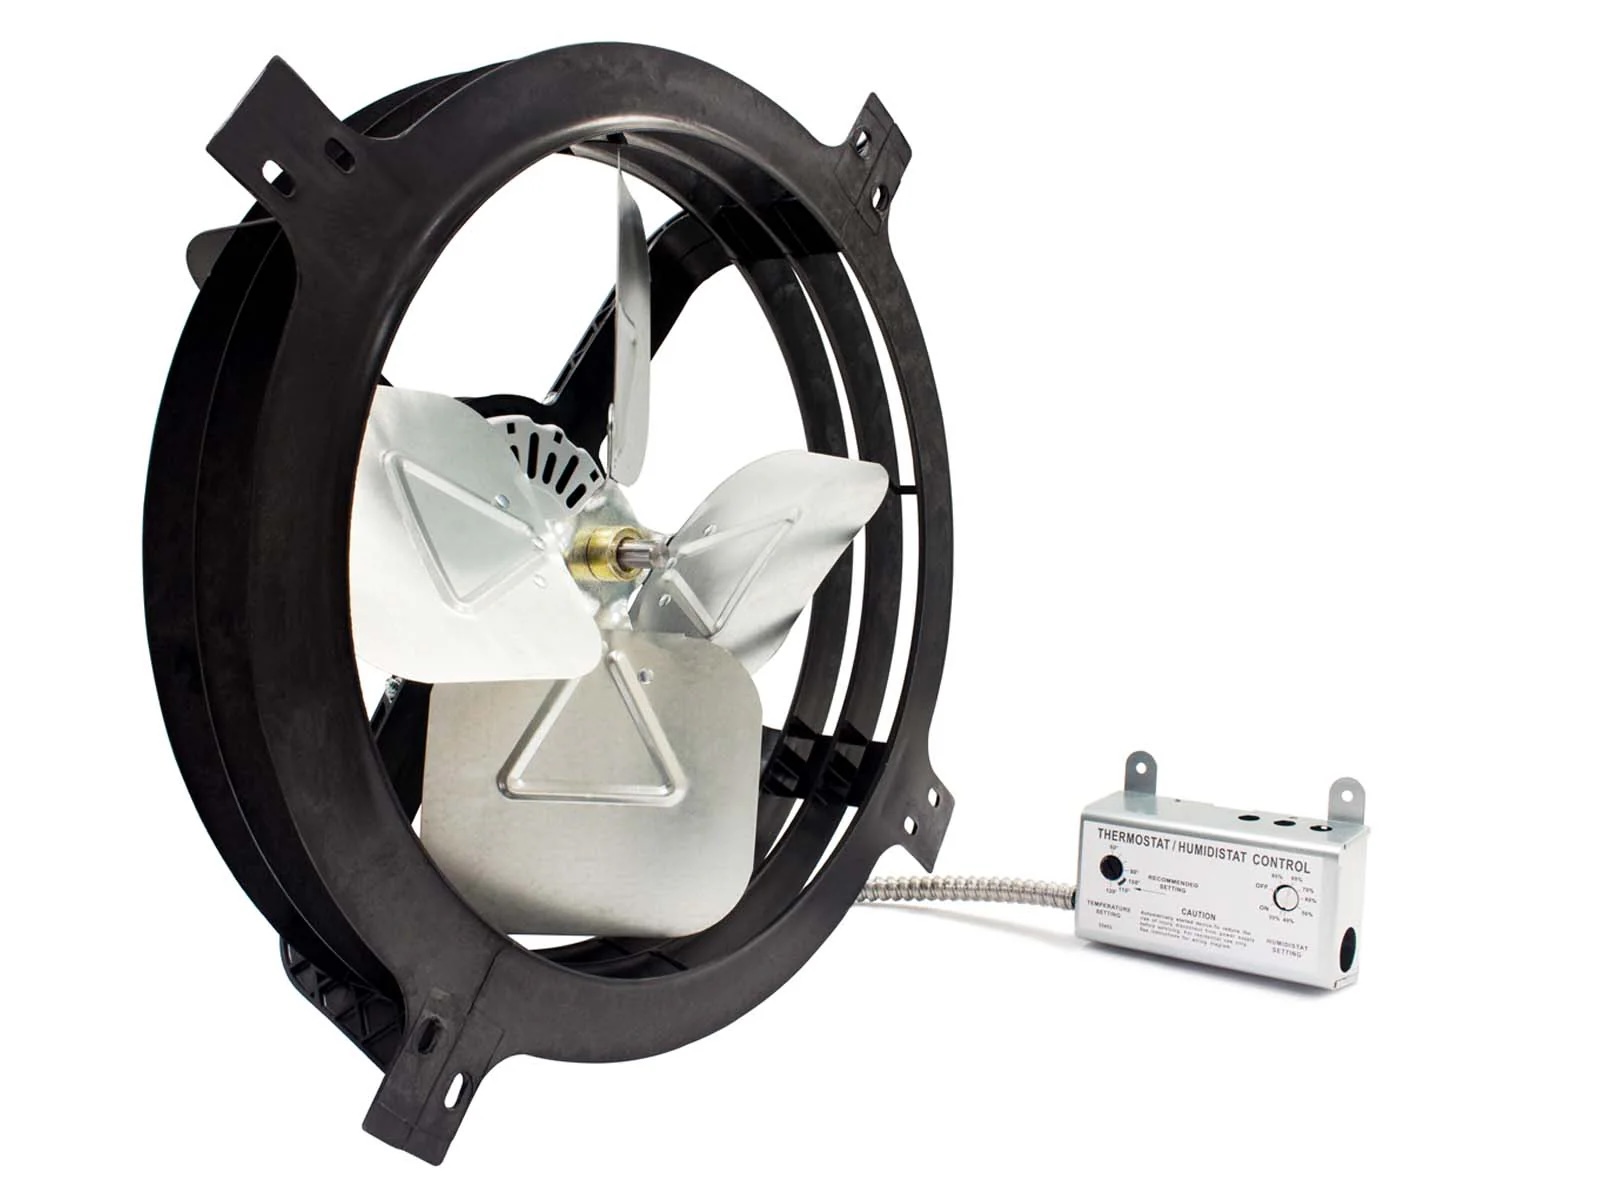
- Bathroom Exhaust Fan: Choose a fan that is suitable for the size of your bathroom and meets your ventilation needs.
- Ventilation Duct: The duct will carry the moist air from the exhaust fan to the outside of your home.
- Vent Cap: This component will cover the exterior end of the ventilation duct, preventing debris and pests from entering.
- Screws or Nails: Depending on the installation requirements of your exhaust fan, you'll need appropriate fasteners to secure it in place.
- Electrical Cable: If the existing wiring is not suitable for the exhaust fan, you may need to install new electrical cable to power the fan.
- Duct Tape or Foil Tape: To seal any connections between the ventilation duct and the exhaust fan to prevent air leaks.
- Safety Gear: It's important to prioritize safety, so consider wearing safety goggles, gloves, and a dust mask during the installation process.
By ensuring that you have all the necessary tools and materials at your disposal, you can streamline the installation process and minimize interruptions. With these items in hand, you'll be well-prepared to move on to the next steps of installing your bathroom exhaust fan without attic access.
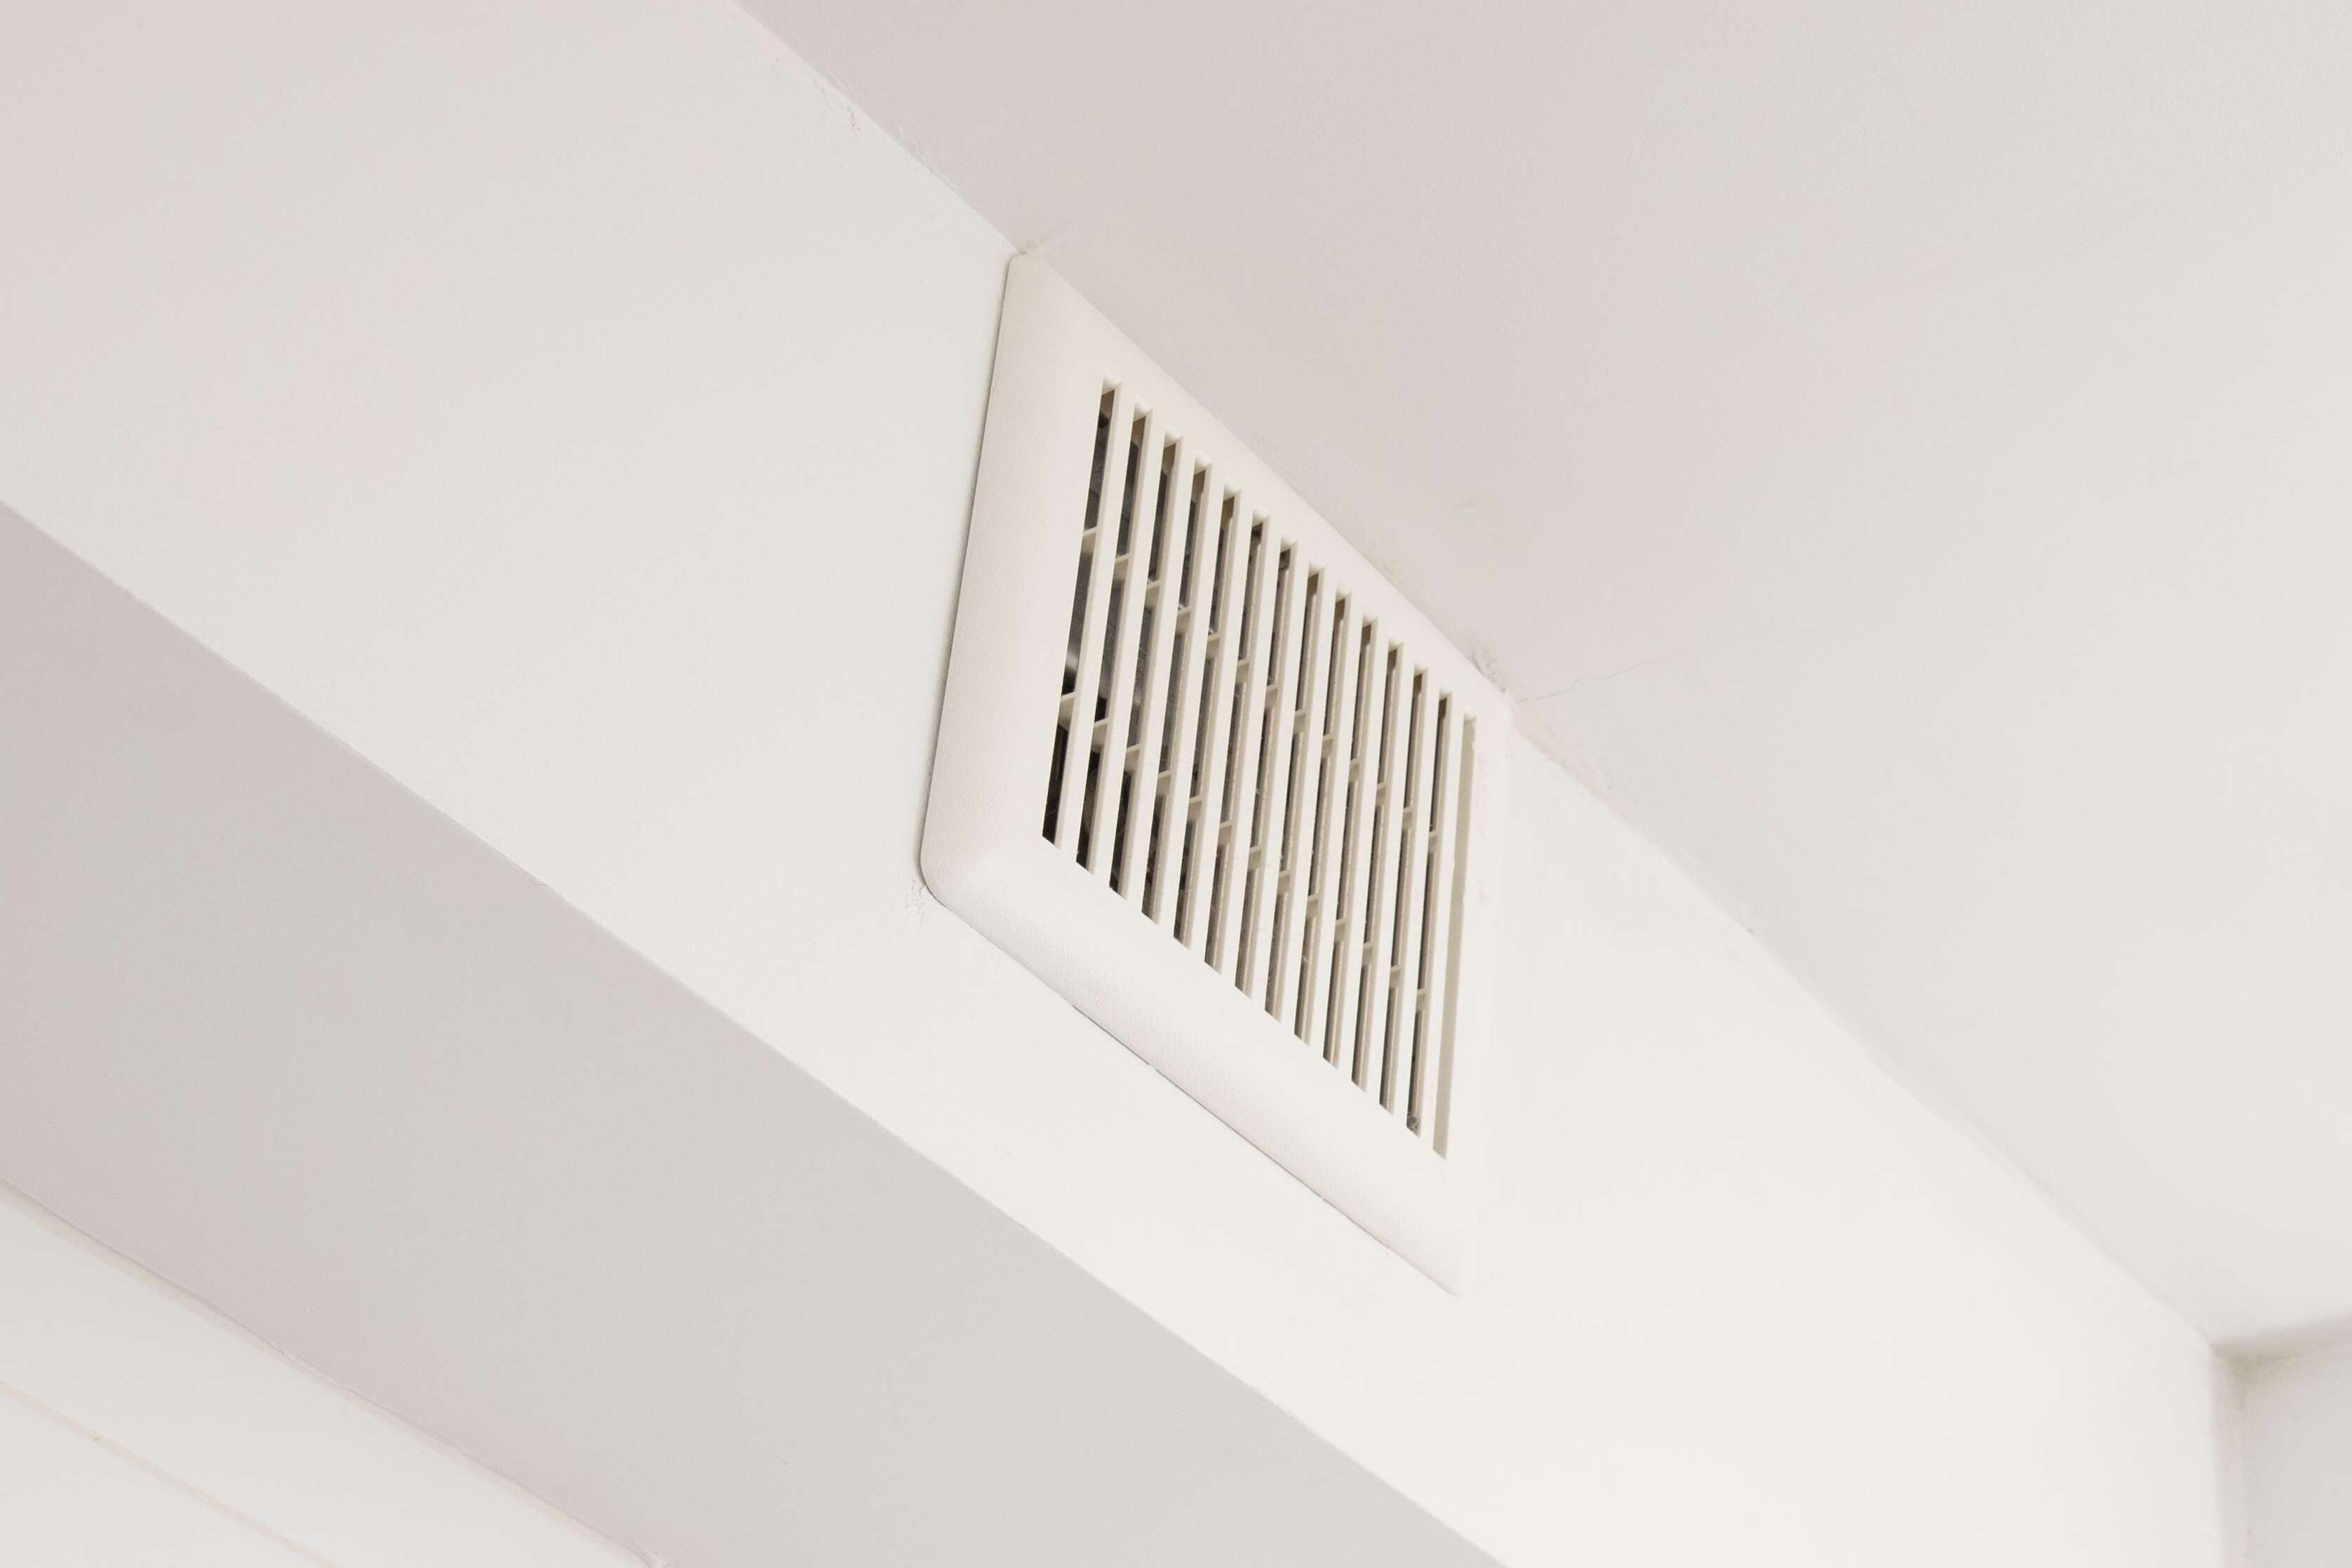
Step 2: Choose the Right Location for the Exhaust Fan
Selecting the optimal location for your bathroom exhaust fan is crucial to ensure its effectiveness in removing moisture and odors from the air. When determining the placement of the exhaust fan, several factors should be taken into consideration to maximize its performance.
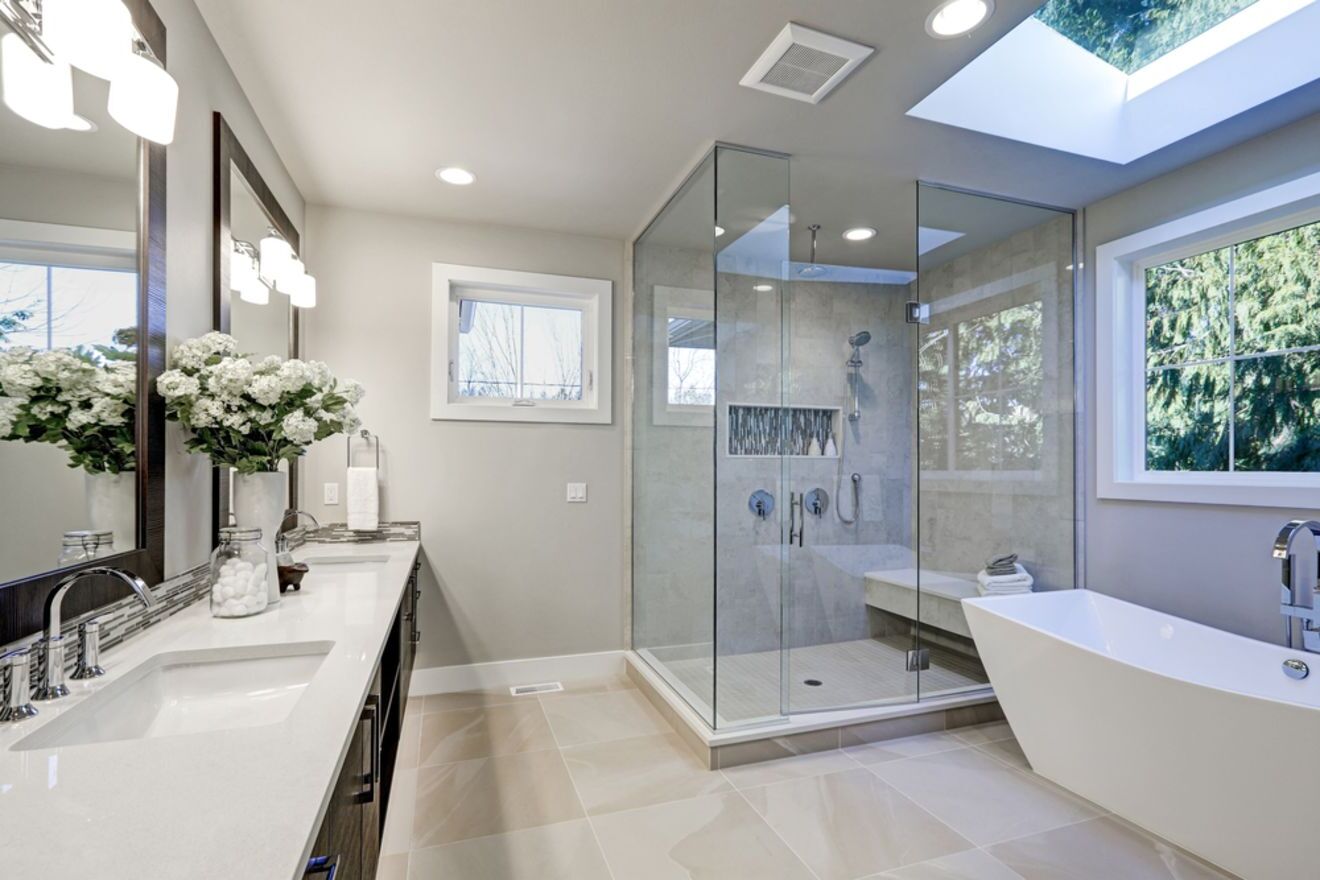
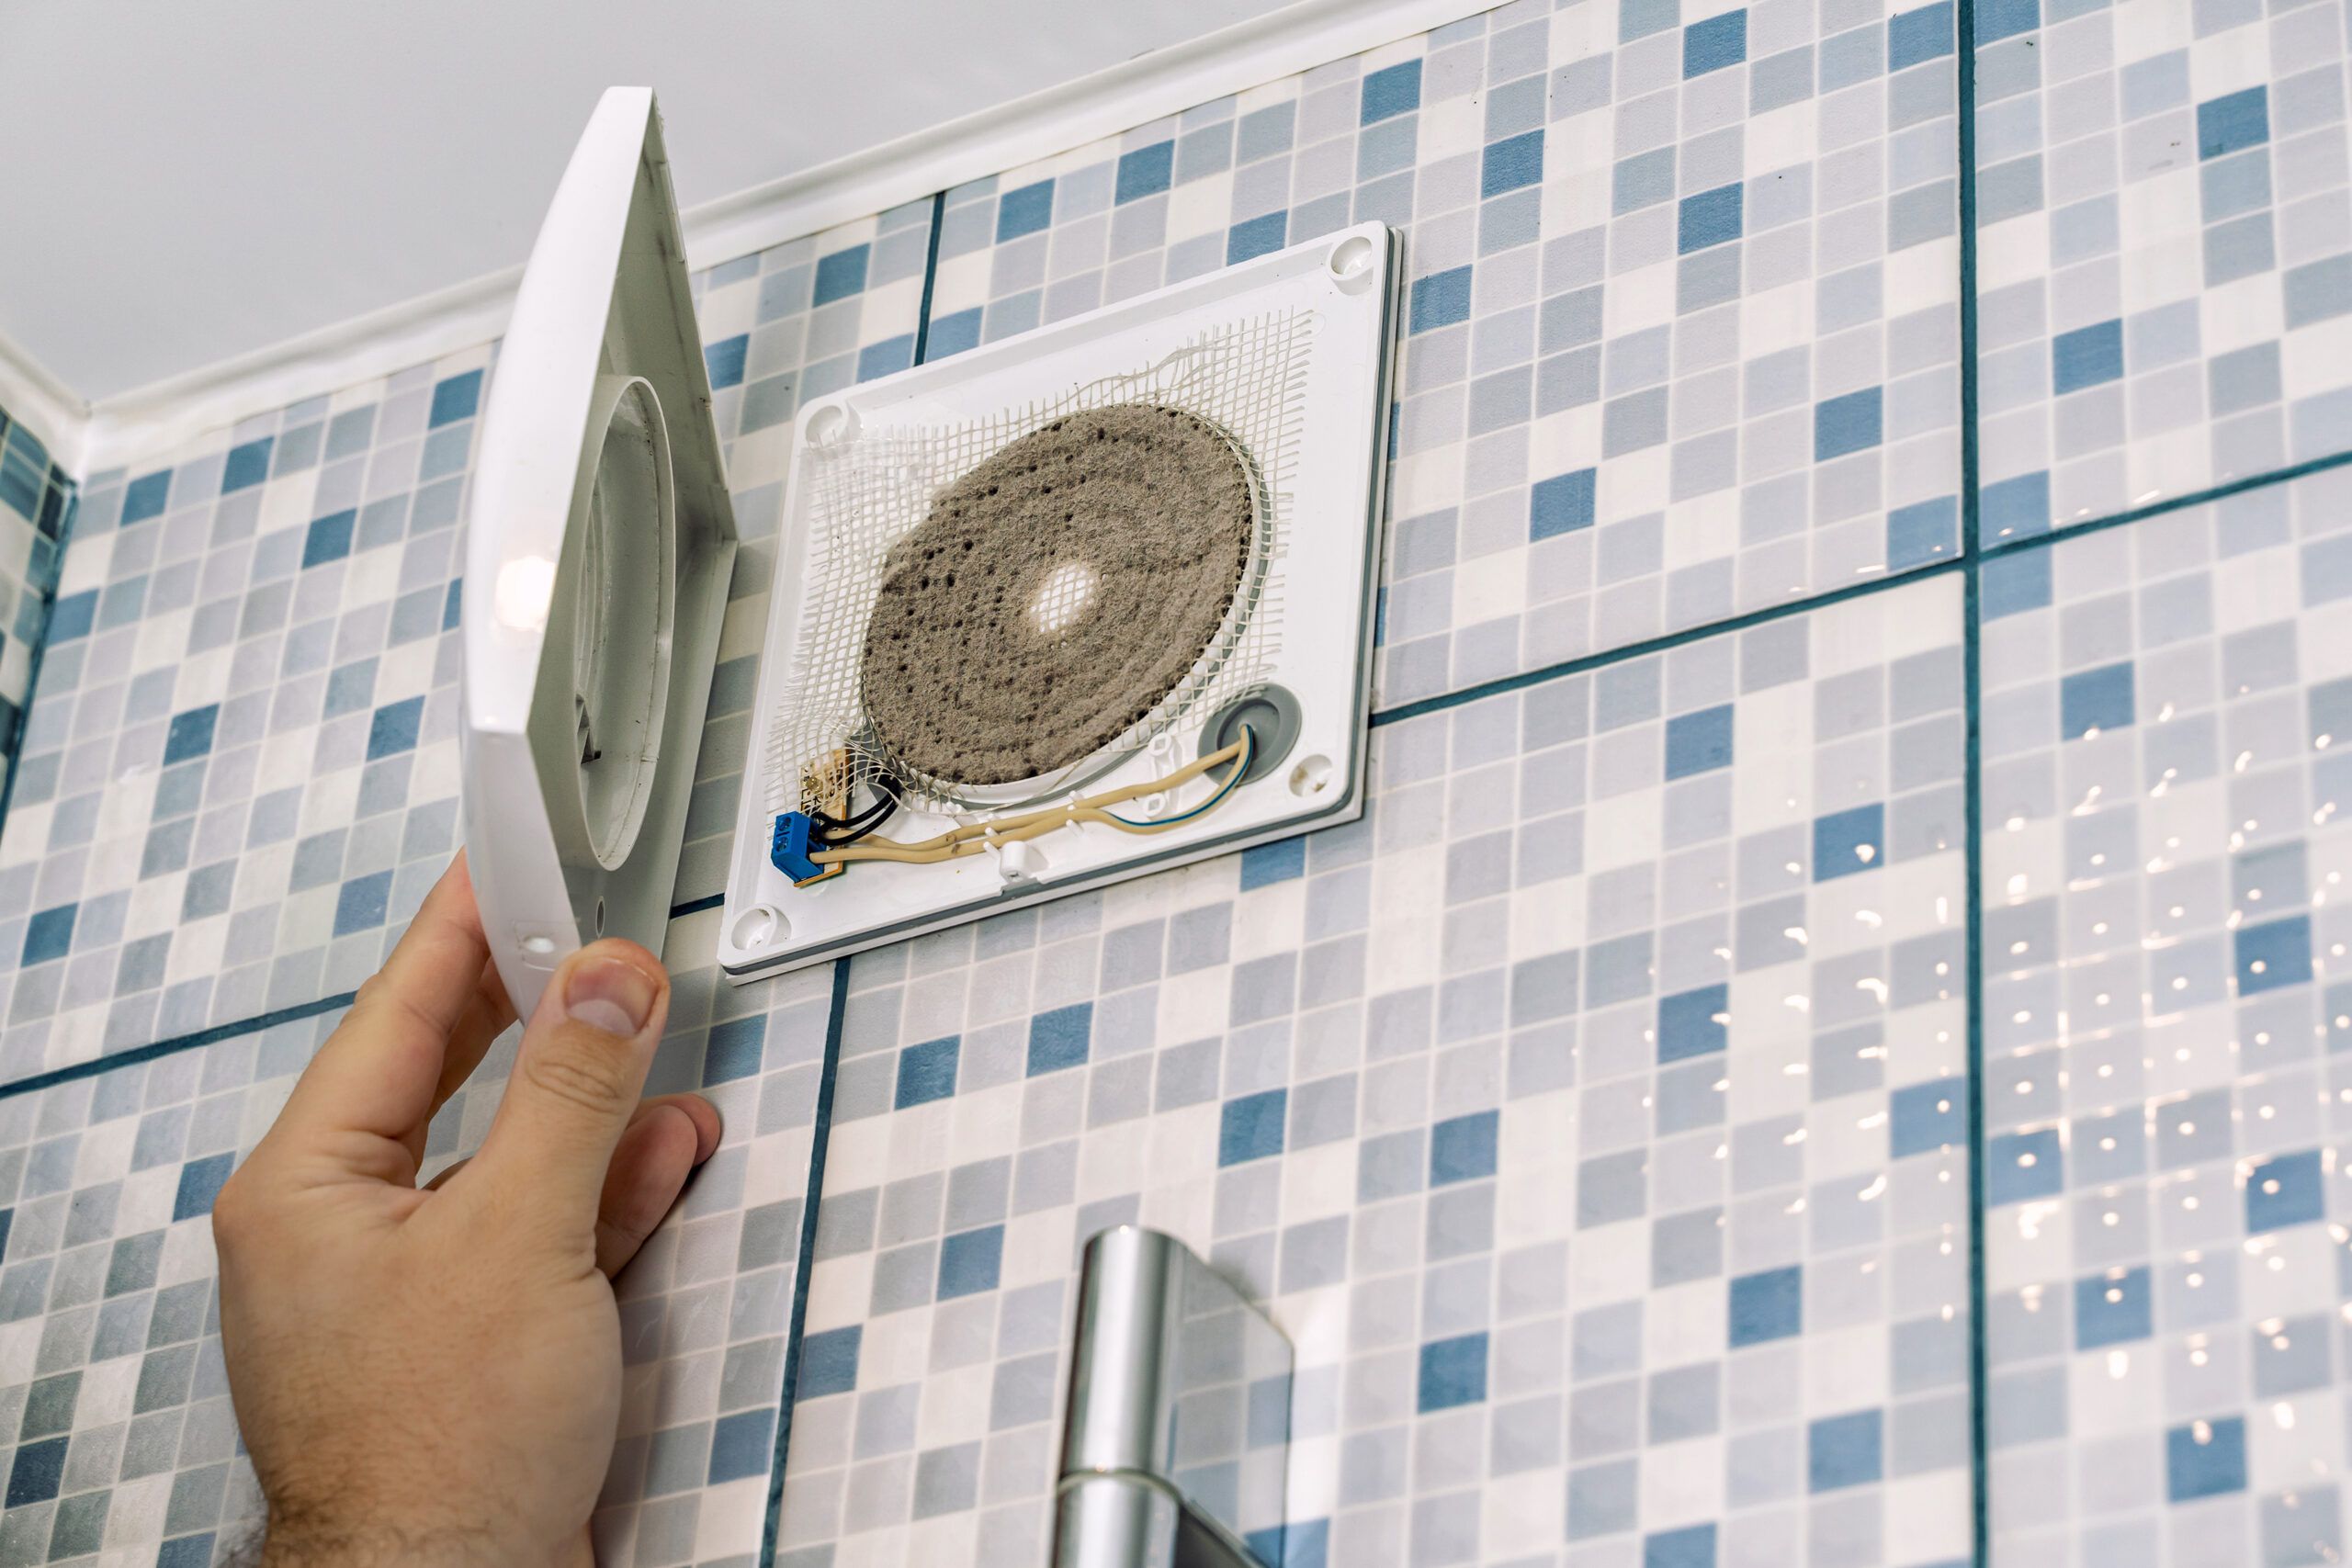
First and foremost, identify the area in your bathroom where moisture tends to accumulate the most. This is typically near the shower or bathtub, as these areas generate the highest levels of humidity during use. Placing the exhaust fan in close proximity to these moisture-prone zones will enable it to swiftly remove damp air, preventing the formation of mold and mildew while maintaining a comfortable environment.
Additionally, consider the proximity of the chosen location to an exterior wall or roof for venting purposes. The exhaust fan must have a clear pathway to expel the moist air outside, so positioning it near an external wall or roof will facilitate the installation of the ventilation duct and vent cap. This strategic placement ensures that the expelled air is efficiently directed out of the home, preventing it from lingering and causing potential damage.
Furthermore, take into account the structural elements of the ceiling when selecting the location for the exhaust fan. Be mindful of any electrical wiring, plumbing, or structural supports that may be concealed within the ceiling. Avoiding these obstructions will not only simplify the installation process but also minimize the risk of damaging essential components of your home's infrastructure.
Lastly, consider the aesthetic and functional aspects of the chosen location. The exhaust fan should be positioned in a manner that complements the overall design of the bathroom while providing optimal coverage for air circulation. By carefully assessing these factors, you can ensure that the exhaust fan is strategically placed to effectively fulfill its purpose without compromising the visual appeal of the space.
By thoughtfully evaluating these considerations, you can confidently determine the most suitable location for your bathroom exhaust fan. This proactive approach sets the stage for a successful installation, ensuring that the fan operates at its full potential, contributing to a healthier and more comfortable bathroom environment.
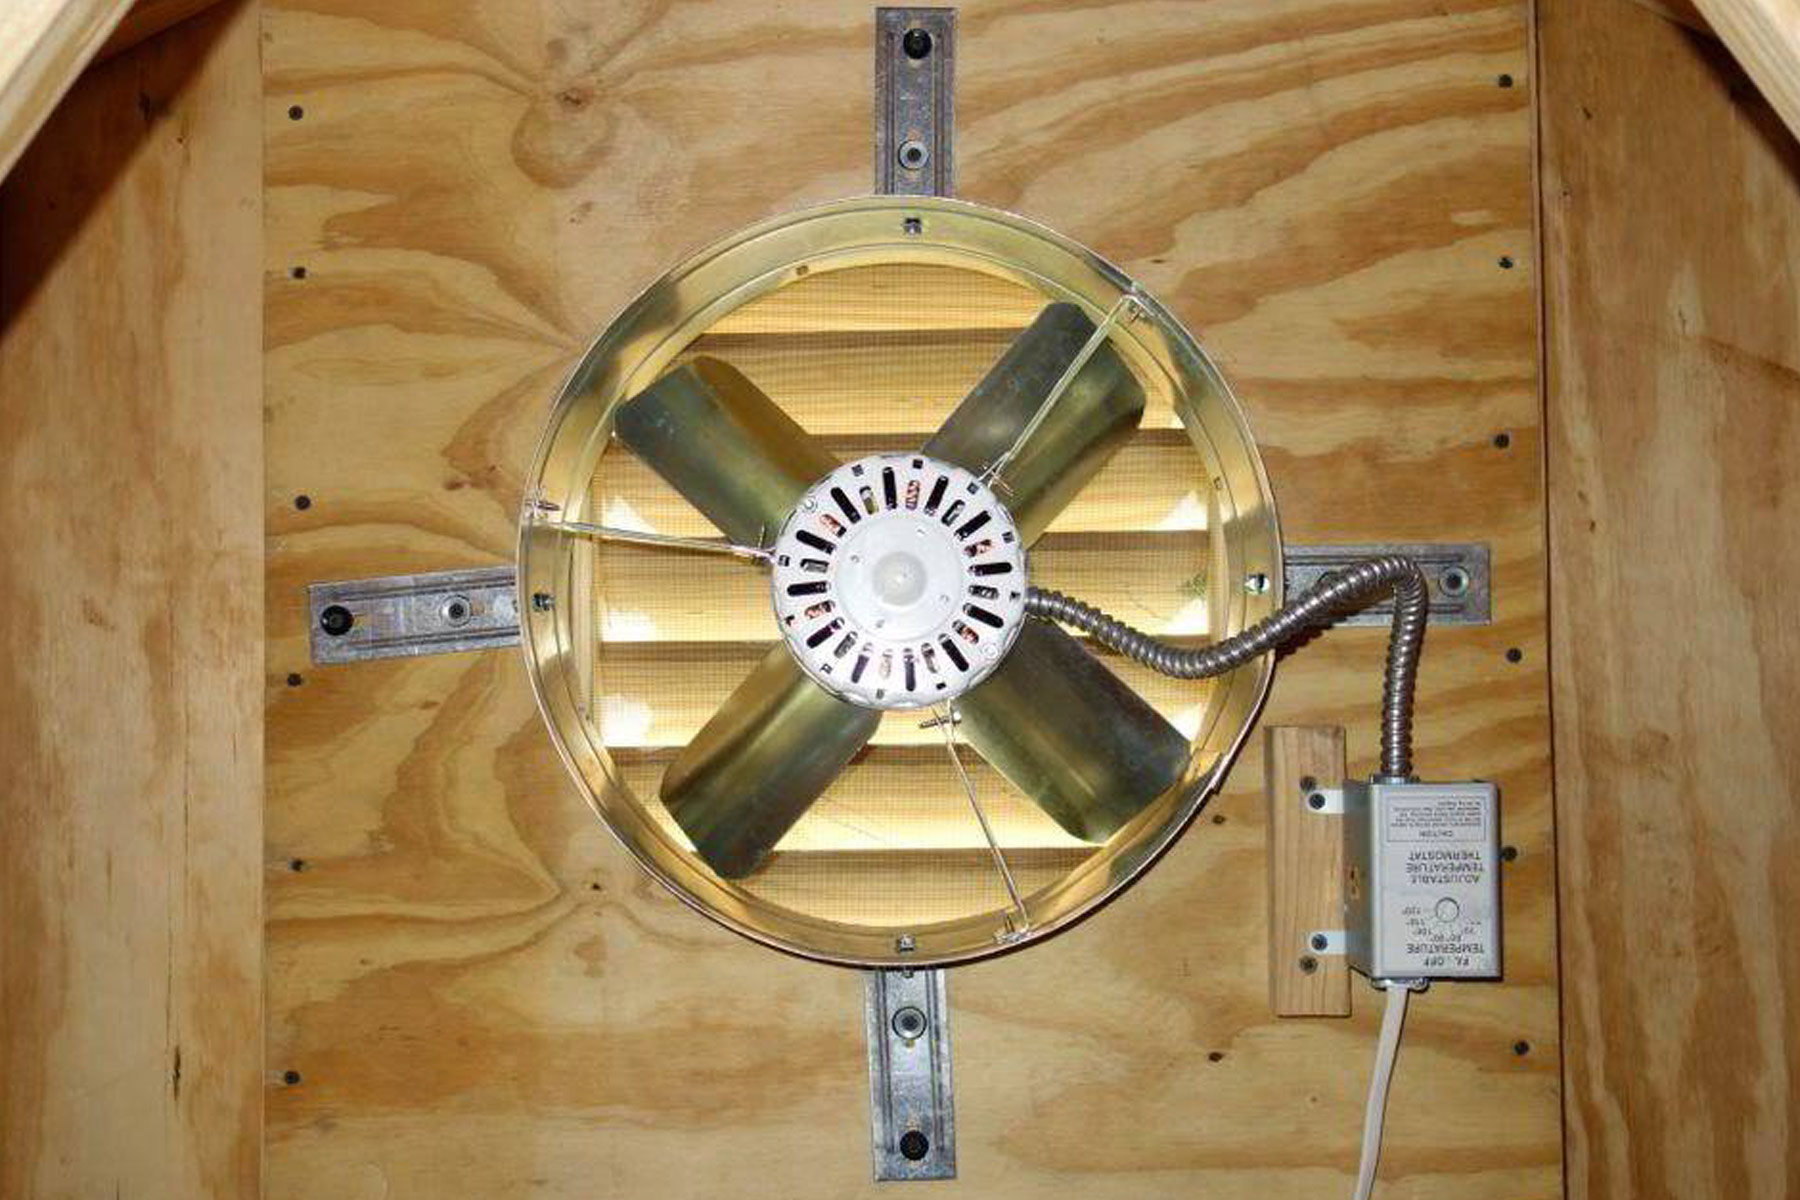
Read more: How To Install An Attic Exhaust Fan
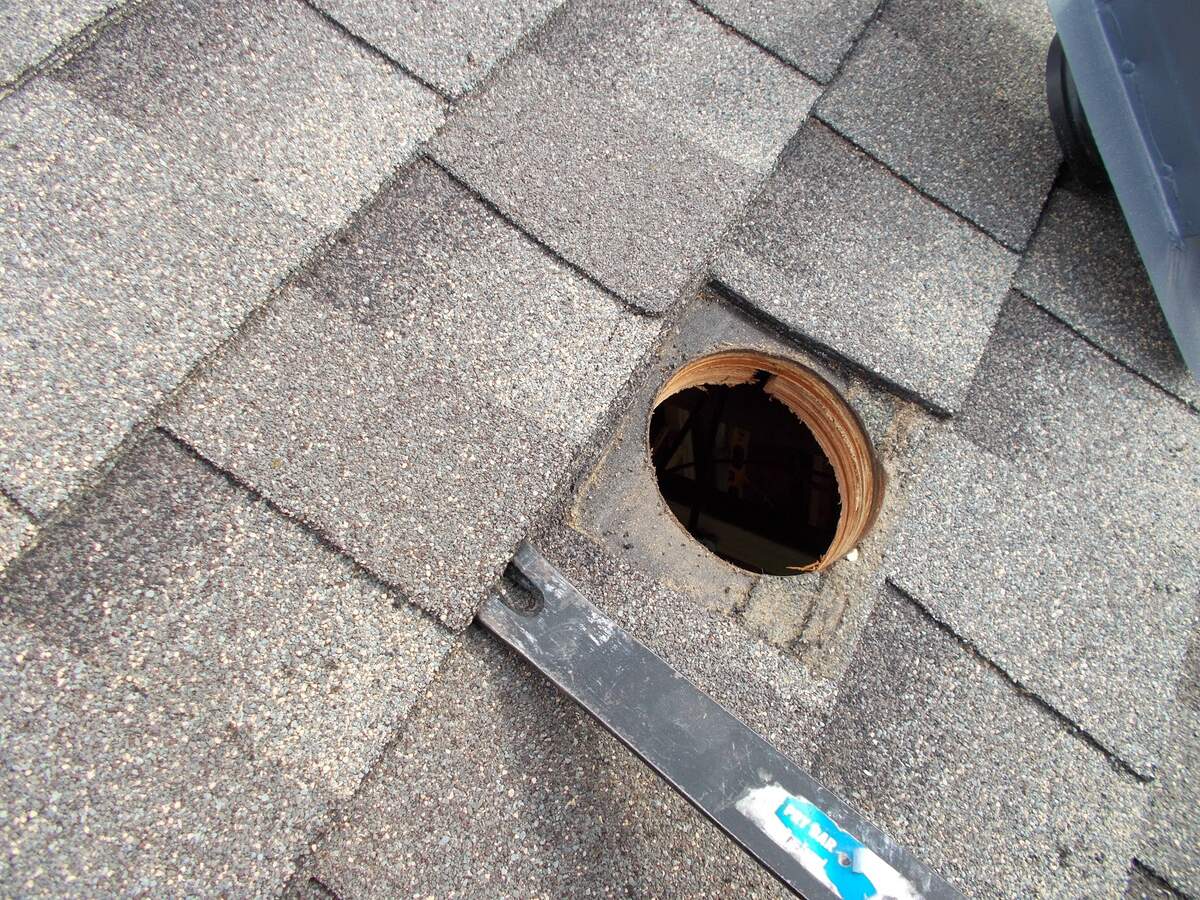
Step 3: Cut a Hole in the Ceiling
Cutting a hole in the ceiling is a critical step in the installation of a bathroom exhaust fan without attic access. This process requires precision and careful consideration to ensure that the opening accommodates the exhaust fan and facilitates the connection of the ventilation duct. Here's a detailed guide on how to execute this step effectively.
-
Measure and Mark: Begin by measuring the dimensions of the exhaust fan to determine the size of the hole needed in the ceiling. Use a measuring tape to mark the dimensions on the ceiling, ensuring that the location aligns with the previously chosen placement for the exhaust fan. Use a pencil to outline the cutting lines, creating a clear guide for the subsequent steps.
-
Prepare the Cutting Tool: If you're using a drywall saw or jigsaw, ensure that the blade is suitable for cutting through the ceiling material. If necessary, adjust the blade to the appropriate length and ensure that it is securely attached to the saw. This preparation will facilitate smooth and accurate cutting, minimizing the risk of damage to the surrounding ceiling area.
-
Cut the Opening: With the marked lines as your guide, carefully use the drywall saw or jigsaw to cut along the perimeter of the outlined area. Exercise caution to maintain a steady hand and follow the marked lines accurately. As you progress through the cutting process, periodically check the dimensions to ensure that the hole aligns with the specifications required for the exhaust fan.
-
Clear the Opening: Once the initial cut is complete, carefully remove the cut portion of the ceiling material to reveal the opening. Use a utility knife to trim any rough edges and ensure that the perimeter of the hole is smooth and even. This meticulous approach will create a clean and precise opening for the subsequent installation steps.
-
Inspect the Interior: After cutting the hole, take a moment to inspect the interior of the ceiling. Ensure that there are no obstructions, such as electrical wiring or structural components, that may impede the installation process. Address any potential obstacles before proceeding to the next step to avoid complications during the installation of the exhaust fan.
By following these detailed steps, you can effectively cut a hole in the ceiling to accommodate the installation of the bathroom exhaust fan. This meticulous approach sets the stage for the seamless integration of the fan into the ceiling, paving the way for the subsequent stages of the installation process.
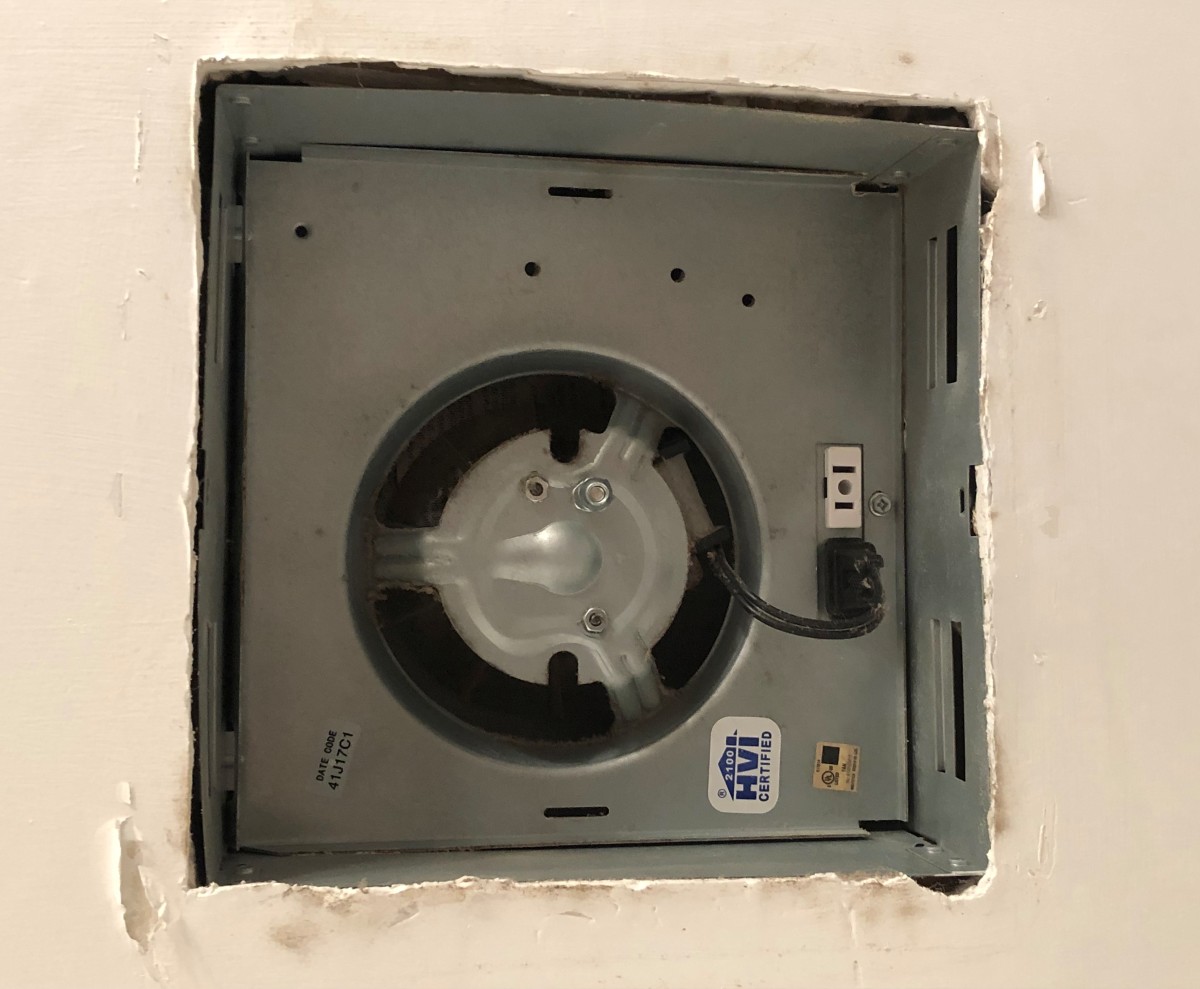
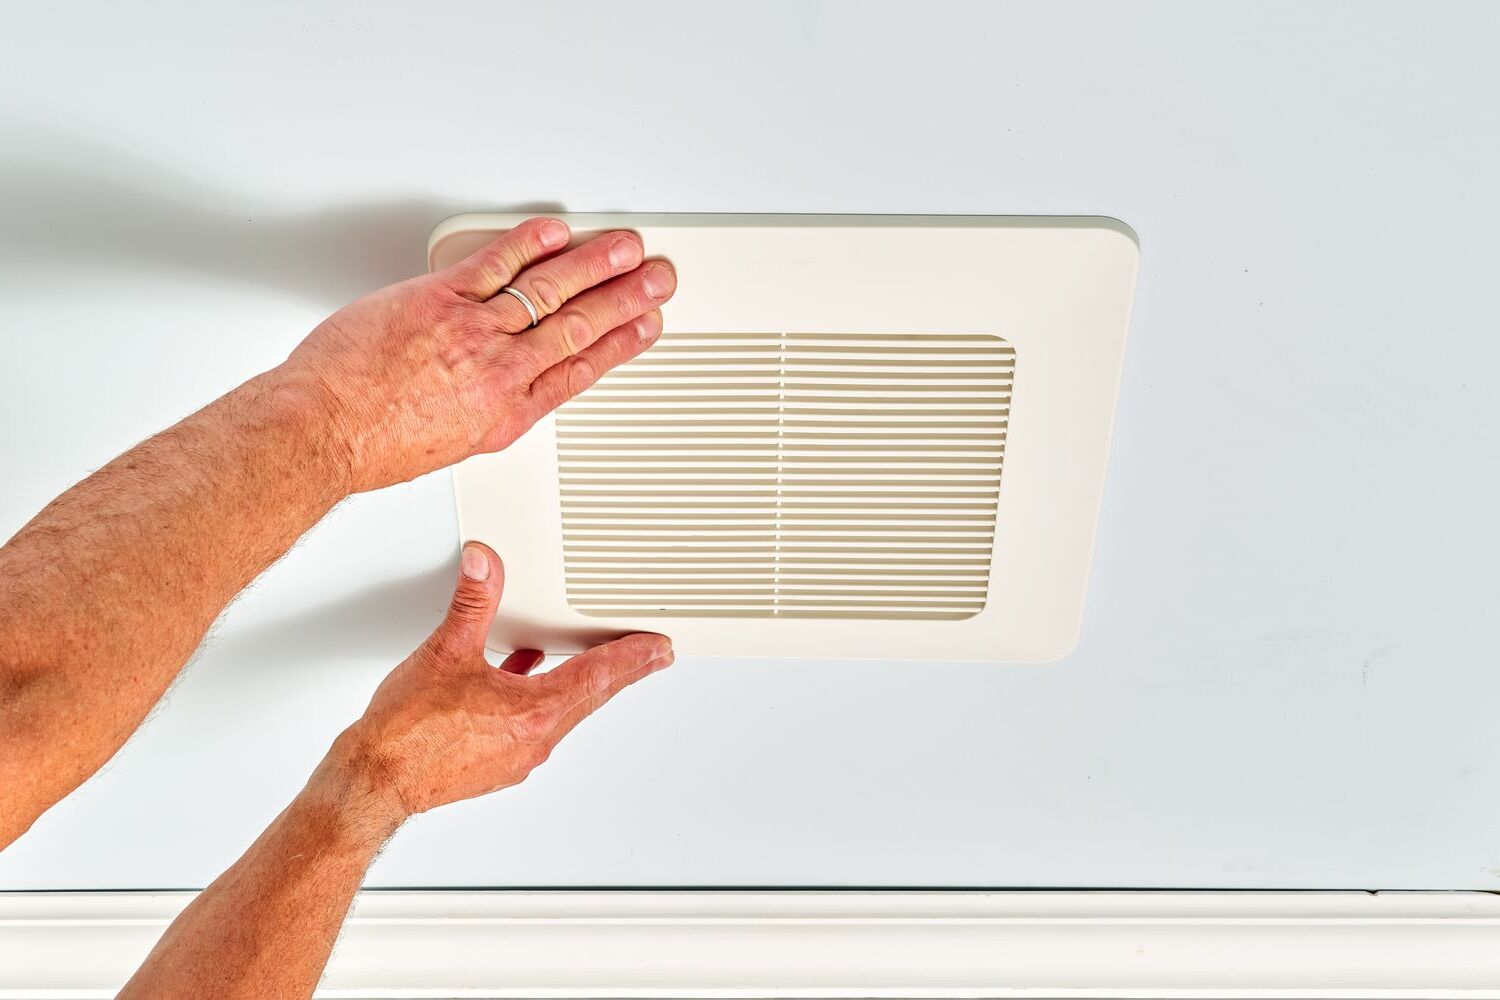
Step 4: Install the Exhaust Fan
With the hole in the ceiling prepared, it's time to proceed with the installation of the bathroom exhaust fan. This step involves securing the fan in place, connecting the ventilation duct, and ensuring that it functions optimally to effectively remove moisture and maintain air quality within the bathroom.
-
Position the Exhaust Fan: Carefully place the exhaust fan into the prepared hole in the ceiling, ensuring that it fits snugly and aligns with the dimensions of the opening. Take note of any mounting brackets or screws that may be required to secure the fan in place. Position the fan securely, readying it for the next installation steps.
-
Secure the Exhaust Fan: If the exhaust fan is equipped with mounting brackets, use screws or nails to secure it to the ceiling. Ensure that the fan is firmly anchored and does not wobble or shift. This secure installation is essential to prevent any potential movement or instability during operation.
-
Connect the Ventilation Duct: Once the exhaust fan is securely in place, connect the ventilation duct to the fan's exhaust port. The duct should extend from the fan to the exterior of the home, providing a clear pathway for the expelled air to exit. Use duct tape or foil tape to seal the connection between the duct and the exhaust port, preventing air leaks and ensuring efficient ventilation.
-
Install the Vent Cap: If the ventilation duct extends through an exterior wall or roof, install a vent cap to cover the duct's exterior end. The vent cap serves as a protective barrier, preventing debris, pests, and inclement weather from entering the duct while allowing the expelled air to exit freely. Secure the vent cap in place, ensuring that it is firmly attached and provides adequate protection.
-
Test the Exhaust Fan: Before completing the installation, test the exhaust fan to verify its functionality. Turn on the fan and observe its operation, ensuring that it effectively removes moist air from the bathroom. Listen for any unusual noises or vibrations that may indicate installation issues. Additionally, check the airflow at the exterior vent to confirm that the expelled air is being directed outside as intended.
By following these detailed steps, you can successfully install the bathroom exhaust fan without attic access, enhancing the ventilation and air quality within your bathroom. This crucial installation ensures that excess moisture and odors are efficiently removed, contributing to a healthier and more comfortable living environment.
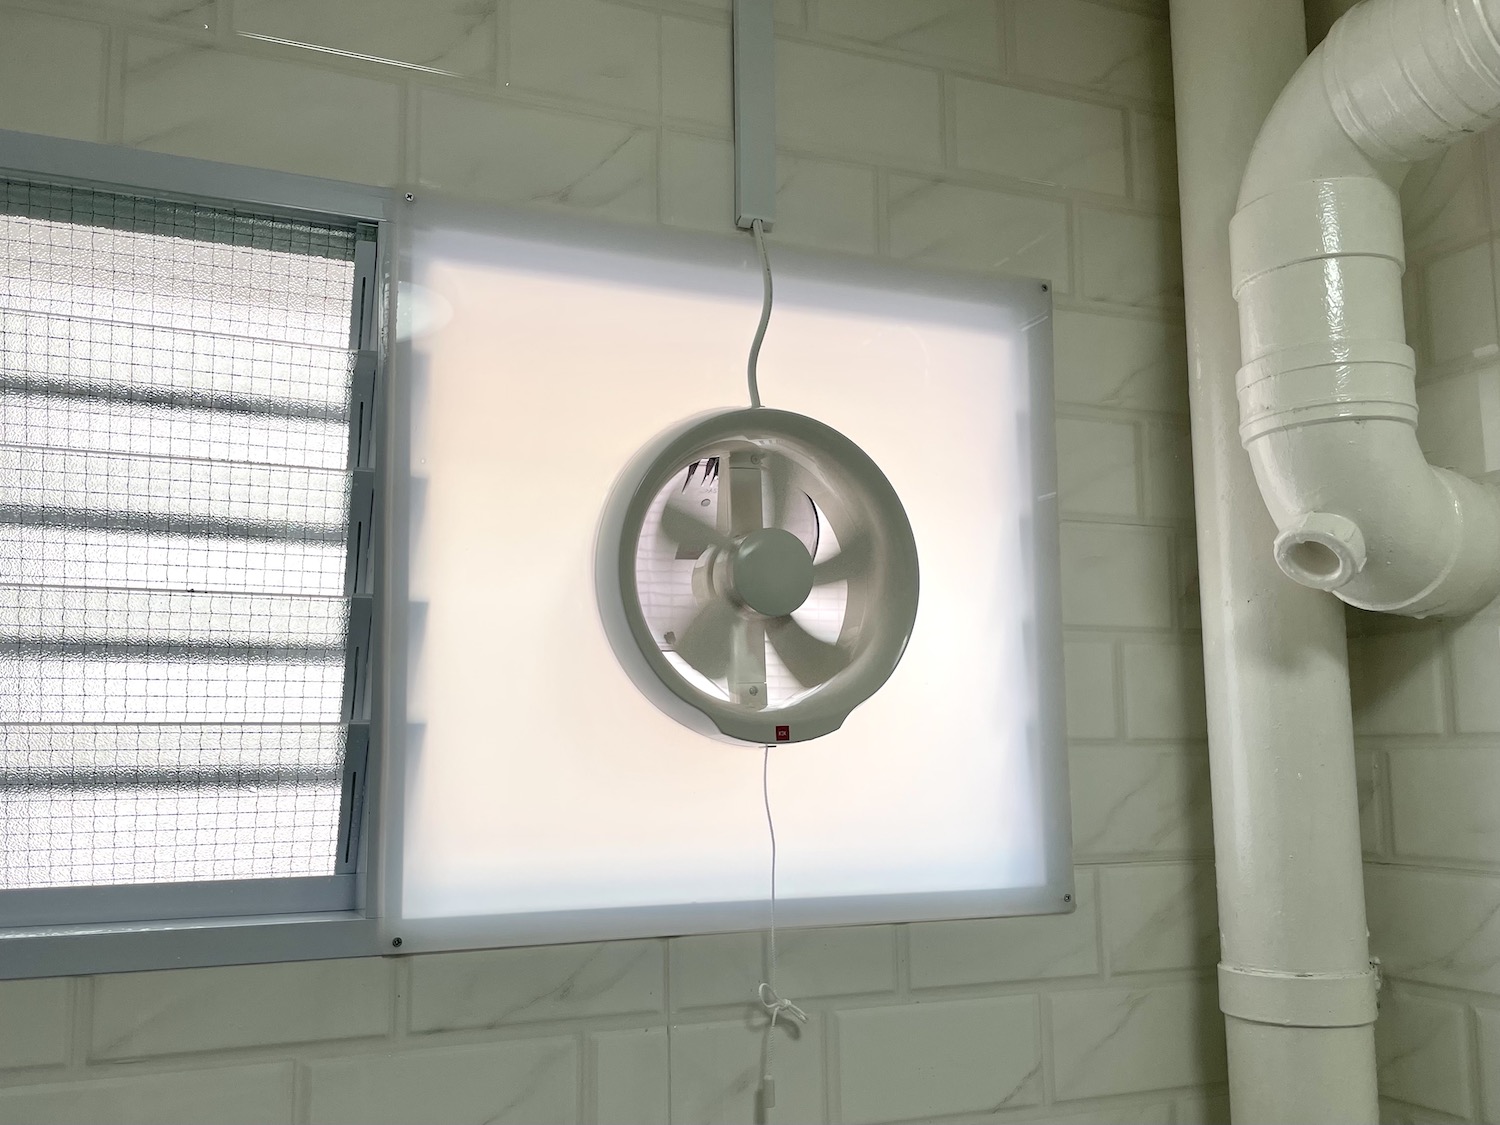
Consider installing a through-the-wall exhaust fan if you don’t have attic access. Choose a location on an exterior wall, cut a hole, and install the fan according to the manufacturer’s instructions.
Step 5: Connect the Wiring
Connecting the wiring for the bathroom exhaust fan is a pivotal step in the installation process, as it ensures that the fan receives the necessary electrical power to operate effectively. Proper wiring connection is essential for the safe and efficient functioning of the exhaust fan, and it requires careful attention to detail and adherence to electrical safety standards.
Before initiating the wiring connection, it is imperative to turn off the power supply to the designated circuit at the electrical panel to prevent any electrical hazards. Once the power is safely disconnected, carefully remove the electrical cover plate from the exhaust fan to access the wiring terminals.
The exhaust fan will typically have wiring terminals labeled for connection to the electrical supply. These terminals may include the hot (black), neutral (white), and ground (green or bare copper) wires. It is crucial to match the corresponding wires from the electrical supply to the appropriate terminals on the fan.
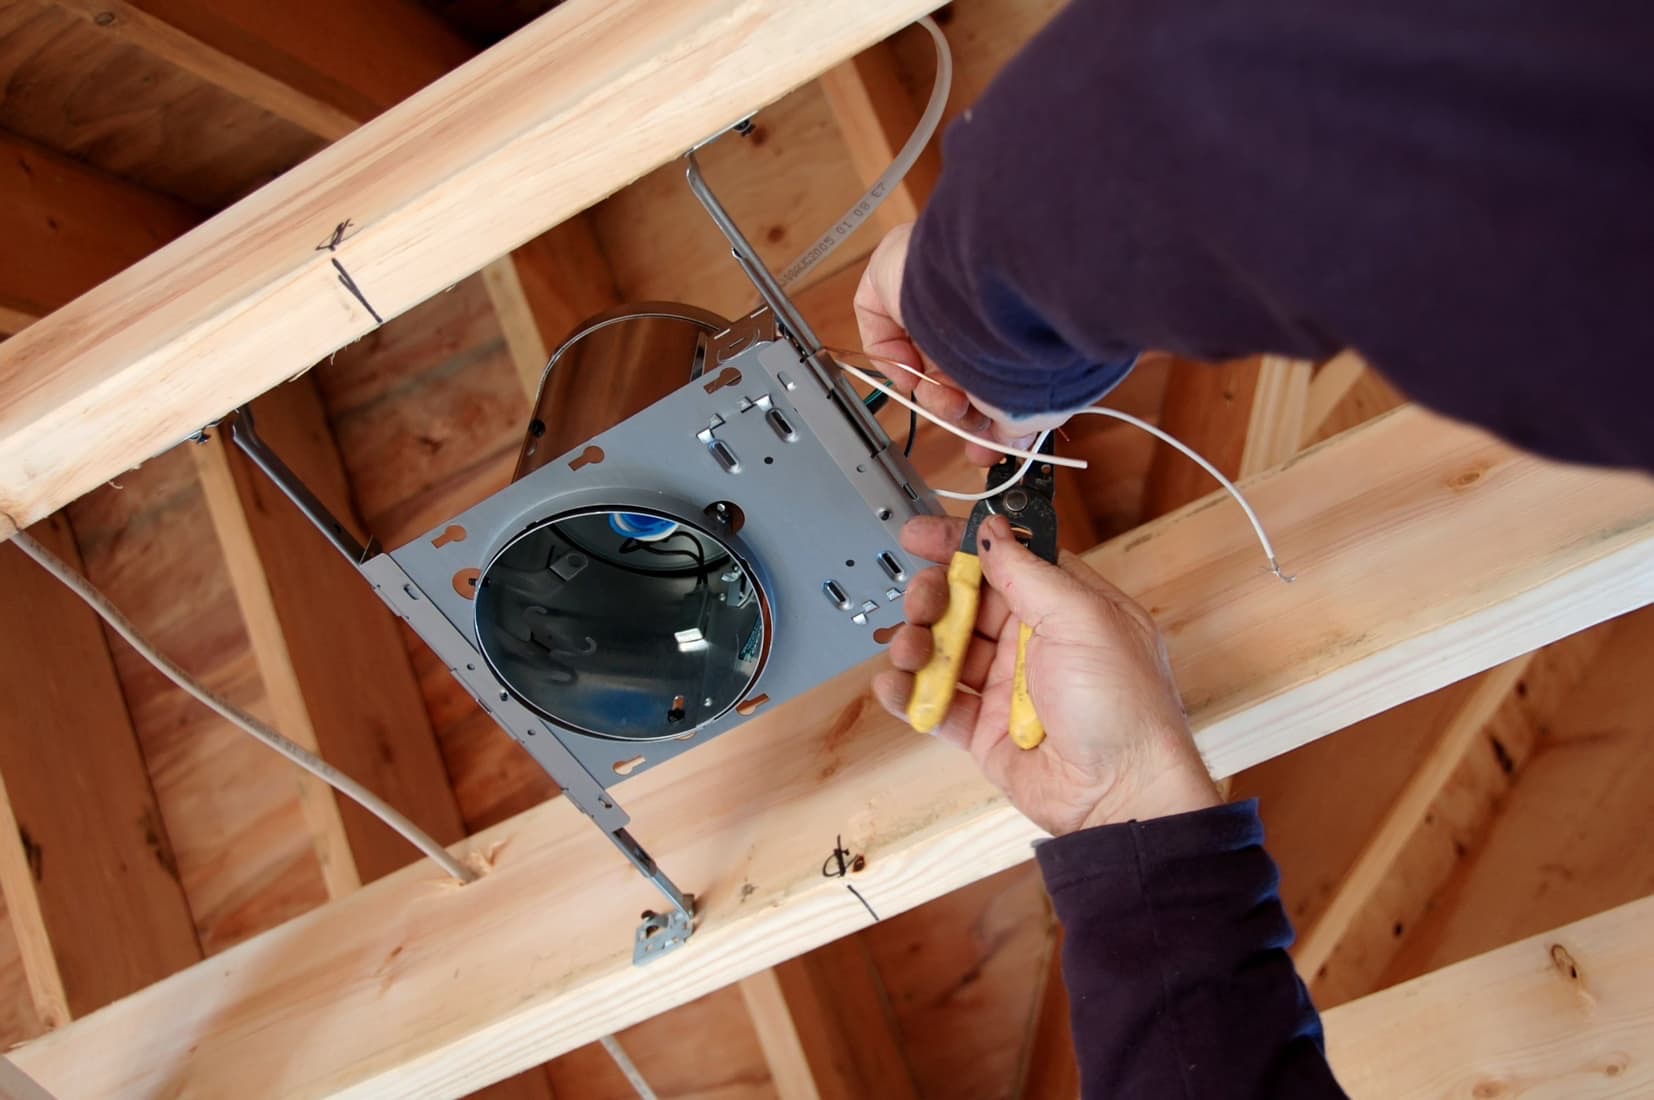
Begin by identifying the hot wire (usually black) and the neutral wire (usually white) from the electrical supply. Using wire strippers, carefully strip a small portion of insulation from the ends of these wires to expose the conductive metal. Take note of any existing insulation or wire sheathing and ensure that the exposed portion is of the appropriate length for secure connection.
With the hot and neutral wires prepared, proceed to connect them to the corresponding terminals on the exhaust fan. Securely fasten the hot wire to the designated hot terminal and the neutral wire to the neutral terminal, ensuring a tight and reliable connection. If the exhaust fan includes a ground wire, connect it to the grounding terminal or the metal housing of the fan to provide a path for electrical safety.
Once the wiring connections are made, carefully tuck the wires into the electrical box within the fan housing, ensuring that they are neatly arranged and do not obstruct the fan's components. Replace the electrical cover plate and secure it in place to encapsulate the wiring and provide a protective barrier.
After completing the wiring connections, restore the power supply at the electrical panel and test the exhaust fan to ensure that it operates as intended. Verify that the fan functions smoothly and effectively removes moist air from the bathroom, indicating successful wiring connection and electrical operation.
By meticulously connecting the wiring for the bathroom exhaust fan, you can ensure that the fan receives the necessary electrical power for optimal performance while upholding electrical safety standards. This meticulous approach sets the stage for the seamless integration of the fan into the bathroom environment, contributing to improved air quality and comfort.
Step 6: Test the Exhaust Fan
Testing the exhaust fan is a crucial step in the installation process, as it allows you to verify its functionality and ensure that it effectively removes moist air from the bathroom. By conducting a thorough test, you can identify any potential issues and make any necessary adjustments before completing the installation. Here's a detailed guide on how to test the exhaust fan and confirm its optimal operation.
Begin by turning on the exhaust fan and observing its performance. Listen for any unusual noises or vibrations that may indicate installation issues. A properly installed exhaust fan should operate quietly and smoothly, without any disruptive sounds or irregular movements. If you notice any unusual noises or vibrations, it may indicate that the fan is not securely installed or that there are obstructions affecting its operation.
While the fan is running, assess the airflow within the bathroom. Stand near the exhaust fan and feel the airflow to ensure that it is effectively removing moist air from the space. Additionally, check the airflow at the exterior vent to confirm that the expelled air is being directed outside as intended. Adequate airflow at the exterior vent indicates that the ventilation duct is clear and unobstructed, allowing the moist air to exit the home efficiently.
To further evaluate the fan's performance, consider conducting a moisture test. Run the exhaust fan while taking a hot shower to generate steam and moisture within the bathroom. Observe how effectively the fan removes the moisture-laden air, preventing it from lingering and causing condensation on surfaces. A well-functioning exhaust fan should swiftly remove the excess moisture, contributing to a drier and more comfortable environment.
If the exhaust fan includes adjustable settings, such as speed or humidity sensors, test these features to ensure that they operate as intended. Adjust the settings and observe how the fan responds, confirming that it adapts to varying ventilation needs and maintains optimal air quality within the bathroom.
By conducting a comprehensive test of the exhaust fan, you can ensure that it operates at its full potential, effectively removing moist air and maintaining a comfortable environment within the bathroom. This proactive approach allows you to address any potential issues and make necessary adjustments, ensuring that the exhaust fan contributes to improved air quality and a healthier living space.
Conclusion
In conclusion, the installation of a bathroom exhaust fan without attic access is a manageable yet essential project that significantly contributes to the overall air quality and comfort within your home. By following the comprehensive steps outlined in this guide, you can successfully enhance the ventilation in your bathroom, effectively removing excess moisture and odors while preventing the growth of mold and mildew.
Throughout the installation process, careful consideration of the location for the exhaust fan, precise cutting of the ceiling hole, and meticulous wiring and testing procedures are paramount. Selecting the optimal location for the exhaust fan ensures that it effectively targets moisture-prone areas, while also considering the structural and aesthetic aspects of the bathroom. The precise cutting of the ceiling hole facilitates the seamless integration of the exhaust fan, providing a clear pathway for the ventilation duct and vent cap. Additionally, the meticulous wiring and testing procedures ensure that the exhaust fan operates safely and efficiently, contributing to a healthier and more comfortable bathroom environment.
By gathering the necessary tools and materials and following the step-by-step instructions, you can successfully complete the installation of a bathroom exhaust fan without attic access, transforming your bathroom into a well-ventilated oasis. The strategic placement of the exhaust fan, secure installation, and thorough testing culminate in an effective ventilation system that enhances the overall functionality and comfort of your bathroom.
Ultimately, the installation of a bathroom exhaust fan without attic access is a worthwhile investment in your home, promoting a healthier living environment and preventing potential issues associated with excess moisture and poor air circulation. With the knowledge and confidence gained from this guide, you can embark on this project with the assurance that your efforts will result in a more comfortable and enjoyable bathroom space for you and your family.
Incorporating a bathroom exhaust fan without attic access into your home improvement endeavors not only enhances the functionality of your bathroom but also contributes to the overall well-being of your household. With a well-ventilated and moisture-free bathroom, you can enjoy a cleaner, more comfortable living space, free from the concerns of mold, mildew, and stagnant air.
Frequently Asked Questions about How To Install A Bathroom Exhaust Fan Without Attic Access
Was this page helpful?
At Storables.com, we guarantee accurate and reliable information. Our content, validated by Expert Board Contributors, is crafted following stringent Editorial Policies. We're committed to providing you with well-researched, expert-backed insights for all your informational needs.


0 thoughts on “How To Install A Bathroom Exhaust Fan Without Attic Access”