Home>Furniture & Design>Bathroom Accessories>How To Remove Bathtub Drain Flange
Bathroom Accessories
How To Remove Bathtub Drain Flange
Modified: August 17, 2024
Learn how to remove a bathtub drain flange easily with our step-by-step guide. Find the best bathroom accessories for your project.
(Many of the links in this article redirect to a specific reviewed product. Your purchase of these products through affiliate links helps to generate commission for Storables.com, at no extra cost. Learn more)
Introduction
Removing a bathtub drain flange may seem like a daunting task, but with the right tools and a clear understanding of the process, it can be a manageable DIY project. Over time, the drain flange may become corroded or develop leaks, necessitating its removal for repair or replacement. Whether you're looking to upgrade your bathroom or simply address a persistent drainage issue, knowing how to remove the bathtub drain flange is a valuable skill for any homeowner.
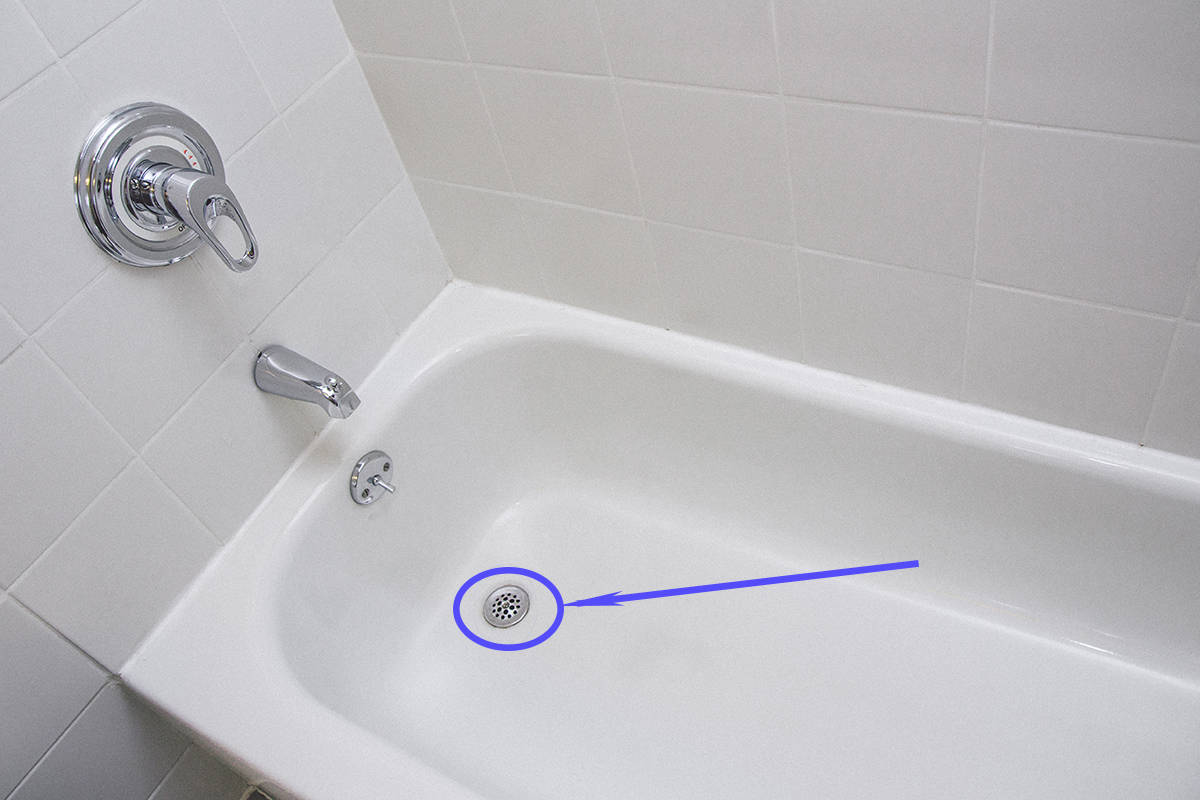
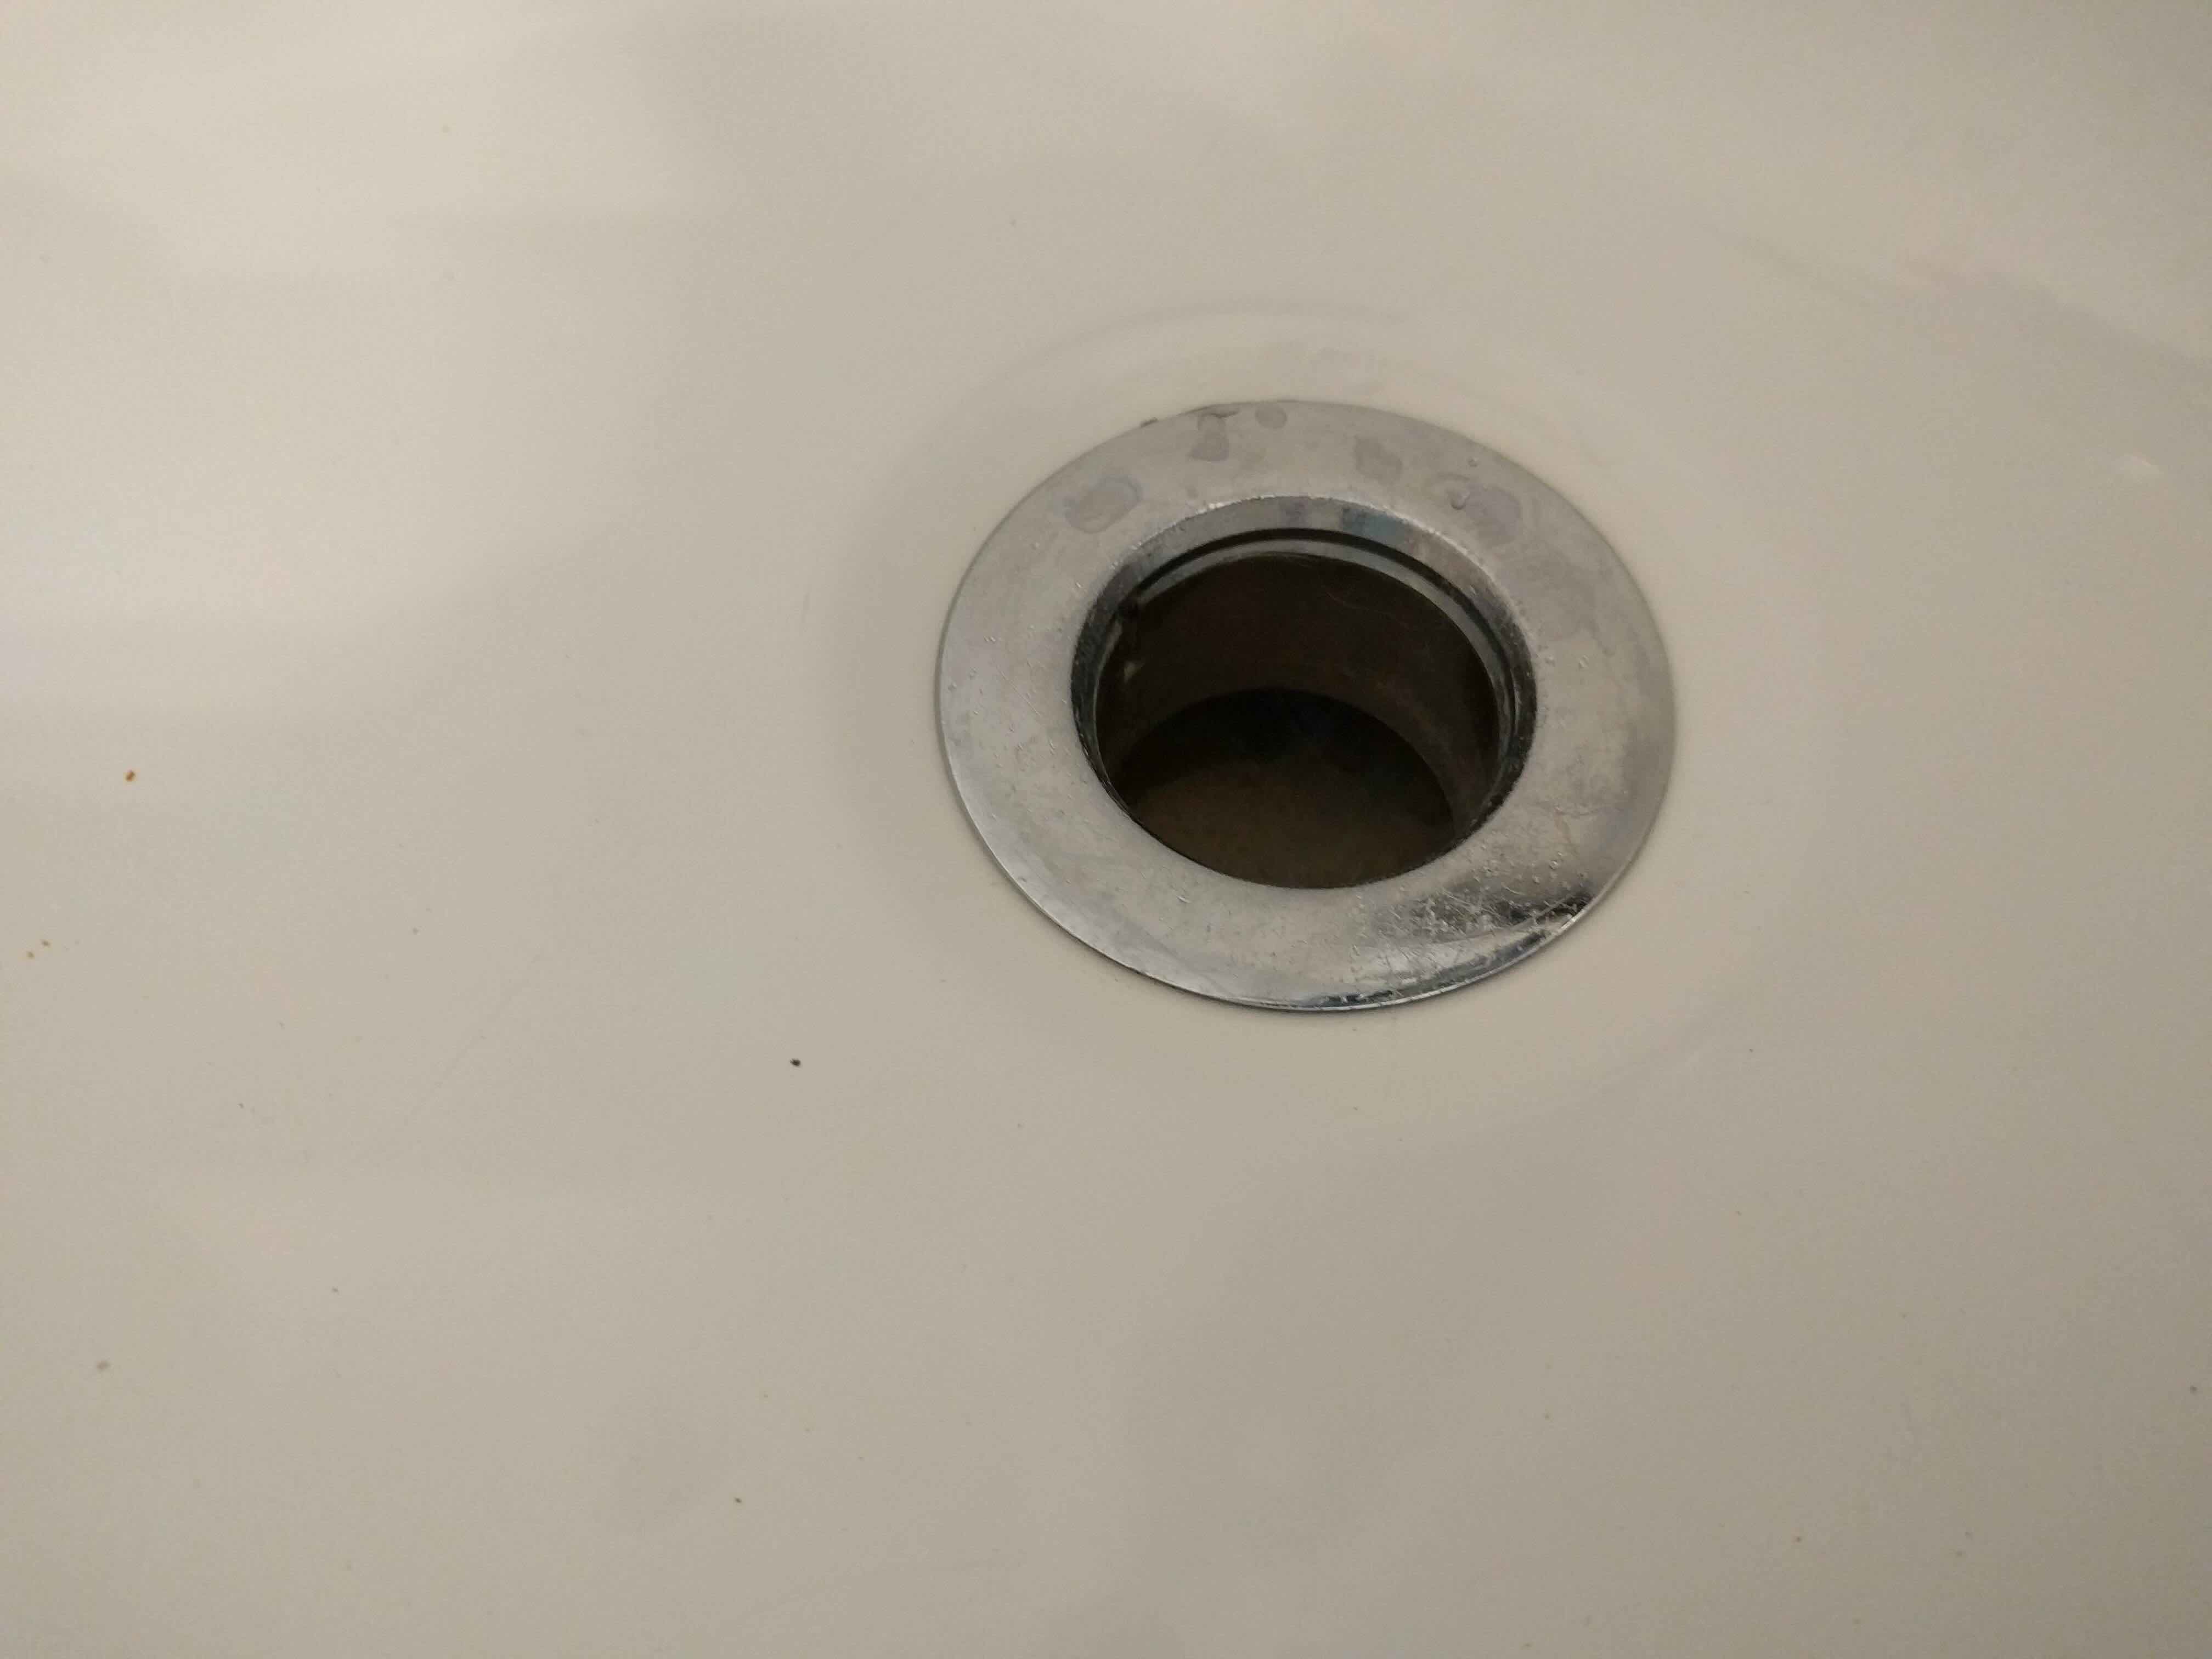
Understanding the anatomy of your bathtub drain system is crucial before embarking on this endeavor. The drain flange is the visible portion of the drain assembly, typically located just below the stopper. It serves as a cover for the drain opening and is secured in place by a connecting pipe beneath the tub. By removing the drain flange, you gain access to the underlying components, allowing for maintenance, repair, or replacement as needed.
In this comprehensive guide, we will walk you through the step-by-step process of removing the bathtub drain flange. From gathering the necessary tools and materials to executing each stage with precision, you'll gain the confidence and know-how to tackle this project with ease. Whether you're a seasoned DIY enthusiast or a novice homeowner eager to learn new skills, this guide will equip you with the knowledge to successfully remove and, if necessary, replace your bathtub drain flange.
By following these instructions, you can save on costly professional services and take pride in maintaining your home. With a bit of patience and attention to detail, you'll soon have the satisfaction of a smoothly functioning bathtub drain system. So, let's roll up our sleeves and delve into the process of removing the bathtub drain flange, empowering you to take charge of your home maintenance needs.
Key Takeaways:
- Removing a bathtub drain flange is a manageable DIY project that empowers homeowners to maintain their bathroom. With the right tools and careful steps, it’s possible to address drainage issues and upgrade the bathtub with confidence.
- Thoroughly cleaning the drain area after removing the flange ensures optimal functionality and prepares the space for maintenance or the installation of a new flange. This meticulous process promotes a clean and reliable bathtub drain system.
Read more: How To Remove Drain Plug In Bathtub
Tools and Materials Needed
Before embarking on the task of removing the bathtub drain flange, it's essential to gather the necessary tools and materials to ensure a smooth and efficient process. Here's a comprehensive list of items you'll need:
Tools:
- Screwdriver Set: A set of screwdrivers, including both flathead and Phillips head varieties, will be essential for loosening and removing screws or fasteners securing the drain flange.
- Adjustable Pliers: These will come in handy for gripping and turning the drain flange, especially if it's tightly secured.
- Plumber's Putty Knife: This tool will aid in prying and scraping off old plumber's putty or silicone sealant around the drain flange.
- Tub Drain Extractor Tool: If the drain flange is stubbornly stuck, a specialized tub drain extractor tool can provide the necessary leverage to loosen and remove it without damaging the surrounding surfaces.
- Safety Glasses and Gloves: It's crucial to protect your eyes and hands while working with plumbing components. Safety glasses shield your eyes from debris, while gloves offer a layer of protection against sharp edges and potential irritants.
Materials:
- Plumber's Putty or Silicone Sealant: Depending on the type of seal used, you may need plumber's putty or silicone sealant to create a watertight seal when reinstalling the drain flange or installing a new one.
- Replacement Gasket or Rubber Washer: If you're planning to replace the drain flange, having a replacement gasket or rubber washer on hand will ensure a proper seal and prevent leaks.
- Cleaning Solution: A mild cleaning solution or vinegar can be used to clean the exposed drain area and remove any accumulated grime or debris.
- Rags or Paper Towels: These will be useful for wiping and cleaning the drain area as well as for general cleanup during the process.
By having these tools and materials at your disposal, you'll be well-prepared to tackle the task of removing the bathtub drain flange. With the right equipment and a methodical approach, you can proceed with confidence, knowing that you have everything you need to complete the job effectively and efficiently.
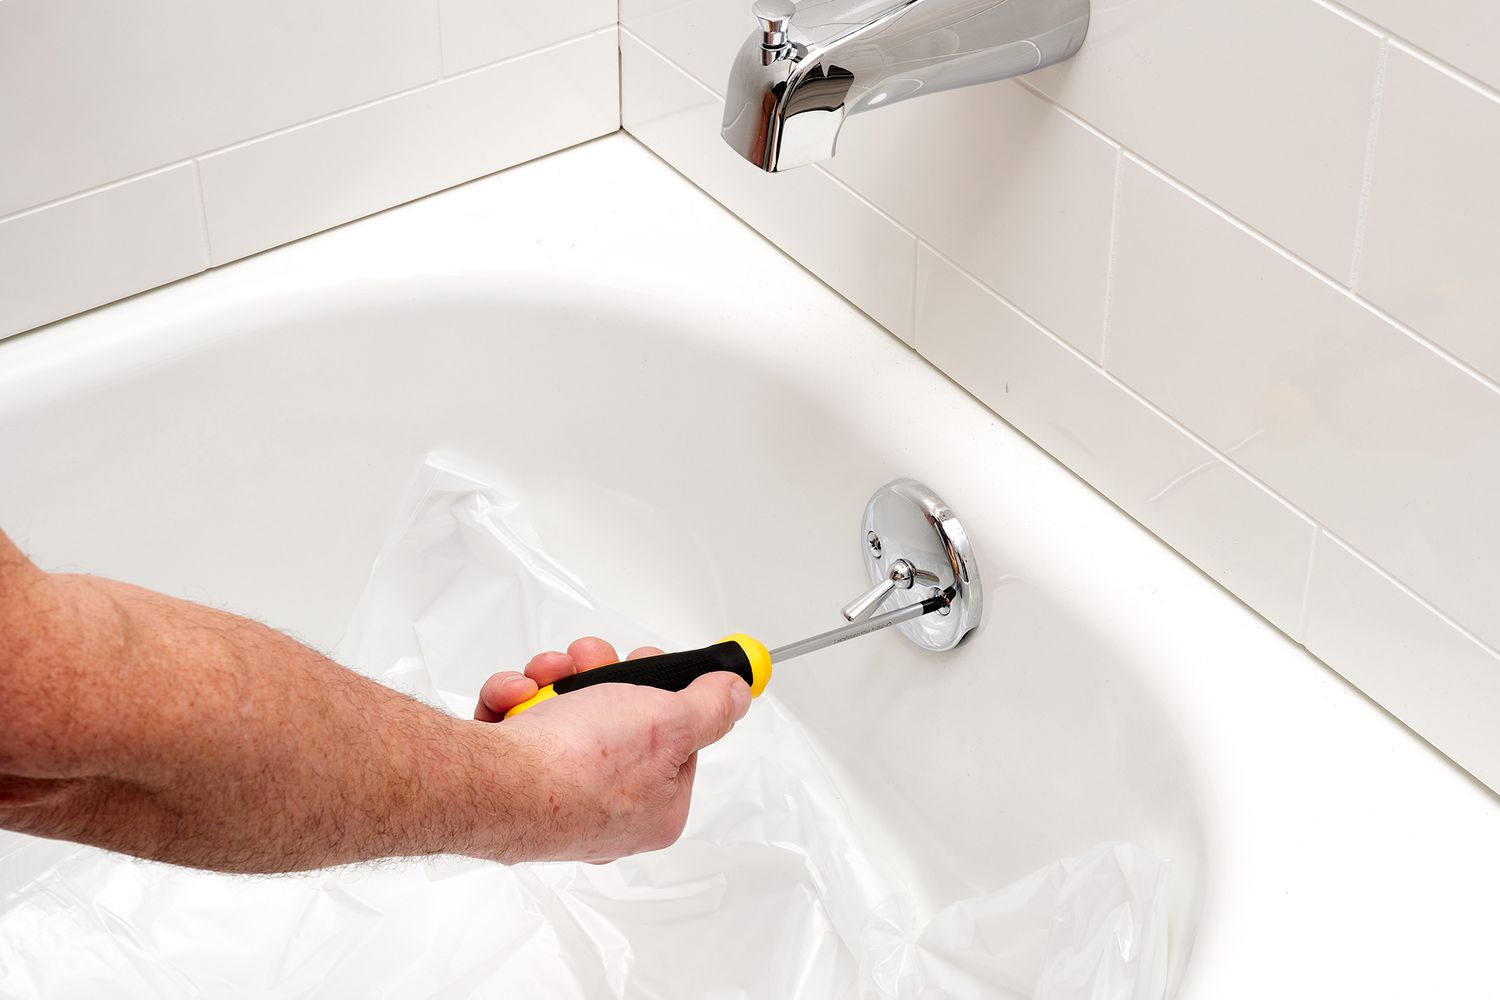
Step 1: Remove the Stopper
The first step in removing the bathtub drain flange is to remove the stopper, which is the visible component that prevents water from draining out of the tub. Depending on the type of stopper your bathtub has, the removal process may vary. Here's a detailed guide on how to remove the stopper:
Read more: How To Remove Sand From A Bathtub Drain
Push-Pull Stoppers:
- Identify the Stopper Type: Push-pull stoppers can be recognized by their knob or handle on top of the drain. The knob is typically connected to a rod that extends into the drainpipe.
- Twist and Lift: Twist the knob counterclockwise to unlock it from the drain. Once unlocked, lift the knob and the attached rod out of the drain. This action should disengage the stopper from the drain assembly.
Lift-and-Turn Stoppers:
- Locate the Set Screw: Lift-and-turn stoppers are secured in place with a set screw located underneath the stopper cap. Look for a small screw at the center of the stopper cap.
- Loosen the Set Screw: Use a flathead screwdriver to loosen the set screw by turning it counterclockwise. Once the set screw is loosened, you should be able to lift the stopper cap off the drain.
- Remove the Stopper: With the set screw loosened, lift the stopper out of the drain. It may be necessary to twist it slightly to disengage it from the drain assembly.
Toe-Touch Stoppers:
- Twist and Release: Toe-touch stoppers are operated by pressing them with your toe to open and close the drain. To remove this type of stopper, twist it counterclockwise to release it from the drain assembly.
- Lift the Stopper: Once the stopper is released, lift it out of the drain, ensuring that the connecting rod, if present, comes out with it.
After successfully removing the stopper, you'll have clear access to the drain flange, setting the stage for the subsequent steps in the removal process. By carefully following these instructions, you can effectively remove the stopper without causing damage to the drain or surrounding components. With the stopper out of the way, you're ready to proceed to the next phase of removing the bathtub drain flange.
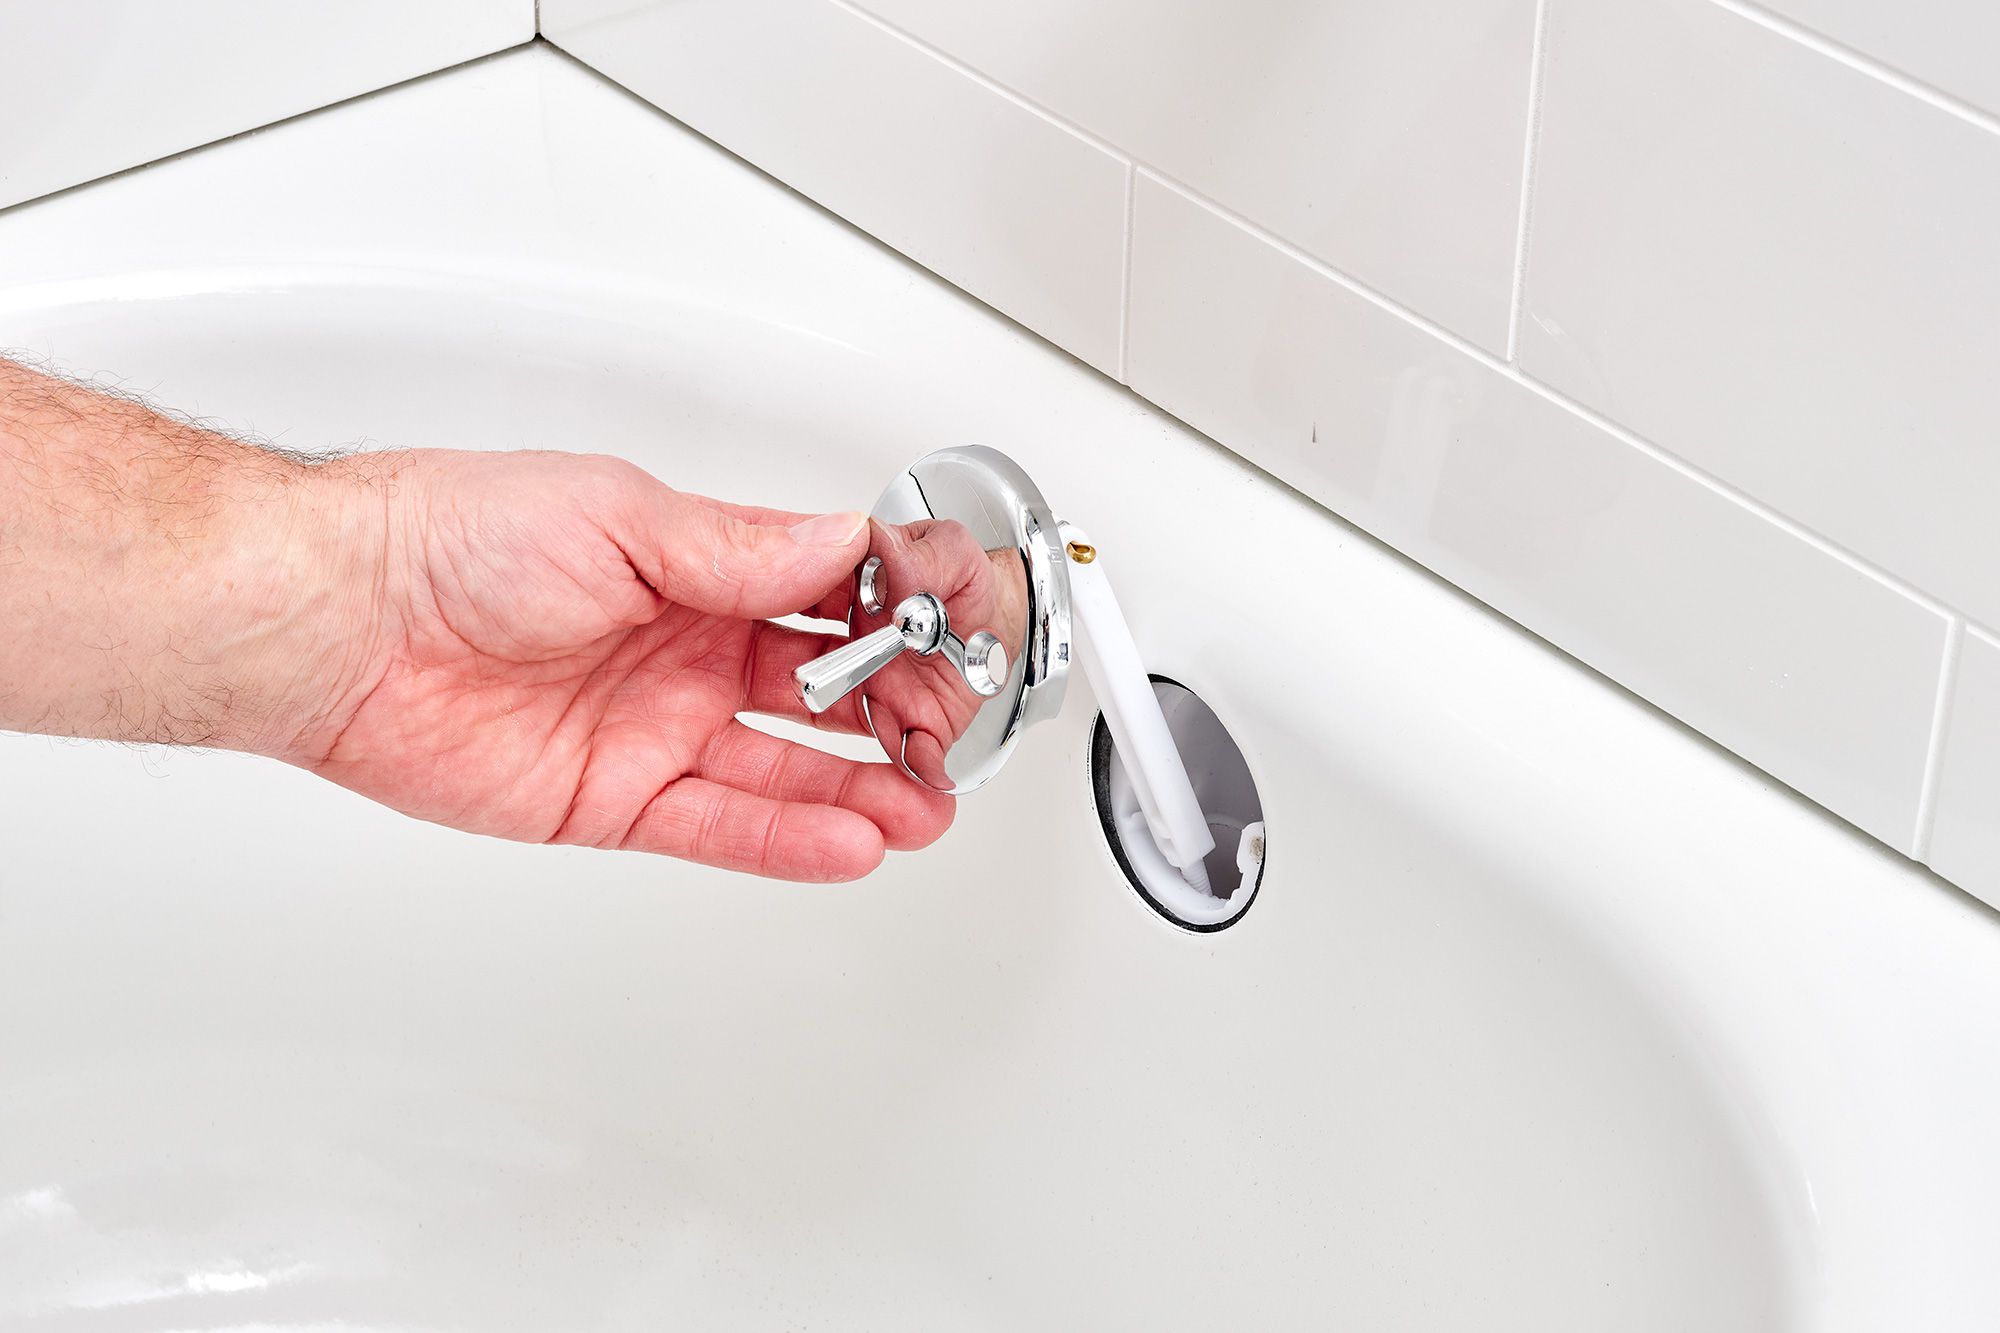
Step 2: Loosen the Drain Flange
With the stopper successfully removed, the next crucial step in the process of removing the bathtub drain flange is to loosen it from its secured position. The drain flange is typically fastened to the drain shoe, the pipe that extends beneath the tub, using screws or a locking mechanism. Loosening the drain flange requires careful attention to detail and the use of appropriate tools to ensure a smooth and effective removal process.
Read more: How To Remove Delta Bathtub Drain Plug
Assess the Fastening Method
Before attempting to loosen the drain flange, it's important to identify the specific fastening method used to secure it in place. In some cases, the drain flange may be held in position by screws, while in others, it may feature a locking mechanism that requires a specialized tool for disengagement. By understanding the fastening method, you can determine the most suitable approach for loosening the drain flange.
Use the Appropriate Tools
Depending on the type of fastening employed, you'll need to utilize the appropriate tools to effectively loosen the drain flange. If the drain flange is secured with screws, a screwdriver set with both flathead and Phillips head options will be essential. On the other hand, if the flange features a locking mechanism, an adjustable pliers or a specialized tub drain extractor tool may be required to disengage it from the drain shoe.
Loosening the Drain Flange
If the drain flange is held in place by screws, carefully insert the appropriate screwdriver into the screw heads and turn them counterclockwise to loosen and remove them. It's important to exercise caution to avoid stripping the screw heads, as this can complicate the removal process. Once the screws are removed, the drain flange should be free to be lifted out of the drain shoe.
For drain flanges with a locking mechanism, use an adjustable pliers or a tub drain extractor tool to grip and turn the flange counterclockwise. Apply steady and controlled force to gradually loosen the flange from its position. It's crucial to avoid excessive force, as this can damage the surrounding surfaces or the drain components.
By carefully following these steps and exercising patience, you can effectively loosen the drain flange, paving the way for its subsequent removal. With the drain flange successfully loosened, you're now ready to proceed to the next stage of removing it from the bathtub drain assembly.
This detailed process ensures that the drain flange is loosened without causing damage to the surrounding components, setting the stage for a seamless continuation of the removal process.
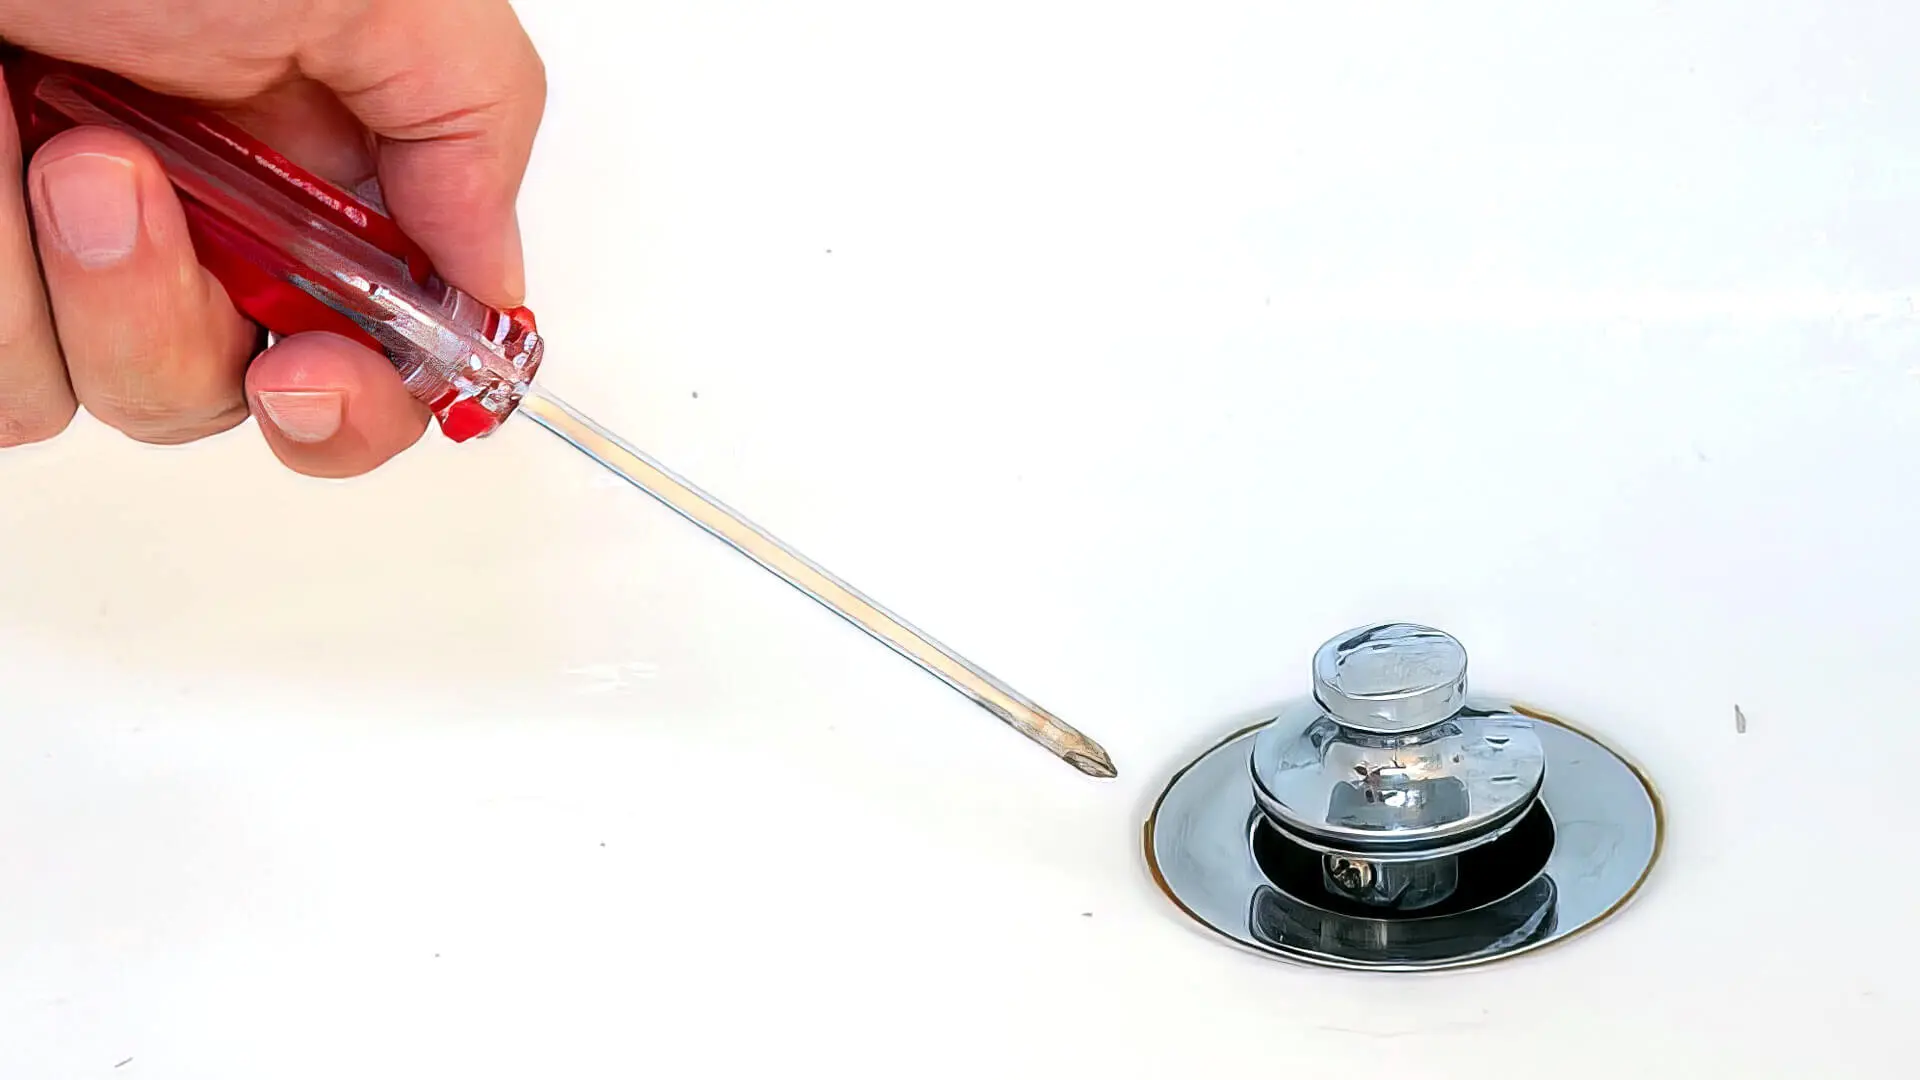
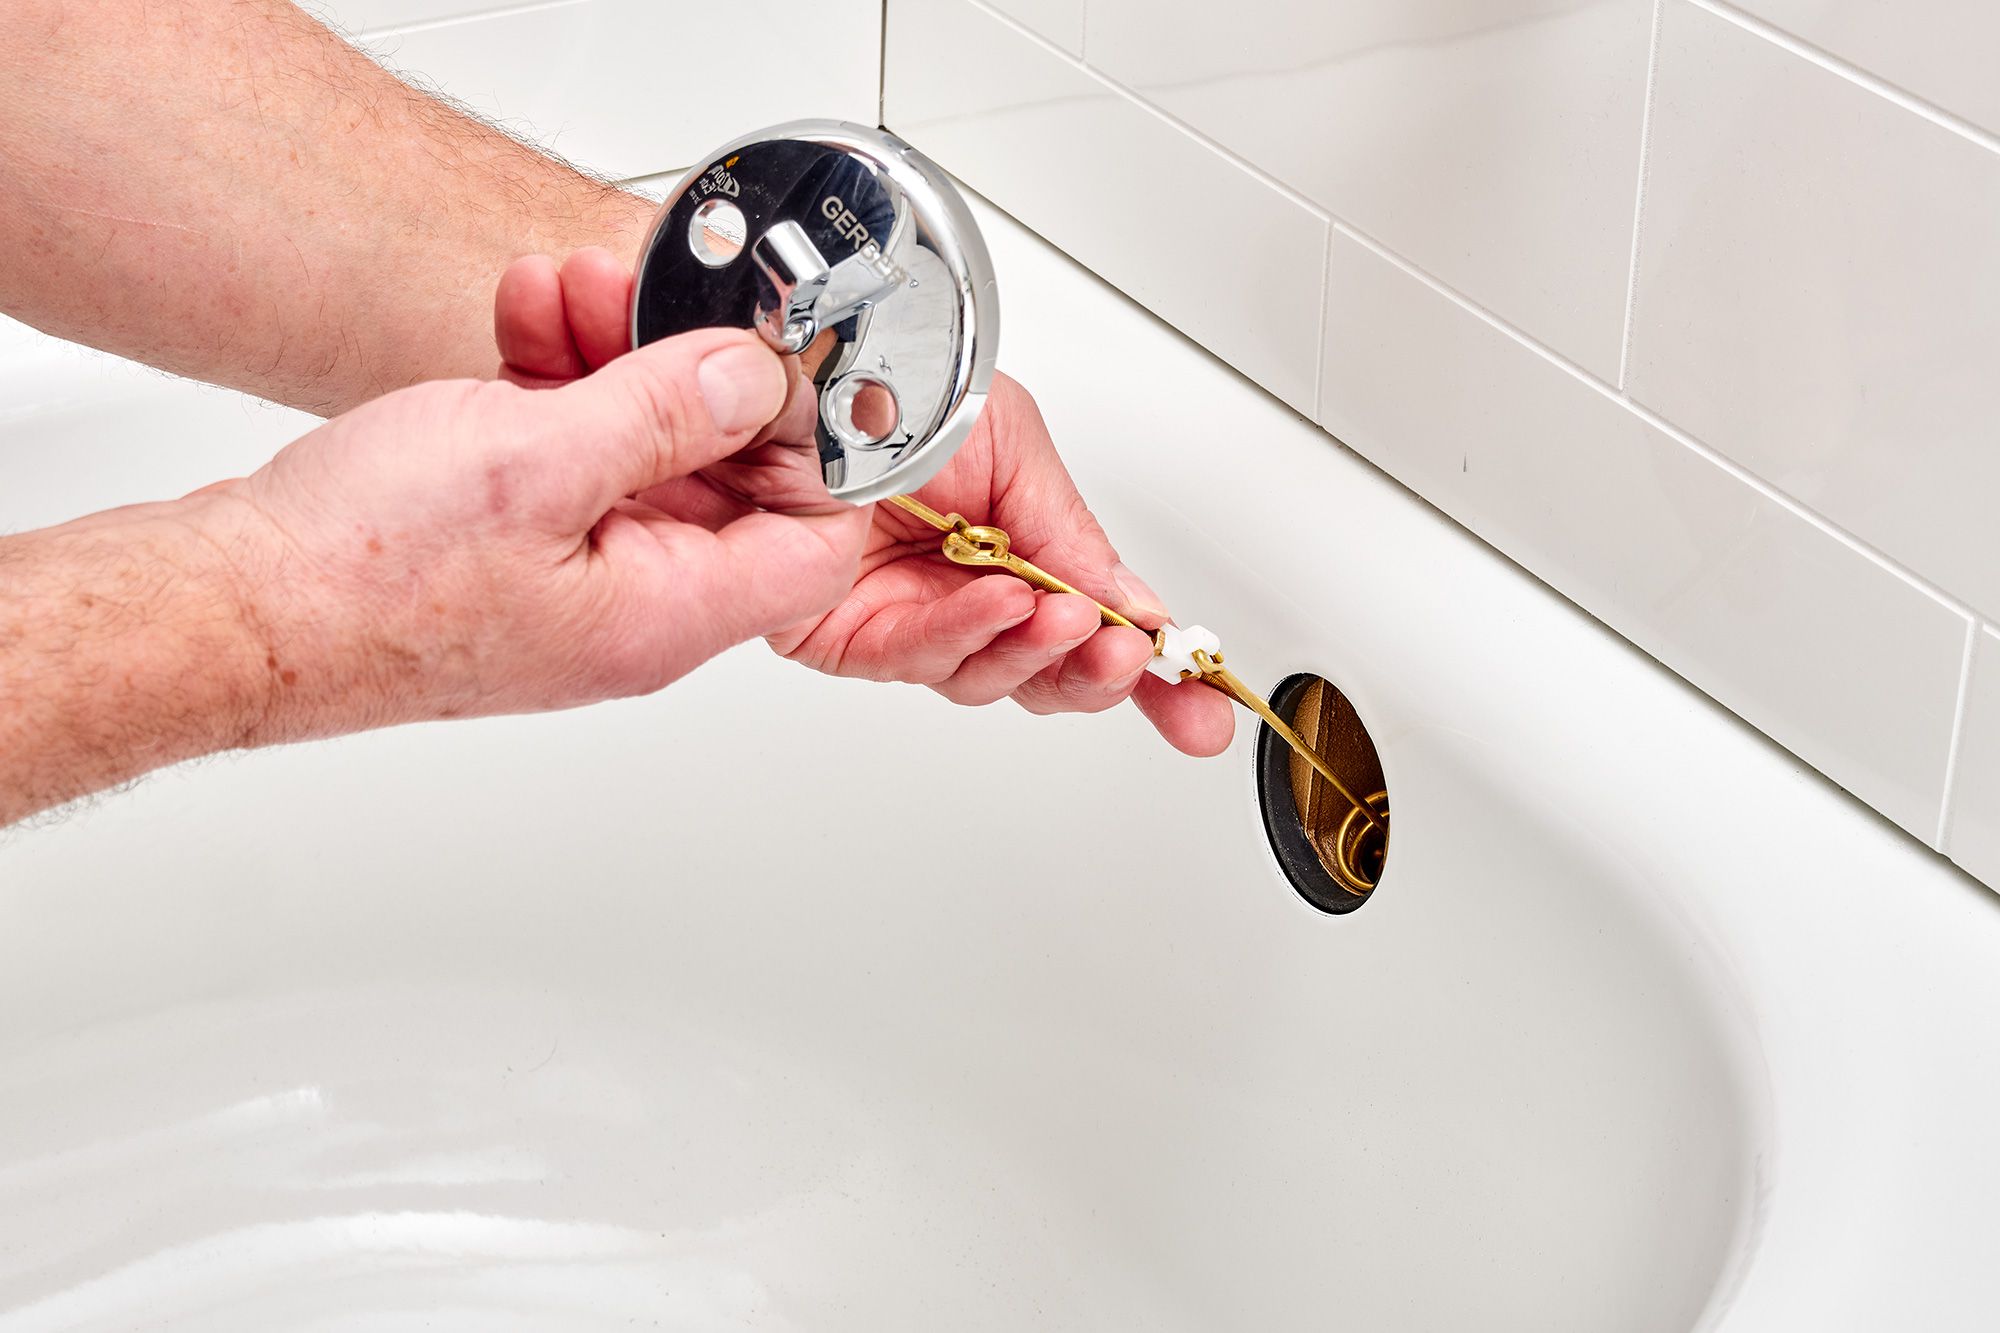
Step 3: Remove the Drain Flange
With the drain flange successfully loosened from its secured position, the next critical step is to carefully remove it from the bathtub drain assembly. This process requires precision and attention to detail to ensure that the flange is extracted without causing damage to the surrounding surfaces or the underlying plumbing components.
Read more: How Do You Remove The Drain From A Bathtub?
Extracting the Drain Flange
-
Gentle Lifting: Begin by gently lifting the loosened drain flange out of the drain shoe. It's important to exercise caution and avoid applying excessive force, as this can lead to unintended damage. If the flange seems stuck, a gentle rocking motion may help dislodge it from any residual sealant or debris.
-
Inspect for Resistance: As you lift the flange, pay close attention to any resistance or sticking points. If the flange encounters significant resistance, it may be necessary to use a plumber's putty knife to carefully pry it away from the drain shoe. Take care to avoid scratching or damaging the surfaces during this process.
-
Clean Removal: Once the drain flange is successfully lifted out of the drain shoe, inspect the exposed area for any remaining debris or old sealant. Use a mild cleaning solution or vinegar along with a rag or paper towel to clean the drain opening and the surrounding surfaces. This step is crucial in preparing the area for any subsequent maintenance or the installation of a new drain flange.
Ensuring Safe Handling
During the removal process, it's essential to handle the drain flange with care to prevent any sharp edges or protruding components from causing injury. Additionally, be mindful of any accumulated grime or debris that may have collected on the flange, taking precautions to avoid contact with your skin or clothing.
By following these detailed steps and exercising patience, you can effectively remove the drain flange from the bathtub drain assembly. This careful approach minimizes the risk of damage to the surrounding components and ensures that the extraction process is carried out smoothly and safely.
With the drain flange successfully removed, you've completed a significant phase of the maintenance or replacement process. This accomplishment brings you one step closer to addressing any underlying issues with the bathtub drain system and sets the stage for the next steps in achieving a fully functional and reliable drainage solution.
Step 4: Clean the Drain Area
After successfully removing the drain flange, it's crucial to thoroughly clean the exposed drain area to ensure optimal functionality and prepare it for any necessary maintenance or the installation of a new drain flange. This step is essential for removing any accumulated grime, debris, or residual sealant that may impede the proper functioning of the bathtub drain system.
Clearing Debris and Residue
Begin by visually inspecting the exposed drain area for any lingering debris, such as hair, soap scum, or mineral deposits. Using a pair of disposable gloves, carefully remove any visible debris and discard it in a trash receptacle. This initial clearing of debris sets the stage for a more thorough cleaning process.
Read more: How To Remove Old Toilet Flange
Application of Cleaning Solution
Next, prepare a mild cleaning solution by diluting a gentle liquid soap or dish detergent in warm water. Alternatively, a solution of equal parts water and vinegar can be effective in breaking down stubborn residue and mineral deposits. Dip a clean rag or paper towel into the cleaning solution and gently scrub the interior of the drain opening, ensuring that all surfaces are thoroughly cleaned.
Removal of Residual Sealant
If the previous drain flange was sealed with plumber's putty or silicone sealant, use a plumber's putty knife to carefully scrape away any remaining sealant from the drain area. It's important to exercise caution to avoid scratching or damaging the surfaces while removing the sealant. Once the majority of the sealant has been cleared, wipe the area with a clean, damp cloth to ensure that it is free from any lingering residue.
Drying and Inspection
After cleaning the drain area, use a dry cloth or paper towel to thoroughly dry the surfaces, ensuring that no moisture remains. Take this opportunity to inspect the drain opening and surrounding components for any signs of damage, corrosion, or wear. Identifying any potential issues at this stage can inform the need for further maintenance or replacement of damaged parts.
Final Preparation
As a final step, ensure that the drain area is free from any cleaning solution or debris, leaving it in a clean and pristine condition. This meticulous cleaning process sets the stage for any subsequent maintenance tasks or the installation of a new drain flange, ensuring that the underlying surfaces are ready for further attention.
By meticulously cleaning the drain area, you're taking proactive steps to maintain the functionality and cleanliness of your bathtub drain system. This thorough cleaning process not only promotes optimal drainage but also provides a clean canvas for any additional work that may be required, ensuring that the entire system operates at its best.
Read more: How To Unfreeze Bathtub Drain
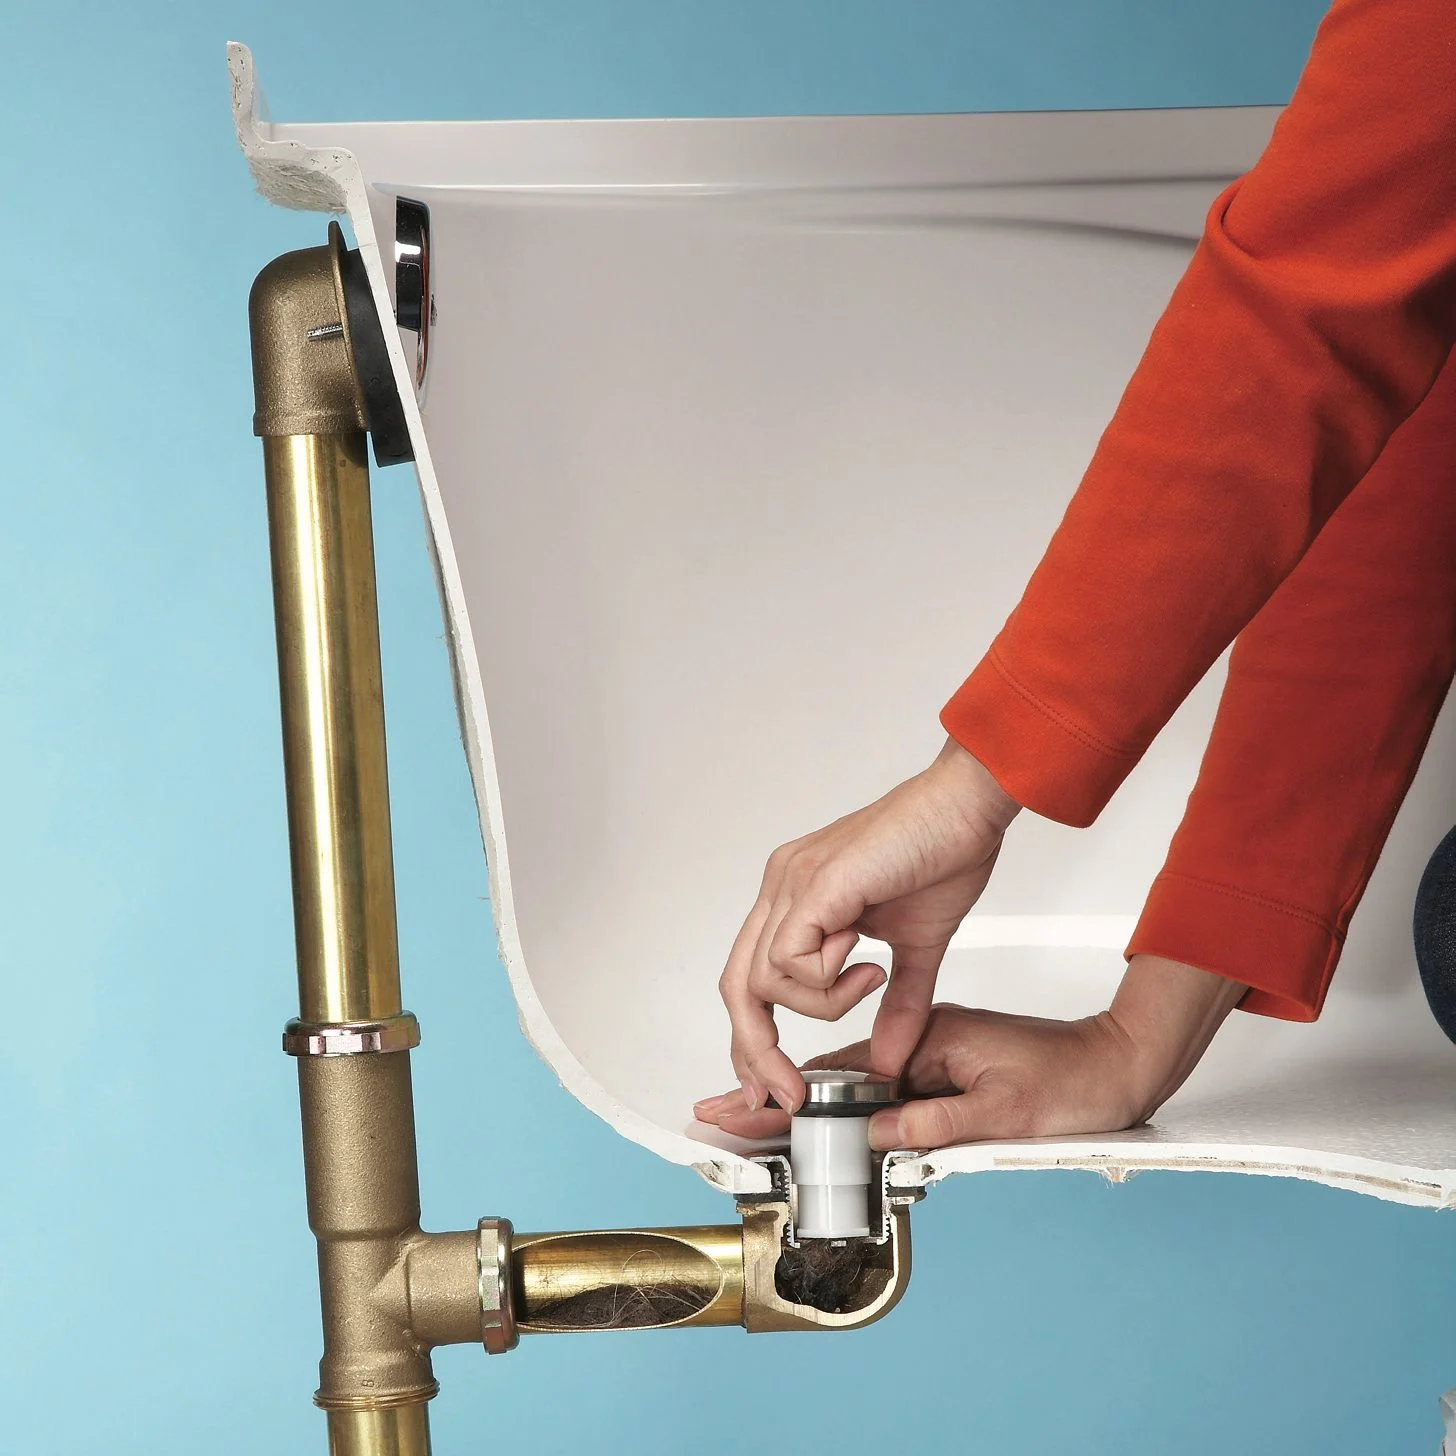
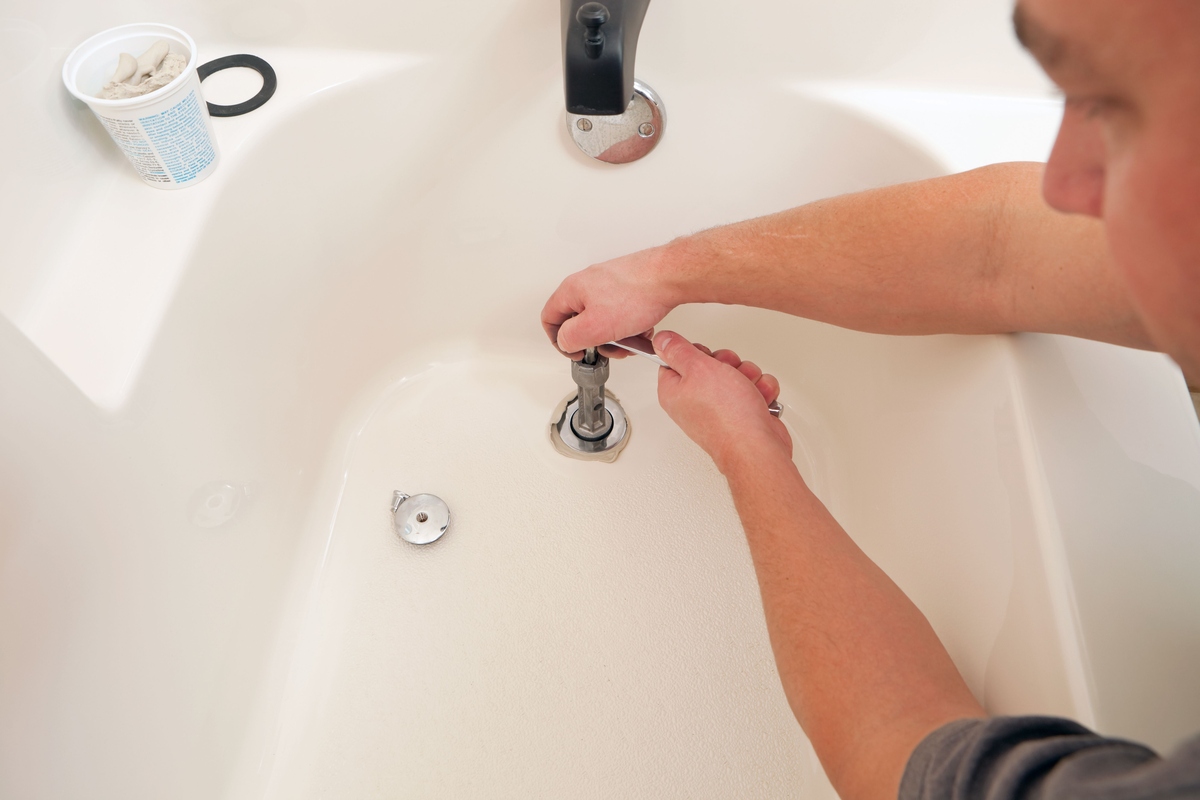
Step 5: Install the New Drain Flange (Optional)
If you've opted to replace the old drain flange with a new one, this step will guide you through the process of installing the new component. Whether you're upgrading the existing flange for aesthetic reasons or addressing a persistent leakage issue, installing a new drain flange can rejuvenate the functionality and appearance of your bathtub drain system.
Assessing the Replacement Needs
Before proceeding with the installation, carefully assess the condition of the existing drain flange and the surrounding components. Look for signs of corrosion, damage, or wear that may have necessitated the replacement. Additionally, ensure that the drain shoe and connecting pipe are in good condition and free from any obstructions or deformities that could impede the installation of the new flange.
Selecting the Replacement Flange
When choosing a new drain flange, consider factors such as material, size, and compatibility with your bathtub's drain assembly. Opt for a high-quality replacement flange that aligns with the specifications of your existing drain system, ensuring a proper fit and reliable performance. Additionally, if the previous flange was sealed with plumber's putty or silicone sealant, ensure that the replacement flange is compatible with the chosen sealing method.
Applying Plumber's Putty or Silicone Sealant
Before installing the new drain flange, prepare the sealing material, either plumber's putty or silicone sealant, to create a watertight seal. Roll the plumber's putty into a uniform rope and apply it around the underside of the new flange, ensuring complete coverage. If using silicone sealant, apply a continuous bead around the underside of the flange, taking care to create a consistent seal without gaps or excess material.
Read more: How To Close Bathtub Drain
Aligning and Securing the New Flange
Carefully position the new drain flange over the drain opening, ensuring that it aligns properly with the drain shoe and sits flush against the bathtub surface. If the flange features screw holes, insert the appropriate screws and tighten them securely to fasten the flange in place. Alternatively, if the flange utilizes a locking mechanism, follow the manufacturer's instructions to engage the locking mechanism and secure the flange.
Testing and Finishing
Once the new drain flange is securely installed, conduct a preliminary test by running water into the bathtub and observing the drainage. Check for any signs of leakage or improper sealing around the flange. If necessary, make adjustments to the sealing material or fastening mechanism to ensure a watertight seal. Once the installation is confirmed to be successful, wipe away any excess sealing material and conduct a final inspection to ensure that the new drain flange is securely in place and functioning as intended.
By following these detailed steps, you can effectively install a new drain flange, rejuvenating the functionality and appearance of your bathtub drain system. This optional step provides an opportunity to address any underlying issues and ensure that your bathtub drain operates reliably and efficiently.
Conclusion
In conclusion, the process of removing a bathtub drain flange is a manageable DIY task that empowers homeowners to address maintenance or upgrade needs within their bathroom. By following the step-by-step guide outlined in this comprehensive article, individuals can confidently tackle the removal of the drain flange, whether for repair, replacement, or general maintenance purposes.
The journey begins with understanding the anatomy of the bathtub drain system and gathering the necessary tools and materials. From screwdrivers and pliers to cleaning solutions and safety gear, having the right equipment at hand sets the stage for a successful removal process. With the tools in place, the initial step involves delicately removing the stopper, allowing clear access to the drain flange.
The subsequent stages focus on loosening and removing the drain flange with precision and care. Whether dealing with screws or a locking mechanism, the process emphasizes the importance of using the appropriate tools and techniques to avoid damage to the surrounding surfaces. Once the flange is successfully removed, thorough cleaning of the drain area ensures optimal functionality and prepares the space for any necessary maintenance or the installation of a new flange.
For those opting to install a new drain flange, the guide provides detailed instructions on assessing replacement needs, selecting the right flange, and executing the installation process with attention to sealing and alignment. This optional step offers an opportunity to rejuvenate the bathtub drain system, addressing any underlying issues and ensuring reliable performance.
By equipping homeowners with the knowledge and confidence to navigate the removal and potential replacement of a bathtub drain flange, this guide promotes self-sufficiency and empowers individuals to take charge of their home maintenance needs. The ability to address common plumbing issues and undertake essential upgrades contributes to a sense of accomplishment and ownership, ultimately enhancing the overall functionality and aesthetics of the bathroom space.
In essence, the process of removing a bathtub drain flange is not only a practical endeavor but also a testament to the rewarding nature of DIY home maintenance. With the right guidance and a methodical approach, homeowners can successfully navigate this task, contributing to the overall well-being and upkeep of their living environment.
Frequently Asked Questions about How To Remove Bathtub Drain Flange
Was this page helpful?
At Storables.com, we guarantee accurate and reliable information. Our content, validated by Expert Board Contributors, is crafted following stringent Editorial Policies. We're committed to providing you with well-researched, expert-backed insights for all your informational needs.
0 thoughts on “How To Remove Bathtub Drain Flange”