Home>Furniture & Design>Bathroom Accessories>How To Connect A Bathtub Drain?

Bathroom Accessories
How To Connect A Bathtub Drain?
Modified: February 18, 2024
Learn how to properly connect a bathtub drain with the right bathroom accessories. Follow our step-by-step guide for a seamless installation.
(Many of the links in this article redirect to a specific reviewed product. Your purchase of these products through affiliate links helps to generate commission for Storables.com, at no extra cost. Learn more)
Introduction
Connecting a bathtub drain may seem like a daunting task, but with the right tools and a clear understanding of the process, it can be a manageable and rewarding DIY project. Whether you're replacing an old drain or installing a new one, this guide will walk you through the steps to ensure a successful and leak-free connection.
A properly connected bathtub drain is essential for maintaining a functional and efficient plumbing system in your bathroom. Over time, drains can become clogged, corroded, or damaged, leading to slow drainage or even water leaks. By learning how to connect a bathtub drain, you can address these issues and ensure that your bathtub functions smoothly for years to come.
In this comprehensive guide, we will cover the necessary tools and materials, the process of removing the old drain, and the steps for installing a new drain. Additionally, we will discuss how to test the drain to confirm that it is properly connected and functioning as intended.
By following the steps outlined in this guide, you can gain the confidence and skills needed to tackle this home improvement project. Whether you're a seasoned DIY enthusiast or a novice homeowner looking to expand your skills, connecting a bathtub drain is a valuable skill that can save you time and money in the long run.
Now, let's dive into the step-by-step process of connecting a bathtub drain, starting with gathering the necessary tools and materials.
Key Takeaways:
- Connecting a bathtub drain is a manageable DIY project that requires gathering tools, removing the old drain, installing the new one, and testing for leaks. It’s essential for maintaining a functional and efficient bathroom plumbing system.
- By following the step-by-step process and conducting a thorough test, you can ensure a reliable and leak-free bathtub drain. This DIY skill empowers you to maintain a functional and efficient bathroom for years to come.
Read more: How To Unfreeze Bathtub Drain
Step 1: Gather the necessary tools and materials
Before embarking on the task of connecting a bathtub drain, it's crucial to gather all the essential tools and materials to ensure a smooth and efficient process. Here's a comprehensive list of items you'll need:
Tools:
- Adjustable Wrench: This versatile tool will come in handy for loosening and tightening various fittings during the installation process.
- Plumbers Putty: An essential sealing material used to create a watertight seal between the drain and the bathtub.
- Plunger: In case you encounter any minor clogs or obstructions during the installation, a plunger can help clear the drain.
- Pipe Wrench: This tool is necessary for securely fastening and loosening the fittings and pipes.
- Screwdriver Set: Ensure you have both flat-head and Phillips-head screwdrivers to accommodate different types of screws you may encounter.
- Hacksaw: In the event that you need to cut or modify pipes, a hacksaw will be indispensable.
- Plumber's Tape: Also known as Teflon tape, this is used to create a tight seal on threaded pipe joints, preventing leaks.
Materials:
- New Bathtub Drain: Depending on your specific requirements, choose a suitable bathtub drain that matches the dimensions and design of your bathtub.
- Rubber Gasket: This component is essential for creating a watertight seal between the drain and the bathtub.
- Silicone Caulk: Used for sealing gaps and preventing water from seeping into unwanted areas.
- Safety Gloves: To protect your hands during the installation process.
- Safety Goggles: Essential for eye protection, especially when working in tight spaces or using tools that may produce debris.
By ensuring that you have all the necessary tools and materials at your disposal, you can streamline the installation process and minimize the risk of interruptions or delays. With these items in hand, you'll be well-prepared to move on to the next step of removing the old drain and proceeding with the installation of the new bathtub drain.
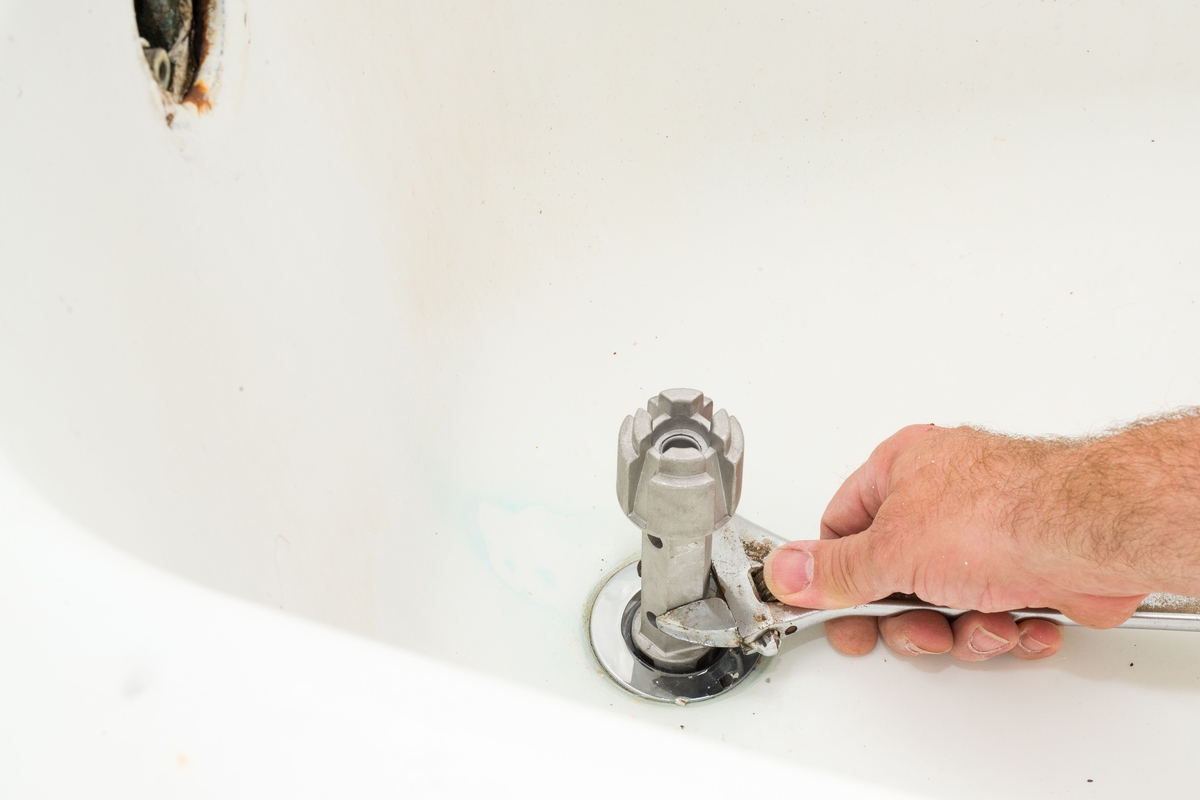
Step 2: Remove the old drain
Removing the old drain is a crucial step in the process of connecting a new bathtub drain. Before starting this step, it's important to ensure that you have gathered all the necessary tools and materials as outlined in the previous section. Once you have everything you need, you can proceed with the following steps to remove the old drain:
-
Access the Drain: Begin by accessing the underside of the bathtub where the drain is located. This may require removing a panel or accessing the area from below the floor, depending on the specific design of your bathtub.
-
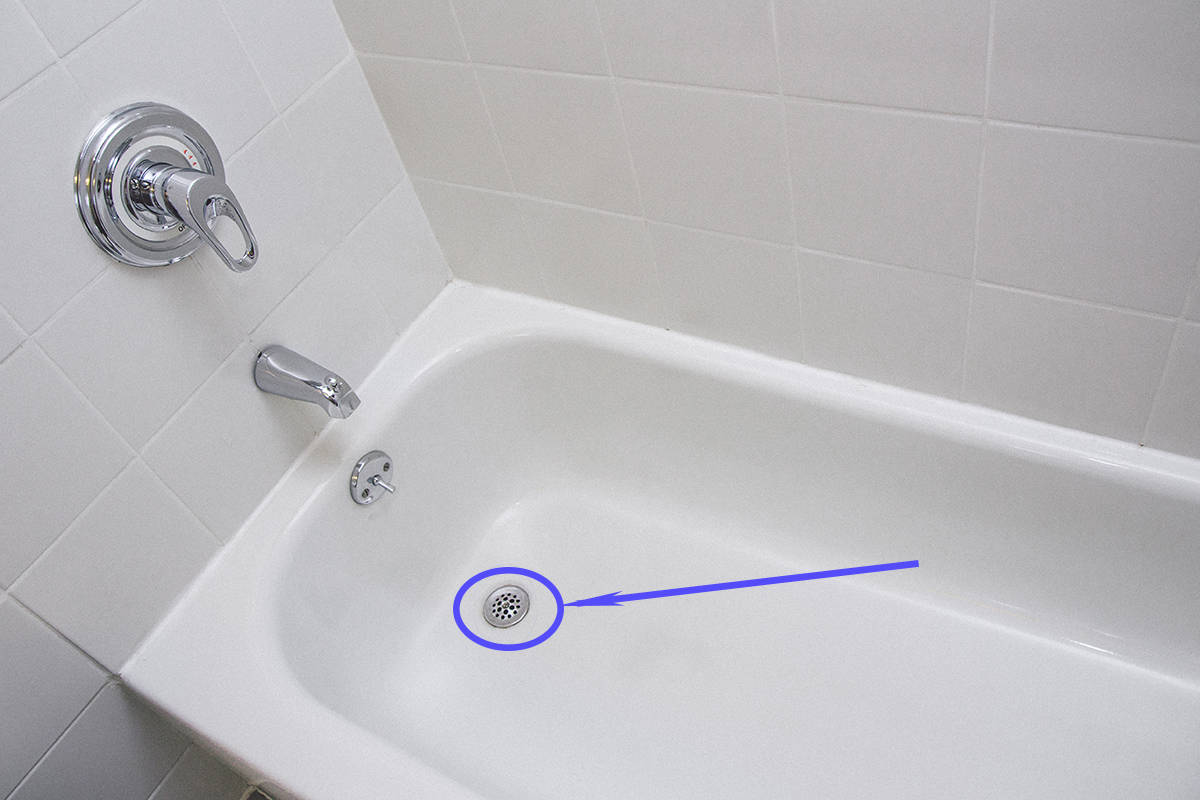
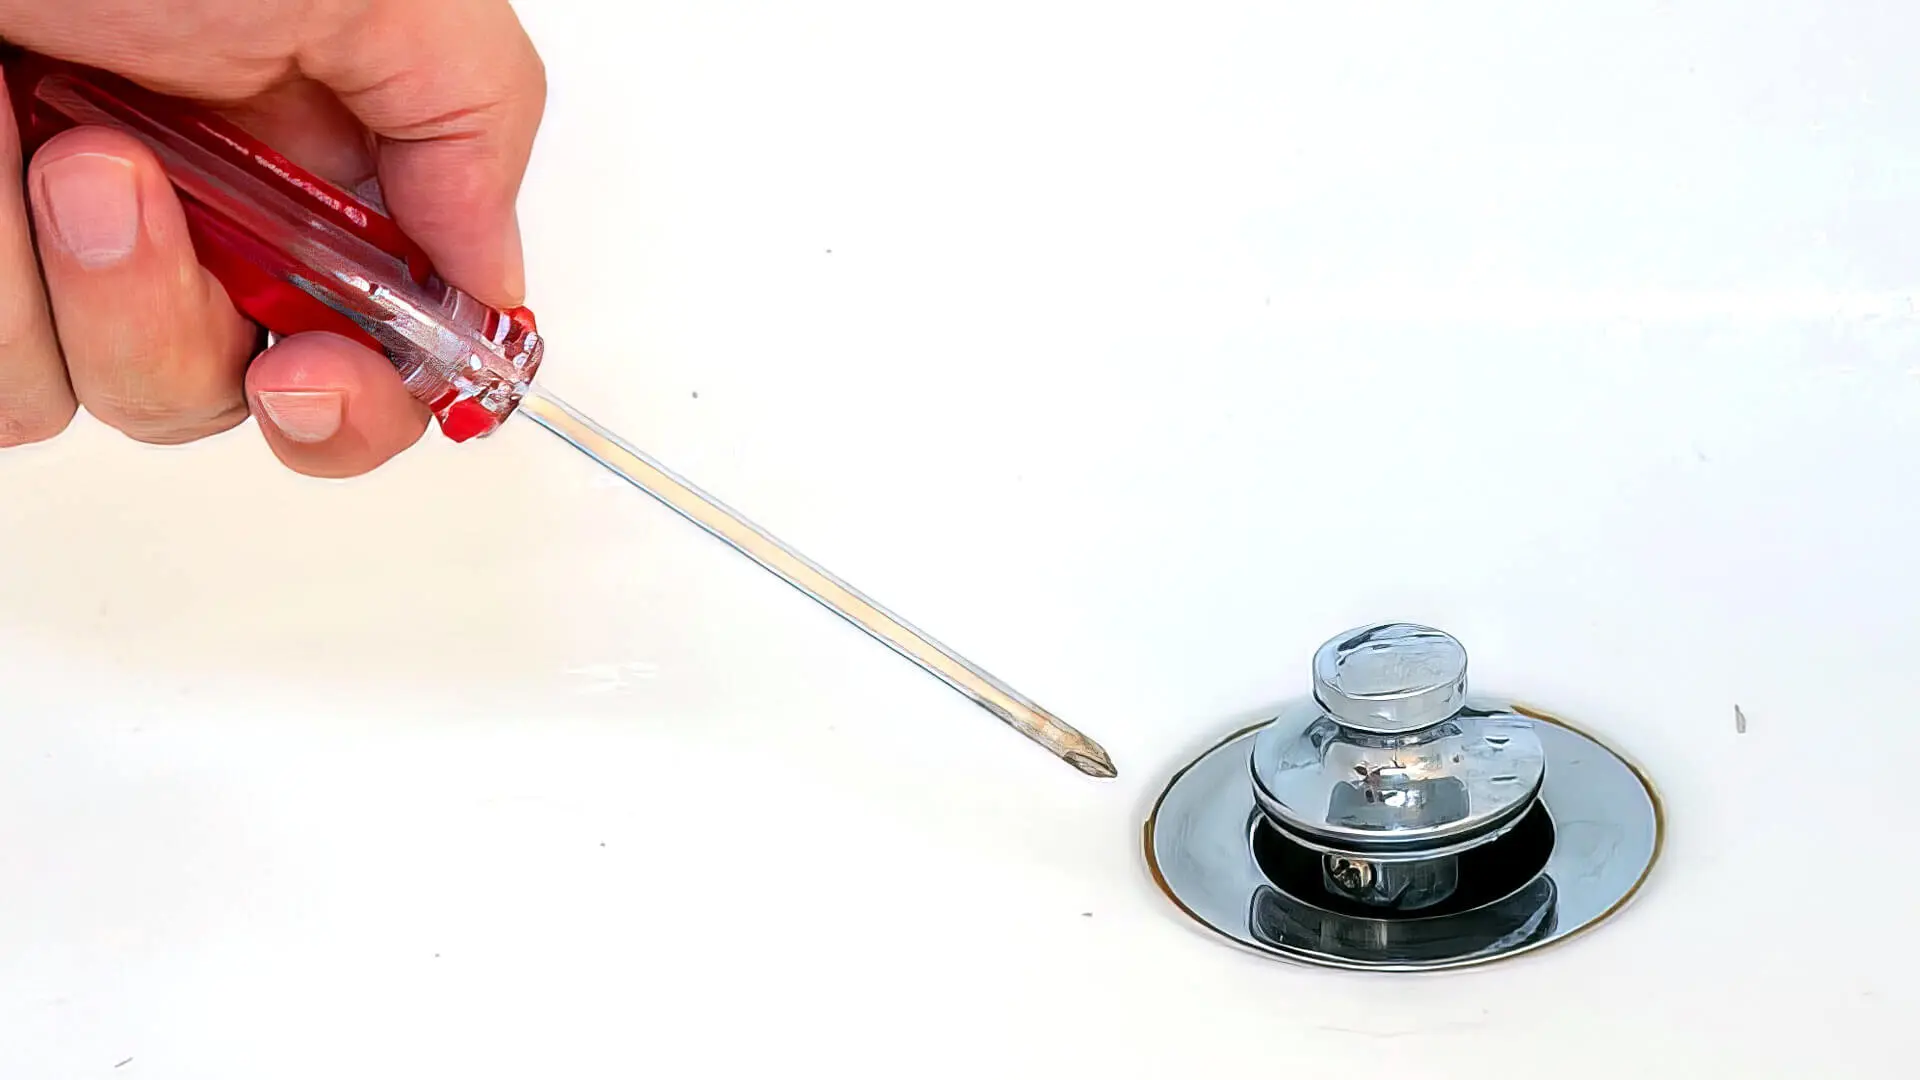
Loosen the Drain Flange: Using an appropriate tool, such as a wrench or pliers, carefully loosen the drain flange by turning it counterclockwise. The drain flange is the visible part of the drain that is typically fitted with crossbars or indentations to facilitate turning.
-
Remove the Drain Flange: Once the drain flange is sufficiently loosened, carefully lift it out of the drain hole. You may need to wiggle it back and forth to detach it from any remaining sealant or gasket.
-
Disconnect the Drain Pipe: With the drain flange removed, you will have access to the drain pipe below. Use a pipe wrench to disconnect the drain pipe from the underside of the bathtub. Be prepared for some residual water or debris to emerge as you disconnect the pipe.
-
Inspect and Clean the Area: After removing the old drain, take a moment to inspect the area around the drain hole. Clear away any debris, old sealant, or gasket material to ensure a clean and smooth surface for installing the new drain.
-
Cap the Drain Pipe: To prevent sewer gases from entering your home during the installation process, consider capping the open end of the drain pipe temporarily. This can be achieved using a suitable cap or plug that securely seals the pipe.
By following these steps, you can effectively remove the old bathtub drain in preparation for installing a new one. It's important to approach this process with care and attention to detail to avoid causing any damage to the bathtub or surrounding plumbing components. With the old drain successfully removed, you are now ready to proceed with the next step of installing the new drain.
Read more: How To Close Bathtub Drain
Step 3: Install the new drain
With the old drain successfully removed, the next crucial step is to install the new bathtub drain. This process involves carefully fitting the new drain components and ensuring a secure and watertight connection. Here's a detailed guide on how to install the new drain:
-
Prepare the Drain Components: Before proceeding with the installation, ensure that all the necessary components of the new bathtub drain are readily available. This includes the new drain flange, rubber gasket, and any accompanying hardware or fittings. Inspect the components to verify that they are free from defects and compatible with your bathtub.
-
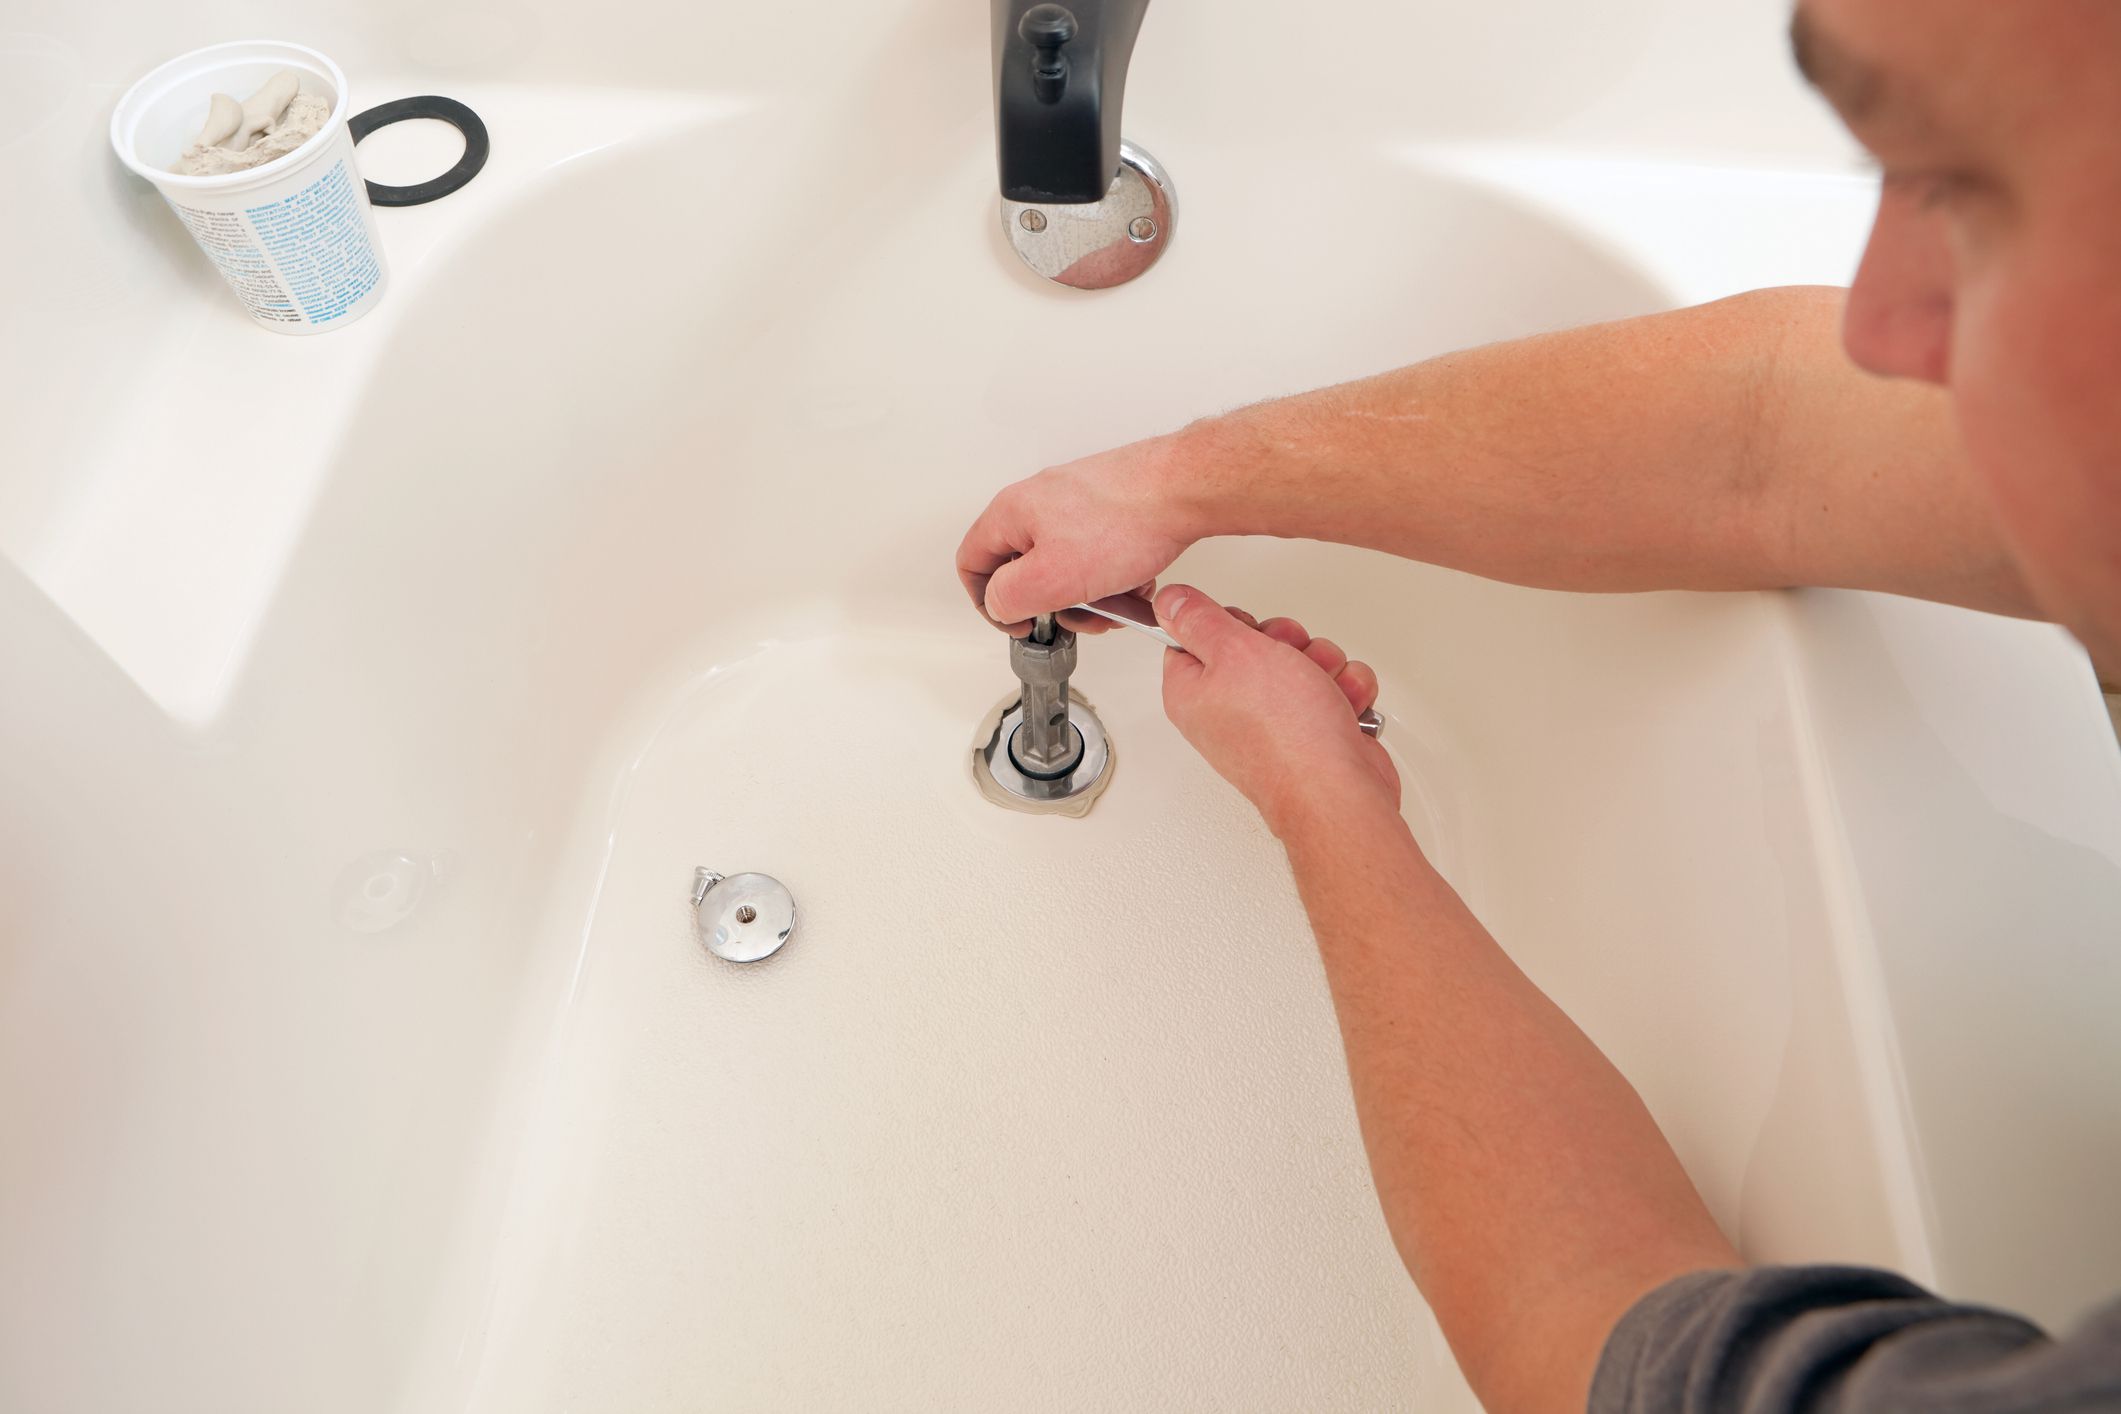
Apply Plumbers Putty: To create a watertight seal, apply a thin, uniform layer of plumbers putty to the underside of the new drain flange. This putty will help prevent water from seeping between the drain and the bathtub, ensuring a secure connection.
-
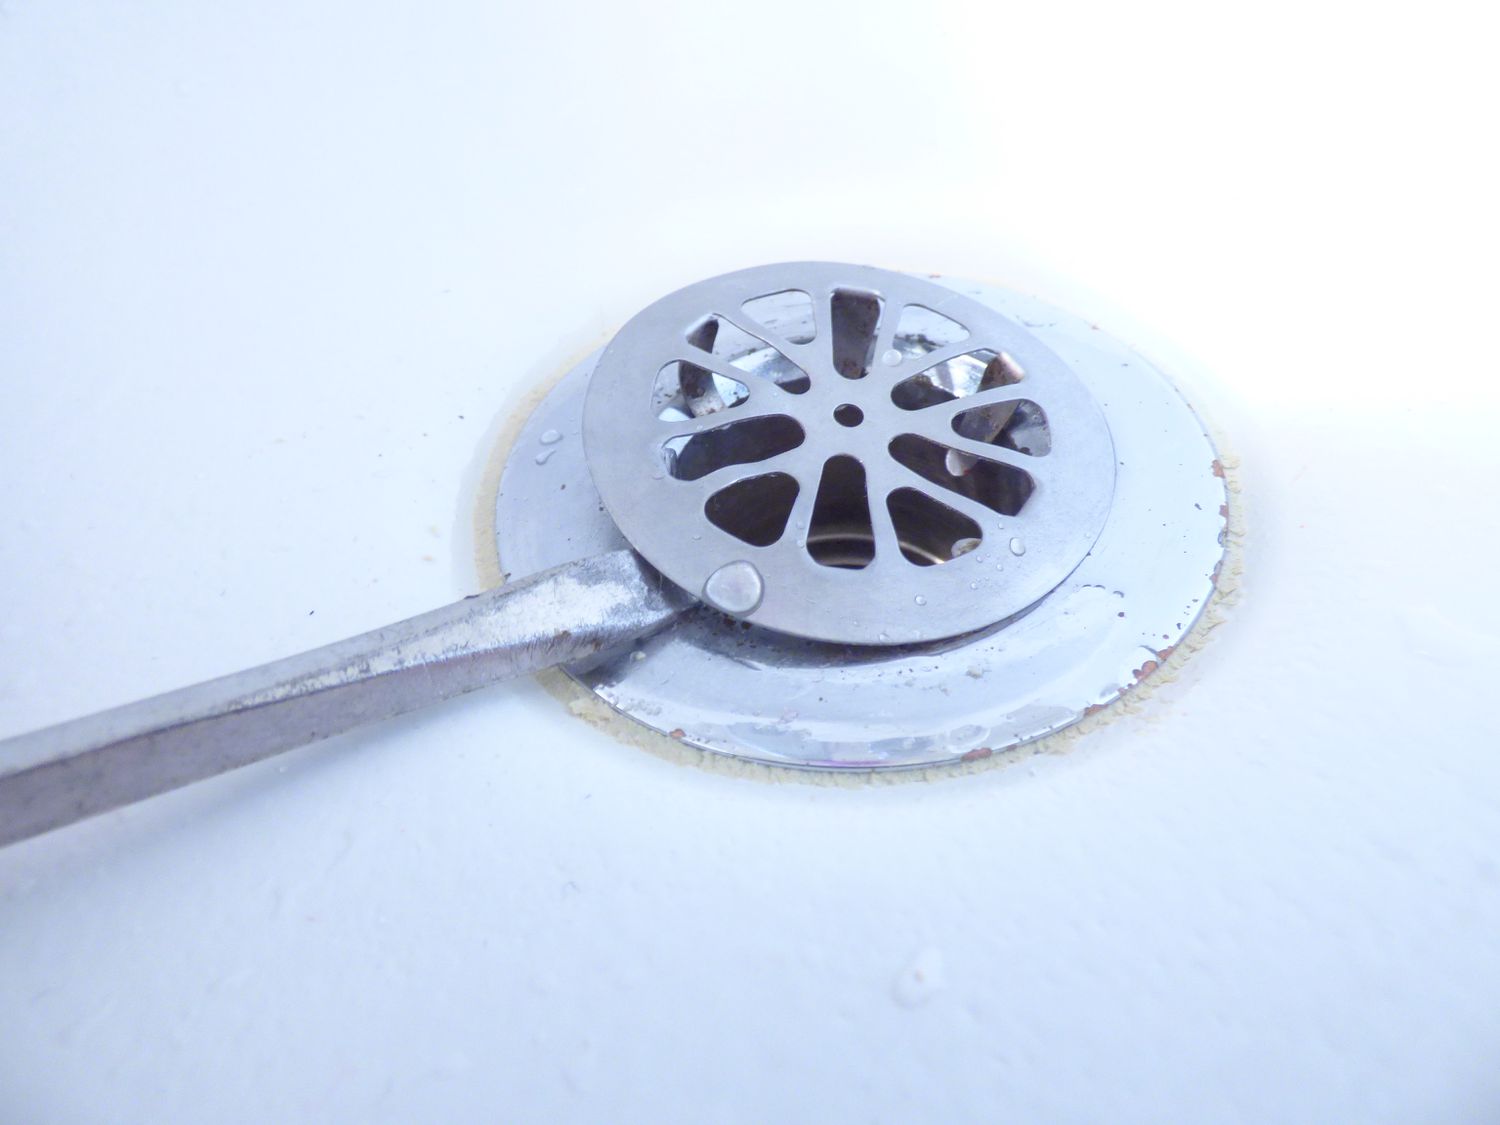
Insert the Drain Flange: Carefully position the new drain flange into the drain hole, ensuring that it aligns properly and sits flush against the surface of the bathtub. Gently press down on the flange to set it in place, allowing the plumbers putty to create a tight seal.
-
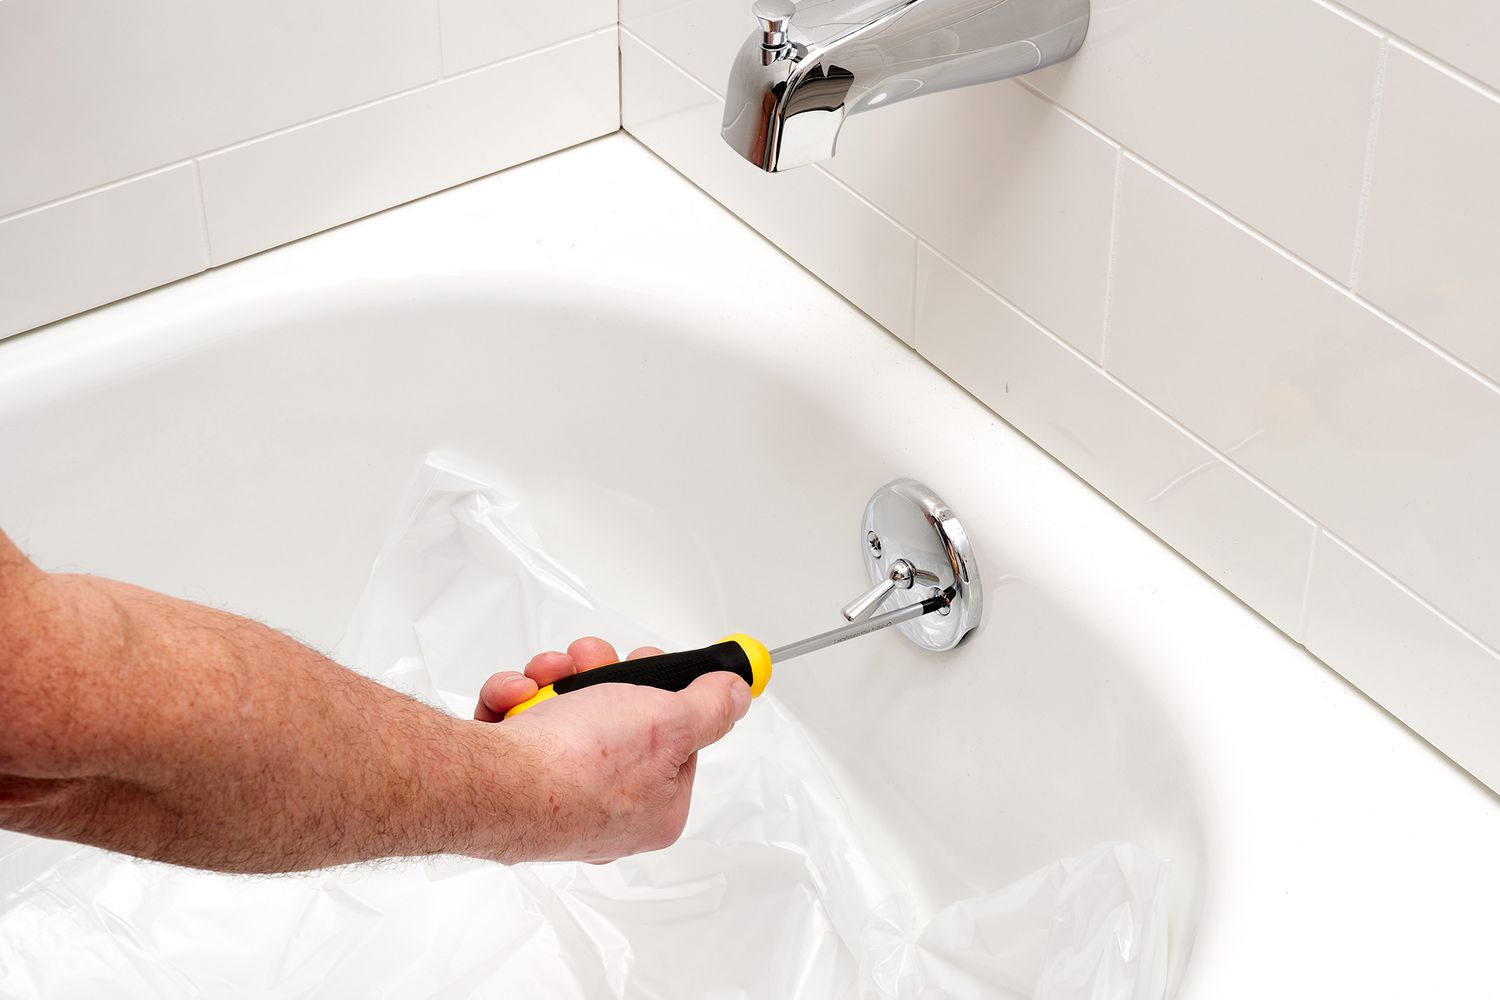
Secure the Drain Flange: Using an adjustable wrench, tighten the drain flange by turning it clockwise. Be cautious not to overtighten, as this may damage the flange or the surrounding bathtub material. Ensure that the flange is securely fastened without excessive force.
-
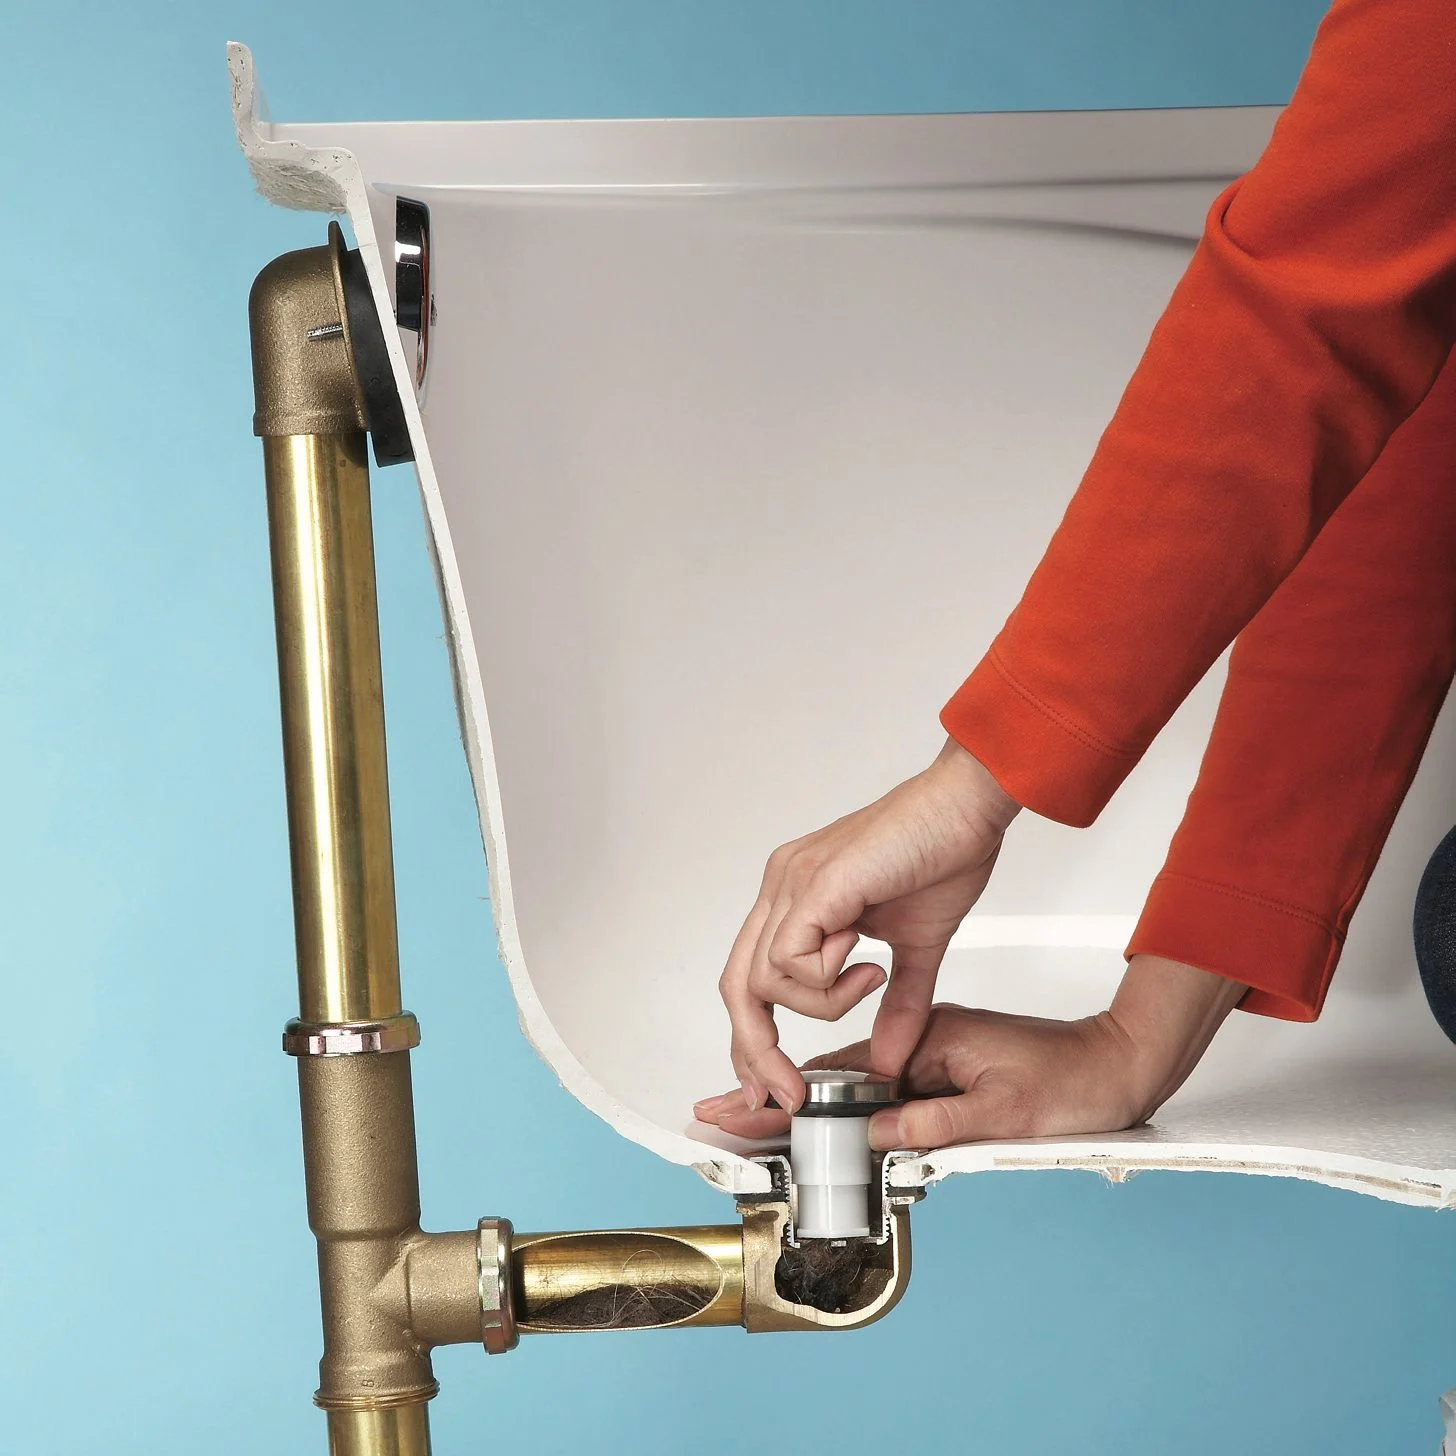
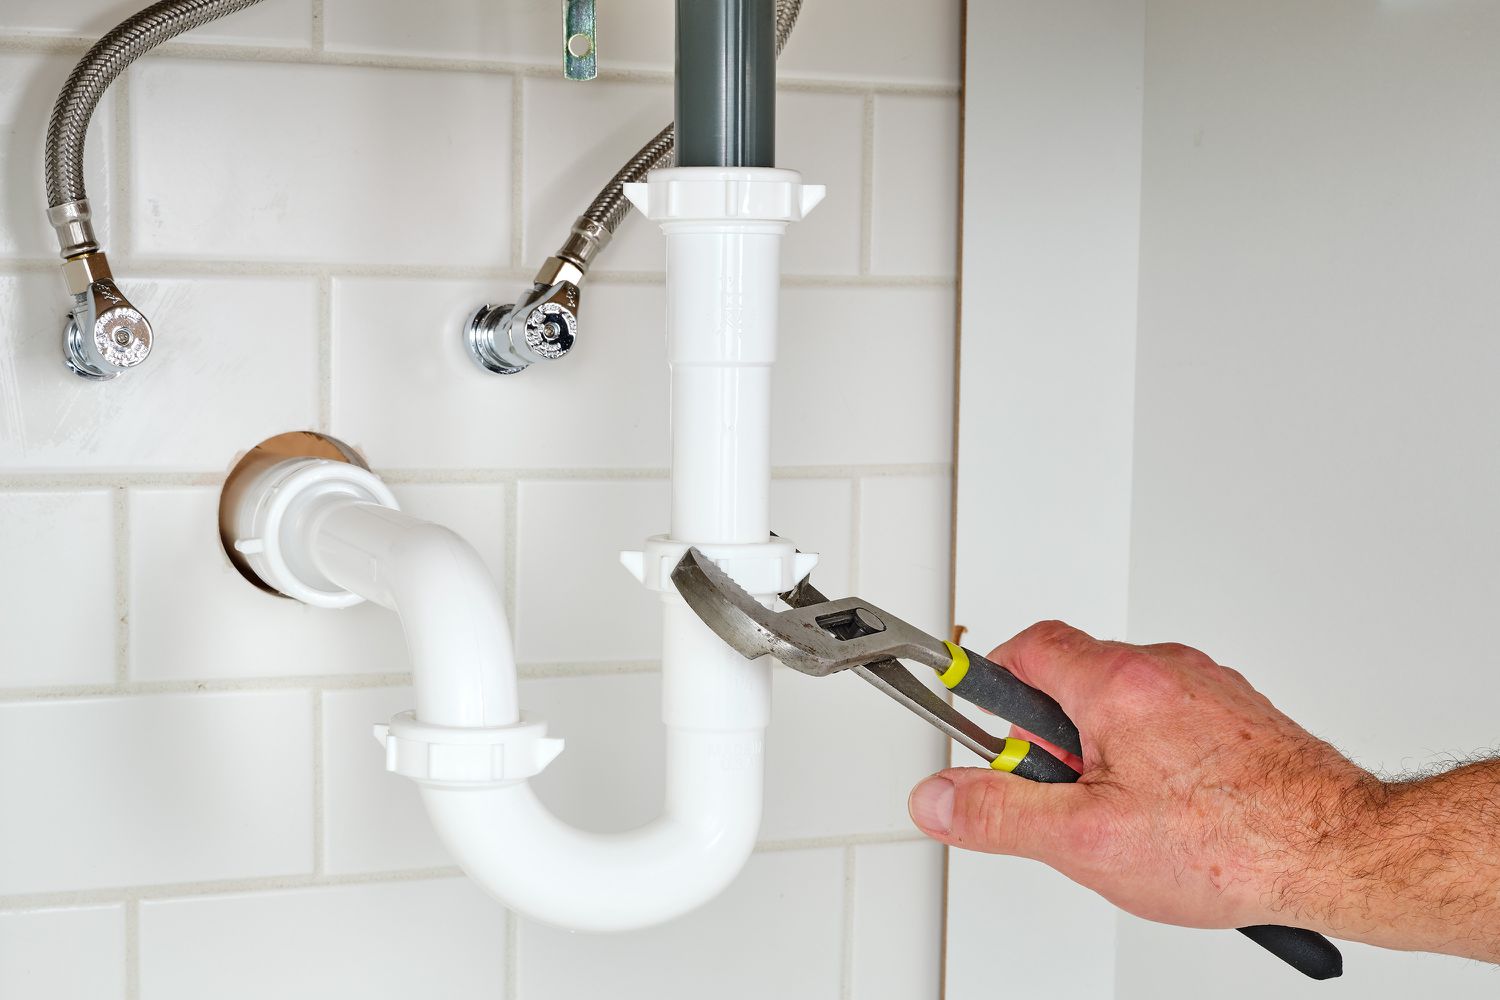
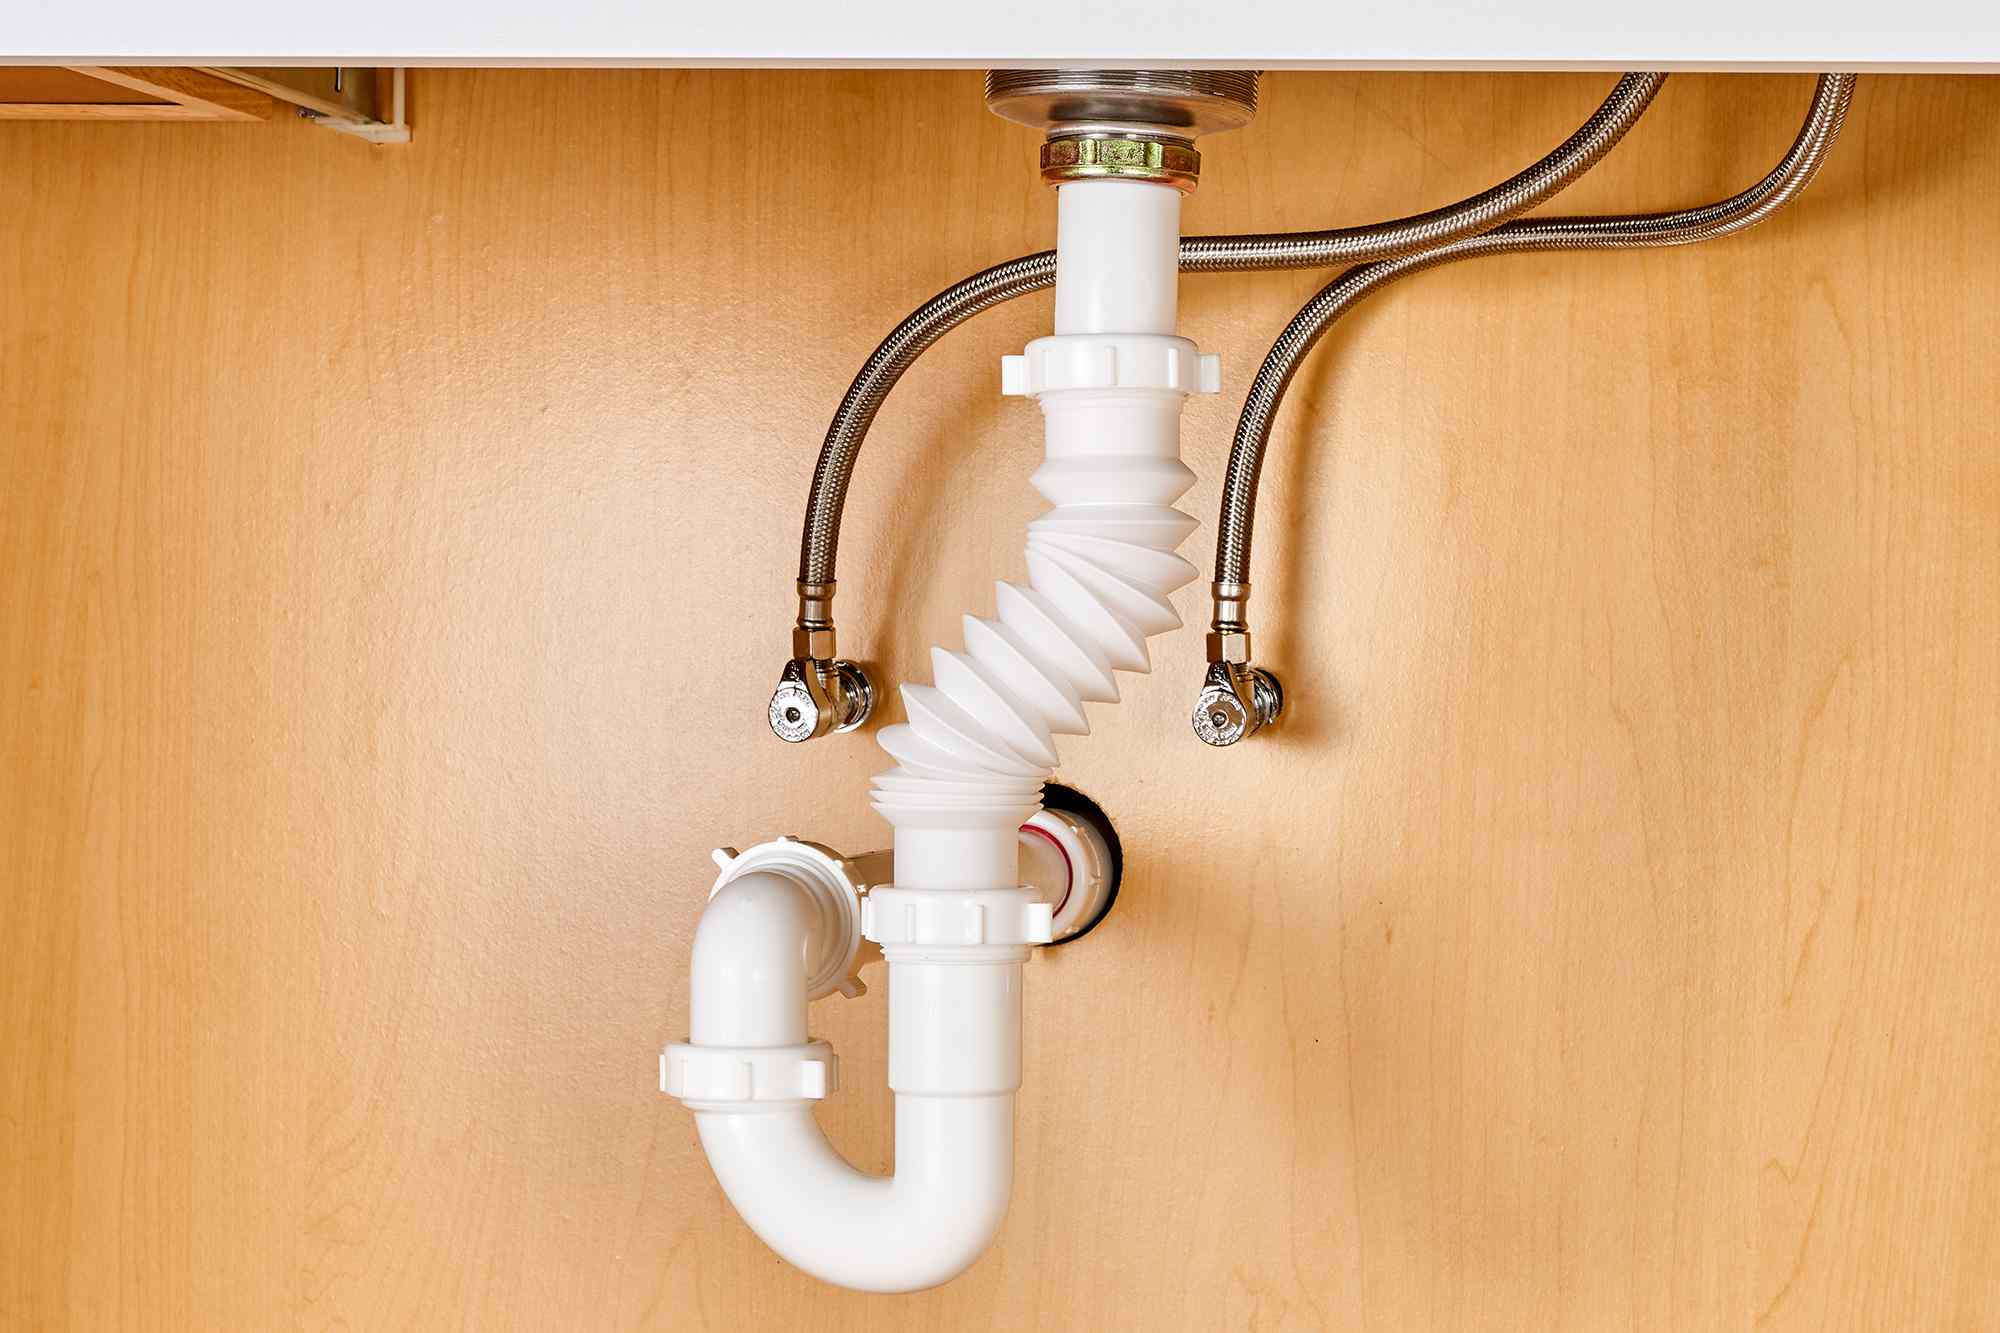
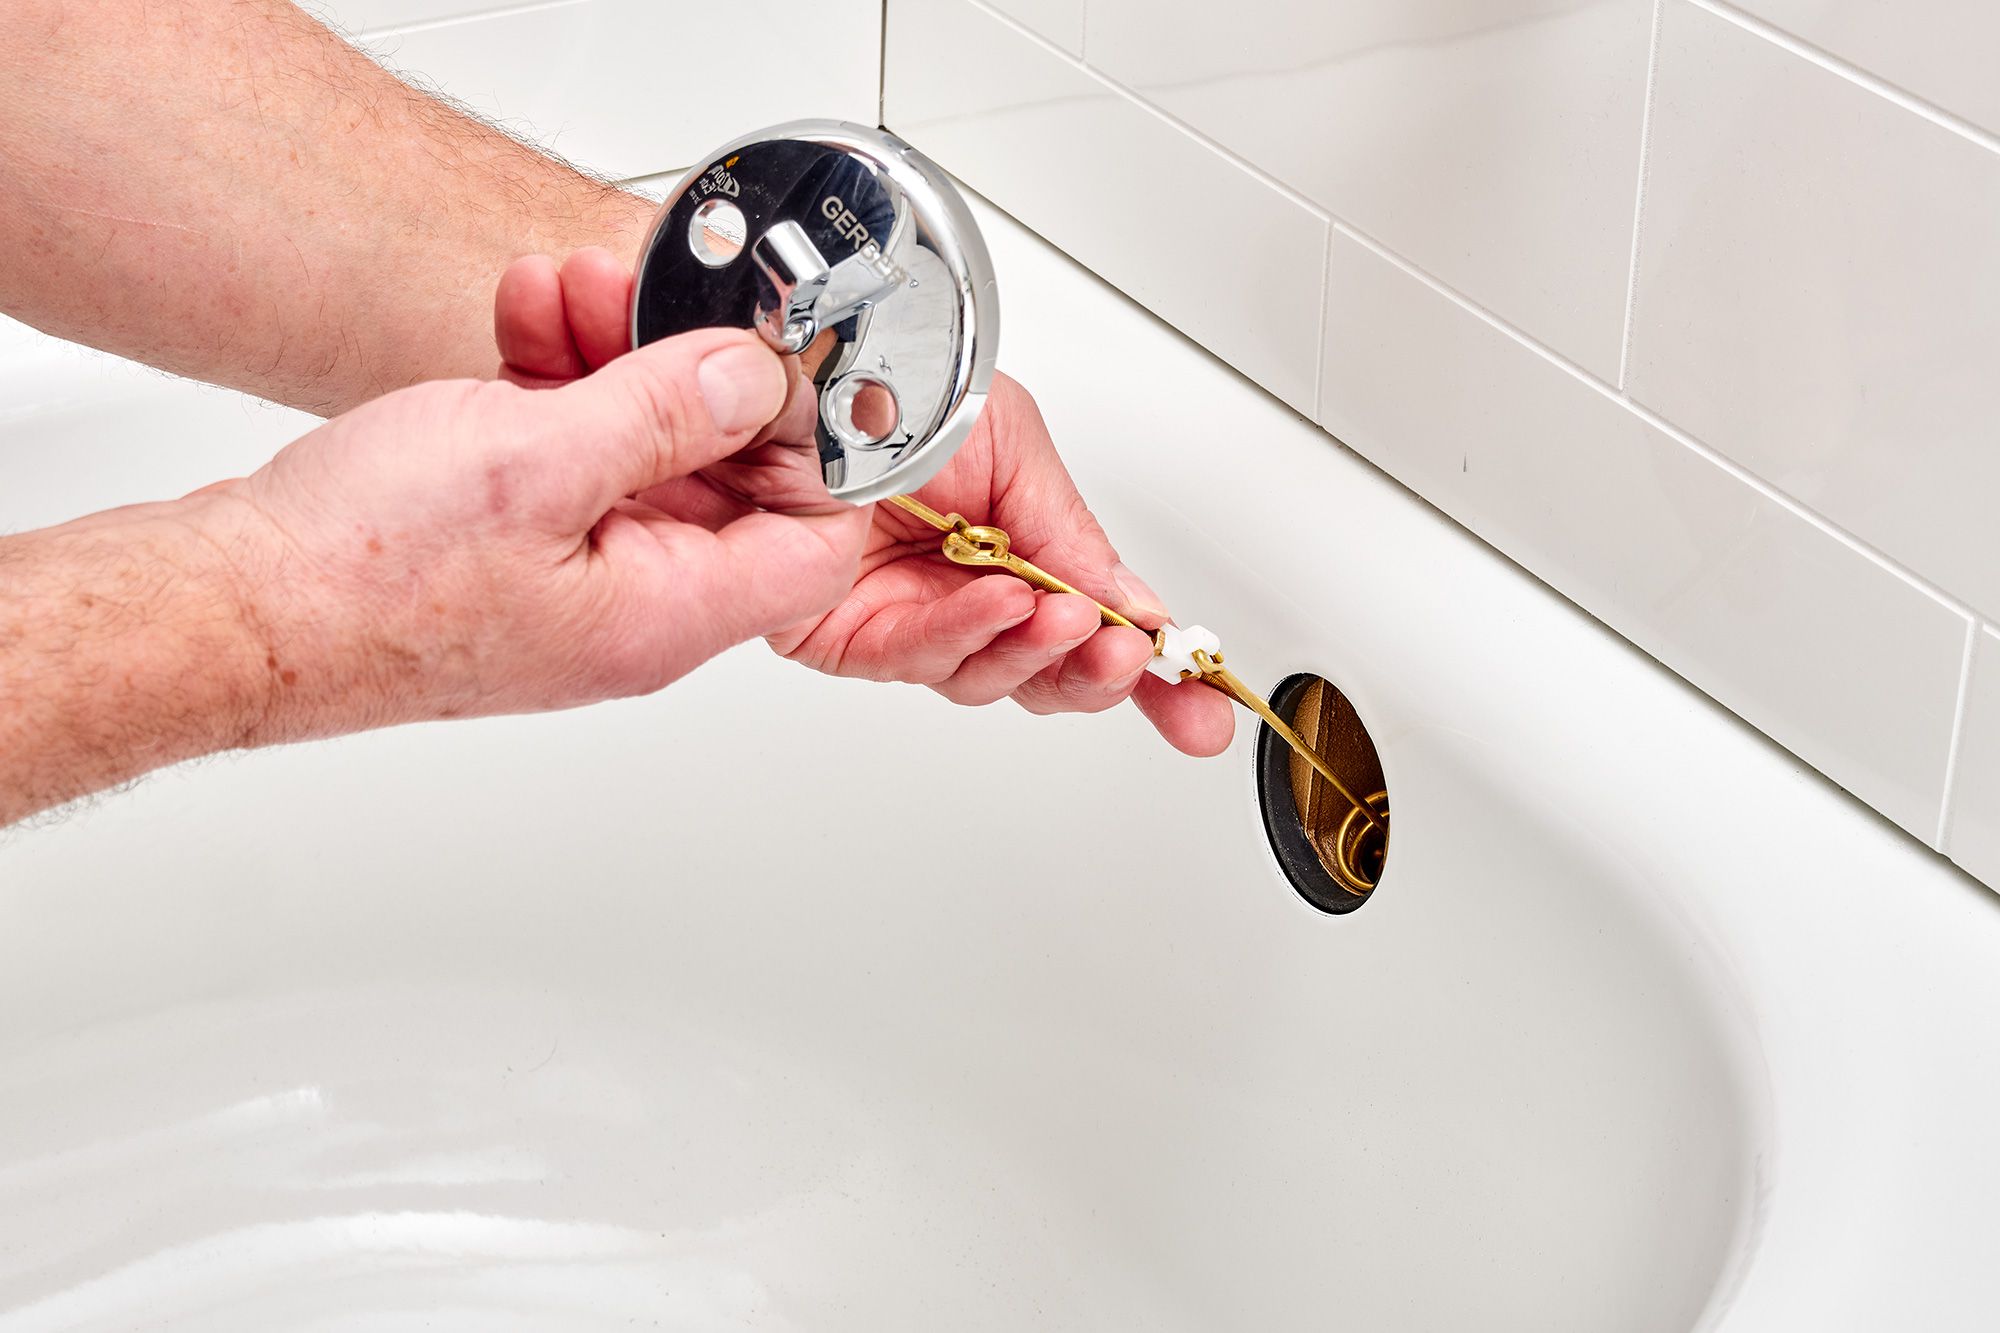
Attach the Drain Pipe: With the drain flange in place, proceed to attach the drain pipe to the underside of the bathtub. Use a pipe wrench to secure the connection, ensuring that it is snug and leak-free. If necessary, apply plumber's tape to the threaded joints to enhance the seal.
-
Install the Rubber Gasket: Place the rubber gasket over the exposed end of the drain pipe, ensuring a proper fit and alignment with the drain flange. The gasket acts as an additional barrier against water leakage and helps stabilize the connection between the drain and the pipe.
-
Tighten the Fittings: Carefully tighten any accompanying fittings or hardware that secure the drain pipe to the bathtub. This may involve tightening locknuts or screws to ensure that the entire assembly is stable and free from potential leaks.
-
Apply Silicone Caulk: To further reinforce the seal and prevent water from seeping into the surrounding area, apply a bead of silicone caulk around the perimeter of the drain flange. Smooth the caulk with a finger or a caulking tool to create a neat and effective seal.
By following these detailed steps, you can successfully install the new bathtub drain, creating a reliable and watertight connection that ensures proper drainage and prevents leaks. With the new drain securely in place, you are now ready to proceed with the final step of testing the drain to confirm its functionality.
When connecting a bathtub drain, make sure to use plumber’s putty to create a watertight seal around the drain flange. Tighten the drain assembly securely to prevent leaks.
Step 4: Test the drain
Once the new bathtub drain is installed, it's essential to conduct a thorough test to ensure that it functions as intended and is free from any leaks or drainage issues. Testing the drain provides an opportunity to identify and address any potential issues before completing the installation process. Here's a detailed guide on how to test the drain effectively:
-
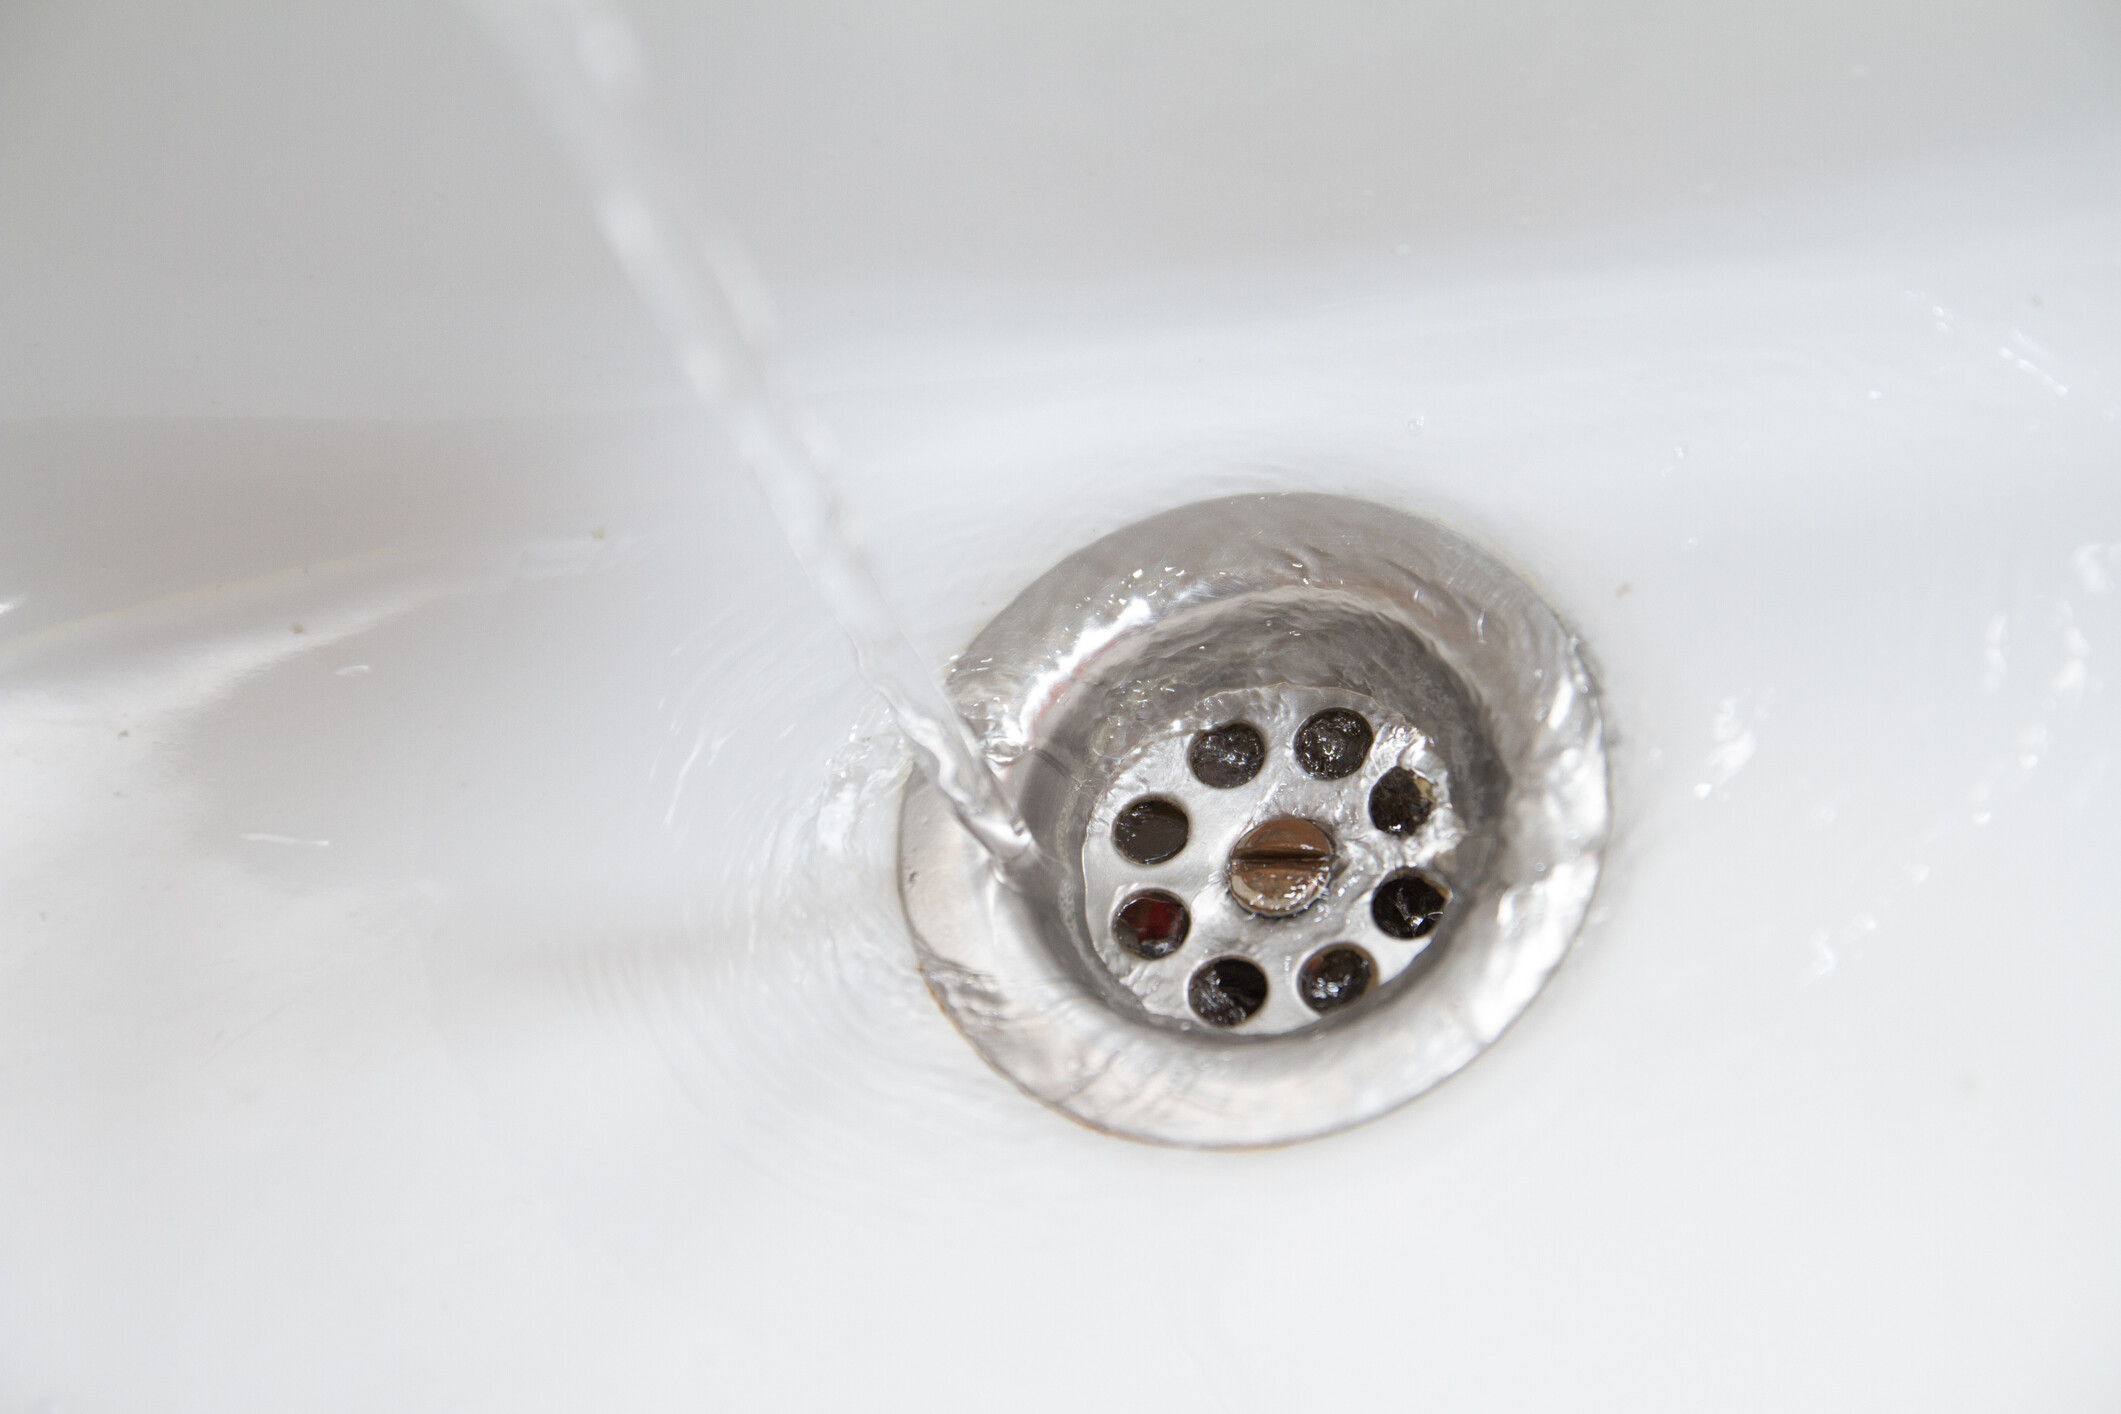
Run Water Through the Drain: Begin by running water through the bathtub drain to observe the flow and drainage. Fill the bathtub with a moderate amount of water and then release it to assess how efficiently the water drains. Observe the speed and consistency of the drainage to ensure that there are no signs of slow or obstructed flow.
-
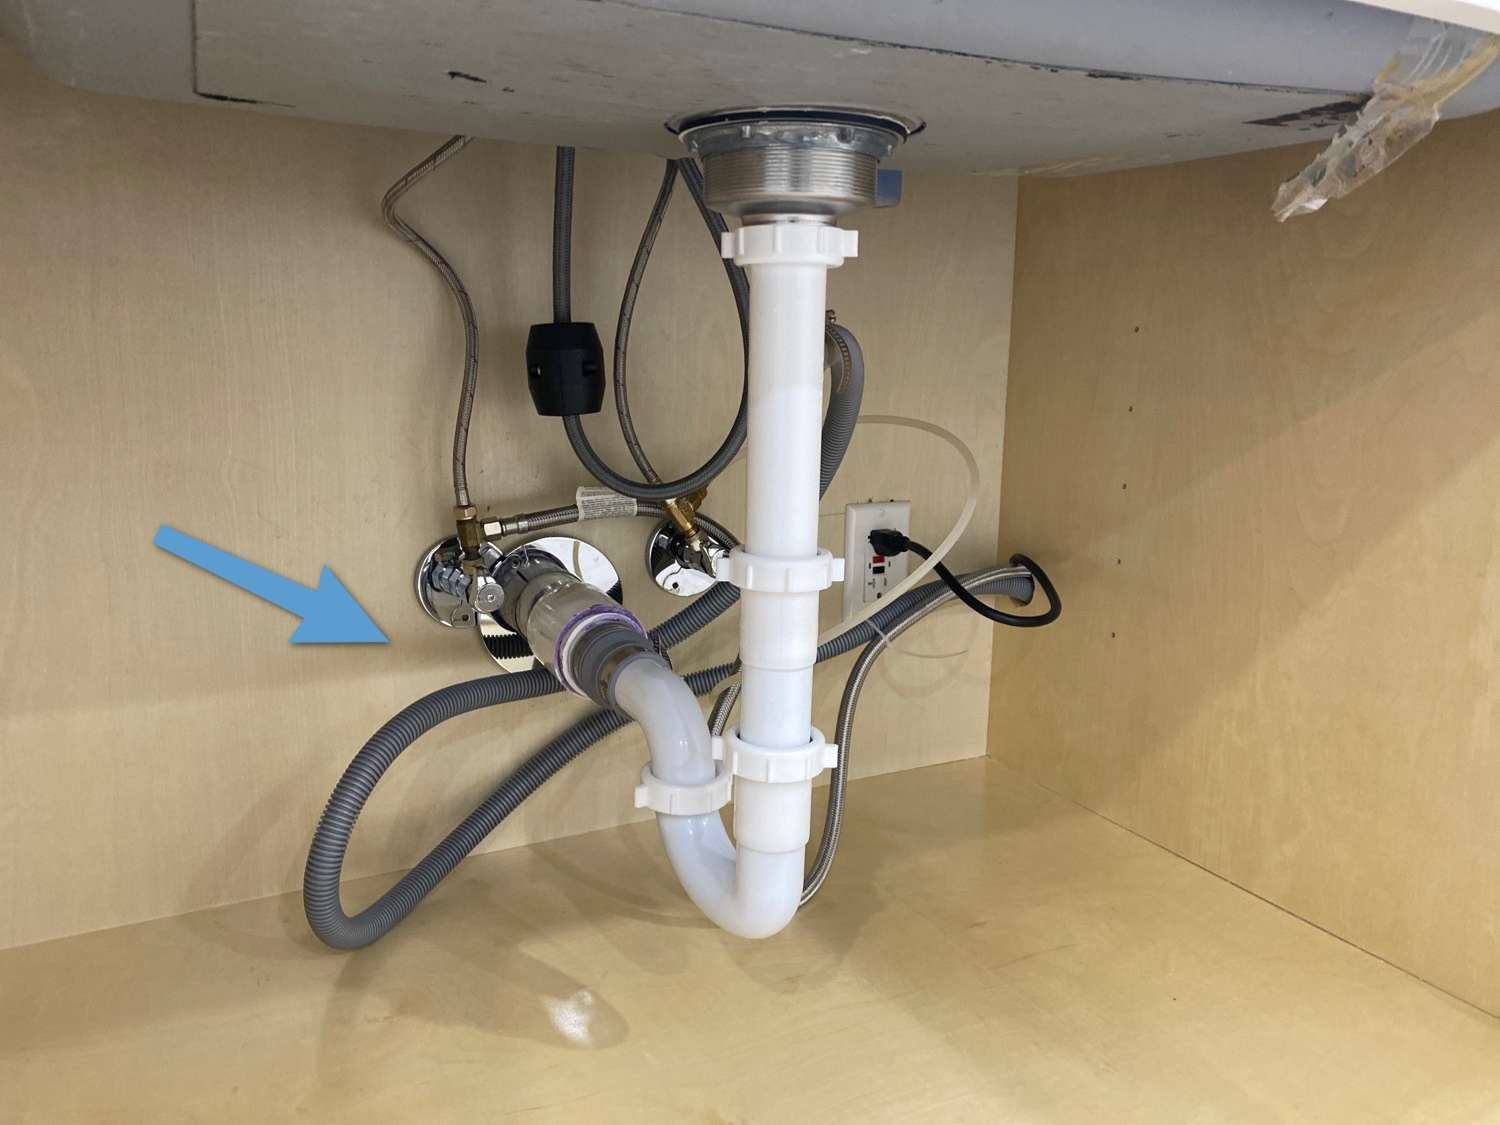
Check for Leaks: While the water is draining, carefully inspect the area around the newly installed drain for any signs of leakage. Look for water seepage, drips, or moisture accumulation, particularly around the drain flange and the connection points with the drain pipe. Use a flashlight to illuminate the area and conduct a thorough visual inspection.
-
Verify the Seal: After the water has drained completely, inspect the underside of the bathtub and the connection points for any signs of moisture or water accumulation. This includes checking the area where the drain pipe meets the bathtub and ensuring that the rubber gasket and fittings are secure and free from leaks.
-
Test the Stopper Mechanism: If your bathtub is equipped with a stopper mechanism, test its functionality by engaging and disengaging the stopper to verify that it operates smoothly and effectively. Ensure that the stopper creates a tight seal when closed and opens fully to allow unobstructed drainage.
-
Observe for Unusual Noises: While the water is draining, listen for any unusual gurgling or bubbling noises that may indicate air pockets or obstructions within the drain system. These noises can be a sign of improper installation or potential issues that need to be addressed to ensure optimal drainage.
-
Repeat the Test: If any issues or concerns are identified during the initial test, repeat the process to confirm that the drain functions as intended after making any necessary adjustments or repairs. It's important to conduct a thorough and comprehensive test to ensure the long-term reliability of the newly installed bathtub drain.
By following these steps and conducting a meticulous test of the drain, you can verify that the installation is successful and that the bathtub drain operates efficiently and without any leaks or drainage problems. Addressing any issues during the testing phase will help prevent future complications and ensure that your bathtub drain provides reliable performance for years to come.
Conclusion
In conclusion, connecting a bathtub drain is a manageable and rewarding DIY project that can significantly contribute to the functionality and efficiency of your bathroom plumbing system. By following the step-by-step process outlined in this guide, you can successfully replace an old drain or install a new one with confidence and precision.
The process begins with gathering the necessary tools and materials, ensuring that you have everything required to complete the installation seamlessly. With tools such as an adjustable wrench, plumbers putty, and a pipe wrench, along with essential materials including a new bathtub drain, rubber gasket, and silicone caulk, you can set the stage for a successful installation.
Removing the old drain is a critical step that involves accessing the drain, loosening and removing the old components, and preparing the area for the installation of the new drain. Careful attention to detail during this phase is essential to avoid damaging the bathtub or surrounding plumbing components.
Installing the new drain requires precision and thoroughness, from applying plumbers putty to securing the drain flange and attaching the drain pipe. The use of silicone caulk and rubber gaskets further enhances the watertight seal, ensuring that the new drain functions reliably and prevents water leaks.
Once the new drain is in place, testing its functionality is crucial to identify any potential issues and ensure that the installation is successful. By running water through the drain, checking for leaks, and verifying the stopper mechanism, you can confirm that the drain operates efficiently and without any drainage problems.
By mastering the process of connecting a bathtub drain, you can enhance your DIY skills and take proactive steps to maintain a functional and efficient bathroom plumbing system. Whether you're addressing a specific issue with an old drain or embarking on a new installation, the knowledge and expertise gained from this guide will empower you to tackle this essential home improvement task with confidence.
With the new bathtub drain securely connected and functioning as intended, you can enjoy the peace of mind that comes with a reliable and leak-free plumbing system, ensuring that your bathroom remains a comfortable and functional space for years to come.
Frequently Asked Questions about How To Connect A Bathtub Drain?
Was this page helpful?
At Storables.com, we guarantee accurate and reliable information. Our content, validated by Expert Board Contributors, is crafted following stringent Editorial Policies. We're committed to providing you with well-researched, expert-backed insights for all your informational needs.

0 thoughts on “How To Connect A Bathtub Drain?”