Articles
How To Paint Rough Cedar Interior Walls
Modified: October 18, 2024
Learn how to paint rough cedar interior walls with our informative articles. Transform your home with our step-by-step guide and expert tips.
(Many of the links in this article redirect to a specific reviewed product. Your purchase of these products through affiliate links helps to generate commission for Storables.com, at no extra cost. Learn more)
Introduction
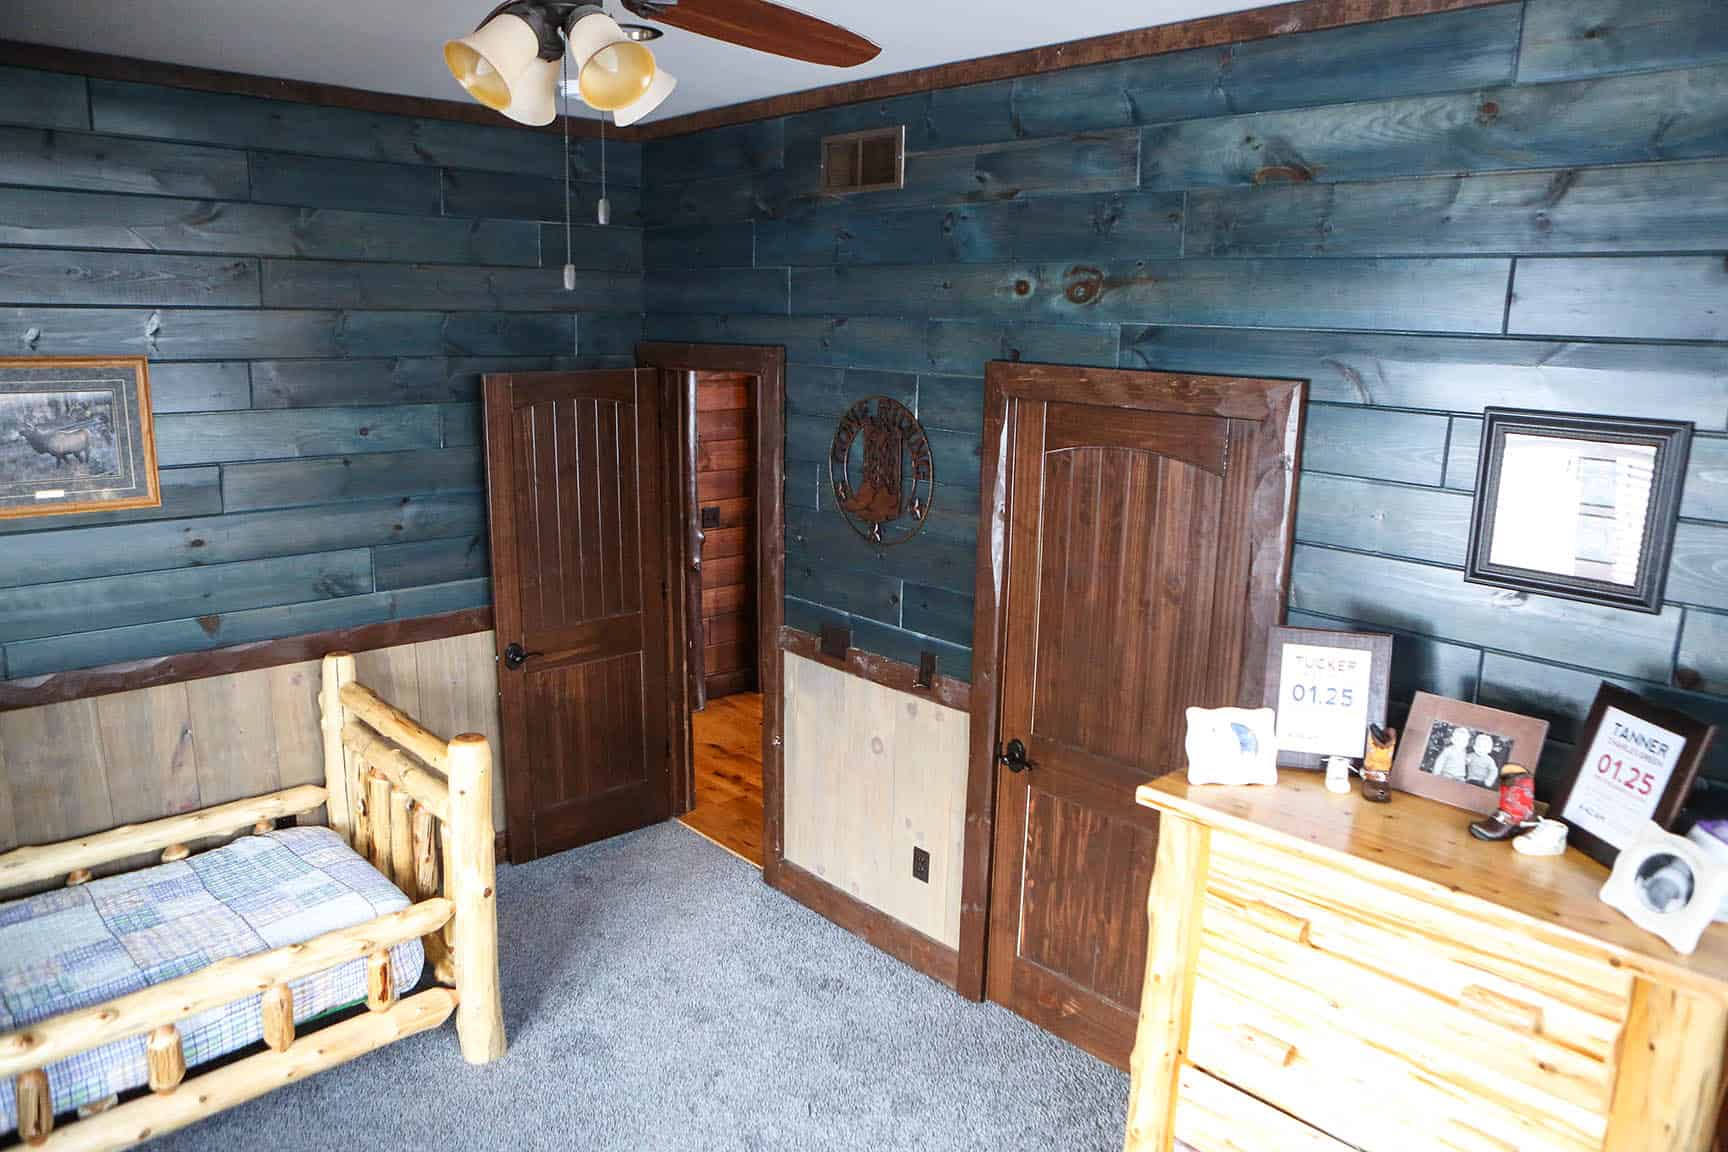
When it comes to interior walls, there are a plethora of options to choose from. However, if you’re looking for a rustic and natural aesthetic, rough cedar walls can be a stunning choice. The unique texture and grains of the wood add character and warmth to any space. Painting rough cedar walls can be a fantastic way to preserve the natural beauty while adding your personal touch.
In this article, we will take you through a step-by-step process on how to paint rough cedar interior walls. From preparing the walls to choosing the right paint and applying the coats, we will cover everything you need to know to achieve a professional-looking finish.
Before we dive into the process, it’s important to note that painting rough cedar walls requires patience and attention to detail. The unevenness and knots in the wood can make the painting process slightly challenging, but with the right techniques and tools, you can achieve outstanding results.
So, if you’re ready to transform your space and bring new life to your rough cedar walls, let’s get started!
Key Takeaways:
- Proper preparation, including cleaning, sanding, and filling in cracks, is essential for achieving a smooth and professional finish when painting rough cedar interior walls.
- Choosing the right paint, applying thin coats, and allowing for adequate drying time are crucial steps in achieving a beautiful and long-lasting paint finish on rough cedar walls.
Read more: How To Spray Paint Interior Walls
Preparing the Walls
Before you can begin painting your rough cedar walls, it’s essential to properly prepare the surface. This step is crucial for achieving a smooth and long-lasting paint finish. Here’s how you can prepare your walls:
- Clean the walls: Start by removing any dust, dirt, or debris from the walls. Use a dusting cloth or a vacuum cleaner with a brush attachment to gently clean the surface. Pay special attention to the crevices and knots in the wood to ensure they are free from any loose particles.
- Sand the surface: If your rough cedar walls have a particularly rough texture, you may need to sand them lightly to create a smoother surface for painting. Use a fine-grit sandpaper or a sanding block to sand the wood gently. Be careful not to sand too aggressively, as you don’t want to remove the natural grains and texture of the cedar.
- Fill in cracks and holes: Inspect the walls for any cracks or holes. Use a wood filler or putty to fill in these imperfections. Smooth out the filler with a putty knife and let it dry according to the manufacturer’s instructions. Once dry, lightly sand the filled areas to ensure they are flush with the rest of the wall’s surface.
- Protect the surrounding areas: Before you start painting, take the time to protect the surrounding areas, such as floors and furniture. Cover them with drop cloths or plastic sheets to prevent any paint splatters or drips from causing damage.
By properly preparing your rough cedar walls, you create a clean and smooth surface that will allow the paint to adhere properly. This step is critical for achieving a professional-looking finish and ensuring the longevity of the paint job.
Choosing the Right Paint
When it comes to painting rough cedar walls, choosing the right type of paint is crucial. Not all paint varieties are suitable for this unique surface. Here are a few factors to consider when selecting the perfect paint:
- Finish: The finish of the paint will determine the final look and durability of your walls. For rough cedar walls, it is recommended to choose a satin or semi-gloss finish. These finishes offer a balance between a smooth appearance and the ability to withstand wear and tear.
- Quality: Investing in a high-quality paint will ensure better coverage and longevity. Look for paints that are specifically formulated for wood surfaces. They should be durable, fade-resistant, and have good adhesion properties.
- Breathability: Cedar is a natural material that can expand and contract with changes in temperature and humidity. Therefore, it’s important to choose a paint that allows the wood to breathe. Look for paints that are labeled as breathable or have good moisture resistance.
- Color: The color of the paint is, of course, a matter of personal preference. However, it’s important to consider the overall aesthetic of your space and how the color will complement the rough cedar. Lighter colors tend to highlight the natural patterns of the wood, while darker shades can create a cozy and intimate ambiance.
- Environmental impact: If you’re conscious about the environment, consider choosing paints that are low in VOCs (volatile organic compounds). These paints have fewer harmful chemicals and are better for indoor air quality.
Once you’ve considered these factors, visit your local paint store and consult with the experts. They can recommend specific paint brands and finishes that are suitable for painting rough cedar walls. Don’t hesitate to ask for color swatches or paint samples to help you make the final decision.
Remember, choosing the right paint is crucial for achieving a beautiful and long-lasting finish. Take your time to make an informed choice and enjoy the process of transforming your rough cedar walls into a stunning focal point in your space.
Gathering the Necessary Tools and Materials
Before you start painting your rough cedar walls, it’s important to gather all the necessary tools and materials. Having everything you need at hand will make the process smoother and more efficient. Here’s a list of the essential items you’ll need:
- Paint: Select the paint color and finish that you’ve chosen during the previous step. Make sure to buy enough paint to cover the entire wall surface, including multiple coats if needed.
- Primer: Depending on the condition of your rough cedar walls, you may need a primer. Look for a high-quality wood primer that is compatible with the paint you’ll be using.
- Paint roller: Opt for a roller with a medium nap or thickness. This will help you apply the paint evenly and effectively cover the rough texture of the cedar.
- Paintbrushes: Have a few different sizes of paintbrushes on hand. A larger brush will be useful for cutting in and painting larger areas, while smaller brushes can be used for detailed work and hard-to-reach spots.
- Paint tray: A paint tray is essential for pouring and loading the paint onto the roller. Look for a sturdy tray with deep wells to prevent spillage.
- Drop cloths or plastic sheets: Protect the surrounding areas by covering them with drop cloths or plastic sheets. This will prevent any accidental paint splatters or drips from causing damage.
- Sandpaper: Keep a few sheets of fine-grit sandpaper on hand for any touch-ups or smoothing out rough areas.
- Painter’s tape: Use painter’s tape to mask off any areas that you don’t want to be painted, such as trim, windows, or door frames.
- Cleaner and rags: You’ll need a cleaner specifically designed for wood surfaces. Use it to clean the walls before painting and have some clean rags available for wiping down any spills or drips.
- Gloves and safety goggles: Protect your hands and eyes by wearing gloves and safety goggles throughout the painting process.
Make sure to gather all these tools and materials before you start painting your rough cedar walls. This way, you’ll have everything you need within reach, allowing you to focus on the task at hand and achieve excellent results.
Cleaning the Cedar Walls
Before you begin painting your rough cedar walls, it’s crucial to clean them thoroughly. Cleaning not only removes dirt and dust but also helps the paint adhere better to the surface. Here are the steps to effectively clean your cedar walls:
- Remove loose debris: Start by using a dry cloth or a vacuum cleaner with a brush attachment to remove any loose debris, such as dust, dirt, or cobwebs. Pay close attention to the crevices and knots in the wood where debris tends to accumulate.
- Prepare a cleaning solution: Mix a mild cleaner specifically designed for wood surfaces with water in a bucket according to the manufacturer’s instructions. Avoid using harsh chemicals or abrasive cleaners that can damage the cedar.
- Test the cleaning solution: Before applying the cleaning solution to the entire wall, test it on a small, inconspicuous area. This will allow you to ensure that the cleaner doesn’t discolor or damage the wood.
- Apply the cleaning solution: Dip a soft, non-abrasive sponge or cloth into the cleaning solution and wring out any excess liquid. Gently scrub the cedar walls, working in small sections at a time. Pay close attention to areas with stains or stubborn dirt.
- Rinse the walls: After scrubbing, rinse the walls thoroughly with clean water using a separate sponge or cloth. This will remove any dirt or residue from the cleaning solution. Ensure that the walls are completely rinsed to prevent any residue from interfering with the paint’s adhesion.
- Dry the walls: Allow the cedar walls to air dry completely before proceeding. This will ensure that the wood is dry and ready for the next steps of the painting process.
By cleaning your cedar walls properly, you create a clean and smooth surface for the paint to adhere to. It also helps to remove any contaminants that could affect the paint’s durability. Taking the time to clean the walls thoroughly will result in a professional-looking finish and ensure the longevity of your paint job.
Read more: How To Paint Interior Brick Wall
Filling in Cracks and Holes
Before you start painting your rough cedar walls, it’s important to inspect them for any cracks or holes. Filling in these imperfections will create a smoother surface and ensure a seamless finish. Here’s how to effectively fill cracks and holes in your cedar walls:
- Inspect the walls: Carefully examine the walls for any cracks, knots, or nail holes. Use a bright light source and run your hand over the surface to identify any imperfections. It’s important to address these issues before painting to achieve the best results.
- Clean the area: Before filling the cracks and holes, clean the surrounding area to ensure proper adhesion. Use a soft cloth or brush to remove any dust, debris, or loose particles from the surface. This will also help the filler or putty to adhere better to the wood.
- Select the filler or putty: Choose a high-quality wood filler or putty that matches the color of your cedar walls. Look for a product that is specifically designed for wood repair and is suitable for interior use.
- Apply the filler or putty: Using a putty knife or a small spatula, apply the filler or putty to the cracks and holes in the wood. Press the filler firmly into the imperfections and smooth it out using the edge of the knife. Make sure to fill the gaps completely and leave a slightly raised surface to account for any shrinkage during drying.
- Let it dry: Allow the filler or putty to dry completely according to the manufacturer’s instructions. This may take several hours or even overnight. Avoid touching or disturbing the filled areas during the drying process to ensure a smooth finish.
- Sand the filled areas: Once the filler or putty is dry, use fine-grit sandpaper to smooth out the filled areas. Gently sand the surface until it is flush with the surrounding wood. This will create a seamless appearance and ensure a uniform finish when you start painting.
- Remove sanding dust: After sanding, wipe away the sanding dust using a clean cloth or vacuum cleaner with a brush attachment. This will ensure a clean surface for painting.
Filling in cracks and holes in your rough cedar walls is an essential step to achieve a smooth and flawless paint finish. By taking the time and effort to properly address these imperfections, you’ll be rewarded with a visually appealing and professional-looking result.
Before painting rough cedar interior walls, make sure to clean the surface thoroughly to remove any dirt, dust, or oils. Sand the surface lightly to smooth out any rough spots and apply a coat of primer before painting to ensure better adhesion and a more even finish.
Priming the Surface
Priming the surface of your rough cedar walls is a crucial step in the painting process. Priming helps to seal the wood, improve adhesion, and ensure a smooth and long-lasting paint finish. Here’s how you can effectively prime your cedar walls:
- Select the right primer: Choose a high-quality wood primer that is specifically formulated for cedar or other porous woods. Look for a primer that offers good adhesion, seals the surface, and is compatible with the paint you’ll be using.
- Prepare the area: Before you start priming, make sure the walls are clean and dry. Protect the surrounding areas, such as floors and furniture, by covering them with drop cloths or plastic sheets. Remove any painter’s tape that was applied during the previous steps.
- Stir the primer: Open the can of primer and stir it thoroughly to ensure all the ingredients are well mixed. This will help achieve a consistent application and optimal performance.
- Apply the primer: Start by cutting in the edges of the walls using a paintbrush. Use long, even strokes to create a smooth and even line. Then, use a paint roller with a medium nap to apply the primer to the larger areas of the wall. Work in small sections, overlapping each stroke slightly, to ensure even coverage.
- Follow the manufacturer’s instructions: Pay attention to the manufacturer’s instructions regarding application time, drying time, and any specific recommendations. Some primers may require multiple coats or a certain drying time before proceeding to the next step.
- Allow the primer to dry: Once you have applied the primer, allow it to dry completely. This may take a few hours or longer, depending on the specific product and environmental conditions. Avoid touching or disturbing the walls during the drying process to prevent any damage or smudging.
- Inspect the primed surface: After the primer has dried, inspect the walls to ensure that they are evenly covered and that there are no bare spots or areas where the primer didn’t adhere properly. If necessary, apply additional primer to these areas and allow it to dry.
Priming the surface of your rough cedar walls is an important step to ensure a high-quality paint finish. Taking the time to prime the walls will enhance the adhesion of the paint and provide a solid base for a smooth and durable result. Don’t skip this step, as it can make a significant difference in the overall quality and longevity of your paint job.
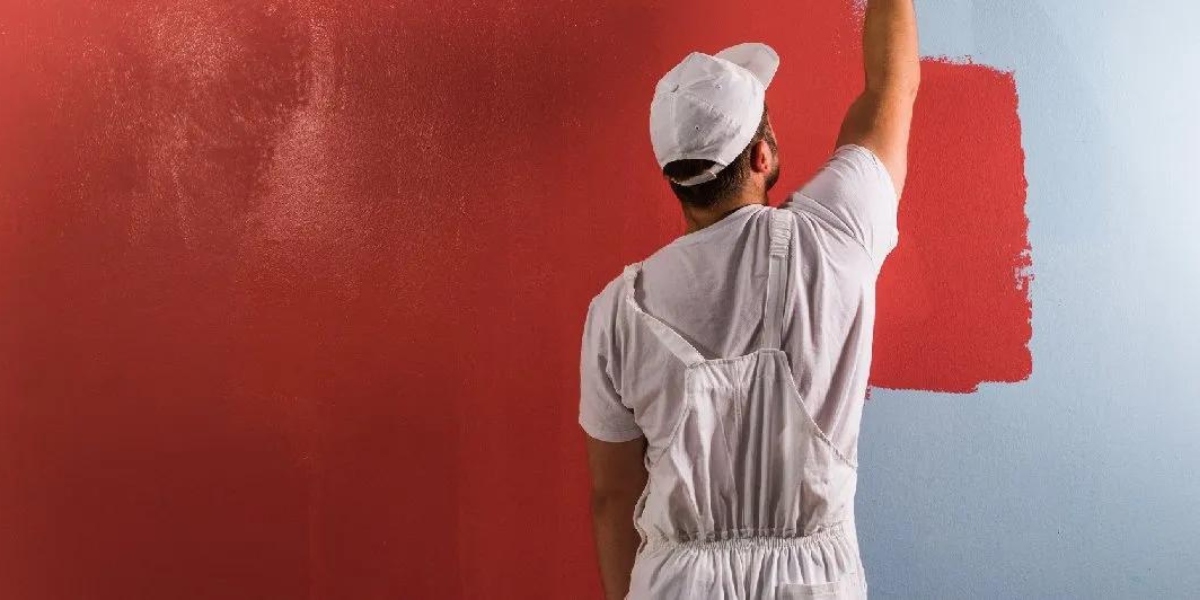
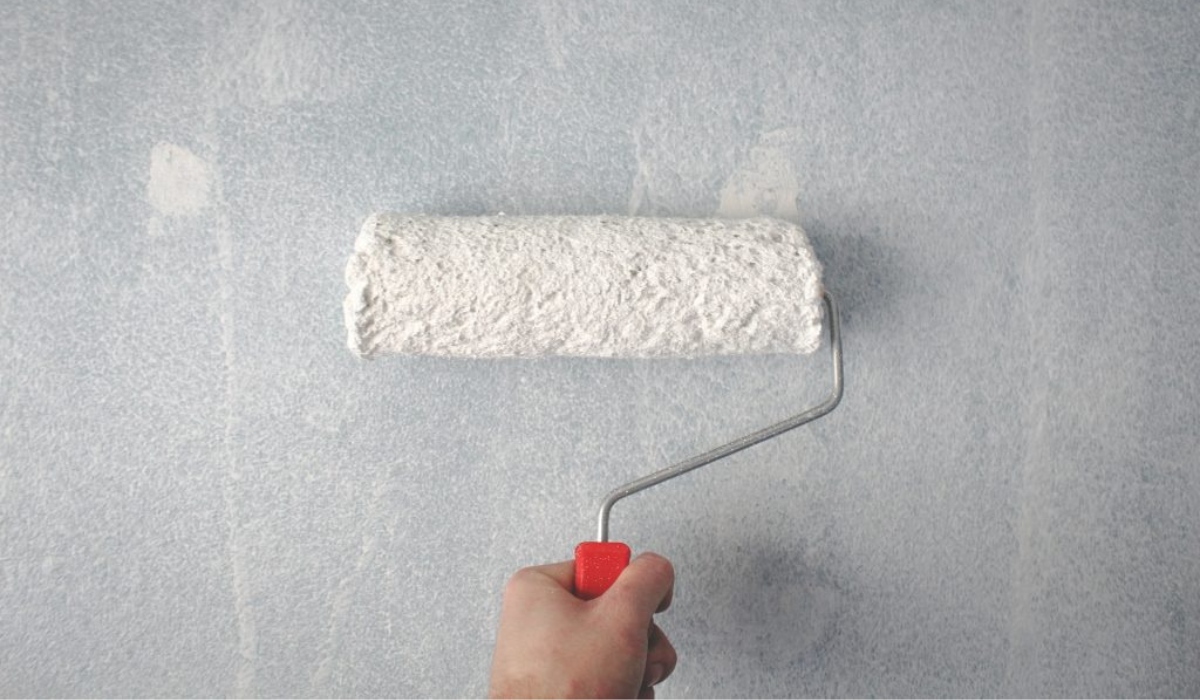
Applying the First Coat of Paint
Now that you have prepared, cleaned, filled in any cracks, and primed your rough cedar walls, it’s time to apply the first coat of paint. This step brings your vision to life and transforms the appearance of your space. Here’s how you can effectively apply the first coat of paint:
- Prepare the paint: Open your can of paint and stir it thoroughly to ensure an even consistency. If necessary, thin the paint according to the manufacturer’s instructions. Pour a portion of the paint into a paint tray, filling it to a depth that allows for easy loading of the roller.
- Cut in the edges: Use a paintbrush to cut in along the edges of the walls, such as corners, trim, and ceiling. Take your time and use steady strokes to create clean lines and ensure proper coverage in those hard-to-reach areas.
- Load the roller: Dip the paint roller into the paint tray and roll it back and forth to evenly distribute the paint on the roller. Avoid overloading the roller to prevent drips and splatters.
- Start painting: Begin painting the larger surface area of the wall by using the roller. Apply even pressure and use long, vertical strokes to cover the rough texture of the cedar. Work in small sections at a time, slightly overlapping each stroke to ensure a seamless finish.
- Work from top to bottom: When using the roller, start from the top of the wall and work your way down. This helps to prevent any drips or streaks from forming on painted surfaces.
- Check for uniform coverage: As you paint, periodically step back and inspect the wall for any missed spots or uneven coverage. If you notice any areas that require more paint, go over them with the roller or a brush to ensure consistent coverage.
- Apply thin coats: It’s generally better to apply thin coats of paint rather than thick ones. This allows for better adhesion and avoids sagging or dripping. If necessary, you can apply a second or third coat once the previous coat is dry.
- Allow the paint to dry: Follow the drying time specified by the paint manufacturer. Typically, it takes a few hours for the first coat to dry. Avoid touching or disturbing the freshly painted surface during this time.
Applying the first coat of paint to your rough cedar walls is an exciting step in the painting process. Take your time, be meticulous, and maintain a consistent technique to achieve an even and flawless finish. Once the first coat is dry, you can assess if any touch-ups or additional coats are needed before moving on to the next steps.
Sanding the Walls (if necessary)
After applying the first coat of paint to your rough cedar walls, it’s important to assess the surface and determine if sanding is necessary. Sanding can help smooth out any imperfections, rough spots, or visible brush marks, resulting in a more polished and professional finish. Here’s how you can effectively sand the walls if needed:
- Inspect the painted surface: Carefully examine the walls to identify any areas that require sanding. Look for rough spots, visible brush marks, drips, or any other imperfections. Run your hand over the surface to feel for any roughness or inconsistencies.
- Gather the necessary tools: To sand the walls, you’ll need a fine-grit sandpaper (around 220 grit) or a sanding block. Additionally, have a clean cloth or vacuum cleaner with a brush attachment to remove the sanding dust.
- Sand the rough areas: Focus on sanding the areas that require smoothing. Use light to moderate pressure and sand in a circular or back-and-forth motion. Be gentle to avoid removing too much paint or damaging the wood. Continuously check your progress to ensure you’re achieving the desired result.
- Remove the sanding dust: After sanding, wipe away the sanding dust using a clean cloth or vacuum cleaner with a brush attachment. Make sure the walls are free from any loose particles before proceeding to the next steps.
- Assess the surface: Take a step back and inspect the walls to determine if the sanding has achieved the desired level of smoothness. If necessary, repeat the sanding process in specific areas until you’re satisfied with the overall surface texture.
- Touch up any sanded areas: If sanding has removed any paint or exposed bare wood, use a small brush to touch up those areas with paint. Allow the touch-up paint to dry before proceeding.
Sanding the walls, if necessary, can refine the appearance of your rough cedar walls and create a smoother canvas for the next coat of paint. However, it’s important to note that this step may not always be required, especially if you achieved a satisfactory result with the first coat. Use your discretion when assessing the surface and don’t over-sand, as it can remove too much paint and compromise the finish.
Read more: How To Prepare Interior Walls For Painting
Applying the Second Coat of Paint
After sanding (if necessary) and allowing the first coat of paint to dry completely, it’s time to apply the second coat of paint to your rough cedar walls. This step will further enhance the color, coverage, and overall finish of your project. Here’s how you can effectively apply the second coat of paint:
- Prepare the paint: Open your can of paint and stir it thoroughly to ensure an even consistency. If needed, thin the paint according to the manufacturer’s instructions, but be cautious not to over thin.
- Inspect the walls: Before applying the second coat, visually inspect the walls for any imperfections or areas that may require touch-ups. Use a small brush to address any spots that require additional paint, such as missed areas or visible brush marks.
- Start painting: Begin applying the second coat by starting at the highest point of the wall and working your way down. Use a paintbrush to cut in around edges, corners, and trim. Then, use a paint roller with a medium nap to cover the larger surface areas, again working in small sections.
- Apply even pressure and strokes: Use even pressure and long, vertical strokes with the roller to achieve consistent coverage. Be mindful of overlapping each stroke slightly to blend the paint seamlessly. Ensure that the roller is adequately loaded with paint, but avoid applying excessive pressure that could cause drips or uneven application.
- Keep a wet edge: To prevent lap marks or visible lines, be mindful of maintaining a wet edge as you work. This means overlapping each newly painted section with the previous one while it is still wet. This technique helps to create a smooth and uniform finish.
- Continue the process: Repeat the painting process, section by section, until you have covered the entire wall surface. Take breaks as needed, but try to complete the second coat of paint without interruptions to maintain a consistent appearance.
- Allow the paint to dry: Follow the drying time specified by the paint manufacturer. Generally, it takes a few hours for the second coat of paint to dry, but it’s a good idea to allow for longer drying time to ensure a durable finish.
- Assess the coverage: Once the second coat is dry, step back and assess the overall coverage and appearance of the walls. If necessary, you can apply additional coats to achieve your desired level of opacity.
Applying the second coat of paint to your rough cedar walls is important for achieving a solid and uniform result. Take your time, use proper technique, and ensure adequate drying time to promote a professional-looking finish. Remember, multiple thin coats are better than one thick coat, as they minimize the risk of drips and provide better adhesion for long-lasting results.
Cleaning Up
Once you have finished applying the final coat of paint to your rough cedar walls, it’s time to clean up and put away your painting tools. Properly cleaning and storing your materials will prolong their lifespan and ensure they’re ready for future projects. Here’s what you need to do:
- Clean your brushes and roller: First, clean your brushes and roller immediately after use to prevent the paint from drying on the bristles or nap. Use warm soapy water and gently scrub the tools until the water runs clear. Rinse thoroughly and allow them to air dry completely before storing them.
- Dispose of excess paint and materials safely: If you have any leftover paint, pour it back into its original container or a sealable jar. Ensure the container is tightly closed to prevent the paint from drying out. Dispose of any paint cans, rags, or other materials according to your local regulations for hazardous waste disposal.
- Clean the paint tray: If you used a paint tray, clean it by scraping off any excess paint and washing it with warm soapy water. Rinse it thoroughly and dry it before storing.
- Remove drop cloths and plastic sheets: Carefully remove the drop cloths or plastic sheets protecting your floors and furniture. Check for any paint drips or spills and clean them up promptly using a damp cloth or sponge.
- Reinstall switch plates and outlet covers: If you removed any switch plates or outlet covers before painting, make sure to reinstall them once the paint is dry. This will restore the functionality and appearance of your walls.
- Inspect the painted walls: Take a final look at your painted walls to ensure there are no visible imperfections or areas that require touch-ups. If needed, make note of any spots that need additional attention and plan to address them at your earliest convenience.
- Enjoy your newly painted walls: Finally, take a step back and admire your hard work! Enjoy the transformation of your rough cedar walls into a beautiful and inviting space. Take the time to decorate and arrange your furniture to showcase the new look.
Cleaning up after painting is an important final step in the process. By properly cleaning and storing your materials, you’ll be ready for future painting projects and maintain the longevity of your tools. With the cleanup complete, you can fully appreciate the beauty of your newly painted rough cedar walls and enjoy the refreshed atmosphere they bring to your space.
Now that you've mastered painting rough cedar walls, why stop there? Dive deeper into home aesthetics with our guide on rustic home decor, perfect for adding a cozy, natural touch to any space. Once you're hooked on transforming your home, don't miss out on professional painting techniques that can elevate any DIY project. And for those feeling adventurous, our comprehensive DIY home improvement guide offers practical steps to tackle upgrades yourself, boosting both your skills and your home's value.
Frequently Asked Questions about How To Paint Rough Cedar Interior Walls
Was this page helpful?
At Storables.com, we guarantee accurate and reliable information. Our content, validated by Expert Board Contributors, is crafted following stringent Editorial Policies. We're committed to providing you with well-researched, expert-backed insights for all your informational needs.

0 thoughts on “How To Paint Rough Cedar Interior Walls”