Home>Furniture & Design>Living Room Furniture>How To Reupholster A Leather Recliner
Living Room Furniture
How To Reupholster A Leather Recliner
Modified: February 18, 2024
Learn how to reupholster a leather recliner and give your living room furniture a fresh new look. Follow our step-by-step guide for furniture and design inspiration.
(Many of the links in this article redirect to a specific reviewed product. Your purchase of these products through affiliate links helps to generate commission for Storables.com, at no extra cost. Learn more)
Introduction
Recliners are a beloved staple of living room furniture, providing comfort and relaxation to countless individuals. Over time, the upholstery of a leather recliner may show signs of wear and tear, prompting the need for a refresh. Reupholstering a leather recliner is a rewarding project that allows you to breathe new life into a cherished piece of furniture. Whether you're looking to update the aesthetic of your recliner or simply extend its lifespan, reupholstering can be a cost-effective and fulfilling endeavor.
In this comprehensive guide, we will walk you through the step-by-step process of reupholstering a leather recliner. From gathering the necessary tools and materials to attaching the new upholstery, each stage of the reupholstering journey will be explored in detail. By following these instructions, you can transform your leather recliner and imbue it with a fresh, personalized look that complements your living room decor.
Reupholstering a leather recliner is not only a practical skill but also a creative outlet. It allows you to unleash your imagination and explore different fabric options, colors, and textures to achieve a custom look that reflects your unique style. Whether you prefer a classic, timeless appearance or a bold, modern design, reupholstering empowers you to tailor your recliner to suit your preferences.
Furthermore, reupholstering your leather recliner presents an opportunity to engage in a sustainable practice. Instead of discarding a worn-out recliner and contributing to environmental waste, reupholstering enables you to repurpose and revitalize an existing piece of furniture. By embracing this eco-friendly approach, you can reduce your environmental footprint while enjoying the satisfaction of breathing new life into your leather recliner.
As we embark on this reupholstering journey together, prepare to unleash your creativity, hone your DIY skills, and witness the transformation of your leather recliner. Let's dive into the step-by-step process and discover the art of reupholstering a leather recliner.
Key Takeaways:
- Revitalize your leather recliner by reupholstering it with new fabric. Gather tools, remove old upholstery, measure and cut new fabric, and attach it with precision to create a personalized masterpiece that reflects your unique style.
- Reupholstering your leather recliner is a sustainable, creative, and rewarding endeavor. By repurposing and reviving your furniture, you reduce environmental waste while infusing your living space with a captivating centerpiece that exudes comfort and style.
Read more: How To Reupholster A Recliner
Step 1: Gather the necessary tools and materials
Before embarking on the reupholstering journey, it's essential to gather the tools and materials that will facilitate a successful transformation of your leather recliner. By ensuring that you have all the necessary items at your disposal, you can streamline the reupholstering process and minimize interruptions. Here's a comprehensive list of tools and materials that you'll need:
Tools:
- Screwdriver Set: A set of screwdrivers, including flathead and Phillips head varieties, will enable you to disassemble the recliner with ease.
- Needle-Nose Pliers: These pliers are invaluable for removing staples and tacks from the old upholstery.
- Staple Remover: A specialized staple remover tool will expedite the process of detaching the old upholstery from the recliner frame.
- Scissors: High-quality fabric scissors are essential for cutting the new upholstery fabric with precision.
- Staple Gun: A heavy-duty staple gun will be used to secure the new upholstery to the recliner frame.
- Rubber Mallet: This tool can aid in gently tapping and securing components during the reassembly phase.
- Measuring Tape: Accurate measurements are crucial when cutting the new upholstery fabric, making a measuring tape indispensable.
Materials:
- Upholstery Fabric: Select a durable, high-quality upholstery fabric that complements your decor and withstands regular use.
- Foam Padding: If the recliner's foam padding is worn or flattened, consider replacing it to enhance comfort and support.
- Dacron Batting: This material is used to provide a smooth, even surface under the upholstery fabric, enhancing the overall appearance and feel of the recliner.
- Staples: Ensure you have an ample supply of appropriate staples for your staple gun to secure the new upholstery.
- Cardboard Tack Strip: This flexible strip is utilized to create clean, straight edges along the upholstery.
- Spray Adhesive: A reliable spray adhesive can be used to secure the foam padding and Dacron batting in place.
- Thread and Needle: If any hand-sewing is required during the reupholstering process, having a sturdy needle and matching thread on hand is essential.
By assembling these tools and materials, you'll be well-equipped to commence the reupholstering process with confidence and efficiency. With everything in place, you can proceed to the next step of removing the old upholstery and preparing the recliner for its rejuvenating transformation.
Step 2: Remove the old upholstery
Removing the old upholstery from your leather recliner is a pivotal phase in the reupholstering process, setting the stage for the rejuvenation of your beloved furniture piece. This step requires patience, precision, and attention to detail to ensure that the old fabric is carefully detached without causing damage to the recliner frame or components. By following these meticulous steps, you can effectively strip away the worn upholstery and prepare the recliner for its stunning transformation.
-
Disassemble the Recliner: Begin by carefully disassembling the recliner, starting with the removal of any screws, bolts, or fasteners securing the upholstery to the frame. Utilize a suitable screwdriver set to systematically loosen and extract these components, taking care to organize and store them for later reassembly. As you disassemble the recliner, maintain a clear inventory of the removed parts to facilitate a seamless reassembly process.
-
Detach the Old Upholstery: Once the fasteners are removed, gently detach the old upholstery from the recliner frame. Employ needle-nose pliers to extract staples and tacks, ensuring that the fabric is liberated without causing undue strain on the frame. Exercise caution to avoid tearing or damaging the underlying padding and foam, as these elements may be reused or replaced during the reupholstering process.
-
Inspect and Clean the Frame: With the old upholstery removed, take the opportunity to inspect the recliner frame for any signs of wear, damage, or rust. Wipe down the frame with a clean, damp cloth to remove any accumulated dust, debris, or residual adhesive from the previous upholstery. This preparatory cleaning step sets the foundation for a fresh start, ensuring that the frame is primed for the application of new upholstery.
-
Evaluate the Padding and Foam: As you uncover the recliner's internal components, assess the condition of the padding and foam beneath the old upholstery. Determine whether the existing padding is structurally sound and sufficiently supportive. If the padding shows signs of deterioration or compression, consider replacing it with new foam to enhance the comfort and resilience of the recliner.
By meticulously removing the old upholstery and preparing the recliner for its revitalization, you pave the way for the subsequent stages of the reupholstering process. With the frame exposed and cleansed, you are poised to embark on the transformative endeavor of adorning your leather recliner with fresh, vibrant upholstery, breathing new life into this cherished piece of furniture.
Read more: How Much To Reupholster A Recliner
Step 3: Measure and cut the new upholstery fabric
With the old upholstery removed and the recliner frame primed for its rejuvenation, the next crucial step in the reupholstering process involves measuring and cutting the new upholstery fabric. This phase demands precision, attention to detail, and a meticulous approach to ensure that the fabric is tailored to fit the recliner impeccably. By following these steps, you can embark on the transformative journey of adorning your leather recliner with fresh, vibrant upholstery, infusing it with renewed allure and comfort.
Measure the Recliner Components
Begin by meticulously measuring the various components of the recliner, including the seat, backrest, armrests, and any additional sections requiring upholstery. Utilize a measuring tape to capture accurate dimensions, accounting for the length, width, and depth of each area to be upholstered. It is essential to measure not only the visible surfaces but also the areas where the fabric will be secured, ensuring comprehensive coverage and a snug fit.
Add Allowances for Wrapping and Securing
When determining the dimensions for the new upholstery fabric, incorporate allowances for wrapping the fabric around the edges of the recliner components and securing it in place. These allowances facilitate a seamless and secure attachment of the fabric, preventing undue tension or strain on the material. By factoring in these allowances during the measurement process, you can ensure that the fabric will envelop the recliner with precision and stability.
Transfer Measurements to the Fabric
Once the dimensions have been meticulously recorded, transfer the measurements to the selected upholstery fabric using fabric chalk or a washable marking tool. Exercise caution and precision during this phase to accurately delineate the outlines of each fabric piece, aligning them with the measured dimensions of the recliner components. This step sets the stage for the precise cutting of the fabric, ensuring that it corresponds harmoniously with the contours of the recliner.
Read more: How To Reupholster A Lazyboy Recliner
Cut the Fabric with Precision
Armed with the marked fabric and high-quality fabric scissors, proceed to cut the upholstery fabric with precision, following the outlined dimensions meticulously. Employ steady, deliberate movements to achieve clean, straight cuts, maintaining the integrity of the fabric and preserving its intended shape. Adhering to the measured dimensions and markings, execute each cut with care and accuracy, yielding fabric pieces that align seamlessly with the contours of the recliner components.
By meticulously measuring and cutting the new upholstery fabric, you lay the foundation for a seamless and visually appealing reupholstering endeavor. With the fabric tailored to fit the recliner components with precision, you are poised to progress to the subsequent phase of attaching the new upholstery, bringing your vision of a revitalized leather recliner closer to fruition.
Step 4: Attach the new upholstery to the recliner
With the meticulously cut upholstery fabric at the ready, the time has come to embark on the transformative phase of attaching the new upholstery to the recliner. This pivotal step requires precision, patience, and a methodical approach to ensure that the fabric is secured with finesse, creating a seamless and visually captivating finish. By following these meticulous steps, you can infuse your leather recliner with a fresh, personalized aesthetic, elevating its allure and comfort.
Secure the Foam Padding and Dacron Batting
Before applying the new upholstery fabric, ensure that the recliner's foam padding and Dacron batting, if utilized, are securely in place. If the existing padding shows signs of wear or compression, consider replacing it with fresh, resilient foam to enhance the comfort and support of the recliner. Utilize a reliable spray adhesive to affix the foam padding and Dacron batting to the appropriate areas of the recliner, ensuring a smooth, even foundation for the upholstery fabric.
Position and Align the Fabric
Carefully position the cut upholstery fabric over the designated sections of the recliner, aligning it with precision to ensure a snug and symmetrical fit. Take note of any patterns or directional elements in the fabric, ensuring that they are oriented as intended to achieve a cohesive and visually appealing result. Smooth out the fabric to eliminate any wrinkles or creases, maintaining a taut yet supple surface that accentuates the contours of the recliner.
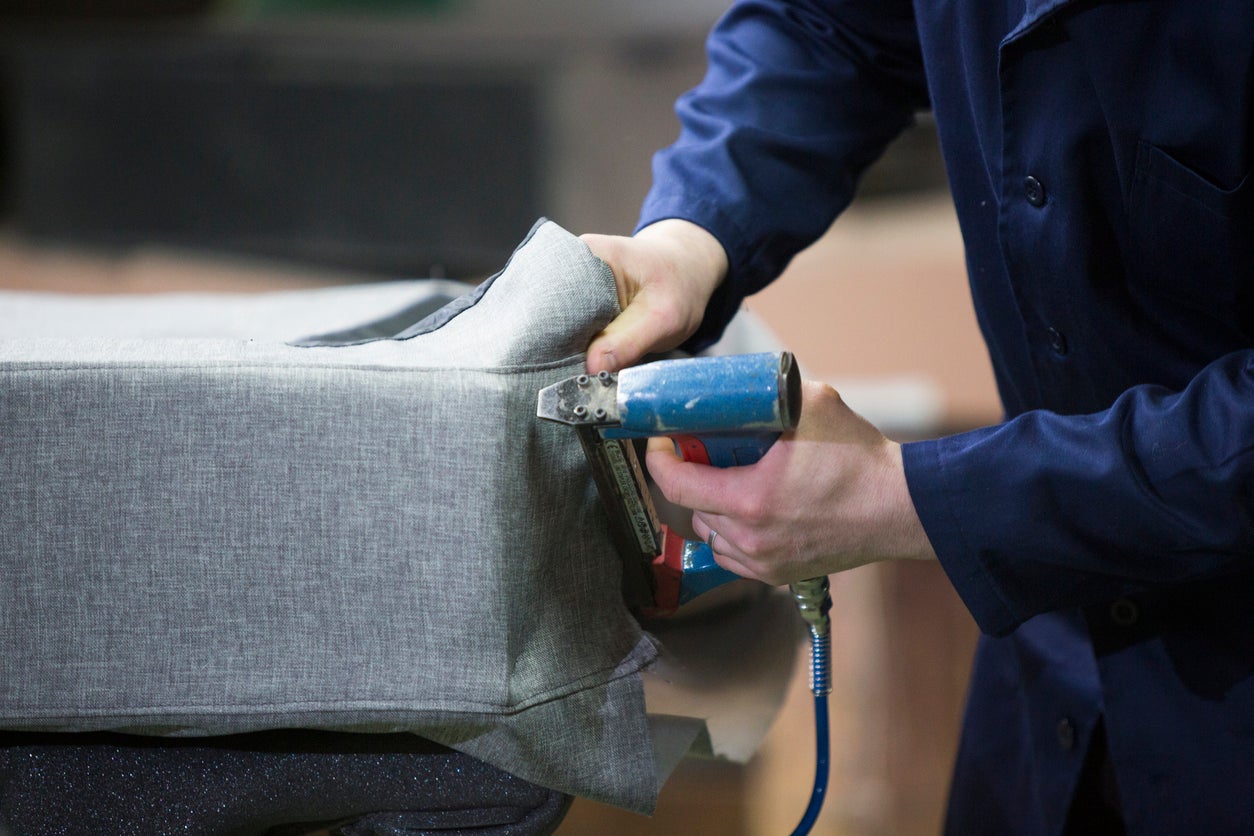
Secure the Fabric with Staples
Armed with a heavy-duty staple gun, commence the process of securing the upholstery fabric to the recliner frame. Starting from one edge and working methodically, affix the fabric to the frame, ensuring that it is taut and free of excess slack. Employ even spacing between the staples to distribute tension evenly and prevent bunching or puckering of the fabric. As you progress, verify that the fabric remains aligned and smooth, making any necessary adjustments to maintain a pristine finish.
Create Clean Edges with Cardboard Tack Strip
To achieve clean, straight edges along the upholstery, utilize a cardboard tack strip to secure the fabric neatly along the perimeters of the recliner components. Gently tuck the fabric over the tack strip, using a rubber mallet to secure it in place and create a refined, tailored appearance. Exercise precision and finesse during this phase, ensuring that the fabric is elegantly finished along the edges, enhancing the overall aesthetic of the recliner.
Reassemble the Recliner Components
As the new upholstery fabric is secured in place, proceed to reassemble the various components of the recliner, including the backrest, seat, and armrests. Utilize the organized inventory of screws, bolts, and fasteners to methodically reattach these elements, ensuring a sturdy and cohesive reconstruction of the recliner. Exercise care and attention to detail during the reassembly process, verifying that each component is aligned and secure, culminating in the restoration of your leather recliner to its former glory.
By meticulously attaching the new upholstery to the recliner, you breathe new life into this cherished piece of furniture, infusing it with a fresh, personalized aesthetic that harmonizes with your living room decor. With the fabric secured with precision and finesse, your leather recliner undergoes a stunning metamorphosis, emerging as a captivating centerpiece that exudes comfort and style.
Step 5: Reassemble the recliner
With the new upholstery securely in place, the final phase of the reupholstering process entails the meticulous reassembly of the recliner components. This pivotal step marks the culmination of the transformative journey, as the revitalized leather recliner is pieced back together, ready to reclaim its position as a cherished fixture in your living space.
Begin by referencing the organized inventory of screws, bolts, and fasteners that were carefully set aside during the disassembly phase. Methodically reattach each component, starting with the backrest, seat, and armrests. Ensure that the fasteners are tightened securely, fostering a stable and cohesive reconstruction of the recliner. Exercise care and precision during this process, verifying that each element aligns seamlessly with the frame, contributing to the structural integrity of the recliner.
As the various components are reassembled, take the opportunity to inspect the recliner for any signs of misalignment or instability. Verify that the frame is robust and free of any residual debris or obstructions that may impede the functionality of the recliner. By conducting a thorough assessment, you can instill confidence in the structural soundness of the revitalized recliner, setting the stage for its reintroduction into your living room.
Once the reassembly is complete, take a moment to admire the remarkable transformation that has taken place. The leather recliner, once adorned with worn upholstery, now exudes a fresh, personalized aesthetic that harmonizes with your living room decor. Its renewed allure and comfort serve as a testament to the artistry and dedication invested in the reupholstering process.
With the recliner reassembled and restored to its former glory, take a moment to revel in the satisfaction of witnessing the tangible results of your efforts. The revitalized leather recliner stands as a testament to the transformative power of reupholstering, embodying a seamless blend of functionality, comfort, and personalized style.
As you reintroduce the recliner to its designated space in your living room, bask in the joy of having revived a beloved piece of furniture, infusing it with renewed allure and comfort. The reupholstered leather recliner now stands as a captivating centerpiece, ready to enrich your living space with its revitalized presence.
Read more: How To Repair A Faux Leather Recliner
Conclusion
In conclusion, the art of reupholstering a leather recliner transcends the realm of practical refurbishment, evolving into a transformative journey that revitalizes a cherished piece of furniture. Throughout the meticulous process of gathering tools, removing old upholstery, measuring and cutting new fabric, attaching the fresh upholstery, and reassembling the recliner, a symphony of creativity, craftsmanship, and dedication unfolds.
As the final staple is secured and the last component is reattached, the culmination of this endeavor is not merely the restoration of a leather recliner, but the creation of a personalized masterpiece that harmonizes with your living space. The revitalized recliner stands as a testament to the transformative power of reupholstering, embodying a seamless blend of functionality, comfort, and personalized style.
The journey of reupholstering a leather recliner is a celebration of sustainability, craftsmanship, and self-expression. By repurposing and reviving an existing piece of furniture, you contribute to a sustainable ethos, reducing environmental waste while embracing the enduring allure of a beloved recliner.
Moreover, the reupholstering process empowers you to unleash your creativity, explore diverse fabric options, and tailor the recliner to reflect your unique style. Whether you opt for a classic, timeless aesthetic or a bold, contemporary design, the reupholstering journey invites you to infuse your personality into every stitch and staple, culminating in a bespoke creation that resonates with your individuality.
As the revitalized leather recliner takes its place in your living room, it becomes more than just a piece of furniture; it becomes a symbol of craftsmanship, creativity, and the enduring beauty of sustainable practices. The reupholstering journey not only breathes new life into the recliner but also enriches your living space with a captivating centerpiece that exudes comfort, style, and the timeless allure of personalized craftsmanship.
Frequently Asked Questions about How To Reupholster A Leather Recliner
Was this page helpful?
At Storables.com, we guarantee accurate and reliable information. Our content, validated by Expert Board Contributors, is crafted following stringent Editorial Policies. We're committed to providing you with well-researched, expert-backed insights for all your informational needs.
0 thoughts on “How To Reupholster A Leather Recliner”