Home>Furniture & Design>Outdoor Furniture>How To Build A Cinder Block Outdoor Kitchen
Outdoor Furniture
How To Build A Cinder Block Outdoor Kitchen
Modified: January 24, 2024
Learn how to create a stylish and functional outdoor kitchen using cinder blocks. Get expert tips on outdoor furniture and design for your space.
(Many of the links in this article redirect to a specific reviewed product. Your purchase of these products through affiliate links helps to generate commission for Storables.com, at no extra cost. Learn more)
Introduction
Are you dreaming of an outdoor kitchen where you can sizzle up a storm while entertaining friends and family? A cinder block outdoor kitchen might just be the perfect addition to your backyard. Not only does it offer a functional and stylish space for cooking and dining al fresco, but it also provides a focal point for outdoor gatherings and adds value to your property.
In this comprehensive guide, we will walk you through the step-by-step process of building your own cinder block outdoor kitchen. From planning and design to the finishing touches, you'll learn everything you need to know to bring your outdoor culinary oasis to life.
So, roll up your sleeves, gather your tools, and get ready to embark on an exciting DIY project that will elevate your outdoor living experience. Whether you're a seasoned DIY enthusiast or a novice looking to flex your creative muscles, this guide will equip you with the knowledge and inspiration to create a stunning outdoor kitchen that reflects your personal style and culinary aspirations. Let's dive in and start turning your outdoor kitchen dreams into reality!
Key Takeaways:
- Building a cinder block outdoor kitchen involves careful planning, gathering materials, and step-by-step construction. It’s a DIY project that adds value and personality to your outdoor space.
- Adding countertops, appliances, and finishing touches transforms your outdoor kitchen into a functional and inviting culinary oasis. It’s a testament to creativity, perseverance, and the joy of outdoor living.
Step 1: Planning and Design
Before you start stacking cinder blocks, it's crucial to lay a solid foundation of thoughtful planning and meticulous design. Consider the following factors to ensure that your outdoor kitchen aligns with your vision and meets your practical needs:
- Layout: Determine the layout of your outdoor kitchen, taking into account the available space, existing features of your backyard, and the flow of foot traffic. Consider how you want to divide the cooking, prep, and dining areas to create a functional and inviting space.
- Functionality: Think about the primary functions of your outdoor kitchen. Do you envision a built-in grill as the centerpiece, or are you keen on incorporating a pizza oven, sink, refrigerator, and ample countertop space for food preparation and serving?
- Style and Aesthetics: Consider the overall style and aesthetic you want to achieve. Whether you prefer a rustic, industrial, modern, or Mediterranean-inspired design, the choice of materials, colors, and finishes will play a pivotal role in bringing your vision to life.
- Budget and Timeline: Establish a realistic budget for your project, factoring in the cost of materials, appliances, and any professional assistance you may require. Additionally, set a timeline for the project, accounting for potential delays and allowing ample time for each phase of construction.
Once you have a clear understanding of your requirements and preferences, it's time to translate your vision into a tangible design. Consider creating a detailed sketch or utilizing design software to visualize the layout, dimensions, and features of your outdoor kitchen. This will serve as a valuable reference point as you move forward with the construction process.
Remember, the key to a successful outdoor kitchen lies in the careful planning and thoughtful design that harmoniously blend functionality, aesthetics, and practicality. With a well-conceived plan in hand, you're ready to move on to the next crucial steps in bringing your cinder block outdoor kitchen to fruition.
Step 2: Gathering Materials
With your outdoor kitchen design taking shape, it’s time to gather the essential materials and tools that will form the building blocks of your project. Here’s a comprehensive list of the key components you’ll need to bring your cinder block outdoor kitchen to life:
- Cinder Blocks: These versatile building blocks will form the foundation and structure of your outdoor kitchen. Choose high-quality cinder blocks that are durable and suitable for outdoor use.
- Mortar Mix: Select a reliable mortar mix that is designed for bonding cinder blocks. Ensure that it is suitable for outdoor applications and provides strong adhesion.
- Rebar: Reinforcing steel bars, commonly known as rebar, are essential for adding strength and stability to the structure. They are used to reinforce the concrete foundation and provide structural integrity.
- Concrete Mix: You’ll need concrete mix to create a solid and stable foundation for your outdoor kitchen. Choose a high-quality concrete mix that is suitable for outdoor construction projects.
- Countertop Materials: Depending on your design preferences, consider the materials for your countertops. Options include natural stone, concrete, granite, or tile, each offering unique aesthetics and durability.
- Outdoor Kitchen Appliances: If your budget allows, invest in high-quality outdoor kitchen appliances such as a built-in grill, refrigerator, sink, and any other amenities that align with your culinary aspirations.
- Finishing Materials: From weather-resistant paint and sealant to decorative tiles and outdoor lighting, gather the finishing materials that will add the final touches to your outdoor kitchen.
- Tools: Ensure that you have the necessary tools on hand, including a level, trowel, masonry saw, concrete mixer, and other equipment required for cutting, shaping, and assembling the materials.
Before making any purchases, carefully review your design plans and take accurate measurements to determine the quantities of materials required. Additionally, consider consulting with a knowledgeable professional at your local home improvement store to ensure that you select the right materials for your specific project.
By diligently gathering the necessary materials and tools, you’ll set the stage for a smooth and efficient construction process, bringing you one step closer to enjoying your very own outdoor kitchen oasis.
Step 3: Preparing the Site
Before the first cinder block is laid, it’s essential to prepare the site where your outdoor kitchen will stand. Proper site preparation is crucial for ensuring the stability, longevity, and functionality of your outdoor culinary space. Follow these key steps to prepare the site effectively:
- Clearing and Leveling: Begin by clearing the designated area of any debris, vegetation, or obstacles that may impede the construction process. Use a shovel, rake, and a level to ensure that the ground is level and free from any unevenness.
- Marking the Layout: Use stakes and string to outline the layout of your outdoor kitchen, including the cooking, prep, and dining areas. This will provide a visual guide for the construction process and help ensure that the dimensions and placement align with your design plan.
- Excavation: If your outdoor kitchen will have a concrete foundation, excavation will be necessary to create a level and stable base. Dig the foundation to the required depth, accounting for the thickness of the concrete slab and any additional layers of material.
- Installing Drainage and Utilities: If your outdoor kitchen will include a sink or other utilities, it’s essential to plan for proper drainage and utility connections. Consult with a professional if you require assistance with installing plumbing or electrical components.
- Compact the Soil: Once the excavation is complete, use a plate compactor to compact the soil thoroughly. This will create a solid and stable base for the foundation, minimizing the risk of settling or shifting over time.
- Consideration for Utilities: Ensure that any utility lines, such as gas, water, and electricity, are accounted for in the design and that their installation complies with local building codes and safety regulations.
By meticulously preparing the site for your outdoor kitchen, you’ll lay the groundwork for a successful and enduring construction process. Taking the time to address site preparation with care and precision will contribute to the overall quality and functionality of your outdoor culinary haven.
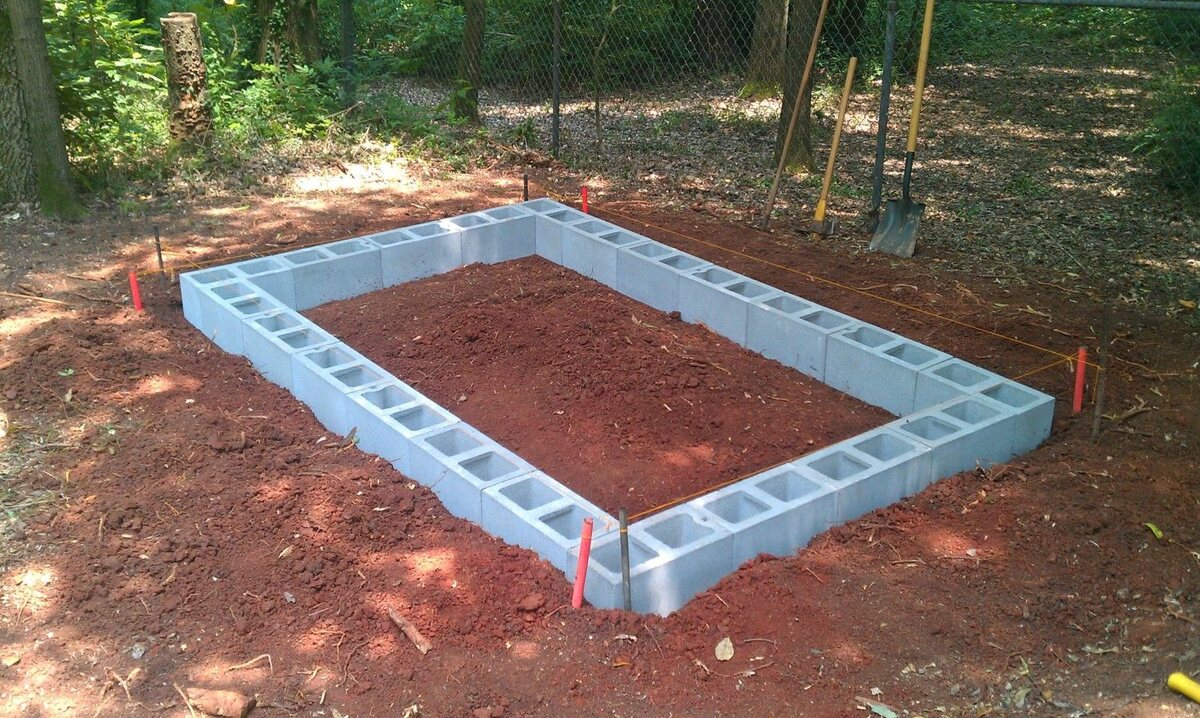
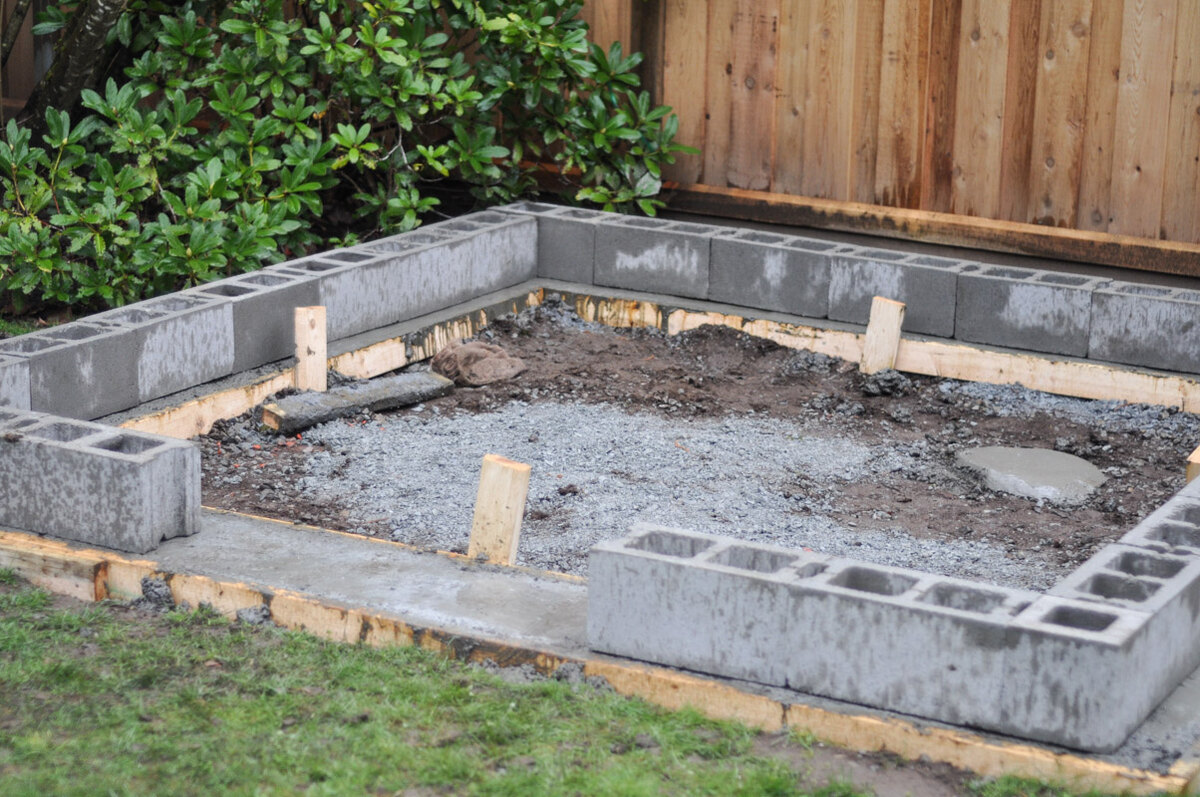
Step 4: Laying the Foundation
With the site meticulously prepared, it’s time to lay the foundation that will provide a solid base for your cinder block outdoor kitchen. The foundation serves as the anchor for the entire structure, ensuring stability and longevity. Here’s a step-by-step guide to laying the foundation for your outdoor culinary oasis:
- Formwork and Reinforcement: If your design calls for a concrete slab foundation, begin by constructing formwork to define the shape and dimensions of the slab. Install rebar within the formwork to reinforce the concrete and enhance its strength.
- Mixing and Pouring Concrete: Prepare the concrete mix according to the manufacturer’s instructions, ensuring the correct ratio of water to dry mix. Carefully pour the concrete into the formwork, using a screed board and a float to level and smooth the surface.
- Curing the Concrete: Allow the freshly poured concrete to cure and harden properly. This process is essential for achieving the desired strength and durability of the foundation. Follow the recommended curing time as per the concrete mix specifications.
- Checking for Levelness: Once the concrete has cured, use a level to ensure that the surface is perfectly level and even. This is crucial for the stability and proper alignment of the subsequent cinder block construction.
- Integration of Utilities: If your outdoor kitchen includes utilities such as gas lines or electrical conduits, ensure that they are integrated into the foundation as per the design plan. This will facilitate the seamless installation of appliances and amenities in the next phases of construction.
By meticulously executing the foundation-laying process, you’ll establish a robust and durable base for your outdoor kitchen, setting the stage for the exciting stages of building the structural elements and adding the finishing touches.
With the foundation in place, you’re ready to move on to the next phase of construction, where the distinctive form of your cinder block outdoor kitchen will begin to take shape.
When building a cinder block outdoor kitchen, make sure to use a sturdy and level foundation to support the weight of the blocks and appliances. This will ensure the stability and durability of your outdoor kitchen.
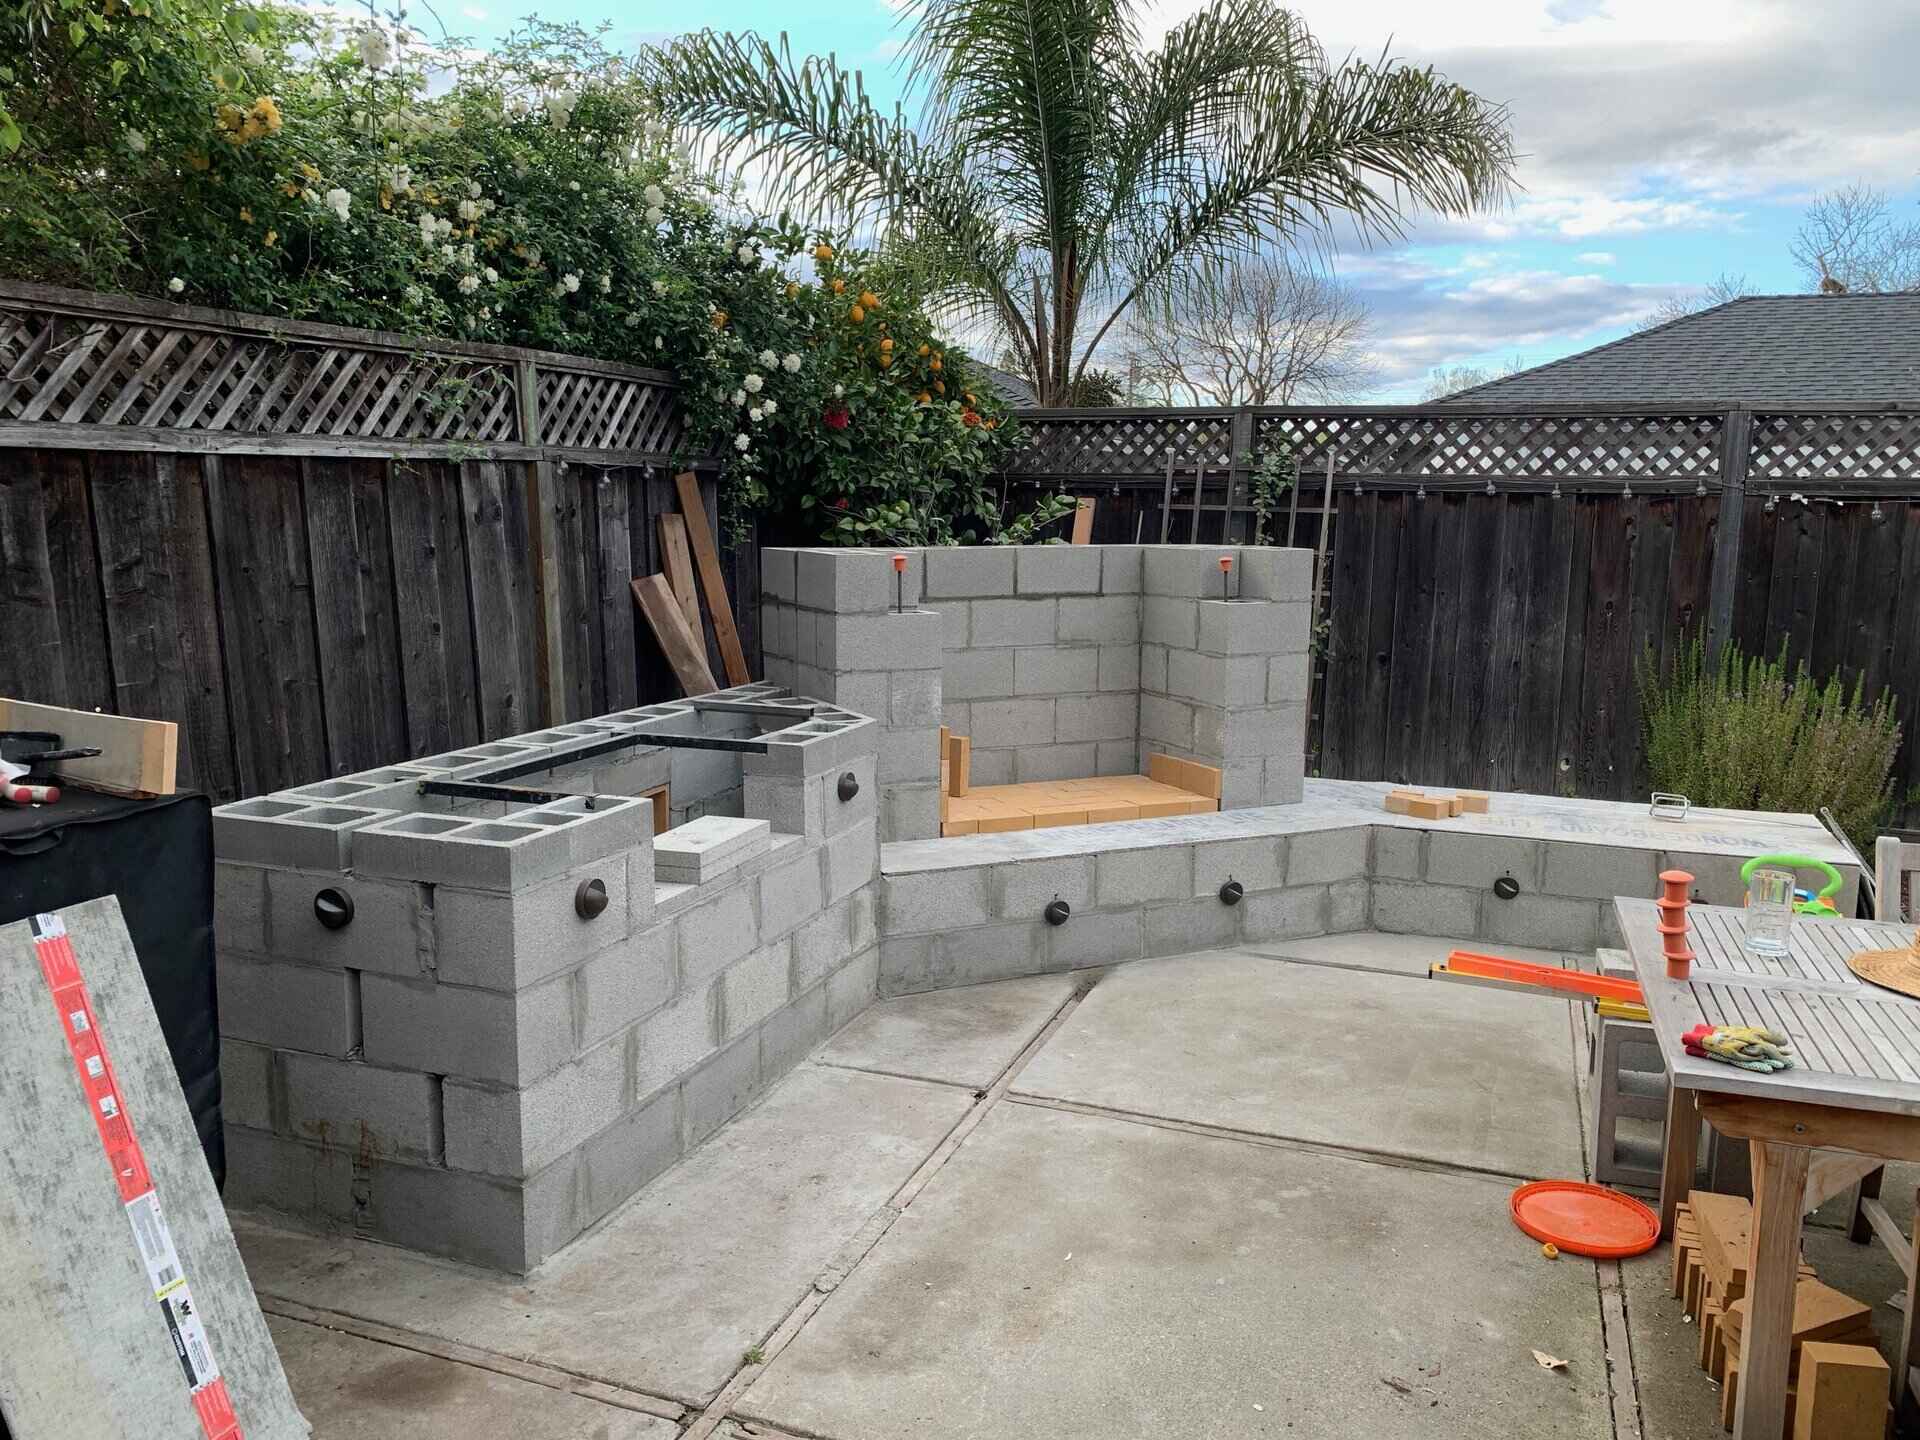
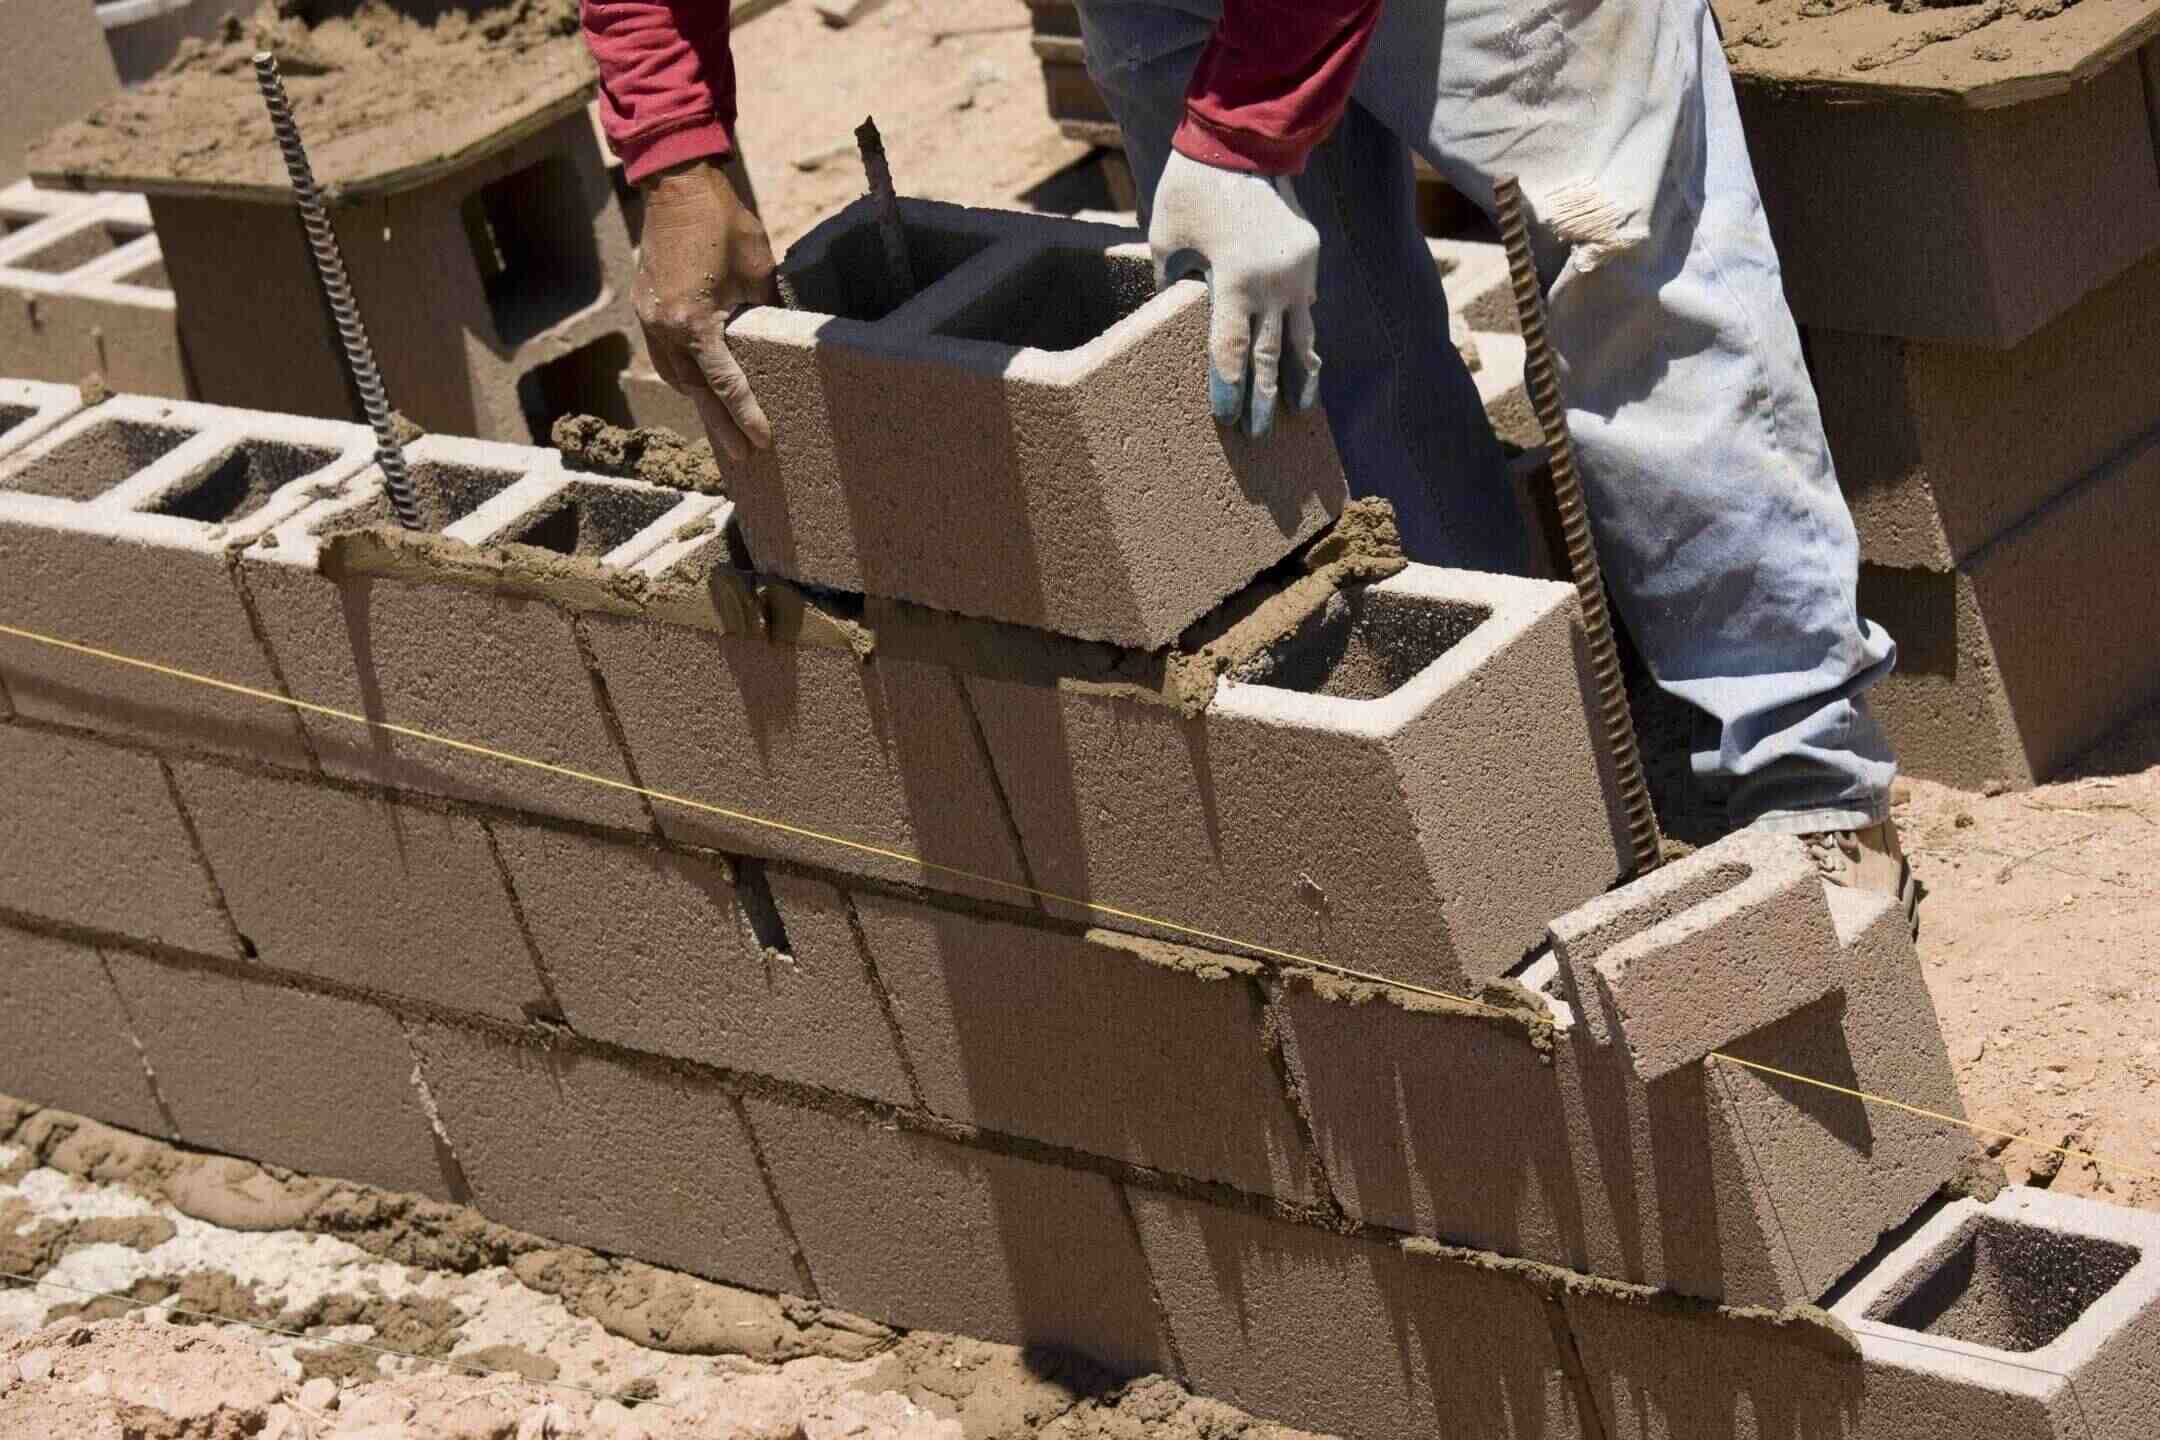
Step 5: Building the Structure
With the foundation solidified, it’s time to embark on the exciting phase of building the structural framework of your cinder block outdoor kitchen. This phase will bring the distinctive form of your culinary haven to life, creating the framework for the functional and aesthetic elements to come. Here’s a step-by-step guide to building the structure:
- Setting the First Course: Begin by laying the first course of cinder blocks on the cured concrete foundation. Use a level to ensure that the blocks are perfectly aligned and plumb, providing a stable and straight base for the structure.
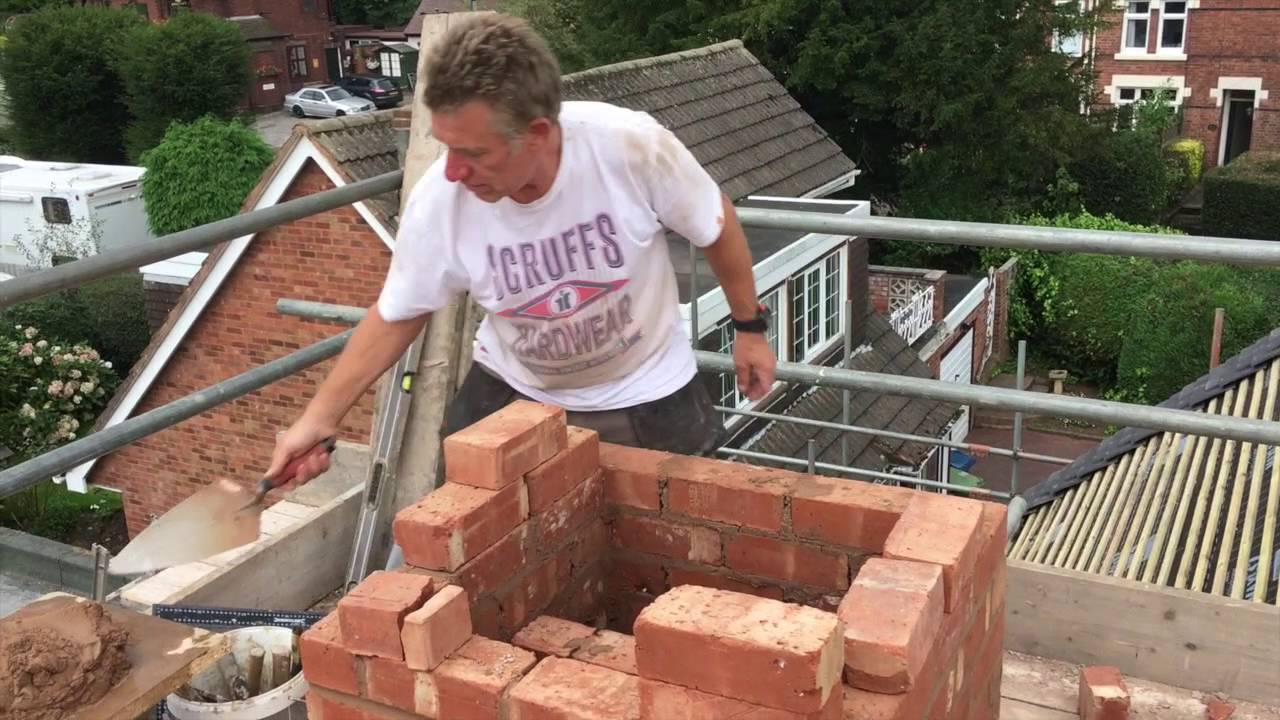
- Mortaring the Joints: Apply mortar to the joints between the cinder blocks, ensuring strong and secure connections. Use a trowel to spread the mortar evenly and remove any excess for a clean and professional finish.
- Stacking the Courses: Continue stacking additional courses of cinder blocks, ensuring that each layer is level and securely bonded with mortar. As the walls of the structure rise, periodically check for plumb and alignment to maintain the integrity of the construction.
- Creating Openings: If your design includes openings for doors, windows, or utility access, plan and construct these openings as you progress with the cinder block assembly. Use precise measurements and appropriate tools to create clean and functional openings within the structure.
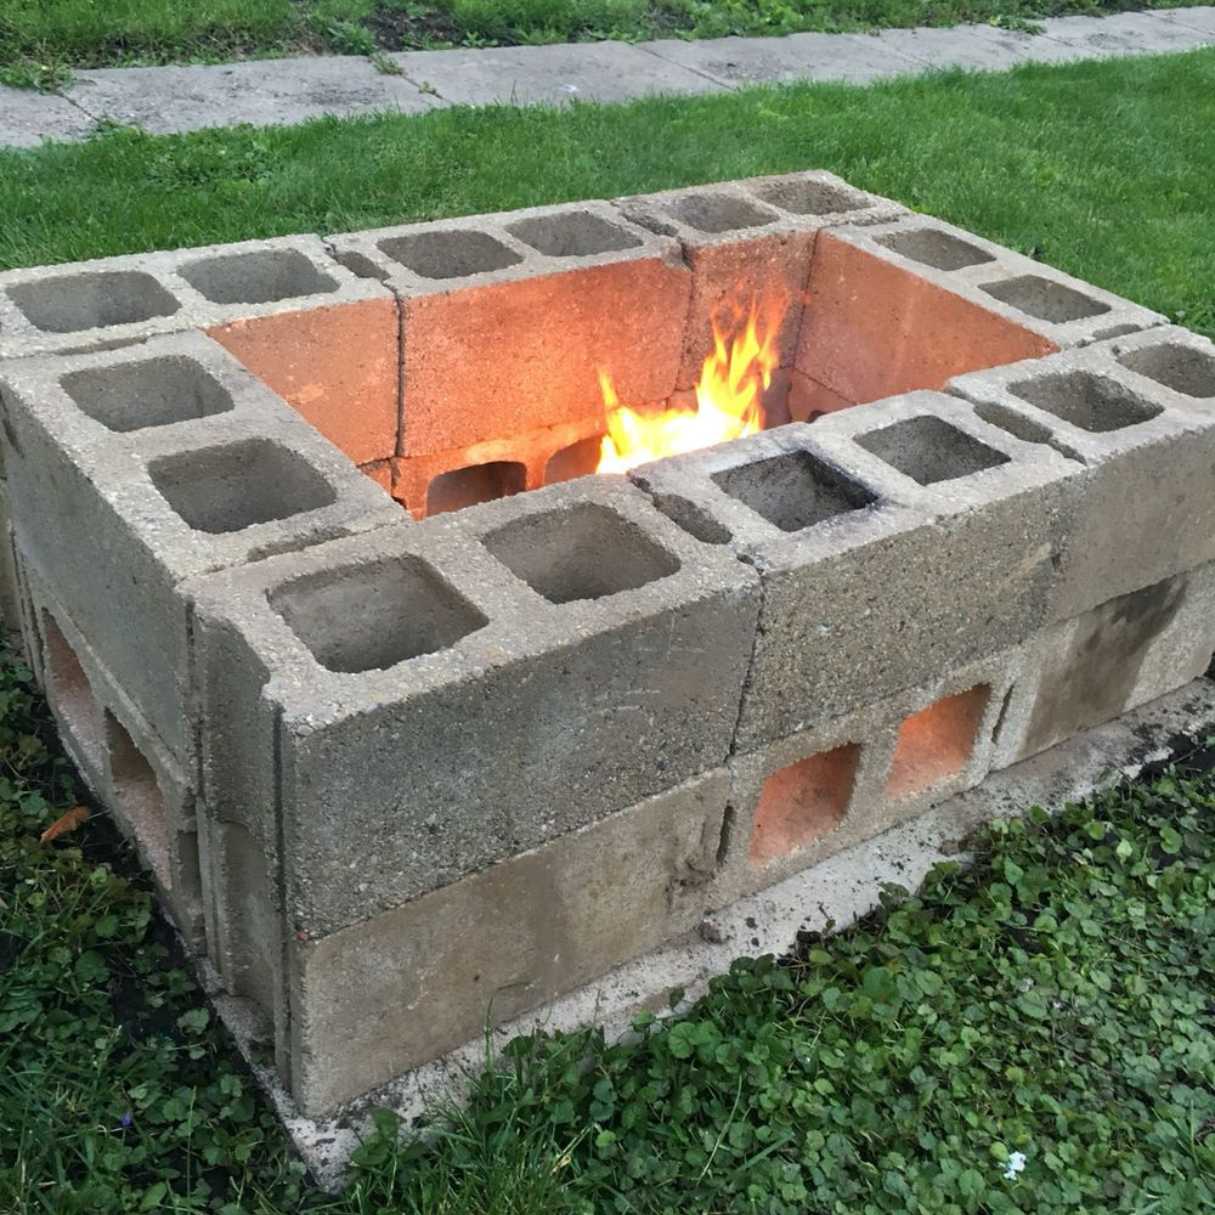
- Reinforcement and Stability: Integrate rebar within the hollow cores of the cinder blocks to reinforce the structure and enhance its stability. This additional reinforcement will contribute to the overall strength and durability of your outdoor kitchen.
As the walls of your outdoor kitchen take shape, you’ll witness the transformation from a conceptual design to a tangible and substantial structure. Each carefully placed cinder block contributes to the form and function of your culinary oasis, setting the stage for the next phase of adding countertops, appliances, and personalized touches.
With the structural framework in place, you’re now ready to move on to the exciting phase of adding essential elements that will elevate your outdoor kitchen to a fully functional and inviting space for culinary creativity and outdoor entertaining.
Step 6: Adding Countertops and Appliances
With the structural framework of your cinder block outdoor kitchen in place, it’s time to introduce the essential elements that will elevate the space into a fully functional and visually appealing culinary oasis. The addition of countertops and appliances will transform your outdoor kitchen into a hub of culinary creativity and outdoor entertainment. Here’s a step-by-step guide to adding countertops and appliances:
- Selecting Countertop Materials: Choose the appropriate materials for your countertops, considering factors such as durability, aesthetics, and maintenance. Options include natural stone, concrete, granite, tile, or stainless steel, each offering unique benefits and visual appeal.
- Installing Countertops: Begin by carefully measuring and cutting the selected countertop materials to fit the dimensions of your outdoor kitchen. Secure the countertops in place, ensuring a level and stable surface for food preparation, serving, and dining.
- Incorporating Appliances: Integrate high-quality outdoor kitchen appliances such as a built-in grill, refrigerator, sink, and any other amenities that align with your culinary aspirations. Ensure that the placement of appliances enhances the functionality and flow of the outdoor kitchen space.
- Connecting Utilities: If your outdoor kitchen includes utilities such as gas lines, water supply, or electrical connections, enlist the assistance of a professional to ensure that the installation is carried out safely and complies with building codes.
- Adding Personalized Touches: Enhance the visual appeal and functionality of your outdoor kitchen by incorporating personalized touches such as decorative tiles, outdoor lighting, and storage solutions. These elements will infuse your outdoor culinary space with character and practicality.
As countertops are installed and appliances are seamlessly integrated, your outdoor kitchen will come to life as a dynamic and inviting space for culinary exploration and outdoor gatherings. The careful selection and placement of these essential elements will contribute to the overall ambiance and functionality of your outdoor culinary haven.
With countertops and appliances in place, your cinder block outdoor kitchen is on the brink of becoming a fully realized extension of your home, offering endless opportunities for outdoor culinary adventures and memorable gatherings with family and friends.
Step 7: Finishing Touches
As your cinder block outdoor kitchen nears completion, it’s time to add the finishing touches that will elevate the space from a construction project to a captivating and functional outdoor culinary oasis. These final details will infuse your outdoor kitchen with personality, style, and comfort, creating an inviting environment for culinary creativity and outdoor entertainment. Here’s a step-by-step guide to adding the finishing touches:
- Weather-Resistant Finishes: Apply weather-resistant finishes such as sealants or outdoor paint to the surfaces of your outdoor kitchen. These finishes will protect the materials from the elements and enhance their longevity and visual appeal.
- Decorative Elements: Incorporate decorative elements such as mosaic tiles, stone veneers, or ornamental details to add visual interest and personality to your outdoor kitchen. These elements will contribute to the overall aesthetic and create a welcoming ambiance.
- Outdoor Lighting: Install outdoor lighting fixtures to illuminate the space and create a warm and inviting atmosphere for evening gatherings. Consider a combination of task lighting for food preparation areas and ambient lighting for dining and socializing zones.
- Landscaping and Greenery: Enhance the surroundings of your outdoor kitchen with strategic landscaping and greenery. Introduce potted plants, vertical gardens, or natural elements to soften the hardscape and integrate the space with the natural beauty of your backyard.
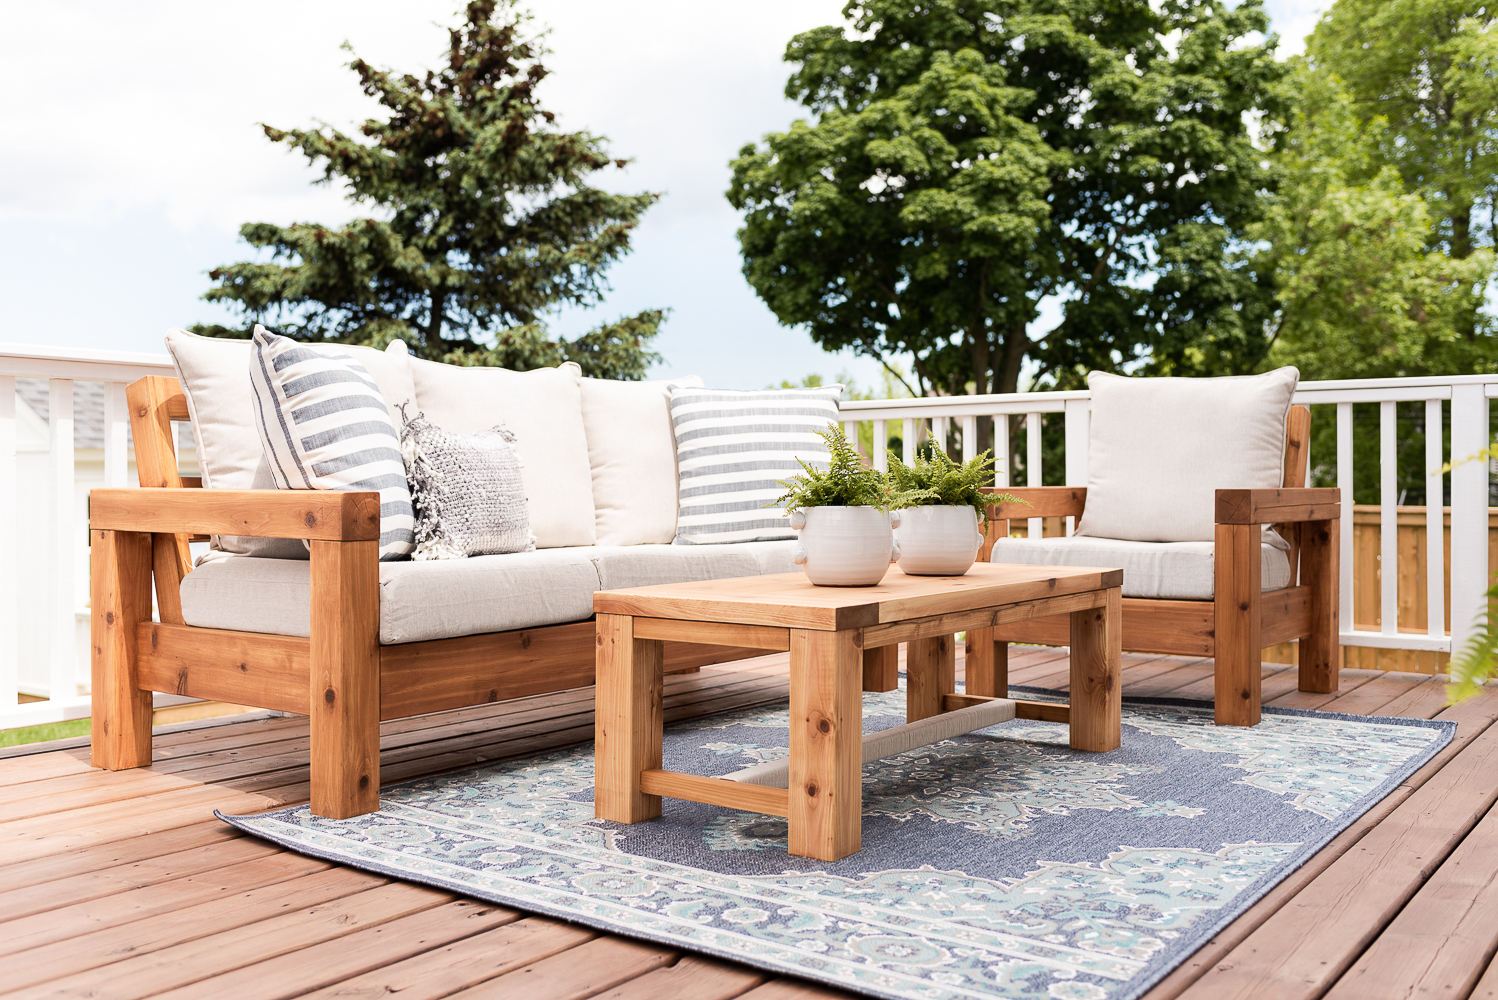
- Comfortable Furnishings: Select comfortable and weather-resistant furnishings such as outdoor dining sets, lounge seating, and shade structures to create a welcoming and functional outdoor dining and relaxation area.
- Personalized Accessories: Add personalized accessories such as outdoor kitchen utensils, serving ware, and decor that reflect your style and enhance the functionality of the space. These accessories will infuse your outdoor kitchen with character and practicality.
As the finishing touches are thoughtfully integrated into your outdoor kitchen, the space will evolve into a captivating and harmonious extension of your home. These details will not only enhance the visual appeal but also contribute to the comfort, functionality, and overall enjoyment of your outdoor culinary haven.
With the completion of the finishing touches, your cinder block outdoor kitchen will stand as a testament to your vision, creativity, and dedication, offering a space where culinary aspirations and outdoor living seamlessly converge.
Conclusion
Congratulations on successfully navigating the exhilarating journey of building your own cinder block outdoor kitchen! From the initial stages of planning and design to the meticulous execution of construction and the thoughtful addition of essential elements, you’ve transformed your outdoor space into a captivating and functional culinary oasis. As you stand back and admire the fruits of your labor, it’s clear that your outdoor kitchen is more than just a construction project—it’s a reflection of your creativity, passion for outdoor living, and commitment to enhancing your home environment.
By embracing the DIY spirit and embarking on this transformative project, you’ve not only crafted a space for culinary exploration and outdoor entertainment but also added value and personality to your property. Your cinder block outdoor kitchen stands as a testament to the power of vision, perseverance, and the joy of creating a space that resonates with your lifestyle and aspirations.
As you prepare to inaugurate your outdoor kitchen with memorable gatherings, delightful meals, and cherished moments with loved ones, take pride in the fact that you’ve brought a dream to life. Your outdoor culinary haven is a place where flavors mingle, laughter abounds, and the simple pleasures of outdoor living unfold in all their splendor.
May your cinder block outdoor kitchen be a source of inspiration, creativity, and countless unforgettable experiences. As you savor the fruits of your labor in this inviting and functional space, may it continue to be a hub of warmth, connection, and the joy of outdoor living for years to come.
Cheers to your remarkable achievement and the boundless possibilities that await in your newly crafted outdoor culinary sanctuary!
Frequently Asked Questions about How To Build A Cinder Block Outdoor Kitchen
Was this page helpful?
At Storables.com, we guarantee accurate and reliable information. Our content, validated by Expert Board Contributors, is crafted following stringent Editorial Policies. We're committed to providing you with well-researched, expert-backed insights for all your informational needs.


0 thoughts on “How To Build A Cinder Block Outdoor Kitchen”