Home>Furniture & Design>Outdoor Furniture>How To Build An Outdoor Grill

Outdoor Furniture
How To Build An Outdoor Grill
Modified: May 6, 2024
Discover expert tips for building your own outdoor grill and creating the perfect outdoor furniture and design. Learn how to enhance your outdoor space with a custom-built grill.
(Many of the links in this article redirect to a specific reviewed product. Your purchase of these products through affiliate links helps to generate commission for Storables.com, at no extra cost. Learn more)
Introduction
Welcome to the world of outdoor cooking! Building your own outdoor grill is a rewarding and practical project that can elevate your backyard gatherings to a whole new level. Whether you're a seasoned DIY enthusiast or a novice looking to embark on your first construction venture, creating your own outdoor grill can be an exciting and fulfilling experience.
Imagine the aroma of sizzling steaks, the sound of crackling embers, and the joy of sharing delicious meals with family and friends in the comfort of your own outdoor oasis. By following the steps outlined in this guide, you'll be well on your way to constructing a custom outdoor grill that suits your specific needs and style.
In this comprehensive guide, we will explore the essential aspects of building an outdoor grill, from choosing the right location and selecting a suitable design to gathering the necessary materials and tools. You'll learn how to construct the grill base, build the grill structure, add the grill grate, and put the finishing touches on your creation. Additionally, we'll discuss important safety measures to ensure that your outdoor grill is not only functional and aesthetically pleasing but also safe for use.
Whether you're envisioning a sleek and modern grill station or a rustic, traditional setup, this guide will provide you with the knowledge and inspiration to bring your vision to life. Get ready to roll up your sleeves, unleash your creativity, and embark on a journey to create a one-of-a-kind outdoor cooking space that will be the envy of your neighborhood.
So, grab your hard hat and apron, and let's dive into the exciting world of outdoor grill construction!
Key Takeaways:
- Building your own outdoor grill is an exciting and fulfilling DIY project that can elevate your backyard gatherings to a whole new level. From choosing the right location to adding the grill grate, this guide provides the knowledge and inspiration to create a one-of-a-kind outdoor cooking space.
- Prioritizing safety and attending to final touches, such as surface finishes and storage solutions, will not only enhance the functionality and aesthetics of your custom outdoor grill but also create a safe and inviting environment for memorable outdoor cooking experiences.
Read more: How To Build An Outdoor Grill Island
Choosing the Right Location
Before you begin building your outdoor grill, it’s crucial to carefully consider the location where it will be situated. The chosen spot should not only accommodate the grill’s size and design but also enhance the overall outdoor cooking experience. Here are some key factors to keep in mind when selecting the perfect location for your outdoor grill:
- Accessibility: Ensure that the grill is easily accessible from your indoor kitchen or dining area. This convenience will streamline the process of transferring food and utensils between the indoor and outdoor cooking spaces, making meal preparation and serving more efficient.
- Ventilation: Position the grill in an area with adequate ventilation to allow smoke and cooking odors to dissipate easily. This will prevent the accumulation of smoke near your home and provide a more comfortable environment for both cooks and guests.
- Safety: Keep a safe distance between the grill and any flammable structures, such as wooden decks, overhanging branches, or shrubbery. This precaution will reduce the risk of accidental fires and ensure a safe cooking environment.
- Shelter: Consider the impact of weather conditions on your outdoor cooking space. If possible, choose a location that offers some form of natural shelter, such as a canopy of trees or a strategically positioned wall, to provide protection from harsh sunlight, strong winds, or light rain.
- Entertainment Area: If you frequently host outdoor gatherings, position the grill in close proximity to your outdoor dining and entertainment area. This arrangement will facilitate seamless interaction between the cook and the guests and create a cohesive outdoor entertainment space.
By carefully evaluating these factors, you can pinpoint the ideal location for your outdoor grill, ensuring that it not only complements your outdoor living space but also contributes to a functional and enjoyable cooking environment. Once you’ve identified the perfect spot, you can move on to the next exciting phase of building your custom outdoor grill.
Selecting the Grill Design
When it comes to building an outdoor grill, the design you choose will significantly influence the functionality, aesthetics, and overall ambiance of your outdoor cooking area. Whether you prefer a traditional charcoal grill, a versatile gas grill, or a combination of both, selecting the right design is a critical step in bringing your outdoor cooking vision to life. Here are some popular grill designs to consider:
- Charcoal Grill: A classic choice for outdoor cooking enthusiasts, charcoal grills provide an authentic grilling experience and impart a distinct smoky flavor to foods. They are relatively simple in design and offer precise temperature control, making them ideal for grilling a variety of foods, from steaks and burgers to vegetables and kebabs.
- Gas Grill: Known for their convenience and rapid heating capabilities, gas grills are favored for their ease of use and consistent heat distribution. They are suitable for quick weeknight meals and can be equipped with additional features such as side burners, rotisseries, and smoker boxes to enhance versatility.
- Hybrid Grill: For those who appreciate the benefits of both charcoal and gas grilling, hybrid grills offer the best of both worlds. These innovative designs allow you to switch between charcoal and gas cooking, providing flexibility and catering to varying cooking preferences.
- Built-In Grill: If you’re aiming for a seamless integration of your grill into an outdoor kitchen or cooking island, a built-in grill offers a sleek and customized solution. These grills can be incorporated into countertops and outdoor cabinetry, creating a cohesive and stylish outdoor cooking space.
- Portable Grill: Ideal for outdoor enthusiasts on the go, portable grills are compact, lightweight, and designed for easy transport. Whether you’re camping, tailgating, or picnicking, a portable grill allows you to enjoy the pleasures of outdoor cooking wherever your adventures take you.
Consider your cooking preferences, space constraints, and aesthetic preferences when selecting a grill design. Additionally, think about the features and accessories that would enhance your grilling experience, such as temperature gauges, warming racks, and storage compartments. By carefully evaluating these factors, you can choose a grill design that aligns with your lifestyle and culinary aspirations, setting the stage for an exceptional outdoor cooking journey.
Gathering Materials and Tools
Before diving into the construction of your outdoor grill, it’s essential to gather all the necessary materials and tools to ensure a smooth and efficient building process. Here’s a comprehensive list of the materials and tools you’ll need to get started:
Materials
- Grill Kit or Components: Depending on the chosen design, acquire a grill kit or the individual components required for constructing the grill, such as grates, burners, and housing.
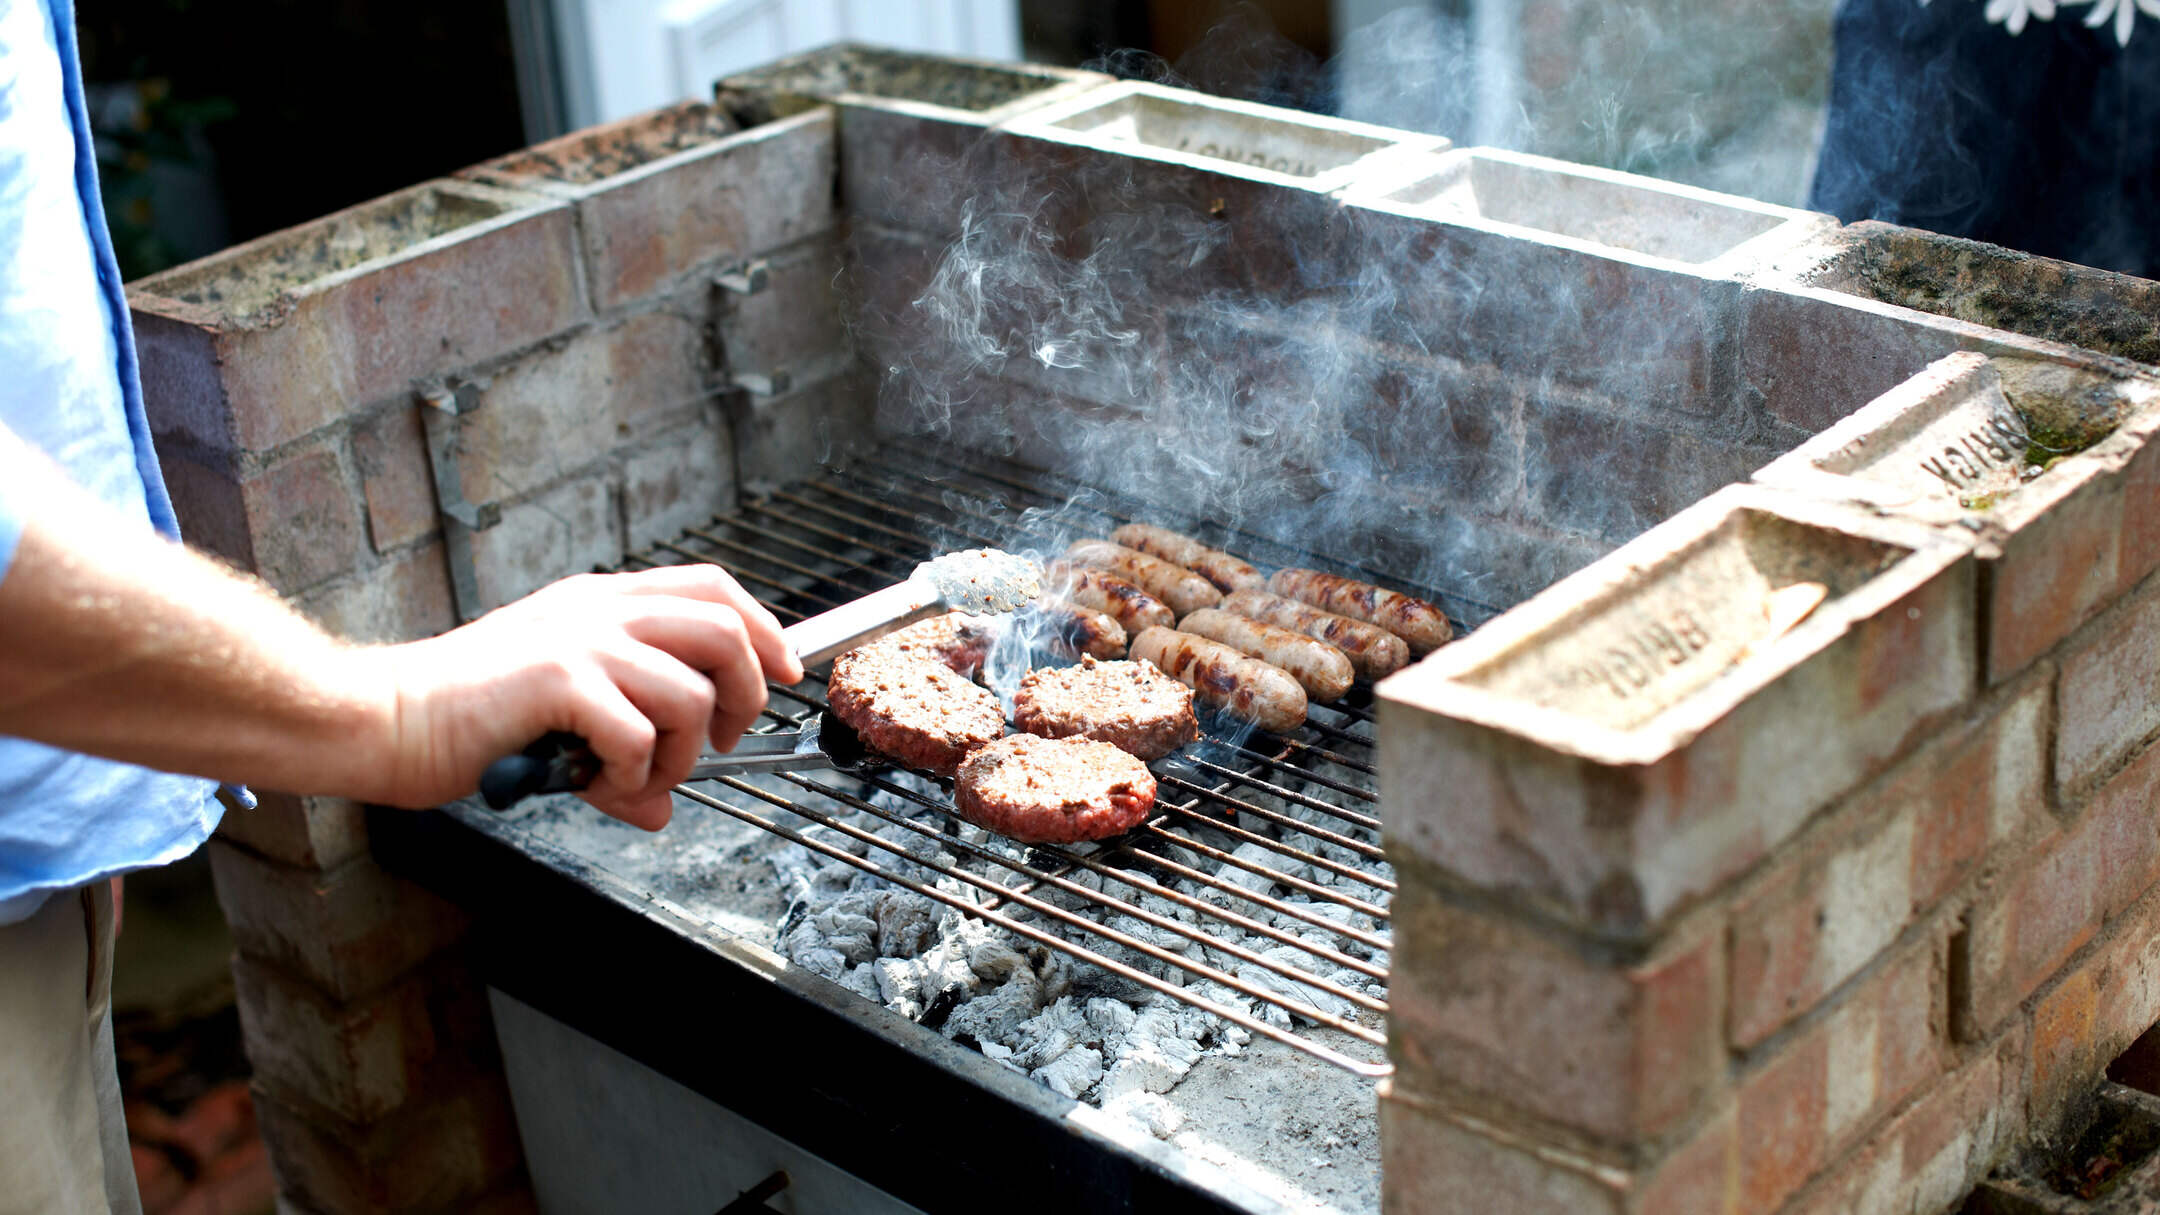
- Bricks, Pavers, or Stone: If you're building a masonry grill, purchase the appropriate quantity of bricks, pavers, or stone to construct the base and structure.
- Concrete or Mortar Mix: For masonry grills, obtain concrete or mortar mix to secure the bricks or stones in place and create a durable foundation.
- Steel or Aluminum Sheets: If fabricating a metal grill, acquire steel or aluminum sheets for constructing the grill housing and other metal components.
- Grill Grate: Select a high-quality grill grate that suits the size and design of your grill, ensuring it is durable and suitable for the types of foods you plan to cook.
- Hardware and Fasteners: Purchase screws, bolts, nuts, and other fasteners required for assembling the grill components securely.
- Heat-Resistant Paint or Finish: If desired, procure heat-resistant paint or finish to coat metal components and protect them from corrosion and heat damage.
- Wood or Composite Materials: For additional features such as shelves or countertops, obtain wood or composite materials that complement the grill design.
Read more: How To Build An Outdoor Grilling Station
Tools
- Measuring Tape and Level: Essential for ensuring accurate and level construction of the grill base and structure.
- Masonry Trowel and Jointer: If building a masonry grill, these tools are necessary for laying bricks or stones and creating clean, uniform joints.
- Welding Equipment: For fabricating metal components, welding equipment such as a welder, welding gloves, and welding mask is essential.
- Power Drill and Bits: Required for drilling holes and securing components during assembly.
- Saw and Cutting Tools: Depending on the materials used, a saw or cutting tools will be necessary for shaping and cutting components to size.
- Paint Brushes and Rollers: If applying paint or finish, ensure you have the appropriate brushes and rollers for an even and professional application.
- Safety Gear: Prioritize safety by obtaining protective gear such as gloves, safety goggles, and a dust mask to safeguard against potential hazards during construction.
By acquiring the right materials and tools, you’ll be well-equipped to commence the construction of your outdoor grill with confidence and precision. With everything in hand, you’re ready to embark on the exciting journey of bringing your custom outdoor cooking space to fruition.
Constructing the Grill Base
Building a sturdy and stable base is a fundamental step in the construction of an outdoor grill. The base serves as the foundation on which the grill structure will be erected, providing essential support and stability. Depending on the chosen design, whether masonry or metal, the construction of the base will vary. Here’s a step-by-step guide to constructing the grill base:
For Masonry Grills:
If you’ve opted for a masonry grill, follow these steps to construct the base:
- Site Preparation: Clear the chosen location, ensuring it is level and free of debris. Mark the dimensions of the base using stakes and string, allowing for adequate space for the grill structure.
- Foundation: Excavate the marked area to a depth of at least 6 inches, ensuring a stable and level foundation. Pour a layer of gravel into the excavated area and compact it to create a solid base for the grill.
- Brick or Stone Placement: Begin laying the bricks or stones in the desired pattern, ensuring they are level and securely positioned. Use a masonry trowel and mortar to create strong and uniform joints between the bricks or stones.
- Building the Support Structure: Depending on the grill design, construct the support structure for the grill components, such as the firebox and cooking surface. Use additional bricks or fire-resistant materials to create the necessary compartments and supports.
- Curing and Finishing: Allow the mortar to cure for the recommended time, ensuring that the base is solid and stable. Once cured, apply any desired finishes or coatings to enhance the appearance and durability of the base.
For Metal Grills:
If you’re constructing a metal grill, the process for building the base will involve different steps:
- Cutting and Shaping: Cut and shape the metal components according to the dimensions and design of the base. Ensure precise measurements and clean cuts for a professional and secure assembly.
- Welding and Assembly: Use welding equipment to join the metal components, creating a stable and robust base structure. Pay careful attention to the alignment and strength of the welds to ensure the integrity of the base.
- Adding Reinforcements: Depending on the grill design, incorporate additional reinforcements or supports to accommodate the weight of the grill components and provide stability.
- Surface Preparation: Prepare the metal surfaces for finishing by removing any rust, debris, or imperfections. This preparation will ensure optimal adhesion and longevity of the final finish.
- Finishing Touches: Apply the desired finish, such as heat-resistant paint or powder coating, to protect the base from corrosion and enhance its visual appeal.
By following these steps and tailoring the construction process to the specific requirements of your chosen grill design, you’ll create a solid and reliable base that forms the backbone of your custom outdoor grill. With the base in place, you’re ready to proceed to the next phase of building the grill structure.
Read more: How To Build A Brick Grill
Building the Grill Structure
With the base of your outdoor grill securely in place, it’s time to focus on constructing the grill structure, which will house the essential components for cooking delectable meals in the great outdoors. Whether you’re working with masonry or metal materials, the process of building the grill structure requires careful attention to detail and precise construction techniques. Here’s a comprehensive guide to help you navigate this pivotal phase of the project:
For Masonry Grills:
If you’ve chosen to build a masonry grill, follow these steps to construct the grill structure:
- Planning the Layout: Determine the layout and dimensions of the grill structure, ensuring that it accommodates the firebox, cooking surface, and any additional features such as storage compartments or side shelves.
- Layering and Bonding: Layer the bricks or stones to form the walls of the grill structure, using mortar to bond the materials together securely. Pay close attention to the alignment and levelness of the walls to ensure a uniform and stable structure.
- Creating Compartments: Construct the firebox and cooking surface compartments within the grill structure, ensuring they are designed to withstand high heat and provide efficient cooking functionality.
- Customizing Features: If desired, incorporate custom features such as integrated storage areas, built-in thermometers, or decorative elements to personalize the grill structure and enhance its functionality.
- Reinforcement and Finishing: Once the structure is complete, reinforce any critical areas and allow the mortar to cure thoroughly. Apply any desired finishes or coatings to protect the structure from the elements and enhance its visual appeal.
For Metal Grills:
If your outdoor grill features a metal structure, the construction process will involve the following steps:
- Assembling Components: Assemble the metal components to form the framework of the grill structure, ensuring precise alignment and secure connections. Utilize welding techniques to join the components effectively.
- Integrating Functional Elements: Incorporate the necessary components such as the firebox, cooking surface, and any additional features into the metal structure, ensuring they are securely attached and designed for optimal functionality.
- Enhancing Stability: Add reinforcements and supports as needed to enhance the stability and durability of the grill structure, ensuring it can withstand the rigors of outdoor cooking and environmental conditions.
- Surface Preparation: Prepare the metal surfaces for finishing by removing any imperfections, cleaning thoroughly, and applying corrosion-resistant treatments to protect the structure from rust and deterioration.
- Applying Finishes: Apply the desired finish, such as high-temperature paint or powder coating, to provide a durable and visually appealing surface that complements your outdoor living space.
By following these guidelines and adapting the construction process to suit the specific requirements of your chosen grill design, you’ll create a robust and functional grill structure that forms the heart of your outdoor cooking haven. With the grill structure taking shape, you’re one step closer to realizing your vision of a custom outdoor grill tailored to your unique preferences and culinary aspirations.
Adding the Grill Grate
As you progress in the construction of your outdoor grill, the addition of the grill grate marks a significant milestone, bringing your creation one step closer to its ultimate purpose: grilling mouthwatering meals in the open air. The grill grate, also known as the cooking grid, is a crucial component that directly influences the cooking performance and versatility of your outdoor grill. Whether you’re building a charcoal, gas, or hybrid grill, the process of adding the grill grate involves careful consideration of design, material, and functionality. Here’s a detailed guide to help you seamlessly integrate the grill grate into your custom outdoor cooking space:
Read more: How To Clean An Outdoor Grill
Choosing the Right Grill Grate:
Before proceeding with the installation, it’s essential to select a grill grate that aligns with your cooking preferences and the design of your outdoor grill. Consider the following factors when choosing a grill grate:
- Material: Grill grates are available in various materials, including stainless steel, cast iron, and porcelain-coated options. Each material offers distinct advantages in terms of heat retention, durability, and maintenance requirements.
- Size and Shape: Ensure that the dimensions and shape of the grill grate are compatible with the cooking area of your grill, providing sufficient space for grilling a variety of foods while allowing for easy handling and maintenance.
- Heat Distribution: Evaluate the heat distribution properties of the grill grate material to ensure even cooking and desirable sear marks on grilled foods.
- Maintenance: Consider the ease of cleaning and maintenance associated with different grill grate materials, as this will impact the long-term performance and appearance of your outdoor grill.
Installing the Grill Grate:
Once you’ve selected the appropriate grill grate for your outdoor grill, follow these steps to install it securely and effectively:
- Positioning the Grate: Place the grill grate within the designated cooking area of your grill, ensuring it rests securely on the supports or ledges designed to hold the grate in place.
- Securing the Grate: If your grill features an adjustable or removable grate, ensure it is positioned at the desired height for optimal cooking results. Secure the grate in place using the designated locking mechanisms or fasteners, if applicable.
- Testing Stability: Verify that the grill grate is stable and level, with no wobbling or unevenness that could affect cooking performance. Make any necessary adjustments to ensure a secure and reliable cooking surface.
- Seasoning the Grate: If using a cast iron or raw steel grill grate, consider seasoning it with a light coating of oil to create a non-stick surface and prevent rusting. Follow the manufacturer’s guidelines for seasoning and maintenance.
- Preheating the Grill: Before your inaugural grilling session, preheat the grill with the grate in place to ensure it reaches the desired cooking temperature and to burn off any residues from the manufacturing process.
By carefully selecting and installing the grill grate, you’ll enhance the functionality and performance of your outdoor grill, setting the stage for countless memorable cooking experiences in the great outdoors. With the grill grate in position, your custom outdoor cooking space is nearly ready to unleash its full culinary potential, bringing the tantalizing aromas and flavors of outdoor grilling to life.
Final Touches and Safety Measures
As you near the completion of your custom outdoor grill, it’s essential to pay attention to the final touches that will not only enhance the aesthetics of your creation but also ensure its safety and functionality. By incorporating thoughtful details and implementing crucial safety measures, you can elevate your outdoor cooking space to a new level of convenience, style, and peace of mind. Here’s a comprehensive guide to adding the final touches and implementing essential safety measures for your outdoor grill:
Final Touches:
As you approach the final stages of constructing your outdoor grill, consider the following finishing touches to refine its appearance and functionality:
- Surface Finishes: Apply any desired finishes to the exterior surfaces of the grill, such as heat-resistant paint, powder coating, or decorative elements, to enhance its visual appeal and complement your outdoor living space.
- Custom Features: Incorporate personalized elements such as side shelves, hooks for utensils, built-in thermometers, or integrated lighting to tailor the grill to your specific cooking needs and preferences.
- Weather Protection: If your grill will be exposed to the elements, consider adding a protective cover or shelter to shield it from rain, snow, and excessive sunlight, prolonging its lifespan and preserving its appearance.
- Storage Solutions: Integrate storage compartments or dedicated storage areas for grilling accessories, fuel sources, and cooking utensils to maintain a tidy and organized outdoor cooking space.
- Lighting and Ambiance: Enhance the ambiance of your outdoor cooking area by incorporating lighting solutions such as overhead lights, task lighting, or decorative lighting to create a welcoming and functional environment for evening grilling sessions.
Read more: How To Build A Stone Patio Grill
Safety Measures:
Prioritizing safety is paramount when it comes to enjoying your outdoor grill with confidence and peace of mind. Implement the following safety measures to ensure the safe operation and longevity of your custom outdoor grill:
- Clearance and Ventilation: Maintain adequate clearance between the grill and any flammable materials, and ensure proper ventilation to prevent the accumulation of smoke and gas near the cooking area.
- Fire Extinguisher: Keep a fire extinguisher or a suitable firefighting tool within close reach of the grill, providing quick access in the event of an emergency or unexpected flare-ups.
- Regular Maintenance: Establish a routine maintenance schedule to inspect and clean the grill components, check for gas leaks (if applicable), and address any signs of wear or deterioration promptly.
- Child and Pet Safety: Create a designated safety zone around the grill to prevent young children and pets from coming into close proximity to the hot surfaces and potential hazards.
- Safe Fuel Storage: Store fuel sources such as charcoal, propane, or wood pellets in a secure and well-ventilated area away from the grill and any ignition sources.
By attending to these final touches and implementing essential safety measures, you’ll not only enhance the functionality and aesthetics of your outdoor grill but also create a safe and inviting environment for memorable outdoor cooking experiences. With careful attention to detail and a focus on safety, your custom outdoor grill will be poised to become the centerpiece of your outdoor entertainment and culinary adventures.
Conclusion
Congratulations on successfully completing the construction of your custom outdoor grill! As you stand back and admire the fruits of your labor, you’re now the proud creator of a versatile, stylish, and functional outdoor cooking space that is poised to elevate your culinary adventures and outdoor gatherings. Throughout this journey, you’ve embarked on a creative and rewarding endeavor, transforming raw materials and components into a centerpiece of warmth, flavor, and shared experiences.
By following the comprehensive guide outlined in this article, you’ve navigated the essential steps of building an outdoor grill with precision, creativity, and attention to detail. From choosing the perfect location and selecting a suitable grill design to gathering materials, constructing the base and grill structure, adding the grill grate, and implementing final touches and safety measures, you’ve embraced the art of outdoor grill construction with enthusiasm and expertise.
As you prepare to inaugurate your custom outdoor grill with sizzling steaks, vibrant vegetables, and the aroma of smoky perfection, remember that your creation is more than just a cooking appliance. It’s a testament to your ingenuity, a reflection of your personal style, and a catalyst for unforgettable moments shared with family and friends. Whether it’s a casual weeknight dinner, a festive barbecue, or a tranquil evening of outdoor cooking, your custom grill will serve as the centerpiece of warmth, flavor, and shared experiences.
As you embark on this new chapter of outdoor cooking, remember to savor the process and embrace the joy of bringing your culinary vision to life. Whether you’re a seasoned grilling enthusiast or a newcomer to the world of outdoor cooking, your custom outdoor grill stands as a testament to your dedication, creativity, and passion for creating memorable experiences in the great outdoors.
So, fire up the grill, gather your loved ones, and savor the moments that unfold around this exceptional creation. Your custom outdoor grill is more than just a cooking space; it’s a symbol of warmth, flavor, and shared memories that will enrich your life for years to come.
Now that you've mastered building your own outdoor grill, consider expanding your expertise into other areas of outdoor living. If optimizing space in your backyard kitchen interests you, don't miss our next piece on outdoor kitchen design, offering smart storage solutions inspired by a top kitchen designer. These practical tips will transform how you organize and enjoy your outdoor cooking space.
Frequently Asked Questions about How To Build An Outdoor Grill
Was this page helpful?
At Storables.com, we guarantee accurate and reliable information. Our content, validated by Expert Board Contributors, is crafted following stringent Editorial Policies. We're committed to providing you with well-researched, expert-backed insights for all your informational needs.


0 thoughts on “How To Build An Outdoor Grill”