Home>Furniture & Design>Outdoor Furniture>How To Build An Outdoor Table
Outdoor Furniture
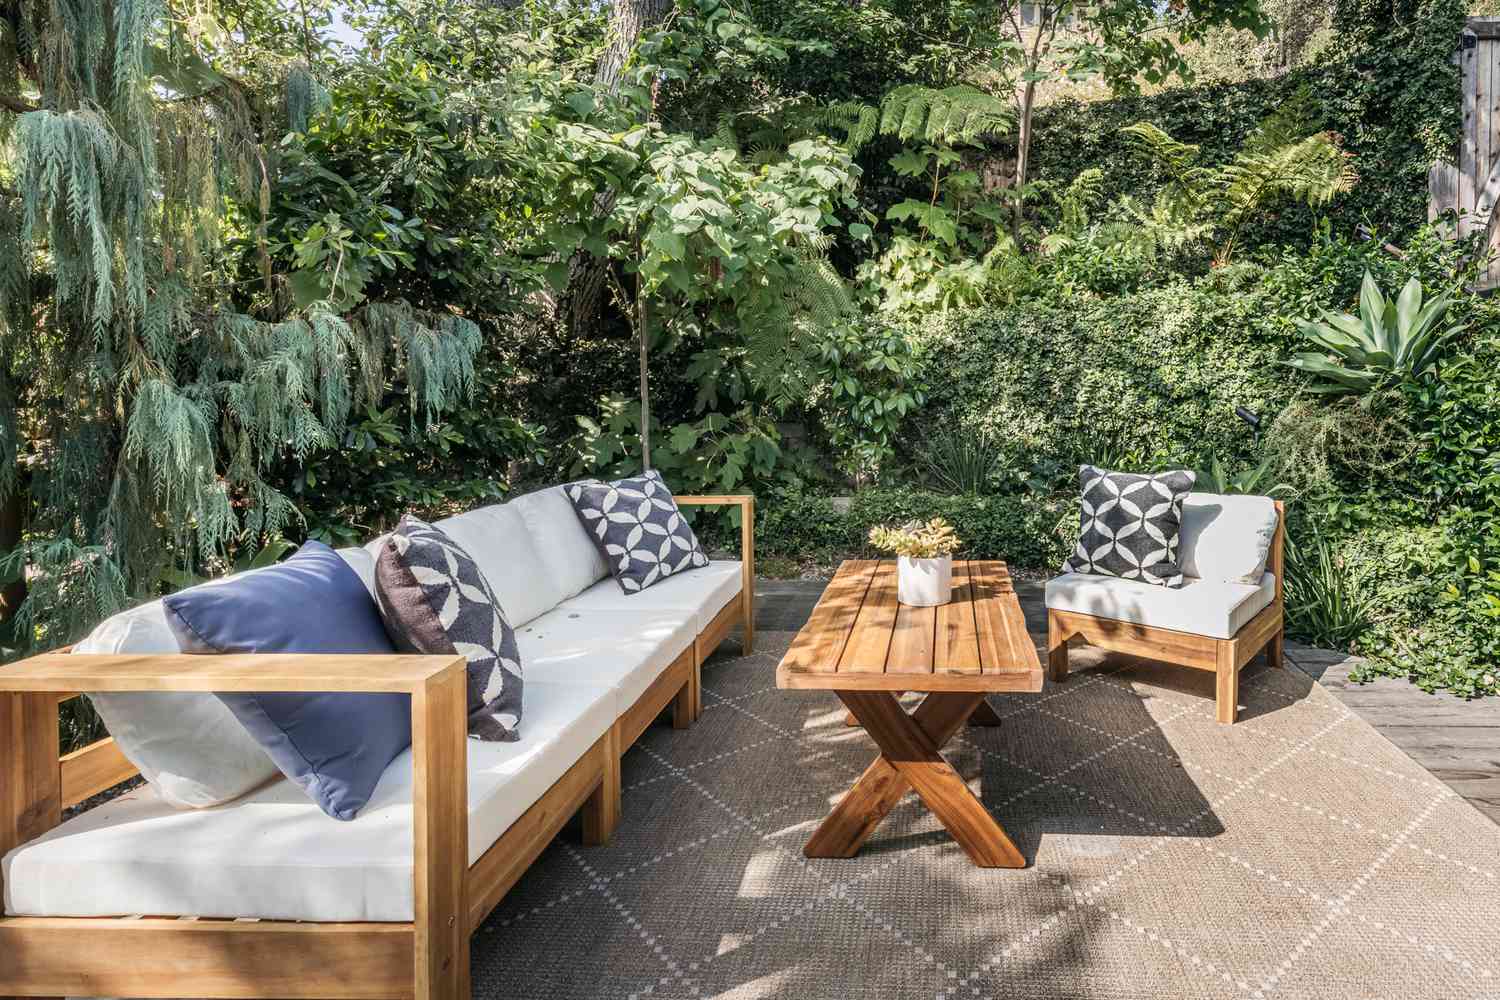
How To Build An Outdoor Table
Published: January 15, 2024
Discover the best tips and tricks for creating your own outdoor table with our comprehensive guide. Enhance your outdoor space with our expert advice and design ideas.
(Many of the links in this article redirect to a specific reviewed product. Your purchase of these products through affiliate links helps to generate commission for Storables.com, at no extra cost. Learn more)
Introduction
Are you ready to elevate your outdoor space with a custom-built table that perfectly complements your patio or garden? Building your own outdoor table can be a rewarding and cost-effective project that allows you to showcase your woodworking skills while creating a functional and stylish piece of furniture. Whether you're a seasoned DIY enthusiast or a novice looking to embark on a new project, crafting an outdoor table can be an enjoyable and fulfilling endeavor.
In this comprehensive guide, we will walk you through the step-by-step process of constructing a sturdy and visually appealing outdoor table. From selecting the right materials to mastering essential woodworking techniques, we'll cover everything you need to know to bring your vision to life. With a few basic tools and a creative mindset, you can embark on this DIY journey and craft a stunning outdoor table that reflects your personal style and enhances your outdoor living space.
So, roll up your sleeves, gather your tools, and let's dive into the exciting world of outdoor furniture construction. Whether you're aiming for a rustic farmhouse aesthetic or a modern, sleek design, this guide will provide you with the knowledge and inspiration to build a beautiful outdoor table that will be the centerpiece of your outdoor gatherings for years to come. Let's get started!
Key Takeaways:
- Building your own outdoor table is a rewarding and creative project that requires precision and patience. From selecting materials to assembling the table, it’s a fulfilling journey that enhances your outdoor space.
- Crafting a custom outdoor table allows you to showcase your woodworking skills and create a functional, stylish centerpiece for outdoor gatherings. With the right tools and materials, you can bring your vision to life and enjoy the satisfaction of a job well done.
Read more: How To Build An Outdoor Dining Table
Materials Needed
Before diving into the construction process, it’s essential to gather all the necessary materials to ensure a smooth and efficient building experience. Here’s a comprehensive list of the materials you’ll need to construct your own outdoor table:
- Pressure-treated lumber or cedar boards for the tabletop and legs
- Wood screws or outdoor-grade fasteners
- Wood glue for added joint strength
- Sandpaper in various grits for sanding and smoothing the wood
- Wood stain or outdoor-grade paint for a protective and decorative finish
- Wood sealant to protect the table from the elements
- Measuring tape and carpenter’s square for precise measurements and angles
- Sawhorses or a sturdy workbench for a stable work surface
- Protective eyewear and a dust mask for safety during cutting and sanding
- Paintbrushes or foam brushes for applying stain or paint
- Rags or disposable cloths for stain application and cleanup
By ensuring you have all these materials on hand before starting the construction process, you’ll be well-prepared to tackle each step with confidence and efficiency. Remember to select high-quality materials that are suitable for outdoor use, as they will contribute to the durability and longevity of your finished table. With the materials gathered, you’re ready to move on to the next phase: preparing your tools for the project.
Tools Required
Equipping yourself with the right tools is crucial for successfully building an outdoor table. Here’s a list of essential tools that will enable you to navigate the construction process with precision and ease:
- Power saw (circular saw or miter saw) for cutting the lumber to the desired dimensions
- Drill/driver with a set of drill bits and screwdriver bits for assembling the table
- Clamps to hold the wood pieces securely in place during assembly
- Sandpaper or a power sander for smoothing the wood surfaces
- Carpenter’s square for ensuring accurate angles and measurements
- Tape measure for taking precise dimensions
- Chisel and hammer for fine adjustments and detailing (if needed)
- Paintbrushes or foam brushes for applying wood finish
- Safety goggles and a dust mask for protection during cutting and sanding
Having these tools readily available will streamline the construction process and empower you to tackle each step with confidence. Additionally, maintaining a clean and organized workspace will contribute to a more efficient and enjoyable building experience. With your materials and tools in place, you’re now prepared to embark on the exciting journey of crafting your very own outdoor table.
Step 1: Cutting the Wood
The first step in building your outdoor table is to carefully measure and cut the lumber to the required dimensions. Whether you’re using pressure-treated lumber or cedar boards, precise cuts are essential for ensuring a seamless assembly and a professional-looking finished product. Here’s a detailed breakdown of the cutting process:
1. Measure Twice, Cut Once: Before making any cuts, take accurate measurements of the tabletop and legs, accounting for the desired dimensions and any design details such as beveled edges or decorative accents. Double-check your measurements to ensure precision before proceeding with the cuts.
2. Setting Up the Work Area: Secure the lumber on sawhorses or a stable workbench, ensuring that it is fully supported and stable. This will provide a safe and controlled environment for the cutting process.
3. Utilizing the Right Saw: Depending on your preference and available tools, use a circular saw or miter saw to make straight, clean cuts. Ensure that the saw blade is suitable for cutting through the chosen type of wood, and adjust the cutting depth and angle as needed.
4. Executing the Cuts: Carefully guide the saw along the marked cut lines, maintaining a steady pace and applying gentle pressure to achieve smooth and precise cuts. If you’re creating angled cuts for the legs or decorative elements, use a miter saw to achieve accurate angles.
5. Double-Checking the Cuts: After each cut, inspect the wood pieces to ensure that they meet the intended dimensions and angles. Make any necessary adjustments or recuts to guarantee that all components fit together seamlessly during assembly.
By approaching the cutting phase with patience and attention to detail, you’ll lay a solid foundation for the subsequent steps of building your outdoor table. With the wood cut to perfection, you’re ready to move on to the exciting process of assembling the tabletop.
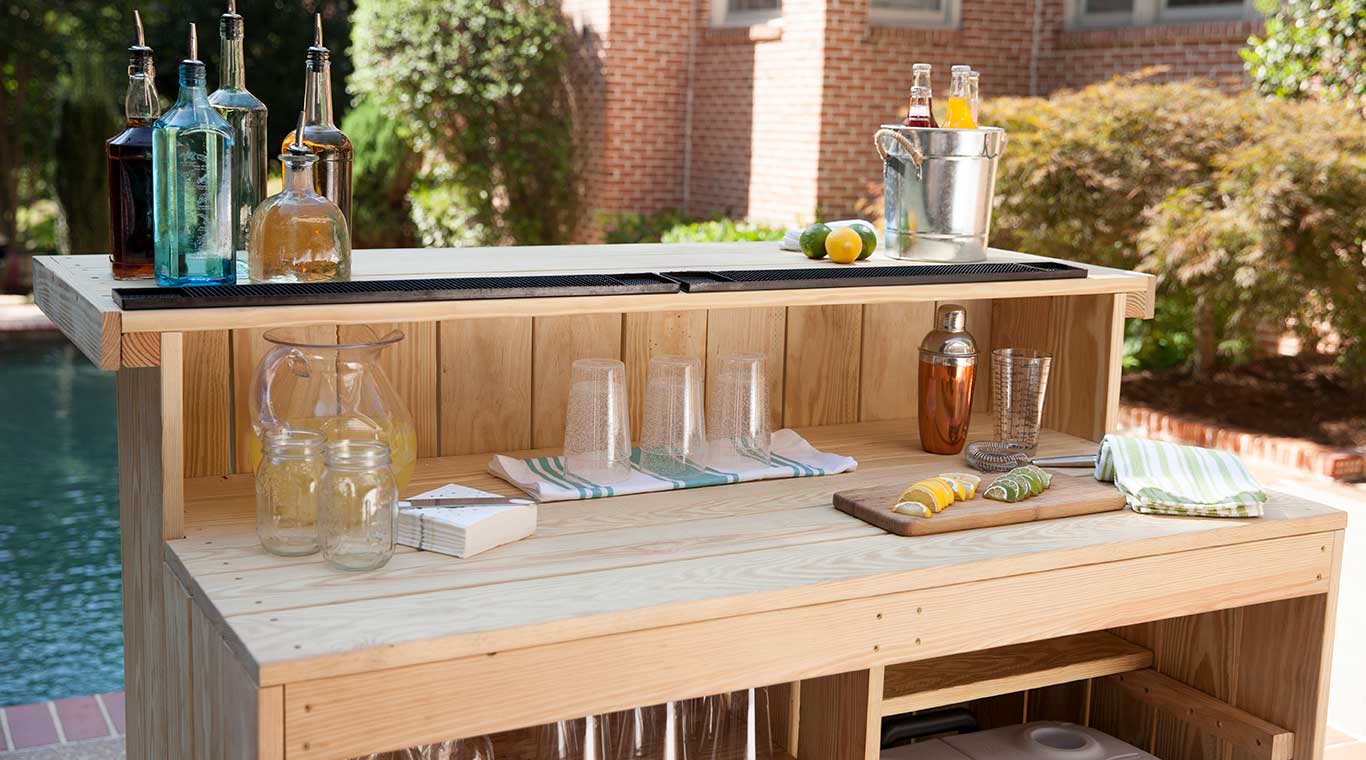
Step 2: Assembling the Tabletop
With the lumber cut to the precise dimensions, it’s time to bring the tabletop to life through the assembly process. This step involves joining the individual wood pieces to create a sturdy and visually appealing tabletop that forms the focal point of your outdoor table. Here’s a comprehensive guide to assembling the tabletop:
1. Arranging the Boards: Lay out the cut boards on a flat and clean surface, ensuring that the edges align seamlessly to create a cohesive tabletop. Take the time to experiment with different arrangements to achieve the desired visual effect, especially if you’re working with boards of varying colors or grain patterns.
2. Applying Wood Glue: Once satisfied with the board arrangement, apply a thin, even layer of wood glue along the edges of each board before joining them together. The wood glue will enhance the bond between the boards, resulting in a solid and durable tabletop.
3. Securing with Screws: Using a drill/driver and appropriate screws, carefully fasten the boards together from the underside of the tabletop. Ensure that the screws are evenly spaced and driven in at the correct angle to prevent splitting or protrusions on the tabletop surface.
4. Reinforcing the Joints: For added stability, consider attaching support beams or braces underneath the tabletop, especially for larger tables. This reinforcement will distribute the weight evenly and prevent warping over time, ensuring the longevity of your outdoor table.
5. Smoothing the Surface: Once the tabletop is assembled, use sandpaper or a power sander to smooth the surface and eliminate any rough edges or imperfections. This step will prepare the tabletop for the finishing touches, enhancing its aesthetic appeal and tactile comfort.
By meticulously assembling the tabletop, you’ll lay the foundation for a durable and visually striking centerpiece for your outdoor table. With the tabletop taking shape, the next step involves crafting the table legs to provide sturdy support and aesthetic balance to the overall design.
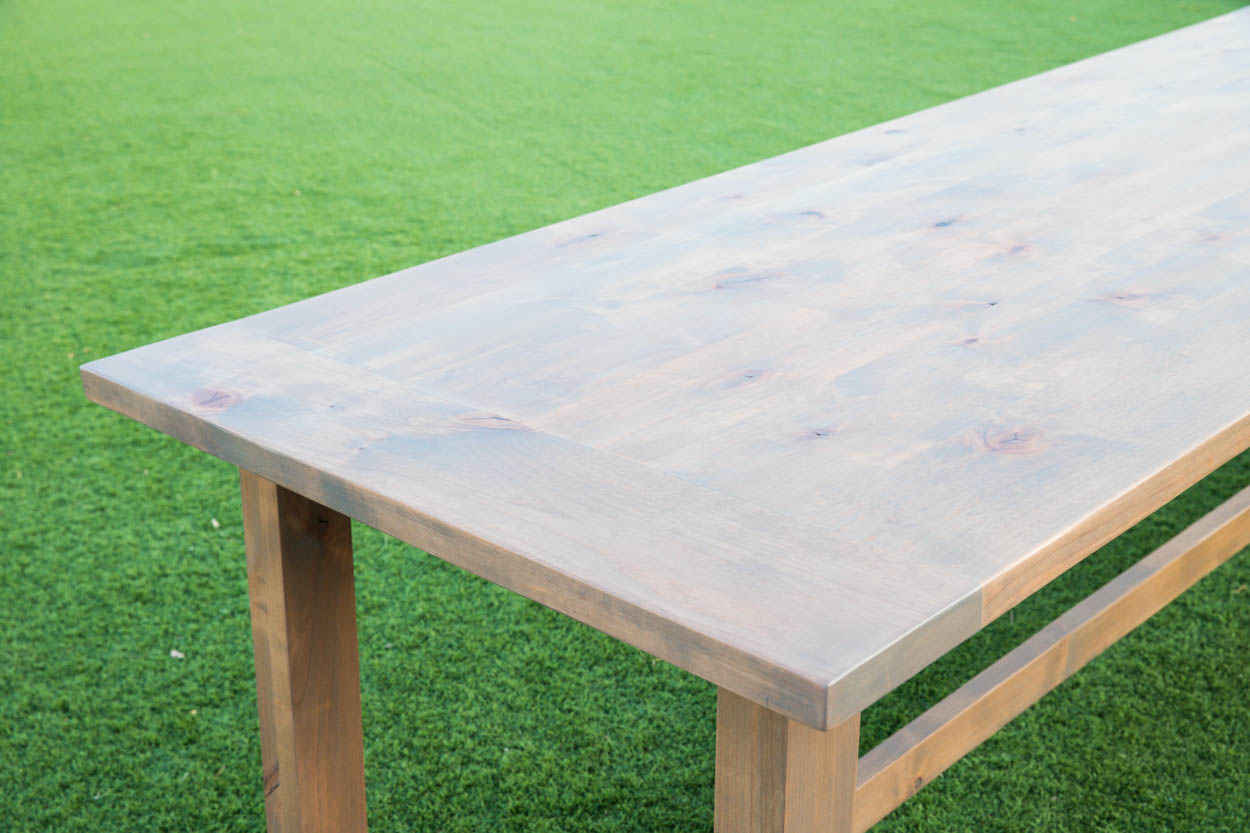
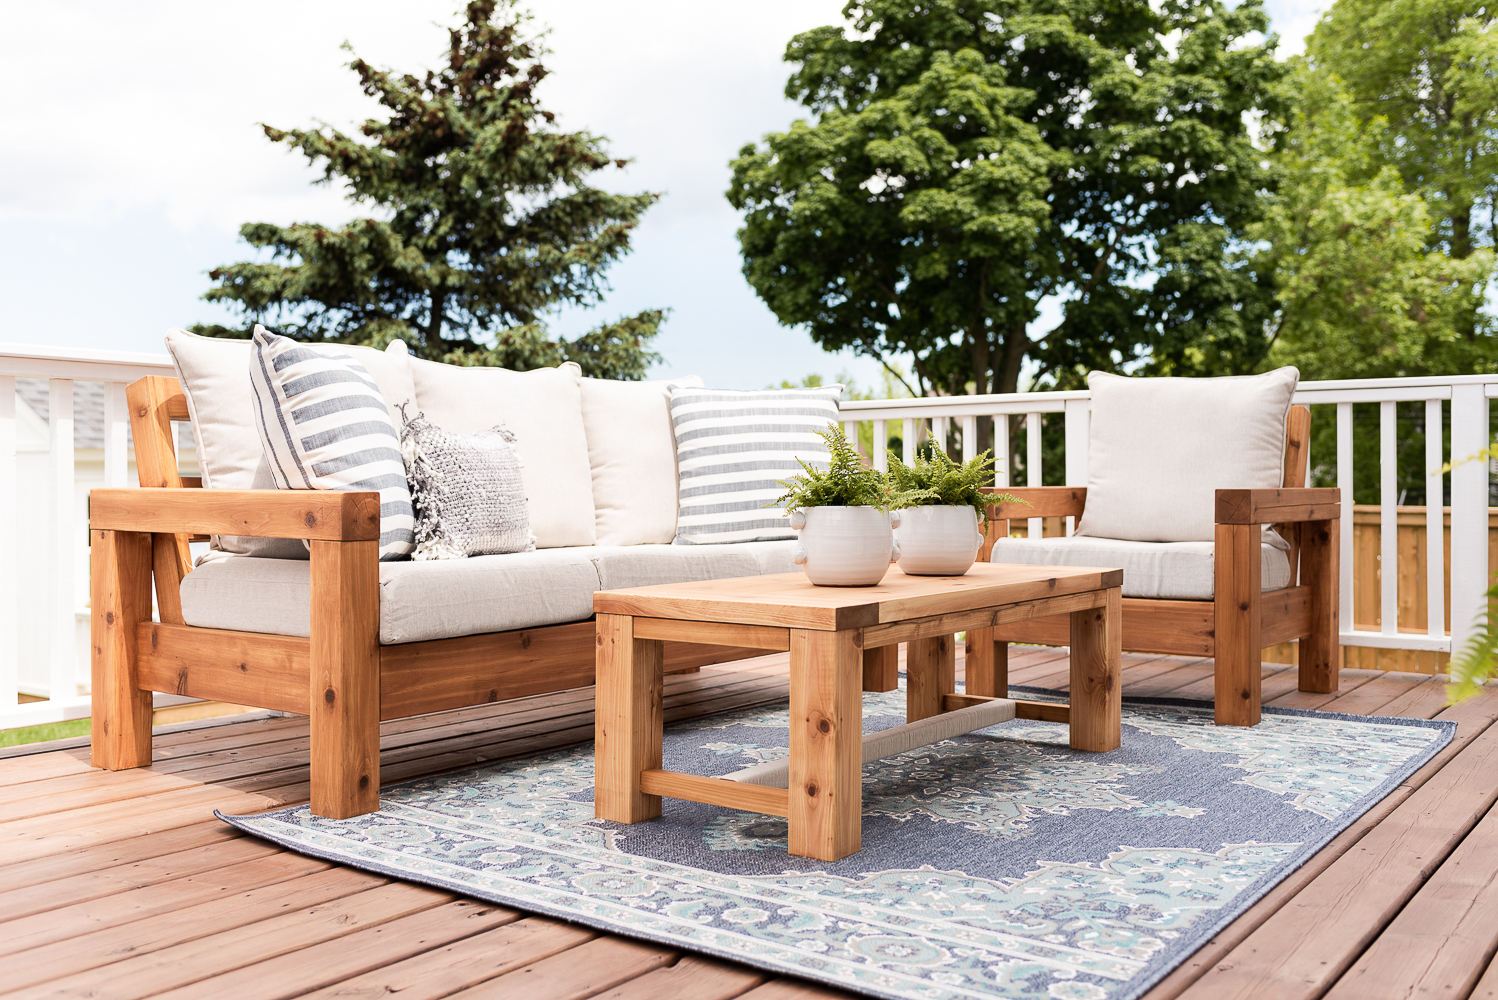
When building an outdoor table, make sure to use weather-resistant materials such as cedar or pressure-treated lumber to ensure durability and longevity.
Read more: How To Build A Console Table
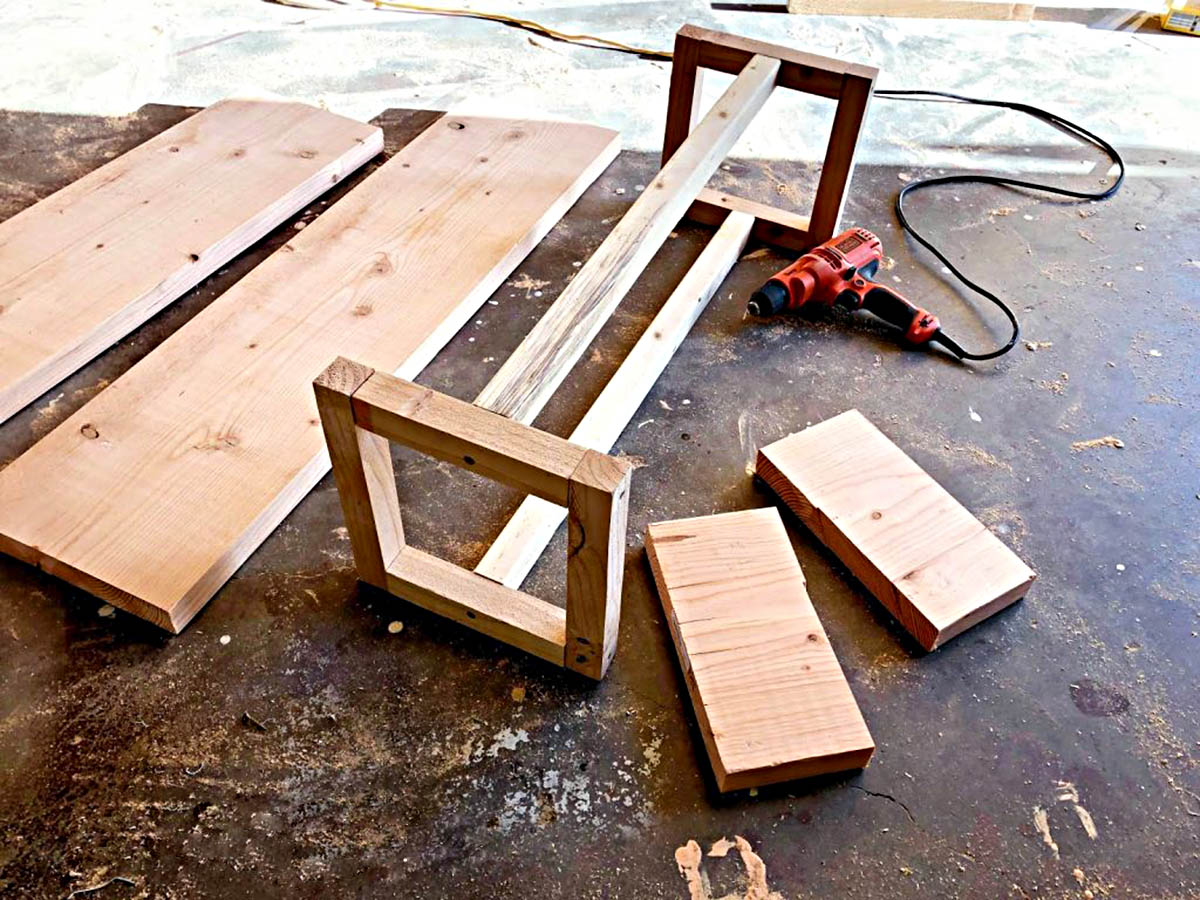
Step 3: Building the Table Legs
As you progress with the construction of your outdoor table, the development of sturdy and visually appealing table legs becomes a pivotal aspect of the project. The table legs not only provide essential support but also contribute significantly to the table’s overall aesthetic. Here’s a detailed guide to crafting and assembling the table legs:
1. Selecting the Leg Design: Consider the design and style of your outdoor table when choosing the appropriate leg profile. Whether you opt for traditional straight legs, tapered legs, or intricately carved designs, ensure that the chosen style harmonizes with the overall aesthetic of the table.
2. Measuring and Cutting: Using the previously cut lumber, measure and mark the dimensions for the table legs, ensuring uniformity in length and width. Employ precision and care during the cutting process to achieve consistent and symmetrical leg components.
3. Creating Support Structures: Depending on the design and size of the table, consider incorporating additional support structures such as cross braces or stretchers to reinforce the legs and enhance the table’s stability. These elements play a crucial role in preventing wobbling and ensuring the table’s longevity.
4. Adding Decorative Details (Optional): If desired, you can incorporate decorative details such as chamfered edges, beveled corners, or carved embellishments to infuse a touch of artistry into the table legs. These details can elevate the visual appeal of the table while showcasing your woodworking skills.
5. Pre-Assembly Finishing: Before attaching the legs to the tabletop, ensure that the leg components are meticulously sanded and finished to achieve a smooth and polished appearance. This step will contribute to the overall refinement of the table’s design.
By methodically crafting and refining the table legs, you’ll lay the groundwork for a structurally sound and aesthetically pleasing support system for your outdoor table. With the table legs prepared, the subsequent step involves seamlessly integrating them with the tabletop to bring the entire structure together.
Step 4: Attaching the Legs to the Tabletop
As you approach this pivotal phase of the construction process, the seamless attachment of the table legs to the tabletop will define the structural integrity and visual coherence of your outdoor table. This step requires precision and attention to detail to ensure a stable and harmonious union between the tabletop and its supporting legs. Here’s a comprehensive guide to attaching the legs to the tabletop:
1. Positioning the Table Legs: Carefully position the table legs at the designated locations on the underside of the tabletop, ensuring symmetrical placement and uniform alignment. Take precise measurements to guarantee that the legs are equidistant from the table’s edges for balanced support.
2. Securing with Fasteners: Utilize wood screws or outdoor-grade fasteners to securely attach the table legs to the tabletop. Predrill pilot holes to prevent splitting and facilitate accurate screw placement, ensuring a robust and enduring connection between the tabletop and the legs.
3. Reinforcing the Attachment: Consider incorporating additional reinforcement, such as corner brackets or metal braces, to fortify the attachment points between the tabletop and the legs. This reinforcement will enhance the table’s stability and durability, especially for tables intended for frequent use.
4. Ensuring Levelness: Use a carpenter’s level to verify that the tabletop is perfectly level after attaching the legs. This step is crucial for ensuring the table’s stability and preventing wobbling or uneven weight distribution, particularly when the table is placed on uneven outdoor surfaces.
5. Inspecting and Fine-Tuning: After attaching the legs, meticulously inspect the attachment points and make any necessary adjustments to ensure a seamless and secure connection. This thorough examination will guarantee that the tabletop and legs form a unified and stable structure.
By skillfully uniting the tabletop with its supporting legs, you’ll bring the outdoor table one step closer to completion, culminating in a functional and visually captivating piece of furniture. With the tabletop and legs seamlessly integrated, the final phase involves refining the table’s surfaces and edges to achieve a polished and inviting appearance.
Step 5: Sanding and Finishing
As you near the culmination of your outdoor table construction, the sanding and finishing phase holds the transformative power to refine the surfaces, enhance the visual allure, and fortify the durability of the table. This meticulous process elevates the table from a collection of wood components to a polished and inviting centerpiece for your outdoor space. Here’s a comprehensive guide to sanding and finishing your outdoor table:
1. Sanding the Wood Surfaces: Utilize sandpaper or a power sander to meticulously sand the tabletop, legs, and any exposed wood surfaces. Begin with a coarse grit to eliminate rough spots and imperfections, gradually progressing to finer grits to achieve a smooth and tactilely pleasing finish.
2. Smoothing the Edges: Pay special attention to rounding off sharp edges and corners, creating a more inviting and comfortable tabletop. This step contributes to the safety and aesthetic refinement of the table, especially in outdoor settings where users may come into close contact with the furniture.
3. Applying Wood Finish: Select a high-quality wood stain or outdoor-grade paint to impart a protective and decorative finish to the table. Apply the finish evenly with a paintbrush or foam brush, ensuring comprehensive coverage and penetration into the wood’s grain to safeguard it from outdoor elements.
4. Sealing for Protection: Following the application of the wood finish, consider applying a durable wood sealant to further fortify the table against moisture, UV exposure, and general wear and tear. The sealant will prolong the table’s lifespan and preserve its aesthetic appeal for years to come.
5. Final Inspection and Touch-Ups: Thoroughly inspect the table for any remaining imperfections or areas that require additional attention. Address any touch-ups or refinements to guarantee that the table exudes a polished and professional finish.
By meticulously sanding and finishing your outdoor table, you’ll infuse it with a captivating aesthetic allure while fortifying its resilience against the rigors of outdoor use. With the sanding and finishing process complete, your custom-built outdoor table is ready to take its place as a stunning and functional centerpiece in your outdoor living space, providing a welcoming setting for gatherings and relaxation.
Conclusion
Congratulations on successfully navigating the exciting journey of constructing your very own outdoor table! Throughout this comprehensive guide, you’ve embarked on a fulfilling and creative endeavor, from selecting the finest materials to mastering essential woodworking techniques. As a result, you’ve brought to life a stunning and functional piece of furniture that will undoubtedly enrich your outdoor living space for years to come.
By embracing the art of woodworking and immersing yourself in the process of crafting each component with care and precision, you’ve not only created a practical table but also imbued it with your unique style and craftsmanship. The satisfaction of witnessing your vision materialize into a tangible and beautiful creation is a testament to your dedication and creativity.
As you admire the seamless integration of the tabletop and legs, the refined surfaces, and the protective finish that adorns your outdoor table, take pride in the skills you’ve honed and the enduring legacy of your craftsmanship. Whether you’ve chosen a rustic, farmhouse-inspired design or a sleek and modern aesthetic, your outdoor table stands as a testament to your ingenuity and passion for woodworking.
As you place your custom-built outdoor table in its designated outdoor space, envision the countless gatherings, meals, and moments of relaxation it will facilitate. From lively outdoor brunches to tranquil evenings under the stars, your table will serve as a cherished focal point, fostering connections and creating lasting memories for you and your loved ones.
With your newfound expertise in outdoor furniture construction, you’re poised to embark on even more ambitious woodworking projects, further enhancing your outdoor oasis with handcrafted pieces that reflect your personal style and creativity. The skills and knowledge you’ve acquired throughout this process will continue to inspire and empower you as you explore the boundless possibilities of woodworking and design.
So, as you revel in the satisfaction of completing this enriching endeavor, take a moment to appreciate the craftsmanship, dedication, and artistry that have culminated in the creation of your stunning outdoor table. Your journey as a woodworking enthusiast has only just begun, and the world of custom furniture and design eagerly awaits your next masterpiece.
Frequently Asked Questions about How To Build An Outdoor Table
Was this page helpful?
At Storables.com, we guarantee accurate and reliable information. Our content, validated by Expert Board Contributors, is crafted following stringent Editorial Policies. We're committed to providing you with well-researched, expert-backed insights for all your informational needs.


0 thoughts on “How To Build An Outdoor Table”