Home>Furniture & Design>Outdoor Furniture>How To Make A Homemade Outdoor Sauna


Outdoor Furniture
How To Make A Homemade Outdoor Sauna
Modified: February 17, 2024
Learn how to create a DIY outdoor sauna with our step-by-step guide. Discover the best outdoor furniture and design tips for your homemade sauna.
(Many of the links in this article redirect to a specific reviewed product. Your purchase of these products through affiliate links helps to generate commission for Storables.com, at no extra cost. Learn more)
Introduction
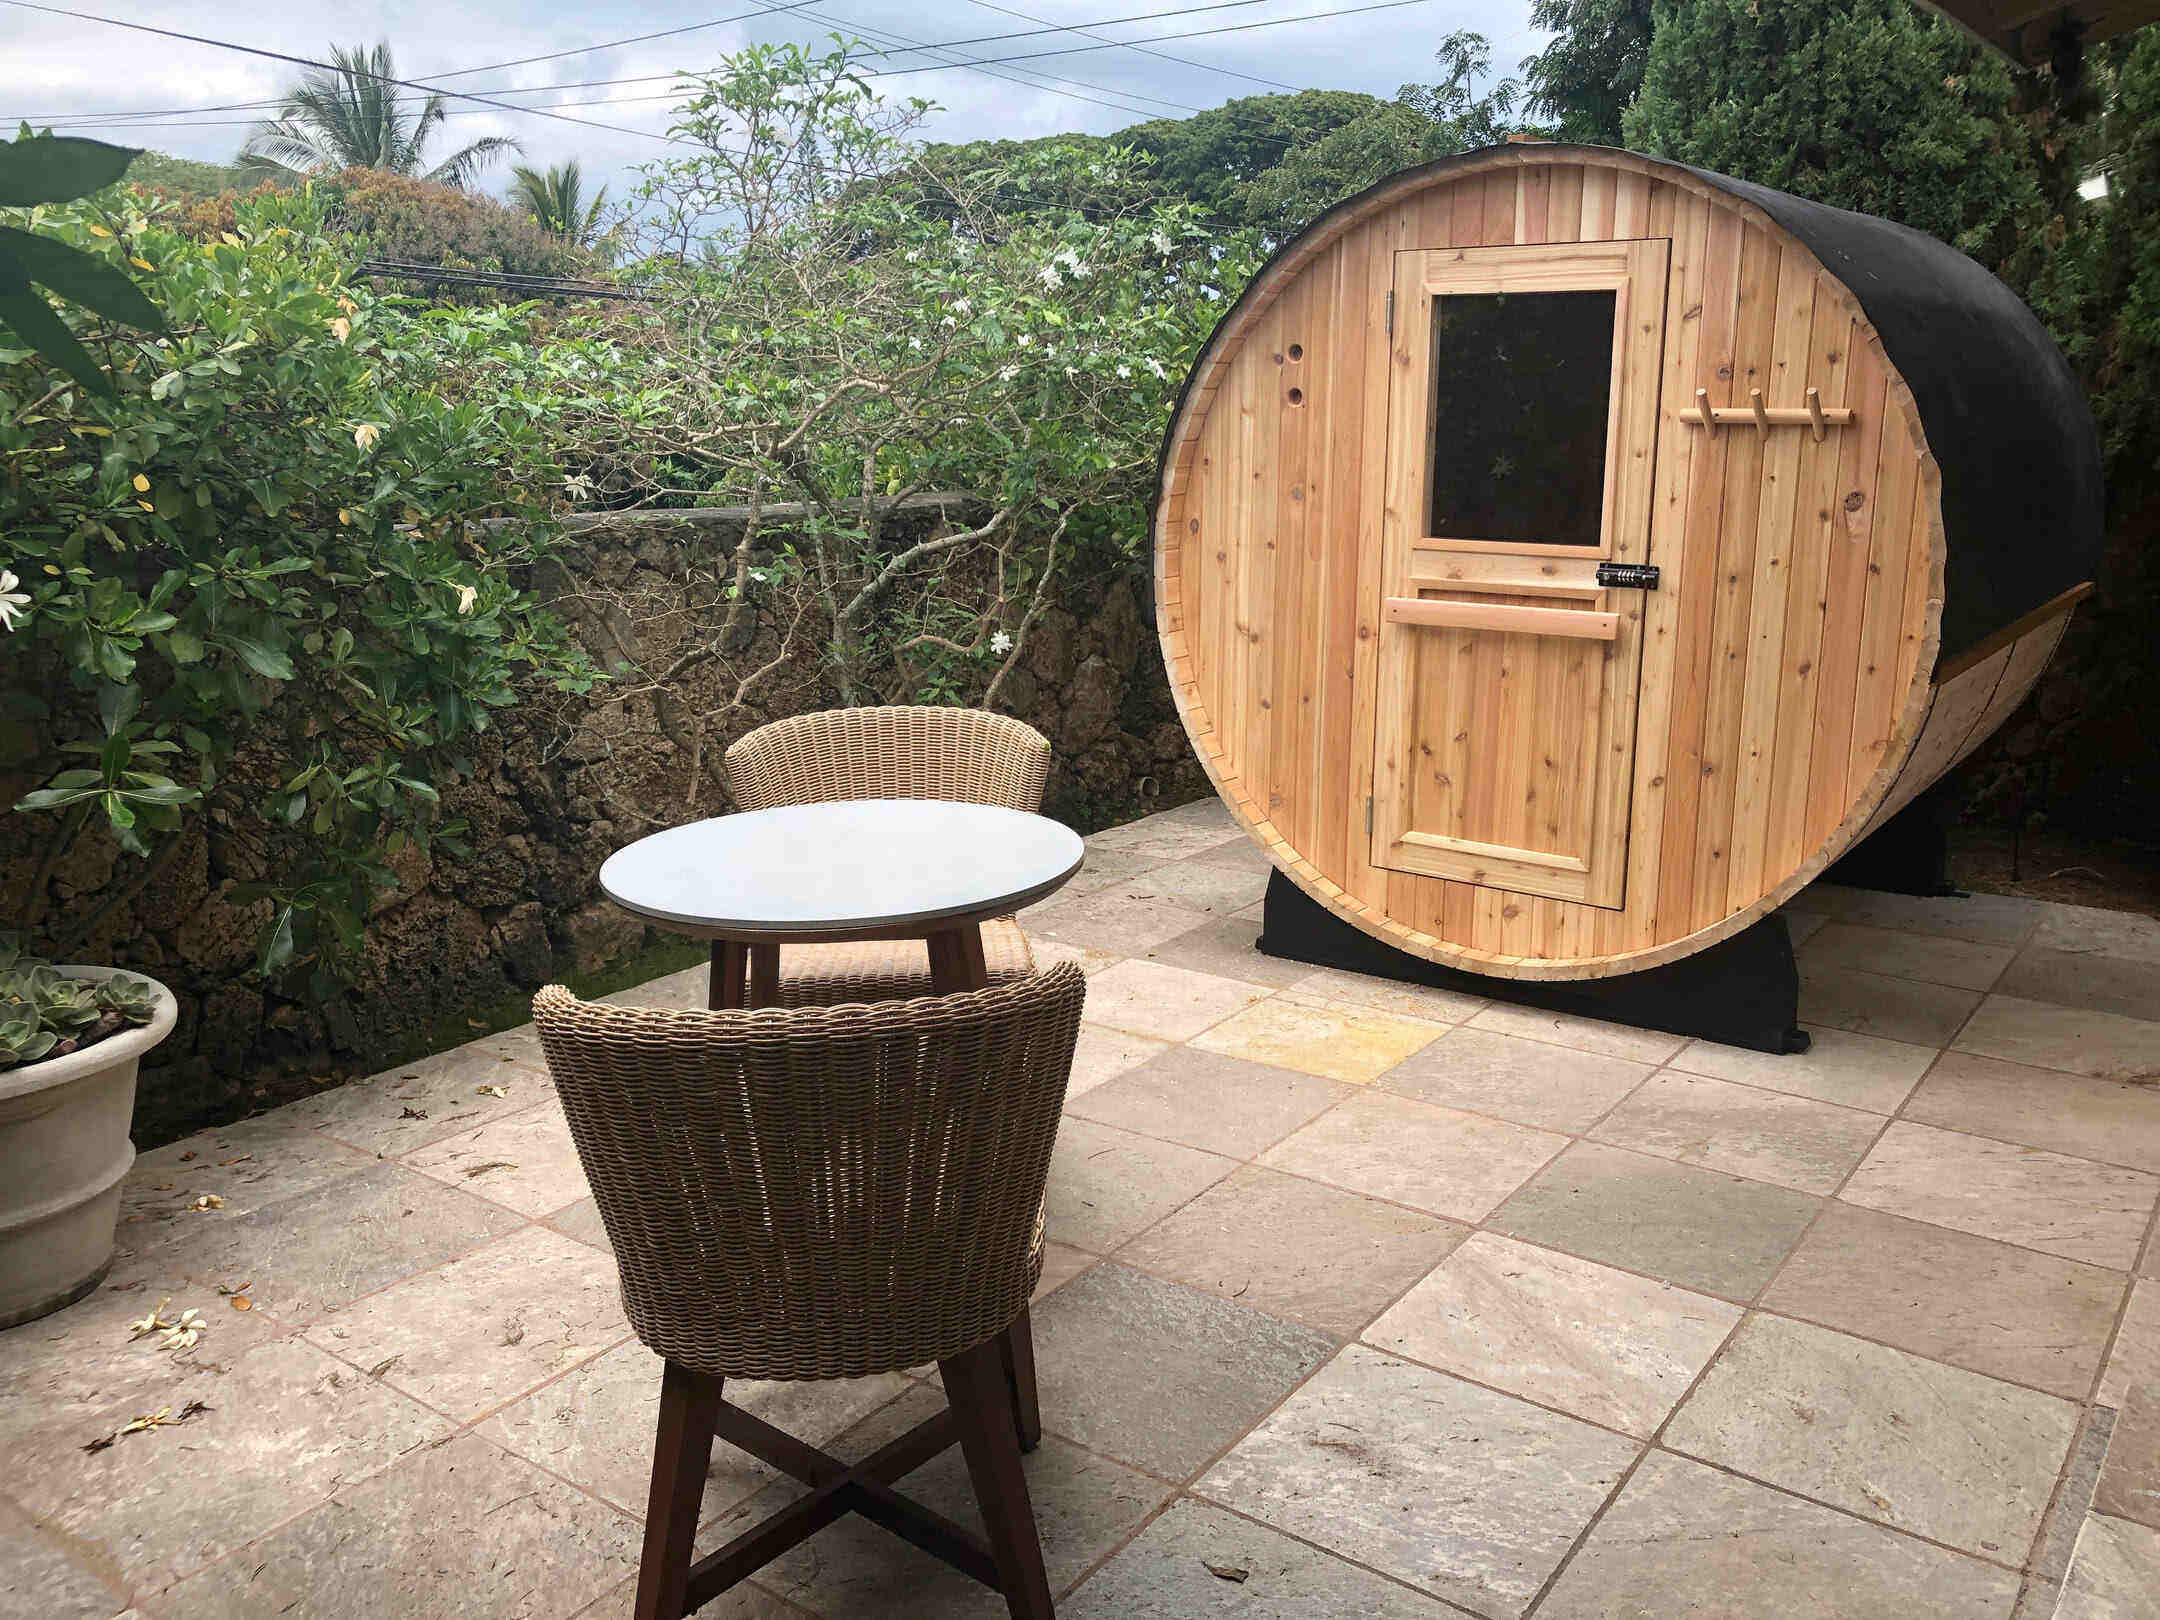
Creating a homemade outdoor sauna can be a rewarding and rejuvenating project for anyone who appreciates relaxation and the therapeutic benefits of heat therapy. Whether you're a seasoned DIY enthusiast or a novice looking for a new challenge, building your own outdoor sauna can bring a sense of accomplishment and a luxurious addition to your outdoor space.
The allure of having a personal oasis for relaxation, stress relief, and socializing is undeniable. With the right materials, tools, and a bit of guidance, you can embark on this fulfilling journey and craft a custom outdoor sauna tailored to your preferences.
In this comprehensive guide, we'll delve into the step-by-step process of constructing a homemade outdoor sauna, covering everything from selecting the ideal location and gathering the necessary materials to building the structure, insulating it for optimal heat retention, installing the heating system, and adding the finishing touches for a polished and inviting ambiance.
Whether you envision unwinding in solitude, hosting intimate gatherings with friends and family, or simply elevating your outdoor living space, the prospect of having a personal outdoor sauna is both exciting and feasible. By following this guide, you'll be well-equipped to bring your vision to life and bask in the warmth and serenity of your very own homemade outdoor sauna.
Key Takeaways:
- Building a homemade outdoor sauna requires high-quality materials, precise construction, and thoughtful planning. The process involves insulation, heating system installation, and finishing touches to create a luxurious and rejuvenating space.
- Enjoying a homemade outdoor sauna offers relaxation, wellness, and connection. Embrace the warmth, savor moments of serenity, explore customization, maintain wellness, appreciate nature, and create lasting memories in this tranquil retreat.
Read more: How To Build An Outdoor Sauna
Materials and Tools
Before embarking on the construction of your homemade outdoor sauna, it’s essential to gather the necessary materials and tools to ensure a smooth and efficient building process. Here’s a comprehensive list to guide you through the initial phase of your project:
Materials
- Wood: Select high-quality, durable lumber such as cedar or redwood for the sauna walls, benches, and exterior components. These woods are naturally resistant to decay and can withstand the fluctuating outdoor elements.
- Insulation: Opt for effective insulation materials to retain heat within the sauna. Common options include fiberglass insulation or mineral wool, both of which provide excellent thermal efficiency.
- Vapor Barrier: A vapor barrier, typically made of polyethylene sheeting, is crucial for preventing moisture from penetrating the sauna walls and compromising the insulation.
- Door: Choose a sturdy, well-insulated door specifically designed for sauna use. The door should seal tightly to maintain heat and create a comfortable sauna environment.
- Heating System: Select a reliable sauna heater suitable for outdoor use. Electric, wood-burning, or infrared heaters are popular options, each offering distinct benefits in terms of convenience and heat distribution.
- Bench Material: Consider using high-quality, heat-resistant wood for the sauna benches, ensuring both comfort and durability during sauna sessions.
- Fasteners and Hardware: Stock up on corrosion-resistant screws, nails, and other fasteners, along with appropriate hinges and latches for the sauna door.
- Sealant and Finish: Choose a sauna-specific sealant and finish to protect the wood from moisture and enhance its natural beauty. These products also contribute to the overall longevity of the sauna structure.
Tools
- Saw: A circular saw or a miter saw for cutting lumber to the desired dimensions.
- Level: Ensure precise and balanced construction by using a reliable level throughout the building process.
- Drill and Bits: A power drill with assorted drill bits for creating pilot holes and securing fasteners.
- Clamps: Utilize clamps to hold wood pieces together securely during assembly.
- Tape Measure: Accurate measurements are essential for a well-constructed sauna, making a quality tape measure indispensable.
- Insulation Knife: A specialized knife for cutting and shaping insulation materials to fit the sauna walls and ceiling accurately.
- Paintbrushes: High-quality brushes for applying sealant and finish to the sauna interior and exterior surfaces.
- Wrenches and Screwdrivers: Assorted wrenches and screwdrivers for assembling the sauna components and hardware.
By assembling the recommended materials and tools, you’ll be well-prepared to commence the construction of your homemade outdoor sauna with confidence and efficiency.
Choosing a Location
When planning the placement of your homemade outdoor sauna, thoughtful consideration of the location is paramount to ensure an optimal and enjoyable sauna experience. Here are essential factors to ponder when selecting the ideal spot for your outdoor sauna:
Read also: 13 Unbelievable Outdoor Sauna For 2024
Accessibility and Privacy
Choose a location that offers convenient access from your home or other frequently used areas of your property. Additionally, consider the surrounding environment to ensure a private and tranquil setting for uninterrupted relaxation during sauna sessions.
Proximity to Utilities
If your sauna will be equipped with an electric heater, proximity to a power source is crucial. Similarly, if you opt for a wood-burning sauna stove, easy access to firewood will be a consideration. Ensure that the chosen location can accommodate these practical needs.
Drainage and Ventilation
It’s essential to place the sauna on a well-drained area to prevent water accumulation and potential moisture-related issues. Adequate ventilation around the sauna structure is also important for air circulation and preventing moisture buildup, particularly if your sauna will be situated near buildings or foliage.
Sunlight and Surroundings
Consider the path of the sun throughout the day and the changing seasons when choosing the location. Optimal sunlight exposure can contribute to a pleasant sauna experience, while being mindful of natural surroundings such as trees or shrubbery can enhance the overall ambiance.
Read more: How To Make A Homemade Projector
Safety and Building Codes
Check local building codes and regulations regarding outdoor structures, including saunas, to ensure compliance and safety. Additionally, assess the terrain and ground stability to determine if any preparatory work, such as leveling the ground or laying a foundation, is necessary for the chosen location.
By carefully evaluating these aspects, you can pinpoint a location that aligns with your practical needs, enhances the sauna experience, and complements the aesthetics of your outdoor space. Once you’ve identified the perfect spot, you’ll be ready to proceed with the next steps of bringing your homemade outdoor sauna to fruition.
Building the Sauna Structure
Constructing the sauna structure is a pivotal phase of creating your homemade outdoor sauna. This process involves assembling the walls, ceiling, and foundation, as well as ensuring proper ventilation and a sturdy framework. Here’s a step-by-step guide to help you navigate this essential stage:
Design and Layout
Begin by outlining the dimensions and layout of your sauna. Consider factors such as the desired interior space, bench placement, and the location of the heater and ventilation components. Ensure that the design optimizes functionality and comfort while adhering to any applicable building codes and safety standards.
Frame Construction
Using the selected high-quality wood, commence the construction of the sauna frame. Build the walls and ceiling with precision, ensuring secure connections at all joints. Incorporate openings for the door and any necessary vents, and verify that the framework is level and stable before proceeding.
Read more: How To Make Homemade Pillows
Foundation and Flooring
If your sauna will be situated directly on the ground, establish a stable foundation using concrete blocks or a similarly robust material. Subsequently, install the sauna flooring with careful attention to moisture resistance and heat insulation, ensuring a comfortable and durable surface for sauna sessions.
Ventilation Considerations
Integrate appropriate ventilation elements into the sauna design to facilitate air circulation and moisture control. Ventilation can be achieved through strategically positioned vents or a dedicated air intake and exhaust system, contributing to a comfortable and safe sauna environment.
Door Installation
Mount the specially designed sauna door, ensuring a snug and insulated fit to maintain heat retention and create a welcoming entrance to the sauna. Verify that the door closes securely and functions seamlessly within the sauna structure.
Sealing and Reinforcement
Apply a high-quality sealant to the exterior of the sauna structure to protect the wood from moisture and outdoor elements. Additionally, reinforce the framework as needed, ensuring the overall stability and longevity of the sauna.
By meticulously executing these steps, you’ll establish a solid and well-crafted foundation for your homemade outdoor sauna, setting the stage for the subsequent phases of insulation, heating system installation, and the addition of interior elements for a fully functional and inviting sauna retreat.
Read more: How To Make A Homemade Fan
Insulating the Sauna
Insulation is a critical component of your homemade outdoor sauna, as it plays a pivotal role in retaining heat and creating a comfortable and energy-efficient sauna environment. Proper insulation ensures that the sauna reaches and maintains the desired temperature while preventing heat loss. Here’s a comprehensive guide to effectively insulating your outdoor sauna:
Selecting Insulation Materials
When choosing insulation for your sauna, opt for materials with excellent thermal resistance and moisture tolerance. Fiberglass insulation and mineral wool are popular choices due to their superior heat retention properties and resistance to moisture, providing an ideal balance for sauna applications.
Wall and Ceiling Insulation
Install the selected insulation material within the walls and ceiling of the sauna structure, ensuring a snug fit without compression. Carefully fill the spaces between the framing members with insulation, creating a continuous thermal barrier to minimize heat transfer and maximize energy efficiency.
Vapor Barrier Installation
Following insulation placement, apply a vapor barrier over the insulated surfaces to prevent moisture from infiltrating the sauna walls. The vapor barrier, typically made of polyethylene sheeting, acts as a protective shield, safeguarding the insulation and wood components from potential moisture-related damage.
Read more: How To Make A Homemade Duster
Sealing and Air Tightness
Seal any gaps or joints in the sauna structure to enhance air tightness and prevent heat leakage. Utilize high-quality sealant to seal penetrations and seams, ensuring that the sauna remains well-insulated and free from drafts, thereby optimizing heat retention and energy efficiency.
Considerations for Outdoor Saunas
For outdoor saunas, it’s crucial to address insulation with added diligence due to exposure to varying weather conditions. Ensure that the insulation and vapor barrier are robust enough to withstand outdoor elements, maintaining their effectiveness and preserving the sauna’s interior environment.
By meticulously insulating your homemade outdoor sauna, you’ll create an environment conducive to relaxation, wellness, and enjoyment. The insulation serves as a cornerstone of the sauna’s functionality, contributing to consistent heat retention and a cozy atmosphere, ultimately enhancing the overall sauna experience for you and your guests.
Installing the Heating System
The heating system is the heart of your homemade outdoor sauna, providing the essential warmth and therapeutic benefits that define the sauna experience. Whether you opt for an electric, wood-burning, or infrared heater, the installation process is a pivotal step in bringing your sauna to life. Here’s a comprehensive guide to installing the heating system for your outdoor sauna:
Electric Sauna Heater Installation
If you’ve chosen an electric sauna heater, begin by positioning it according to the manufacturer’s guidelines, typically near the sauna’s floor level. Ensure that the heater is securely mounted and that all electrical connections are made in compliance with safety standards and local building codes. Additionally, install the sauna’s control panel within convenient reach, allowing for effortless temperature adjustments during sauna sessions.
Read more: How To Build Your Own Outdoor Sauna
Wood-Burning Stove Setup
For a wood-burning sauna stove, carefully follow the installation instructions provided by the manufacturer. Properly position the stove within the sauna, allowing adequate clearance from combustible materials. Additionally, ensure that the stovepipe and chimney are installed according to regulations, providing efficient smoke ventilation and safe operation of the wood-burning heater.
Infrared Heater Placement
If you’ve opted for an infrared sauna heater, strategically position the heating panels within the sauna to achieve even heat distribution. Ensure that the panels are securely mounted and that the electrical connections are carried out with precision, adhering to safety standards and the manufacturer’s specifications for optimal performance.
Safety Precautions and Ventilation
Regardless of the heating system type, prioritize safety by incorporating appropriate ventilation to facilitate air circulation and prevent overheating. Install vents or a dedicated air intake and exhaust system to maintain a comfortable and secure sauna environment, promoting a relaxing and enjoyable experience for sauna enthusiasts.
Testing and Calibration
Upon completing the installation, thoroughly test the heating system to verify its functionality and performance. Calibrate the temperature controls and assess the heat output to ensure that the sauna reaches and maintains the desired temperature range, allowing for personalized and rejuvenating sauna sessions.
By meticulously installing the heating system, you’ll establish the cornerstone of your homemade outdoor sauna, providing the essential warmth and therapeutic benefits that define the sauna experience. Whether you prefer the convenience of an electric heater, the traditional allure of a wood-burning stove, or the innovative technology of an infrared sauna, your carefully installed heating system will set the stage for countless moments of relaxation and rejuvenation in your personal sauna retreat.
Read more: How To Make A Homemade Plunger
Adding the Benches and Flooring
The incorporation of benches and flooring within your homemade outdoor sauna not only enhances comfort and functionality but also contributes to the overall ambiance and aesthetic appeal of the space. From selecting suitable bench materials to ensuring a comfortable and resilient sauna floor, each element plays a crucial role in creating a welcoming and rejuvenating sauna environment. Here’s a comprehensive guide to adding benches and flooring to your outdoor sauna:
Bench Material Selection
When choosing materials for the sauna benches, prioritize heat-resistant wood that can withstand the elevated temperatures within the sauna. Cedar and other durable, heat-tolerant woods are popular choices, offering both comfort and longevity for sauna enthusiasts. Select materials that align with your aesthetic preferences while ensuring durability and resistance to moisture and heat.
Bench Design and Layout
Design the sauna benches to optimize comfort and functionality, considering factors such as bench height, depth, and the arrangement of seating tiers. Create a layout that maximizes seating capacity while allowing ample space for movement within the sauna. Additionally, ensure that the bench design promotes proper ventilation to maintain a comfortable and inviting sauna environment.
Flooring Considerations
Choose sauna flooring materials that are resilient, moisture-resistant, and conducive to a clean and hygienic environment. Cedar or other heat-treated wood is a popular choice for sauna flooring, providing a comfortable and visually appealing surface. Ensure that the flooring material is installed securely and that it can withstand the rigors of regular sauna use while offering a safe and slip-resistant surface.
Read more: How To Make Homemade Dishwasher Soap
Bench and Flooring Installation
Install the sauna benches with precision, ensuring secure anchoring to the sauna walls and framework. Pay careful attention to bench height and spacing to accommodate various users comfortably. Similarly, lay the sauna flooring with meticulous attention to detail, ensuring a level and stable surface that complements the sauna’s overall aesthetic and functionality.
Finishing Touches
Apply a sauna-specific sealant and finish to the benches and flooring to protect the wood from moisture and wear while enhancing its natural beauty. The sealant will contribute to the overall longevity of the benches and flooring, maintaining their pristine condition and ensuring a welcoming and hygienic sauna environment for years to come.
By thoughtfully adding benches and flooring to your homemade outdoor sauna, you’ll elevate the comfort, functionality, and visual appeal of the space, creating an inviting retreat for relaxation and rejuvenation. The carefully selected materials and meticulous installation will contribute to a luxurious and welcoming sauna environment, setting the stage for countless moments of tranquility and well-being within your personal outdoor oasis.
Sealing and Finishing Touches
As you near the completion of your homemade outdoor sauna, the sealing and finishing touches play a crucial role in safeguarding the wood, enhancing its natural beauty, and ensuring a welcoming and hygienic sauna environment. By applying a high-quality sealant and attending to the finer details, you’ll preserve the integrity of the sauna structure while creating an inviting atmosphere for relaxation and rejuvenation. Here’s a comprehensive guide to sealing and adding finishing touches to your outdoor sauna:
Sealant Selection
Choose a sauna-specific sealant designed to withstand the high temperatures and humidity levels characteristic of sauna environments. Look for a sealant that offers superior moisture resistance, UV protection, and durability, ensuring long-term preservation of the wood while accentuating its natural grain and color.
Read more: How To Make A Homemade Water Pump
Application Process
Prior to applying the sealant, thoroughly clean the sauna interior and exterior surfaces to remove any dust, debris, or residual construction materials. Apply the sealant evenly using a high-quality brush or applicator, ensuring comprehensive coverage and penetration into the wood for maximum protection and longevity.
Enhancing Aesthetics
Consider adding aesthetic elements such as decorative lighting, natural accents, or personalized touches to infuse character and warmth into the sauna environment. Thoughtfully selected accessories and embellishments can contribute to a harmonious and inviting ambiance, elevating the overall appeal of the space.
Interior Comfort and Functionality
Ensure that the sauna interior is equipped with essential amenities for comfort and convenience, such as towel hooks, a thermometer, and a bucket and ladle for dispensing water onto the sauna stones. These functional elements not only enhance the practicality of the sauna but also contribute to a well-appointed and enjoyable sauna experience.
Maintenance and Care
Provide guidance on routine maintenance and care practices to preserve the sauna’s pristine condition and extend its longevity. Encourage regular cleaning, ventilation, and periodic reapplication of sealant to uphold the wood’s integrity and sustain a welcoming and hygienic sauna environment for years to come.
By meticulously sealing the wood and attending to the finishing touches, you’ll safeguard the sauna structure, enhance its visual appeal, and create a welcoming and hygienic environment for relaxation and rejuvenation. The thoughtful application of sealant and attention to the finer details will ensure that your homemade outdoor sauna remains a luxurious and inviting retreat, ready to provide countless moments of tranquility and well-being within your personal outdoor oasis.
Read more: How To Make Homemade Lava Lamp
Enjoying Your Homemade Outdoor Sauna
Congratulations on the successful completion of your homemade outdoor sauna! As you step into this tranquil retreat, you’re embarking on a journey of relaxation, wellness, and rejuvenation in the comfort of your own outdoor oasis. Here’s a guide to fully savoring and making the most of your personalized sauna experience:
Embracing Relaxation
Step into the soothing warmth of your sauna, allowing the enveloping heat to melt away stress and tension. Embrace the tranquil ambiance, take deep breaths, and revel in the therapeutic benefits of heat therapy as it soothes your body and calms your mind.
Savoring Moments of Serenity
Whether you choose to indulge in solitary sauna sessions or invite friends and family to share in the experience, savor the moments of serenity and connection within this inviting space. Engage in meaningful conversations, quiet reflection, or simply immerse yourself in the peaceful solitude of the sauna environment.
Exploring Customization
Experiment with various sauna rituals and traditions, such as gently pouring water onto the sauna stones to produce invigorating steam, incorporating essential oils for aromatherapy, or integrating gentle stretching or meditation practices to enhance the overall wellness experience.
Read more: How To Make A Homemade Carpet Shampoo
Maintaining Wellness
Integrate regular sauna sessions into your wellness routine to reap the numerous health benefits, including improved circulation, stress relief, and detoxification. Embrace the sauna as a sanctuary for rejuvenation and self-care, nurturing your well-being with each visit.
Appreciating Nature
Immerse yourself in the natural surroundings as you transition between sauna sessions and outdoor relaxation. Embrace the invigorating contrast of the sauna’s warmth with the refreshing outdoor air, allowing nature to complement and enhance your overall well-being.
Making Lasting Memories
Celebrate special occasions and create lasting memories by hosting intimate gatherings or wellness-focused events in your outdoor sauna. Share the joy of relaxation and rejuvenation with loved ones, fostering meaningful connections and cherished experiences within this unique and inviting space.
As you embark on this journey of relaxation and wellness within your homemade outdoor sauna, cherish each moment and embrace the countless opportunities for rejuvenation and connection that this tranquil retreat affords. Whether you seek solace, socialization, or simply a respite from the demands of daily life, your personalized sauna is poised to provide a haven of warmth, serenity, and well-being, enriching your life with countless moments of tranquility and rejuvenation.
Frequently Asked Questions about How To Make A Homemade Outdoor Sauna
Was this page helpful?
At Storables.com, we guarantee accurate and reliable information. Our content, validated by Expert Board Contributors, is crafted following stringent Editorial Policies. We're committed to providing you with well-researched, expert-backed insights for all your informational needs.


0 thoughts on “How To Make A Homemade Outdoor Sauna”