Articles
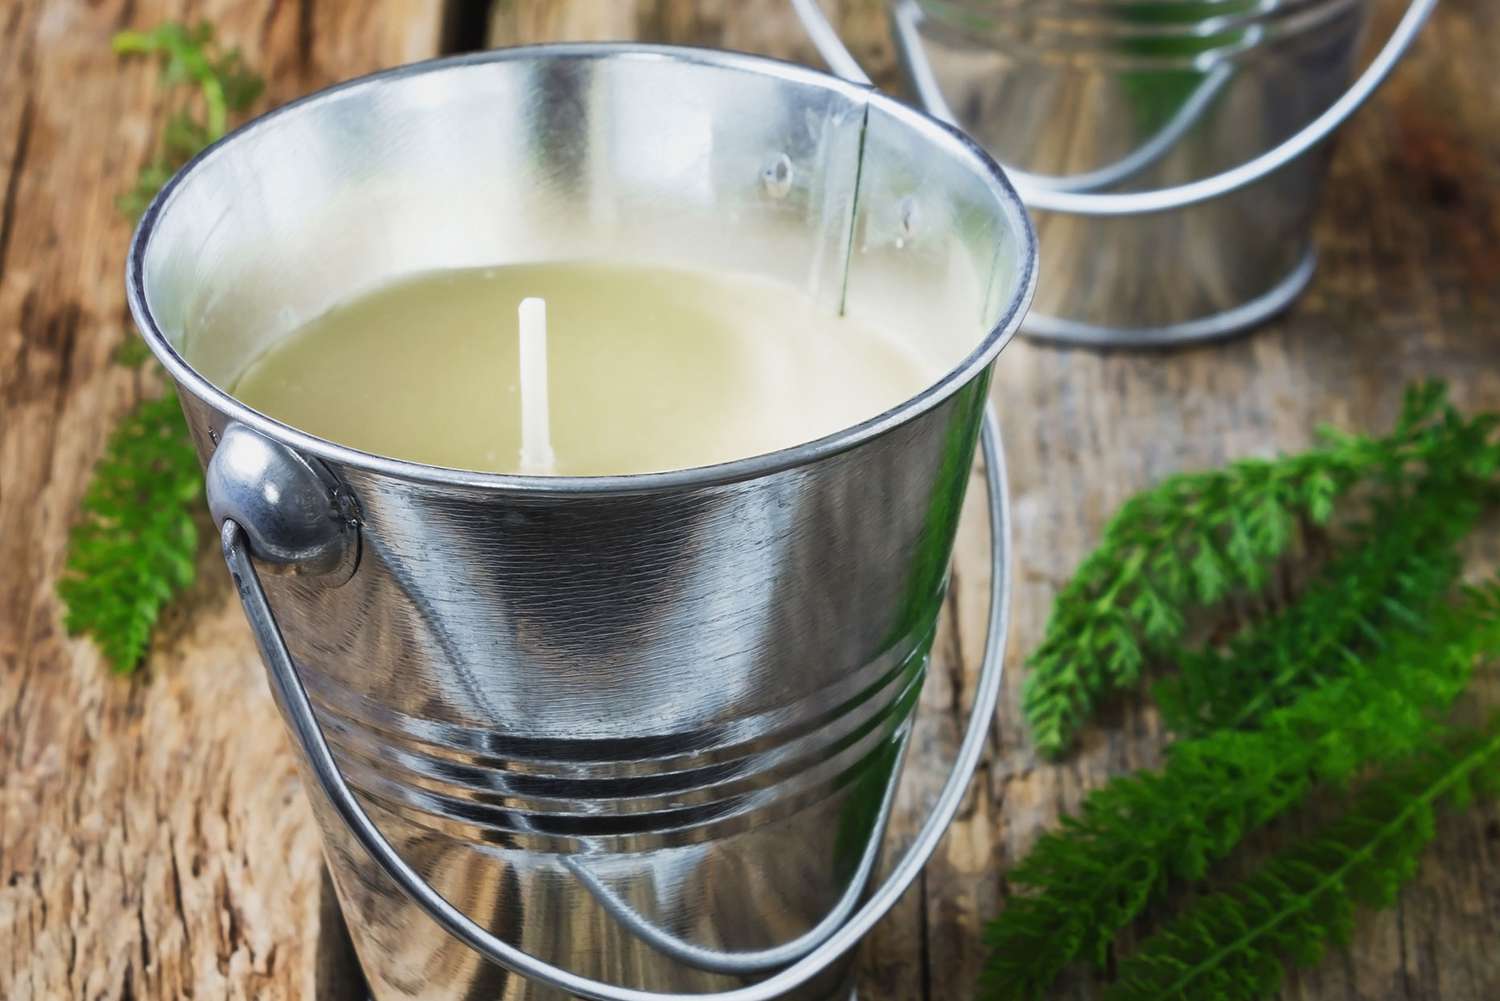
How To Make Homemade Citronella Candles
Modified: December 7, 2023
Learn how to make homemade citronella candles with this easy step-by-step guide. Protect your outdoor space from mosquitoes naturally. Perfect for summer nights.
(Many of the links in this article redirect to a specific reviewed product. Your purchase of these products through affiliate links helps to generate commission for Storables.com, at no extra cost. Learn more)
Introduction
Are you tired of those pesky mosquitoes ruining your time outdoors? If so, it’s time to take matters into your own hands and create homemade citronella candles. Citronella candles are not only a beautiful addition to your outdoor space, but they also serve as a natural insect repellent, keeping those annoying bugs at bay.
Commercial citronella candles can be expensive, and often contain additives and chemicals. By making your own citronella candles, you have complete control over the ingredients and can ensure that they are natural and safe for you and your loved ones. Plus, it can be a fun and rewarding DIY project that allows you to unleash your creativity.
In this article, we will guide you through the step-by-step process of making homemade citronella candles. From gathering the materials to adding the final touches, you will learn everything you need to know to create your own beautiful and effective mosquito-repelling candles.
Key Takeaways:
- Creating homemade citronella candles is a fun and rewarding DIY project that not only repels mosquitoes but also adds a personal touch to your outdoor space, allowing you to enjoy bug-free evenings.
- By making your own citronella candles, you have complete control over the ingredients, ensuring they are natural and safe, while also being more affordable than store-bought alternatives.
Read more: How To Make Homemade Candles Without Wax
Materials Needed
Before starting your DIY citronella candle project, it’s important to gather all the necessary materials. Here’s a list of what you’ll need:
- Wax: You can choose between soy wax, beeswax, or paraffin wax. Soy wax is a popular choice as it is natural and eco-friendly.
- Container: Select a container that is heat-resistant and suitable for holding melted wax. Glass jars, tin cans, or ceramic pots are great options.
- Wick: Use a pre-tabbed wick or purchase wick material and wick tabs separately.
- Citronella Essential Oil: This is the key ingredient that repels mosquitoes and other insects. Make sure to choose a high-quality citronella essential oil.
- Fragrance Oils (optional): If you want to add a pleasant scent to your citronella candles, consider using fragrance oils such as lavender, lemongrass, or eucalyptus.
- Colorant (optional): If you prefer colored candles, you can use dye chips or liquid candle dyes to add a pop of color to your creations.
- Double Boiler or Melting Pot: A double boiler is ideal for melting wax, but if you don’t have one, you can use a heat-resistant container placed in a pot of water.
- Thermometer: A thermometer is essential for monitoring the temperature of the melted wax to ensure it doesn’t overheat.
- Stirring Utensil: Use a heat-resistant spoon or stirring stick to mix the wax and essential oils.
- Hot Glue Gun: This will be used to secure the wick to the bottom of the container.
- Decorative Elements (optional): Get creative and personalize your candles with decorative elements like ribbons, beads, or dried flowers.
Once you have gathered all the materials, you’re ready to move on to the next step: melting the wax.
Step 1: Gathering Citronella Wax and Wick
The first step in making homemade citronella candles is gathering the necessary citronella wax and wick for your project.
When it comes to choosing citronella wax, you have a few options. Soy wax is a popular choice as it is eco-friendly and burns cleanly. Beeswax is another natural option that gives a lovely honey scent to the candles. If you prefer a more traditional approach, you can use paraffin wax, which is readily available and easy to work with.
When selecting the wick, you have the choice between pre-tabbed wicks or purchasing wick material and wick tabs separately. Pre-tabbed wicks are convenient as they come with a metal base that can be easily glued to the bottom of the container. If you opt for wick material and tabs, make sure to choose the appropriate size for your candle container.
It’s essential to have enough citronella wax and wick for the number of candles you plan to make. The amount required will vary depending on the size of your containers and the desired thickness of the candles. As a general guideline, for a standard-sized mason jar, you will need approximately 1 pound of wax and a wick that is long enough to reach the bottom of the container.
Once you have gathered the citronella wax and wick, set them aside and proceed to the next step: melting the wax.
Step 2: Melting the Wax
After gathering the citronella wax and wick, it’s time to melt the wax for your homemade citronella candles.
You will need a double boiler or a melting pot to melt the wax. If you don’t have a double boiler, you can create one by placing a heat-resistant container inside a pot filled with water. Ensure that the water level is below the rim of the melting pot or container.
Start by filling the bottom pot with water, then place the melting pot or container on top. Turn the heat to medium-low and allow the water to come to a simmer. Place the citronella wax into the melting pot or container and stir occasionally with a heat-resistant spoon or stirring stick.
As the wax melts, keep an eye on the temperature using a thermometer. The ideal melting temperature for most waxes is between 160-180°F (71-82°C). Avoid exceeding the recommended temperature as it may affect the quality of the candle.
Once the wax has completely melted, you can proceed to the next step of adding citronella essential oil to create the mosquito-repelling properties in your candles.
Remember to exercise caution when working with hot wax and heat sources. Ensure proper ventilation in your workspace to avoid inhaling fumes, and keep children and pets away from the area.
With the wax melted and ready, it’s time to move on to step 3: adding citronella essential oil.
Step 3: Adding Citronella Essential Oil
Now that you have melted the wax for your homemade citronella candles, it’s time to add the essential oil that will give them their mosquito-repelling properties.
Citronella essential oil is derived from the leaves and stems of the citronella plant, which is known for its strong and distinctive aroma that repels mosquitoes and other insects. It’s important to choose a high-quality citronella essential oil to ensure the effectiveness of your candles.
First, turn off the heat and remove the melting pot or container from the double boiler or heat source. Allow it to cool slightly before adding the essential oil. The recommended amount of citronella essential oil is approximately 1 ounce per pound of wax. However, you can adjust the amount based on your personal preference for scent strength.
Using a heat-resistant spoon or stirring stick, gently stir the melted wax while adding the citronella essential oil. Make sure to thoroughly incorporate the oil into the wax to ensure an even distribution. Take your time and stir gently to avoid creating air bubbles in the mixture.
If desired, this is also the time to add any optional fragrance oils to enhance the scent of your citronella candles. Popular choices include lavender, lemongrass, or eucalyptus, which can provide a pleasant aroma while still maintaining the mosquito-repelling properties of the citronella oil.
Once you have added the essential oil and any optional fragrance oils, give the mixture a final stir to ensure everything is well combined. Proceed to the next step to prepare the candle containers for pouring.
Now that your citronella wax is infused with the power of essential oils, it’s time to move on to step 4: preparing the candle containers.
When making homemade citronella candles, be sure to use high-quality citronella essential oil for maximum effectiveness in repelling insects.
Step 4: Preparing the Candle Container
With the citronella wax infused with the mosquito-repelling power of essential oils, it’s time to prepare the candle container for pouring.
First, ensure that your chosen container is clean and free of any dust or debris. This will help create a smooth and even finish for your homemade citronella candle.
If using glass jars or containers, you can enhance the aesthetic appeal by cleaning them thoroughly and removing any labels or stickers. For tin cans or ceramic pots, make sure they are clean and dry.
Next, consider adding a touch of creativity to your candle containers by decorating them with ribbons, beads, or other decorative elements. This step is optional but can add a personal touch to your candles and make them even more visually appealing.
Before proceeding to the next step, make sure the candle container is on a stable, heat-resistant surface that can withstand the pouring of hot wax. This will prevent any accidental spills or mishaps during the candle-making process.
Once the container is prepared and ready, it’s time to move on to step 5: inserting the wick.
NOTE: It is essential to ensure proper ventilation and take necessary precautions when working with hot wax. Keep children and pets away from the area and exercise caution to avoid any accidents.
Step 5: Inserting the Wick
Now that your candle container is prepared, it’s time to insert the wick. Properly placing the wick ensures that your homemade citronella candle burns evenly and effectively.
If you are using pre-tabbed wicks, simply apply a small amount of hot glue to the metal base of the wick and firmly press it onto the bottom center of the candle container. Make sure the wick is centered and straight to ensure an even burn.
If you are using wick material and tabs, cut the wick slightly longer than the desired height of the candle container. Thread the wick through the wick tab, leaving a bit of excess wick sticking out. Use a hot glue gun to secure the wick tab to the bottom center of the container.
Regardless of the type of wick you use, ensure that the wick is taut and straight in the container. You can use a wick holder or pencil to keep the wick centered and upright while pouring the wax.
As a final touch, you may want to trim the excess wick to a suitable length, leaving about half an inch above the wax. This will make it easier to light the candle later on.
Now that the wick is securely in place, it’s time to move on to step 6: pouring the wax into the container.
NOTE: Always exercise caution when working with hot glue and hot wax to avoid burns or accidents. Ensure proper ventilation in your workspace and keep children and pets away from the area.
Step 6: Pouring the Wax
With the wick securely in place, it’s time to pour the melted citronella wax into the prepared candle container. This step brings your homemade citronella candle one step closer to completion.
Start by carefully pouring the melted wax into the container, taking care not to disturb the position of the wick. Pour the wax slowly and steadily, ensuring an even distribution. It’s recommended to leave a small amount of space at the top of the container to allow for any shrinkage that may occur as the wax cools.
As you pour, be mindful of the temperature of the wax. It’s best to pour the wax when it is still liquid and warm but not scalding hot. This will help prevent any cracks or warping that could occur if the wax cools too quickly.
While pouring, you may notice air bubbles forming in the wax. To eliminate these bubbles, gently tap or shake the container to encourage them to rise to the surface. You can also use a toothpick or heat-resistant skewer to pop any stubborn bubbles that remain.
Once the wax is poured, allow it to cool and solidify completely. This may take several hours, so be patient and resist the temptation to disturb or move the candle during this time.
As the wax cools and solidifies, it may develop a slight sinkhole or uneven surface. If desired, you can melt a small amount of additional wax and carefully pour it into these areas to even out the surface and fill any gaps.
Now that you have poured the wax into the container, it’s time to move on to step 7: allowing the candle to cool and adding final touches.
NOTE: Exercise caution when working with hot wax to prevent burns or accidents. Keep children and pets away from the area and let the wax cool completely before handling the candle.
Step 7: Cooling and Final Touches
After pouring the melted wax into the candle container, it’s time for the final steps in creating your homemade citronella candle: allowing it to cool and adding some final touches.
Once you’ve poured the wax, it’s important to let the candle cool and solidify completely. This process usually takes a few hours, but it’s best to leave the candle undisturbed overnight to ensure it sets properly. Avoid moving or touching the candle during this time to prevent any imperfections or air bubbles from forming.
As the candle cools, you may notice that the surface becomes slightly concave. This is normal and can be easily fixed by reheating a small amount of leftover wax and carefully pouring it into the indented area. This will level out the surface and create a smooth finish.
Once the candle has cooled and set entirely, it’s time to add some final touches to enhance its appearance. Consider tying a decorative ribbon or twine around the container to give it a stylish look. You can also attach small beads, charms, or dried flowers to the ribbon for an added touch of creativity.
Labeling your citronella candles can also be a nice touch. Create a personalized label with the name of the scent, the date it was made, and any other relevant information. This will not only add a professional touch to your candles but also help you keep track of their expiration date.
Remember, citronella candles are not only effective at repelling mosquitoes but also create a cozy and inviting ambiance in your outdoor space. Place your homemade citronella candles strategically around your patio, porch, or garden to maximize their mosquito-repelling properties and enjoy bug-free evenings all summer long.
With the cooling process complete and the final touches added, your homemade citronella candle is ready to be used and enjoyed.
Congratulations! You have successfully created your own homemade citronella candles. Now, sit back, relax, and bask in the warm glow of your beautifully crafted and mosquito-repelling creations.
Read more: How To Make Homemade Pillows
Conclusion
Creating homemade citronella candles is a rewarding and practical DIY project that not only adds a personal touch to your outdoor space but also helps to repel mosquitoes and other pesky insects.
By following the steps outlined in this article, you have learned how to gather the necessary materials, melt the wax, add citronella essential oil, prepare the candle container, insert the wick, pour the wax, and add final touches to create your own homemade citronella candles.
Not only are homemade citronella candles more affordable than store-bought alternatives, but they also allow you to have complete control over the ingredients, ensuring that your candles are natural and safe for you and your loved ones. Additionally, the process of making these candles can be a fun and creative activity that you can enjoy alone or with family and friends.
Remember to exercise caution when working with hot wax and heat sources. Ensure proper ventilation, keep children and pets away from the area, and follow safety guidelines to prevent accidents or injuries.
Now, it’s time to light up your homemade citronella candles and enjoy bug-free evenings in your outdoor space. Whether you’re hosting a backyard BBQ, relaxing on your porch, or camping in the great outdoors, your homemade citronella candles will provide a natural and effective mosquito repellent, allowing you to fully enjoy your time outdoors.
So, embrace your inner DIY enthusiast, harness the power of citronella, and create your own homemade citronella candles to keep those annoying bugs at bay while adding a touch of charm and ambiance to your outdoor living spaces.
Frequently Asked Questions about How To Make Homemade Citronella Candles
Was this page helpful?
At Storables.com, we guarantee accurate and reliable information. Our content, validated by Expert Board Contributors, is crafted following stringent Editorial Policies. We're committed to providing you with well-researched, expert-backed insights for all your informational needs.


0 thoughts on “How To Make Homemade Citronella Candles”