Home>Furniture & Design>Outdoor Furniture>How To Make An Outdoor Fridge
Outdoor Furniture
How To Make An Outdoor Fridge
Modified: February 18, 2024
Learn how to build an outdoor fridge to keep your drinks cool and your outdoor furniture looking stylish. Get creative with outdoor furniture, furniture, and design. Step-by-step guide.
(Many of the links in this article redirect to a specific reviewed product. Your purchase of these products through affiliate links helps to generate commission for Storables.com, at no extra cost. Learn more)
Introduction
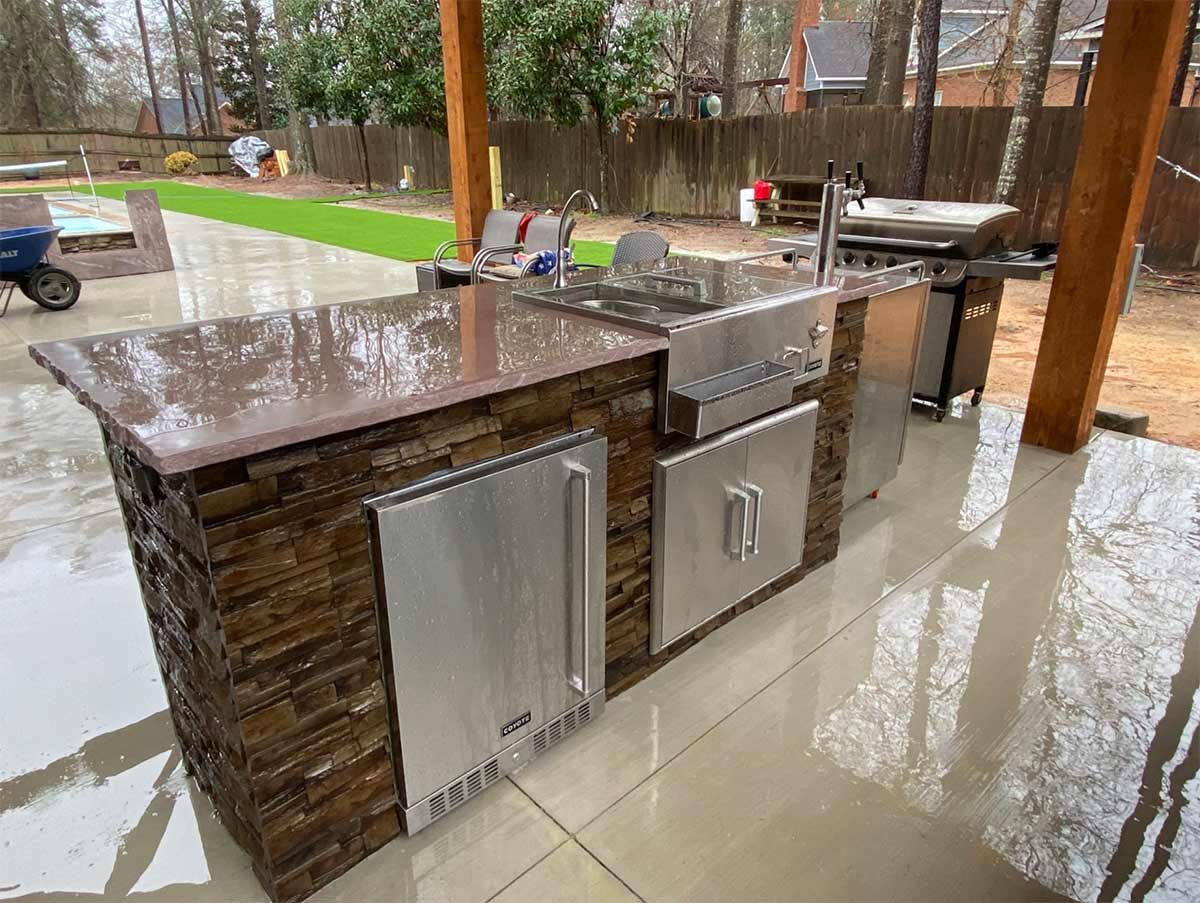
Creating an outdoor fridge is a fantastic way to elevate your outdoor living space while adding convenience and functionality. Whether you are hosting a backyard barbecue, lounging by the pool, or simply enjoying the fresh air, having a dedicated outdoor fridge can make all the difference. Imagine being able to grab a cold beverage or delicious snack without having to step inside your home – it's the epitome of luxury and practicality.
In this comprehensive guide, we will walk you through the process of building your own outdoor fridge, from gathering the necessary materials to installing the cooling system and adding the finishing touches. By following these steps, you can customize your outdoor space to suit your needs and enhance your overall outdoor experience.
So, roll up your sleeves and get ready to embark on a rewarding DIY project that will not only boost the functionality of your outdoor area but also showcase your creativity and craftsmanship. Let's dive in and explore the exciting world of outdoor fridge creation!
Key Takeaways:
- Elevate your outdoor space with a DIY outdoor fridge, providing convenience and luxury for outdoor gatherings and relaxation. Enjoy cold beverages and snacks without stepping inside your home.
- Building an outdoor fridge is a rewarding DIY project that enhances your outdoor experience, showcasing your creativity and craftsmanship. Customize your space to suit your needs and enjoy the convenience of outdoor refreshments.
Read more: How To Make An Outdoor Chair
Materials Needed
Before diving into the construction of your outdoor fridge, it’s essential to gather all the necessary materials. Here’s a comprehensive list of items you’ll need to bring your project to life:
- Mini Fridge: Select a compact refrigerator that is designed for outdoor use or can be easily adapted for outdoor conditions. Look for models with durable construction and weather-resistant features.
- Outdoor Cabinet or Enclosure: Choose a sturdy, weatherproof cabinet or build an enclosure using materials such as pressure-treated wood, marine-grade plywood, or outdoor-rated composite boards.
- Insulation: Opt for high-quality insulation materials to ensure that your outdoor fridge maintains the desired temperature efficiently. Closed-cell foam insulation is a popular choice for its excellent thermal properties.
- Sealant: Invest in a reliable sealant to weatherproof the seams and joints of the outdoor cabinet or enclosure, protecting the interior from moisture and external elements.
- Cooling System Components: If you plan to build a custom cooling system, gather the necessary components, including a temperature controller, evaporator, condenser, compressor, and refrigerant. Alternatively, you can repurpose the cooling system from the mini fridge if it is suitable for outdoor use.
- Power Source: Ensure access to a reliable power source, whether it’s a nearby electrical outlet or a dedicated power line for outdoor appliances.
- Decorative Hardware: Consider adding decorative handles, hinges, and other hardware to enhance the aesthetic appeal of your outdoor fridge.
- Weather-Resistant Paint or Stain: If you are constructing an outdoor cabinet or enclosure, choose a weather-resistant finish to protect the wood from the elements and complement your outdoor decor.
- Tools: Gather a variety of tools, including a drill, saw, screwdriver, measuring tape, level, and other carpentry essentials to facilitate the construction process.
By ensuring that you have all the required materials at the outset, you can streamline the construction process and minimize interruptions, bringing you closer to enjoying your custom outdoor fridge in no time.
Building the Fridge
Now that you have assembled all the necessary materials, it’s time to roll up your sleeves and start building your outdoor fridge. Follow these steps to construct the foundation of your custom outdoor cooling solution:
- Prepare the Enclosure: If you are building an outdoor cabinet or enclosure, begin by cutting the wood or composite boards to the desired dimensions. Assemble the pieces to form the structure, ensuring that it is sturdy and weather-resistant. Consider incorporating a hinged door for easy access to the fridge’s interior.
- Install the Mini Fridge: Position the mini fridge inside the prepared enclosure, ensuring that it fits snugly and allows for proper ventilation around the cooling components. Secure the fridge in place according to the manufacturer’s recommendations, taking care to maintain accessibility for future maintenance or repairs.
- Apply Insulation: Line the interior walls of the enclosure with high-quality insulation, such as closed-cell foam, to optimize the thermal efficiency of the outdoor fridge. Pay close attention to sealing any gaps or seams to prevent temperature fluctuations.
- Seal the Enclosure: Use a durable sealant to weatherproof the seams and joints of the enclosure, safeguarding the interior from moisture and external elements. This step is crucial for preserving the integrity of the insulation and ensuring the longevity of your outdoor fridge.
By meticulously following these steps, you can lay the groundwork for a robust and reliable outdoor fridge that is tailored to your specific needs and preferences. The construction phase sets the stage for the installation of the cooling system, which is essential for maintaining optimal temperatures within the fridge’s interior.
When building an outdoor fridge, make sure to use weather-resistant materials and insulation to keep the inside cool. Consider using a small air conditioner or a thermoelectric cooler to maintain the temperature.
Installing the Cooling System
With the foundation of your outdoor fridge in place, it’s time to focus on installing the cooling system to ensure that your beverages and perishables stay refreshingly cold, even in outdoor conditions. Follow these essential steps to integrate the cooling components into your custom fridge:
- Assess the Mini Fridge’s Cooling System: If your chosen mini fridge comes with a suitable outdoor-rated cooling system, you may be able to use it as is. However, if you plan to build a custom cooling setup, carefully disassemble the mini fridge to access the evaporator, condenser, compressor, and other essential components.
- Position the Components: Determine the optimal placement for the evaporator, condenser, and compressor within the enclosed space, ensuring adequate airflow and ventilation for efficient operation. Secure these components in place according to the manufacturer’s specifications, taking care to maintain accessibility for future maintenance and repairs.
- Connect the Refrigerant Lines: If you are assembling a custom cooling system, carefully connect the refrigerant lines to the evaporator and condenser, adhering to best practices and safety guidelines. It’s crucial to ensure a secure and leak-free connection to facilitate the circulation of refrigerant and the transfer of heat.
- Integrate the Temperature Controller: Install a reliable temperature controller within the outdoor fridge to regulate the cooling system and maintain the desired internal temperature. Program the controller according to your preferences, taking into account factors such as ambient outdoor temperatures and the contents of the fridge.
By methodically installing the cooling system and its associated components, you can transform your outdoor fridge into a dependable and efficient appliance that enhances your outdoor entertainment and relaxation experiences. The successful integration of the cooling system sets the stage for adding the finishing touches to your custom creation.
Adding the Finishing Touches
As you approach the final stages of creating your outdoor fridge, it’s time to infuse it with personalized touches and enhancements that elevate both its functionality and visual appeal. Consider the following steps to add the finishing touches to your custom outdoor cooling solution:
- Decorative Hardware and Finishes: Enhance the aesthetic appeal of your outdoor fridge by adding decorative handles, hinges, and other hardware that complement your outdoor decor. Choose weather-resistant finishes that withstand the elements while adding a touch of style to the exterior of the fridge.
- Custom Shelving and Organization: Customize the interior of the fridge with adjustable or removable shelving to accommodate various items, from beverages to condiments and snacks. Organizational features can enhance accessibility and maximize the storage capacity of your outdoor fridge.
- Exterior Customization: Consider personalizing the exterior of the fridge with a weather-resistant paint or stain that aligns with your outdoor design scheme. Whether you opt for a vibrant hue or a natural wood finish, the exterior customization can seamlessly integrate the fridge into your outdoor space.
- Weatherproofing and Sealing: Double-check the weatherproofing and sealing of the outdoor fridge to ensure that it is well-equipped to withstand outdoor conditions. Address any potential areas of vulnerability and reinforce the protective measures to safeguard the interior components and insulation.
By attending to these finishing touches, you can transform your outdoor fridge into a functional and visually appealing addition to your outdoor living space. The combination of practical enhancements and personalized details culminates in a custom creation that aligns with your lifestyle and outdoor entertaining aspirations.
Read more: How To Make An Outdoor Stove
Conclusion
Congratulations on successfully creating your own outdoor fridge! By embarking on this DIY project, you have not only enhanced the functionality of your outdoor space but also demonstrated your creativity and craftsmanship. Your custom outdoor fridge is poised to elevate your outdoor living experience, providing convenient access to refreshing beverages and delectable treats without the need to venture indoors.
As you bask in the satisfaction of completing this project, it’s important to remember the versatility and adaptability of your outdoor fridge. Whether you’re hosting lively gatherings, unwinding with loved ones, or simply savoring moments of solitude in your outdoor oasis, your custom creation stands ready to serve your needs.
Furthermore, the process of building an outdoor fridge fosters a deeper connection to your outdoor environment, allowing you to tailor your space to reflect your preferences and lifestyle. This hands-on approach to enhancing your outdoor area can inspire future projects and ignite a passion for creating functional and inviting outdoor settings.
As you revel in the fruits of your labor, take a moment to appreciate the ingenuity and resourcefulness that went into bringing your outdoor fridge to life. Your dedication to this project has not only resulted in a practical addition to your outdoor space but also added a touch of individuality and character to your surroundings.
With your custom outdoor fridge in place, you are well-equipped to savor the outdoor moments that matter most, knowing that convenience and refreshment are always within reach. So, raise a toast to your DIY triumph and the countless enjoyable experiences that await in your newly enhanced outdoor haven.
Frequently Asked Questions about How To Make An Outdoor Fridge
Was this page helpful?
At Storables.com, we guarantee accurate and reliable information. Our content, validated by Expert Board Contributors, is crafted following stringent Editorial Policies. We're committed to providing you with well-researched, expert-backed insights for all your informational needs.


0 thoughts on “How To Make An Outdoor Fridge”