Furniture
How To Make An Outdoor Chandelier
Modified: February 23, 2024
Learn how to make a stunning outdoor chandelier with our step-by-step guide. Add elegance to your outdoor space with this DIY furniture project.
(Many of the links in this article redirect to a specific reviewed product. Your purchase of these products through affiliate links helps to generate commission for Storables.com, at no extra cost. Learn more)
Introduction
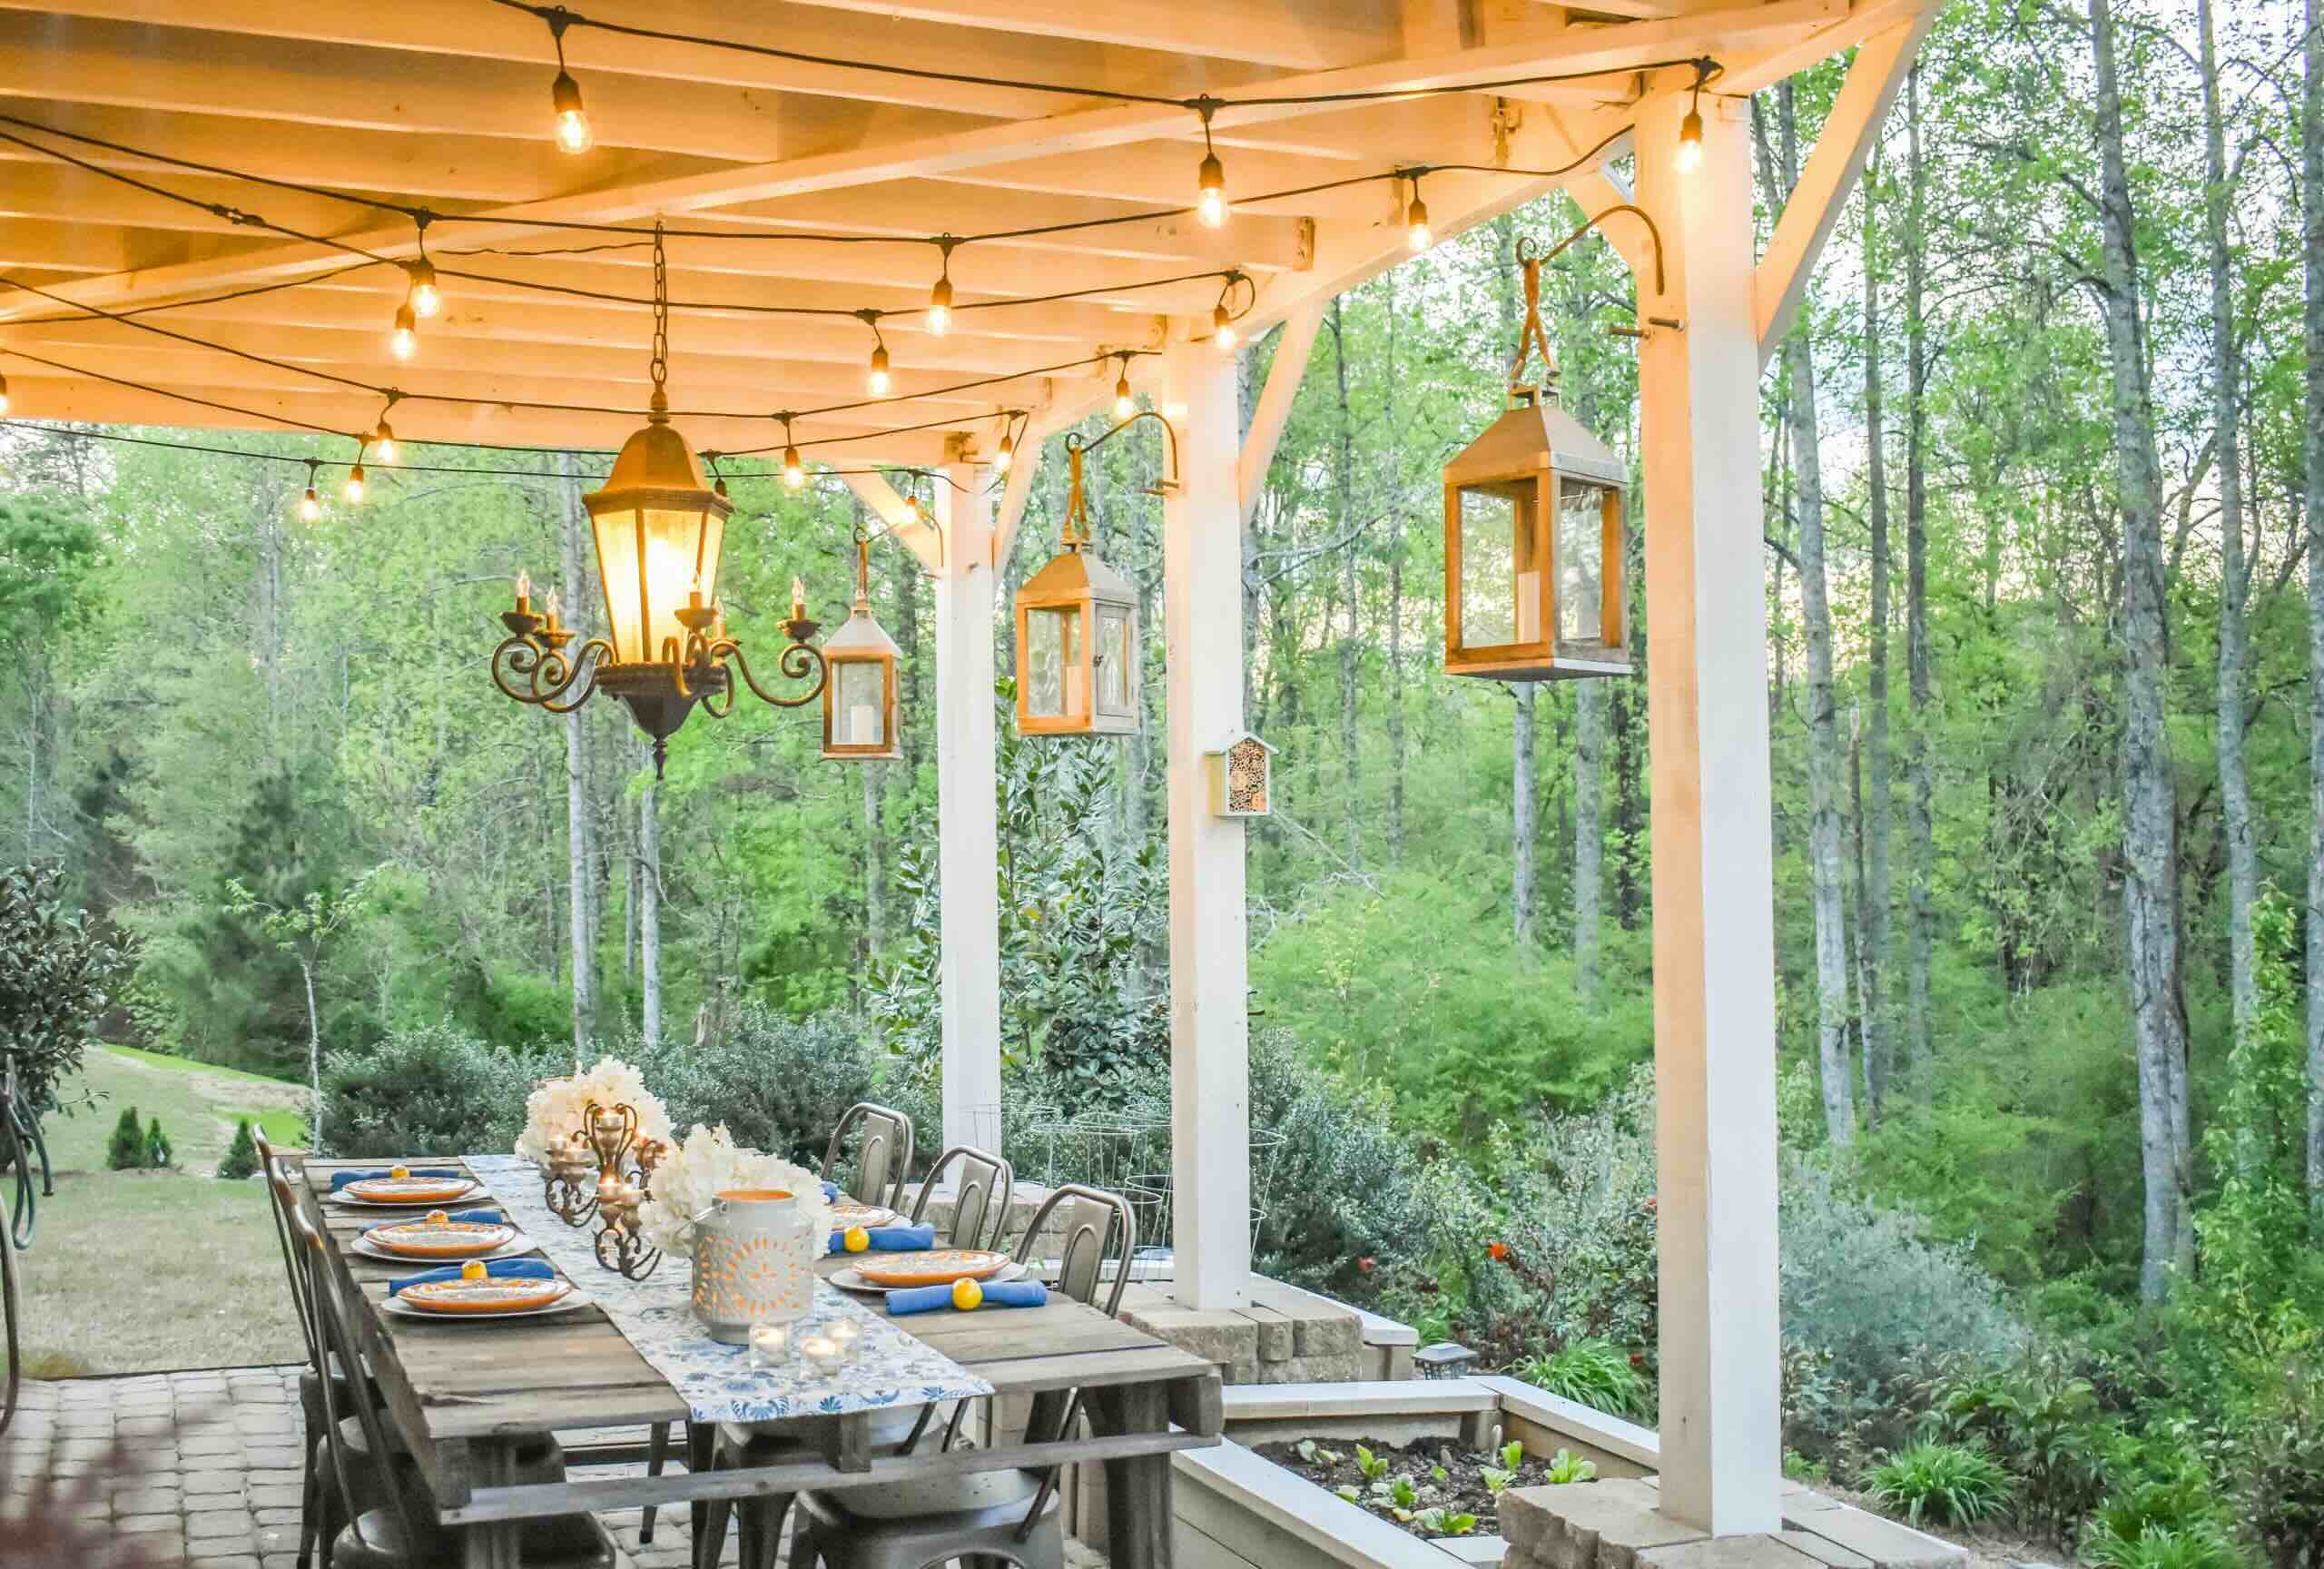
Adding an outdoor chandelier to your outdoor living space is a great way to create a warm and inviting atmosphere. Whether you have a cozy patio, a spacious deck, or a sprawling backyard, an outdoor chandelier can add a touch of elegance and charm to any outdoor area. Not only does it provide beautiful lighting, but it also serves as a striking centerpiece that enhances the overall aesthetic appeal of your outdoor space.
Creating your own outdoor chandelier is a fun and rewarding DIY project that allows you to customize the design to suit your personal style and preferences. With a few materials and tools, you can transform ordinary lighting fixtures into a stunning outdoor chandelier that will impress your family and friends. In this article, we will guide you through the step-by-step process of making your very own outdoor chandelier.
Before we dive into the details, let’s briefly discuss the materials and tools you will need for this project.
Key Takeaways:
- Create a personalized outdoor chandelier by following a step-by-step guide. Choose a suitable location, gather materials, and add decorative elements to enhance your outdoor living space with a touch of elegance and charm.
- Prioritize safety and attention to detail when making an outdoor chandelier. From preparing the frame to installing electrical components and attaching lighting fixtures, each step contributes to a stunning and functional DIY project.
Read more: How To Make A Chandelier
Materials and Tools Needed
Before getting started, gather the following materials and tools:
- Chandelier frame or wire basket
- Outdoor-safe lighting fixtures
- Electrical wire
- Wire cutters
- Electrical tape
- Screwdriver
- Hanging chain or rope
- Hooks or screws
- Decorative elements (e.g., beads, crystals, feathers, etc.)
- Extension cord (if necessary)
- Step ladder
It’s important to choose outdoor-safe materials that are designed to withstand the elements. Look for lighting fixtures that are specifically labeled for outdoor use and can handle exposure to rain, wind, and sunlight. This will ensure the longevity and safety of your outdoor chandelier.
If you’re starting with a chandelier frame, make sure it’s sturdy enough to support the weight of the lighting fixtures and any additional decorative elements you plan to add. Alternatively, you can repurpose a wire basket or even create a frame using wire and other materials.
Now that you have everything you need, let’s move on to the step-by-step process of creating your own outdoor chandelier.
Step 1: Choose a Suitable Location
The first step in making an outdoor chandelier is to determine where you want to hang it. Consider the layout of your outdoor space, the available electrical outlets, and the overall aesthetic you want to achieve.
Look for a location that is visually appealing and enhances the ambiance of your outdoor area. It could be above a dining table, in a cozy seating area, or as a focal point in your garden. Keep in mind that the location should have easy access to an electrical outlet unless you plan on using a battery-powered or solar-powered chandelier.
Consider the height at which you want to hang the chandelier. It should be low enough to create an intimate atmosphere, but not so low that it obstructs the view or poses a safety hazard. Use a step ladder to get a better sense of the height and adjust as needed.
Additionally, it’s important to ensure that the chosen location is protected from the elements. If you’re planning to hang the chandelier in an exposed area, make sure the lighting fixtures and electrical components are weatherproof or properly covered to prevent damage.
Take some time to visualize how the chandelier will look in the chosen location and make any necessary adjustments before moving on to the next step.
Step 2: Gather the Required Supplies
Now that you have chosen a suitable location for your outdoor chandelier, it’s time to gather all the necessary supplies. Here’s a list of the items you will need:
- Chandelier frame or wire basket
- Outdoor-safe lighting fixtures
- Electrical wire
- Wire cutters
- Electrical tape
- Screwdriver
- Hanging chain or rope
- Hooks or screws
- Decorative elements (e.g., beads, crystals, feathers, etc.)
- Extension cord (if necessary)
- Step ladder
Make sure to choose outdoor-safe lighting fixtures that can withstand the elements. Look for fixtures labeled for outdoor use and ensure they are waterproof and UV-resistant.
If you’re using a chandelier frame, ensure it is sturdy enough to support the weight of the lighting fixtures and any additional decorative elements you plan to add. Alternatively, you can repurpose a wire basket or create a frame using wire and other materials.
Measure the length of electrical wire you will need to connect the lighting fixtures to the electrical outlet. Use wire cutters to cut the wire to the appropriate length.
Keep a screwdriver handy, as you will need it to install or remove the lighting fixtures and secure the chandelier to the desired location.
Lastly, gather any decorative elements you wish to incorporate into your design, such as beads, crystals, feathers, or other ornaments that match your outdoor decor style.
Once you have gathered all the supplies, you’re ready to move on to the next step: preparing the chandelier frame.
Step 3: Prepare the Chandelier Frame
Whether you’re using a pre-made chandelier frame or creating one from a wire basket, this step involves preparing the frame to accommodate the lighting fixtures and other decorative elements.
If you’re starting with a chandelier frame, inspect it for any loose or broken parts. Tighten screws or make necessary repairs to ensure the frame is sturdy and secure. If you’re using a wire basket, make sure it’s clean and free of any sharp edges that could pose a safety risk.
Next, determine the placement of the lighting fixtures. Consider the overall design and evenly distribute the fixtures around the frame. Mark the spots where the fixtures will be attached, keeping in mind the length of the electrical wire to connect them.
Use a screwdriver to remove any decorative elements that may obstruct the attachment of the lighting fixtures. Ensure that the frame has enough space and support for the fixtures to hang securely.
If you want to add extra flair to your chandelier, now is the time to incorporate any decorative elements you gathered earlier. Thread beads, crystals, feathers, or other ornaments onto the frame for an added touch of charm and personalization.
Once you have prepared the chandelier frame and added any desired decorative elements, it’s time to move on to the next step: installing the electrical components.
When making an outdoor chandelier, be sure to use weather-resistant materials such as outdoor-rated wiring and waterproof light fixtures to ensure durability and safety.
Read more: How To Make A Balloon Chandelier
Step 4: Install the Electrical Components
Now that you have prepared the chandelier frame, it’s time to install the electrical components that will bring the chandelier to life. Follow these steps to safely install the electrical wiring:
- Turn off the power: Before you begin any electrical work, make sure the power to the designated electrical outlet is turned off at the circuit breaker. This step is crucial to prevent any accidents or injuries.
- Measure and cut the electrical wire: Measure the distance from the chandelier frame to the electrical outlet and cut the electrical wire to the appropriate length. Leave a few extra inches for flexibility.
- Strip the wire ends: Using wire cutters, strip off about half an inch of insulation from the ends of the electrical wire. This will expose the bare wires for connection.
- Connect the electrical wires: Connect the exposed wires from the chandelier frame to the corresponding wires from the electrical outlet. Twist them together and secure them with electrical tape for added safety.
- Test the connection: Before proceeding further, briefly turn on the power to ensure that the electrical connection is correct and there are no issues or shorts.
- Wrap the connection: Once you have confirmed the proper connection, wrap electrical tape around the exposed wire connections for added insulation and protection.
It’s important to note that if you’re not comfortable working with electrical wiring, it’s best to consult a professional electrician for assistance. Safety should always be a top priority when working with electricity.
With the electrical components installed, you’re one step closer to creating your very own outdoor chandelier. The next step involves attaching the lighting fixtures.
Step 5: Attach the Lighting Fixtures
Now that the electrical components are installed, it’s time to attach the lighting fixtures to the chandelier frame. Follow these steps to ensure a secure and visually appealing arrangement:
- Position the lighting fixtures: Place the lighting fixtures in the designated spots on the chandelier frame. Ensure that they are evenly spaced and aligned for a balanced look.
- Secure the fixtures: Use a screwdriver to attach the fixtures to the frame. Follow the manufacturer’s instructions for proper installation, making sure they are tightly secured.
- Check the wiring: Double-check the wiring connections from the lighting fixtures to the electrical wire. Ensure that they are secure and properly insulated with electrical tape.
- Test the lighting fixtures: Turn on the power and test each lighting fixture to make sure they are functioning properly. Make any necessary adjustments or repairs before proceeding.
As you attach the lighting fixtures, consider the overall design aesthetic you want to achieve. You can mix and match different fixture styles or stick with a uniform look. Additionally, you may choose to incorporate dimmable fixtures or LED lights for added versatility and energy efficiency.
Once the lighting fixtures are securely attached and tested, you can move on to the next step: hanging the chandelier in its designated location.
Step 6: Hang the Chandelier
With the lighting fixtures securely attached, it’s time to hang your outdoor chandelier in its designated location. Follow these steps to ensure a safe and visually appealing installation:
- Locate the hanging point: Identify the beams, hooks, or other mounting options in the chosen location where you will hang the chandelier. Ensure that they are strong enough to support the weight of the chandelier.
- Prepare the hanging chain or rope: Attach the hanging chain or rope to the chandelier frame using appropriate connectors or hooks. Make sure it is securely fastened to prevent any accidents.
- Measure the height: Determine the desired height at which you want the chandelier to hang. Consider the surrounding elements and the functionality of the space. Use a step ladder to get a better perspective if needed.
- Hang the chandelier: With the help of a friend or family member, carefully lift the chandelier and hang it from the selected hanging point. Ensure that it hangs evenly and is properly supported.
- Adjust the position: Step back and assess the chandelier’s position. Make any necessary adjustments to ensure that it is centered and level with the surrounding space.
It’s important to note that if you’re unsure about the structural integrity of the hanging point or if you’re dealing with a heavier chandelier, it’s always advisable to seek professional assistance to ensure a safe installation.
Once the chandelier is securely hung in its designated location, it’s time to add some finishing touches and decorative elements.
Step 7: Add Decorative Elements
Now that your outdoor chandelier is hanging beautifully, it’s time to add the finishing touches with decorative elements. This step allows you to personalize your chandelier and create a unique look that complements your outdoor space. Follow these steps to enhance the visual appeal of your chandelier:
- Choose your decorative elements: Select beads, crystals, feathers, or other ornaments that match your outdoor decor style. Consider the color scheme, theme, and overall aesthetics of your outdoor space.
- Attach the decorative elements: Thread the decorative elements onto the chandelier frame using fishing line, thin wire, or any other suitable material. Attach them at various points to create a visually pleasing arrangement.
- Experiment with heights: Vary the lengths and positioning of the decorative elements to add depth and visual interest to the chandelier. Play around with different combinations to achieve the desired look.
- Consider the surroundings: Take into account the surrounding elements such as trees, plants, or architectural features. Harmonize the decorative elements with the natural or man-made structures present in your outdoor space.
- Step back and assess: Once you have attached the decorative elements, step back and assess the overall aesthetic impact. Make any final adjustments to ensure a balanced and cohesive design.
Adding decorative elements not only enhances the visual appeal of your outdoor chandelier but also allows you to reflect your personal style and create a customized look that is truly yours.
With the decorative elements in place, take a moment to admire your handcrafted outdoor chandelier. It’s now ready to illuminate your outdoor space and set the mood for memorable gatherings and cozy evenings.
Congratulations on completing your outdoor chandelier! Enjoy the ambiance and enchantment that it brings to your outdoor living area.
Remember to always exercise caution and follow safety guidelines when working with electrical components. If you are not comfortable with DIY electrical work, consult a professional electrician for assistance.
Read more: How To Make A Beaded Chandelier
Conclusion
Creating your own outdoor chandelier is a rewarding DIY project that adds elegance and charm to your outdoor living space. By following the step-by-step process outlined in this guide, you can make a stunning chandelier that not only provides beautiful lighting but also becomes a captivating centerpiece for your outdoor area.
From choosing a suitable location to gathering the necessary materials and tools, each step is crucial in ensuring a successful outcome. Preparing the chandelier frame, installing the electrical components, and attaching the lighting fixtures require careful attention to detail and adherence to safety precautions.
Once your outdoor chandelier is hung, the addition of decorative elements allows you to personalize the design and create a unique look that complements your outdoor decor style. The finishing touches of beads, crystals, or other ornaments bring a touch of individuality and beauty to your chandelier.
Remember to prioritize safety throughout the entire process. If you’re uncomfortable working with electrical components, consult a professional electrician for assistance. They can ensure that your chandelier is properly and safely installed.
Now, take a step back and admire your handiwork. Your custom outdoor chandelier is ready to illuminate your outdoor space, creating a warm and inviting atmosphere for relaxing evenings, outdoor dinner parties, or simply enjoying the beauty of your surroundings.
Enjoy the ambiance and charm that your outdoor chandelier brings to your outdoor living area. Embrace the comfort and style it adds to your outdoor space, creating unforgettable moments and cherished memories with family and friends.
Frequently Asked Questions about How To Make An Outdoor Chandelier
Was this page helpful?
At Storables.com, we guarantee accurate and reliable information. Our content, validated by Expert Board Contributors, is crafted following stringent Editorial Policies. We're committed to providing you with well-researched, expert-backed insights for all your informational needs.


0 thoughts on “How To Make An Outdoor Chandelier”