
Furniture
How To Cut A Dresser In Half
Modified: October 20, 2024
Learn how to cut a dresser in half to transform it into two separate pieces of furniture. Step-by-step guide for a successful DIY furniture project.
(Many of the links in this article redirect to a specific reviewed product. Your purchase of these products through affiliate links helps to generate commission for Storables.com, at no extra cost. Learn more)
Introduction
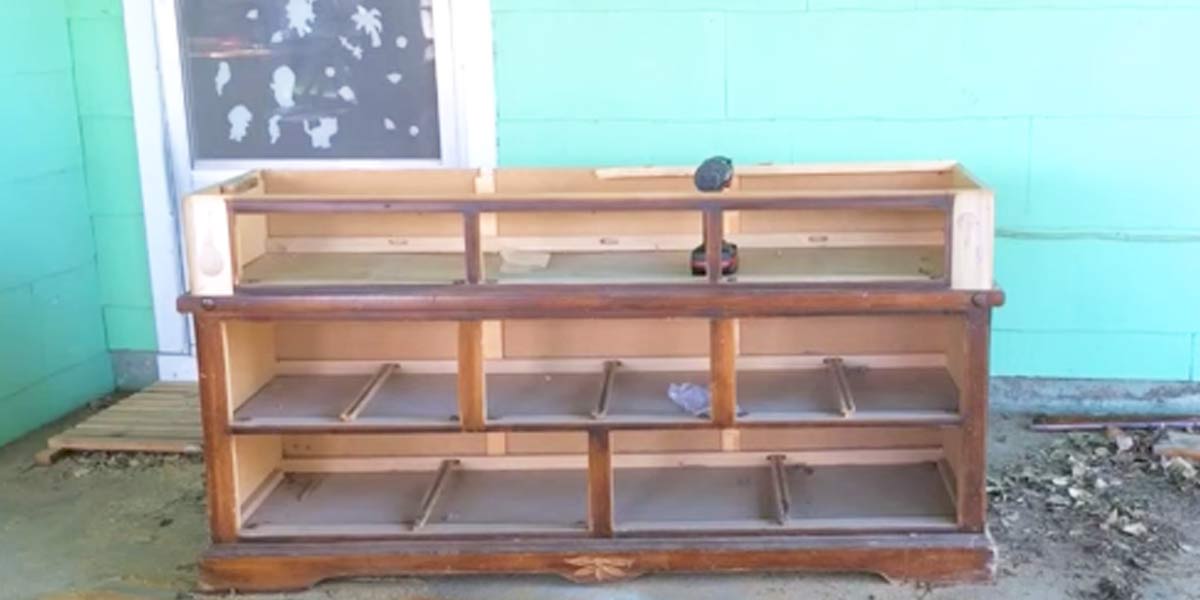
Welcome to the world of furniture customization and DIY projects! If you’ve ever found yourself faced with the dilemma of a large, bulky dresser that just doesn’t fit in your space, fear not. In this article, we will guide you through the process of cutting a dresser in half, allowing you to create two separate pieces that can be more easily incorporated into your home.
Whether you’re downsizing, moving to a new place, or simply looking to repurpose your furniture, cutting a dresser in half can be a practical solution. Not only does it allow you to make the most of your existing furniture, but it also provides an opportunity for customization and creativity.
Before we dive into the step-by-step process, it’s important to note that cutting a dresser in half requires basic DIY skills and tools. If you are not confident in your abilities, it’s always a good idea to consult a professional or seek assistance from someone with experience. Safety should be paramount, so be sure to take necessary precautions and use appropriate safety equipment.
Now, let’s gather our tools and get started on transforming your dresser into two separate pieces.
Key Takeaways:
- Transform your bulky dresser into two versatile pieces that fit your space perfectly by following these DIY steps to cut a dresser in half. Embrace creativity and customization while ensuring safety and precision throughout the process.
- With basic DIY skills and the right tools, you can repurpose your furniture and create unique, personalized pieces. From measuring and cutting to reinforcing and adding finishing touches, this project offers endless possibilities for furniture customization.
Read more: How To Store Half Cut Onion
Step 1: Gather Necessary Tools and Equipment
Before you begin the process of cutting a dresser in half, it’s important to gather all the necessary tools and equipment. Having everything prepared will ensure a smooth and efficient workflow. Here’s a list of items you will need:
- A sturdy workbench or table
- A measuring tape
- A pencil or marker
- A circular saw or a reciprocating saw with a metal-cutting blade
- Safety goggles
- A dust mask or respirator
- Sandpaper or a sanding block
- Wood glue or adhesive
- Clamps
- Paint or stain (optional)
- Paintbrush or foam roller (optional)
Ensure that you have all these items ready and easily accessible before you begin the cutting process. This will save you time and prevent any unnecessary delays as you move through the steps.
Additionally, it’s always a good idea to prepare your workspace. Clear any clutter, make sure there is ample lighting, and ensure that you have enough space to move around comfortably while working on your dresser. This will make the process easier and safer.
Now that you have all your tools and a well-prepared workspace, it’s time to move on to the next step: measuring and marking the cutting line.
Step 2: Measure and Mark the Cutting Line
Once you have your tools ready, it’s time to measure and mark the cutting line on your dresser. This step is crucial to ensure that you achieve an even and precise cut.
Start by deciding how you want to divide your dresser. Take into consideration the size and proportions of the pieces you want to create. Measure the height and width of your dresser and determine the desired dimensions of each half.
Using a measuring tape, carefully measure and mark the cutting line on the dresser. Make sure the line is straight and aligned with your desired dimensions. Double-check your measurements to avoid any mistakes or uneven cuts.
When marking the cutting line, it’s helpful to use a pencil or marker that contrasts with the color of your dresser. This will make the line more visible and easier to follow during the cutting process.
Remember to take into account any decorative elements or hardware on the dresser that may affect the cutting process. If needed, remove or adjust these elements before proceeding further.
Once you have accurately marked the cutting line, it’s time to secure the dresser in place to ensure stability during the cutting process. We will cover this in the next step.
Step 3: Secure the Dresser
Before you start cutting your dresser, it’s essential to secure it in place to prevent any movement or instability. This will not only ensure your safety but also help you achieve a cleaner and more accurate cut.
Begin by placing your dresser on a sturdy workbench or table. Make sure the surface is level and can support the weight of the dresser. If needed, use shims or other supports to ensure stability.
Once the dresser is in place, you can further secure it by using clamps. Clamp the dresser to the workbench or table, applying pressure evenly on both sides. This will hold the dresser firmly and minimize any vibrations or shifting during the cutting process.
If your dresser has drawers, remove them beforehand to make the cutting process easier and more accessible. Set them aside in a safe area until you’re ready to reassemble the dresser.
Double-check that your dresser is securely fastened and there is no wobbling or movement. This step is crucial for your safety and the accuracy of your cut. Taking the time to properly secure the dresser will ensure a smooth and controlled cutting process.
With the dresser securely in place, you’re ready to move on to the most critical step: cutting the dresser in half. We’ll cover the different cutting methods in the next step to choose from depending on the tools available to you.
Step 4: Cut the Dresser in Half
Now comes the exciting part – cutting the dresser in half. This step requires precision and careful attention to detail to ensure a clean and accurate cut. Depending on the tools you have available, you can choose between a circular saw or a reciprocating saw with a metal-cutting blade.
If you’re using a circular saw, follow these steps:
- Position the saw blade just outside the marked cutting line.
- Hold the saw firmly and start cutting slowly along the marked line.
- Continue cutting in a smooth and steady motion, applying gentle pressure. Make sure to maintain control of the saw throughout the process.
- Once you have cut through one side of the dresser, move to the other side and repeat the process.
If you’re using a reciprocating saw, the process is slightly different:
- Position the saw blade just outside the marked cutting line.
- Hold the saw firmly with both hands and start cutting along the marked line.
- Apply steady and even pressure as you move the saw back and forth, following the marked line.
- Continue cutting until you have gone through one side of the dresser.
- Move to the other side and repeat the process.
Whichever saw you use, it’s crucial to stay focused and take your time. Be cautious of any hardware or decorative elements that may be present on the dresser.
Once the dresser has been cut in half, make sure to support the weight of each half to prevent any damage or sagging. You can use additional clamps or a supportive surface for this purpose.
With the cutting process complete, you can move on to the next step: sanding and smoothing the cut edges.
Before cutting a dresser in half, make sure to measure and mark the exact center. Use a circular saw to make the cut, and support the dresser to prevent it from tipping over. Sand the edges for a smooth finish.
Read more: How To Cut A Pallet In Half With Hand Tools
Step 5: Sand and Smooth the Cut Edges
After cutting your dresser in half, the next step is to sand and smooth the cut edges. This is an essential process to ensure that the edges are safe to touch and have a finished appearance.
Start by using coarse-grit sandpaper or a sanding block to remove any rough or jagged edges along the cut line. Hold the sandpaper firmly and move it back and forth along the edges, applying gentle pressure. This will help to even out any inconsistencies and create a smoother surface.
Continue sanding with progressively finer-grit sandpaper, such as medium and then fine-grit, to achieve a polished and smooth finish. Be attentive to the edges and corners, making sure to remove any splinters or rough spots.
As you sand, periodically wipe away the sawdust to assess the progress and ensure that you’re achieving the desired smoothness. You can use a clean cloth or a tack cloth for this purpose.
After sanding, you may choose to apply a wood filler to any gaps or imperfections along the cut edges. This will help create a seamless appearance and reinforce the structure. Follow the manufacturer’s instructions for the specific wood filler you are using.
Once the wood filler has dried, sand the area again to achieve a smooth and consistent surface. Remember to wipe away any excess dust before moving on to the next step.
At this point, you can also consider adding a decorative touch to the cut edges. Applying a stain or paint that matches your desired aesthetic can enhance the overall look of the dresser halves. Use a brush or foam roller to apply the stain or paint evenly, following the manufacturer’s instructions.
Allow the stain or paint to dry completely before proceeding to the next step, where we will reinforce the dresser halves to ensure stability.
Step 6: Reinforce the Halves
With your dresser halves now cut and smoothed, it’s time to reinforce them to ensure stability and durability. Reinforcing the halves will help maintain the structural integrity of each piece, especially if you plan to use them independently.
One common method to reinforce the dresser halves is by using wood glue or adhesive. Applying a generous amount of wood glue along the cut edges and joining them together will create a strong bond. Make sure to align the halves properly and press them firmly together.
Once the halves are joined, you can further strengthen the connection by using clamps. Place the clamps strategically along the length of the dresser to hold the halves tightly together. Leave the clamps in place for the recommended drying time specified by the wood glue manufacturer.
In addition to wood glue, you may choose to use screws or nails to reinforce the connection between the two halves. Drill pilot holes along the cut edges before inserting the screws or nails. This will prevent the wood from splitting during the installation process.
Another option for reinforcement is the use of metal brackets or corner braces. These metal hardware pieces can be screwed into the inside or outside of the dresser halves, providing extra support and stability. Ensure that the brackets are securely attached and do not obstruct the functionality or appearance of the dresser.
Choose the reinforcement method that best suits your needs and the design of your dresser halves. Whether using wood glue, screws, nails, or metal brackets, the goal is to create a strong and durable connection between the two halves.
After allowing sufficient time for the wood glue or adhesive to dry and the connection to solidify, you can remove the clamps and move on to the final step: adding the finishing touches to your newly transformed dresser halves.
Step 7: Finishing Touches
Congratulations on successfully cutting your dresser in half and reinforcing the halves! Now it’s time to add the finishing touches to your newly transformed pieces to make them truly shine.
If you chose to apply a stain or paint during Step 5, this is the stage where you can complete the finishing process. Allow the stain or paint to dry completely according to the manufacturer’s instructions. Once dry, you can apply a protective topcoat — such as varnish or polyurethane — to seal and protect the surface of the dresser halves.
If you’re looking to add a personal touch or enhance the aesthetic appeal, consider incorporating decorative elements. This may include adding new hardware, such as stylish drawer pulls or knobs, to complement the updated look of the dresser halves. You might also explore decorative molding or trim pieces that can be attached to the edges to give them a more polished and finished appearance.
Don’t forget to reattach any drawers that were removed in Step 3, ensuring they align properly and operate smoothly. Make any necessary adjustments to ensure a seamless integration.
Once you’ve completed the finishing touches, take a moment to step back and admire your handiwork. Your dresser halves have been transformed into functional and stylish pieces that can be easily incorporated into your home.
Remember to clean up your workspace, storing away any tools and materials that were used during the process. Properly dispose of any waste or sawdust generated from cutting and sanding.
Now that you’ve mastered the art of cutting a dresser in half, you can confidently tackle future furniture customization projects. With your newfound knowledge and skills, the possibilities for creating unique and personalized furniture pieces are endless.
Enjoy your newly transformed dresser halves, and may they bring both practicality and beauty to your living space!
Conclusion
Cutting a dresser in half is a rewarding DIY project that allows you to repurpose your furniture and create customized pieces that perfectly fit your space. Throughout this article, we have walked you through the step-by-step process of cutting a dresser in half, from gathering the necessary tools to adding the finishing touches.
By carefully measuring and marking the cutting line, securing the dresser, and using the appropriate cutting tools, you can achieve clean and accurate cuts. Sanding and smoothing the cut edges ensure a polished finish, while reinforcing the halves with wood glue, screws, or metal brackets guarantees their stability and durability.
Adding your personal touch through stain, paint, or decorative elements elevates the appearance of the dresser halves, making them unique and tailored to your style. The final result is two separate pieces that can be seamlessly integrated into your home, providing both functionality and aesthetic appeal.
Remember, safety is paramount throughout the entire process. Use protective gear, follow instructions, and exercise caution when operating tools and equipment. If you are unsure about any steps or feel uncomfortable, seek professional assistance.
With the knowledge and skills gained from this article, you can now embark on more furniture customization projects and confidently transform your living space. Cutting a dresser in half is just one of the many possibilities that allow you to repurpose and breathe new life into your furniture.
So, roll up your sleeves, gather your tools, and let your creativity run wild. It’s time to embark on your next DIY adventure and create furniture pieces that reflect your unique style and meet your specific needs. Happy crafting!
Frequently Asked Questions about How To Cut A Dresser In Half
Was this page helpful?
At Storables.com, we guarantee accurate and reliable information. Our content, validated by Expert Board Contributors, is crafted following stringent Editorial Policies. We're committed to providing you with well-researched, expert-backed insights for all your informational needs.


0 thoughts on “How To Cut A Dresser In Half”