Articles
How To Install Half Round Gutters
Modified: October 18, 2024
Looking for articles on how to install half round gutters? Check out our comprehensive guide for step-by-step instructions and expert tips. Enhance your home's drainage system with ease.
(Many of the links in this article redirect to a specific reviewed product. Your purchase of these products through affiliate links helps to generate commission for Storables.com, at no extra cost. Learn more)
Introduction
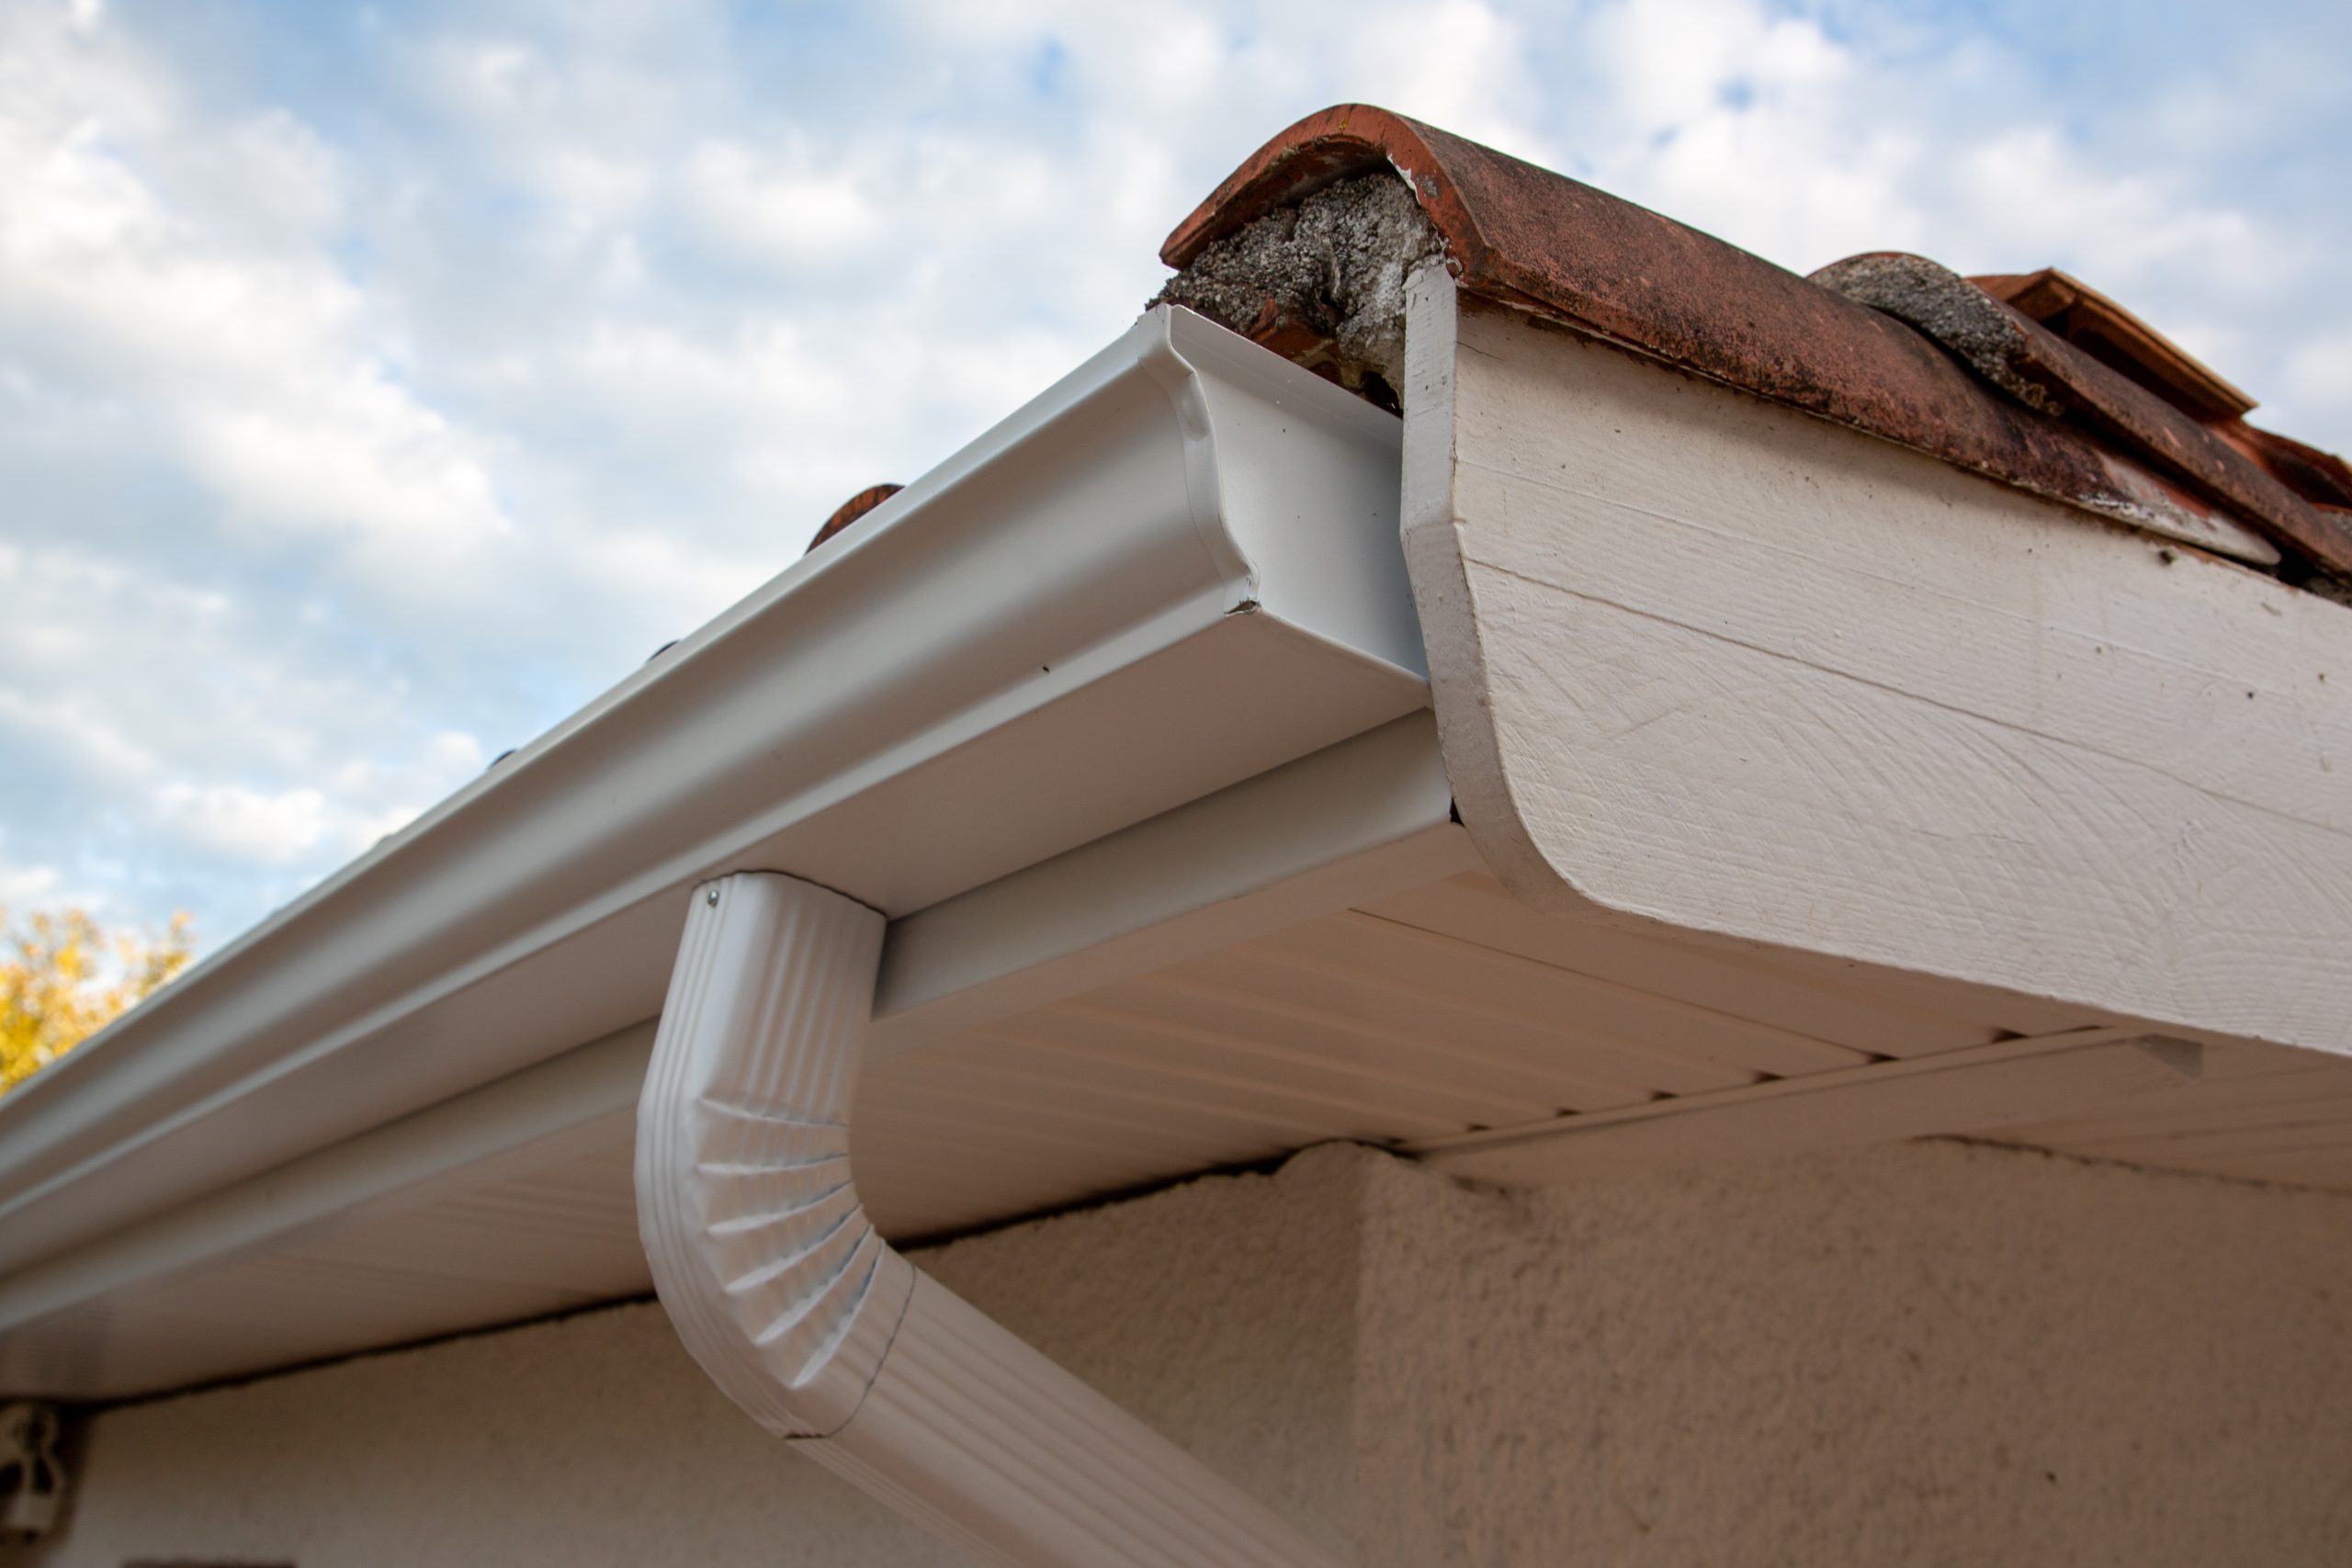
Welcome to our comprehensive guide on how to install half round gutters! If you’re looking to upgrade your home’s gutter system, half round gutters can be a fantastic choice. With their classic and elegant look, these gutters not only provide practical functionality but also add a touch of sophistication to your home’s exterior.
In this article, we will walk you through the step-by-step process of installing half round gutters. From measuring and planning to securing the gutters in place, we will cover everything you need to know to successfully complete this project. Whether you’re a seasoned DIY enthusiast or a beginner with little experience, you’ll find all the information you need right here.
Before we dive into the installation process, let’s first discuss the tools and materials you’ll need for this project:
Key Takeaways:
- Upgrade your home’s gutter system with elegant half round gutters for both practical functionality and sophisticated exterior appeal. Follow the step-by-step guide for a successful DIY installation.
- Properly measure, plan, and secure half round gutters to ensure optimal water flow and long-term stability. Test the gutters for proper functioning and enjoy the benefits of a reliable gutter system.
Read more: How To Install Gutters Yourself
Tools and Materials Needed
- Tape measure
- Pencil
- Hacksaw
- Tin snips
- Rivet gun
- Drill
- Gutter hangers
- Seam sealer
- Downspout
- Screws
- Gutter sealant
- Level
Now that you have all the necessary tools and materials, let’s move on to the installation process.
Key Takeaways:
- Upgrade your home’s gutter system with elegant half round gutters for both practical functionality and sophisticated exterior appeal. Follow the step-by-step guide for a successful DIY installation.
- Properly measure, plan, and secure half round gutters to ensure optimal water flow and long-term stability. Test the gutters for proper functioning and enjoy the benefits of a reliable gutter system.
Read more: How To Install Gutters Yourself
Tools and Materials Needed
Before you begin the installation process, gather the following tools and materials:
- Tape measure: This will be used to accurately measure the length of the gutters and downspouts.
- Pencil: Use a pencil to mark the measurements on the gutters and downspouts.
- Hacksaw: You’ll need a hacksaw to cut the gutters and downspouts to the desired lengths.
- Tin snips: These are helpful for cutting and shaping the gutter hangers.
- Rivet gun: A rivet gun is used to secure the gutter hangers in place.
- Drill: You’ll need a drill to create pilot holes for the screws.
- Gutter hangers: These are the brackets that hold the gutters in place. Choose hangers that are suitable for half round gutters.
- Seam sealer: This is used to seal the joints between gutter sections to prevent leaks.
- Downspout: Purchase a downspout that matches the style and size of your half round gutters.
- Screws: Use screws to secure the downspout straps and gutter hangers.
- Gutter sealant: Apply gutter sealant to the joints and seams of the gutters for added protection against leaks.
- Level: A level will help ensure that your gutters are correctly installed and sloped for proper drainage.
Having these tools and materials on hand will make the installation process smoother and more efficient.
Keep in mind that the specific tools and materials required may vary depending on the design of your half round gutter system and the specific instructions provided by the manufacturer. Be sure to read and follow the manufacturer’s guidelines to ensure a successful installation.
Step 1: Measure and Plan
The first step in installing half round gutters is to accurately measure and plan the layout of your gutter system. This will ensure that you have the correct amount of materials and that the gutters will be properly positioned for optimal functionality.
Start by measuring the length of the area where the gutters will be installed. Use a tape measure to determine the total length in linear feet.
Next, assess the slope of your roof. Proper gutter installation requires a slight slope to ensure that water flows towards the downspouts and away from your home’s foundation. Use a level to determine the angle and slope of the roofline.
With these measurements in hand, you can now calculate the number of gutter sections and downspouts needed for your project. Generally, gutter sections come in 10-foot lengths, so divide the total length by 10 to determine the number of sections needed. As for the downspouts, one downspout should be installed for every 30 to 40 feet of gutter.
Take some time to plan the placement of the downspouts as well. Ideally, they should be positioned at the corners of your home or where water naturally flows off the roof.
During the planning phase, it’s also important to consider any obstacles or architectural features that may impact the installation, such as windows, doors, or decorative elements. You may need to make adjustments to accommodate these elements and ensure a seamless installation.
Once you have the measurements and layout planned out, it’s a good idea to sketch a diagram or create a visual representation of the gutter system. This will serve as a helpful reference throughout the installation process.
By taking the time to measure and plan, you’ll have a clear roadmap for installing your half round gutters. This will help minimize errors and ensure a smooth and successful installation.
Step 2: Gather Necessary Materials
Before you start installing your half round gutters, it’s crucial to gather all the necessary materials. Having everything on hand will make the installation process smoother and more efficient.
Here are the materials you’ll need:
- Half round gutters: Purchase the appropriate length and quantity of half round gutter sections based on your measurements from Step 1.
- Gutter hangers: Choose hangers suitable for half round gutters. These brackets will hold the gutters in place.
- Downspouts: Select downspouts that match the style and size of your half round gutters. Consider the number and placement of downspouts determined during the planning stage.
- End caps: These are used to close off the ends of the gutter sections and ensure proper water flow.
- Downspout elbows: Depending on the layout of your gutters and the direction of the downspouts, you may need elbows to redirect the water flow.
- Screws: Use screws specifically designed for gutter installation. These should be resistant to rust and corrosion.
- Seam sealer: This adhesive sealant is applied to the joints between gutter sections to prevent leaks.
- Gutter sealant: Apply this sealant to the joints and seams of the gutters for added protection against leaks.
Additionally, you’ll need a variety of tools to complete the installation. Refer to the list provided in Step 1 to ensure you have all the necessary tools at your disposal.
Once you have all the materials and tools ready, double-check that everything is in good condition and that you have enough of each item to complete the installation. If something is missing or damaged, it’s best to address it before starting the installation process.
Gathering all the materials upfront will save you time and allow for a more efficient installation. With everything prepared, you can move on to the next step: preparing the area for the gutter installation.
Read more: How To Install Gutters On A Metal Building
Step 3: Prepare the Area
Before you can begin installing your half round gutters, it’s important to properly prepare the area to ensure a smooth and successful installation. Follow these steps to prepare the area:
1. Clear the area: Remove any debris or obstructions from the area where the gutters will be installed. This includes leaves, branches, dirt, and any other objects that could interfere with the gutter installation or proper water flow. Use a broom or rake to clear the area effectively.
2. Clean the roof and fascia board: Ensure that the roof and fascia board are free from any dirt, debris, or existing gutter remnants. Use a broom or power washer to clean the surfaces thoroughly. This will provide a clean and stable foundation for the gutter installation.
3. Repair any damage: Inspect the fascia board for any signs of damage, such as rot or decay. It’s crucial to address any issues before installing the gutters to ensure a secure and stable attachment. Replace or repair any damaged sections of the fascia board as necessary.
4. Install drip edge flashing (optional): While not mandatory for all installations, drip edge flashing can provide additional protection against water damage. If desired, install drip edge flashing along the edge of the roof before attaching the gutters. This will help direct water into the gutters and prevent it from seeping behind the fascia board.
5. Apply gutter and seam sealant: To enhance the longevity and effectiveness of the gutter system, apply gutter sealant to the joints and seams of the gutter sections. This will create a watertight seal and help prevent leaks. Additionally, apply seam sealer to the inside of the end caps to ensure a secure and leak-free connection.
By properly preparing the area, you’ll create a solid foundation for the gutter installation and ensure optimal performance. Once the area is prepared, you can move on to the next step: installing the downspout.
When installing half round gutters, make sure to properly slope them towards the downspout to ensure proper drainage and prevent water buildup. Use a level to ensure they are installed evenly.
Step 4: Install the Downspout
Installing the downspout is an essential step in the process of installing half round gutters. The downspout is responsible for carrying water from the gutters down to the ground and away from your home’s foundation. Follow these steps to install the downspout:
1. Determine the downspout location: Referencing your earlier planning, carefully choose the location where the downspout will be installed. This is typically at the corner of your home or where water naturally flows off the roof. Mark the precise spot with a pencil.
2. Measure and cut the downspout: Measure the distance from the bottom of the gutter to the ground at the marked location. Use a hacksaw or tin snips to cut the downspout to the appropriate length. Remember to leave a slight gap between the bottom of the downspout and the ground to allow for drainage.
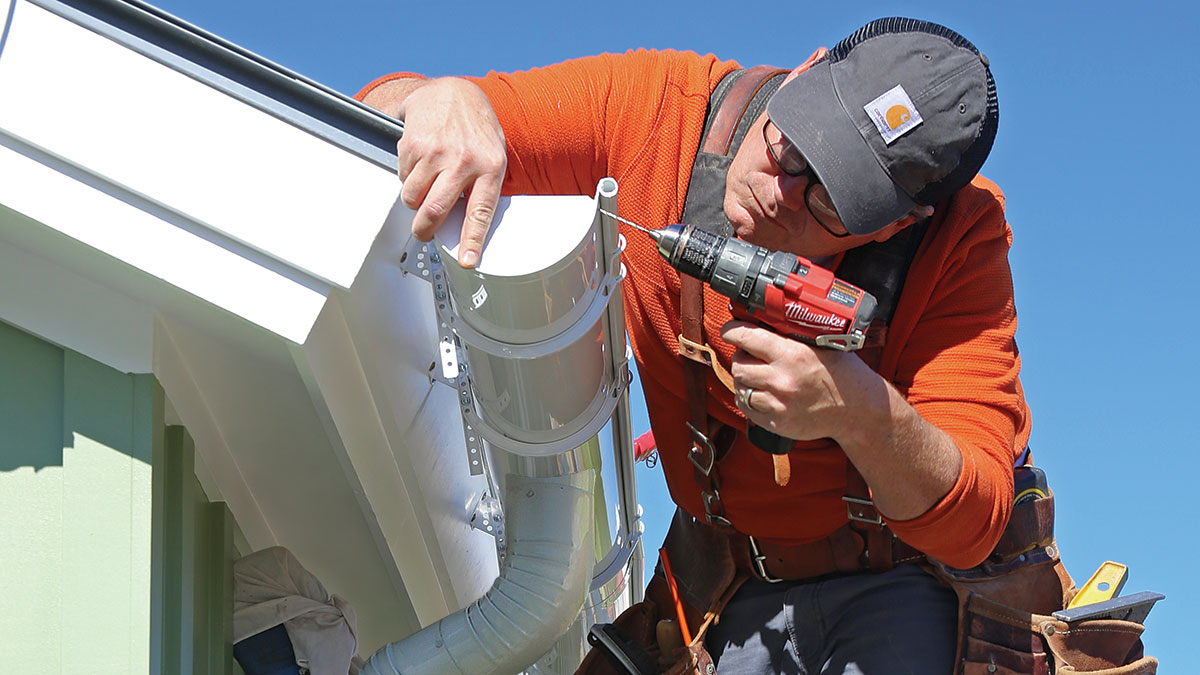
3. Attach the downspout strap: Position the downspout against the side of your home and secure it in place with a downspout strap. Use a drill to create pilot holes in both the downspout and the exterior wall. Insert screws through the strap and into the wall to secure the downspout firmly.
4. Install the downspout elbow: Attach a downspout elbow to the bottom end of the downspout. The angle of the elbow should direct water away from your home’s foundation. Use screws or rivets to secure the elbow to the downspout. Ensure a snug fit to prevent any gaps or leaks.
5. Connect the downspout to the drainage system: If you have an underground drainage system, connect the bottom end of the downspout to it. Ensure a proper and secure connection to prevent any water leakage. If you don’t have an underground drainage system, position the downspout extension to direct water away from your home’s foundation and landscaping.
By installing the downspout correctly, you will effectively channel water away from your home’s foundation and prevent water damage. With the downspout in place, you can now proceed to install the gutter hangers.
Step 5: Install the Gutter Hangers
Installing gutter hangers is a crucial step in securely supporting your half round gutters. The hangers provide stability and ensure that the gutters are properly aligned and sloped for efficient water flow. Follow these steps to install the gutter hangers:
1. Measure and mark the placement of the gutter hangers: Start by measuring the distance from the end of the gutter to the desired location of the first hanger. Typically, hangers should be spaced approximately every 2 feet along the length of the gutter. Use a pencil to mark the locations where the hangers will be installed.
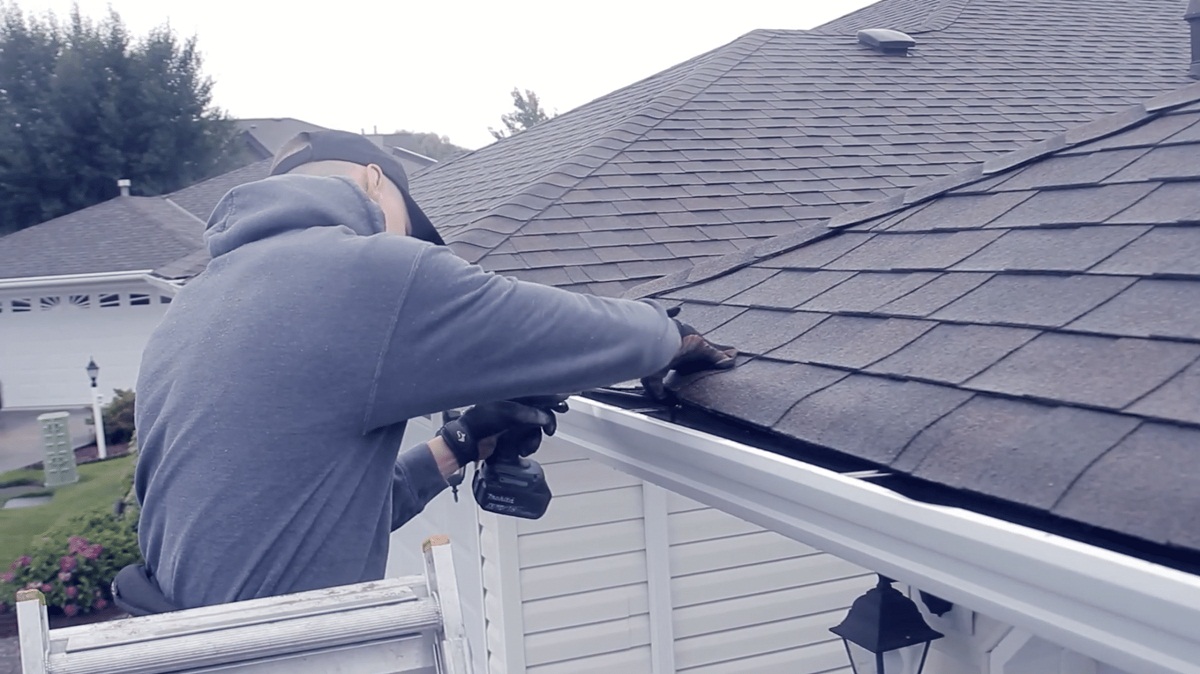
2. Attach the gutter hangers to the fascia board: Position the first hanger at the marked location on the fascia board. Ensure that the hanger is level. Use a drill to create pilot holes in both the hanger and the fascia board. Insert screws into the holes to secure the hanger in place. Repeat this process for each marked location along the length of the gutter.
3. Cut and attach the gutter hanger brackets: Cut the gutter hanger brackets to the appropriate length using tin snips or a hacksaw. Slide the brackets into the hanger. Ensure that the brackets are positioned at the correct angle to properly support the gutter. Use a rivet gun or screws to secure the brackets to the gutter.
4. Continue installing gutter hangers: Move along the length of the gutter, repeating the process of attaching hangers and brackets. Ensure that the hangers are evenly spaced and aligned. Use a level to ensure that the gutters have a slight slope towards the downspouts for proper water flow.
5. Revisit the first hanger: Return to the first hanger and double-check the alignment and levelness. Adjust if necessary to ensure that the gutters are properly supported and positioned. Make any necessary tweaks to the hangers and brackets as needed.
By properly installing the gutter hangers, you’ll ensure that the gutters are securely mounted and provide efficient water drainage. Once the hangers are in place, you’re ready to move on to the next step: hanging the gutters.
Step 6: Hang the Gutters
Now that the gutter hangers are securely in place, it’s time to hang the half round gutters. This step requires precision and attention to detail to ensure that the gutters are properly aligned and sloped for optimal water flow. Follow these steps to hang the gutters:
1. Start at the highest point: Begin by positioning the first gutter section at the highest point of the roofline. This will typically be at the corner of your home. Place the gutter section between the brackets of the first hanger, ensuring it sits securely in place.
2. Level the gutter: Use a level to check that the gutter is straight and properly angled. Adjust the hanger brackets if necessary to ensure that the gutter has a slight slope towards the downspout. This will ensure that water flows smoothly and efficiently through the gutter system.
3. Secure the gutter to the hanger brackets: Once the gutter is properly aligned and leveled, use a rivet gun or screws to secure the gutter to the hanger brackets. Ensure that the gutter is securely fastened but avoid overtightening the screws or rivets, as this can cause damage to the gutter material.
4. Continue with the remaining gutter sections: Move along the roofline, repeating the process of positioning, leveling, and securing the gutter sections. As you install each section, make sure it overlaps the previous section by about an inch to ensure a watertight connection. Use connectors or sealant to secure the joints between the gutter sections if needed.
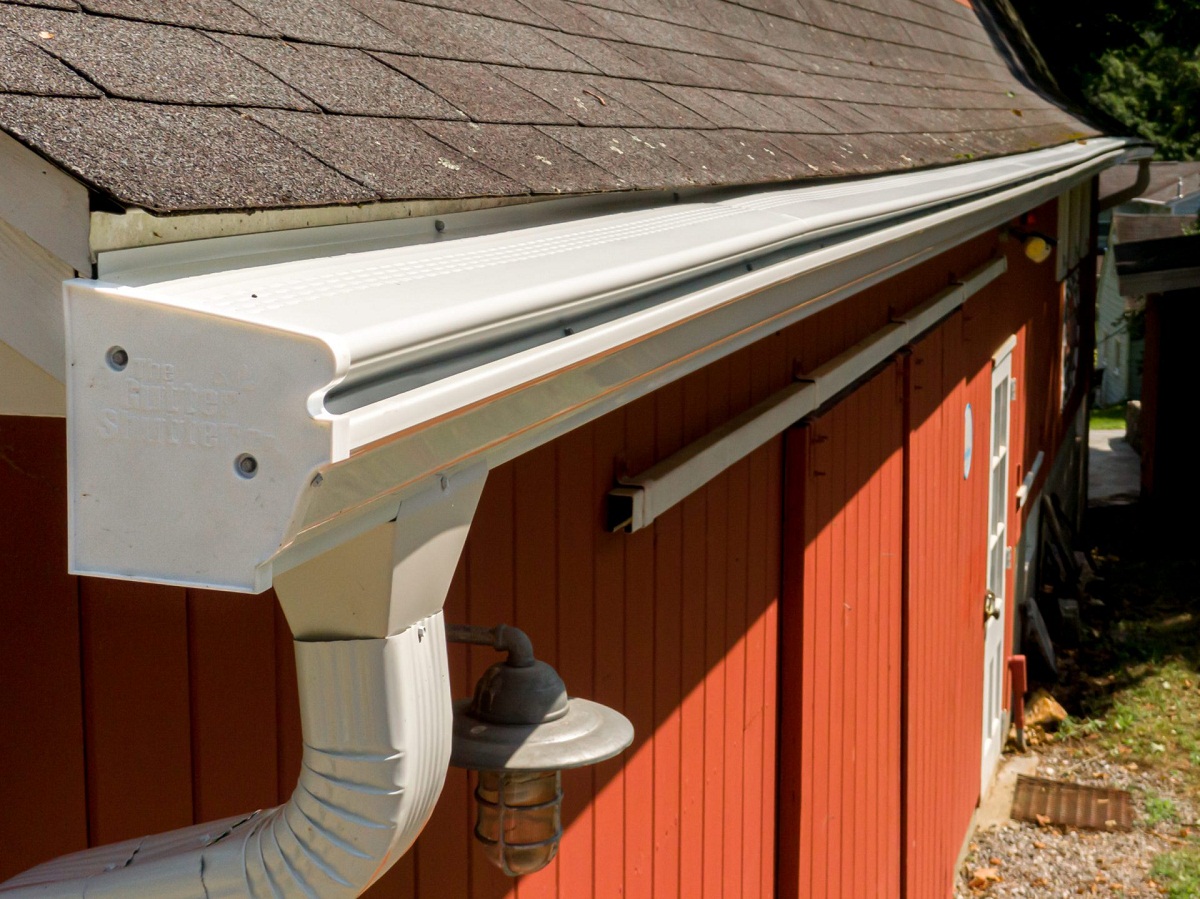
5. Trim the last gutter section: When you reach the end of the roofline, you may need to trim the last gutter section to fit. Measure and mark the appropriate length, then cut the gutter using a hacksaw or tin snips. Attach the trimmed section to the hanger bracket and ensure it is properly aligned and leveled before securing it in place.
By hanging the gutters with precision and attention to detail, you’ll create a seamless and effective gutter system. With the gutters securely in place, you’re almost done with the installation process. The next step is to secure the gutters to ensure their long-term stability.
Read more: How To Install Gutters With Drip Edge
Step 7: Secure the Gutters
Now that the gutters are hung in place, it’s important to secure them to ensure their long-term stability and effectiveness. Securing the gutters will prevent them from sagging or shifting, especially during heavy rainfall or strong winds. Follow these steps to properly secure the gutters:
1. Double-check alignment and slope: Before securing the gutters, double-check that they are properly aligned and sloped towards the downspouts. This will ensure that water flows smoothly and efficiently through the gutter system. Use a level to confirm that the gutters have a slight downward slope.
2. Attach additional hangers: If needed, install additional gutter hangers along the length of the gutters to provide extra support. This is especially important for longer gutter sections to prevent sagging in the middle. Follow the same process as in Step 5 to attach the hangers securely to the fascia board and gutter brackets.
3. Apply gutter sealant: Apply a bead of gutter sealant along the inside of the gutter joints and seams. This will provide added protection against leaks and ensure a watertight connection. Use a sealant gun to apply an even and consistent line of sealant along the joints.
4. Reinforce with screws: To further secure the gutters, insert screws through the gutter brackets and into the fascia board. Make sure to use screws specifically designed for gutters, as they are corrosion-resistant and provide a strong grip. Space the screws approximately every 16 inches along the length of the gutters.
5. Test for stability: After securing the gutters, give them a gentle shake to test their stability. They should feel firm and stable, without any noticeable movement or sagging. If you notice any areas that feel unstable, reinforce them with additional screws or hangers.
By properly securing the gutters, you’ll ensure their long-term stability and effectiveness in redirecting rainwater away from your home. With the gutters securely in place, you’re ready for the final step: testing the gutters for proper functioning.
Step 8: Test the Gutters for Proper Functioning
After completing the installation process, it’s crucial to test the gutters to ensure they are functioning properly. Testing the gutters will help identify any issues or areas that require further adjustment or improvement. Follow these steps to test the gutters for proper functioning:
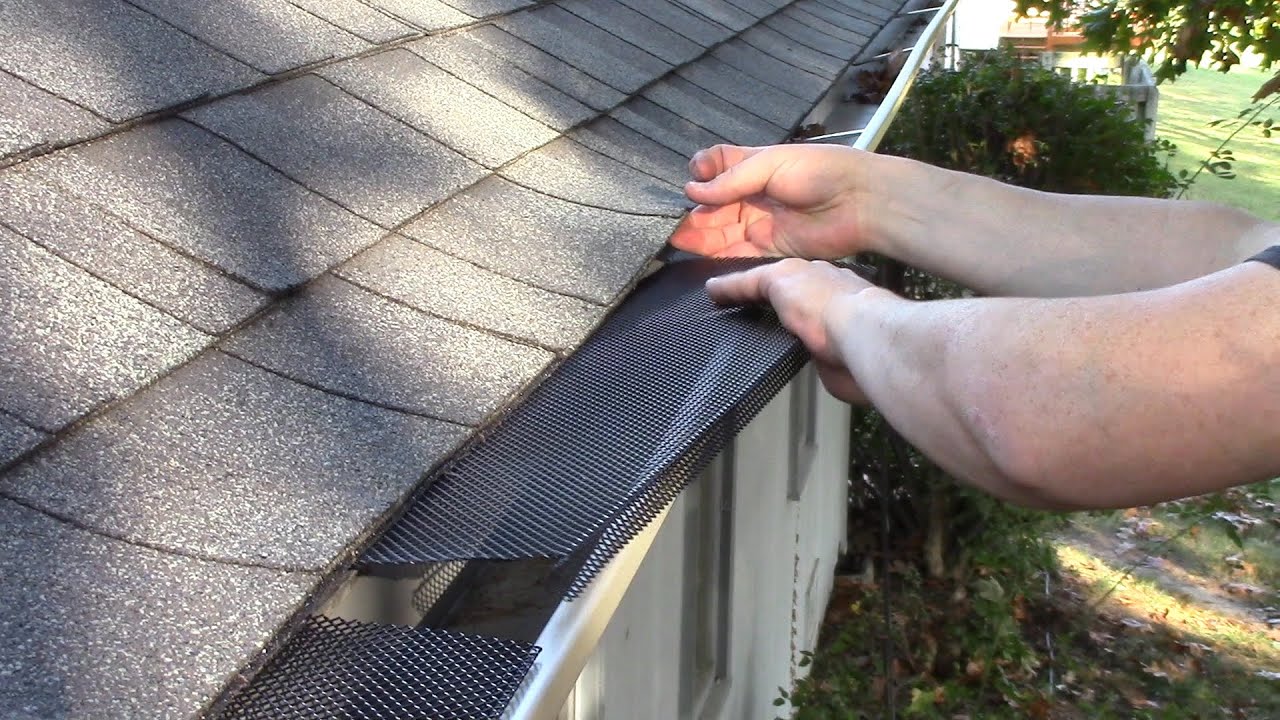
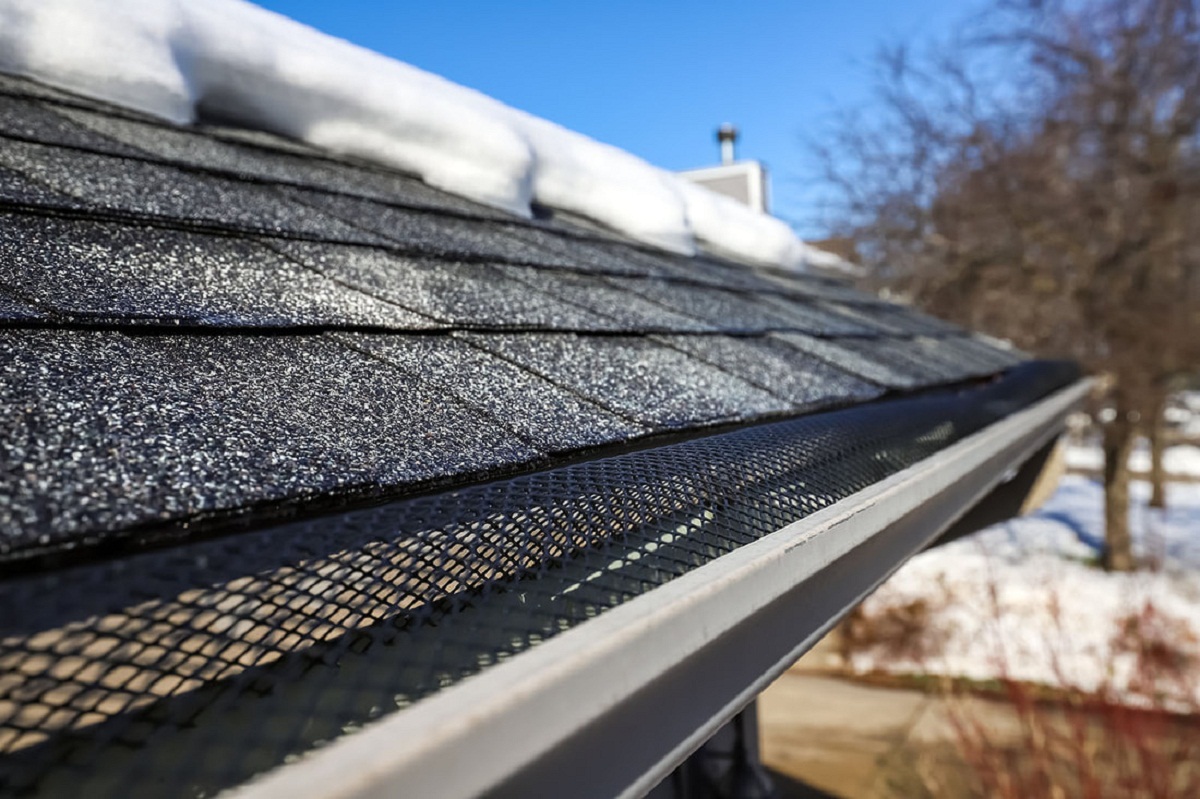
1. Clear any debris: Before testing the gutters, make sure they are free from any debris or obstructions. Remove any leaves, twigs, or other debris that may have accumulated in the gutters or downspouts. This will ensure that water can flow freely through the system.
2. Use a hose or bucket: If it’s not raining, you can use a hose or bucket to simulate the flow of water through the gutters. If using a hose, turn it on to a moderate flow and direct the water into the gutters at the highest point. If using a bucket, pour water into the gutters at the highest point.
3. Observe the water flow: As the water flows through the gutters, observe how it moves along the length of the gutter system. Look for any areas where the water pools or doesn’t flow smoothly. Also, check for any leaks or drips along the gutter joints or seams.
4. Check the downspouts: As the water reaches the downspouts, ensure that it is properly redirected and flows out at the desired location. Aim to have the water flow a few feet away from your home’s foundation to prevent water damage.
5. Make adjustments if needed: If you notice any issues during the testing process, such as pooling water or leaks, make the necessary adjustments. This may involve readjusting the slope of the gutters, securing loose components, or applying additional sealant in leak-prone areas.
6. Repeat the test: After making adjustments, repeat the testing process to ensure that the issues have been resolved and the gutters are functioning correctly. It’s important to retest the gutters to confirm that the changes made have improved their performance.
By testing the gutters for proper functioning, you’ll ensure that they effectively channel rainwater away from your home and minimize the risk of water damage. Addressing any issues promptly will help maintain the integrity of your gutter system in the long run.
With the gutters successfully tested and functioning properly, you have completed the installation process. Congratulations on a job well done!
Conclusion
Congratulations on successfully installing your half round gutters! By following the step-by-step guide outlined in this article, you have enhanced the functionality and aesthetic appeal of your home. Properly installed and maintained gutters are essential for protecting your home from water damage, preventing foundation issues, and preserving its overall integrity.
Throughout the installation process, you learned various key steps, from measuring and planning to securing the gutters in place. By taking accurate measurements, carefully planning the layout, and using the right tools and materials, you have set a solid foundation for a reliable gutter system.
Installing the downspout and gutter hangers ensured proper water flow and stability, while securely hanging the gutters and applying sealant guaranteed their long-term durability. Testing the gutters for proper functioning allowed you to identify and address any issues, ensuring optimal performance and protection against water damage.
Remember to perform periodic maintenance on your gutters, including clearing out debris and checking for any signs of damage. Regular inspections and cleaning will help maintain the effectiveness of your gutter system and extend its lifespan.
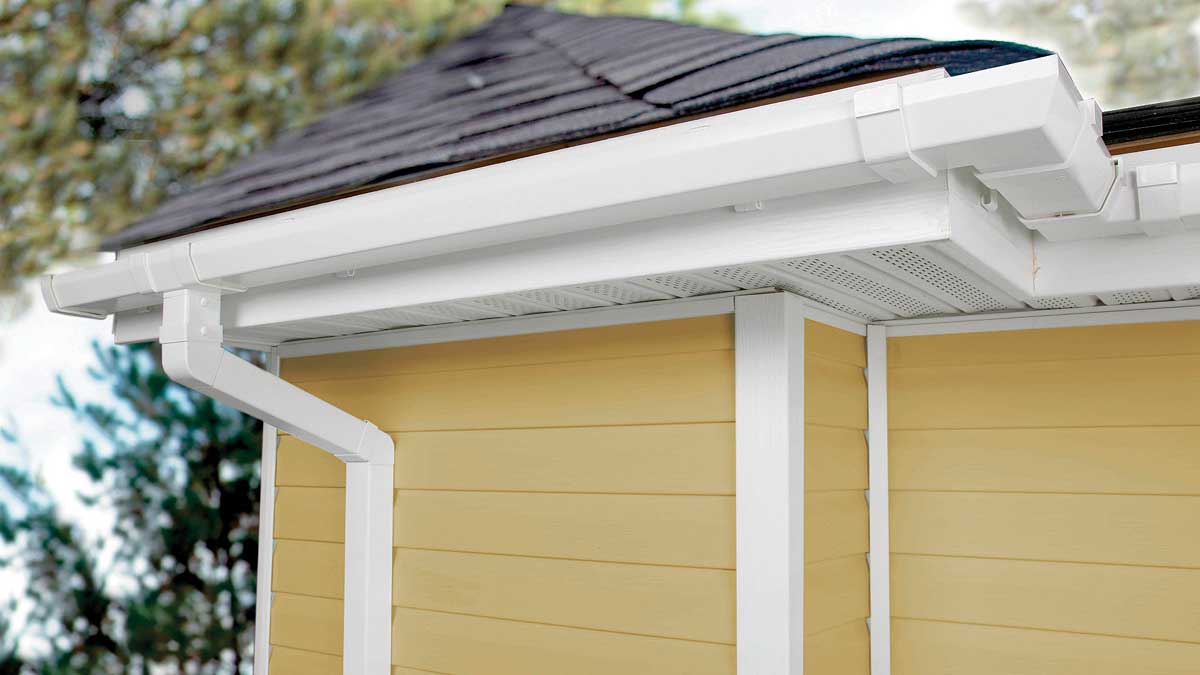
Installing half round gutters not only serves a functional purpose but also adds a touch of elegance to your home’s exterior. The classic and timeless design of half round gutters complements a variety of architectural styles, enhancing your home’s overall curb appeal.
Whether you completed this installation as a DIY project or with the help of a professional, you should be proud of your accomplishment. Your investment in a well-installed and properly maintained gutter system will pay off in the long run, protecting your home and providing peace of mind.
Thank you for following our comprehensive guide on how to install half round gutters. We hope this article has been informative and helpful in your gutter installation journey.
Good luck and enjoy the benefits of your new half round gutter system!
Frequently Asked Questions about How To Install Half Round Gutters
Was this page helpful?
At Storables.com, we guarantee accurate and reliable information. Our content, validated by Expert Board Contributors, is crafted following stringent Editorial Policies. We're committed to providing you with well-researched, expert-backed insights for all your informational needs.


0 thoughts on “How To Install Half Round Gutters”