Articles
How To Draw A Triangle With A Protractor
Modified: February 22, 2024
Learn how to draw a triangle accurately using a protractor with our informative articles. Expert tips and step-by-step instructions provided.
(Many of the links in this article redirect to a specific reviewed product. Your purchase of these products through affiliate links helps to generate commission for Storables.com, at no extra cost. Learn more)
Introduction
Triangles are one of the most basic and fundamental shapes in geometry. They’re not only aesthetically pleasing but also hold significant mathematical and practical importance. Drawing a triangle with a protractor may seem like a daunting task, but with the right approach and a little practice, it can be quite simple.
In this article, we will guide you through the process of drawing a triangle using a protractor. We will start by explaining the essential materials you’ll need for the task. Then, we’ll go through each step in detail, providing clear instructions and helpful tips along the way.
Whether you’re a student learning geometry or simply looking to expand your artistic skills, understanding how to draw a triangle accurately can be a valuable skill to have. So, let’s dive into the world of triangles and learn how to create them with a protractor!
Key Takeaways:
- Master the art of drawing triangles with a protractor by understanding its components, measuring sides and angles accurately, and embracing mistakes as part of the learning process.
- Drawing triangles with a protractor not only enhances geometric skills but also opens up creative possibilities in art and design, making it a valuable skill to master.
Materials Needed
Before we begin, let’s gather the necessary materials to draw a triangle with a protractor. Here’s what you’ll need:
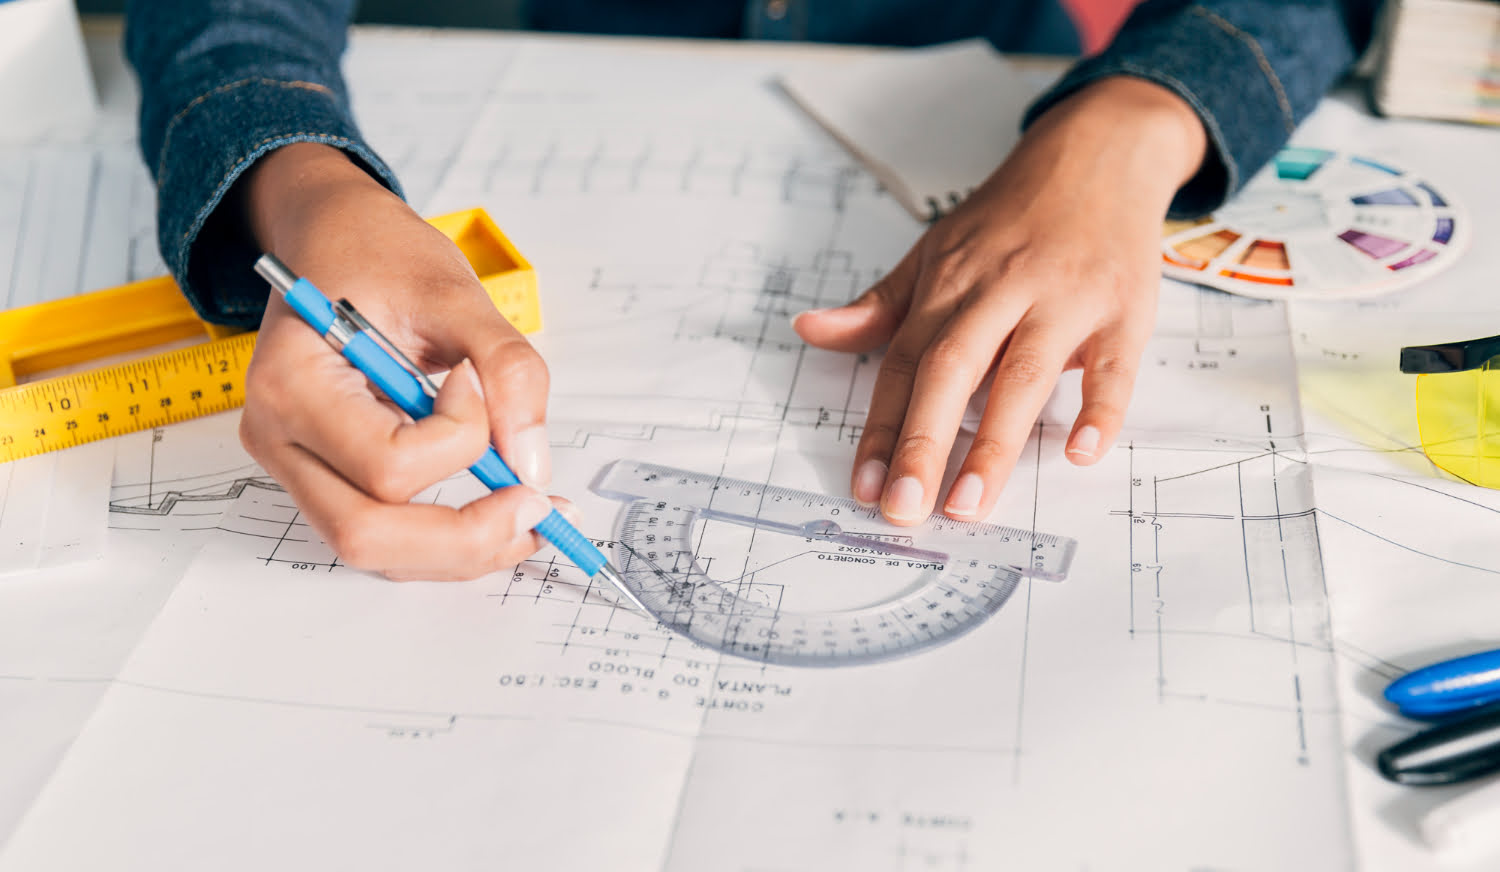
- A protractor: This is the primary tool we’ll be using to measure the angles of the triangle and ensure accuracy in our drawing. Make sure you have a clear and reliable protractor.
- A ruler or straightedge: This will be used to draw straight lines and ensure the sides of the triangle are precise.
- A pencil: A sharpened pencil will allow you to make accurate markings and easily erase any mistakes along the way.
- A piece of paper: Choose a clean and smooth sheet of paper to draw your triangle on. It’s better to have a larger sheet to allow more space for your drawing.
- An eraser: Mistakes happen, and having an eraser at hand will help you correct any inaccuracies as you go.
Once you have these materials ready, let’s move on to the step-by-step process of drawing a triangle with a protractor.
Step 1: Understanding the Basics of a Protractor
Before we start drawing the triangle, it’s important to familiarize ourselves with the basic components of a protractor. A protractor is a measuring tool that is typically semi-circular or circular in shape and is used to measure angles.
Here are the key components of a protractor:
- Baseline: The baseline is the straight edge of the protractor. It acts as a reference point to align with the base of the angle being measured.
- Center point: The center point is the precise midpoint of the protractor. It is usually marked with a small hole or dot.
- Degrees: The degrees are the markings along the curved edge of the protractor, indicating the measurement of angles. The most common protractors have 180 degrees, making them suitable for drawing triangles.
To ensure accurate measurements, place the baseline of the protractor along the base or horizontal line of the angle you are measuring. Make sure the center point aligns with the vertex or starting point of the angle.
Now that we understand the basic components of a protractor, we are ready to move on to the next step – drawing the base of the triangle.
Step 2: Drawing the Base of the Triangle
To begin drawing a triangle with a protractor, we first need to establish the base. The base of a triangle is the bottom side from which the other sides and angles are measured.
Let’s follow these steps to draw the base:
- Take your ruler or straightedge and draw a straight line horizontally across your sheet of paper. This will serve as the base of your triangle.
- Label the endpoints of the base as point A and point B. These labels will help you refer to the base as we progress.
Ensure that the base is long enough to allow sufficient space for the other sides and angles of the triangle.
Once you have drawn the base, we can move on to measuring the first side of the triangle using the protractor.
Step 3: Measuring the First Side of the Triangle
Now that we have the base of the triangle, it’s time to measure the first side. Remember, the sides of a triangle are measured in length, while the angles are measured in degrees.
Let’s follow these steps to measure the first side:
- Place the center point of the protractor on point A, which is one of the endpoints of the base.
- Align the baseline of the protractor with the base of the triangle, making sure it is in contact with point B, the other endpoint of the base.
- Look along the curved edge of the protractor and find the degree markings.
- Starting from the baseline, count and mark the desired length of the first side of the triangle. For example, if you want the first side to be 5 centimeters long, count 5 centimeters along the curved edge of the protractor and make a mark.
- Use your ruler or straightedge to draw a straight line connecting point A to the marked point on the curved edge of the protractor. This line represents the first side of the triangle.
Remember to use light and clean pencil marks so that you can easily erase them later if needed.
With the first side of the triangle drawn, we can proceed to measure the second side using the protractor.
When using a protractor to draw a triangle, start by measuring and marking the angles with the protractor, then connect the points to form the sides of the triangle. Double check your measurements to ensure accuracy.
Read also: 13 Amazing Protractor Triangle for 2024
Step 4: Measuring the Second Side of the Triangle
With the first side of the triangle drawn, let’s now move on to measuring the second side. Remember, each side of a triangle is connected to the other sides by vertices.
Follow these steps to measure the second side of the triangle:
- Place the center point of the protractor on the endpoint of the first side opposite to the base.
- Align the baseline of the protractor with the endpoint of the base.
- Look along the curved edge of the protractor and find the degree markings.
- Starting from the baseline, count and mark the desired length of the second side of the triangle.
- Use your ruler or straightedge to draw a straight line connecting the endpoint of the first side to the marked point on the curved edge of the protractor. This line represents the second side of the triangle.
Ensure that the second side meets the endpoint of the first side to form a vertex and complete the triangle.
Now that we have both the first and second sides drawn, we can proceed to connect the end points to complete the triangle.
Step 5: Connecting the End Points to Complete the Triangle
Now that we have measured and drawn the first two sides of the triangle, it’s time to connect the end points to complete the shape.
Follow these steps to connect the end points:
- Take your ruler or straightedge and align it with the end points of the first two sides.
- Draw a straight line connecting the end points. Make sure this line intersects with the base of the triangle.
By connecting the end points, you are creating the third side of the triangle which closes the shape. The triangle should now be fully formed and recognizable.
Double-check that the lines you drew are straight and properly aligned. Adjust and refine as needed to ensure the triangle looks symmetrical and well-proportioned.
Once you’ve connected the end points and completed the triangle, we can move on to the final step – checking the angles of the triangle.
Step 6: Checking the Angles of the Triangle
After drawing the sides and completing the triangle, it’s important to ensure that the angles of the triangle are accurate. This will help validate the correctness of your measurements and drawing.
Follow these steps to check the angles of the triangle:
- Place the protractor’s center point on one of the vertices of the triangle.
- Align the baseline of the protractor with one of the sides of the triangle, making sure it intersects the other side.
- Read the degree measurement where the third side of the triangle intersects the curved edge of the protractor.
- Repeat this process for the other two vertices to measure all three angles of the triangle.
If you are drawing an equilateral triangle, all three angles should measure 60 degrees. For other types of triangles, the angles may vary.
Compare the measured angles to the expected values for the type of triangle you are drawing. If the measurements align with the expected values, then congratulations! You’ve successfully drawn a triangle with a protractor.
If there are slight variations, don’t worry. It’s normal to have small deviations due to human error or the limitations of the drawing tools. Simply use your judgment to make any necessary adjustments.
With the angles checked and verified, you have completed the process of drawing a triangle with a protractor. Take a moment to admire your creation and appreciate the geometric beauty of the triangle.
Before we conclude, let’s summarize the steps we’ve covered in this article.
Conclusion
Drawing a triangle with a protractor may seem challenging at first, but with the right approach and practice, it becomes a manageable task. By following the step-by-step instructions outlined in this article, you can confidently draw triangles that are accurately proportioned and visually appealing.
Remember to gather the necessary materials, including a protractor, ruler, pencil, paper, and eraser. Understanding the components of a protractor, such as the baseline, center point, and degree markings, will help you achieve precise measurements.
Start by drawing the base of the triangle and then proceed to measure and draw the remaining sides. Use the protractor to measure the angles and ensure accuracy. Finally, connect the end points to complete the triangle and check the angles for correctness.
Throughout the process, it’s important to maintain a steady hand, use clean pencil marks, and make adjustments as needed. Mistakes are part of the learning process, so don’t be discouraged if you encounter any. Simply erase and try again until you achieve the desired results.
Whether you’re a student learning geometry or an artist exploring shapes and forms, mastering the skill of drawing triangles with a protractor opens up a world of possibilities. Triangles are not only fundamental geometrical shapes but also appear in architectural structures, art compositions, and various real-life objects.
So, grab your materials, embrace the challenge, and start experimenting with triangles. With practice, you’ll become more confident in your ability to draw accurate and visually captivating triangles using a protractor.
Now, go ahead and showcase your newfound skill in drawing triangles with precision and creativity!
Frequently Asked Questions about How To Draw A Triangle With A Protractor
1. Use the ruler to draw a straight line for the base of the triangle.
2. Use the protractor to measure and mark the angles for the other two sides of the triangle.
3. Connect the marks to form the remaining sides of the triangle.
4. Finally, erase any unnecessary lines and refine the shape of the triangle.
Was this page helpful?
At Storables.com, we guarantee accurate and reliable information. Our content, validated by Expert Board Contributors, is crafted following stringent Editorial Policies. We're committed to providing you with well-researched, expert-backed insights for all your informational needs.


0 thoughts on “How To Draw A Triangle With A Protractor”