Furniture
How To Fix A Touch Lamp
Modified: October 20, 2024
Learn how to fix a touch lamp and bring light back to your space. Our expert tips and tricks will help you troubleshoot and repair your furniture touch lamp.
(Many of the links in this article redirect to a specific reviewed product. Your purchase of these products through affiliate links helps to generate commission for Storables.com, at no extra cost. Learn more)
Introduction:
Welcome to our comprehensive guide on how to fix a touch lamp! Touch lamps are a convenient and stylish lighting option for any home or office. With just a simple touch, you can easily turn them on or off. However, like any electronic device, touch lamps can encounter issues that require troubleshooting and repair.
In this article, we will take you through a step-by-step process to help you identify and fix common problems that may arise with your touch lamp. Whether it’s a faulty bulb, a malfunctioning touch sensor, or a damaged cord, we will provide you with the necessary guidance to get your touch lamp up and running again.
Before we dive into the troubleshooting and repair process, it’s important to note that safety should always be your top priority. Make sure to unplug the lamp from the power source before attempting any repairs and be cautious while working with electrical components.
So, if you’re ready to shed some light on your touch lamp issues, let’s get started!
Key Takeaways:
- Troubleshooting and repairing a touch lamp is a manageable task that involves steps such as replacing the bulb, checking the touch sensor, and resetting the lamp. Safety and professional assistance are crucial for complex issues.
- Knowing when to seek professional help and considering lamp replacement when necessary are essential aspects of touch lamp maintenance. Regular cleaning and maintenance can extend the lamp’s lifespan and functionality.
Read also: 14 Unbelievable Touch Lamp for 2025
Step 1: Troubleshooting the Lamp
When your touch lamp is not working properly, the first step is to troubleshoot the issue to identify the root cause. Here are a few common problems and their potential solutions:
- No Response to Touch: If your touch lamp does not respond when you touch it, the first thing to check is the power source. Ensure that the lamp is properly plugged into a working outlet. If it is plugged in correctly and still not responding, try plugging it into a different outlet to rule out any issues with the power source.
- Dim or Flickering Light: If your touch lamp is producing a dim or flickering light, it may be due to a faulty bulb. Start by turning off the lamp and allowing the bulb to cool down. Once cooled, check if the bulb is loose or burnt out. If it is, replacing the bulb with a new one should fix the issue.
- Inconsistent Response: If your touch lamp has an inconsistent response, such as turning on or off randomly, it may be caused by interference from other electronic devices. Move the lamp away from any potential sources of interference, such as Wi-Fi routers or cordless phones, and see if the issue persists.
- Unresponsive Touch Sensor: If the touch sensor of your lamp is not working at all, there may be an issue with the sensor itself. Start by cleaning the surface of the touch sensor with a soft cloth to remove any dirt or debris that may be obstructing the sensor’s function. If cleaning does not help, the touch sensor may need to be replaced.
- Noisy or Loose Components: If your touch lamp is making strange noises or has loose components, it is important to address these issues promptly. Examine the lamp for loose screws or connections and tighten them if necessary. If the noise persists, consult a professional for further assistance.
By troubleshooting the lamp, you can quickly narrow down the issue and determine the appropriate course of action. In the next step, we will explore how to replace the bulb in your touch lamp.
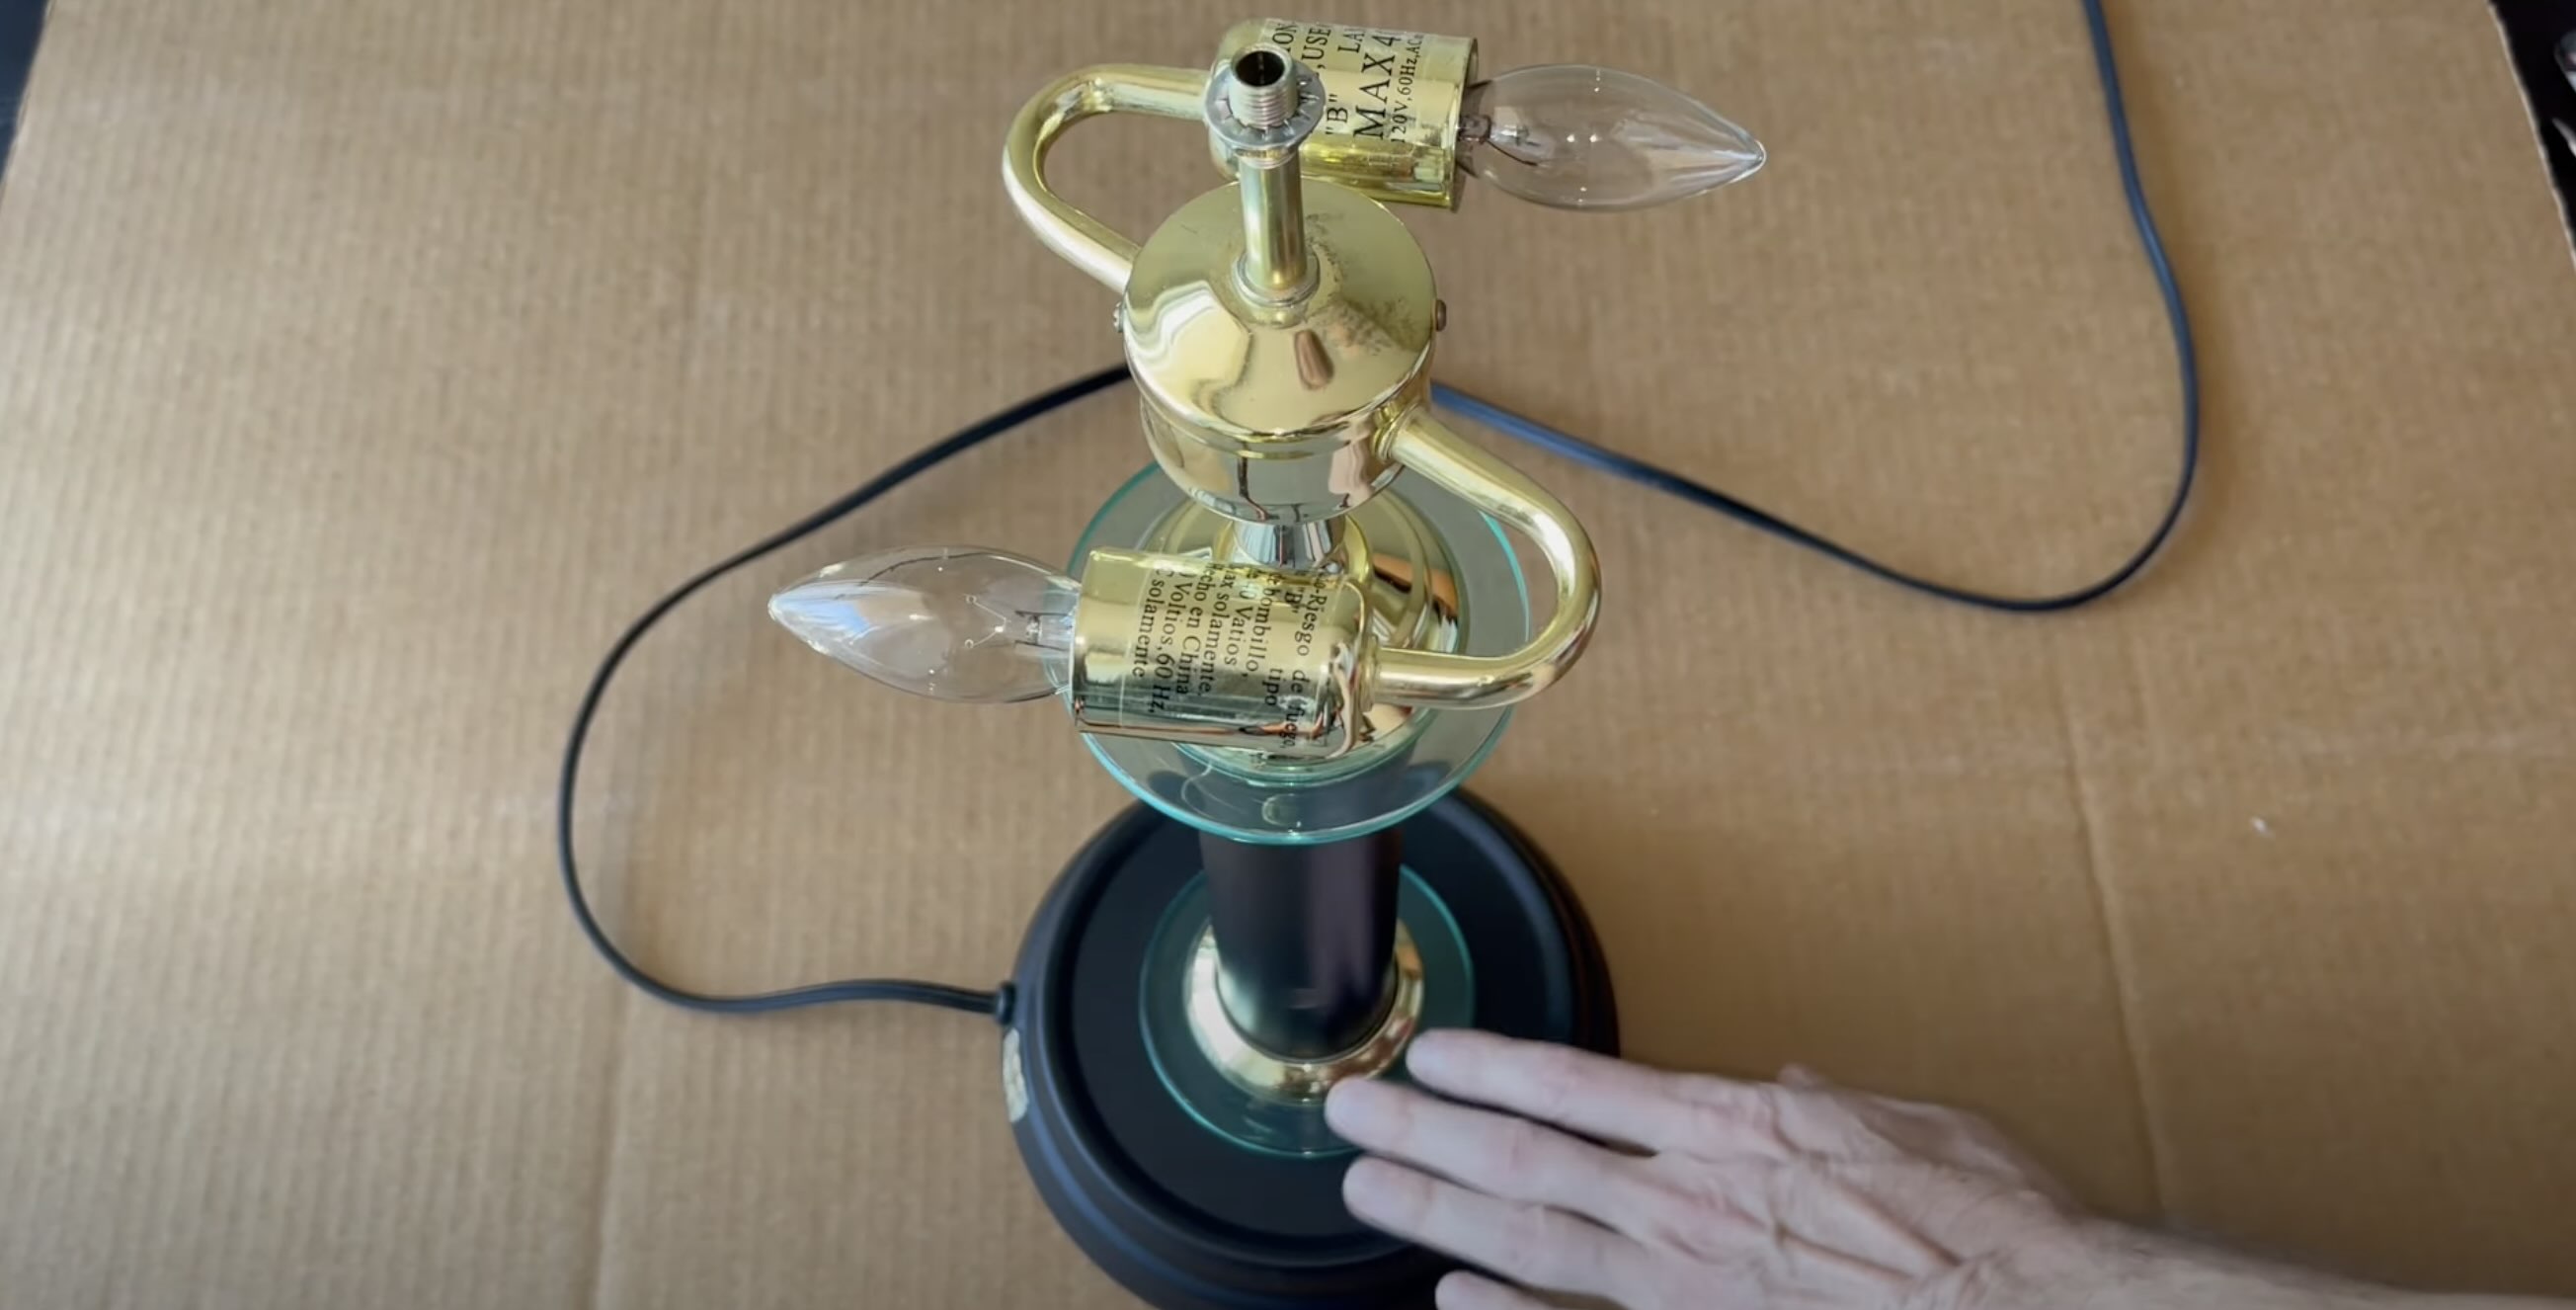
Step 2: Replacing the Bulb
If your touch lamp is experiencing issues with the brightness or if the bulb has completely burnt out, it may be time to replace it. Here’s a step-by-step guide on how to replace the bulb in your touch lamp:
- Turn off and unplug the lamp: Before replacing the bulb, make sure the lamp is turned off and unplugged from the power source. This ensures your safety while working with electrical components.
- Allow the bulb to cool down: If the lamp has been recently used, give the bulb some time to cool down. Touching a hot bulb can result in burns or damage to the new bulb.
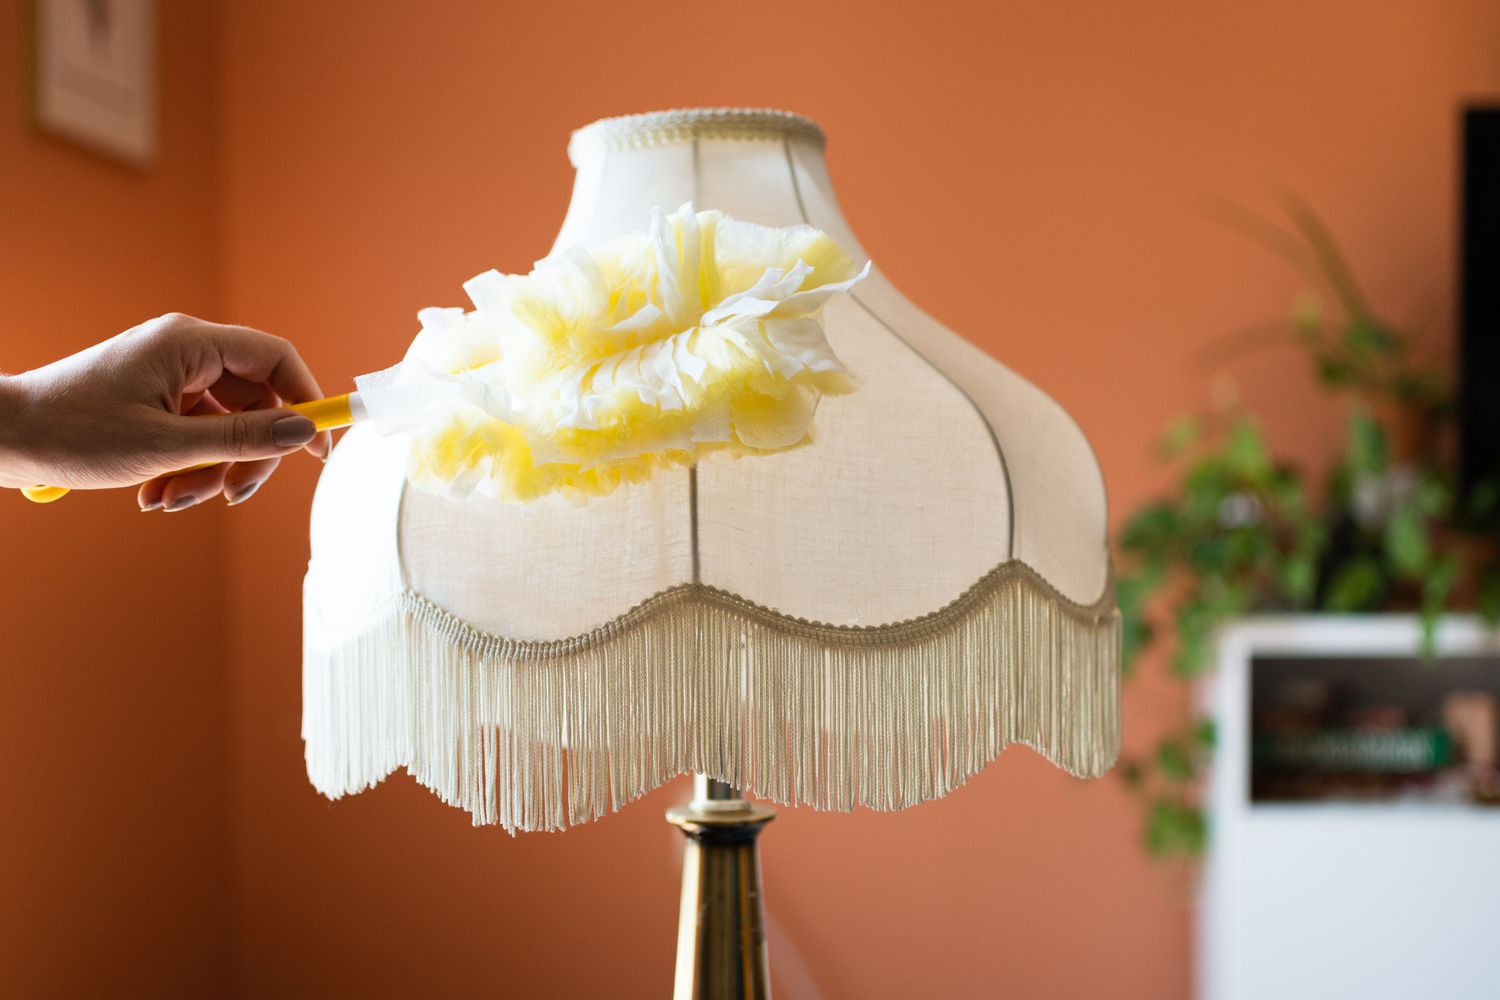
- Remove the lampshade: Carefully remove the lampshade by unscrewing or unhinging it, depending on the lamp’s design. Set the lampshade aside in a safe place to avoid damage.
- Remove the old bulb: Gently twist the old bulb counterclockwise to remove it from the lamp socket. Be cautious not to apply excessive force to avoid breaking the bulb.
- Choose a compatible replacement bulb: Check the wattage and size specifications of the old bulb and choose a new bulb that matches these requirements. It’s always a good idea to consult the lamp’s user manual or contact the manufacturer for specific recommendations.
- Insert the new bulb: Hold the new bulb by its base and insert it into the lamp socket. Carefully twist it clockwise until it is securely in place. Avoid touching the bulb with bare hands as the oils from your skin can affect its lifespan.
- Reattach the lampshade: Once the new bulb is in place, reattach the lampshade by screwing or hinging it back onto the lamp. Ensure it is properly aligned and secure.
- Plug in and test the lamp: Finally, plug the lamp back into the power source and turn it on. Give it a touch to ensure the new bulb illuminates properly. If everything is working as expected, congratulations! You have successfully replaced the bulb in your touch lamp.
Remember to dispose of the old bulb responsibly, following local regulations for recycling or safe disposal of electronic waste. Now that the bulb has been replaced, let’s move on to the next step to check the touch sensor functionality.
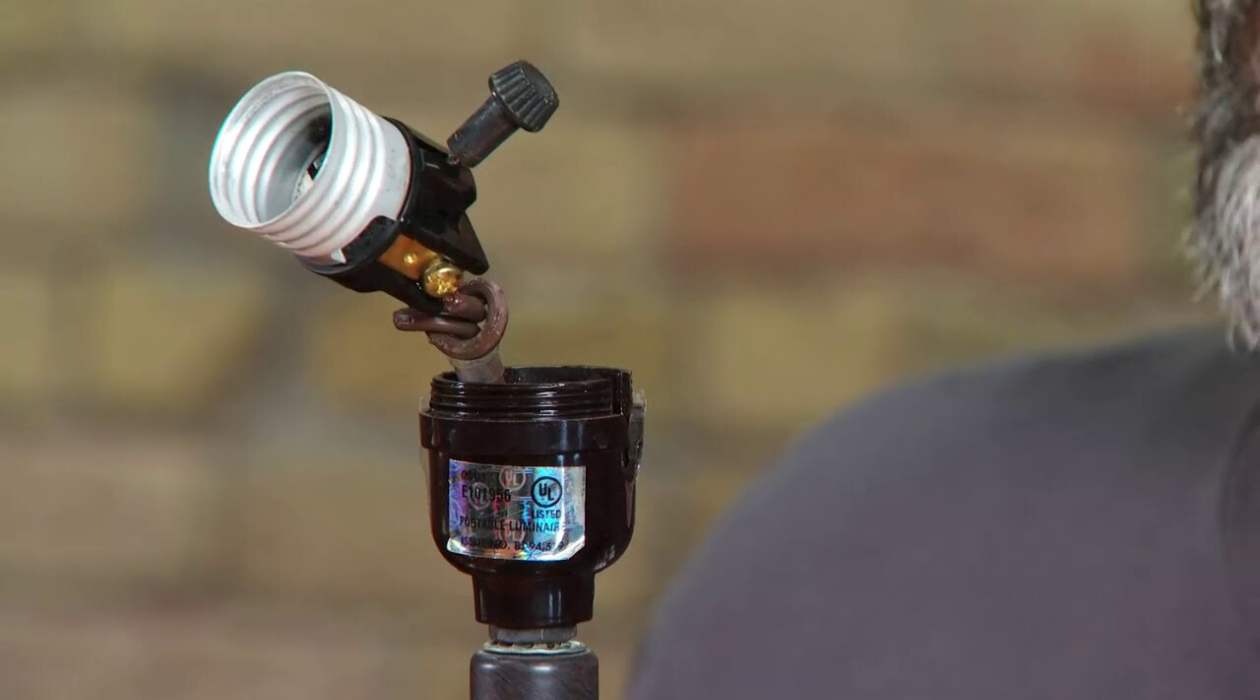
Step 3: Checking the Touch Sensor
If your touch lamp is still not responding to touch after replacing the bulb, it’s time to check the touch sensor. The touch sensor is responsible for detecting your touch and activating the lamp. Here’s how you can check the touch sensor:
- Turn off and unplug the lamp: As always, make sure the lamp is turned off and unplugged from the power source before proceeding.
- Inspect the touch sensor: Examine the touch sensor area on the lamp base. It is usually a small metal or glass plate. Make sure there are no visible cracks, dirt, or debris on the surface of the touch sensor. If there is, clean it gently with a soft cloth.
- Check for loose connections: Inspect the wiring and connections around the touch sensor. Look for any loose or disconnected wires. If you find any, securely reconnect them or tighten any loose screws, taking care not to damage the lamp or its components.
- Test the touch sensor: With the lamp still unplugged, use a multimeter set to the continuity testing mode. Touch the probes of the multimeter to the metal or glass plate of the touch sensor. If the multimeter beeps or shows a reading, it means the touch sensor is functioning properly. If there is no beep or reading, it may indicate a faulty touch sensor that needs replacement.
- Replace the touch sensor: If the touch sensor is found to be faulty, you will need to replace it. Consult the lamp’s user manual or contact the manufacturer for guidance on the specific touch sensor model compatible with your lamp. Follow the manufacturer’s instructions for installation.
- Reassemble and test the lamp: Once the touch sensor is replaced or if it was in working condition, reassemble the lamp, ensuring all connections are secure. Plug the lamp back into the power source and test the touch sensor functionality. If the lamp responds to your touch, congratulations! The touch sensor issue has been resolved.
If the touch sensor issues persist or if you are unsure about any steps, it is advisable to contact a professional technician or the manufacturer for further assistance. Now, let’s move on to the next step to learn how to reset the lamp.
Step 4: Resetting the Lamp
If your touch lamp is still not working properly even after troubleshooting and checking the touch sensor, you may need to reset the lamp. Resetting the lamp can help resolve issues caused by temporary glitches in the internal circuitry. Here’s how you can reset your touch lamp:
- Turn off and unplug the lamp: Before resetting the lamp, ensure it is turned off and unplugged from the power source.
- Wait for a few minutes: Allow the lamp to remain unplugged for at least 5-10 minutes. This will ensure that any residual electrical charge is discharged from the lamp’s circuitry.
- Press and hold the on/off touch sensor: While the lamp is still unplugged, press and hold the on/off touch sensor for approximately 30 seconds. This will help discharge any stored electricity and reset the lamp’s internal circuitry.
- Plug in and test the lamp: After the 30-second reset, plug the lamp back into the power source and turn it on. Give it a touch to check if the lamp is now responding as expected. If the lamp is still not functioning properly, proceed to the next step for further troubleshooting.
Resetting the lamp is often an effective solution for resolving minor issues. However, if the lamp continues to show problems, it may require more extensive repair or professional assistance. Let’s move on to the next step to learn how to repair the cord or plug of your touch lamp.
If your touch lamp is not working, try replacing the bulb first. If that doesn’t work, check the power outlet and the touch sensor for any loose connections. If all else fails, consider replacing the touch sensor module.
Read more: How Does A Touch Lamp Work
Step 5: Repairing the Cord or Plug
If your touch lamp is still not working after troubleshooting and resetting, the issue may lie with the cord or plug. Over time, cords and plugs can become damaged, resulting in a loss of power or faulty connections. Here’s how you can repair the cord or plug of your touch lamp:
- Turn off and unplug the lamp: Before attempting any repairs, ensure that the lamp is turned off and unplugged from the power source for safety purposes.
- Examine the cord and plug: Inspect the entire length of the cord and the plug for any visible signs of damage such as fraying, cuts, or exposed wires. If you notice any of these issues, it is essential to repair or replace the cord or plug to ensure safe operation.
- Trim and strip the cord: If there are small sections of frayed or damaged cord, you can trim them off with sharp scissors. After trimming, carefully strip the outer insulation of the cord using wire strippers to expose a small section of the inner wires.
- Twist the exposed wires: Once the inner wires are exposed, twist them tightly together so that they are securely connected. Use electrical tape or wire connectors to hold the twists in place and insulate the connections.
- Replacing the plug: If the plug itself is damaged, you may need to replace it. Cut off the old plug, leaving enough length of cord to work with. Follow the manufacturer’s instructions on how to install the new plug, ensuring that the wires are securely connected to the correct terminals.
- Test the repaired cord or plug: After repairing or replacing the cord or plug, plug the lamp back into the power source and turn it on. Test the touch sensor to ensure that the lamp is now working properly. If the issue persists, it is advisable to consult a professional for further assistance.
Repairing the cord or plug of your touch lamp requires careful attention to detail and knowledge of electrical systems. If you are not confident in your ability to perform these repairs, it is always best to seek professional help. Now, let’s move on to the next step to learn how to check the fuse of your touch lamp.
Step 6: Checking the Fuse
If your touch lamp is still not functioning after troubleshooting and repairing the cord or plug, the issue may be related to a blown fuse. The fuse is a safety device that protects the lamp’s circuitry from electrical overloads. Here’s how you can check the fuse in your touch lamp:
- Turn off and unplug the lamp: Before checking the fuse, ensure that the lamp is turned off and unplugged from the power source for safety purposes.
- Locate the fuse: The fuse is typically located within the lamp base, near the cord or plug. Consult the lamp’s user manual or visually inspect the lamp to find the fuse.
- Remove the fuse: Once you’ve located the fuse, carefully remove it from the fuse holder. You may need to use small pliers or tweezers if the fuse is tightly secured.
- Inspect the fuse: Examine the fuse to see if the metal strip inside is intact or if it is visibly broken or melted. A blown fuse will have a broken or melted strip and will need to be replaced.
- Replace the fuse: If the fuse is blown, replace it with a new one of the same type and rating. It’s important to use the correct type and rating as specified in the lamp’s user manual or consult the manufacturer for guidance.
- Plug in and test the lamp: After replacing the fuse, plug the lamp back into the power source and turn it on. Try touching the lamp to check if it now responds correctly. If the lamp is still not working, it may be best to consult a professional for further assistance.
Keep in mind that not all touch lamps have replaceable fuses. Some lamps may have integrated circuit breakers or non-replaceable fuses. If this is the case, it is recommended to contact the manufacturer for guidance on how to resolve the issue. Now, let’s move on to the final step to learn when it’s time to contact a professional for help.
Step 7: Contacting a Professional
If you have exhausted all troubleshooting and repair options and your touch lamp is still not functioning properly, it may be time to contact a professional for assistance. Sometimes, complex issues or internal component failures require specialized knowledge and tools to be resolved safely and effectively. Here are a few situations in which it is recommended to seek professional help:
- Complex electrical issues: If you have identified an electrical issue within the lamp that is beyond your expertise, it is best to reach out to a professional electrician. They have the knowledge and equipment to diagnose and repair complex electrical problems.
- Mechanical failures: If there are mechanical failures, such as faulty switches or damaged internal parts, it is advisable to contact a lamp repair specialist. They have the necessary expertise to dismantle and repair intricate lamp components.
- Manufacturer warranty: If your touch lamp is still covered by a manufacturer warranty, it is recommended to contact the manufacturer or their authorized service center for repairs. They can provide you with guidance on the next steps and may offer free or discounted repair services.
- Safety concerns: If you have concerns about your safety or the safety of others when attempting to repair the lamp, it is crucial to seek professional help. Working with electricity can be hazardous, and it’s better to prioritize your safety by leaving it to the experts.
Remember, reaching out to a professional doesn’t necessarily mean you’ve failed in your attempts to repair the lamp. It simply means that you’ve recognized the limitations of your knowledge and skills and are seeking the best solution to ensure the proper functioning of your touch lamp.
By following these steps and knowing when to call in a professional, you can effectively troubleshoot and repair most common issues with your touch lamp. However, if all else fails, remember that it might be time to consider replacing the lamp altogether. Now that you have all the necessary knowledge, good luck with your touch lamp repair journey!
Conclusion:
Fixing a touch lamp doesn’t have to be a daunting task. By following the steps outlined in this comprehensive guide, you can troubleshoot and repair common issues that may arise with your touch lamp. From troubleshooting and replacing the bulb to checking the touch sensor, resetting the lamp, repairing the cord or plug, checking the fuse, and knowing when to contact a professional, you now have the knowledge to tackle most touch lamp problems.
Remember, safety should always be your top priority when working with electrical appliances. Always unplug the lamp before attempting any repairs and exercise caution throughout the process to avoid accidents or electrical hazards.
If you find yourself unsure about any step or encounter a complex issue, it is advisable to seek professional help. Electricians, lamp repair specialists, or contacting the manufacturer can provide you with the expertise and guidance needed to resolve the problem.
In some cases, if the lamp is no longer repairable or the cost of repair exceeds the value of the lamp, it may be best to consider replacing it. Touch lamps come in a variety of designs and styles, allowing you to find a suitable replacement that meets your aesthetic preferences and lighting needs.
Remember, maintenance and regular cleaning can help extend the lifespan of your touch lamp. Wiping down the lamp regularly and ensuring it is dust-free can prevent issues with the touch sensor and keep the lamp functioning optimally.
We hope this guide has provided you with the information and confidence to fix and maintain your touch lamp. By following the steps outlined here, you can continue to enjoy the convenience and ambiance that touch lamps bring to your living space for years to come.
Frequently Asked Questions about How To Fix A Touch Lamp
Was this page helpful?
At Storables.com, we guarantee accurate and reliable information. Our content, validated by Expert Board Contributors, is crafted following stringent Editorial Policies. We're committed to providing you with well-researched, expert-backed insights for all your informational needs.


0 thoughts on “How To Fix A Touch Lamp”