Furniture
Where To Get A Lamp Fixed
Modified: August 22, 2024
Looking for furniture repair services? Find out where to get your lamp fixed and restored to its former glory with our expert recommendations.
(Many of the links in this article redirect to a specific reviewed product. Your purchase of these products through affiliate links helps to generate commission for Storables.com, at no extra cost. Learn more)
Introduction
Welcome to the world of lamp repair! If you have a lamp that is not working properly or in need of a little TLC, you’ve come to the right place. There are various options available to get your lamp fixed, whether you prefer to go local, explore the services of a hardware store, or even try your hand at DIY lamp repair.
A well-functioning lamp not only adds ambiance to your space but also serves a practical purpose by providing light where you need it most. However, over time, lamps can experience issues such as flickering bulbs, faulty switches, or frayed cords. Don’t fret! With the right resources and know-how, you can have your lamp shining bright again in no time.
Let’s dive into the different avenues you can explore to get your lamp fixed:
Key Takeaways:
- Lamp repair shops offer expert diagnosis and repair, providing peace of mind and restored functionality for your beloved lamps. Trust the professionals for complex issues and valuable fixtures.
- DIY lamp repair can be rewarding with the right tools and knowledge, but for convenience and accessibility, consider hardware stores with lamp repair services. Get your lamp shining bright again hassle-free!
Read more: Where To Get Car Windows Fixed
Lamp Repair Shops in Your Local Area
If you prefer a hands-off approach and want your lamp repaired by experts, your best bet is to visit a local lamp repair shop. These specialized shops have experienced technicians who can diagnose and fix a wide range of lamp issues.
When looking for lamp repair shops in your local area, start by asking friends, family, or neighbors for recommendations. Word-of-mouth referrals are often reliable and can help you find reputable repair shops that have a track record of excellent service.
Another option is to search online directories or review websites to find lamp repair shops near you. Make sure to read reviews and check their ratings to ensure you’re choosing a reliable and trustworthy repair service.
Once you have a few options in mind, contact the repair shops and ask about their services, turnaround time, and pricing. It’s essential to get an estimate upfront to understand the potential cost of the repair. Some repair shops may offer a free inspection or consultation to assess the issue with your lamp.
When visiting the lamp repair shop, bring your lamp along with any necessary accessories like the lampshade or light bulb. It’s helpful to provide as much information as possible about the lamp’s make, model, and any visible issues. This will assist the technician in diagnosing the problem accurately and determining the appropriate repair method.
Once your lamp is in the hands of the professionals, they will work their magic to repair or replace any faulty components. They have access to specialized tools and replacement parts, ensuring that your lamp is restored to its former glory.
Once the repair is complete, you can pick up your lamp and enjoy its renewed beauty and functionality. Lamp repair shops often offer warranties on their work, providing peace of mind in case any further issues arise.
Remember, lamp repair shops are staffed by professionals who have extensive knowledge and experience in dealing with different types of lamps. They can handle complex repairs and provide advice on proper lamp maintenance to ensure your lighting fixtures last for years to come.
Hardware Stores with Lamp Repair Services
If you prefer a more convenient and cost-effective option for lamp repair, look no further than your local hardware store. Many hardware stores offer lamp repair services, allowing you to get your lamp fixed while you shop for other home improvement needs.
When searching for hardware stores with lamp repair services, start by checking with well-known chains in your area. These stores often have dedicated departments or staff members who specialize in lamp repairs. Popular hardware stores such as Home Depot, Lowe’s, and Ace Hardware are known to offer lamp repair services.
One advantage of choosing a hardware store for lamp repair is the accessibility. Most hardware stores are conveniently located and open during extended hours, making it easier to drop off and pick up your lamp at your convenience.
To get your lamp repaired at a hardware store, simply bring your lamp along with any necessary accessories like the lampshade or light bulb. The staff will typically assess the lamp and provide an estimated cost for the repair.
Hardware store lamp repair services can handle a variety of common lamp issues, including wiring problems, switch replacements, and socket repairs. They may also offer bulb replacement services. However, it’s important to keep in mind that more complex repairs or specialized lamps may require the services of a dedicated lamp repair shop.
While hardware stores may not have the same level of expertise as specialized lamp repair shops, they can still provide reliable and cost-effective solutions for common lamp problems. Plus, you have the added convenience of being able to browse the store and take care of other household needs while your lamp is being repaired.
Don’t hesitate to inquire about warranties or guarantees offered by the hardware store for lamp repair services. It’s always good to have peace of mind knowing that you are covered in case any issues arise after the repair is completed.
Overall, hardware stores with lamp repair services are a convenient option for straightforward lamp repairs. They offer accessibility and cost-effectiveness, making them a preferred choice for many homeowners. So, the next time your lamp needs a little attention, consider visiting your local hardware store for a quick and hassle-free solution.
Check with local lighting stores or repair shops to see if they offer lamp repair services. You can also search for lamp repair specialists or electricians in your area.
Online Lamp Repair Services
In today’s digital age, there’s no shortage of services available online, and lamp repair is no exception. If you prefer the convenience of online shopping and want to get your lamp fixed without leaving the comfort of your home, online lamp repair services may be the perfect solution for you.
When searching for online lamp repair services, start by doing a quick internet search or look for recommendations from trusted sources. Many reputable websites specialize in lamp repairs and offer services for various types of lamps, including table lamps, floor lamps, and chandeliers.
One advantage of using online lamp repair services is the ability to access a wider pool of repair experts. These services often have a network of experienced technicians who are well-versed in repairing different lamp models and brands.
Here’s how online lamp repair services typically work:
- You submit a request or fill out a form on the website, providing information about the lamp and the repair needed.
- You may be asked to upload photos of the lamp or describe the issue in detail.
- The online lamp repair service will review your request and provide you with an estimate or quote for the repair.
- If you agree to the cost, you can ship your lamp to the designated repair facility.
- The technicians will assess the lamp, perform the necessary repairs, and ensure it is in working condition.
- Once the repair is complete, the lamp will be shipped back to you.
Online lamp repair services often offer convenience by providing pre-paid shipping labels or arranging pick-up services to make the process as smooth as possible for you.
It’s important to choose a reputable online lamp repair service with positive customer reviews and a solid track record. Look for websites that offer warranties on their repairs to ensure you have recourse if any issues arise after the lamp is repaired.
While online lamp repair services may not offer the same personalized experience as visiting a physical repair shop, they can be a convenient option, especially when local repair shops are not easily accessible or do not cater to your specific lamp needs.
Before choosing an online lamp repair service, make sure to compare prices, check the turnaround time for repairs, and inquire about their policies for lost or damaged shipments. It’s also a good idea to reach out to their customer service to ask any questions you may have before entrusting your lamp to their service.
Overall, online lamp repair services provide a convenient and hassle-free way to get your lamp fixed without having to leave your home. With the right service, you can have your lamp repaired and shining brightly once again, all with just a few clicks of a button.
DIY Lamp Repair: Tips and Resources
If you are a handy individual who enjoys tackling DIY projects, you may be inclined to repair your lamp on your own. DIY lamp repair can be a rewarding and cost-effective option, provided you have the right tools, knowledge, and resources. Here are some tips to help you successfully repair your lamp:
- Safety first: Before attempting any lamp repair, make sure to unplug the lamp from the power source and allow it to cool down. This will minimize the risk of electrical shocks or burns.
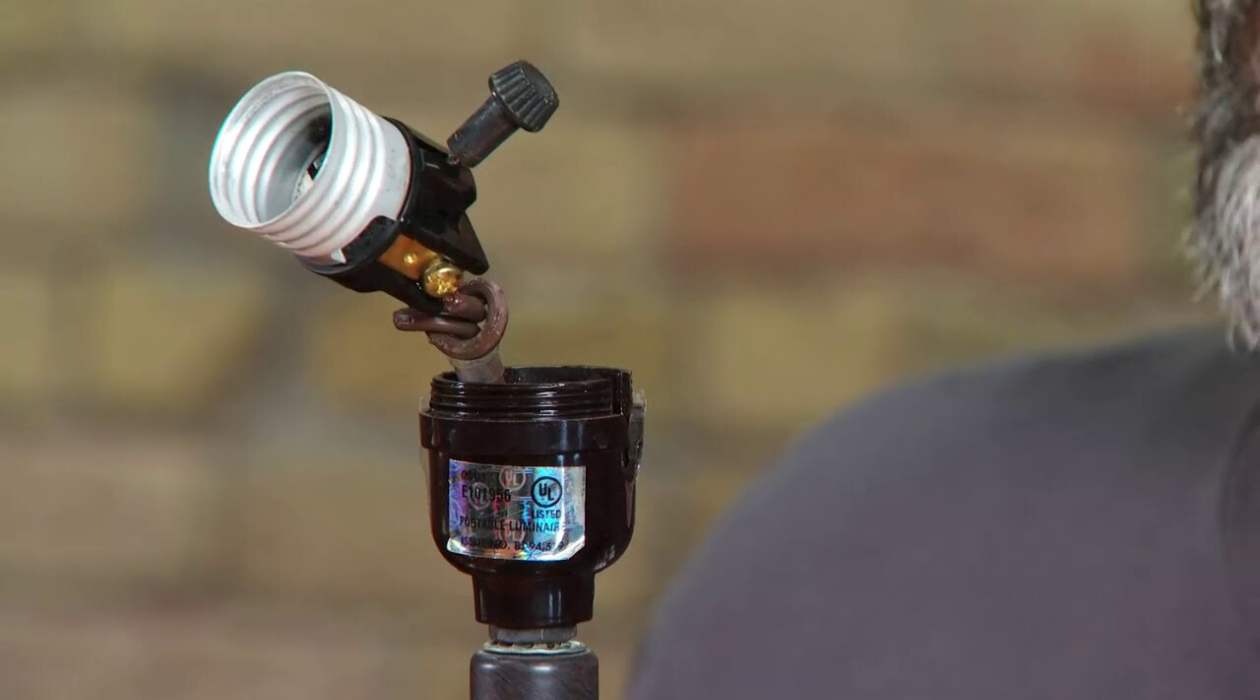
- Identify the problem: Start by identifying the issue with your lamp. Is it a flickering bulb, a loose socket, or a frayed cord? Understanding the problem will help you determine the appropriate repair method and gather the necessary tools or replacement parts.
- Research and learn: Take advantage of the wealth of information available online to learn about lamp repair techniques and troubleshooting tips. Websites, tutorials, and forums can provide step-by-step instructions, video demonstrations, and insights from experienced individuals.
- Tools and supplies: Ensure you have the necessary tools and supplies for the repair. These may include wire cutters, pliers, electrical tape, replacement sockets, and bulbs. Having a well-equipped toolbox will make your DIY lamp repair much smoother.
- Follow instructions: If you come across a specific lamp repair tutorial or guide, follow the instructions carefully. Pay attention to safety precautions and any warnings or cautions mentioned. Remember, electrical tasks may require a certain level of expertise, so if you are not confident in your abilities, it’s best to seek professional help.
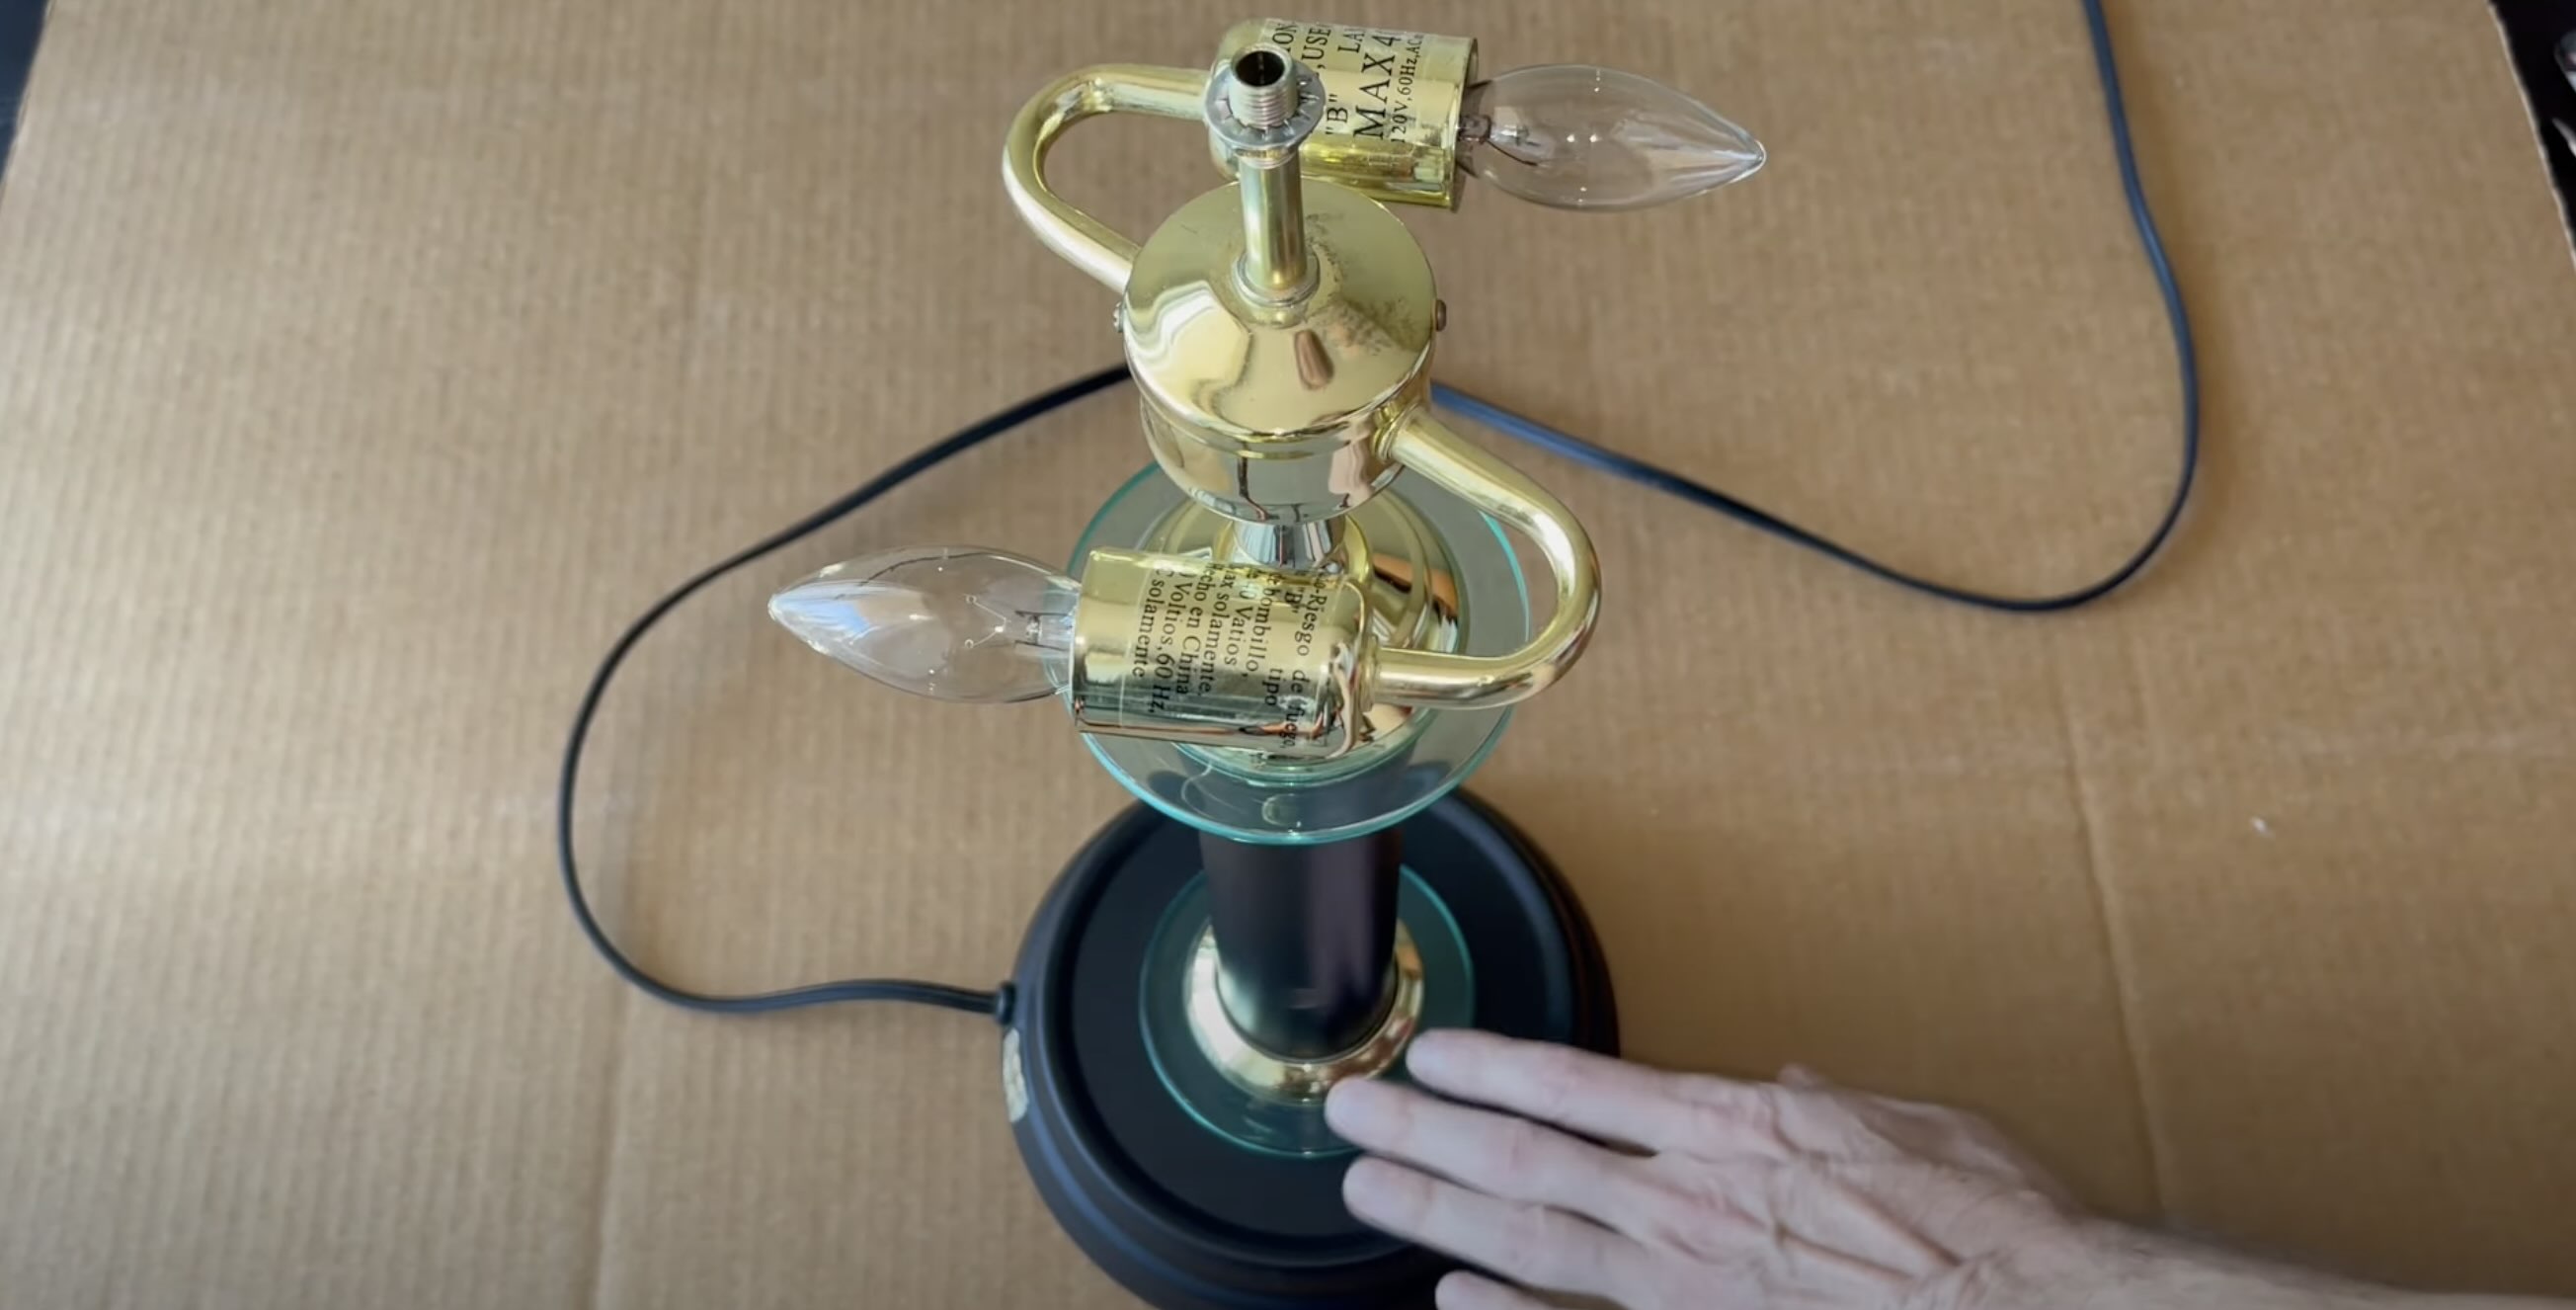
- Test before reassembling: Once you have completed the repair, test the lamp before reassembling it. This will ensure that the issue has been resolved, and the lamp is in working order.
- Resources and troubleshooting: If you encounter challenges during the repair or need additional guidance, there are various resources available to help. Online forums and communities dedicated to DIY lamp repair can provide valuable advice and troubleshooting tips. You can also refer to lamp repair books or consult with experts at your local hardware store.
Remember, not all lamp repairs are suitable for DIY. Complex electrical issues or intricate antique lamps may require the expertise of a professional lamp repair service. Don’t hesitate to seek professional help if you are unsure or uncomfortable with the repair process.
DIY lamp repair can be a rewarding and empowering experience, allowing you to save money and maintain a sense of accomplishment. With the right knowledge, tools, and resources, you can successfully repair your lamp and enjoy its warm glow once again.
Read more: Where To Get Car Air Conditioning Fixed
Conclusion
Whether your lamp is in need of a simple fix or requires more extensive repairs, there are several options available to get it back in working order. Lamp repair shops, hardware stores with lamp repair services, online lamp repair services, and DIY approaches each offer their own advantages and considerations.
For those who prefer professional assistance and expertise, lamp repair shops are the go-to option. These specialized establishments have experienced technicians who can diagnose and repair a wide range of lamp issues, ensuring that your lamp is restored to its former glory.
Hardware stores with lamp repair services provide a convenient and cost-effective alternative. These stores often have dedicated departments or staff members who can handle common lamp repairs, allowing you to address the issue while attending to other home improvement needs.
If you prefer the convenience of online services, online lamp repair services offer a wide network of experienced technicians who can address various lamp repair needs. The process is typically straightforward, starting with a request or form submission, followed by shipping your lamp to the repair facility, and eventually receiving your repaired lamp at your doorstep.
For the hands-on individuals who enjoy taking matters into their own hands, DIY lamp repair can be a fulfilling option. Equipped with the right tools, knowledge, and resources, you can troubleshoot and repair common lamp issues, all while enjoying the satisfaction of a successful DIY project.
Ultimately, the choice of lamp repair method depends on your preferences, budget, and the complexity of the repair needed. For complex electrical issues or valuable antique lamps, it’s best to consult with professionals to ensure proper handling and preservation.
Remember, a well-functioning lamp not only illuminates your space, but also adds charm and ambiance. By taking the necessary steps to repair and maintain your lamps, you can enjoy their beauty and functionality for years to come.
So, whether you opt for local lamp repair shops, hardware stores, online services, or choose to DIY, don’t let a malfunctioning lamp dim your spirits – shine a light on the situation and get your lamp fixed!
After getting your lamp fixed, why stop there? Home upkeep is vital for preserving your living space's comfort and safety. Dive into our guide on essential home maintenance routines that every homeowner needs to know about. You'll find practical advice on keeping your abode in tip-top condition, saving you headaches and costly repairs down the line. Don't miss out on these indispensable tips!
Frequently Asked Questions about Where To Get A Lamp Fixed
Was this page helpful?
At Storables.com, we guarantee accurate and reliable information. Our content, validated by Expert Board Contributors, is crafted following stringent Editorial Policies. We're committed to providing you with well-researched, expert-backed insights for all your informational needs.